Genshin
Genshin Impact Wiki Guide & Tips
The Wild Fairy of Erinnyes Quest Guide & Keys Locations

Genshin | The Wild Fairy of Erinnyes Quest Guide & Keys Locations

Last Updated:
Genshin | The Wild Fairy of Erinnyes Quest Guide & Keys Locations - GameWith

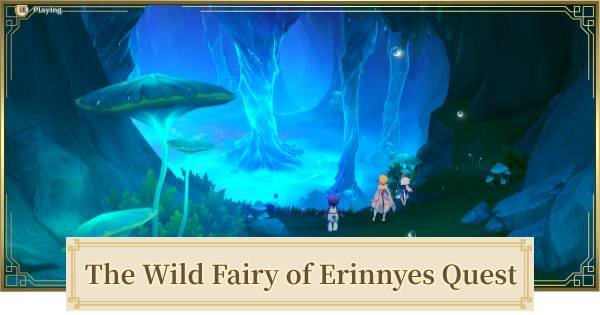
The Wild Fairy of Erinnyes is a quest for Genshin Impact. Guide contains how to start, Erinnyes Forest, walkthrough, answers, puzzle, keys location, how to unlock, achievements & rewards.

Table of Contents

All World Quest List

The Wild Fairy of Erinnyes - How To Unlock & Location

How To Unlock The Wild Fairy of Erinnyes?

Interact With The Carved Stone Tablet At Marcotte Station

MapLocation
Map
Location

To unlock The Wild Fairy Of Erinnyes, you need to interact with the Carved Stone Tablet at Marcotte Station.

Foggy Forest Path Walkthrough Guide

The Wild Fairy of Erinnyes Walkthrough & Tips

Walkthrough Guide
  1. Interact with the Monument and head to the next quest area.
  2. Mysterious Altar
    Interact to the Mysterious Altar below the floating tree.
  3. ▼Reveal the Altar's Secrets.
    You can do this by solving the bubble puzzles that surrounds the tree. The puzzles can be solved by getting the power of the Octopus Xenochromatic Fontemer and Harmonious Reed Pipe
  4. Interact with the Mysterious Altar once again and get the item.
  5. Talk to Pahsiv

Reveal The Altar's Secrets Guide

Puzzle 1

Puzzle 1
Puzzle 1 Solution
Puzzle 1
  1. Puzzle 1
    Cleanse the pollution using the Octopus Xenochromatic Fontemer skill.
  2. Puzzle 1 bubble together
    A bubble will be summoned and move it towards the other bubble to fuse them.
  3. Puzzle 1 Move
    Using the Xenochromatic Fontemer Skill, move the big bubble until it is in the range of the 2 Instruments.
  4. Hit the bubble to make it explode.

Puzzle 2

Puzzle 2
Puzzle 2 Solution
Puzzle 2
  1. Cleanse the pollution using the Octopus Xenochromatic Fontemer skill.
  2. A bubble will be summoned and move it towards the other bubble to fuse them.
  3. Puzzle 2
    Place the bubble a bit closer to the instrument that only has one symbol on top while still being at the scope of the 2 instruments with 2 symbols on top.
    The goal is to make the wave hit the instrument with one symbol first then the other instrument with 2 Symbols on top.
  4. Hit the bubble to make it explode.

Puzzle 3

Puzzle 3
Puzzle 3 Solution
Puzzle 2
  1. Cleanse the pollution using the Octopus Xenochromatic Fontemer skill.
  2. A bubble will be summoned and move it towards the other bubble to fuse them.
  3. Puzzle 3
    Place the bubble in the location in the photo. It should be a bit closer to the 1 Symbol instrument and on the scope of 2 and 3.
    The goal is to make the wave hit the instrument with one symbol first then the instrument with 2 Symbols on top then the instrument with 3 Symbols.
  4. Hit the bubble to make it explode.

Wilting Weeping Willow

Walkthrough Guide
  1. Head to the Weeping Willow of the Lake and dive down.
  2. Stingray
    Get the powers of the Xenochromatic Stingray
  3. Free Octopus
    Use the power of the Stingray to free the Xenochromatic Octopus and get its powers.
  4. Use the obtained ability to cleanse the pollution below.
  5. Bubble Move
    A bubble will appear so move it between the instruments and pop it. The wave should hit the instruments with one symbol first.
  6. Get the item that will pop up in the monument.

Furious Mouth Of The Spring

Walkthrough Guide
  1. Follow the Quest to Loch Urania and dive down.
  2. Crab
    Get the power of Xenochromatic Crab and use the power to destroy the polluted Barnacles. Follow the path to the current and ride it to get to the last one.
  3. Vishap
    Return to the tunnel that you pass using the current and get the item near a Vishap.
  4. You will be teleported above ground after and you need to defeat the Vishap.

Within The Depths Of Erinnyes

Walkthrough Guide
  1. Head to the Square and place all of the keys.
  2. Head inside the fountain then follow the quest mark.
  3. Fight the Root-Consuming Tumor.
    ↳ Use Xenochromatic Octopus powers to deal damage to the Tumor while attacking the enemies that spawns with Character Skills.
  4. Talk to Pahsiv.

The Wild Fairy of Erinnyes - Rewards

Rewards Per Sub-Quest

  • Adventure EXP x 350
  • Primogems x 30
  • Hero's Wit x 2
  • Mora x 30,000

Get Various Treasure Chest

You will receive various treasure chest from Pahsiv upon finishing this quest.

Unlocks Shop Of Pahsiv

Tidalga For Lakelight Lily

You can obtain Lakelight Lily from Pahsive after finishing the The Wild Fairy of Erinnyes Quest. You can find Pahsiv inside a cave after finishing the quest. You can also find a treasure chest containing Drained Conch Cup Guide in the area.

Pahsiv Location Map & Cave Entrance

Map LocationCave Entrance
Tidalga For Lakelight Lily - Pahsiv Map
Tidalga For Lakelight Lily - Pahsiv Cave Entrance

Pahsiv is located in the northern cave of Loch Urania. Make sure to complete The Wild Fairy Of Erinnyes Quest or else Pahsiv will not spawn here.

Exchange The Foggy Forest Branch & Unlock An Achievement

The Wild Fairy of Erinnyes

After completing the world quest, collect all the 6 Foggy Forest Branches and then exchange it to Pahsiv and then you will be able to unlock an achievement called Semnai Sans Shadow.

Foggy Forest Branch Locations Guide
Genshin Impact - Related Quest Guides

quest

Latest Quests

All Archon Quests

All Archons Quest List

All World Quest

All World Quest List

All Story Quest

All Story Quests List
All Story Quests
Lepus Chapter: Act 1Amber 1Pavo Ocellus Chapter: Act 1Kaeya 1Tempus Fugit Chapter: Act 1Lisa 1
Lupus Minor Chapter: Act 1Razor 1Noctua Chapter: Act IDiluc 1Trifolium Chapter: Act IKlee 1
Leo Minor Chapter: Act IJean 1Carmen Dei Chapter: Act IVenti 1Astrolabos Chapter: Act IMona 1
Princeps Cretaceus Chapter: Act IAlbedo 1Aphros Delos Chapter: Act 1Eula 1Trulla Chapter: Act 1Xiangling 1
Fabulae Textile Chapter: Act 1Xingqiu 1Historia Antiqua Chapter: Act IZhongli 1Historia Antiqua Chapter: Act IIZhongli 2
Sinae Unicornis Chapter: Act IGanyu 1Alatus Chapter: Act IXiao 1Papilio Charontis Chapter: Act IHu Tao 1
Carassius Auratus Chapter: Act IYoimiya 1Grus Nivis Chapter: Act IAyaka 1Imperatrix Umbrosa Chapter: Act 1Raiden Shogun 1
Dracaena Somnolenta Chapter: Act 1Kokomi 1Taurus Iracundus Chapter: Act 1Itto 1Acer Palmatum Chapter: Act 1Kazuha 1
Imperatrix Umbrosa Chapter: Act 2Raiden Shogun 2Divina Vulpes Chapter: Act 1Yae Miko 1Cypressus Custos Chapter: Act IAyato 1
Umbrabilis Orchis Chapter: Act 1Yelan 1Vulpes Zerda Chapter: Act 1Tighnari 1Lupus Aureus Chapter Act 1Cyno 1
Lotos Somno: Act 1Nilou 1Sapientia Oromasdis Act 1Nahida 1Vultur Volans Chapter: Act IAlhaitham 1
Mantichora Chapter: Act 1Dehya 1Sapientia Oromasdis Act 2Nahida 2Lagenaria Chapter: Act 1Baizhu 1
Carassius Auratus Chapter: Act IIYoimiya 2Felis Fuscus Chapter: Act ILyney 1Cerberus Chapter: Act 1Wriothesley 1
Diluvies Chapter: Act 1Neuvillette 1Animula Choragi Chapter: Act IFurina 1Rosa Multiflora Chapter: Act INavia 1
Grus Serena Chapter: Act 1Xianyun 1Cisoria Chapter: Act 1Chiori 1Ignis Purgatorius Chapter: Act 1 Arlecchino 1
Lupus Aureus Chapter: Act 2Cyno 2Rapperia Chapter: Act 1Clorinde 1Nereiders Chapter: Act 1Sigewinne 1
Where The Springs ReturnMualani 1YupanquiKinich 1Melodious ChantXilonen 1
As The Blazing SunMavuika 1Memories Flowing With ColorCitlali 1-
Have some feedback? Click here

Your feedbacks will be checked by our staffs and will be attended to accordingly. Please be advised that we may not reply to every individual feedbacks.


Article Written by
Reader Comments
Max. 300 Characters

By clicking Submit you are agreeing to the Terms of Use.
*Offensive, insulting or inappropriate use of forum may lead to ban/restriction.
To avoid griefing, you will not be able to post or report for the first %d hours upon visiting this forum for the first time.

Close

Looks like nobody posted here yet...

Copyright Notice

© All rights reserved by miHoYo.
The copyrights of videos of games used in our content and other intellectual property rights belong to the provider of the game.

Article Menu
Latest Updates
5.3 Update
5.3 Characters
5.3 Events
5.3 Quests
Natlan Guides
Natlan Domains
Tribal Chronicle Quests (Story Quests)
Natlan World Quest
Natlan Secret Guides
Tier & Character Guides
Character List By Roles
5★ Characters
AlbedoAlhaitham
AloyArlecchino
AyakaAyato
BaizhuChasca
ClorindeChilde
(Tartaglia)
ChioriCyno
DehyaDiluc
EmilieEula
FurinaGanyu
Hu TaoJean
KazuhaKeqing
KinichKlee
KokomiLyney
MonaMualani
NahidaNavia
NilouNeuvillette
TighnariVenti
QiqiRaiden Shogun
SigewinneShenhe
Wanderer
(Scaramouche)
Wriothesley
XiaoXilonen
XianyunYae Miko
YelanYoimiya
Zhongli-
4★ Characters
Other Characters
Traveler Elements
Maps & Materials
Oculus Maps
Shrine Of Depths
Other Maps
Local Specialties
Fontaine Specialties
Sumeru Specialties
Inazuma Specialties
Liyue Specialties
Mondstadt Specialties
Weapon Guide & Lists
Mini Games & Useful Tools
Quest List
Materials
Weapons & Artifact Guide
Weapon Type List
Locations & Nations
Imaginarium Theater Guides
Genius Invokation (TCG)
Beginner's Guide
Gameplay Guides
Teapot System Articles
Future Oculus
Future Shrine Of Depths
日本版原神攻略サイト