Comprehensive Jahoda guide for Genshin Impact. Learn Jahoda's best build, best team, kit, and ascension materials for Jahoda the 4-Star Anemo Support Bow user.
| Jahoda Related Articles | ||||||||
|---|---|---|---|---|---|---|---|---|
 Best Build Best Build | Best Team | |||||||
| Materials Pre-Farm Guide | Best Weapon | |||||||
Table of Contents
Jahoda Character Overview, Base Stats, and Tier
Character Profile
 | Rarity | | |
|---|---|---|---|
| Element | Anemo | ||
| Weapon | Bow | ||
| Ascend Stat | Healing Bonus 18% | ||
| Region | Nod-Krai | ||
| Birthday | January 5 | ||
| Roles | | ||
| How To Get | Available in all Banners at a low drop rate | ||
Base Stats
| Base HP | Base ATK | Base DEF | |
|---|---|---|---|
| Lvl. 90 | 9,646 | 223 | 580 |
| Lvl. 80 (Ascended) | 8,978 | 208 | 540 |
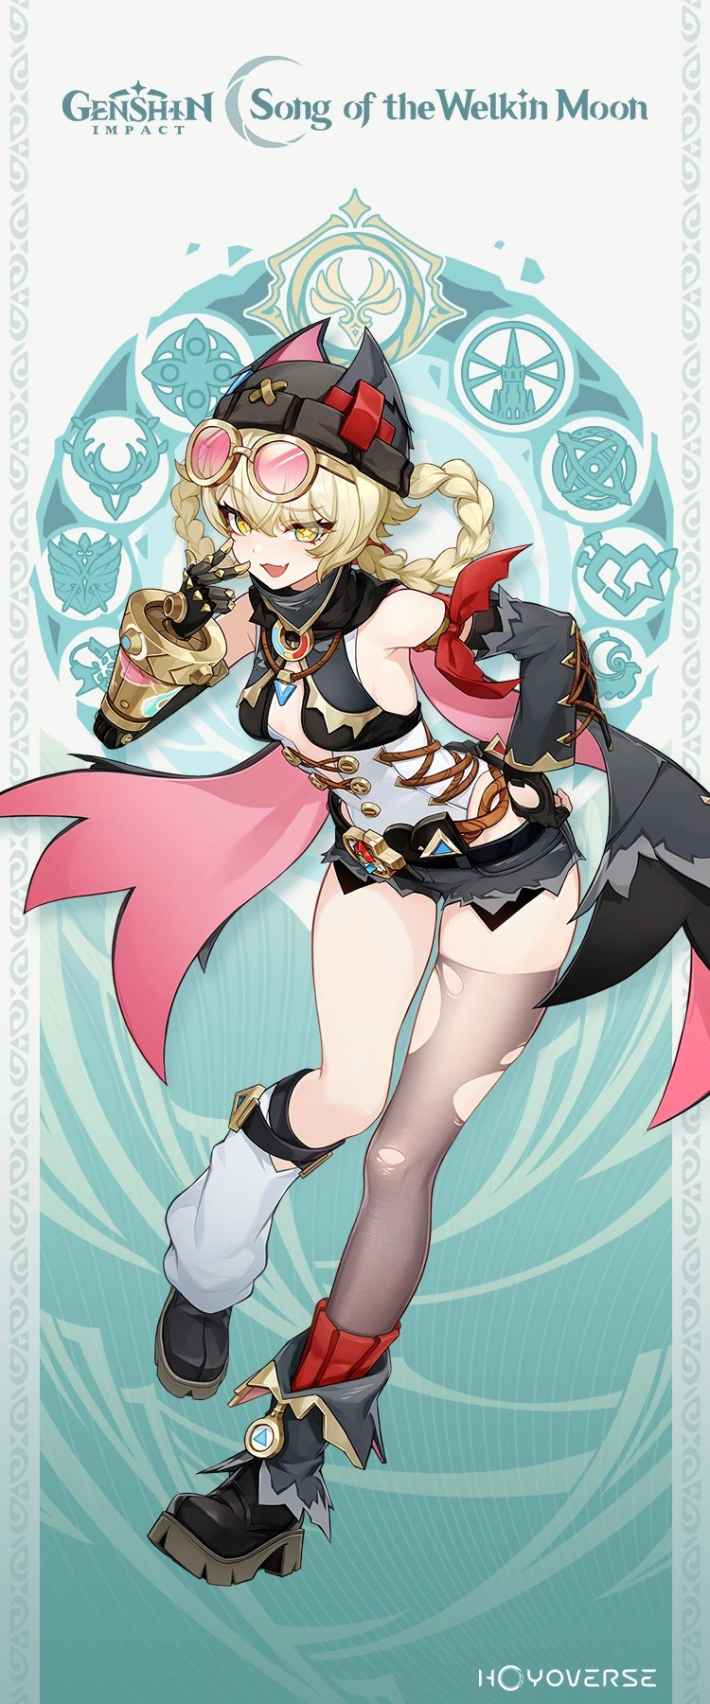
Jahoda is a 4-Star Off-Field Anemo Support Bow user in Genshin Impact. She can dash using her Elemental Skill and heal the team with her Elemental Burst. Jahoda gains different buffs for her Burst from the team's Elements and can increase the party's Moonsign level by 1.
When the party has the Ascendant Gleam Moonsign effect, which requires 2 Nod-Krai characters, Jahoda can deal Elemental Damage based on the Swirled Element via her Elemental Skill.
Jahoda's Tier & Rating
| Overall Tier | ||||||||||||||
|---|---|---|---|---|---|---|---|---|---|---|---|---|---|---|
| A | ||||||||||||||
| On-Field | Off-Field | DPS | Support | Sustain | ||||||||||
| - | A | - | A | A | ||||||||||
In battle, Jahoda is a healer and shred support for Duo Nod-Krai teams. Her Skill allows her to dash, fill up the Skill gauge, and deal damage, while her Burst creates Robots that can heal and deal damage. She is also able to buff Elemental Mastery and gain buffs herself, depending on the Elements in the team.
Rate Jahoda!
Roles & Playstyle Of Jahoda and Its Strengths and Weaknesses
A Moonsign Anemo Healer
Jahoda is an off-field healer that can increase the moonsign level of the team. She is mostly used as an off-field healer and a resistance shred character with Viridescent Venerer. At higher constellations, she is able to increase the Lunar Reaction damage of the team.
Pros and Cons of Jahoda
| Pros |
|---|
| - Consistent healing and frequent elemental infliction of the swirled element. |
| - Just by using Jahoda in the team, she increases the level of Lunarsign of the team making her a crucial Nod-Krai teammate. |
| Cons |
| - Fairly high on-field time to activate her off-field abilities. |
| - Does not provide many buffs without constellations. |
Best Build for Jahoda
Jahoda Works Best as a Healer with Good Energy Recharge
As a healer who needs her Burst to heal, Jahoda is best built with the stat her healing scales on and Energy Recharge.
| Weapon | Elegy For The End |
|---|---|
| Best Artifact | Viridescent Venerer x4 |
| Artifact Main Stats | Sands: Energy Recharge or ATK% Goblet: ATK% Circlet: Healing Bonus or ATK% |
| Priority Sub-Stats | Energy Recharge > ATK% |
| Recommended Team | |
Stat Goals For Healer Jahoda
| Energy Recharge | 200%~ |
|---|---|
| ATK | 1800~ |
Even if Jahoda has a low Energy cost, she will still need a good amount of Energy Recharge for her Burst's uptime. Jahoda needs to have a high ATK stat, assuming she'll be the 5th ATK Anemo support since there are 5 EM Anemo supports.
Jahoda 's Recommended Talent Priority
| Talent | Level Up Priority |
|---|---|
| Strike While the Arrow's Hot | ★ ・ ・ ・ ・ |
| Savvy Strategy: Splitting the Spoils (Elemental Skill) | ★★★★ ・ |
| Hidden Aces: Seven Tools of the Hunter (Elemental Burst) | ★★★★★ |
Related Links:
Best Weapon for Jahoda
Jahoda needs Energy Recharge or ATK stat weapons that can help boost her Burst uptime or healing. As a support character, she can also use support weapons to further buff the team.
Premium Weapons for Jahoda
| Weapon | How to Get Rating | |
|---|---|---|
| Best | Elegy For The End | Get from Limited Banner - Signature Weapon of Venti that is only available when he is featured on a banner. - Best support weapon for buffing teammates and increasing Jahoda's Energy Recharge. |
| 2nd | Sacrificial Bow | Get from Banners - Another 4-Star Bow that can easily be obtained from all banners. - Has a decent Energy Recharge stat, but the Skill refresh effect is not as beneficial for support Jahoda. |
| 3rd | Get from Banners - 5-Star weapon that works as an ATK stat stick for Jahoda's healing. |
Elegy is Jahoda's BiS premium weapon for both its Energy Recharge stat and ability to buff her teammates. Aside from it, any Energy Recharge or ATK stat stick can work for her.
Free-to-Play Friendly (F2P Weapons) for Jahoda
| Weapon | How to Get Rating | |
|---|---|---|
| Best F2P | Rainbow Serpent's Rain Bow | Get from Limited Event - Event reward from Version 6.2's flagship event. - Boosts both Energy Recharge and ATK, allowing Jahoda to easily have both stats she needs. |
| 2nd (Quest) | Favonius Bow | Mondstadt Archon Quest Reward - 4-Star Bow that can be obtained as a reward in Mondstadt's Archon Quest and is available from all banners. - Great for its Energy Recharge stat and ability to create Energy Particles that can give energy to the team. |
| 3rd (Forge) | Snare Hook | Nod-Krai Craftable (Forgeable) Weapon - Great Energy Recharge stat stick for Burst uptime. - EM buff doesn't increase Jahoda's healing but it can help in reaction damage. |
The new event weapon is Jahoda's signature weapon that tops most of her premium options aside from Elegy. Favonius Warbow is another great F2P option for her due to its Energy mechanic.
Best Weapon For JahodaAll Weapon ListJahoda Best Artifacts
Jahoda's artifact sets should focus on boosting her Energy Recharge and ATK, or buffing her teammates. As a support, it's best if she uses a support set to empower her teammates.
| Artifact | Recommendation Details |
|---|---|
| Viridescent Venerer | ★★★★★ - Best support set for Jahoda since she can trigger Swirl as an Anemo character. - Not recommended to be farmed in the domain since it's inefficient compared to using the Artifact Strongbox system. |
| Noblesse Oblige | ★★★★ ・ - 2nd best support set that can be used if someone else in the party is using VV or Scroll set. - Only viable if the DPS scales with ATK, but it can also boost Jahoda's healing. |
| Song Of Days Past | ★★★★ ・ - Healing-focused set that can be used if the DPS doesn't scale with ATK. - Buffs damage based on healing but will require Jahoda to heal often for a consistent buff. |
| Any ATK% setAny Healing Bonus setEmblem Of Severed Fate | ★★★ ・ ・ - Best 2-pc set effects for Jahoda when farming for her set. - Energy Recharge is the most preferred stat and can be equipped with either ATK or Healing Bonus. Going two Energy Recharge set effects can work but you will need to use an ATK Sands and weapon. |
Recommended Artifact Stats
| Main: Flat HP Sub: Energy Recharge / ATK% |
|---|---|
| Main: Flat ATK Sub: Energy Recharge / ATK% |
| Main: Energy Recharge or ATK% Sub: Energy Recharge / ATK% |
| Main: ATK% Sub: Energy Recharge |
| Main: Healing Bonus or ATK% Sub: Energy Recharge / ATK% |
Focus on Energy Recharge and ATK for Burst Uptime and Healing
Built similarly to other Burst-reliant supports, Jahoda should have good Energy Recharge and ATK to make sure she can heal efficiently. If using Favonius Bow on Jahoda, CRIT Rate should also be built.
Related Articles
Best Team Comp Jahoda
Lunar-Charged Team with Jahoda
| Support | DPS | Shielder | Sub-DPS |
|---|---|---|---|
| Jahoda | Flins | Ineffa | |
| Details | |||
| - Full Moonsign Lunar-Charged team with Jahoda holding Viridescent Venerer to shred Electro RES to boost Lunar-Charged damage. - While Jahoda has a weaker EM buff compared to Sucrose, she can provide healing if Ineffa's shield breaks or if Ineffa isn't added to the team. - While the Hydro buff is preferred for Jahoda's Burst, the Electro buff is also good, and she can have both if she's C2. | |||
Lunar-Charged is Jahoda's best team since her Swirls can help trigger more Lunar-Charged procs and she has access to both of her best Elemental buffs for her Burst. As a healer and VV holder, Jahoda is able to fill two roles that the Lunar-Charged team needs. If Aino isn't C6, use a non-Moonsign Hydro Sub-DPS for the Ascendant Gleam buff on Lunar-Charged.
Other Team Comps for Jahoda
Vapemelt Team with Jahoda
| Team | Detail | |
|---|---|---|
| Mavuika | Citlali | - Mavuika Vapemelt team with Jahoda and Aino to enable Ascendant Gleam for each other. - Jahoda will be able to buff Elemental Mastery and shred Elemental resistances allowing Citlali to use an EM artifact set to strengthen her shield. - Aino can be swapped out for another Hydro Sub-DPS but Jahoda will no longer be able to apply the infused element with her Skill. |
| Jahoda | ||
Free To Play Team Comp for Jahoda
| Team | Detail | |
|---|---|---|
| Yanfei | Yun Jin | - F2P Vaporize team with Yanfei as the DPS. - Yun Jin can benefit from all 4 different Elements while Jahoda buffs Elemental Mastery for Yanfei's Vaporize damage. - Aino can be swapped out for another Hydro Sub-DPS but Jahoda will no longer be able to apply the infused element with her Skill. |
| Jahoda | ||
Team Rotation of Jahoda and Combos
Team Rotation with Support Jahoda
| Basic Rotation Of Jahoda |
|---|
| 1. Use other characters to apply the DPS Element. 2. Use Jahoda's Skill twice to immediately cancel it and use her Burst. 3. Switch to the DPS character. |
Jahoda's rotation follows other supports. Use her Elemental Skill and Burst then switch her out. If Ascendant Gleam is active, you can choose to charge Jahoda's Skill gauge to allow her to help apply an Element but most of the time, skipping her Skill gauge is done in favor of a faster rotation.
Basics Of Using Jahoda (Beginner Guide)
Anemo Healer for Moonsign Teams
Just like all other Nod-Krai characters, Jahoda has access to the Moonsign mechanic and her abilities have an additional effect when Ascendant Gleam is active. For Jahoda, it allows her Skill to convert to the Swirled Element and deal Off-Field damage based on it while her Burst also undergoes conversion and deals damage based on the Swirled Element.
Ascendant Gleam Changes Her Off-Field Potential Greatly
Jahoda's Skill and Burst deal Anemo damage, with only her Burst being able to deal damage while she's Off-Field. But with the Ascendant Gleam effect, her Skill can apply the Swirled Element Off-Field and her Burst undergoes conversion as well.
Elemental Skill Can Be Charged
Jahoda's Elemental Skill activates a dash ability that fills up a gauge. But it takes time to charge it fully, requiring more field time given to Jahoda. Depending on the team comp, her Skill's gauge can be ignored in favor of a faster rotation.
Elemental Burst Can Heal and Deal Damage
Jahoda's Elemental Burst summons 2 floating cat paws that follow the active character and heal them as well as deal damage to nearby enemies. These Cat Paws can undergo Elemental Conversion if Ascendant Gleam effect is active and will deal damage based on the Element they convert to.
Elemental Skill, Burst and Abilities Guide for Jahoda
How To Use Jahoda's Skills & Passives?
Anemo Healer For Moonsign Teams
Jahoda is an Anemo healer and Elemental applier who is meant to be for Moonsign teams but she can be used outside of it. Outside of Moonsign teams, she's a dedicated healer and Viridescent Venerer holder.
Elemental Skill Is A Dash Move
Jahoda's Elemental Skill allows her to charge a gauge while dashing on the field. If the team doesn't have Ascendant Gleam active, you can skip the dash and prematurely end her Skill early by tapping on it again.
Elemental Burst Heals And Deals Damage
Jahoda's Elemental Burst summons floating cat paws that heal the active character and deal Anemo DMG periodically to nearby enemies. It can undergo Elemental Conversion when Ascendant Gleam effect is active and change the Elemental DMG it deals.
Ascendant Gleam Can Change Her Skill And Burst
If there's another Moonsign character with Jahoda, Ascendant Gleam effect changes both her Skill and Burst to be able to undergo Elemental Conversion and deal damage based on the Element it converts to.
| Without Ascendant Gleam | With Ascendant Gleam | |
|---|---|---|
| Elemental Skill | - Only does one instance of Anemo DMG when ending the Skill early or gauge maxes out. - Fully drains the gauge afterwards. | - Periodically deals damage based on the Converted Element when gauge maxes out. - Continuously drains the gauge. |
| Elemental Burst | - Summons 2 cat paws that periodically deals Anemo DMG to enemies. | - Summons 3 cat paws that can deal damage based on the Converted Element. |
Passives Allows Her To Buff EM And Buff Her Burst
Jahoda's first passive allows her to empower her Burst while her second passive can buff the active character's Elemental Mastery if her Burst heals them and their HP is above 70%. Her first passive's buff depends on the team composition but the best buff for her Burst is the Hydro and Electro buff.
| Element | Buff to Jahoda's Burst |
|---|---|
| Pyro | - Increases the coordinated attack damage. |
| Hydro | - Increases the healing from the floating cat paws. |
| Electro | - Increases the number of floating cat paws. (Non-Ascendant Gleam teams summons 3 cat paws and Moonsign teams summons 4 cat paws) |
| Cryo | - Increases the attack speed of the floating cat paws. |
Jahoda's passive records the highest amount of Pyro, Hydro, Electro and Cryo characters in the team and if there's a tie, the leftmost Element is chosen for her buff. Her Constellation 2 allows two buffs to exist at the same time.
Should You Pull for Jahoda's Constellation Or Best Weapon?
C2 Gives Jahoda More Functionality
Jahoda's C2 allows her Elemental Burst to have 2 buffs at once. In a Lunar-Charged team, this means she can heal more and deploy one more Robot. Depending on the team comp, her Burst could heal more or deal more damage.
Aim for C6 for CRIT Stat Buff in Nod-Krai Teams
Jahoda's C6 is only good for Nod-Krai teams since it only buffs the CRIT stats of Moonsign characters. If you don't have a Moonsign DPS character, Jahoda's C2 is good enough.
Jahoda's Constellations & Effects
| Rating | Constellation Effect |
|---|---|
| ★★★・・ | C1: One More Flask! When a Fluffy Meowball fired by the Purr-loined Treasure Flask from the Elemental Skill Savvy Strategy: Splitting the Spoils hits an enemy, there is a 50% chance for it to bounce, dealing the corresponding Elemental DMG to nearby opponents. |
| ★★★★・ | C2: Rogue's Quick Thinking Moonsign: Ascendant Gleam: In the Ascension Talent "Plan to Get Paid," Jahoda can secretly track, in addition to the element with the highest number of characters, the element with the next highest number of characters among the remaining types. This allows up to two elemental effects to be active at once. You must first unlock the Ascension Talent "Plan to Get Paid." |
| ★★・・・ | C3: Desperate Gamble Increases the Level of Hidden Aces: Seven Tools of the Hunter by 3. Maximum upgrade level is 15. |
| ★★★・・ | C4: Wild Berry Amid the Dust When a Purrsonal Coordinated Assistance Robot from the Elemental Burst Hidden Aces: Seven Tools of the Hunter undergoes an Elemental Conversion, Jahoda will recover 4 Elemental Energy. |
| ★★・・・ | C5: The Greatest Treasure Increases the Level of Savvy Strategy: Splitting the Spoils by 3. Maximum upgrade level is 15. |
| ★★★★★ | C6: The Littlest Luck Moonsign: Ascendant Gleam: After the Purr-loined Treasure Flask from the Elemental Skill Savvy Strategy: Splitting the Spoils is full, nearby Moonsign characters in your party have their CRIT Rate increased by 5% and CRIT DMG increased by 40% for 20s. |
Jahoda's Constellation Name is Fragum
| Fragum |
|---|
 |
Ascension Materials for Jahoda Talents & Level
Materials Per Ascension Level
| Lvl 20 | Vayuda Turquoise Sliver x1Portable Bearing x3Broken Drive Shaft x3 |
|---|---|
| Lvl 40 | Vayuda Turquoise Fragment x3Lightbearing Scale-Feather x2 Portable Bearing x10Broken Drive Shaft x15 |
| Lvl 50 | Vayuda Turquoise Fragment x9Lightbearing Scale-Feather x4 Portable Bearing x20Reinforced Drive Shaft x12 |
| Lvl 60 | Vayuda Turquoise Chunk x6Lightbearing Scale-Feather x8 Portable Bearing x30Reinforced Drive Shaft x18 |
| Lvl 70 | Vayuda Turquoise Chunk x3Lightbearing Scale-Feather x12 Portable Bearing x45Precision Drive Shaft x12 |
| Lvl 80 | Vayuda Turquoise Gemstone x6Lightbearing Scale-Feather x20 Portable Bearing x60Precision Drive Shaft x24 |
Materials Per Talent Ascension
| Lvl 1 | Default |
|---|---|
| Lvl 2 | Teachings Of Vagrancy x3Broken Drive Shaft x6 |
| Lvl 3 | Guide To Vagrancy x2Reinforced Drive Shaft x3 |
| Lvl 4 | Guide To Vagrancy x4Reinforced Drive Shaft x4 |
| Lvl 5 | Guide To Vagrancy x6Reinforced Drive Shaft x6 |
| Lvl 6 | Guide To Vagrancy x9Reinforced Drive Shaft x9 |
| Lvl 7 | Philosophies Of Vagrancy x4Precision Drive Shaft x4Ascended Sample: Knight x1 |
| Lvl 8 | Philosophies Of Vagrancy x6Precision Drive Shaft x6Ascended Sample: Knight x1 |
| Lvl 9 | Philosophies Of Vagrancy x12Precision Drive Shaft x9Ascended Sample: Knight x2 |
| Lvl 10 | Philosophies Of Vagrancy x16Precision Drive Shaft x12Ascended Sample: Knight x2 |
| Lvl 11 | Unlocked via Constellation Levels |
| Lvl 12 | Unlocked via Constellation Levels |
| Lvl 13 | Unlocked via Constellation Levels |
Related Links
Jahoda Skills & Talents Details
Normal Attack: Strike While the Arrow's Hot
Normal Attack
| Effect |
|---|
| Performs up to 3 consecutive shots with a bow. |
| Lv1 | Lv2 | Lv3 | Lv4 | Lv5 | Lv6 | Lv7 | Lv8 | Lv9 | Lv10 | Lv11 | Lv12 | Lv13 | Lv14 | Lv15 | |
|---|---|---|---|---|---|---|---|---|---|---|---|---|---|---|---|
| 1-Hit DMG | 41.67% | 45.07% | 48.46% | 53.3% | 56.7% | 60.57% | 65.9% | 71.23% | 76.56% | 82.38% | 88.19% | 94.01% | 99.82% | 105.64% | 111.45% |
| 2-Hit DMG | 19.23%× 2 | 20.8%× 2 | 22.36%× 2 | 24.6%× 2 | 26.16%× 2 | 27.95%× 2 | 30.41%× 2 | 32.87%× 2 | 35.33%× 2 | 38.02%× 2 | 40.7%× 2 | 43.38%× 2 | 46.07%× 2 | 48.75%× 2 | 51.43%× 2 |
| 3-Hit DMG | 51.2% | 55.36% | 59.53% | 65.49% | 69.65% | 74.42% | 80.96% | 87.51% | 94.06% | 101.2% | 108.35% | 115.49% | 122.64% | 129.78% | 136.92% |
▲Use side-scroll to see percentage per level.
Charged Attack
| Effect |
|---|
| Performs a more precise Aimed Shot with increased DMG. While aiming, mighty winds will accumulate on the arrowhead. A fully charged wind arrow will deal Anemo DMG. |
| Lv1 | Lv2 | Lv3 | Lv4 | Lv5 | Lv6 | Lv7 | Lv8 | Lv9 | Lv10 | Lv11 | Lv12 | Lv13 | Lv14 | Lv15 | |
|---|---|---|---|---|---|---|---|---|---|---|---|---|---|---|---|
| Aimed Shot | 43.86% | 47.43% | 51% | 56.1% | 59.67% | 63.75% | 69.36% | 74.97% | 80.58% | 86.7% | 92.82% | 98.94% | 105.06% | 111.18% | 117.3% |
| Fully-Aimed Shot | 124% | 133.3% | 142.6% | 155% | 164.3% | 173.6% | 186% | 198.4% | 210.8% | 223.2% | 235.6% | 248% | 263.5% | 279% | 294.5% |
▲Use side-scroll to see percentage per level.
Plunging Attack
| Effect |
|---|
| Fires off a shower of arrows in mid-air before falling and striking the ground, hitting opponents along the path and dealing AoE DMG upon impact. |
| Lv1 | Lv2 | Lv3 | Lv4 | Lv5 | Lv6 | Lv7 | Lv8 | Lv9 | Lv10 | Lv11 | Lv12 | Lv13 | Lv14 | Lv15 | |
|---|---|---|---|---|---|---|---|---|---|---|---|---|---|---|---|
| Plunge DMG | 56.83% | 61.45% | 66.08% | 72.69% | 77.31% | 82.6% | 89.87% | 97.14% | 104.41% | 112.34% | 120.27% | 128.2% | 136.12% | 144.05% | 151.98% |
| Low Plunge DMG | 113.63% / 141.93% | 122.88% / 153.49% | 132.13% / 165.04% | 145.35% / 181.54% | 154.59% / 193.1% | 165.17% / 206.3% | 179.7% / 224.45% | 194.23% / 242.61% | 208.77% / 260.76% | 224.62% / 280.57% | 240.48% / 300.37% | 256.34% / 320.18% | 272.19% / 339.98% | 288.05% / 359.79% | 303.9% / 379.59% |
| High Plunge DMG | 113.63% / 141.93% | 122.88% / 153.49% | 132.13% / 165.04% | 145.35% / 181.54% | 154.59% / 193.1% | 165.17% / 206.3% | 179.7% / 224.45% | 194.23% / 242.61% | 208.77% / 260.76% | 224.62% / 280.57% | 240.48% / 300.37% | 256.34% / 320.18% | 272.19% / 339.98% | 288.05% / 359.79% | 303.9% / 379.59% |
▲Use side-scroll to see percentage per level.
Savvy Strategy: Splitting the Spoils (Elemental Skill)
| Effect |
|---|
| Jahoda dashes toward her opponent, entering the Shadow Pursuit state upon contact. While in this state, Jahoda moves continuously and swiftly: If nearby opponents are affected by Pyro, Hydro, Electro, or Cryo, she will quietly convert her Purr-loined Treasure Flask to that element, gradually filling it. When the duration ends or the skill is used again, Jahoda drains the Purr-loined Treasure Flask and deals a single instance of Anemo DMG to nearby opponents. When the Purr-loined Treasure Flask is full, Jahoda immediately drains it, exiting the Shadow Pursuit state and dealing a more powerful instance of Anemo DMG. If her dash fails to make contact with an opponent, Jahoda instead drops a Smoke Bomb at her location, dealing a single instance of Anemo DMG to nearby opponents. |
Purr-loined Treasure Flask
| Effect |
|---|
| A small elemental vessel that Jahoda retrieves after casting her Elemental Skill Savvy Strategy: Splitting the Spoils. While Jahoda is in the Shadow Pursuit state, if nearby opponents are affected by Pyro, Hydro, Electro, or Cryo, the Purr-loined Treasure Flask will convert to that element and begin filling up. The order of priority that determines which element will be converted to is: Pyro, Hydro, Electro, then Cryo. After each use of her Elemental Skill, the Purr-loined Treasure Flask can undergo one such conversion.When the Purr-loined Treasure Flask is full, Jahoda immediately drains it, exiting the Shadow Pursuit state and dealing a single instance of Anemo DMG to nearby opponents. Each time the Elemental Skill is cast, Jahoda takes out a brand-new Purr-loined Treasure Flask.. |
Moonsign: Ascendant Gleam
| Effect |
|---|
| When the Purr-loined Treasure Flask becomes full, Jahoda will not immediately discharge it. Instead, for a short duration, she steadily consumes the stored element inside and periodically fires Fluffy Meowballs at nearby opponents, dealing DMG of the corresponding element stored in the Purr-loined Treasure Flask. When a Fluffy Meowball hits an opponent, Jahoda regenerates 2 Elemental Energy. This effect can be triggered once every 3.5s. |
| Lv1 | Lv2 | Lv3 | Lv4 | Lv5 | Lv6 | Lv7 | Lv8 | Lv9 | Lv10 | Lv11 | Lv12 | Lv13 | Lv14 | Lv15 | |
|---|---|---|---|---|---|---|---|---|---|---|---|---|---|---|---|
| Smoke Bomb DMG | 159% | 170.93% | 182.85% | 198.75% | 210.68% | 222.6% | 238.5% | 254.4% | 270.3% | 286.2% | 302.1% | 318% | 337.88% | 357.75% | 377.63% |
| Unfilled Treasure Flask DMG | 190.8% | 205.11% | 219.42% | 238.5% | 252.81% | 267.12% | 286.2% | 305.28% | 324.36% | 343.44% | 362.52% | 381.6% | 405.45% | 429.3% | 453.15% |
| Filled Treasure Flask DMG | 212% | 227.9% | 243.8% | 265% | 280.9% | 296.8% | 318% | 339.2% | 360.4% | 381.6% | 402.8% | 424% | 450.5% | 477% | 503.5% |
| Treasure Flask Duration | 20s | 20s | 20s | 20s | 20s | 20s | 20s | 20s | 20s | 20s | 20s | 20s | 20s | 20s | 20s |
| Meowball DMG | 128% | 137.6% | 147.2% | 160% | 169.6% | 179.2% | 192% | 204.8% | 217.6% | 230.4% | 243.2% | 256% | 272% | 288% | 304% |
| CD | 15s | 15s | 15s | 15s | 15s | 15s | 15s | 15s | 15s | 15s | 15s | 15s | 15s | 15s | 15s |
▲Use side-scroll to see percentage per level.
Hidden Aces: Seven Tools of the Hunter (Elemental Burst)
| Effect |
|---|
| Time to reveal those pocket aces! Jahoda retrieves 2 Purrsonal Coordinated Assistance Robots and deals a single instance of Anemo DMG to nearby opponents. |
| Lv1 | Lv2 | Lv3 | Lv4 | Lv5 | Lv6 | Lv7 | Lv8 | Lv9 | Lv10 | Lv11 | Lv12 | Lv13 | Lv14 | Lv15 | |
|---|---|---|---|---|---|---|---|---|---|---|---|---|---|---|---|
| Skill DMG | 207.2% | 222.74% | 238.28% | 259% | 274.54% | 290.08% | 310.8% | 331.52% | 352.24% | 372.96% | 393.68% | 414.4% | 440.3% | 466.2% | 492.1% |
| Purrsonal Coordinated Assistance Robot DMG | 17.27% | 18.56% | 19.86% | 21.58% | 22.88% | 24.17% | 25.9% | 27.63% | 29.35% | 31.08% | 32.81% | 34.53% | 36.69% | 38.85% | 41.01% |
| Purrsonal Coordinated Assistance Robot Duration | 12s | 12s | 12s | 12s | 12s | 12s | 12s | 12s | 12s | 12s | 12s | 12s | 12s | 12s | 12s |
| Purrsonal Coordinated Assistance Robot Healing | 79.87% ATK+ 500.74 | 85.86% ATK+ 550.82 | 91.85% ATK+ 605.07 | 99.84% ATK+ 663.5 | 105.83% ATK+ 726.1 | 111.82% ATK+ 792.88 | 119.81% ATK+ 863.82 | 127.8% ATK+ 938.94 | 135.78% ATK+ 1018.24 | 143.77% ATK+ 1101.71 | 151.76% ATK+ 1189.35 | 159.74% ATK+ 1281.16 | 169.73% ATK+ 1377.15 | 179.71% ATK+ 1477.31 | 189.7% ATK+ 1581.65 |
| Lowest HP Character Additional Healing | 30.72% ATK+ 192.6 | 33.02% ATK+ 211.86 | 35.33% ATK+ 232.73 | 38.4% ATK+ 255.2 | 40.7% ATK+ 279.28 | 43.01% ATK+ 304.96 | 46.08% ATK+ 332.25 | 49.15% ATK+ 361.14 | 52.22% ATK+ 391.64 | 55.3% ATK+ 423.75 | 58.37% ATK+ 457.46 | 61.44% ATK+ 492.77 | 65.28% ATK+ 529.69 | 69.12% ATK+ 568.21 | 72.96% ATK+ 608.34 |
| CD | 18s | 18s | 18s | 18s | 18s | 18s | 18s | 18s | 18s | 18s | 18s | 18s | 18s | 18s | 18s |
| Energy Cost | 70 | 70 | 70 | 70 | 70 | 70 | 70 | 70 | 70 | 70 | 70 | 70 | 70 | 70 | 70 |
▲Use side-scroll to see percentage per level.
Plan to Get Paid
| Effect |
|---|
| When your team has at least one Pyro, Hydro, Electro, or Cryo character, the Purrsonal Coordinated Assistance Robots from the Elemental Burst Hidden Aces: Seven Tools of the Hunter will be enhanced based on the number of characters of each corresponding element.Jahoda secretly keeps track of these characters. Among them, the element with the highest number of characters determines the enhancement effect: [b]r· Pyro: Purrsonal Coordinated Assistance Robots deal 130% of their original DMG. · Hydro: Purrsonal Coordinated Assistance Robots heal for 120% of their original healing amount. · Electro: The number of Purrsonal Coordinated Assistance Robots increases by one. · Cryo: The attack interval of Purrsonal Coordinated Assistance Robots is reduced by 10%. If there's a tie between elements, the order of priority that determines which enhancement takes effect is: Pyro, Hydro, Electro, then Cryo. Only one elemental effect can initially be triggered. |
Sweet Berry Bounty
| Effect |
|---|
| When a Purrsonal Coordinated Assistance Robot from the Elemental Burst Hidden Aces: Seven Tools of the Hunter triggers healing on an active team member, if that character's HP is above 70%, their Elemental Mastery will be increased by 100 for 6s. Purrsonal Coordinated Assistance Robots One of the gadgets that Jahoda — a former treasure hunter — carries around with her. It is deployed upon using her Elemental Burst Hidden Aces: Seven Tools of the Hunter. Purrsonal Coordinated Assistance Robots continuously restore HP to your active character. If the healed character's HP is above 70%, they also restore HP to the nearby party member with the lowest HP. |
Moonsign Benediction: Rooftop Dash
| Effect |
|---|
| When Jahoda is in the party, the party's Moonsign will increase by 1 level. |
Backstreet Guile
| Effect |
|---|
| When dispatched on an expedition in Nod-Krai, time consumed is reduced by 25%. |
Who Is Jahoda?
A "Legendary Bounty Hunter" Working for Nefer
Jahoda is employed by Nefer and often works as an errand runner depending on the commissions given to her. She often claims that she is a legendary bounty hunter.
A Very Expressive Person
In the Nod-Krai Archon Quest, Jahoda has internal monologues of self-doubt and shows various expressions.
Friends with Aino and Ineffa
Jahoda is often mentioned in Aino and Ineffa's dialogues and character stories. According to them, Jahoda often drops by to eat some snacks made by Ineffa and in exchange, gives Aino any mechanical parts she finds.
Jahoda's Voice Actor & Their Notable Roles
English Voice Actor: Sonya Krueger
| Notable Roles | |
|---|---|
| Nautika | Reverse: 1999 |
| Lady Diva | L.O.L. House Of Surprises |
| Kiiko Shimazu | Mai Mai Miracle |
Japanese Voice Actor: INAGAKI Konomi
| Notable Roles | |
|---|---|
| Xia Xia | Tower of God |
| Marciana | Goddess of Victory: Nikke |
| Lilique Kadoka Lipati | Mobile Suit Gundam: The Witch From Mercury |
| Copano Rickey | Umamusume |
Character Related Articles
Character Tier Lists
All Characters
| Characters By Rarity | |||||||||||
|---|---|---|---|---|---|---|---|---|---|---|---|
| Characters By Roles | |||||||||||
| DPS List | Support List | Sustain List | |||||||||
| On-Field List | Off-Field List | ||||||||||
| Characters By Element | |||||||||||
| Hydro | Anemo | Electro | |||||||||
| Dendro | |||||||||||
| Characters By Nation | |||||||||||
| Mondstadt | Liyue | ||||||||||
| Fontaine | Natlan | ||||||||||
| Snezhnaya | Nod-Krai | ||||||||||

