
Comprehensive Bennett guide for Genshin Impact. Learn Bennett's best build, voice actor, and hangout guide for this 4-Star Pyro Support Sword user.
| Bennett Related Articles | |||||
|---|---|---|---|---|---|
 Best Build Best Build | Best Team | ||||
| Specialty | Story Quest | ||||
Table of Contents
Bennett Character Overview, Base Stats, and Tier
Character Profile
 | Rarity | | |
|---|---|---|---|
| Element | |||
| Weapon | Sword | ||
| Ascend Stat | Energy Recharge 26.7% | ||
| Region | Mondstadt | ||
| Birthday | February 29 | ||
| Roles | | ||
| How To Get | - Available in all Banners at a low drop rate ★ Rate Up: 8/19/2025 - 9/9/2025 - Can be bought with Masterless Starglitter at Paimon's Bargains shop | ||
Base Stats
| Base HP | Base ATK | Base DEF | |
|---|---|---|---|
| Lvl. 90 | 12,397 | 191 | 771 |
| Lvl. 80 (Ascended) | 11,539 | 178 | 718 |
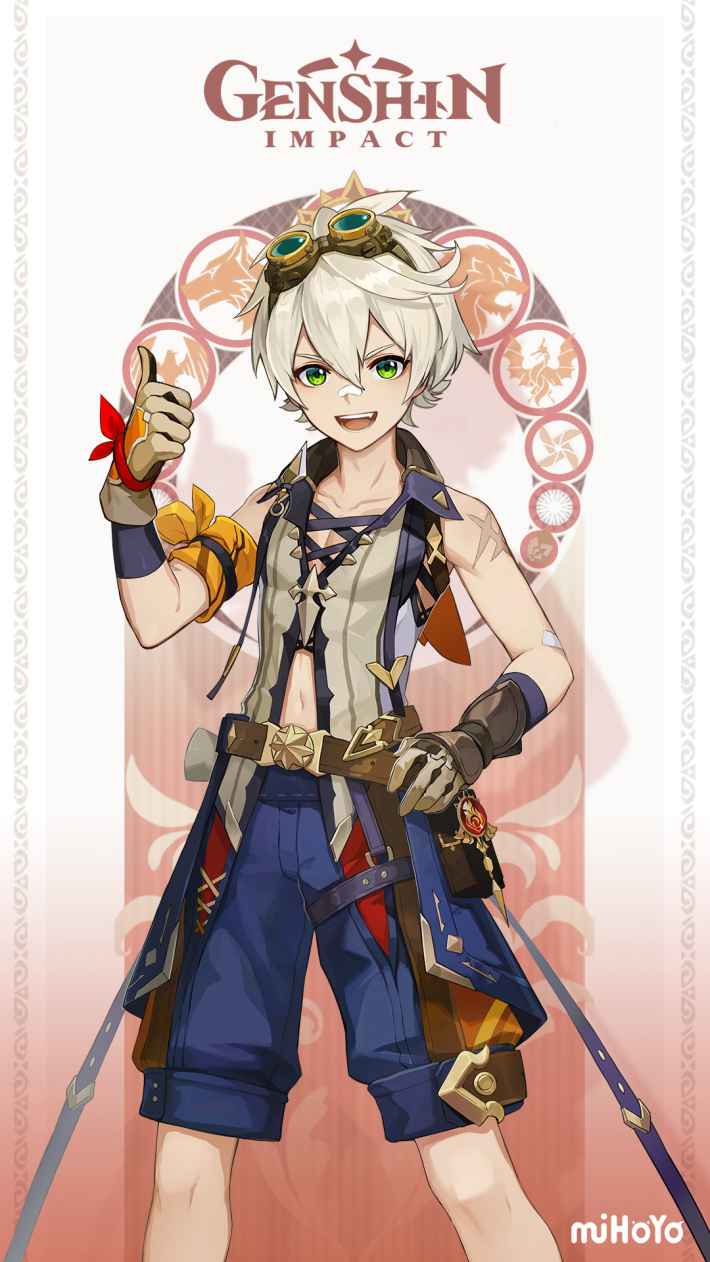
Bennett is a 4-star Pyro character that wields a Sword in Genshin Impact. His gameplay focuses on being one of the best support characters in the game, offering healing and an attack buff through his Elemental Burst. His Elemental Skill, "Passion Overload," can be tapped or held to unleash Pyro strikes that deal AoE damage and may knock Bennett back at higher charge levels. His Elemental Burst, "Fantastic Voyage," creates an Inspiration Field that heals allies and provides a massive ATK bonus to characters within it if their HP is above 70%. Lore-wise, Bennett is the only remaining member of "Benny's Adventure Team" in Mondstadt, a passionate yet unlucky adventurer whose optimism and selflessness have earned him widespread affection despite his constant misfortune.
Bennett's Tier & Rating
| Overall Tier | ||||||||||||||
|---|---|---|---|---|---|---|---|---|---|---|---|---|---|---|
| SS | ||||||||||||||
| On-Field | Off-Field | DPS | Support | Sustain | ||||||||||
| - | SS | - | SS | A | ||||||||||
What Kind of Character is Bennett?
Bennett is an Off-Field Pyro Support whose Elemental Burst both heals the active character and also providing a generous attack buff, provided the character remains in his Burst field. His buff is highly desired by most attack-scaling On-Field DPSes, and this naturally makes him fit into multiple teams as a result.
Bennett is among the most meta 4-star supports since the game's release, and it's easy to see why. Very few supports give as much attack as he does, and even then, end-game content favoring multiple teams ensures that Bennett will always have a place regardless.
Rate Bennett!
Roles & Playstyle of Bennett and His Strengths and Weakness
Off-Field Support Bennett
Bennett is a support character that can consolidate sustain and buffing. He works well alongside most DPSes and Sub-DPSes that appreciate having more attack, such as most Pyro DPS characters.
Pros and Cons of Off-Field Support Bennett
| Pros |
|---|
| - Easy to play. |
| - Sizeable attack buff that is sought after by a lot of meta damage dealers. |
| - Acts as a sustain and a buffing unit in one, which is considerably high value for a support. |
| - Can generate Energy for Pyro characters with high burst costs. |
| Cons |
| - Attack buff and healing is constrained to his Elemental Burst field. |
| - Elemental Burst field is stationary, which makes it slightly hard to use against mobile enemies. |
| - Healing is capped to 70% of the active character's Max HP only. |
| - Elemental Burst field applies Pyro to the active character. This can be lethal into enemies that use Hydro or Cryo Elements since they can one-shot your active character by triggering the Melt or Vape reaction. |
Best Build for Bennett
A support like Bennett can gain even more value by equipping him with a build that enhances his base utility while also adding more to it via the Artifact set's passive. See below for the recommendations:
Amplify Bennett's Value as an Attack Support
| Weapon | Skyward Blade └ Use a high base ATK weapon like Aquila Favonia if you don't need ER from his weapon. |
|---|---|
| Best Artifact | Noblesse Oblige └ Scroll of the Hero of Cinder City can be an alternative if someone else on the team is already using Noblesse. |
| Artifact Main Stats | Sands: HP% or Energy Recharge (ER) Goblet: HP% Circlet: HP or CRIT Rate (for Favonius Sword) |
| Priority Sub-Stat | Energy Recharge > HP% > CRIT Rate (for Favonius Sword) |
| Recommended Team | |
Stat Goals For Off-Field Support Bennett
| Energy Recharge | - 200-250%~ if no other Pyro teammate - 180-220% with +1 Pyro teammate - 165-190% with +2 Pyro teammates |
|---|---|
| Crit Rate | At least 80%~ if using Favonius Sword |
It's usually preferable to have at least 1 Pyro teammate to lower Bennett's Energy requirements. Any other support with a Favonius weapon equipped can also make it easier to fully charge his Burst every rotation without much downtime.
Bennett 's Recommended Talent Priority
| Talent | Level Up Priority |
|---|---|
| Normal Attack: Strike of Fortune | ★・・・・ |
| Passion Overload (Elemental Skill) | ★★★・・ |
| Fantastic Voyage (Elemental Burst) | ★★★★★ |
Related Links:
Best Weapon for Bennett
Bennett appreciates any weapon with high base attack value, but a weapon helping him reach his Energy requirements is a strong option. See below for the recommendations:
Premium Weapons for Off-Field Support Bennett
| Weapon | How to Get Rating | |
|---|---|---|
| Best | Skyward Blade | Get from Banners - High base attack stat further increases the amount of attack received from Bennett's buff. - Energy Recharge secondary stat makes it easier to reach his Energy requirements. - Passive is usable but isn't really impactful overall. |
| 2nd | Mistsplitter ReforgedAzurelightAbsolution | Get from Limited Banners - Limited 5-star swords with the highest base attack values available (674). - The offensive passives are good if you've invested enough into Bennett's Artifacts that they have CRIT, so his ability hits actually deal damage. - These swords are an option if you can reach Bennett's ER requirements through his Artifacts. Otherwise it'd be better to use Energy Recharge swords. |
| 3rd | Aquila Favonia | Get from Banners - Non-limited 5-star sword with the highest base attack value available (674). - Passive and secondary stat are mostly useless on Bennett as a support, so this weapon is primarily taken only for the base attack stat. - Requires Bennett to have a lot of ER on his Artifacts to compensate. |
| 4th | Freedom-Sworn | Get from Limited Banners - Relatively high base attack value. - Best weapon in terms of buffing value in teams where he can reliablly trigger 2 elemental reactions in one rotation. - Getting Bennett to trigger 2 reactions may be awkward to pull off most of the time, so the weapon's ranking is lower in comparison to other options. - Supplement Bennett's Energy needs with high ER stats on his Artifacts. |
| 5th | Peak Patrol Song | Get from Limited Banners - A good buffing weapon if you can manage to have a lot of DEF% rolls on Bennett's Artifacts. - Needs Bennett to do two Normal Attacks first to stack the passive. - Less base attack lowers the ranking a bit, but the utility of this weapon's passive can be enough to compensate for it. - Look for high ER stats on his Artifacts with this equipped. |
| 6th | The Alley Flash | Get from Limited Banners - Highest base attack among the 4-star swords. - Passive and secondary stat aren't really useful for typical supportive Bennett. |
| 7th | Favonius Sword | Get from Banners - Energy Recharge secondary stat can help Bennett reach his Energy requirements. - Low base attack value decreases the potency of his attack buff. - Viable option if his other teammates require a lot of Energy and can benefit from the weapon's passive. - Aim for at least 80% CRIT Rate on Bennett to reliably trigger the passive. |
For ease of play, the Skyward Blade will normally be the best option for Bennett due to the Energy Recharge (ER) secondary stat. This enables him to reach his Energy stat-goal without too much reliance on Artifacts. The other weapons with higher base attack can become better options over the Skyward Blade if your Artifacts can supply enough ER already.
Free To Play Friendly (F2P Weapons) for Off-Field Support Bennett
| Weapon | How to Get Rating | |
|---|---|---|
| Best F2P | Sapwood Blade | Sumeru Forgeable (Craftable) Weapon - Craftable 4-star sword with high base attack. - Has an Energy Recharge secondary stat, making it Bennett's best free-to-play option. - If passive is met and the active character manages to pick up the Leaf, the free Elemental Mastery given can prove incredibly useful in teams that could use it. - Best at R5. - Requires you to finish certain Sumeru World Quests to get the crafting recipe. |
| 2nd F2P | Prototype Rancour | Mondstadt Forgeable (Craftable) Weapon -Decent base attack. - Passive and secondary stat aren't exactly the best for Support Bennett. - No Energy Recharge given so you need to have compensate through Bennett's Artifacts. - Good for newer Travelers until you can get Sapwood Blade, since you get 1 free from reaching Adventure Rank 10 - You don't need to refine this weapon if you're going to use it for Bennett. |
For Free-to-Play options, the Sapwood Blade gives Bennett a lot of things that he wants in a weapon. It has relatively good base attack for a 4-star weapon, an Energy Recharge secondary stat, and a utility or buffing passive as further bonus. Prototype Rancour can be his temporary weapon until you're able to get him the Sapwood Blade.
All Weapon ListBennett Best Artifacts
Bennett's best Artifacts choices are supportive in nature, often allowing Bennett to provide another buff for the party or the active character. See the recommendations below:
| Artifact | Recommendation Details |
|---|---|
| Noblesse Oblige | ★★★★★ - Bennett's most popular Artifact choice for DPSes that care about attack. - Increases party ATK% after he uses Elemental Burst. - Further enhances his effectiveness as an attack-buffer. - A little less useful for DPSes that scale with other stats like HP% or DEF. |
| Scroll of the Hero of Cinder City | ★★★・・ - Despite having no Nightsoul Blessing state, Bennett can still give party members a 12% Elemental DMG bonus to their respective element types by triggering a reaction. - Bennett should trigger a reaction that involves the element of the On-Field DPS for them to get the set buff. - When in a party with a Natlan character, triggering their Nightsoul Burst activates the 2-piece effect for Bennett, letting him benefit from the energy. - This set doesn't stack, so only 1 member of the party can equip it. |
| Instructor | ★★★・・ - An option if all other sets are unavailable, and the team can make use of the Elemental Mastery increase after the equipping character triggers a reaction, such as in Melt or Vaporize teams. |
Recommended Artifact Stats
| Main: Flat HP Sub: Energy Recharge / HP% / Flat HP |
|---|---|
| Main: Flat ATK Sub:Energy Recharge / HP% / Flat HP |
| Main: Energy Recharge Sub: HP% / Flat HP |
| Main:HP% Sub:Energy Recharge / Flat HP |
| Main:HP% or Healing Bonus Sub:Energy Recharge / HP% / Flat HP |
Focus on Bennett's Energy Recharge
Bennett's Burst energy cost is noticeably on the higher end, and because most teams want him to use it every rotation, meeting his Energy requirements is going to be the priority when arranging his Artifact set. Having an Energy Recharge sands is highly recommended. Because ATK% doesn't impact Bennett's buff, the next stats you can try working on are HP% for stronger heals.
Related Articles
Best Team Comp Bennett
Premium Mavuika Melt Team
| Support | DPS | Support | Support |
|---|---|---|---|
| Bennett | Mavuika | Citlali | Iansan |
| Details | |||
| - Bennett is Mavuika's ideal non-Natlan teammate due to his generous ATK buff and the fact that he activates Pyro Resonance, which gives even more ATK. - Mavuika is among the best performing On-Field DPSes in the game as of the current version, which places this team at the very top of the meta. - Citlali shreds Pyro RES and applies Cryo for Mavuika to trigger Melt with. - Iansan at C6 compounds another ATK buff on top of Bennett's, allowing Mavuika to consider getting more Elemental Mastery artifacts to better enhance her nuke potential. | |||
Bennett will want to be paired with most ATK-scaling DPSes, and even more so if they're Pyro in order to activate Pyro Resonance. Mavuika is the current strongest Pyro On-Field DPS, and she greatly appreciates Bennett's ATK buff as well as his healing.
Other Team Comps For Bennett
Overload Arlecchino Team
| Team | Detail | |
|---|---|---|
| Bennett | Arlecchino | - Bennett can be flexed into Overload teams that already have an Off-Field Pyro or Electro applicator, since he can't apply Pyro to enemies if he isn't the active character. - Fischl is the primary source of Electro that enables the team to trigger Overload constantly. - Chevreuse is the essential Overload support that shreds enemy Pyro and Electro RES so long as the party only includes Pyro and Electro characters. |
| Fischl | Chevreuse | |
F2P Friendly Team Comp
| Team | Detail | |
|---|---|---|
| Bennett | Xiangling | - A F2P-friendly team comp using free or easily obtainable characters. - Bennett can provide her Energy with his Skill (tap) while Xiangling's Burst is able to 'snapshot' the ATK buff for the entire duration even if you leave Bennett's Burst area. - Xingqiu enables Xiangling's Burst to trigger Vaporize, while Sucrose provides Elemental RES shred with Viridescent Venerer and an Elemental Mastery buff. |
| Xingqiu | Sucrose | |
Team Rotation of Bennett and Combos
Basic Team Rotation for Off-Field Support Bennett
| Basic Rotation For Off-Field Support Bennett |
|---|
| 1.Start with the supports with longer ability durations if there are any. If any Sub-DPS or DPS needs to deploy their abilities first as part of their mechanic, such as Arlecchino, then ensure they do so beforehand. 2. Swap to Bennett. Do Skill (tap) into Burst. 3. Swap to any other supports that need to apply their abilities after if there are any. 4. Swap to the main On-Field DPS to execute their primary damage combo. 5. Repeat from Step 1. |
For characters with high Energy requirements like Xiangling, it may be required to use Bennett's Skill before swapping into her immediately after so she can catch the particles that Bennett's Elemental Skill generates as a means of charging her Burst. Otherwise, most of Bennett's team rotations will follow the typical Support combo theme of Skill into Burst.
Basics Of Using Bennett

Bennett is an
Burst Is His Most Important Ability
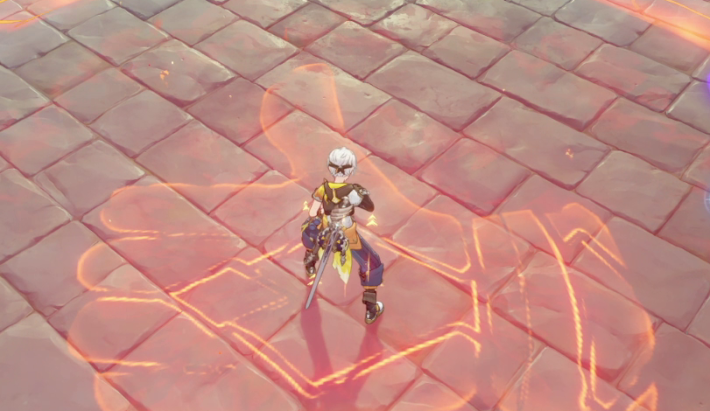
▲ Bennett's Burst creates an Inspiration Field.
Bennett is a contested support in certain teams due to his Elemental Burst that provides a substantial ATK for the On-Field character or deployable, provided they stay within the circular area that it creates, which is called an Inspiration Field. Characters within the circle also receive healing up to a certain HP threshold.
| Note! | Characters standing in the Inspiration Field will occasionally have Pyro applied to them. This can cause certain enemies to deal lethal damage against the character by triggering a reaction using that applied Pyro, such as Melt. |
|---|
Skill Deals Pyro DMG
Bennett's Skill can be tapped or held. Both versions deal single or multiple instances of Pyro DMG. The tap version of his Skill is a simple slash, while his hold Skill has two levels. Level 1 lets Bennett strike twice, and level 2 makes him deal three subsequent attacks, with the third attack launching him upward and away from the enemy.
Passives Reduce His Skill Cooldown
Bennett's passives reduce the cooldown of his Elemental Skill, with it being decreased even further when he himself is standing inside his Elemental Burst field. This allows you to use his Skill to quickly apply Pyro for various purposes, such as Elemental shield-breaking, or to generate Pyro Energy particles to help another Pyro teammate charge their own Burst.
Elemental Skill, Burst and Abilities Guide for Bennett
How To Use Bennett's Skills & Passives
Top Tier Support and Healer for ATK-scaling DPS
| Basic Rotation Of Bennett |
|---|
| 1.Start with the supports with longer ability durations if there are any. 2. Swap to Bennett. Do Skill (tap) into Burst. 3. Swap to the main On-Field DPS to execute their primary damage combo. 5. Repeat from Step 1. |
Bennett's tap skill has a shorter cooldown and animation wind-up, so it's preferable to only ever use his tap Skill unless in some specific scenarios where you need a lot of Pyro application.
ATK Buff Comes From His Elemental Burst
| Icon | Elemental Burst Summary |
|---|---|
| Fantastic Voyage | Bennett performs a jumping attack that deals Pyro DMG and creates an Inspiration Field. Inspiration Field effects: - Characters within the AoE at ≤70% HP continuously regenerate HP, scaling with Bennett’s Max HP - Characters within the AoE at >70% HP gain an ATK Bonus based on Bennett’s Base ATK. - Characters within the AoE are imbued with Pyro. |
| Note! | As stated previously, Bennett's ATK buff scales with only his base ATK, meaning any ATK% substat or main stat from his artifacts are not counted towards the buff. |
|---|
Bennett creates an Inspiration Field with his Burst, which is where the ATK buff and healing is tied to. It's important to stay within the field to maintain both, and it's also good to remember that Bennett can't move the field after placing down, so you have to ensure you can position the ability or time its usage optimally.
Use Skill for Energy
| Icon | Elemental Skill Summary |
|---|---|
| Passion Overload | Press: Performs a single, swift flame strike that deals Pyro DMG. Hold (Short):Charges the attack, with effects based on charge level: - Level 1: Strikes twice, dealing Pyro DMG and launching opponents. - Level 2: Unleashes 3 consecutive Pyro attacks; the final hit triggers an explosion that launches both Bennett and the enemy. Bennett takes no damage from being launched. |
Bennett will usually utilize his Skill as a means of generating Energy for his Elemental Burst. There aren't a lot of use-cases for his Hold Skill, especially since the ability has a long wind-up animation.
Passives Lower His Skill Cooldown
| Icon | Passive Description |
|---|---|
| Rekindle | Decreases Passion Overload's CD by 20% |
| Fearnaught | - Within the area created by Fantastic Voyage, Passion Overload takes on the following effects: - CD is reduced by 50% - Bennett will not be launched by the effects of Charge Level 2. |
Bennett's passives work towards making his Skill a little more spammable, which can help with Energy generation. Additionally, his Skill has a few seconds worth of cooldown if you On-Field him while standing inside his Elemental Burst, allowing you to quickly apply Pyro for various purposes such as when you need to break an enemy's Cryo shield.
Pairs Well With Attack-Scaling DPSes
| Some Attack-Scaling DPSes | ||||
|---|---|---|---|---|
| Mavuika | Arlecchino | Lyney | Navia | Kinich |
Bennett's attack buff, when combined with the attack buff from Noblesse Oblige, can account for a substantial amount of attack towards the active character. This buff from Bennett's Elemental Burst is obviously best used by the On-Field DPSes that benefit from having a surplus of this stat, more so by the Pyro DPSes who can further benefit from the attack bonus given by Pyro Resonance.
Better With Constellations
| Constellation Description | |
|---|---|
| (C1) Grand Expectation | Fantastic Voyage's ATK increase no longer has an HP restriction, and gains an additional 20% of Bennett's Base ATK. |
At C0, Bennett's attack buff is only triggered when the active character within the Inspiration Field is above 70%. With C1, the attack buff now applies regardless of their current HP. In addition, his C1 also increases the amount of attack he gives through the buff by 20%. This is his most important Constellation overall, and is worth getting if you find a chance to do so.
Should You Pull for Bennett's Constellation Or Best Weapon?
Bennett's C1 Makes His Attack Buff Stronger
| Constellation Priority |
|---|
| C1 > C6 or C5 |
C1 Is Ideal For a Majority of Teams
Bennett's generous Attack buff is very valuable in a good number of teams where he is the largest source of external Attack. His C1 makes it so that the buff is now unconditional, instead of requiring a character to be above a specific HP% while also further increasing the Attack scaling, which is significant when you consider just how much Attack Bennett gives at his baseline. It is an easy constellation to get since it's his first one, so getting his C1 is highly recommended, either through wishing on banners or through Paimon's Bargain.
Whether you go to C6 is entirely up to preference. Some older teams may not like wanting their autos infused with Pyro, like Eula for example, but most new characters have an infusion that cannot be overriden, so his C6 is still good to have especially for Pyro characters that would like the extra Pyro DMG bonus. Otherwise, if this infusion is a problem for you, then keeping him at C5, where his burst now gains extra levels is also a viable choice.
Bennett's Constellations & Effects
| Rating | Constellation Effect |
|---|---|
| ★★★★★ | C1: Grand Expectations Fantastic Voyage's ATK increase no longer has an HP restrictions, and gains an additional 20% of Bennett's Base ATK. |
| ★★・・・ | C2: Impasse Conqueror When Bennett's HP falls below 70%, his Energy Recharge is increased by 30%. |
| ★★・・・ | C3: Unstoppable Fervor Increases the Level of Passion Overload by 3. Maximum upgrade level is 15. |
| ★・・・・ | C4: Unexpected Odyssey Using a Normal Attack as the second attack of Passion Overload's Charge Level 1 will perform a follow-up attack. This additional attack does 135% of the second attack's DMG. |
| ★★★★・ | C5: True Explorer Increases the Level of Fantastic Voyage by 3. Maximum upgrade level is 15. |
| ★★★・・ | C6: Fire Ventures With Me Sword, Claymore, or Polearm-wielding characters inside Fantastic Voyage's radius gain a 15% Pyro DMG Bonus and their weapons are infused with Pyro |
Bennett's Constellation Name is Rota Calamitas
| Rota Calamitas |
|---|
 |
Ascension Materials for Bennett Talents & Level
Materials Needed for Level Ascension
| Materials Needed To Get To Lvl. 80 |
|---|
| Agnidus Agate Sliver x 1Agnidus Agate Fragment x 9Agnidus Agate Chunk x 9Treasure Hoarder Insignia x 18Silver Raven Insignia x 30Golden Raven Insignia x 12Windwheel Aster x 108Everflame Seed x 26 |
| Materials Needed To Get To Lvl. 90 |
| Agnidus Agate Sliver x 1 Agnidus Agate Fragment x 9Agnidus Agate Chunk x 9Agnidus Agate Gemstone x 6Treasure Hoarder Insignia x 18Silver Raven Insignia x 30Golden Raven Insignia x 36Windwheel Aster x 168Everflame Seed x 46 |
Windwheel Aster Farming Routes
| Windwheel Aster Farming Routes |
|---|
 |
| Level 1 | Default |
|---|---|
| Level 2 | Teachings Of Resistance x3 Treasure Hoarder Insignia x6 |
| Level 3 | Guide To Resistance x2 Silver Raven Insignia x3 |
| Level 4 | Guide To Resistance x4 Silver Raven Insignia x4 |
| Level 5 | Guide To Resistance x6 Silver Raven Insignia x6 |
| Level 6 | Guide To Resistance x9 Silver Raven Insignia x9 |
| Level 7 | Philosophies Of Resistance x4 Golden Raven Insignia x4 Dvalin's Plume x1 |
| Level 8 | Philosophies Of Resistance x6 Golden Raven Insignia x6 Dvalin's Plume x1 |
| Level 9 | Philosophies Of Resistance x12 Golden Raven Insignia x9 Dvalin's Plume x2 |
| Level 10 | Philosophies Of Resistance x16 Golden Raven Insignia x12 Dvalin's Plume x2 Crown Of Insight x1 |
| Level 11 | Unlocked via Constellation |
| Level 12 | Unlocked via Constellation |
| Level 13 | Unlocked via Constellation |
Related Links
Bennett Skills & Talents Details
Normal Attack: Strike of Fortune
Normal Attack
| Effect |
|---|
| Performs up to 5 rapid strikes. |
| Lv1 | Lv2 | Lv3 | Lv4 | Lv5 | Lv6 | Lv7 | Lv8 | Lv9 | Lv10 | Lv11 | |
|---|---|---|---|---|---|---|---|---|---|---|---|
| 1-Hit DMG | 44.5% | 48.2% | 51.8% | 57% | 60.6% | 64.8% | 70.4% | 76.2% | 81.9% | 88.1% | 94.3% |
| 2-Hit DMG | 42.7% | 46.2% | 49.7% | 54.7% | 58.1% | 62.1% | 67.6% | 73.1% | 78.5% | 84.5% | 90.5% |
| 3-Hit DMG | 54.6% | 59.1% | 63.5% | 69.9% | 74.3% | 79.4% | 86.4% | 93.4% | 100.3% | 108% | 115.6% |
| 4-Hit DMG | 59.7% | 64.5% | 69.4% | 76.3% | 81.2% | 86.8% | 94.4% | 102% | 109.7% | 118% | 126.3% |
| 5-Hit DMG | 71.9% | 77.7% | 83.6% | 92% | 97.8% | 105% | 114% | 123% | 132% | 142% | 152% |
▲Use side-scroll to see percentage per level.
Charged Attack
| Effect |
|---|
| Consumes a certain amount of Stamina to unleash 2 rapid sword strikes. |
| Lv1 | Lv2 | Lv3 | Lv4 | Lv5 | Lv6 | Lv7 | Lv8 | Lv9 | Lv10 | Lv11 | |
|---|---|---|---|---|---|---|---|---|---|---|---|
| Charged Attack DMG | 55.9%+60.7% | 60.5%+65.7% | 65.0%+70.6% | 71.5%+77.7% | 76.1%+82.6% | 81.3%+88.3% | 88.4%+96.0% | 95.0%+103.8% | 102.7%+111.6% | 110.5%+120.0% | 118.3%+128.5% |
| Charged ATK Cost | 20 | 20 | 20 | 20 | 20 | 20 | 20 | 20 | 20 | 20 | 20 |
▲Use side-scroll to see percentage per level.
Plunging Attack
| Effect |
|---|
| Plunges from mid-air to strike the ground below, damaging opponents along the path and dealing AoE DMG upon impact. |
| Lv1 | Lv2 | Lv3 | Lv4 | Lv5 | Lv6 | Lv7 | Lv8 | Lv9 | Lv10 | Lv11 | |
|---|---|---|---|---|---|---|---|---|---|---|---|
| Plunge DMG | 63.9% | 69.1% | 74.3% | 81.8% | 87% | 92.9% | 101.1% | 109.3% | 117.5% | 126.4% | 135.3% |
| Low Plunge DMG | 128% | 138% | 149% | 164% | 174% | 186% | 202% | 219% | 235% | 253% | 271% |
| High Plunge DMG | 160% | 173% | 186% | 204% | 217% | 232% | 253% | 273% | 293% | 316% | 338% |
▲Use side-scroll to see percentage per level.
Passion Overload (Elemental Skill)
| Effect |
|---|
| Bennett puts all his fire and passion for adventuring into his sword. Results may vary based on how fired up he is |
| Lv1 | Lv2 | Lv3 | Lv4 | Lv5 | Lv6 | Lv7 | Lv8 | Lv9 | Lv10 | Lv11 | Lv12 | Lv13 | |
|---|---|---|---|---|---|---|---|---|---|---|---|---|---|
| Explosion DMG | 132% | 142% | 152% | 165% | 175% | 185% | 198% | 211% | 224% | 238% | 251% | 264% | 281% |
| CD | 5s/7s/10s | 5s/7s/10s | 5s/7s/10s | 5s/7s/10s | 5s/7s/10s | 5s/7s/10s | 5s/7s/10s | 5s/7s/10s | 5s/7s/10s | 5s/7s/10s | 5s/7s/10s | 5s/7s/10s | 5s/7s/10s |
▲Use side-scroll to see percentage per level.
Tap
| Effect |
|---|
| A single, swift strike that deals Pyro DMG. |
| Lv1 | Lv2 | Lv3 | Lv4 | Lv5 | Lv6 | Lv7 | Lv8 | Lv9 | Lv10 | Lv11 | Lv12 | Lv13 | |
|---|---|---|---|---|---|---|---|---|---|---|---|---|---|
| Tap DMG | 138% | 148% | 158% | 172% | 182% | 193% | 206% | 220% | 234% | 248% | 261% | 275% | 292% |
▲Use side-scroll to see percentage per level.
Hold (Short)
| Effect |
|---|
| Charges up, resulting in different effects when unleashed based on the Charge Level. |
| Level 1 |
| Strikes twice, dealing Pyro DMG and launching opponents. |
| Level 2 |
| Unleashes 3 consecutive attacks that deal impressive Pyro DMG, but the last attack triggers an explosion that launches both Bennett and the enemy. Bennett takes no DMG from being launched. |
| Lv1 | Lv2 | Lv3 | Lv4 | Lv5 | Lv6 | Lv7 | Lv8 | Lv9 | Lv10 | Lv11 | Lv12 | Lv13 | |
|---|---|---|---|---|---|---|---|---|---|---|---|---|---|
| Level 1 DMG | 84%+92% | 90.3%+98.9% | 96.6%+106% | 105%+115% | 111%+122% | 118%+129% | 126%+138% | 134%+147% | 143%+156% | 151%+166% | 160%+175% | 168%+184% | 179%+196% |
| Level 2 DMG | 88%+96% | 94.6%+103% | 101%+110% | 110%+120% | 117%+127% | 123%+134% | 132%+144% | 141%+154% | 150%+163% | 158%+173% | 167%+182% | 176%+192% | 187%+204% |
▲Use side-scroll to see percentage per level.
Fantastic Voyage
| Effect |
|---|
| Bennett performs a jumping attack that deals Pyro DMG, creating an Inspiration Field. |
Inspiration Field
| Effect |
|---|
| ・If the health of a character within the AoE is equal to or falls below 70%, their health will continuously regenerate. The amount of HP restored scales off Bennett's Max HP. ・If the health of a character within the AoE is higher than 70%, they gain an ATK Bonus that is based on Bennett's base ATK. ・Imbues characters within the AoE Pyro. |
| Lv1 | Lv2 | Lv3 | Lv4 | Lv5 | Lv6 | Lv7 | Lv8 | Lv9 | Lv10 | Lv11 | Lv12 | Lv13 | |
|---|---|---|---|---|---|---|---|---|---|---|---|---|---|
| Skill DMG | 233% | 250% | 268% | 291% | 308% | 326% | 349% | 372% | 396% | 419% | 442% | 466% | 495% |
| Continuous Regen/Sec | 6.0%+577 | 6.4%+635 | 6.9%+698 | 7.5%+765 | 8.0%+837 | 8.4%+914 | 9.0%+996 | 9.6%+1083 | 10.2%+1174 | 10.8%+1270 | 11.4%+1371 | 12.0%+1477 | 12.8%+1588 |
| ATK Bonus Ratio | 56% | 60% | 64% | 70% | 74% | 78% | 84% | 90% | 95% | 101% | 106% | 112% | 119% |
| Duration | 12s | 12s | 12s | 12s | 12s | 12s | 12s | 12s | 12s | 12s | 12s | 12s | 12s |
| CD | 15s | 15s | 15s | 15s | 15s | 15s | 15s | 15s | 15s | 15s | 15s | 15s | 15s |
| Energy Cost | 60 | 60 | 60 | 60 | 60 | 60 | 60 | 60 | 60 | 60 | 60 | 60 | 60 |
▲Use side-scroll to see percentage per level.
Rekindle
| Effect |
|---|
| Decreases Passion Overload's CD by 20%. |
Fearnaught
| Effect |
|---|
| Within the area created by Fantastic Voyage, Passion Overload takes on the following effects: ・CD is reduced by 50% ・Bennett will not be launched by the effects of Charge Level 2. |
It Should Be Safe...
| Effect |
|---|
| When dispatched on an expedition in Mondstadt, time consumed is reduced by 25%. |
Who Is Bennett?
An Unlucky Adventurer From Mondstadt

Bennett is an adventurer with quite an unlucky side. When adventuring, he often comes across empty chests and sometimes random things land on his head. He's currently the sole member of the Benny's Adventure Team as the other members have all left due to unfortunate events that keep happening.
Raised By Members Of The Adventurer's Guild
Bennett is an orphan that was raised by the elderly members of the Adventurer's Guild. He fondly refers to them as his dads and became an adventurer like them.
Bennett Voice Actor & Their Notable Roles
English Voice Actor: Cristina Vee Valenzuela
| Notable Roles | |
|---|---|
| Magical Girl Lyrical Nanoha | Nanoha |
| K-On! | Mio Akiyama |
| Sailor Moon Sailor Moon Crystal | Sailor Mars |
| Genshin Impact | Xingqiu |
Japanese Voice Actor: OUSAKA Ryouta
| Notable Roles | |
|---|---|
| Haikyu!! | Keiji Akaashi |
| Demon Slayer: Kimetsu no Yaiba | Gyutaro |
| The Devil Is a Part-Timer! | Sadao Maou |
| Yamada-kun and the Seven Witches | Ryu Yamada |
Character Related Articles
Character Tier Lists
All Characters
| Characters By Rarity | |||||||||||
|---|---|---|---|---|---|---|---|---|---|---|---|
| Characters By Roles | |||||||||||
| DPS List | Support List | Sustain List | |||||||||
| On-Field List | Off-Field List | ||||||||||
| Characters By Element | |||||||||||
| Hydro | Anemo | Electro | |||||||||
| Dendro | |||||||||||
| Characters By Nation | |||||||||||
| Mondstadt | Liyue | ||||||||||
| Fontaine | Natlan | ||||||||||
| Snezhnaya | Nod-Krai | ||||||||||


