
Comprehensive Yae Miko guide for Genshin Impact. Learn Yae Miko's best build, team, kit, and materials for this 5-Star Electro DPS Catalyst user.
| Yae Miko Related Articles | ||||||||
|---|---|---|---|---|---|---|---|---|
 Best Build Best Build | Best Team | Gacha Banner | ||||||
| Story Quest | Specialty | Signature Weapon | ||||||
Table of Contents
Yae Miko Latest Information & News
Yae Miko's Upcoming Buffs on July 1

| Elemental Skill | Yakan Evocation: Sesshou Sakura - Her Sesshou Sakura now lasts 10 seconds longer and remains active after using her burst. Additionally, she triggers extra lightning strikes whenever three turrets are present on the field. |
|---|---|
| Constellation Summary | (C1) / (C2) / (C4) / (C6) - This effect increases the Elemental Mastery of Yae Miko and her party, restores Elemental Energy, and grants an Elemental Burst DMG bonus. Additionally, it provides the team with Electro and Stellar-Conduct DMG bonuses while significantly increasing Stellar-Conduct reaction CRIT DMG. |
| Weapon | Kagura's Verity - The new effect increases the wielder's Elemental Skill DMG and Stellar-Conduct DMG by 12% for 24s upon using an Elemental Skill. |
Based on Yae Miko's buff, her Sesshou Sakura will now last longer on the field, remain active after using her Elemental Burst, and trigger extra lightning when three turrets are on the field.
Additionally, her constellations will increase the Elemental Mastery for her and for her team. It also restores Elemental Energy, grants an Elemental Burst DMG bonus, provides team Electro and Stellar-Conduct DMG bonuses, and significantly boosts Stellar-Conduct reaction CRIT DMG.
Character Buffs & Adjustments for Yae MikoYae Miko Character Overview, Base Stats, and Tier
Character Profile
 | Rarity | | |
|---|---|---|---|
| Element | Electro | ||
| Weapon | Catalyst | ||
| Ascend Stat | CRIT Rate 19.2% | ||
| Region | Inazuma | ||
| Birthday | June 27 | ||
| Roles | | ||
| How To Get | Can only be pulled during Yae Miko's Limited-Time Banner (Currently not available) | ||
Base Stats
| Base HP | Base ATK | Base DEF | |
|---|---|---|---|
| Lvl. 90 | 10,372 | 340 | 569 |
| Lvl. 80 (Ascended) | 9,643 | 316 | 529 |
Yae Miko is a 5-star Electro character that wields a catalyst weapon. She is the shrine maiden (Guuji) of the Grand Narukami Shrine and also the Editor-in-chief of Yae Publishing House in Inazuma region.
Miko is a powerful yokai who excels as an Off-Field Electro Sub-DPS. Her Elemental Skill, which summons fox-like totems called Sesshou Sakura, provides continuous Electro application, making it perfect for reaction-based teams such as Stellar-Conduct or Overload. Her Elemental Burst also deals an decent chunk of damage, but comes with an expensive Energy cost.
Yae Miko's Tier & Rating
| Overall Tier | ||||||||||||||
|---|---|---|---|---|---|---|---|---|---|---|---|---|---|---|
| S | ||||||||||||||
| On-Field | Off-Field | DPS | Support | Sustain | ||||||||||
| - | SS | SS | - | - | ||||||||||
What Kind of Character Is Yae Miko?
Yae Miko is an Electro
Her place in the meta previously wasn't very good, since there are a lot of other Sub-DPS characters who can fill her niches, often with similar or better results. However, the introduction of Stellar-Conduct gave her the ability to contest for a spot alongside the top meta teams.
Rate Yae Miko!
Roles & Playstyle Of Yae Miko and Her Strengths and Weakness
Electro Off-Field Sub-DPS

Yae Miko is usually considered a Sub-DPS since she can deal damage from an Off-Field position once you deploy her Skill three times. After her buffs, Miko's best use-case is now in in Stellar-Conduct teams (Electro and Cryo) alongside Sandrone, but she can still be played in an Electrocharged (Hydro and Electro), Overload (Electro and Pyro) and Aggravate or Spread (Dendro and Electro) comps.
Pros and Cons of Off-Field Sub-DPS Yae Miko
| Pros |
|---|
| - Easy to play. |
| - Random targeting makes her viable in both single- and multi-target scenarios. |
| - Her Burst can be used every other rotation instead of every rotation, so Energy Recharge doesn't have to be a heavy focus on her Artifacts. |
| Cons |
| - Her Skill setup is time-consuming, and she can be interrupted mid-animation. |
| - Fischl can deal comparable damage in non-Stellar-Conduct teams, with less field-time commitment. |
| - Miko's Burst deals a lot of damage, but the high Energy Cost makes it hard to have it up consistently without sacrificing offensive stats on her Artifacts. |
Best Build for Yae Miko
Yae Miko's usual best comps involve her being deployed as an Off-Field Sub-DPS. She will want to be supplied with the typical damage stats, like CRIT, to maximize her DPS contribution. See below for our top recommendations.
| Weapon | Kagura's Verity |
|---|---|
| Best Artifact | Disenchantment in Deep Shadow x4 |
| Artifact Main Stats | Sands: ATK% / Elemental Mastery Goblet: ATK% (Stellar-Conduct) or Electro DMG% Bonus (Other teams) Circlet: CRIT Rate or DMG |
| Priority Sub-Stat | CRIT Rate = CRIT DMG > ATK% > Elemental Mastery or Energy Recharge |
| Recommended Team | |
Stat Goals For Off-Field Yae Miko
| ATK | 2000~ |
|---|---|
| Crit Rate | 70-80%~ |
| Crit DMG | 140-200%~ |
| Elemental Mastery | 100-300~ |
| Energy Recharge | 100% (no Miko Burst teams), 110-130% (with another Electro teammate) 200%~ (without another Electro teammate) |
When used as an Off-Field Sub-DPS, Miko needs high Energy Recharge% to Burst consistently. The required ER depends on other Electro teammates and Favonius weapon users. Without either, her ER needs tend to be really high. You can also prioritize Skill damage instead and only Burst when it's available every other rotation or completely ignore it.
Stellar-Conduct Yae Miko will always prefer to have the Deep Shadow set.
Yae Miko 's Recommended Talent Priority
| Talent | Level Up Priority |
|---|---|
| Normal Attack: Spiritfox Sin-Eater | ★★★・・ |
| Yakan Evocation: Sesshou Sakura (Elemental Skill) | ★★★★★ |
| Great Secret Art: Tenko Kenshin (Elemental Burst) | ★★★・・ |
Related Links:
Best Weapon for Yae Miko
Yae Miko naturally favors offensive catalysts due to being a damage-type character. CRIT and DMG% weapons are preferable, but you can make do with ones that offer ATK%. See below for our top recommendations:
Premium Weapons for Yae Miko
| Weapon | How to Get Rating | |
|---|---|---|
| Best | Kagura's Verity | Get from Limited Banner - Elemental Skill DMG and Elemental DMG bonus is always appreciated for any Skill-based DPS. - CRIT DMG main stat makes building CRIT Rate easier. - A good stat-stick catalyst for other catalyst DPS characters that have use for their Elemental Skill. - The new Stellar-Conduct buffs also gave it an additional Stellar-Conduct DMG% bonus increase. |
| 2nd | Reliquary of Truth | Get from Limited Banner - A high CRIT DMG main-stat weapon that also has a CRIT Rate and EM buff. - A close second option for Miko across a lot of her team setups thanks to the amount of CRIT value it provides. - Miko won't be able to access the other half of the passive since she doesn't deal Lunar-Bloom DMG, but it is still a strong catalyst on her regardless. |
| 3rd | Tulaytullah's RemembranceCashflow Supervision | Get from Limited Banner - CRIT main stat can make achieving the stat goals easier. - Miko still has use for ATK% buffs regardless of comp, but its especially good in her Stellar-Conduct teams. - Great pick-ups if you have either and other characters that can make use of them, but as stated before, it's not advisable to pull for them just for Miko alone. |
| 4th | Vivid NotionsTome of the Eternal Flow | Get from Limited Banner - CRIT main stats that can make reaching the 1:2 CRIT ratio easier. - Can be a good stat stick if you have any of the three, but Miko can't normally take full advantage of their passives. - Decent options if you have anyone else who can use them. - High CRIT main stats can end up being better than her best 4-star weapons. |
| 5th | Lost Prayer to the Sacred WindsSkyward Atlas | Get from Banners - Both will result in about the same performance. - Lost Prayer can make reaching the desired CRIT Ratio easier, but the passive isn't very strong for Miko. - Atlas gives easy access to a modest ATK% and DMG% buff but has no CRIT, so you will need to rely on your Artifact rolls. |
| 6th | A Thousand Floating Dreams | Get from Limited Banner - This weapon are decent for teams that focus on heavily EM-based reactions like Aggravate and Hyperbloom, due to the Elemental Mastery buff. - Going to be less desirable in other team comps. - EM isn't a high priority for Stellar-Conduct teams so the passive isn't very impactful. - A decent option if you have it, but not worth the pulls if you want to get it solely for Miko. |
| 7th | The WidsithSolar Pearl | Get from Banners - CRIT main stats can help reach the ideal CRIT Ratio easier. - 4-star options that can be good on Miko if you have them and no other limited 5-star option. - Miko can make use of all of Widsith's buffs, but the uptime is always an issue with it. - Solar Pearl requires you to do a Normal Attack (after skill and before Burst). - The Widsith should be her strongest 4-star option even in Stellar-Conduct teams (despite Stellar-Conduct DMG not being buffed by DMG% buffs). - Both are best at Refinement Level 5 (R5). |
Her Signature Weapon is designed to have everything her kit wants, so it is always going to be her best option. The alternative premium options will still be competitive with each other, however, so use whichever you have, keeping in mind to balance her CRIT Rate and CRIT DMG at a 1:2 ratio if possible.
Free To Play Friendly (F2P Weapons) for Yae Miko
| Weapon | How to Get Rating | |
|---|---|---|
| Best F2P (Forge) | Flowing Purity | Fontaine Forgeable (Craftable) Weapon - Gives Elemental DMG bonus and ATK% - Requires a healer. - Will perform at its best when there isn't a lot of external sources of ATK%. - ATK% buffs raise its value more for Miko's Stellar-Conduct setups. - Best at Refinement Level 5 (R5). |
| 2nd (Forge) | Hakushin Ring | Inazuma Forgeable (Craftable) Weapon - Gives Elemental DMG bonus provided you can trigger an Electro reaction. - Best used in Aggravate or Electrocharged comps. - Best at Refinement Level 5 (R5). |
| 3rd (Event) | Oathsworn Eye | Reward From Past Event (Three Realms Gateway Offering) - Raises Energy Recharge% after using skill. - Eases Miko's ER requirements on her Artifacts. - Ideal if you want to commit to using Miko's Burst every rotation. - No longer obtainable if you didn't participate in the event. |
For F2P options, Yae Miko has very few choices in terms of CRIT. All of the above catalysts result in about the same performance with small differences, but Stellar-Conduct teams would rather have her equip the Fontaine craftable catalyst, Flowing Purity, instead.
All Weapon ListYae Miko Best Artifacts
Yae Miko's artifact set choices will depend on how you want to play her and the team comp focus. See our top recommendations below:
| Artifact | Recommendation Details |
|---|---|
| Disenchantment in Deep Shadow | ★★★★★ - The ideal set for Stellar-Conduct Yae Miko due to the the Stellar-Conduct DMG% buff. - Grants extra CRIT Rate against enemies affected by Stellar-Conduct. - New reactions tend to be meta for a good while, so expect this to be Miko's best-performing set going into Snezhnaya. |
| Golden Troupe | ★★★★・ - Best General Artifact set for Yae Miko as an Off-Field Sub-DPS outside of Stellar-Conduct teams. - Enhances Skill DMG, which is Off-Field Miko's biggest contribution as an Off-Field Sub-DPS. - Relatively resin efficient since both sets in the domain are used by a lot of characters. |
| Gilded Dreams | ★★★・・ - Good for Aggravate/Spread teams with Yae Miko supplying the Electro application. - Not as good in other team comps due to the Elemental Mastery. - Not as resin efficient since there is less need for the other set in the domain for recent characters. |
| 2-pc. ATK%2-pc. ATK% | ★★・・・ - You can mix and match 2-piece set effects while farming for a full 4-piece set. - The setup is not strict, and you can use any combination between the 2-piece versions of: ・Disenchantment in Deep Shadow (ATK%) ・Golden Troupe (Skill DMG) ・Thundering Fury (Electro DMG%) ・Emblem of Severed Fate (ER). - 2-piece sets with very good sub-stats can be as good as 4-piece sets with mediocre stat lineups. - Stellar-Conduct teams would prefer ATK% sets over other 2-piece effects. |
Recommended Artifact Stats
| Main: Flat HP Sub: CRIT Rate or CRIT DMG / ATK% / Elemental Mastery or Energy Recharge |
|---|---|
| Main: Flat ATK Sub:CRIT Rate or CRIT DMG / ATK% / Elemental Mastery or Energy Recharge |
| Main: ATK% (for Stellar-Conduct) or Elemental Mastery Sub: CRIT Rate or CRIT DMG / ATK% / Elemental Mastery or Energy Recharge |
| Main: Electro DMG Bonus / ATK% (for Stellar-Conduct) Sub: CRIT Rate or CRIT DMG / ATK% / Elemental Mastery or Energy Recharge |
| Main: Crit Rate or DMG Sub: CRIT Rate or CRIT DMG / ATK% / Elemental Mastery or Energy Recharge |
Focus On Offensive Stats
To use Yae Miko's Elemental Burst frequently, you would need to build enough Energy Recharge% (ER). Consistent uptime is hard if she's the only Electro on the team, so consider your teammates. Burst adds to total DPS, but if you find getting enough ER a problem, then you can instead focus on her Elemental Skill, either casting her Burst every other rotation or skipping it entirely.
This allows you more room for damage-increasing stats such as CRIT Rate, CRIT DMG and ATK%.
Related Articles
Best Team Comp Yae Miko
Premium Stellar-Conduct Sandrone Team
| Sub-DPS | DPS | Support | Support |
|---|---|---|---|
| Yae Miko | Sandrone | Escoffier | |
| Details | |||
| - With the introduction of Stellar-Conduct and Miko's related Stellar-Conduct buffs, this setup is her best-performing team in terms of damage output. - Sandrone is the only character that can enable Stellar-Conduct and subsequently the Radiance: Stellar-Conduct state, so she is required for Miko to deal Stellar-Conduct DMG. - Qiqi is another buffed character that grants a sizeable Stellar-Conduct DMG% increase. - Escoffier is here to contribute her personal damage and a bit of Cryo RES shred. | |||
The only way for Yae Miko to make use of her buffs related to the Radiance: Stellar-Conduct is in a team with Sandrone, who is the sole Stellar Linchpin character as of the current version of the game.
Fortunately, it seems that Miko's buffs were designed to make her one of the better Electro Sub-DPS choices to pair alongside Sandrone, so synergy and strong performance have been guaranteed until better alternatives for either are released.
Other Team Comps For Yae Miko
Lunar-Charged Yae Miko
| Team | Detail | |
|---|---|---|
| Miko | Columbina | - Ineffa and Columbina make up a strong core for any team that allows you to pair them with most non-restrictive characters. Yae Miko is one such case. - Nahida provides an Elemental Mastery Buff and lets Miko trigger a few Aggravates here and there. - You can swap between Miko, Nahida, or even Columbina for your On-Field character. |
| Nahida | Ineffa | |
F2P Friendly Team Comp
| Team | Detail | |
|---|---|---|
| Miko | Fischl | - A F2P-friendly team comp that uses free characters or easily obtainable ones. - An Overload team that takes advantage of Chevreuse's dedicated Overload buffs to elevate an otherwise underwhelming reaction. - You will want to use Yanfei as the On-Field character, using Normal Attacks to allow Fischl to trigger her 'Begone Thy Sinful Hex' passive. |
| Chevreuse | Yanfei | |
Team Rotation of Yae Miko and Combos
Basic Team Rotation for Off-Field Yae Miko
| Basic Rotation For Off-Field Yae Miko |
|---|
| 1. Use Elemental Skill x3, you can also Normal Attack once or twice after 2. Swap to other off-field supports 3. Do the main combo of your On-Field DPS 4. Use Miko's Elemental Burst (optional). 5. Repeat from Step 1. |
In general, you want to use Yae Miko's Skill three times at the start of the rotation so that the time she consumes by doing doesn't waste the buff durations of other supports, which are meant for your on-field DPS to maximize by being the last character you swap into.
When to Use Yae Miko's Burst?
Bursting every rotation is fine but optional, especially if she is the only Electro character in the party. Miko's high-energy cost Burst requires a lot of Energy Recharge (ER) for full uptime or another Electro character that can generate a lot of Energy for her, like Fischl.
Giving Miko a lot of ER can get in the way of other desirable stats such as CRIT Rate and CRIT DMG, so its considered optimal in a lot of cases to just skip using her Burst.
Basics of Using Yae Miko (Beginner Guide)

Skill-Based Electro Sub-DPS
Yae Miko is an Electro Off-Field character who is designed to deal the majority of her damage through her Skill. Her ability to be viable in different Electro reaction-based teams comes from her lacking any real restriction apart from the need to press her Elemental Skill three times, which deploys three fox-like objects called Sesshou Sakura.
Stellar-Conduct Synergy
While she can be flexed into multiple comps, the buffs she received for Stellar-Conduct have made Stellar-Conduct teams her preferred setup from a meta standpoint, since its current performance is competitive damage-wise.
Deploy Sesshou Sakura Through Skill

Yae Miko's Skill has three charges, and it deploys one Sesshou Sakura per charge. The first Sesshou Sakura is considered to be at Level 1 after summoning, with each subsequent Sesshou Sakura raising the level, up to Level 3.
These deployables have a small AoE around each lightning strike they summon.
| Note! | The Stellar-Conduct buffs also gave Miko's Skill an extra 10 seconds to the duration. This helps make it feel a little comfier to use alongside a DPS that wants to be on the field for some time. |
|---|
Use Up All Three Charges of Her Skill

Yae Miko's Skill has some setup to deal with before it can deal damage. It isn't worth it to stop below three Sesshou Sakura due to the reduced damage output, so it is always better to use up all her Skill charges for better DPS. Ensure that you are outside of harm's way while activating Yae Miko's Skill, because she can easily be staggered mid-animation.
| Note! | Having 3 Sesshou Sakura on the field now lets them deal an additional lightning strike after using her Skill again. This effect is enabled once you finish her Witch's Revelation quest. |
|---|
Elemental Burst Can be Used Every Other Rotation

Her Burst is a good amount of damage, but it comes with a high Energy cost that is difficult to always have available without a lot of Energy Recharge on her Artifacts. Building around her Burst might make you have less offensive stats, like CRIT Rate and CRIT DMG, so it's fine to either activate her Burst every other rotation or skip it entirely.
Radiance: Stellar-Conduct State Effects

▲ The Polestar Field is denoted by the blue border around a small star-like structure on the ground.
When a team with a Stellar Linchpin holder deals Stellar-Conduct by applying Electro and Cryo on an enemy, a Polestar Field is created. Standing inside this field activates the Radiance: Stellar-Conduct state for everyone in the party.
After completing her Witch's Revelation quest, the Sesshou Sakura will be able to deal Stellar-Conduct damage while in the mentioned state. Any subsequent Stellar-Conduct triggered also enhances the next attack from the Sesshou Sakura.
Elemental Skill, Burst and Abilities Guide for Yae Miko
How To Use Yae Miko?
Elemental Skill Is Her Main Source of Damage
| Basic Rotation of Yae Miko |
|---|
| 1. Use her Elemental Skill 3 times. Try to create a triangle with her Sakura to increase the damage. 2. Swap to other supports with shorter ability durations. 3. Swap to your On-Field DPS to execute their damage combo. 4. Repeat from step 1. |
Yae Miko is an Off-Field character that is more damage-focused than supportive. She deals most of her DPS through her Skill, which puts down a deployable called a Sesshou Sakura on the field. Miko's Skill can be used at the very start thanks to the Sakura's relatively long duration.
Use Elemental Skill Three Times to Maximize DPS
Elemental Skill Summary
| Icon | Elemental Skill Summary |
|---|---|
| Yakan Evocation: Sesshou Sakura | - Yae Miko moves swiftly and leaves behind a Sesshou Sakura. Has 3 charges. Sesshou Sakura - Periodically strikes a nearby opponent with lightning. - Deals Electro DMG. Level Mechanic: - Nearby Sesshou Sakura increase each other's level. - Higher levels increase the DMG of lightning strikes. Additional Rules: - Maximum of 3 Sesshou Sakura can exist at once. - Newly created Sesshou Sakura start at Level 1. - Initial maximum level is 3. - Creating a Sesshou Sakura too close to an existing one destroys the existing Sakura. |
| Sesshou Sakura Level Appearances |
|---|
 ▲Level 3 Sakura have more rings around them |
Each Sakura summoned equals 1 Level, with each level above it having more damage. When all three are summoned, this is considered 'Level 3'. Because of this, it is ideal to ensure you use all three charges of her Elemental Skill to get the most DPS.
Sesshou Sakura Targets Enemies at Random
Due to her Sesshou Sakura having random targeting, Miko has a natural advantage against multi-target content, but she performs well enough against bosses or smaller groups regardless. The Sesshou Sakura are also able to hit enemies that burrow underground, like the Setekh Wenut.
| Note! | Miko's Witch's Revelation buffs grant a sizeable amount of quality-of-life and damage-increasing changes to her Skill. ▶ Click here for detailed info about Miko's buffs! |
|---|
High Energy Cost Elemental Burst
Elemental Burst Summary
| Icon | Elemental Burst Summary |
|---|---|
| Great Secret Art: Tenko Kenshin | - Summons a lightning strike. - Deals AoE Electro DMG. - Active Sesshou Sakuras create Tenko Thunderbolts. Tenko Thunderbolt - Deals AoE Electro DMG. |
Miko's Elemental Burst summons large Electro lightning strikes. The number of strikes depends on how many Sesshou Sakura were on the field before activating her Burst.
At its core, Miko's Burst should contribute a decent amount to the total team DPS. However, its main drawback is the high Energy cost, so she’ll need plenty of Energy Recharge% or Electro teammates to use it consistently.
Because of the Energy requirement and long cooldown, you might typically forego using it or opt into activating the ability every other rotation instead, since overinvesting in Energy Recharge% can cut into offensive stats like CRIT and ATK%.
| Note! | Before her buffs, Miko's Burst would have destroyed her active Sesshou Sakura. This is no longer the case. ▶ Click here for detailed info about Miko's buffs! |
|---|
Elemental Mastery Passive Makes Her Good With EM-Scaling Reactions
Ascension 4 Passive Description| Icon | Ascension 4 Passive Description |
|---|---|
| Enlightened Blessing | Every point of Elemental Mastery Yae Miko possesses will increase Sesshou Sakura DMG by 0.15%. |
Miko has a passive that increases her Elemental Skill damage from her totems according to how much Elemental Mastery she has. This enables her to gain some use out of any EM sub-stats on her Artifacts.
| Note! | Stellar-Conduct is more ATK% oriented than EM. In this case, it's better to give Miko an ATK% Sands instead. ▶ Click here for detailed info about Miko's buffs! |
|---|
Complete Witch’s Revelation Quest for Ability Changes
 Witch's Revelation Passive Summary
| Icon | Witch's Revelation Passive Summary |
|---|---|
| Edict of Cleansing | Sesshou Sakura Enhancement - Extends Sesshou Sakura duration by 10s. When a nearby party member triggers Superconduct or Stellar-Conduct: - The next Sesshou Sakura lightning strike is enhanced. - Deals additional DMG equal to 80% of Yae Miko's ATK. - Can trigger once every 2.5s. ⯁ Radiance: Stellar-Conduct State - When inside a ▼ Polestar Field, Yae Miko will enter the Radiance: Stellar-Conduct state. - Enhanced Sesshou Sakura lightning also deals an additional instance of Electro DMG equal to 200% of Yae Miko's ATK. - This additional DMG is considered Stellar-Conduct DMG. |
| Icon | New Ascension 4 Passive Summary |
|---|---|
| The Shrine's Sacred Shade | When Burst is used: - Each Sesshou Sakura involved resets the cooldown of 1 charge of Sesshou Sakura. If at least 3 Sesshou Sakura are nearby: - Casting the Skill triggers an additional lightning strike. - Deals Electro DMG equal to 40% of Yae Miko's ATK. ⯁ Radiance: Stellar-Conduct State - The additional lightning strike instead deals Electro DMG equal to 50% of Yae Miko's ATK. - This additional DMG is considered Stellar-Conduct DMG. |
| Polestar Field Description |
|---|
 |
| When Stellar-Conduct is triggered, the surrounding area will transform into a Polestar Field for a short period of time, and when inside a Polestar Field, certain characters will enter the Radiance: Stellar-Conduct state, which grants various skill buffs. |
Miko is one of the few Electro characters that received direct kit adjustments that align her with the new Stellar-Conduct reaction and its subsequent teams through the Witch's Revelation system.
After finishing the quest, Miko will receive a new passive alongside other abilities and ▼constellation changes. This passive is one of the primary reasons why Miko can contribute almost as much DPS as Sandrone in the premium Stellar-Conduct team.
Should You Pull for Yae Miko's Constellation Or Best Weapon?
Choice Depends on Preference
| Signature VS Constellations |
|---|
| C1 > Kagura's Verity > C2 |
Get Miko's C1 for Free
The introduction of the 'To Temper Thyself & Journey Far' system that grants you a single free Constellation of certain characters gave everyone the chance to receive Yae Miko's C1 for free after eight (8) weeks' worth of activities.
Before her adjustments, this Constellation was unremarkable, but because it now grants a 50% Stellar-Conduct DMG% Bonus, it's one of the first things you should consider obtaining if you want Miko to perform at her best in a Stellar-Conduct team.
Kagura's Verity Is an Improvement Over the Alternatives
Additionally, getting her Signature Weapon becomes a more valuable choice as a means of increasing Miko's damage if your account only has her 4-star catalyst options, such as The Widsith.
The added Stellar-Conduct DMG% buff also made it above and beyond other options in terms of her personal damage for Stellar-Conduct teams. So if you want to maximize Miko's DPS potential, her weapon becomes the more appealing choice.
C2 Is a Good Stopping Point
Since Miko's damage is primarily dealt through her Sesshou Sakura, it goes without saying that increasing its max level from three to four should result in a noticeable damage boost. This Constellation also compounds an Elemental Mastery buff for the active character depending on the current level of the Sesshou Sakura.
If you would rather increase Miko's overall team value, C2 would be more favorable over her Signature Weapon.
| Recommendation If You Have Limited CRIT Catalyst |
|---|
| C1 > C2 > Kagura's Verity |
The difference between Kagura's Verity and the other 5-star catalysts, such as the Reliquary of Truth in terms of performance isn't very drastic, but other catalysts will still be far less potent. But these weapons can still allow Miko to function well as a Sub-DPS, and are good reasons to skip getting Kagura's Verity in favor of Constellations.
Yae Miko's Constellations & Effects
| Rating | Constellation Effect |
|---|---|
| ★★★★★ | C1: Yakan Offering Each time Great Secret Art: Tenko Kenshin activates a Tenko Thunderbolt, Yae Miko restores 8 Elemental Energy to herself. After Yae Miko triggers a Superconduct or Stellar-Conduct reaction, or deals Stellar-Conduct DMG, nearby party members will gain a 50% Electro DMG and Stellar-Conduct DMG Bonus for 10s. Triggering these reactions again will refresh the duration of the DMG bonuses. |
| ★★★★・ | C2: Fox's Mooncall Sesshou Sakura start at Level 2 when created, their max level is increased to 4, and their attack range is increased by 60%. Additionally, when there are Sesshou Sakura in the field, Yae Miko's and your current active character's Elemental Mastery will also be increased by 60/90/120/200 points, depending on the level of the Sesshou Sakura. |
| ★★★★・ | C3: The Seven Glamours Increases the Level of Yakan Evocation: Sesshou Sakura by 3. Maximum upgrade level is 15. |
| ★★★・・ | C4: Sakura Channeling When Sesshou Sakura lightning hits opponents, the Electro DMG Bonus of all nearby party members is increased by 20% for 5s, and Yae Miko regenerates 8 Elemental Energy. The aforementioned Elemental Energy recovery effect can trigger once every 5s. Additionally, Yae Miko's Elemental Burst DMG is increased by 100%. |
| ★★・・・ | C5: Mischievous Teasing Increases the Level of Great Secret Art: Tenko Kenshin by 3. Maximum upgrade level is 15. |
| ★★★★・ | C6: Forbidden Art: Daisesshou Sesshou Sakura's attacks will ignore 60% of the opponents' DEF. The CRIT DMG of Yae Miko's Stellar-Conduct DMG is increased by 200%. |
Yae Miko's Constellation Name is Divina Vulpes
| Divina Vulpes |
|---|
 |
Ascension Materials for Yae Miko Talents & Level
Materials Needed for Level Ascension
| Materials Needed To Get To Lvl. 80 |
|---|
| Vajrada Amethyst Sliver x 1Vajrada Amethyst Fragment x 9Vajrada Amethyst Chunk x 9Old Handguard x 18Kageuchi Handguard x 30Famed Handguard x 12Sea Ganoderma x 108Dragonheir's False Fin x 26 |
| Materials Needed To Get To Lvl. 90 |
| Vajrada Amethyst Sliver x 1 Vajrada Amethyst Fragment x 9Vajrada Amethyst Chunk x 9Vajrada Amethyst Gemstone x 6Old Handguard x 18Kageuchi Handguard x 30Famed Handguard x 36Sea Ganoderma x 168Dragonheir's False Fin x 46 |
Sea Ganoderma Farm Routes
| Sea Ganoderma Farm Routes | |
|---|---|
 |  |
| Level 1 | Default |
|---|---|
| Level 2 | Teachings Of Light x3Old Handguard x6 |
| Level 3 | Guide To Light x2 Kageuchi Handguard x3 |
| Level 4 | Guide To Light x4 Kageuchi Handguard x4 |
| Level 5 | Guide To Light x6 Kageuchi Handguard x6 |
| Level 6 | Guide To Light x9 Kageuchi Handguard x9 |
| Level 7 | Philosophies Of Light x4 Famed Handguard x4 The Meaning Of Aeons x1 |
| Level 8 | Philosophies Of Light x6 Famed Handguard x6 The Meaning Of Aeons x1 |
| Level 9 | Philosophies Of Light x12 Famed Handguard x9 The Meaning Of Aeons x2 |
| Level 10 | Philosophies Of Light x16 Famed Handguard x12 The Meaning Of Aeons x2 Crown of Insight x1 |
| Level 11 | Unlocked via Constellation |
| Level 12 | Unlocked via Constellation |
| Level 13 | Unlocked via Constellation |
Related Links
Yae Miko Skills & Talents Details
Normal Attack: Spiritfox Sin-Eater
Normal Attack
| Effect |
|---|
| Summons forth kitsune spirits, initiating a maximum of 3 attacks that deal Electro DMG. |
| Lv1 | Lv2 | Lv3 | Lv4 | Lv5 | Lv6 | Lv7 | Lv8 | Lv9 | Lv10 | Lv11 | Lv12 | Lv13 | Lv14 | Lv15 | |
|---|---|---|---|---|---|---|---|---|---|---|---|---|---|---|---|
| 1-Hit DMG | 39.66% | 42.63% | 45.61% | 49.57% | 52.55% | 55.52% | 59.49% | 63.45% | 67.42% | 71.39% | 75.35% | 79.32% | 84.27% | 89.23% | 94.19% |
| 2-Hit DMG | 38.52% | 41.41% | 44.3% | 48.15% | 51.04% | 53.93% | 57.78% | 61.63% | 65.48% | 69.33% | 73.19% | 77.04% | 81.85% | 86.67% | 91.48% |
| 3-Hit DMG | 56.89% | 61.16% | 65.42% | 71.11% | 75.38% | 79.64% | 85.33% | 91.02% | 96.71% | 102.4% | 108.09% | 113.78% | 120.89% | 128% | 135.11% |
▲ You can check the percentage with sideward scroll.
Charged Attack
| Effect |
|---|
| Consumes a certain amount of Stamina to deal AoE Electro DMG after a short casting time. |
| Lv1 | Lv2 | Lv3 | Lv4 | Lv5 | Lv6 | Lv7 | Lv8 | Lv9 | Lv10 | Lv11 | Lv12 | Lv13 | Lv14 | Lv15 | |
|---|---|---|---|---|---|---|---|---|---|---|---|---|---|---|---|
| Charged Attack DMG | 142.89% | 153.61% | 164.33% | 178.62% | 189.34% | 200.05% | 214.34% | 228.63% | 242.92% | 257.21% | 271.5% | 285.79% | 303.65% | 321.51% | 339.38% |
| Charged Attack Stamina Cost | 50 | 50 | 50 | 50 | 50 | 50 | 50 | 50 | 50 | 50 | 50 | 50 | 50 | 50 | 50 |
▲ You can check the percentage with sideward scroll.
Plunging Attack
| Effect |
|---|
| Plunges towards the ground from mid-air, damaging all opponents in her path with thunderous might. Deals AoE Electro DMG upon impact with the ground. |
| Lv1 | Lv2 | Lv3 | Lv4 | Lv5 | Lv6 | Lv7 | Lv8 | Lv9 | Lv10 | Lv11 | Lv12 | Lv13 | Lv14 | Lv15 | |
|---|---|---|---|---|---|---|---|---|---|---|---|---|---|---|---|
| Plunge DMG | 56.83% | 61.45% | 66.08% | 72.69% | 77.31% | 82.6% | 89.87% | 97.14% | 104.41% | 112.34% | 120.27% | 128.2% | 136.12% | 144.05% | 151.98% |
| Low Plunge DMG | 113.63% | 122.88% | 132.13% | 145.35% | 154.59% | 165.17% | 179.7% | 194.23% | 208.77% | 224.62% | 240.48% | 256.34% | 272.19% | 288.05% | 303.9% |
| High Plunge DMG | 141.93% | 153.49% | 165.04% | 181.54% | 193.1% | 206.3% | 224.45% | 242.61% | 260.76% | 280.57% | 300.37% | 320.18% | 339.98% | 359.79% | 379.59% |
▲ You can check the percentage with sideward scroll.
Yakan Evocation: Sesshou Sakura (Elemental Skill)
| Effect |
|---|
| To Yae, such dull tasks as can be accomplished by driving spirits out need not be done personally. Moves swiftly, leaving a Sesshou Sakura behind. |
Sesshou Sakura
| Effect |
|---|
| Has the following properties: ・Periodically strikes one nearby opponent with lighting, dealing Electro DMG. ・When there are other Sesshou Sakura nearby, their level will increase, boosting the DMG dealt by these lightning strikes. This skill has three charges. A maximum of 3 Sesshou Sakura can exist simultaneously. The initial level of each Sesshou Sakura is 1, and the initial highest level each sakura can reach is 3. If a new Sesshou Sakura is created too close to an existing one, the existing one will be destroyed. |
| Lv1 | Lv2 | Lv3 | Lv4 | Lv5 | Lv6 | Lv7 | Lv8 | Lv9 | Lv10 | Lv11 | Lv12 | Lv13 | Lv14 | Lv15 | |
|---|---|---|---|---|---|---|---|---|---|---|---|---|---|---|---|
| Sesshou Sakura DMG: Level 1 | 60.67% | 65.22% | 69.77% | 75.84% | 80.39% | 84.94% | 91.01% | 97.08% | 103.14% | 109.21% | 115.28% | 121.34% | 128.93% | 136.51% | 144.1% |
| Sesshou Sakura DMG: Level 2 | 75.84% | 81.53% | 87.22% | 94.8% | 100.49% | 106.18% | 113.76% | 121.34% | 128.93% | 136.51% | 144.1% | 151.68% | 161.16% | 170.64% | 180.12% |
| Sesshou Sakura DMG: Level 3 | 94.8% | 101.91% | 109.02% | 118.5% | 125.61% | 132.72% | 142.2% | 151.68% | 161.16% | 170.64% | 180.12% | 189.6% | 201.45% | 213.3% | 225.15% |
| Sesshou Sakura DMG: Level 4 | 118.5% | 127.39% | 136.28% | 148.13% | 157.01% | 165.9% | 177.75% | 189.6% | 201.45% | 213.3% | 225.15% | 237% | 251.81% | 266.63% | 281.44% |
| Duration | 14s | 14s | 14s | 14s | 14s | 14s | 14s | 14s | 14s | 14s | 14s | 14s | 14s | 14s | 14s |
| CD | 4s | 4s | 4s | 4s | 4s | 4s | 4s | 4s | 4s | 4s | 4s | 4s | 4s | 4s | 4s |
▲You can check the percentage with sideward scroll.
Great Secret Art: Tenko Kenshin (Elemental Burst)
| Effect |
|---|
| Legends of "kitsunetsuki," or the manifestation of a kitsune's might, are common in Inazuma's folktales. One that particularly captures the imagination is that of the Sky Kitsune, said to cause lightning to fall down upon the foes of the Grand Narukami Shrine. Summons a lightning strike, dealing AoE Electro DMG. When this is cast, Yae Miko will transform nearby Sesshou Sakura into Tenko Thunderbolts that descend from the skies, dealing AoE Electro DMG. Each Sesshou Sakura within range transforms into one Tenko Thunderbolt. |
| Lv1 | Lv2 | Lv3 | Lv4 | Lv5 | Lv6 | Lv7 | Lv8 | Lv9 | Lv10 | Lv11 | Lv12 | Lv13 | Lv14 | Lv15 | |
|---|---|---|---|---|---|---|---|---|---|---|---|---|---|---|---|
| Skill DMG | 260% | 279.5% | 299% | 325% | 344.5% | 364% | 390% | 416% | 442% | 468% | 494% | 520% | 552.5% | 585% | 617.5% |
| Tenko Thunderbolt DMG | 333.82% | 358.85% | 383.89% | 417.27% | 442.31% | 467.34% | 500.72% | 534.11% | 567.49% | 600.87% | 634.25% | 667.63% | 709.36% | 751.09% | 792.81% |
| CD | 22s | 22s | 22s | 22s | 22s | 22s | 22s | 22s | 22s | 22s | 22s | 22s | 22s | 22s | 22s |
| Energy Cost | 90 | 90 | 90 | 90 | 90 | 90 | 90 | 90 | 90 | 90 | 90 | 90 | 90 | 90 | 90 |
▲You can check the percentage with sideward scroll.
Passive Skill
The Shrine's Sacred Shade
| Effect |
|---|
| When Great Secret Art: Tenko Kenshin is unleashed, each Sesshou Sakura involved will reset the cooldown for one instance of Yakan Evocation: Sesshou Sakura. When there are at least 3 Sesshou Sakura nearby at the same time, unleashing Yakan Evocation: Sesshou Sakura will cause Yae Miko to unleash an additional lightning strike which deals Electro DMG at 40% of her ATK. Radiance: Stellar-Conduct: The aforementioned additional lightning strike becomes an instance of Electro DMG at 50% of Yae Miko's ATK instead. This DMG will also be considered Stellar-Conduct DMG. |
Enlightenment Blessing
| Effect |
|---|
| Every point of Elemental Mastery Yae Miko possesses will increase Sesshou Sakura DMG by 0.15%. |
Edict of Cleansing
| Effect |
|---|
| Extends the duration of the Sesshou Sakura by 10s. When a nearby party member triggers a Superconduct or Stellar-Conduct reaction, the next instance of Sesshou Sakura lightning is enhanced as follows: DMG dealt is increased at 80% of Yae Miko's ATK. This effect can trigger once every 2.5s. Radiance: Stellar-Conduct: An enhanced Sesshou Sakura lightning bolt hit on an opponent will also cause an additional instance of Electro DMG at 200% of Yae Miko's ATK. This DMG is considered Stellar-Conduct DMG. Additionally, when inside a Polestar Field, Yae Miko will enter the Radiance: Stellar-Conduct state. |
Meditations Of A Yako
| Effect |
|---|
| Has a 25% chance to get 1 regional Character Talent Material (base material excluded) when crafting. The rarity is that of the base material. |
Who Is Yae Miko?
The Head Shrine Maiden Of The Grand Narukami Shrine
Yae Miko is the Lady Guuji of the Grand Narukami Shrine. Mysterious and mischievous, she's quite known for being a trickster even for someone of her standing.
Owner Of The Yae Publishing House
Besides being the Lady Guuji, Yae Miko also holds responsibility in the Yae Publishing House as its owner and editor-in-chief. She herself is a lover of books and is interested in interesting stories that would sell well.
Ei's Friend
Yae Miko has been friends with Raiden Ei, the Electro Archon, for centuries. She's her only friend that survived throughout all these years. Their trust in each other is so strong that Ei gave the Electro Gnosis to Yae for safe keeping.
Yae Miko Voice Actor & Their Notable Roles
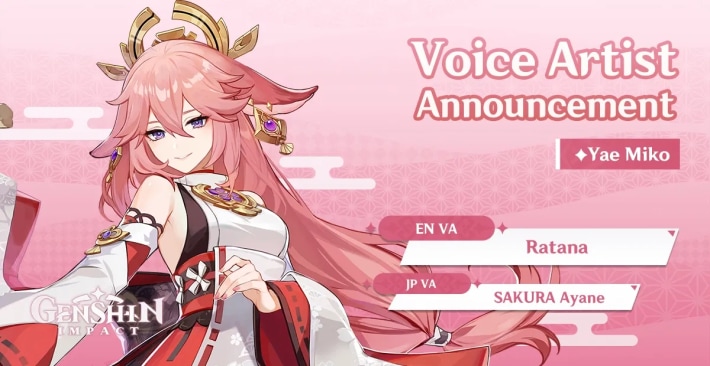
English Voice Actor: Ratana
| Notable Roles | |
|---|---|
| Fire Emblem: Three Houses | Leonie |
| Dynasty Warriors 9 | Lianshi |
| Goddess of Victory: Nikke | Vesti, Scarlet |
Japanese Voice Actor: SAKURA Ayane
| Notable Roles | |
|---|---|
| My Hero Academia | Ochaco Uraraka |
| The Quintessential Quintuplets | Yotsuba Nakano |
| Honkai Impact 3rd | Yae Sakura |
Character Related Articles
Character Tier Lists
All Characters
| Characters By Rarity | |||||||||||
|---|---|---|---|---|---|---|---|---|---|---|---|
| Characters By Roles | |||||||||||
| DPS List | Support List | Sustain List | |||||||||
| On-Field List | Off-Field List | ||||||||||
| Characters By Element | |||||||||||
| Hydro | Anemo | Electro | |||||||||
| Dendro | |||||||||||
| Characters By Nation | |||||||||||
| Mondstadt | Liyue | ||||||||||
| Fontaine | Natlan | ||||||||||
| Snezhnaya | Nod-Krai | ||||||||||

