
Comprehensive Chevreuse guide for Genshin Impact. Learn Chevreuse's best build, team, kit, constellation, and materials for this 4-Star Pyro Support Polearm user.
| Chevreuse Related Articles | |||||||
|---|---|---|---|---|---|---|---|
 Best Build Best Build | Best Team | ||||||
| Specialty | Best Weapon | ||||||
Table of Contents
Chevreuse Character Overview, Base Stats, and Tier
Character Profile
 | Rarity | | |
|---|---|---|---|
| Element | |||
| Weapon | Polearm | ||
| Ascend Stat | HP 24.0% | ||
| Region | Fontaine | ||
| Birthday | January 10 | ||
| Roles | | ||
| How To Get | Available in all Banners at a low drop rate | ||
Base Stats
| Base HP | Base ATK | Base DEF | |
|---|---|---|---|
| Lvl. 90 | 11,962 | 193 | 605 |
| Lvl. 80 (Ascended) | 11,134 | 180 | 563 |
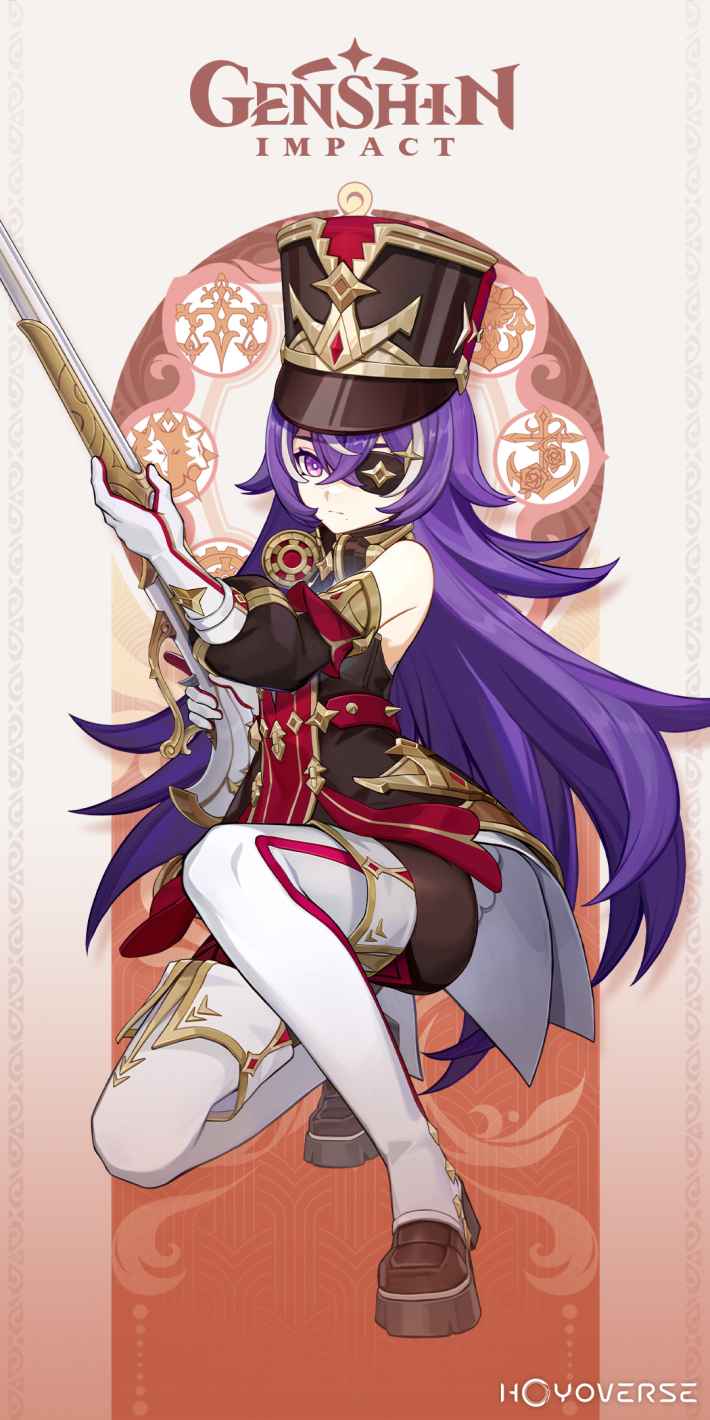
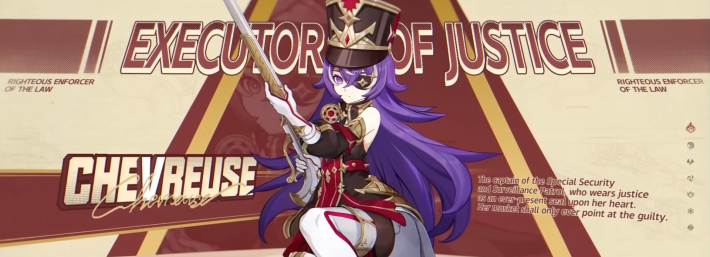
Chevreuse is a 4-star Pyro character that wields a Polearm in Genshin Impact. She is an off-field support Pyro character who works best in Overloaded teams since she can provide buffs such as ATK% and Pyro and Electro RES Shred. Lore-wise, Chevreuse is the ever-present captain of the Special Security and Surveillance Patrol in Fontaine.
Chevreuse's Tier & Rating
| Overall Tier | ||||||||||||||
|---|---|---|---|---|---|---|---|---|---|---|---|---|---|---|
| S | ||||||||||||||
| On-Field | Off-Field | DPS | Support | Sustain | ||||||||||
| - | S | - | S | S | ||||||||||
What Kind of Character is Chevreuse?
In battle, Chevreuse is the dedicated 4-Star Pyro
Chevreuse is what makes pure Overload teams to be meta, so much so that these teams without her are going to be underwhelming in comparison. Her RES shred and ATK% buff are very potent for the Electro or Pyro DPSes that can take advantage of it, and her healing is also a welcome comfort feature. C6 Chevreuse allows her best teams to be competitive with the top 5 teams, but will be at best average if otherwise.
Rate Chevreuse!
Roles & Playstyle Of Chevreuse and Her Strengths and Weaknesses
Dedicated Buffer for Overload Teams
Chevreuse elevates the DPS output of pure Overload teams to a point where, since her release, such teams have been competitive in terms of meta, especially if you have Chevreuse's C6.
Pros and Cons of Support Chevreuse
| Pros |
|---|
| - Easy to play. |
| - Strong buffs for her Pyro and Electro DPSes that can be played in pure Overload teams, even at C0. |
| - Not Burst-dependent so easier to build than most supports. |
| Cons |
| - Personal damage is negligible. |
| - Healing only affects the On-Field character. |
| - Restricted to teams with only Pyro or Electro characters for her RES shred to work. |
Best Build for Chevreuse
Chevreuse generally wants to maximize her utility or supportive capability both in ideal weapon and artifact choices. See below for recommendations:
| Weapon | Symphonist of Scents └ Equip Favonius Lance if other teammates are very Energy-hungry. |
|---|---|
| Best Artifact | Noblesse Oblige └ Scroll of the Hero of Cinder City can be an alternative if someone else on the team is already using Noblesse. |
| Artifact Main Stats | Sands: HP% or Energy Recharge (ER) Goblet: HP% Circlet: HP or CRIT Rate (for Favonius Lance) |
| Priority Sub-Stat | Energy Recharge > CRIT Rate (for Favonius Lance) > ATK% |
| Recommended Team | |
Stat Goals For Off-Field Support Chevreuse
| HP | 40,000 |
|---|---|
| Energy Recharge | 180-210%~ |
| Crit Rate | At least 50%~ if using Favonius Lance |
If Chevreuse needs to use her Burst in a team (especially when using Noblesse Oblige), you'll need to prioritize her Energy requirements first, which should be relatively easy to achieve in comparison to other supports. Beyond that, Chevreuse's ATK% buff maxes out when she has 40,000 max HP, so this can be your soft goal after gaining enough ER for her.
Chevreuse 's Recommended Talent Priority
| Talent | Level Up Priority |
|---|---|
| Normal Attack: Line Bayonet Thrust EX | ★★・・・ |
| Short-Range Rapid Interdiction Fire (Elemental Skill) | ★★★★★ |
| Ring Of Bursting Grenades (Elemental Burst) | ★★★・・ |
Related Links:
Best Weapon for Chevreuse
Any weapon that can make Chevreuse reach her stat-goals or add another layer to her buffing value in a team are going to be good choices for her. See below for the recommendations:
Premium Weapons for Off-Field Support Faruzan
| Weapon | How to Get Rating | |
|---|---|---|
| Best | Symphonist of Scents | Get from Limited Banners - If you can manage to reach Chevreuse's Energy Recharges stat goal from artifacts alone, this weapon allows her to give another ATK buff to a character she healed. - Since her healing at a baseline only affects the active character, only that character will receive the additional ATK% buff from this weapon. - Better with her C6 that enables her to activate a single instance of an AoE heal, which results in other teammates also gaining the extra ATK% buff. |
| 2nd | Favonius Lance | Get from Banners - Chevreuse's most practical weapon choice since it gives her Energy Recharge through the main stat. - If you can trigger the passive consistently, it gives an Energy Particle that can be caught by other members of the party, allowing them to charge their Bursts faster. - Chevreuse would need to have a decent amount of CRIT Rate in order to proc the passive effect. - Best at R5. |
| 3rd | Engulfing Lightning | Get from Limited Banners - ER secondary stat helps Chevreuse reach her desired Energy Recharge stat. - Essentially a stat-stick for Chevreuse, but it allows you to focus heavily on HP% on her artifacts. |
Escoffier's Signature Weapon is a good choice for Chevreuse since she can activate the effect with the healing from her Skill, but if you happen to have it, it may be better to go on Escoffier herself. Because of this, Favonius Lance becomes the de-facto best choice unless you have the Symphonist of Scents weapon unused.
Free To Play Friendly (F2P Weapons) for Off-Field Support Chevreuse
| Weapon | How to Get Rating | |
|---|---|---|
| Best F2P | Dialogues of the Desert Sages | Reward From Past Event (Alchemical Ascension) - HP% main stat allows Chevreuse to reach her max HP stat goal for the maximum ATK% buff and better healing. - Provides Energy every time the equipping character provides healing, which allows Chevreuse to consistently use her Burst. - No longer obtainable if you didn't participate in the event. |
| 2nd | Rightful Reward | Fontaine Forgeable (Craftable) Weapon - Another HP% main stat weapon, which helps Chevreuse get closer to the 40,000 HP goal. - Restores some energy when the character is healed, which will only happen once every rotation unless you use Chevreuse on-field for a bit longer. - Best at R5. |
| 3rd | Black Tassel | Get from Banners or From NPC Dialogue - HP% main stat boosts Chevreuse's ATK buff and healing. - Passive is irrelevant, so it acts as a stat-stick on Chevreuse. |
For Free-to-Play options, a free 4-star weapon from a past event is considered to be a relatively decent option since it gives Energy and HP, which are two stats Chevreuse appreciates. But because it's from an old event, you may not have it available for use, so any HP% polearm can be a viable option until you're able to secure a better weapon.
All Weapon ListChevreuse Best Artifacts
Chevreuse is also best equipped with artifacts that can increase her value as a support in her best teams. See the recommendations below:
| Artifact | Recommendation Details |
|---|---|
| Noblesse Oblige | ★★★★★ - Allows Chevreuse to provide another ATK% buff after she uses her Elemental Burst. - A universal choice when she's paired with ATK% scaling On-Field DPSes. |
| Scroll of the Hero of Cinder City | ★★★★・ - If someone else is already equipped with the Noblesse set, Chevreuse can hold this one instead. - Even if she can't trigger the full 4-piece effect, she can still provide a 12% DMG boost after she triggers a reaction that includes the Element of the character you want to buff. - The 2-piece set gives Energy after a teammate triggers a Nightsoul Burst, which happens often when she's paired with Pyro or Electro Natlan characters like Mavuika. |
| Song of Days Past | ★★★・・ - After triggering a healing effect for a certain amount of time, the On-Field character receives 5 expendable buff "instances" based on the healing, which will affect all of their damage sources. - Because these buff instances are finite and apply to every DMG hit made, they will eventually run out even faster in multi-target situations. - This pairs well with Chevreuse's C6 since that constellation briefly creates a teamwide heal after Chevreuse's initial heal from her Skill, allowing you to have better uptime on the buff from this set. |
Recommended Artifact Stats
| Main: Flat HP Sub: Energy Recharge% / HP% / CRIT Rate (for Favonius Lance) |
|---|---|
| Main: Flat ATK Sub: Energy Recharge% / HP% / CRIT Rate (for Favonius Lance) |
| Main: Energy Recharge% or HP% Sub: Energy Recharge / HP% / CRIT Rate (for Favonius Lance) |
| Main:HP% Sub:Energy Recharge% / CRIT Rate (for Favonius Lance) |
| Main: HP% or CRIT Rate (for Favonius Lance) Sub: Energy Recharge% / HP% / CRIT Rate (for Favonius Lance) |
Prioritize Energy Recharge For Reliable Burst Uptime
If you want Chevreuse to use her Burst every rotation, to trigger the Noblesse Oblige effect for example, then you'll need to prioritize getting enough Energy Recharge (ER) on her artifacts so she's able to have it fully-charged on demand. You can then shift focus to getting as much HP% as you can manage to benefit from her ATK% buff.
Conversely, Chevreuse can be left at 100% ER if you have no plans of using her Burst every rotation.
Related Articles
Best Team Comp Chevreuse
Overload Varesa Team
| Support | DPS | Support | Support |
|---|---|---|---|
| Chevreuse | Varesa | Durin | Iansan |
| Details | |||
| - Chevreuse's Pyro and Electro RES shred, paired with her teamwide ATK% buff, are greatly appreciated by both Varesa and Durin, whose DMG scales with their ATK. - Chevreuse also acts as the sustain character, alongside Iansan, who contributes her own ATK buffs as well. - Durin adds more Pyro and Electro RES shred as well as consistent AoE Pyro DMG in his Confirmation of Purity mode. | |||
Chevreuse will always want to be in a team consisting of only Pyro and Electro characters. Varesa is one of the best Electro characters for a pure Overload team since she isn't restricted to a specific reaction. Durin benefits from Chevreuse's buffs as well, but he can be replaced by any other Pyro applicator, with the most popular choice being Mavuika.
Other Team Comps For Chevreuse
Overload Arlecchino Team
| Team | Detail | |
|---|---|---|
| Chevreuse | Arlecchino | - Arlecchino (or any other On-Field Pyro DPS) can also be paired alongside Chevreuse, provided you have a constant supply of Electro to trigger Overload off of. - Durin and Fischl activate each other's Hexerei passives and therefor provide more buffs for this team. - Fischl adds another ATK% buff while providing Electro application, while Durin's RES shred becomes stronger. |
| Fischl | Durin | |
F2P Friendly Team Comp
| Team | Detail | |
|---|---|---|
| Chevreuse | Razor | - A F2P-friendly team comp using free or easily obtainable characters. - Razor gains his Hexerei passive with Fischl in the team, which helps boost his DPS potential. - Thoma applies Off-Field Pyro application and shielding against attacks that can stagger. C6 Bennett will be the better option overall however due to the ATK buff and more healing. - Additionally, since Razor doesn't gain an Electro infusion, he can reliably trigger Overload himself while in his Burst C6 Bennet gives a Pyro infusion to characters in his Burst area. |
| Thoma | Fischl | |
Team Rotation of Chevreuse and Combos
Basic Team Rotation for Off-Field Support Chevreuse
| Basic Rotation For Off-Field Support Chevreuse |
|---|
| 1.Start with the supports with longer ability durations if there are any. If any Sub-DPS or DPS needs to deploy their abilities first as part of their mechanic, such as Durin sometimes, then ensure they do so beforehand. └ For maximum DPS, you want to start the rotation with an Overload trigger. This will depend on the On-Field DPS (e.g. for Varesa, she starts the rotation with a quick Normal Attack to apply Electro). 2. Swap to Chevreuse. Use her Burst, then her Skill (hold). 3. Swap to any other supports that need to apply their abilities after if there are any. 4. Swap to the main On-Field DPS to execute their primary damage combo. 5. Repeat from Step 1. |
Most of Chevreuse's teams will open the rotation with an immediate Overload trigger to maximize the usage of her elemental RES shred. Often this'll depend on who your On-Field DPS is and which supports you have. But in general, you'll want to deploy the supports with longer ability durations first so they don't expire mid-rotation.
Basics Of Using Chevreuse
Chevreuse is an
Trigger Overload for Resistance Shred
One of Chevreuse's passives reduces the Electro and Pyro Resistance (RES) of nearby enemies for a short duration after any of her teammates trigger the Overload reaction. She can also activate this effect herself. This passive is disabled if the party includes a character that isn't Pyro or Electro.
Healing Is Attached to Her Skill

Chevreuse can deploy her Elemental Skill either by tapping or holding it. Her tapped Skill deals AoE Pyro DMG while also healing the active character. The healing is based off of her HP%. Her Skill also has a hold version that lets her enter aiming mode to fire at a target more precisely.
Hold Skill Applies a Teamwide ATK Buff
Additionally, Chevreuse gains an Overcharged Ball whenever her allies trigger Overload, and this ball can only be used by her hold Skill. The party gains an ATK buff based on Chevreuse's HP% thanks to one of her passives if she does use up an Overcharged Ball this way.
Burst Deals AoE Pyro DMG
After firing a grenade, Chevreuse's Burst deals Pyro DMG in a wide, circular area in front of her. Chevreuse isn't very Burst dependent unlike other Off-Field Supports, so she normally wouldn't require a lot of Energy Recharge.
| Note! | Focus on HP for the Healing and ATK Buff Chevreuse's ideal build will want to max out her HP to get the most out of her healing from her Skill and the ATK buff from her passive, which both scale off of Chevreuse's HP stat. |
|---|
Elemental Skill, Burst and Abilities Guide for Chevreuse
How To Use Chevreuse's Skills & Passives
Core Pyro Support for Pure Overload Teams
| Basic Rotation Of Chevreuse |
|---|
| 1.Start with the supports that have longer ability durations. Make sure to trigger Overload first to activate Chevreuse's RES shred. 2. Switch to Chevreuse. Start with her Skill (hold). 3. Aim and shoot as Chevreuse to activate her ATK% buff. 4. Swap to supports with shorter ability durations. 5. Switch to your On-Field DPS to do their main damage combo. 6. Repeat from Step 1 after other abilities have expired. |
Chevreuse's hold Skill is always preferable since it applies her teamwide ATK% buff, so try to always ensure you manage to use the hold version over the tap version.
Elemental Skill Heals the On-Field Character
| Icon | Elemental Skill Summary |
|---|---|
| Short-Range Rapid Interdiction Fire | - After firing, she continuously heals the active character for a short duration, with healing based on her Max HP. Hold to change firing behavior: - Enters Aiming Mode to lock onto a target and fire a precise interdiction shot. - If Chevreuse has an Overcharged Ball, she consumes it to fire a stronger shot that deals greater Pyro DMG in a larger AoE. - Chevreuse gains 1 Overcharged Ball whenever a nearby party member triggers Overloaded. - She can hold up to 1 Overcharged Ball at a time. |
Chevreuse's single target healing is tied to her Skill. This healing scales with her max HP. But more importantly, her Skill is the trigger condition of one of her passives that provide an ATK buff after firing an Overcharged Ball, which is only possible through the hold version, which you can read about in the next section.
ATK% Buff Is Tied to Her Hold Skill
| Icon | Passive Description |
|---|---|
| Vertical Force Coordination | - After Chevreuse fires an Overcharged Ball using Short-Range Rapid Interdiction Fire (Skill), nearby Pyro and Electro characters in the party gain 1% increased ATK for every 1,000 Max HP Chevreuse has for 30s. ATK can be increased by up to 40% in this way. |
In order to maximize the ATK buff, Chevreuse needs to have 40,000 HP total. This can be achieved through her artifacts' main and sub-stats, as well as her weapon main stat. Chevreuse also gains more HP% after ascending, which helps you reach this stat-goal a lot easier.
Note that as stated, Chevreuse is required to use her hold Skill to activate the above passive.
RES Shred Is Conditional
| Icon | Passive Summary |
|---|---|
| Vanguard's Coordinated Tactics | - Activation condition: All party members must be Pyro or Electro, with at least one Pyro and one Electro character in the party. - Chevreuse grants “Coordinated Tactics” to nearby party members. - After a character triggers Overloaded, affected opponents have their Pyro RES and Electro RES decreased by 40% for 6s. - Coordinated Tactics is removed if the party no longer meets the required Elemental Type conditions. |
This is Chevreuse's iconic passive and is what really defines her as the premiere Overload support. The amount of RES shred it provides significantly contributes to the damage potential of her teams, and makes it so that Chevreuse, even at C0, is worth building.
It's important to remember that not only does her RES shred requires the team to consist of only Pyro and Electro characters, but it also needs you to consistently trigger Overload every 6 seconds to get the most value out of it. This means you need to have an Off-Field Pyro or Electro character to reliably apply their element, so your Electro or Pyro DPS can continue to enjoy the benefits of Chevreuse's RES Shred.
Elemental Burst Deals AoE Pyro DMG
| Icon | Elemental Burst Description |
|---|---|
| Ring of Bursting Grenades | - Chevreuse fires an explosive grenade at opponents with her musket, dealing AoE Pyro DMG. After the projectile hits, it will split into many secondary explosive shells. |
Chevreuse's Burst simply deals Pyro DMG to enemies within range of it, but while it doesn't have any other functions in isolation, it's important to use when you need to trigger a Burst related effect such as the Noblesse Oblige set, or if you need to quickly trigger Overload to re-apply her RES shred.
C6 Is Her Strongest and Most Ideal State
| Icon | Constellation Summary |
|---|---|
| In Pursuit of Ending Evil | - After 12s of Short-Range Rapid Interdiction Fire’s healing effect, all nearby party members recover HP equal to 10% of Chevreuse’s Max HP (once). - When a party member is healed by Short-Range Rapid Interdiction Fire, they gain 20% Pyro DMG Bonus and 20% Electro DMG Bonus for 8s. This bonus can stack up to 3 times. - Each stack’s duration is counted independently. |
The Pyro and Electro DMG bonus stated in the above Constellation adds up to a substantial amount when all three stacks are active, which is a significant DPS increase. Additionally, Chevreuse's C6 applies a single instance of teamwide healing after the healing from her Skill ends. Having C6 Chevreuse allows Overload teams to start reaching the peak of their DPS potential, but isn't strictly necessary for her to function properly.
Ousia Arkhe Disables Pneuma Mechanisms
| Icon | Arkhe Summary |
|---|---|
| Short-Range Rapid Interdiction Fire Arkhe: Ousia | - Periodically, after Chevreuse's Short-Range Rapid Interdiction Fire hits, a Surging Blade will be called forth that deals Ousia-aligned Pyro DMG. |
Like all Fontaine characters, Chevreuse has an Arkhe that's attached to her Elemental Skill. This Arkhe is essentially an extra attack that applies a specific DMG type, which is either Ousia (dark) or Pneuma (white). Chevreuse's Arkhe is Ousia, and when her Arkhe attack hits an enemy or object that is Pneuma-aligned, it triggers an explosion that enables or disables certain enemies or mechanisms. It can also be used to solve puzzles all over Fontaine.
Should You Pull for Chevreuse's Constellation Or Best Weapon?
Aim for C6 if You Are Able To
| Constellation Priority |
|---|
| C6 > C4 > C2 |
C6 Upgrades Chevreuse's Buffs for Overload
Chevreuse is perfectly capable as a healer and buffer for her Overload teams at C0, and any constellation level on her will be a welcomed addition to any account. Chevreuse's most valuable constellation, however, is her C6, mostly due to the Pyro DMG bonus and Electro DMG bonus it gives. If she is on a banner with a 5-star you are interested in getting, consider trying for Chevreuse's C6, but remember that isn't necessary for her to function as intended.
Chevreuse's Constellations & Effects
| Rating | Constellation Effect |
|---|---|
| ★★・・・ | C1: Stable Front Line's Resolve When the active character with the "Coordinated Tactics" status (not including Chevreuse herself) triggers the Overloaded reaction, they will recover 6 Energy. This effect can be triggered once every 10s. You must first unlock the Passive Talent "Vanguard's Coordinated Tactics." |
| ★★・・・ | C2: Sniper Induced Explosion After Holding Short-Range Rapid Interdiction Fire and hitting a target, 2 chain explosions will be triggered near the location where said target is hit. Each explosion deals Pyro DMG equal to 120% of Chevreuse's ATK. This effect can be triggered once every 10s, and DMG dealt this way is considered Elemental Skill DMG. |
| ★★★★・ | C3: Practiced Field Stripping Technique Increases the Level of Short-Range Rapid Interdiction Fire by 3. Maximum upgrade level is 15. |
| ★★・・・ | C4: The Secret To Rapid-Fire Multishots After using Ring of Bursting Grenades, the Hold mode of Short-Range Rapid Interdiction Fire will not go on cooldown when Chevreuse uses it. This effect is removed after Short-Range Rapid Interdiction Fire has been fired twice using Hold or after 6s. |
| ★・・・・ | C5: Enhanced Incendiary Firepower Increases the Level of Ring of Bursting Grenades by 3. Maximum upgrade level is 15. |
| ★★★★★ | C6: In Pursuit Of Ending Evil After 12s of the healing effect from Short-Range Rapid Interdiction Fire, all nearby party members recover HP equivalent to 10% of Chevreuse's Max HP once. After a party member is healed by Short-Range Rapid Interdiction Fire, they gain a 20% Pyro DMG Bonus and Electro DMG Bonus for 8s. Max 3 stacks. Each stack's duration is counted independently. |
Chevreuse's Constellation Name is Sclopetum Ensiferum
| Sclopetum Ensiferum |
|---|
 |
Ascension Materials for Chevreuse Talents & Level
Materials Needed for Level Ascension
| Materials Needed To Get To Lvl. 80 |
|---|
| Agnidus Agate Sliver x 1Agnidus Agate Fragment x 9Agnidus Agate Chunk x 9Meshing Gear x 18Mechanical Spur Gear x 30Artificed Dynamic Gear x 12Lumidouce Bell x 108Fontemer Unihorn x 26 |
| Materials Needed To Get To Lvl. 90 |
| Agnidus Agate Sliver x 1 Agnidus Agate Fragment x 9Agnidus Agate Chunk x 9Agnidus Agate Gemstone x 6Meshing Gear x 18Mechanical Spur Gear x 30Artificed Dynamic Gear x 36Lumidouce Bell x 168Fontemer Unihorn x 46 |
| Level 1 | Default |
|---|---|
| Level 2 | Teachings Of Order x3Meshing Gear x6 |
| Level 3 | Guide To Order x2 Mechanical Spur Gear x3 |
| Level 4 | Guide To Order x4Mechanical Spur Gear x4 |
| Level 5 | Guide To Order x6 Mechanical Spur Gear x6 |
| Level 6 | Guide To Order x9 Mechanical Spur Gear x9 |
| Level 7 | Philosophies Of Order x4 Artificed Dynamic Gear x4 Lightless Eye Of The Maelstrom x1 |
| Level 8 | Philosophies Of Order x6 Artificed Dynamic Gear x6 Lightless Eye Of The Maelstrom x1 |
| Level 9 | Philosophies Of Order x12 Artificed Dynamic Gear x9 Lightless Eye Of The Maelstrom x2 |
| Level 10 | Philosophies Of Order x16 Artificed Dynamic Gear x12 Lightless Eye Of The Maelstrom x2 Crown of Insight x1 |
| Level 11 | Unlocked via Constellation |
| Level 12 | Unlocked via Constellation |
| Level 13 | Unlocked via Constellation |
Related Links
Chevreuse Skills & Talents Details
Normal Attack: Line Bayonet Thrust EX
Normal Attack
| Effect |
|---|
| Performs up to 4 consecutive spear strikes. |
| Lv1 | Lv2 | Lv3 | Lv4 | Lv5 | Lv6 | Lv7 | Lv8 | Lv9 | Lv10 | Lv11 | |
|---|---|---|---|---|---|---|---|---|---|---|---|
| 1-Hit DMG | 53.1% | 57.5% | 61.8% | 68% | 72.3% | 77.2% | 84% | 90.8% | 97.6% | 105% | 112.4% |
| 2-Hit DMG | 49.3% | 53.3% | 57.3% | 63.1% | 67.1% | 71.7% | 78% | 84.3% | 90.6% | 97.5% | 104.4% |
| 3-Hit DMG | 27.6%+32.5% | 29.9%+35.1% | 32.2%+37.7% | 35.4%+41.5% | 37.6%+44.2% | 40.2%+47.2% | 43.7%+51.3% | 47.3%+55.5% | 50.8%+59.6% | 54.7%+64.2% | 58.5%+68.7% |
| 4-Hit DMG | 77.3% | 83.6% | 89.8% | 98.8% | 105.1% | 112.3% | 122.2% | 132.1% | 142% | 152.7% | 163.5% |
▲Use side-scroll to see percentage per level.
Charged Attack
| Effect |
|---|
| Drains Stamina over time to perform continuous spinning attacks against all nearby opponents. At the end of the sequence, performs a more powerful slash. |
| Lv1 | Lv2 | Lv3 | Lv4 | Lv5 | Lv6 | Lv7 | Lv8 | Lv9 | Lv10 | Lv11 | |
|---|---|---|---|---|---|---|---|---|---|---|---|
| Charged Attack DMG | 121.7% | 131.6% | 141.5% | 155.7% | 165.6% | 176.9% | 192.4% | 208% | 223.6% | 240.1% | 257.5% |
| Charged Attack Stamina Cost | 25 | 25 | 25 | 25 | 25 | 25 | 25 | 25 | 25 | 25 | 25 |
▲Use side-scroll to see percentage per level.
Plunging Attack
| Effect |
|---|
| Plunges from mid-air to strike the ground below, damaging opponents along the path and dealing AoE DMG upon impact. |
| Lv1 | Lv2 | Lv3 | Lv4 | Lv5 | Lv6 | Lv7 | Lv8 | Lv9 | Lv10 | Lv11 | |
|---|---|---|---|---|---|---|---|---|---|---|---|
| Plunge DMG | 63.9% | 69.1% | 74.3% | 81.8% | 87% | 92.9% | 101.1% | 109.3% | 117.5% | 126.4% | 135.3% |
| Low Plunge DMG | 128% | 138% | 149% | 164% | 174% | 186% | 202% | 219% | 235% | 253% | 271% |
| High Plunge DMG | 160% | 173% | 186% | 204% | 217% | 232% | 253% | 273% | 293% | 316% | 338% |
▲Use side-scroll to see percentage per level.
Short-Range Rapid Interdiction Fire (Elemental Skill)
| Effect |
|---|
| Chevreuse quickly shoulders her musket and fires at her opponent(s), dealing AoE Pyro DMG. For a short duration after Chevreuse fires a shot, she will continuously restore HP to the active character on the field. The amount healed is based on her Max HP. Hold to fire in a different fashion. |
Hold
| Effect |
|---|
| Enter Aiming Mode, locking a target in her sights to fire a precise interdiction shot. If Chevreuse has an Overcharged Ball, then she will fire the Overcharged Ball instead, dealing greater Pyro DMG in a larger area. Chevreuse gains 1 Overcharged Ball every time a nearby character in the party triggers an Overloaded reaction, and can have up to 1 Overcharged Ball at a time. |
Arkhe: Ousia
| Effect |
|---|
| Periodically, after Chevreuse's Short-Range Rapid Interdiction Fire hits, a Surging Blade will be called forth that deals Ousia-aligned Pyro DMG. |
| Lv1 | Lv2 | Lv3 | Lv4 | Lv5 | Lv6 | Lv7 | Lv8 | Lv9 | Lv10 | Lv11 | Lv12 | Lv13 | |
|---|---|---|---|---|---|---|---|---|---|---|---|---|---|
| Press DMG | 115.2% | 123.8% | 132.5% | 144% | 152.6% | 161.3% | 172.8% | 184.3% | 195.8% | 207.4% | 218.9% | 230.4% | 244.8% |
| Hold DMG | 172.8% | 185.8% | 198.7% | 216% | 229% | 241.9% | 259.2% | 276.5% | 293.8% | 311% | 328.3% | 345.6% | 367.2% |
| Overcharged Ball DMG | 282.4% | 303.6% | 324.8% | 353% | 374.2% | 395.4% | 423.6% | 451.8% | 480.1% | 508.3% | 536.6% | 564.8% | 600.1% |
| HP Regeneration Over Time | 2.67%+257 | 2.87%+282 | 3.07%+310 | 3.33%+340 | 3.53%+372 | 3.73%+407 | 4%+443 | 4.27%+482 | 4.53%+522 | 4.8%+565 | 5.07%+610 | 5.33%+657 | 5.67%+706 |
| Healing Duration | 12s | 12s | 12s | 12s | 12s | 12s | 12s | 12s | 12s | 12s | 12s | 12s | 12s |
| Surging Blade DMG | 28.8% | 31% | 33.1% | 36% | 38.2% | 40.3% | 43.2% | 46.1% | 49% | 51.8% | 54.7% | 57.6% | 61.2% |
| Surging Blade Interval | 10s | 10s | 10s | 10s | 10s | 10s | 10s | 10s | 10s | 10s | 10s | 10s | 10s |
| CD | 15s | 15s | 15s | 15s | 15s | 15s | 15s | 15s | 15s | 15s | 15s | 15s | 15s |
▲Use side-scroll to see percentage per level.
Ring Of Bursting Grenades
| Effect |
|---|
| Chevreuse fires an explosive grenade at opponents with her musket, dealing AoE Pyro DMG. After the projectile hits, it will split into many secondary explosive shells. The secondary explosive shells will burst after a short interval, dealing Pyro DMG to nearby opponents. |
| Lv1 | Lv2 | Lv3 | Lv4 | Lv5 | Lv6 | Lv7 | Lv8 | Lv9 | Lv10 | Lv11 | Lv12 | Lv13 | |
|---|---|---|---|---|---|---|---|---|---|---|---|---|---|
| Explosive Grenade DMG | 368.2% | 395.8% | 423.4% | 460.2% | 487.8% | 515.4% | 552.2% | 589.1% | 625.9% | 662.7% | 700% | 736.3% | 782.3% |
| Secondary Explosive Shell DMG | 49.1% | 52.8% | 56.5% | 61.4% | 65% | 68.7% | 73.6% | 78.5% | 83.4% | 88.4% | 93.3% | 98.2% | 104.3% |
| CD | 15s | 15s | 15s | 15s | 15s | 15s | 15s | 15s | 15s | 15s | 15s | 15s | 15s |
| Energy Cost | 60 | 60 | 60 | 60 | 60 | 60 | 60 | 60 | 60 | 60 | 60 | 60 | 60 |
▲Use side-scroll to see percentage per level.
Vanguard's Coordinated Tactics
| Effect |
|---|
| When all party members are Pyro and Electro characters and there is at least one Pyro and one Electro character each in the party: Chevreuse grants "Coordinated Tactics" to nearby party members: After a character triggers the Overloaded reaction, the Pyro and Electro RES of the opponent(s) affected by this Overloaded reaction will be decreased by 40% for 6s. The "Coordinated Tactics" effect will be removed when the Elemental Types of the characters in the party do not meet the basic requirements for the Passive Talent. |
Vertical Force Coordination
| Effect |
|---|
| After Chevreuse fires an Overcharged Ball using Short-Range Rapid Interdiction Fire, nearby Pyro and Electro characters in the party gain 1% increased ATK for every 1,000 Max HP Chevreuse has for 30s. ATK can be increased by up to 40% in this way. |
Double Time March
| Effect |
|---|
| Decreases sprinting Stamina consumption for your own party members by 20%. Not stackable with Passive Talents that provide the exact same effects. |
Character Related Articles
Character Tier Lists
All Characters
| Characters By Rarity | |||||||||||
|---|---|---|---|---|---|---|---|---|---|---|---|
| Characters By Roles | |||||||||||
| DPS List | Support List | Sustain List | |||||||||
| On-Field List | Off-Field List | ||||||||||
| Characters By Element | |||||||||||
| Hydro | Anemo | Electro | |||||||||
| Dendro | |||||||||||
| Characters By Nation | |||||||||||
| Mondstadt | Liyue | ||||||||||
| Fontaine | Natlan | ||||||||||
| Snezhnaya | Nod-Krai | ||||||||||


