
Comprehensive Sayu guide for Genshin Impact. Learn Sayu's best build, team, artifacts, kit, and materials for this 4-Star Anemo Support Claymore user.
Table of Contents
| Sayu Related Articles | |||||
|---|---|---|---|---|---|
 Best Build Best Build | Best Team | ||||
| Specialty | Story Quest | ||||
Sayu Tier & Review
Tier & Rating
| Overall Tier | ||||||||||||||
|---|---|---|---|---|---|---|---|---|---|---|---|---|---|---|
| B | ||||||||||||||
| On-Field | Off-Field | DPS | Support | Sustain | ||||||||||
| - | B | - | - | B | ||||||||||
**The Tiers above are ranked in 6 levels. With SS being the highest and D the lowest.
Tiers: SS → S → A → B → C → D
** Tiers above are at Zero Constellations
Rate Sayu!
What Kind Of Character Is Sayu?
Sayu is an Anemo Swirl healer who can be used as healer or on-field reaction driver. Her healing is based on both ATK and EM with her Constellations allowing her to be built fully on EM. Her Elemental Skill allows her to roll around and deal Anemo DMG, making it useful for exploration as well.
Strengths & Weakness Of Sayu
| Strengths |
|---|
| - Provides heal while inflicting Anemo damage to enemies within the range ↳ Perfect for Viridescent Venerer |
| Weakness |
| - High energy cost for Elemental Burst ↳ Can be aided with Favonius Greatsword - Does not provide many benefits making her not complete well with its competitors. |
Sayu Best Build
Sayu Is Best Built With Energy Recharge & Elemental Mastery
| Weapon | Favonius Greatsword |
|---|---|
| Substitute | 1. Skyward Pride 2. Mailed Flower (F2P Option)3. Sacrificial Greatsword |
| Best Artifact | Viridescent Venerer x4 |
| Main Stat | Sands: Energy Recharge / Elemental Mastery Goblet: Elemental Mastery Circlet: Elemental Mastery |
| Sub-Stat | 1. Energy Recharge 2. ATK% 3. Elemental Mastery |
| Sample Team | |
Sayu Can Be On-Field Swirl Driver or Off-Field Healer
Sayu can be used as on-field Swirl driver or healer with this build. This build focuses on increasing the Swirl DMG of Sayu while letting Sayu have enough healing to sustain the team.
Related Links:
Sayu Best Weapon
Sayu Works Best With Energy Recharge or Elemental Mastery Claymores
| Weapon | Details | |
|---|---|---|
| Best | Favonius Greatsword | Energy Recharge 61.3% (Lvl. 90) - Huge Energy Recharge Buff. - Allows you to provide more energy for the team. - Requires you to invest on CRIT Rate for consistency. |
| 2nd | Skyward Pride | Energy Recharge 36.8% (Lvl. 90) - Energy Recharge and High based ATK is perfect for increasing heals. |
| 3rd | Makhaira Aquamarine | Elemental Mastery 165 (Lvl. 90) - Elemental Mastery increases the healing and DMG of Sayu at high constellations - Increases the team's ATK making it amazing for split scaling Sayu. |
| 4th (F2P) | Mailed Flower | Elemental Mastery 110 (Lvl. 90) - Elemental Mastery substat is great for increasing Sayu's Swirl damage and heals. - Elemental Skill hits buffs ATK and Elemental Mastery, great for split scaling Sayu. |
| 5th (F2P) | Katsuragikiri Nagamasa | Energy Recharge 45.9% (Lvl. 90) - Great Energy Recharge stat stick.. - Make use of Elemental Skill to battery Elemental Burst. - Obtainable for free. |
| 6th | Sacrificial Greatsword | Energy Recharge 30.6% - Energy Recharge substat is good for maintaining Burst uptime. - Skill CD refresh is good for Sayu's rolling mode but only the kick at the end of her rolling mode can trigger it. |
| 7th | Rainslasher | Elemental Mastery 165 (Lvl. 90) - EM is good for Sayu's DMG and healing. - Few characters are able to use this weapon decently so less competition. - Limits your team comps to Hydro and Electro. - Also suit the aesthetic of Sayu. |
Energy Recharge & Elemental Mastery Weapon Are Recommended
Sayu has a very high Elemental Burst cost that requires her to invest a lot on Energy Recharge. You can also use EM for bigger swirl numbers, damage and healing (when your Sayu is at higher constellations).
All Weapon ListSayu Best Artifacts
Sayu On-Field Driver & Healer Artifacts
Best Artifacts For Swirl EM Support
| Artifacts | |
|---|---|
| Viridescent Venerer | ★★★★★ - Great for both on-field and healer Sayu. - Reduces enemies' Elemental DMG RES for teammates to deal more damage. |
| Gilded Dreams | ★★★★ ・ - Great for increasing Sayu's heals with both ATK and EM buff. - ATK buff depends whether you put another Anemo character in her teams but usually she is with different Elements. |
Artifact Stat Priority
| Main: Flat HP Sub: Elemental Mastery / Energy Recharge / ATK% |
|---|---|
| Main: Flat ATK Sub: Elemental Mastery / Energy Recharge / ATK% |
| Main: Elemental Mastery / Energy Recharge Sub: Energy Recharge / Elemental Mastery / ATK% |
| Main: Elemental Mastery Sub: Energy Recharge / ATK% |
| Main: Elemental Mastery Sub: Energy Recharge / ATK% |
Main Priority Is Elemental Mastery
Sayu's swirls will have bigger damage with Elemental Mastery so focus on increasing them for bigger reactions from Sayu. Since EM also increases the heals of Sayu, it should also provide sufficient heals.
Related Articles
Sayu Best Team Comp
Use Sayu As Swirl Support For PECH Teams
| Support | DPS | Shielder | Sub-DPS |
|---|---|---|---|
| Arlecchino | Zhongli | Yelan | |
| Details | |||
| - Sayu can spread Viridescent Venerer debuff on enemies while healing via her Burst and Swirl reactions. - The PECH DPS can deal increased damage against enemies while getting healed. - Zhongli can add another damage RES shred on enemies and provide a shield for the DPS. - Yelan can trigger Vaporize and increase the damage of the DPS. | |||
Free-To-Play Party
| Team | Detail | ||
|---|---|---|---|
| Ororon | - Sayu is a good on-field healer and reaction driver for Electro-Charged. - Ororon's Passive ability and Fischl's Energy Particle generation can charge Sayu's Burst easily for additional healing and Swirl proc. - Barbara's Skill can apply Hydro on the active character and can instantly heal the whole team with her Burst. | ||
| Fischl | Barbara | ||
Sayu Ascension Materials
| Lack materials in your world? Search for people who would like to help in this: Item Exchange Thread |
Materials Needed for Level Ascension
| Materials Needed To Get To Lvl. 80 |
|---|
| Vayuda Turquoise Sliver x 1Vayuda Turquoise Fragment x 9Vayuda Turquoise Chunk x 9Whopperflower Nectar x 18Shimmering Nectar x 30Energy Nectar x 12Crystal Marrow x 108Marionette Core x 26 |
| Materials Needed To Get To Lvl. 90 |
| Vayuda Turquoise Sliver x 1 Vayuda Turquoise Fragment x 9Vayuda Turquoise Chunk x 9Vayuda Turquoise Gemstone x 6Whopperflower Nectar x 18Shimmering Nectar x 30Energy Nectar x 36Crystal Marrow x 168Marionette Core x 46 |
Crystal Marrow Farm Routes
| Crystal Marrow Farm Routes | |
|---|---|
 |  |
Talent Materials For Sayu
| Level 1 | Default |
|---|---|
| Level 2 | Teachings Of Light x3Whopperflower Nectar x6 |
| Level 3 | Guide To Light x2 Shimmering Nectar x3 |
| Level 4 | Guide To Light x4 Shimmering Nectar x4 |
| Level 5 | Guide To Light x6 Shimmering Nectar x6 |
| Level 6 | Guide To Light x9 Shimmering Nectar x9 |
| Level 7 | Philosophies Of Light x4 Energy Nectar x4 Gilded Scale x1 |
| Level 8 | Philosophies Of Light x6 Energy Nectar x6 Gilded Scale x1 |
| Level 9 | Philosophies Of Light x12 Energy Nectar x9 Gilded Scale x2 |
| Level 10 | Philosophies Of Light x16 Energy Nectar x12 Gilded Scale x2 Crown of Insight x1 |
| Level 11 | Unlocked via Constellation |
| Level 12 | Unlocked via Constellation |
| Level 13 | Unlocked via Constellation |
Sayu 's Recommended Talent Priority
| Talent | Level Up Priority |
|---|---|
| Shuumatsuban Ninja Blade | ★★・・・ |
| Yoohoo Art: Fuuin Dash (Elemental Skill) | ★★★★・ |
| Yoohoo Art: Mujina Flurry (Elemental Burst) | ★★★★★ |
Sayu Skill Guide & How To Use Sayu
Recommended Rotation for Sayu
| Recommended Rotation | |
|---|---|
| 1 | Inflict an Element to an enemy using other characters. |
| 2 | Use Sayu's Elemental Skill to swirl the element for buff. Continue rolling to deal damage and break shields. |
| 3 | Switch to a different character and deal damage. |
| 4 | Use Elemental Burst when healing is needed. |
Uses Of Sayu's Elemental Skill
Elemental Skill Is Great At Offense & Traveling
Elemental Skill is a rolling skill that last for a long time that makes Sayu semi-invisible because of its speed and mobility. This is great for breaking shield and debuffing enemies with Viridescent Venerer. It is also great for traveling when exploring the overworld.
Uses Of Sayu's Elemental Burst
Burst Heals & Deals Damage

Sayu's Elemental Burst is a great utility skill that heals the players and deals Anemo damage to enemies. However, the burst cost is at 80 making Energy Recharge weapon such as Favonius Greatsword useful for the skill's consistency.
Should You Pull for Sayu's Constellation Or Best Weapon?
Constellations are Good But Not Necessary
| Constellation Priority |
|---|
| C1 > C6 > C3 > C2 or C4-C5 |
C1 is a Good Stopping Point
Sayu's kit is relatively complete at C0 and does not need further constellations to do what she was designed to do as an Anemo Healer. Her constellations adds nice extras to her abilities, but not to the point that it would drastically upgrade Sayu's performance in her niche.
For healing purposes, C1 can be a small but welcome increase to her healing output and is a good stopping point. Anything beyond C1 is okay to have, but come with some form of caveat. C4 provide some energy, but will only apply if she's on-field. C6 lets her Burst healing and damage scale off of Elemental Mastery instead, which can let her contribute some Swirl damage if it happens, but it typically isn't enough to warrant pulling for Sayu's C6 directly. Unless you plan to use her as an on-field Swirl trigger, and if you plan to use her as a team's sustain option, C1 will be enough to yield decent results.
Sayu's Constellations & Effects
| Rating | Constellation Effect |
|---|---|
| ★★★★★ | C1: Multi-Task No Jutsu The Muji-Muji Durama created by Yoohoo Art: Mujina Flurry will ignore HP limits and can simultaneously attack nearby opponents and heal characters. |
| ★・・・・ | C2: Egress Prep Yoohoo Art: Fuuin Dash gains the following effects: - DMG of Fuufuu Whirlwind Kick in Press Mode increased by 3.3% - Every 0.5s in the Fuufuu Windwheel state will increase the DMG of this Fuufuu Whirlwind Kick by 3.3%. The maximum DMG increase possible through this method is 66%. |
| ★★・・・ | C3: Eh, The Bunshin Can Handle It Increases the Level of Yoohoo Art: Mujina Flurry by 3. Maximum upgrade level is 15. |
| ★★・・・ | C4: Skiving: New And Improved Sayu recovers 1.2 Energy when she triggers a Swirl reaction. This effect occurs once every 2s. |
| ★・・・・ | C5: Speed Comes First Increases the Level of Yoohoo Art: Fuuin Dash by 3. Maximum upgrade level is 15. |
| ★★★★・ | C6: Sleep O'Clock The Muji-Muji Daruma created by Sayu's Yoohoo Art: Mujina Flurry will now also benefit from her Elemental Mastery. Each point of Sayu's Elemental Mastery will produce the following effects: - Increases the damage dealt by the Muji-Muji Daruma's attacks by 0.2% ATK. A maximum DMG increase of 400% ATK can be gained via this method - Increase the HP restored by the Muji-Muji Daruma by 3. A maximum of 6,000 additional HP can be restored in this manner |
Sayu's Constellation Name is Nyctereutes Minor
| Nyctereutes Minor |
|---|
 |
Sayu Skills & Talents Details
Normal Attack: Shuumatsuban Ninja Blade
Normal Attack
| Effect |
|---|
| Performs up to 4 consecutive strikes. |
| Lv1 | Lv2 | Lv3 | Lv4 | Lv5 | Lv6 | Lv7 | Lv8 | Lv9 | Lv10 | Lv11 | |
|---|---|---|---|---|---|---|---|---|---|---|---|
| 1-Hit DMG | 72.4% | 78.2% | 84% | 92.4% | 98.3% | 105% | 114.2% | 123.5% | 132.7% | 142.8% | 154.4% |
| 2-Hit DMG | 71.4% | 77.2% | 83% | 91.3% | 97.1% | 103.8% | 112.9% | 122% | 131.1% | 141.1% | 152.5% |
| 3-Hit DMG | 3.4%+43.4% | 47.0%+47.0% | 50.5%+50.5% | 55.6%+55.6% | 59.1%+59.1% | 63.1%+63.1% | 68.9%+68.9% | 74.2%+74.2% | 79.8%+79.8% | 85.9%+85.9% | 92.8%+92.8% |
| 4-Hit DMG | 98.3% | 106.1% | 114.1% | 125.5% | 133.5% | 142.6% | 155.2% | 167.7% | 180.3% | 194% | 209.7% |
▲Use side-scroll to see percentage per level.
Charged Attack
| Effect |
|---|
| Drains Stamina over time to perform continuous spinning attacks against all nearby opponents. At the end of the sequence, performs a more powerful slash. |
| Lv1 | Lv2 | Lv3 | Lv4 | Lv5 | Lv6 | Lv7 | Lv8 | Lv9 | Lv10 | Lv11 | |
|---|---|---|---|---|---|---|---|---|---|---|---|
| Charged Attack Cyclic DMG | 62.6% | 67.6% | 72.7% | 80% | 85.1% | 90.9% | 98.9% | 106.9% | 114.9% | 123.6% | 133.6% |
| Charged Attack Final | 113% | 122% | 132% | 145% | 154% | 164% | 179% | 193% | 208% | 224% | 242% |
| Charged Attack Stamina Cost | 5s | 5s | 5s | 5s | 5s | 5s | 5s | 5s | 5s | 5s | 5s |
| Max Duration | 40 | 40 | 40 | 40 | 40 | 40 | 40 | 40 | 40 | 40 | 40 |
▲Use side-scroll to see percentage per level.
Plunging Attack
| Effect |
|---|
| Plunges from mid-air to strike the ground below, damaging opponents along the path and dealing AoE DMG upon impact. |
| Lv1 | Lv2 | Lv3 | Lv4 | Lv5 | Lv6 | Lv7 | Lv8 | Lv9 | Lv10 | Lv11 | |
|---|---|---|---|---|---|---|---|---|---|---|---|
| Plunge DMG | 63.9% | 69.1% | 74.3% | 81.8% | 87% | 92.9% | 101.1% | 109.3% | 117.5% | 126.4% | 135.3% |
| Low Plunge DMG | 128% | 138% | 149% | 164% | 174% | 186% | 202% | 219% | 235% | 253% | 271% |
| High Plunge DMG | 160% | 173% | 186% | 204% | 217% | 232% | 253% | 273% | 293% | 316% | 338% |
▲Use side-scroll to see percentage per level.
Yoohoo Art: Fuuin Dash (Elemental Skill)
| Effect |
|---|
| The special technique of the Yoohoo Ninja Arts! Sayu curls up into a rolling Fuufuu Windwheel and smashes into opponents at high speed, dealing Anemo DMG. When the duration ends, she unleashes a Fuufuu Whirlwind Kick, dealing AoE Anemo DMG. |
Tap
| Effect |
|---|
| Enters the Fuufuu Windwheel state, rolling forward a short distance before using the Fuufuu Whirlwind Kick. |
Hold
| Effect |
|---|
| Rolls about continuously in the Fuufuu Windwheel state, increasing Sayu's resistance to interruption while within that state. During this time, Sayu can control the direction of her roll, and can use the skill again to end her Windwheel state early and unleash a stronger version of the Fuufuu Whirlwind Kick. The Hold version of this skill can trigger Elemental Absorption. This skill has a maximum duration of 10s and enters CD once its effects end. The longer Sayu remains in her Windwheel state, the longer the CD. |
Elemental Absorption
| Effect |
|---|
| If Sayu comes into contact with Hydro/Pyro/Cryo/Electro while in her Windwheel state, she will deal additional elemental DMG of that type. Elemental Absorption may only occur once per use of this skill. |
| Lv1 | Lv2 | Lv3 | Lv4 | Lv5 | Lv6 | Lv7 | Lv8 | Lv9 | Lv10 | Lv11 | Lv12 | Lv13 | |
|---|---|---|---|---|---|---|---|---|---|---|---|---|---|
| Fuufuu Windwheel DMG | 36% | 38.7% | 41.4% | 45% | 47.7% | 50.4% | 54% | 57.6% | 61.2% | 64.8% | 68.4% | 72% | 76.5% |
| Fuufuu Whirlwind Kick Press DMG | 158.4% | 170.3% | 182.2% | 198% | 209.9% | 221.8% | 237.6% | 253.4% | 269.3% | 285.1% | 301% | 316.8% | 336.6% |
| Fuufuu Whirlwind Kick Hold DMG | 217.6% | 233.9% | 250.2% | 272% | 288.3% | 304.6% | 326.4% | 348.2% | 369.9% | 391.7% | 413.4% | 435.2% | 462.4% |
| Fuufuu Windwheel Elemental DMG | 16.8% | 18.1% | 19.3% | 21% | 22.3% | 23.5% | 25.2% | 26.9% | 28.6% | 30.2% | 31.9% | 33.6% | 35.7% |
| Fuufuu Whirlwind Kick Elemental DMG | 76.2% | 81.9% | 87.6% | 95.2% | 100.9% | 106.6% | 114.2% | 121.9% | 129.5% | 137.1% | 144.7% | 152.3% | 161.8% |
| Duration | 10s | 10s | 10s | 10s | 10s | 10s | 10s | 10s | 10s | 10s | 10s | 10s | 10s |
| CD | 6-10s | 6-10s | 6-10s | 6-10s | 6-10s | 6-10s | 6-10s | 6-10s | 6-10s | 6-10s | 6-10s | 6-10s | 6-10s |
▲Use side-scroll to see percentage per level.
Yoohoo Art: Mujina Flurry
| Effect |
|---|
| The other super special technique of the Yoohoo Ninja Arts! It summons a pair of helping hands for Sayu. Deals Anemo DMG to nearby opponents and heals all nearby party members. The amount of HP restored is based on Sayu's ATK. This skill then summons a Muji-Muji Daruma. |
| Lv1 | Lv2 | Lv3 | Lv4 | Lv5 | Lv6 | Lv7 | Lv8 | Lv9 | Lv10 | Lv11 | Lv12 | Lv13 | |
|---|---|---|---|---|---|---|---|---|---|---|---|---|---|
| Skill Activation DMG | 117% | 126% | 134% | 146% | 155% | 164% | 175% | 187% | 199% | 210% | 222% | 234% | 248% |
| Skill Activation Healing | 92.7%+577 | 99.1%+635 | 106.0%+698 | 115.2%+765 | 122.1%+837 | 129.0%+914 | 138.0%+996 | 147.5%+1083 | 156.7%+1174 | 165.9%+1270 | 175.1%+1371 | 184.0%+1477 | 195.8%+1588 |
| CD | 20s | 20s | 20s | 20s | 20s | 20s | 20s | 20s | 20s | 20s | 20s | 20s | 20s |
| Energy Cost | 80 | 80 | 80 | 80 | 80 | 80 | 80 | 80 | 80 | 80 | 80 | 80 | 80 |
▲Use side-scroll to see percentage per level.
Muji-Muji Daruma
| Effect |
|---|
| At specific intervals, the Daruma will take one of several actions based on the situation around it: ・If the HP of nearby characters is above 70%, it will attack a nearby opponent, dealing Anemo DMG. ・If there are active characters with 70% or less HP nearby, it will heal the active character with the lowest percentage HP left. If there are no opponents nearby, it will heal active characters nearby even if they have 70% HP or more. |
| Lv1 | Lv2 | Lv3 | Lv4 | Lv5 | Lv6 | Lv7 | Lv8 | Lv9 | Lv10 | Lv11 | Lv12 | Lv13 | |
|---|---|---|---|---|---|---|---|---|---|---|---|---|---|
| Muji-Muji Daruma DMG | 52% | 56% | 60% | 65% | 69% | 73% | 78% | 83% | 88% | 94% | 99% | 104% | 111% |
| Muji-Muji Daruma Healing | 79.9%+500 | 85.9%+550 | 91.9%+606 | 99.8%+663 | 105.8%+726 | 111.8%+792 | 119.8%+863 | 127.8%+938 | 135.8%+1017 | 143.8%+1101 | 151.8%+1188 | 159.7%+1280 | 169.7%+1376 |
| Duration | 12s | 12s | 12s | 12s | 12s | 12s | 12s | 12s | 12s | 12s | 12s | 12s | 12s |
▲Use side-scroll to see percentage per level.
Someone More Capable
| Effect |
|---|
| When Sayu triggers a Swirl reaction while active, she heals all your characters and nearby allies for 300 HP. She will also heal an additional 1.2 HP for every point of Elemental Mastery she has. This effect can be triggered once every 2s. |
No Work Today!
| Effect |
|---|
| The Muji-Muji Daruma created by Yoohoo Art: Mujina Flurry gains the following effects: ・When healing a character, it will also heal characters near that healed character for 20% the amount of HP. ・Increases the AoE of its attack against opponents. |
Yoohoo Art: Silencer's Secret
| Effect |
|---|
| When Sayu is in the party, your characters will not startle Crystalflies and certain other animals when getting near them. Check the "Other" sub-category of the "Living Beings / Wildlife" section in the Archive for creatures this skill works on. |
Who Is Sayu?
A Ninja From The Yashiro Commission
A part of the Yashiro Commission's Shuumatsuban, Sayu works as a ninja even at such a young age. She's particularly skilled in hiding and covering her tracks, making her quite hard to find for ordinary people.
Shirks Responsibilities To Sleep

Sayu is quite well known for two things: her unique ninjutsu and her penchant for running away from work to sleep. Being so small, Sayu believes that by sleeping she may grow taller!
Sayu Voice Actor & Their Notable Roles
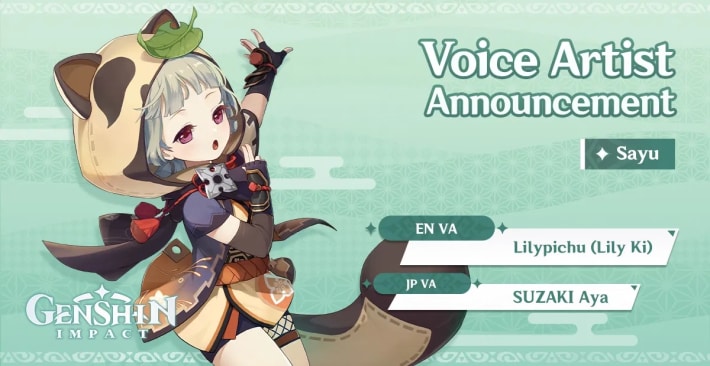
English Voice Actor: Lilypichu (Lily Ki)
| Notable Roles | |
|---|---|
| Paladins: Champions of the Realm | Salt Io |
| Pokemon Masters | Iono |
| Cookie Run: Kingdom | Onion Cookie |
Japanese Voice Actor: MORITA Masakazu
| Notable Roles | |
|---|---|
| Kill la Kill | Mako Mankanshoku |
| Tamako Market | Tamako Kitashirakawa |
| Assassination Classroom | Kaede Kayano |
Characters With Same Role As Sayu
Best Characters With Same Role
| Survivability (Shielder / Healer) | |||
|---|---|---|---|
| Baizhu SS | Zhongli SS | Chevreuse S | Ineffa S |
S | Lan Yan S | Sangonomiya Kokomi S | Sigewinne S |
| Xianyun S | Yaoyao S | Barbara A | Bennett A |
| Charlotte A | Citlali A | Diona A | Escoffier A |
| Off-Field | |||
| Baizhu SS | Bennett SS | Citlali SS | Furina SS |
| Ineffa SS | Kaedehara Kazuha SS | Nahida SS | Xiangling SS |
| Xilonen SS | Xingqiu SS | Yelan SS | Chevreuse S |
| Chiori S | Emilie S | Escoffier S | Iansan S |
Character Related Articles
Character Tier Lists
All Characters
| Characters By Rarity | |||||||||||
|---|---|---|---|---|---|---|---|---|---|---|---|
| Characters By Roles | |||||||||||
| DPS List | Support List | Sustain List | |||||||||
| On-Field List | Off-Field List | ||||||||||
| Characters By Element | |||||||||||
| Hydro | Anemo | Electro | |||||||||
| Dendro | |||||||||||
| Characters By Nation | |||||||||||
| Mondstadt | Liyue | ||||||||||
| Fontaine | Natlan | ||||||||||
| Snezhnaya | Nod-Krai | ||||||||||

