
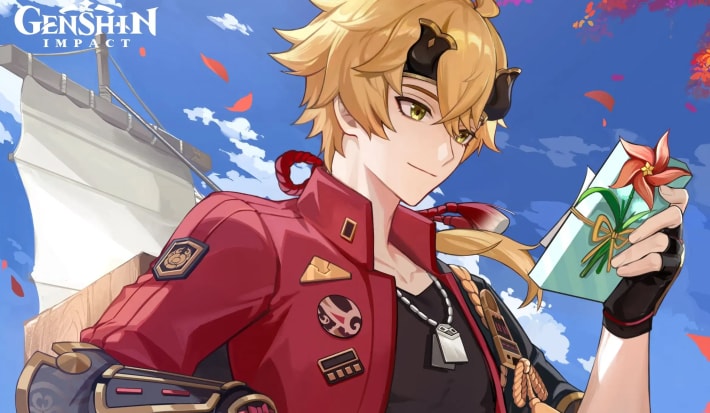
Comprehensive Thoma guide for Genshin Impact. Learn Thoma's best build, team, artifacts, kit, and materials for this 4-Star Pyro Support Polearm user.
| Thoma Related Articles | |||||
|---|---|---|---|---|---|
 Best Build Best Build | Best Team | ||||
| Specialty | Story Quest | ||||
Table of Contents
Thoma Character Overview, Base Stats, and Tier
Character Profile
 | Rarity | | |
|---|---|---|---|
| Element | |||
| Weapon | Polearm | ||
| Ascend Stat | ATK 24.0% | ||
| Region | Inazuma | ||
| Birthday | January 9 | ||
| Roles | | ||
| How To Get | Available in all Banners at a low drop rate | ||
Base Stats
| Base HP | Base ATK | Base DEF | |
|---|---|---|---|
| Lvl. 90 | 10,331 | 202 | 751 |
| Lvl. 80 (Ascended) | 9,616 | 188 | 699 |
Thoma is a 4-star Pyro character that wields a Polearm in Genshin Impact. He excels as a support character, providing strong shields for the team through his Elemental Skill and Elemental Burst, the latter of which also deals coordinated Pyro attacks with the active character's Normal Attacks. Lore-wise, Thoma is the affable and reliable housekeeper for the Kamisato Clan of Inazuma and a well-known "fixer" in the nation.
Thoma's Tier & Rating
| Overall Tier | ||||||||||||||
|---|---|---|---|---|---|---|---|---|---|---|---|---|---|---|
| B | ||||||||||||||
| On-Field | Off-Field | DPS | Support | Sustain | ||||||||||
| - | A | - | - | B | ||||||||||
What Kind of Character is Thoma?
Thoma is as an
Thoma at a glance has many use-cases and can be flexed into many teams. However there are very few teams where he is the absolute best in the slot as a shielder. He is currently the best Burgeon trigger or DPS, but that playstyle usually makes his Blazing Barrier weaker. His place in the meta also isn't very notable.
Rate Thoma!
Roles & Playstyle of Thoma and His Strengths and Weakness
Off-Field Support Thoma
Thoma is primarily a shielder who provides a Pyro shield coupled with decent Pyro application. He wants to be paired with an On-Field DPS that uses Normal Attacks to consistently refresh his shield. He can also be played as the Pyro trigger in a Burgeon team with Elemental Mastery-focused Artifacts.
Pros and Cons of Off-Field Support Thoma
| Pros |
|---|
| - Easy to play. |
| - Shield can be very durable with Normal Attack-based characters. |
| - One of the few characters that can be good for Burning and Burgeon teams due to his Fiery Collapse (pyro waves). |
| Cons |
| - Low self-damage. |
| - Needs lots of Energy Recharge% or C4. |
| - Fiery Collapse has limited range. |
| - When built for Burgeon, shield durability is compromised. |
Best Build for Thoma
Thoma wants to be played Off-Field most of the time, with his weapon options focused on Energy to ensure his Burst is always available. See below for the recommendations.
Thoma's Build Depends on Purpose
| Weapon | Favonius Lance |
|---|---|
| Best Artifact | Noblesse Oblige x 4 |
| Artifact Main Stats | Sands: Energy Recharge% or HP% Goblet: HP% Circlet: HP% or CRIT Rate with Favonius Lance |
| Priority Sub-Stat | ER% > CRIT Rate (with Favonius Lance) > HP% > Flat HP/EM |
| Recommended Team | |
Stat Goals For Off-Field Shielder Thoma
| HP | 30,000+ HP |
|---|---|
| Crit Rate | 50%~ with Favonius Lance |
| Energy Recharge | 210%~ without C4 170%~ with C4 |
Thoma's Energy needs are very often going to be on the higher end due to the Energy Cost. Because this is most important ability, supplying him with enough Energy Recharge% is recommended. You always want to have Thoma's Elemental Burst to be ready every rotation, since his shield might be the only sustain option or source of Pyro application. Having his C4 drastically lowers his Energy requirements. Including Hp% or Flat HP in his Artifacts should also help strengthen the durability of the shield.
| Weapon | Kitain Cross Spear |
|---|---|
| Best Artifact | Deepwood Memories x 4 |
| Artifact Main Stats | Sands: Energy Recharge% / Elemental Mastery Goblet: Elemental Mastery Circlet:Elemental Mastery |
| Priority Sub-Stat | Energy Recharge% > HP% > Elemental Mastery |
| Recommended Team | |
Stat Goals For Off-Field Burgeon Trigger Thoma
| Elemental Mastery | 800~ |
|---|---|
| Energy Recharge | 210%~ without C4 170%~ with C4 |
Thoma's best Burgeon team at this point in the game includes Kinich, who can effectively trigger his Fiery Collapse in his grappled mode. Thoma is equipped with Deepwood Memories in this team to shred Dendro RES for Kinich. If you're running a different Burgeon team, you can opt to give Thoma Flower of Paradise Lost or Gilded Dreams instead to maximize the Burgeon damage. You can also consider getting HP% main-stat Artifacts instead if Thoma in a Burgeon team is the only sustain.
Thoma 's Recommended Talent Priority
| Talent | Level Up Priority |
|---|---|
| Normal Attack: Swiftshatter Spear | ★★・・・ |
| Blazing Blessing (Elemental Skill) | ★★★★・ |
| Crimson Ooyoroi (Elemental Burst) | ★★★★★ |
Related Links:
Best Weapon for Thoma
Thoma primarily wants to have weapons that can provide him Energy to charge his Elemental Burst. The best weapon will depend on how you plan to use him.
Premium Weapons for Off-Field Shielder Thoma
| Weapon | How to Get Rating | |
|---|---|---|
| Best | Favonius Lance | Get from Banners - Energy Recharge% helps Thoma get his Elemental Burst up quicker and more consistently. - Passive provides Energy for everyone on his team including himself. - Thoma will need some CRIT Rate to activate the passive often. |
| 2nd | Skyward Spine | Get from Battle Pass - Energy Recharge% stat can make it easier for Thoma to have his Elemental Burst available for use every rotation. - No further team utility, which lowers its rank against Favonius Lance, but it's something you can use if you don't have any other choice. |
Like most characters who are dependent on their Elemetal Bursts, the Energy given by the Favonius Lance's passive allows Thoma to meet his high Energy requirements, while his other teammates also benefit from the Energy Particles. So long as you have enough CRIT Rate to ensure the passive can be triggered constantly, Thoma can be a reliable Shielder that can generate Energy for his party. Other Energy weapon options such as the Skyward Spine is viable, but the polearms that lean more towards damage might be better on actual DPS characters, unlike Thoma.
Free To Play Friendly (F2P Weapons) for Off-Field Shielder Thoma
| Weapon | How to Get Rating | |
|---|---|---|
| Best F2P | Kitain Cross Spear | Inazuma Forgeable (Craftable) Weapon - Provides Energy that'll let Thoma charge his Burst more consistently. - Best at R5 - Elemental Mastery on shielder Thoma isn't the best, but the Energy gain is still useful. |
| 2nd F2P | Black Tassel | Get From Banners or After Finishing an NPC's Dialogue - One of the few Polearms with HP% as the secondary stat, which strengthens Thoma's shield. - Passive isn't anything noteworthy. - No form of Energy gain. |
| 3rd F2P | Rightful Reward | Fontaine Forgeable (Craftable) Weapon - Has an HP% secondary stat. - Gives Energy whenever Thoma receives healing. - Thoma as a shielder is usually the main sustain and isn't typically going to be paired with healers, making it less than ideal. - Best at R5. |
For Free-to-Play options, Thoma will appreciate the Energy he receives from the Kitain Cross Spear. Though he doesn't have use for the Elemental Mastery secondary stat for general shielding, it's still an option since it lets him meet his Energy requirements. The next options are viable due to the HP% that can make his Blazing Barrier more durable, but you'd need to have a lot of Energy Recharge% on his Artifacts.
Premium Weapons for Off-Field Burgeon DPS Thoma
| Weapon | How to Get Rating | |
|---|---|---|
| Best | Dragon's Bane | Get from Banners - Gives Thoma Elemental Mastery. The more EM he has, the better the damage of the Burgeon Explosions. - No means of gaining Energy. Thoma still needs his Elemental Burst as a Burgeon support, so you may need a lot of Energy Recharge% with this weapon. |
| 2nd | Favonius Lance | Get from Banners - Gives a lot of Energy Recharge%. - Allows Thoma to reliably use his Burst, which he uses often in a Burgeon team for Pyro application. - No Elemental Mastery provided, which may lower the damage of the Burgeon explosions. - Thoma needs some CRIT Rate to trigger the passive. |
Thoma in a Burgeon comp is the main source of Pyro application, thus the trigger of the reaction. Because this is the case, he wants to still be able to use his Elemental Burst consistently every rotation for the Pyro. Dragon's Bane is a decent option, but has no Energy gain in its passive. Conversely, Favonius Lance is the go-to for Energy needs, but doesn't give Elemental Mastery, which increases Burgeon damage.
Free To Play Friendly (F2P Weapons) for Off-Field Burgeon DPS Thoma
| Weapon | How to Get Rating | |
|---|---|---|
| Best F2P | Kitain Cross Spear | Inazuma Forgeable (Craftable) Weapon - Has an Elemental Mastery stat that Thoma wants in a Burgeon comp. - Has an Energy gain passive that helps Thoma meet his Energy requirements. - Best at R5 |
For Free-to-Play options, the Kitain Cross Spear is the best option by a good margin. There aren't a lot of polearms that provide Elemental Mastery, and this weapon can also provide Energy on top of it, making it the best weapon overall for Thoma as a Burgeon support. Since its a craftable weapon, its very accessible for Free-to-Play Travelers, but you would need to first unlock Inazuma and then complete the Orobashi's Legacy Quest.
Thoma Best Artifacts
Thoma's Artifact choices will depend on how you want to use him and who the On-Field DPS will be. See the recommendations below:
| Artifact | Recommendation Details |
|---|---|
| Noblesse Oblige | ★★★★★ - Lets Thoma provide more utility through an ATK% buff after he uses his Elemental Burst. - Best generalist set that works with On-Field DPSes that want Attack, like Arlecchino. |
| Deepwood Memories | ★★★・・ - Allows Thoma to shred Dendro RES. - The ideal choice if you play Thoma with Kinich. |
| Instructor | ★★★・・ - Provides Elemental Mastery when Thoma triggers a reaction. - Good for On-Field DPSes that can appreciate the extra Elemental Mastery like Wriothesley in a Melt comp. |
| Artifact | Recommendation Details |
|---|---|
| Flower of Paradise Lost | ★★★★★ - Best choice for maximizing the damage of the Burgeon explosions while also providing Elemental Mastery. |
| Gilded Dreams | ★★★★・ - Decent alternative to the Paradise Lost set since it still gives Elemental Mastery. |
| 2-pc. Elemental Mastery2-pc. Elemental Mastery | ★★・・・ - This set is a combo of 2 piece Elemental Mastery, which is good if you want Thoma still have decent Elemental Mastery for Burgeon damage. - Can be a temporary set while you farm for a better 4-piece set. |
Recommended Artifact Stats
| Main: Flat HP Sub: Energy Recharge% / HP% / CRIT Rate (with Favonius Lance) / Elemental Mastery (in Burgeon team) |
|---|---|
| Main: Flat ATK Sub:Energy Recharge% / HP% / CRIT Rate (with Favonius Lance) / Elemental Mastery (in Burgeon team) |
| Main: Energy Recharge% or HP% Sub: Energy Recharge% / HP% / CRIT Rate (with Favonius Lance) / Elemental Mastery (in Burgeon team) |
| Main:HP% Sub: Energy Recharge% / Flat HP / CRIT Rate (with Favonius Lance) / Elemental Mastery (in Burgeon team) |
| Main: HP% or CRIT Rate (for Favonius Lance) Sub: Energy Recharge% / HP% / CRIT Rate (with Favonius Lance) / Elemental Mastery (in Burgeon team) |
For Sub-Stats, Energy Recharge% Is the Most Important
Thoma wants Energy Recharge% for either of his playstyles, since they both want him to consistently use his Elemental Burst. HP% and Flat HP sub-stats are best for shielder Thoma because it bulks up his Blazing Barrier damage absorption. Elemental Mastery is more ideal for Burgeon Thoma due to Burgeons scaling off of this stat.
Related Articles
Best Team Comp Thoma
Premium Team For Thoma
| Main DPS | Sub-DPS | Sub-DPS / Enabler | Enabler |
|---|---|---|---|
| Ayato | Nahida | Kazuha | Thoma |
| Details | |||
| - A burgeon team comp for Thoma - Nahida and Ayato will provide continuous Dendro Cores - Thoma's slow Pyro application will insure you deal Burgeon instead of burning - Kazuha will be able to increase the team's damage and deal shred to enemies | |||
Other Characters That Work With Thoma
| Character | Sub | Details |
|---|---|---|
| Ayato | ChildeAyaka | - Since Thoma's Pyro on-field attack sync with the active character normal attack, it's best paired with main DPS characters that utilize Normal Attacks - Not good with Pyro characters since Thoma might end up stealing reactions from them instead |
| Nahida | Dendro TravelerXingqiuChongyun | - Thoma can work with most characters who have on-field abilities - This doesn't apply only to Burgeon, but you do have the risk that Thoma might steal reactions. This is not ideal since Thoma has a lower damage multiplier |
| Kazuha | SucroseVenti | - Since you want Thoma for reactions, he works really well with Anemo characters who also run EM or those that deal Elemental shred |
Free To Play Friendly Party
| Main DPS | Sub-DPS | Sub-DPS | Support |
|---|---|---|---|
| Xiangling | Chongyun | Xiangling | Thoma |
| Details | |||
| - A relatively free-to-play team comp for Thoma - This team comp will work to continuously deal Elemental Reactions | |||
Notes About Team Comps For Thoma
Thoma has a very limited pool of characters he can work with due to his kit working best with those that deal Normal & Charged Attacks. There's also the concern that due to his Pyro application being relatively slow, he might end up stealing reactions, lowering the team's DPS.
Team Rotation of Thoma and Combos
Basic Team Rotation for Off-Field Thoma
| Basic Rotation For Off-Field Thoma |
|---|
| 1. Start with supports with longer ability durations. 2. Swap to Thoma then use Elemental Skill. 3. Use Elemental Burst 4. Swap to other supports with shorter ability durations than Thoma if there are any. 5. Swap to your On-Field DPS to do their full damage combo. 6. Return to step 1. |
Thoma usually wants to be deployed at the start of the rotation, before the On-Field DPS and other supports due to his longer durations and cooldowns Note that if your On-Field DPS wants to activate their skill at the start, like Arlecchino or Mavuika, then it's fine to use Thoma after instead of the start.
This rotation should also still apply for both normal shielder Thoma and Burgeon Thoma teams.
Basics Of Using Thoma
Thoma is designed to be an Off-Field Pyro support with a Blazing Barrier or pyro shield that can continuously release waves of Pyro damage. Thoma wants to deploy the shield from his Elemental Skill first, then use his Elemental Burst to allow the active character's Normal Attacks to refresh the duration of the Blazing Barrier, which allows the shield to be stronger.
Elemental Burst is Required For Better Shields
Thoma's Blazing Barrier can be created with both his Elemental Skill and Elemental Burst. But it's his Burst that enables it to be durable. This is because the active character refreshes the shield's duration and stacks the remaining damage absorption of an existing Blazing barrier on to a new one.
By default, Thoma wants to have a lot of Energy Recharge since his Elemental Burst has high Energy cost, so equipping him with enough Energy Recharge% on his Artifacts or weapon should be prioritized.
Shield Scales with HP, Damage Scales with Attack
The Blazing Barrier bases its total DMG absorption based on Thoma's Max HP. Conversely, the Fiery Collapse (Pyro waves) only take into account Thoma's Attack. Because of the split in scaling, it can become difficult to build for both shield durability and DPS. It's typically better to focus on his utility as a shielder and support by equipping Artifacts with HP% and Energy Recharge% over offensive stats like CRIT Rate (unless you're using Favonius Lance).
Thoma's personal damage can be underwhelming, so maximizing his shielding abilities will result in better results.
Can Be Played in Burgeon Teams
Thoma's kit has features that make him one of the better Pyro characters to for a (Dendro, Hydro and Pyro) team. The Blazing Barrier can help with the self-damage inflicted by the Burgeon explosions, and his Fiery Collapse, that triggers with Normal Attacks, is an ideal source of Pyro to explode the Dendro Cores.
Thoma in Burgeon comps will build Elemental Mastery instead, since he's the main trigger of the Burgeon reaction in these teams. His shield's durability will naturally be compromised, so having a Hydro or Dendro healer is likely preferred in this case.
Elemental Skill, Burst and Abilities Guide for Thoma
How To Use Thoma Skills & Passives
Pyro Shielder That Can Apply Off-Field Pyro
| Basic Rotation Of Thoma |
|---|
| 1. Start with Thoma then use Elemental Skill then Elemental Burst. 2. Swap to other supports to deploy their abilities. 3. Swap your main On-Field character to do their usual combos. You can also occasionally switch back to Thoma to use his Skill again if you're able to. 6 .Repeat from number 1. |
Thoma's shield is fairly strong with the right setup, and has Pyro application that can be useful in specific teams. If you have Thoma on the Kitain Cross Spear, then starting with his Elemental Burst into his Skill allows you to trigger the Energy passive easily. You want to use your other supports' abilities first if Thoma has Kitain.
Elemental Skill Provides the Initial Shield
Thoma usually prefers to start his combo with his Elemental Skill to trigger the initial Blazing Barrier.This will let him catch the Energy Particles generated by his Skill. The shield made by his Elemental Skill is noticeably less durable without the Elemental Burst refreshing it, however, so its important to have his Elemental Burst ready.
Elemental Burst Refreshes the Shield and Adds Pyro Application
Thoma's full Elemental Skill into Burst combo is a key part of his team's rotation. The Burst creates a new Blazing Barrier each time the On-Field character triggers Fiery Collapse, which are the Pyro waves that follow your On-Field character's Normal Attacks. Any leftover damage absorption from an existing Blazing Barrier stacks with the new one. The Blazing Barrier's duration is also refreshed. This results in a stronger shield as long as the On-Field DPS keeps using Normal Attacks.
Thoma in Burgeon Teams Wants Elemental Mastery Over HP%
While it's range is limited, the Pyro application from Fiery Collapses are enough to trigger Burgeon reactions, which makes Thoma the ideal Pyro character for Burgeon teams. He wants to be built with Elemental Mastery instead of HP% in these teams, which is good for increasing the damage dealt by the Burgeon explosions, but makes his shield less durable. It's better to rely on a healer for survivability if you play Thoma this way.
Should You Pull for Thoma's Constellation Or Best Weapon?
Aim for C4 if You're Able To
| Constellation Priority |
|---|
| C4 > C6 > C2 |
C4 Is Ideal for Thoma's Best Use-Cases
Thoma is very reliant on his Burst to sustain his "Blazing Barrier" and for Pyro application, and C4 refunds a decent amount of Energy that results in less Energy Recharge requirements for consistent Burst uptime. This constellation lets you invest into other stats (such as HP for better shields) instead of Energy Recharge, and it should yield good results in the teams that would benefit from having Thoma's Burst always up. Anything beyond C4 is a good bonus to have, with the buff from C6 being good for Normal, Charged and Plunge on-fielders respectively.
Note that constellation levels will not be strictly required if you are content with how he functions at C0. If you want to improve Thoma's performance in his given role, however, then going to C4 is highly recommended.
Thoma's Constellations & Effects
| Rating | Constellation Effect |
|---|---|
| ★・・・・ | C1: A Comrade's Duty When a character protected by Thoma's own Blazing Barrier (Thoma excluded) is attacked, Thoma's own Blazing Blessing CD is decreased by 3s, while his own Crimson Ooyoroi's CD is decreased by 3s. This effect can be triggered once every 20s. |
| ★★★・・ | C2: A Subordinate's Skills Crimson Ooyoroi's duration is increased by 3s. |
| ★★★・・ | C3: Fortified Resolve Increases the Level of Blazing Blessing by 3. Maximum upgrade level is 15. |
| ★★★★★ | C4: Long-Term Planning After using Crimson Ooyoroi, 15 Energy will be restored to Thoma. |
| ★★★・・ | C5: Raging Wildfire Increases the Level of Crimson Ooyoroi by 3. Maximum upgrade level is 15. |
| ★★★★・ | C6: Burning Heart When Blazing Barrier is obtained or refreshed, the DMG dealt by all party members' Normal, Charged, and Plunging Attacks is increased by 15% for 6s. |
Thoma's Constellation Name is Rubeum Scutum
| Rubeum Scutum |
|---|
 |
Ascension Materials for Thoma Talents & Level
Materials Needed for Level Ascension
| Materials Needed To Get To Lvl. 80 |
|---|
| Agnidus Agate Sliver x 1Agnidus Agate Fragment x 9Agnidus Agate Chunk x 9Treasure Hoarder Insignia x 18Silver Raven Insignia x 30Golden Raven Insignia x 12Fluorescent Fungus x 108Smoldering Pearl x 26 |
| Materials Needed To Get To Lvl. 90 |
| Agnidus Agate Sliver x 1 Agnidus Agate Fragment x 9Agnidus Agate Chunk x 9Agnidus Agate Gemstone x 6Treasure Hoarder Insignia x 18Silver Raven Insignia x 30Golden Raven Insignia x 36Fluorescent Fungus x 168Smoldering Pearl x 46 |
Fluorescent Fungus Farming Routes
| Fluorescent Fungus Farming Locations | |
|---|---|
 |  |
| Level 1 | Default |
|---|---|
| Level 2 | Teachings Of Transience x3Treasure Hoarder Insignia x6 |
| Level 3 | Guide To Transience x2 Silver Raven Insignia x3 |
| Level 4 | Guide To Transience x4 Silver Raven Insignia x4 |
| Level 5 | Guide To Transience x6 Silver Raven Insignia x6 |
| Level 6 | Guide To Transience x9 Silver Raven Insignia x9 |
| Level 7 | Philosophies Of Transience x4 Golden Raven Insignia x4 Hellfire Butterfly x1 |
| Level 8 | Philosophies Of Transience x6 Golden Raven Insignia x6 Hellfire Butterfly x1 |
| Level 9 | Philosophies Of Transience x12 Golden Raven Insignia x9 Hellfire Butterfly x2 |
| Level 10 | Philosophies Of Transience x16 Golden Raven Insignia x12 Hellfire Butterfly x2 Crown of Insight x1 |
| Level 11 | Unlocked via Constellation |
| Level 12 | Unlocked via Constellation |
| Level 13 | Unlocked via Constellation |
Related Links
Thoma Skills & Talents Details
Normal Attack: Swiftshatter Spear
Normal Attack
| Effect |
|---|
| Performs up to 4 consecutive spear strikes. |
| Lv1 | Lv2 | Lv3 | Lv4 | Lv5 | Lv6 | Lv7 | Lv8 | Lv9 | Lv10 | Lv11 | |
|---|---|---|---|---|---|---|---|---|---|---|---|
| 1-Hit DMG | 44.4% | 48% | 51.6% | 56.8% | 60.4% | 64.5% | 70.2% | 75.9% | 81.6% | 87.8% | 94% |
| 2-Hit DMG | 43.6% | 47.2% | 50.7% | 55.8% | 59.4% | 63.4% | 69% | 74.6% | 80.2% | 86.2% | 92.3% |
| 3-Hit DMG | 26.8%×2 | 29%×2 | 31.2%×2 | 34.3%×2 | 36.5%×2 | 38.9%×2 | 42.4%×2 | 45.8%×2 | 49.2%×2 | 53%×2 | 56.7%×2 |
| 4-Hit DMG | 67.4% | 72.8% | 78.3% | 86.2% | 91.6% | 97.9% | 106.5% | 115.1% | 123.8% | 133.1% | 142.5% |
▲Use side-scroll to see percentage per level.
Charged Attack
| Effect |
|---|
| Consumes a certain amount of Stamina to lunge forward, dealing damage to opponents along the way. |
| Lv1 | Lv2 | Lv3 | Lv4 | Lv5 | Lv6 | Lv7 | Lv8 | Lv9 | Lv10 | Lv11 | |
|---|---|---|---|---|---|---|---|---|---|---|---|
| Charged Attack DMG | 113% | 122% | 131% | 144% | 153% | 164% | 178% | 193% | 207% | 222.9% | 239% |
| Charged Attack Stamina Cost | 25 | 25 | 25 | 25 | 25 | 25 | 25 | 25 | 25 | 25 | 25 |
▲Use side-scroll to see percentage per level.
Plunging Attack
| Effect |
|---|
| Plunges from mid-air to strike the ground below, damaging opponents along the path and dealing AoE DMG upon impact. |
| Lv1 | Lv2 | Lv3 | Lv4 | Lv5 | Lv6 | Lv7 | Lv8 | Lv9 | Lv10 | Lv11 | |
|---|---|---|---|---|---|---|---|---|---|---|---|
| 69.1% | 74.3% | 81.8% | 87% | 92.9% | 101.1% | 109.3% | 117.5% | 126.4% | 135.3% | ||
| 138% | 149% | 164% | 174% | 186% | 202% | 219% | 235% | 253% | 271% | ||
| 173% | 186% | 204% | 217% | 232% | 253% | 273% | 293% | 316% | 338% | ||
| Plunge DMG | 63.9% | 69.1% | 74.3% | 81.8% | 87% | 92.9% | 101.1% | 109.3% | 117.5% | 126.4% | 135.3% |
| Low Plunge DMG | 128% | 138% | 149% | 164% | 174% | 186% | 202% | 219% | 235% | 253% | 271% |
| High Plunge DMG | 160% | 173% | 186% | 204% | 217% | 232% | 253% | 273% | 293% | 316% | 338% |
▲Use side-scroll to see percentage per level.
Blazing Blessing (Elemental Skill)
| Effect |
|---|
| Thoma vaults forward with his polearm and delivers a flame-filled flying kick that deals AoE Pyro DMG, while also summoning a defensive Blazing Barrier. At the moment of casting, Thoma's Elemental Skill applies Pyro to himself. The DMG Absorption of the Blazing Barrier scales off Thoma's Max HP. The Blazing Barrier has the following traits: ・Absorbs Pyro DMG 250% more effectively. ・When a new Blazing Barrier is obtained, the remaining DMG Absorption of an existing Blazing Barrier will stack and its duration will be refreshed. |
| Lv1 | Lv2 | Lv3 | Lv4 | Lv5 | Lv6 | Lv7 | Lv8 | Lv9 | Lv10 | Lv11 | Lv12 | Lv13 | |
|---|---|---|---|---|---|---|---|---|---|---|---|---|---|
| Skill DMG | 146% | 157% | 168% | 183% | 194% | 205% | 220% | 234% | 249% | 264% | 278% | 293% | 311% |
| Shield DMG Absorption | 7.2%+693 | 7.7%+763 | 8.3%+848 | 9%+919 | 9.5%+1005 | 10.1%+1098 | 10.8%+1196 | 11.5%+1300 | 12.2%+1410 | 13.0%+1525 | 13.7%+1647 | 14.4%+1774 | 15.3%+1907 |
| Shield Duration | 8s | 8s | 8s | 8s | 8s | 8s | 8s | 8s | 8s | 8s | 8s | 8s | 8s |
| Max Shield DMG Absorption | 19.6%+1887 | 21.1%+2076 | 22.5%+2281 | 24.5%+2501 | 26.0%+2737 | 27.4%+2989 | 29.4%+3256 | 31.4%+3539 | 33.3%+3838 | 35.3%+4153 | 37.2%+4483 | 39.2%+4829 | 41.7%+5191 |
| Skill CD | 15s | 15s | 15s | 15s | 15s | 15s | 15s | 15s | 15s | 15s | 15s | 15s | 15s |
▲Use side-scroll to see percentage per level.
Crimson Ooyoroi
| Effect |
|---|
| Thoma spins his polearm, slicing at his foes with roaring flames that deal AoE Pyro DMG and weave themselves into a Scorching Ooyoroi. |
Scorching Ooyoroi
| Effect |
|---|
| While Scorching Ooyoroi is in effect, the active character's Normal Attacks will trigger Fiery Collapse, dealing AoE Pyro DMG and summoning a Blazing Barrier. Fiery Collapse can be triggered once every 1s. Except for the amount of DMG they can absorb, the Blazing Barriers created in this way are identical to those created by Thoma's Elemental Skill, Blazing Blessing: ・Absorbs Pyro DMG 250% more effectively. ・When a new Blazing Barrier is obtained, the remaining DMG Absorption of an existing Blazing Barrier will stack and its duration will be refreshed. The maximum DMG Absorption of the Blazing Barrier will not exceed a certain percentage of Thoma's Max HP. If Thoma falls, the effects of Scorching Ooyoroi will be cleared. |
| Lv1 | Lv2 | Lv3 | Lv4 | Lv5 | Lv6 | Lv7 | Lv8 | Lv9 | Lv10 | Lv11 | Lv12 | Lv13 | |
|---|---|---|---|---|---|---|---|---|---|---|---|---|---|
| Skill DMG | 88% | 95% | 101% | 110% | 117% | 123% | 132% | 141% | 150% | 158% | 167% | 176% | 187% |
| Fiery Collapse DMG | 58% | 62% | 67% | 73% | 77% | 81% | 87% | 93% | 99% | 104% | 110% | 116% | 123% |
| Shield DMG Absorption | 1.1%+110 | 1.2%+121 | 1.3%+133 | 1.4%+146 | 1.5%+160 | 1.6%+174 | 1.7%+190 | 1.8%+206 | 1.9%+224 | 2.1%+242 | 2.2%+261 | 2.3%+282 | 2.4%+303 |
| Shield Duration | 8s | 8s | 8s | 8s | 8s | 8s | 8s | 8s | 8s | 8s | 8s | 8s | 8s |
| Scorching Ooyoroi Duration | 15s | 15s | 15s | 15s | 15s | 15s | 15s | 15s | 15s | 15s | 15s | 15s | 15s |
| Skill CD | 20s | 20s | 20s | 20s | 20s | 20s | 20s | 20s | 20s | 20s | 20s | 20s | 20s |
| Energy Cost | 80 | 80 | 80 | 80 | 80 | 80 | 80 | 80 | 80 | 80 | 80 | 80 | 80 |
▲Use side-scroll to see percentage per level.
Imbricated Armor
| Effect |
|---|
| When your current active character obtains or refreshes a Blazing Barrier, this character's Shield Strength will increase by 5% for 6s. This effect can be triggered once every 0.3 seconds. Max 5 stacks. |
Flaming Assault
| Effect |
|---|
| DMG dealt by Crimson Ooyoroi's Fiery Collapse is increased by 2.2% of Thoma's Max HP. |
Snap And Swing
| Effect |
|---|
| When you fish successfully in Inazuma, Thoma's help grants a 20% chance of scoring a double catch. |
Who Is Thoma?
Housekeeper Of The Kamisato Clan
Thoma is the loyal and hardworking housekeeper of the Kamisato Clan. He manages the cleaning, cooking, sewing, gardening, caregiving, and more with an ever-present smile on his face.
Fully Dedicated To The Kamisato Siblings
Ever since he was stranded in Inazuma with no family and no way back home to Mondstadt, Thoma has fully dedicated his life in serving the Kamisato siblings. He will wholeheartedly defend them from any that would speak ill about them.
Thoma Voice Actor & Their Notable Roles
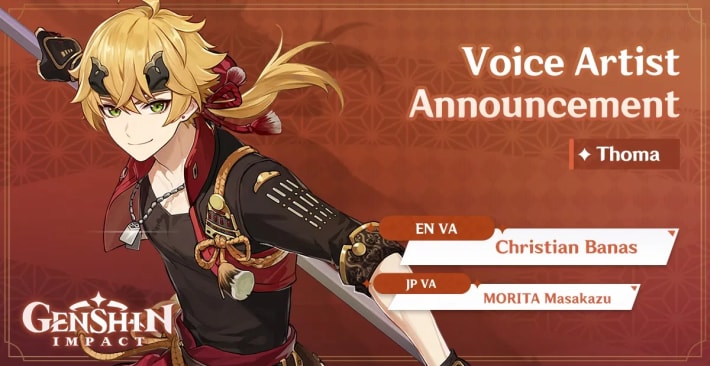
English Voice Actor: Christian Banas
| Notable Roles | |
|---|---|
| Dynasty Warriors | Yuanhua |
| Cookie run: Kingdom | Mango Cookie |
| Dying Light 2 Stay Human | Steve |
Japanese Voice Actor: MORITA Masakazu
| Notable Roles | |
|---|---|
| Bleach | Ichigo Kurosaki |
| Final Fantasy X | Tidus |
| One Piece | Marco the Phoenix |
Character Related Articles
Character Tier Lists
All Characters
| Characters By Rarity | |||||||||||
|---|---|---|---|---|---|---|---|---|---|---|---|
| Characters By Roles | |||||||||||
| DPS List | Support List | Sustain List | |||||||||
| On-Field List | Off-Field List | ||||||||||
| Characters By Element | |||||||||||
| Hydro | Anemo | Electro | |||||||||
| Dendro | |||||||||||
| Characters By Nation | |||||||||||
| Mondstadt | Liyue | ||||||||||
| Fontaine | Natlan | ||||||||||
| Snezhnaya | Nod-Krai | ||||||||||

