
Comprehensive Lanyan guide for Genshin Impact. Learn Lanyan's best build, teams, weapons, artifacts, special dish, and materials for this 4-Star Anemo DPS Catalyst user.
| Lan Yan Related Articles | ||||||||
|---|---|---|---|---|---|---|---|---|
 Best Build Best Build | Best Team | Specialty | ||||||
Table of Contents
Lan Yan Character Overview, Base Stats, and Tier
Character Profile
 | Rarity | | |
|---|---|---|---|
| Element | Anemo | ||
| Weapon | Catalyst | ||
| Ascend Stat | ATK 24.0% | ||
| Region | Liyue | ||
| Birthday | January 6 | ||
| Roles | | ||
| How To Get | Available in all Banners at a low drop rate | ||
Base Stats
| Base HP | Base ATK | Base DEF | |
|---|---|---|---|
| Lvl. 90 | 9,244 | 251 | 580 |
| Lvl. 80 (Ascended) | 8,604 | 233 | 540 |
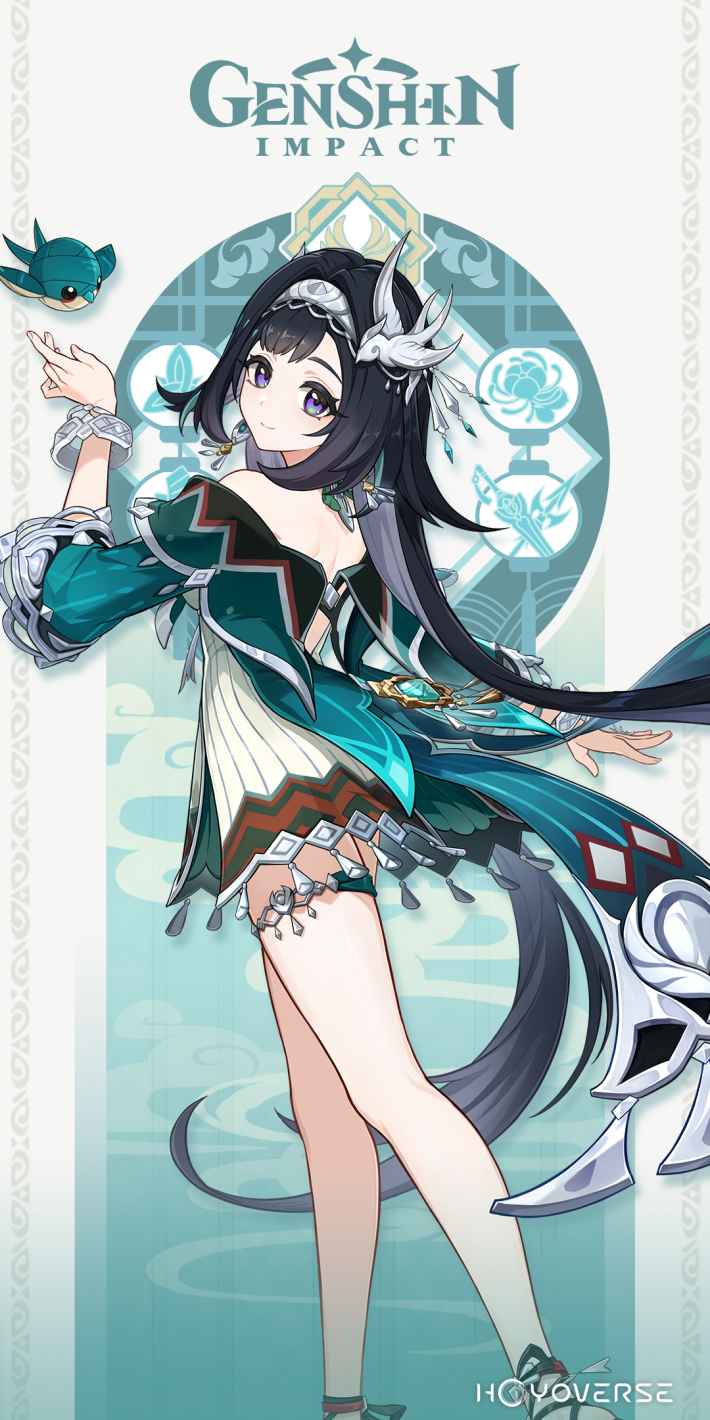
Lan Yan is a 4-star Anemo character who wields a Catalyst in Genshin Impact. Her gameplay excels in shielding and crowd control. Her Elemental Skill, "Swallow‑Wisp Pinion Dance," dashes her forward and generates an Anemo shield that scales with her Attack stat. With upgrades, the shield can absorb other elemental types for additional effects. Her Elemental Burst, "Lustrous Moonrise," summons an Anemo vortex that draws in enemies and deals sustained damage, making her an effective disruptor in group combat. Lore-wise, Lan Yan is a skilled rattan weaver from Chenyu Vale in Liyue. Known for her calm and thoughtful demeanor, she embodies the harmony between craftsmanship and the natural world, preferring a humble lifestyle rooted in tradition.
Lan Yan's Tier & Rating
| Overall Tier | ||||||||||||||
|---|---|---|---|---|---|---|---|---|---|---|---|---|---|---|
| B | ||||||||||||||
| On-Field | Off-Field | DPS | Support | Sustain | ||||||||||
| C | - | C | - | S | ||||||||||
What Kind of Character is Lan Yan?
In battle, Lan Yan is primarily a 4-Star
Lan Yan is a character whose purpose, kit and gameplay are all easy to grasp and define, but she remains an average performer in this given niche. She is replaceable in most of her teams, and isn't particularly stand-out in terms of what she provides either. The current meta has yet to slot her into a team where she's the best choice for her role, but Lan Yan can still help you clear certain content if you invest enough resources into her, regardless.
Rate Lan Yan!
Roles & Playstyle of Lan Yan and Her Strengths and Weaknesses
Anemo Shielder and RES Shredder
Apart from her shield, Lan Yan's value as a support also comes from the fact that she's an Anemo character and can reliably trigger the effect of the Viridescent Venerer set that lowers the resistance of enemies hit to a Swirled Element for a short amount of time.
Pros and Cons of Support Lan Yan
| Pros |
|---|
| - Easy to use and build. |
| - Shield can be good enough to act as the sole sustain. |
| - Can use and trigger the Viridescent Venerer set. |
| - Burst can be used for grouping, and Skill can be used for exploration. |
| Cons |
| - Her Skill cooldown makes it so that her shield has some downtime in between, which can be problematic in some scenarios. |
| - No innate buffing value apart from her artifact and weapon choices. |
| - Burst cannot group heavy enemies, which is a trait shared amongst most Anemo supports that have grouping abilities. |
Best Build for Lan Yan
Building Lan Yan should be an easy task since she has clear preferences regarding stats and Artifacts. See below for recommendations:
| Weapon | Thrilling Tales of Dragon Slayers |
|---|---|
| Best Artifact | Viridescent Venerer x 4 |
| Artifact Main Stats | Sands: ATK% Goblet: ATK% Circlet: ATK% |
| Priority Sub-Stat | Energy Recharge > ATK% > CRIT Rate or DMG |
| Recommended Team | |
Stat Goals For Off-Field Bloom Support Lan Yan
| ATK% | At least 2000~ |
|---|---|
| Energy Recharge | 160%-220% |
Despite having grouping abilities, most of the time Lan Yan's Burst isn't considered a priority. Rather, it's better to focus on giving her as much attack as you can manage, so her shields are strong enough to tank specific enemy moves, so the On-Field character can safely continue providing DPS.
While she has a passive that scales her personal damage with Elemental Mastery, most of the time you'll want to build Lan Yan primarily as a sustain character, rather than as an On-Field DPS.
Lan Yan 's Recommended Talent Priority
| Talent | Level Up Priority |
|---|---|
| Normal Attack: Black Pheasant Strides on Water | ★★★・・ |
| Swallow-Wisp Pinion Dance (Elemental Skill) | ★★★★★ |
| Lustrous Moonrise (Elemental Burst) | ★★★★・ |
Related Links:
Best Weapon for Lan Yan
Lan Yan's shields scale with her attack, so you'll want to base your weapon choice around this, while also considering what the weapon can supply for the team in terms of supportive value. See below for the recommendations:
Premium Weapons for Off-Field Anemo Support Lan Yan
| Weapon | How to Get Rating | |
|---|---|---|
| Best | Starcaller's Watch | Get from Limited Banner - Lan Yan reliably triggers the weapon's passive that increases the damage dealt by the active character. - The Elemental Mastery this weapon provides helps to somewhat boost Lan Yan's own damage so it contributes a good amount to the total team DPS. |
| 2nd | Sacrificial Fragments | Get from Banners - Elemental Mastery (EM) secondary stat helps to make Lan Yan contribute a little more to the overall team DPS. - Allows her to refresh her skill, which becomes more reliable at higher refinements for better Energy gain. |
| 3rd | Wandering Evenstar | Get from Limited Banners - Gives Lan Yan some Elemental Mastery, which boosts her personal damage. - The modest attack buff is appreciated by most attack-scaling DPSes, but at lower refinements, it's often eclipsed by the buff from Thrilling Tales of Dragon Slayers. |
| 4th | Favonius Codex | Get from Banners - The Energy Recharge secondary stat makes it easier for you to constantly use Lan Yan's Burst. - Energy passive is good for teams that would appreciate the extra battery capability. - Lan Yan would need to build some CRIT Rate to effectively trigger the passive. - Lesser in overall value in comparison to Thrilling Tales of Dragon Slayers due to a lack of buffing utility. |
Citlali's Signature Weapon is Lan Yan's most synergistic 'premium' option thanks to the additional buff value it gives whenever she creates a shield. Although Elemental Mastery isn't her most prioritized stat, having her contribute non-negligible damage to the team DPS is still appreciated.
Free To Play Friendly (F2P Weapons) for Off-Field Anemo Support Lan Yan
| Weapon | How to Get Rating | |
|---|---|---|
| Best F2P | Thrilling Tales of Dragon Slayers | Get from Banners - Provides a decent amount of Energy Recharge, which allows more Burst uptime. - The attack buff after switching to the On-Field DPS is a strong additional utility for support Catalyst users, and Lan Yan is no exception to this. - You're likely to gain multiple copies of this weapon as you continue playing and Wishing on Banners, so it's one of her most accessible (and strongest) option available. |
| 2nd | Prototype Amber | Liyue Forgeable (Craftable) Weapon - The Energy passive can be a nice boon for Energy-heavy teams and DPSes. - Allows Lan Yan a small heal as additional sustain. - The support value of this weapon increases the more you find yourself lacking survivability or wanting heals, but typically, this loses to Thrilling Tales since it doesn't offer much else. |
| 3rd | Hakushin Ring | Inazuma Forgeable (Craftable) Weapon - The Energy Recharge secondary stat makes it easier to use Lan Yan's Burst every rotation. - The better option for specific Electro-charged teams that care about DMG% buffs. |
For Free-to-Play options, Thrilling Tales of Dragon Slayers is arguably her strongest choice, even more so than Starcaller's Watch for teams that don't care about DMG%, such as Lunar Reaction teams. The ATK% buff from Thrilling Tales can go a long way for attack-scaling DPSes, and it further increases Lan Yan's value as a support by letting her enable another buff.
All Weapon ListLan Yan Best Artifacts
Lan Yan will really only have a few Artifact options due to her simple abilities and straightforward niche. See the recommendations below:
| Artifact | Recommendation Details |
|---|---|
| Viridescent Venerer | ★★★★★ - As an Anemo Support that is encouraged to Swirl elements, Lan Yan becomes an ideal holder for this set especially since she also consolidates the sustain slot in a party. - Shreds the Elemental RES of the Swirled element, which can equate into a sizeable increase in damage from your On-Field DPS. - You can use the Mystic Offerings to convert other unusable Artifacts into Viridescent Venerer pieces, which means you don't have to directly farm the Valley of Remembrance domain. |
| Golden Troupe | ★★・・・ - If there already is a source of Elemental RES shred on the team, or if you want Lan Yan to output better numbers without being On-Field, you can use this set to amplify her Skill damage. - Not the most ideal setup, loses significantly to Viridescent due to a lack of utility. |
Recommended Artifact Stats
| Main: Flat HP Sub: ATK% / Energy Recharge / Elemental Mastery |
|---|---|
| Main: Flat ATK Sub: ATK% / Energy Recharge / Elemental Mastery |
| Main: ATK% Sub: Energy Recharge / Elemental Mastery |
| Main: ATK% Sub: Energy Recharge / Elemental Mastery |
| Main: ATK% Sub: Energy Recharge / Elemental Mastery |
More ATK Results in Better Shields
Lan Yan's shields become a better source of sustain so long as you supply her enough ATK to make them worthwhile. Giving her more offensive stats like CRIT and Elemental Mastery helps to make her DPS a viable option, but if you don't have the time and resources to fine-tune her Artifacts, simply aiming for a high ATK stat should be sufficient for her to be usable in most teams.
Related Articles
Best Team Comp Lan Yan
Arlecchino Vaporize Team
| Support | DPS | Support | Support |
|---|---|---|---|
| Lan Yan | Arlecchino | Yelan | Bennett |
| Details | |||
| - Lan Yan's shield helps Arlecchino gain resistance to interruption, with the added bonus of applying the ATK buff from Thrilling Tales of Dragon Slayers. - Arlecchino's Bond of Life Mechanics make it so that she can't receive healing while in combat outside of her Elemental Burst, so having Lan Yan's shields as an extra line of defense can make clearing content with her more comfortable overall. - Yelan applies the Off-Field Hydro so Arlecchino can trigger Vaporize. - Bennett's generous attack buff benefits both Arlecchino and Lan Yan. | |||
While Arlecchino has Bond of Life or Blood-Debt Directive stacks, she cannot receive any healing from outside resources. The only ability that can heal her while she has these stacks is her Elemental Burst, which removes the stacks alongside her Pyro Infusion at the same time. Lan Yan's shields in this team therefore provide slightly more value as a form of sustain since it allows Arlecchino to continue performing her usual damage combo without having to worry about hits that could stagger or one-shot her.
Other Team Comps For Lan Yan
Clorinde Aggravate Team
| Team | Detail | |
|---|---|---|
| Lan Yan | Fischl | - Lan Yan value as a supportive sustain character has stronger footing in this team since Aggravate benefits from the Elemental RES shred of the Viridescent Venerer, considering how the reaction is from an Electro attack hitting a Quickened (Dendro plus Electro) enemy. - Fischl and Clorinde are two of the characters that benefit from having their ability hits buffed by the Aggravate reaction. - Nahida is still the best Aggravate support due to her EM buff and reliable AoE Dendro application. |
| Clorinde | Nahida | |
F2P Friendly Team Comp
| Team | Detail | |
|---|---|---|
| Lan Yan | Sethos | - A F2P-friendly team comp using free or easily obtainable characters. - Lan Yan is the secondary sustain but more a source of interruption resistance thanks to her shield so Sethos can dealing damage without getting interrupted. - Sethos functions similarly to Clorinde in this team, who wants to maintain the Quicken aura on enemies so he can keep triggering Aggravate on his attacks. - Yaoyao is the primary sustain and a source of Off-Field Dendro to ensure enemies remain affected by Quicken. |
| Fischl | Yaoyao | |
Team Rotation of Lan Yan and Combos
Basic Team Rotation for Off-Field Support Lan Yan
| Basic Rotation for Off-Field Support Lan Yan |
|---|
| 1. Start with the supports with longer ability durations if there are any. If your On-Field DPS needs to use an ability first at the start of the rotation due to mechanics, like Arlecchino and her Skill, then do this first as well. 2. Switch to Lan Yan, use her Elemental Burst first if it's available, then use her Elemental Skill. 3. When Lan Yan is hovering mid-air, press Normal Attack or Skill again so she attacks nearby enemies with her rings. 4. Swap to your On-Field DPS, in this case Arlecchino, to do their main damage combo. 5. Repeat from Step 1. |
The most important part of Lan Yan's rotations is the fact you need to input either a Normal Attack or Skill use so she can attack enemies nearby while mid-air. Since this attack bounces off of targets, it becomes effective at triggering the Viridescent Venerer set effect that shreds Elemental RES on multiple enemies.
Additionally, if your Lan Yan doesn't have Energy Recharge to use her Elemental Burst every rotation, you can opt to activate it every other rotation instead, since her Burst isn't extremely necessary for her overall kit mechanics.
Basics of Using Lan Yan
Lan Yan is a
Skill Has Two Parts
Lan Yan's Elemental Skill can be broken into two parts. The first time you activate Lan Yan's Elemental Skill causes her to rush forward to attack an enemy; she then hovers mid-air briefly after the dash. While she is mid-air, you can press her Skill again or perform a Normal Attack so she sends out her rings to attack nearby enemies.
It's typically recommended to make use of the second part of her Skill to be able to trigger the Swirl reaction on enemies since it can bounce off of different targets, thereby triggering the Viridescent Venerer RES shred more efficiently.
Shield Can Absorb an Element
Because of her passive, Four Sealing Divination Charms, Lan Yan's shield has a unique mechanic where causing a Swirl reaction with the dash of her Elemental Skill infuses her Anemo shield with the Swirled Element. This causes the shield to become more effective against that Element, and can elevate Lan Yan's solo-sustain ability significantly.
Only Certain Elements Can Be Swirled
Lan Yan is best paired alongside teammates whose Elements can be Swirled. This is to ensure her shield gains that additional durability from Swirling an Element with her Skill. Note that Anemo cannot interact with Geo, Dendro and Anemo itself, so only Hydro, Pyro, Cryo and Electro teammates are recommended.
Burst Can Group Enemies
Lan Yan's Elemental Burst creates a Feathermoon Array, which functions similarly to a vortex that knocks up nearby enemies before slightly pulling them towards the center. The area of this Array is good enough for this ability to be used for grouping purposes, provided enemies are within range.
Elemental Skill, Burst and Abilities Guide for Lan Yan
How To Use Lan Yan's Skills & Passives
- ▼Off-Field Anemo Support with a flexible Anemo shield.
- ▼Elemental Skill generates the shield.
- ▼Elemental Burst is for grouping light enemies.
- ▼Shield can absorb a Swirlable element.
- ▼More ATK equals better shielding.
- ▼Elemental Mastery is good for her damage.
- ▼Shield becomes even sturdier at C2.
- ▼Hold Skill can be used for exploration.
Off-Field Anemo Support With a Flexible Anemo Shield
| Basic Rotation Of Lan Yan |
|---|
| 1.Start with the supports with longer ability durations if there are any. If your On-Field DPS needs to use an ability first at the start of the rotation due to mechanics, like Arlecchino with her Skill, then don't forget to do this first as well. 2. Switch to Lan Yan, use her Elemental Burst first if it's available, then use her Elemental Skill. 3. When Lan Yan is hovering mid-air, press Normal Attack or Skill again so she attacks nearby enemies with her rings. 4. Swap to your On-Field DPS to do their main damage combo. 5. Repeat from Step 1. |
Lan Yan typically only uses her Elemental Skill to activate her shield and trigger the Swirl reaction. Her Elemental Burst can be deployed whenever it fully charges instead of every rotation since it's not incredibly important to the entire rotation.
Elemental Skill Generates the Shield
| Icon | Elemental Skill Description |
|---|---|
| Swallow-Wisp Pinion Dance: Nature's Chorus | - Summons the Swallow-Wisp Shield, dashing forward and leaping into the air upon hitting a target. - Shield absorption scales on ATK and has 250% efficiency against Anemo DMG. - While airborne from Swallow-Wisp Pinion Dance, pressing the Skill again or performing a Normal Attack throws Feathermoon Rings that spin twice between nearby enemies, dealing Anemo DMG. - Hold Version: Enters Aiming Mode to adjust dash direction. - Interacts with her Ascension 1 Passive where it can become a Pyro, Hydro, Electro or Cryo (PHEC) shield if you Swirl any of these Elements using the initial dash. |
The biggest weakness of this shield is how its cooldown is longer than its duration, which leads to a few seconds of downtime and can result in your active character still getting hit ever so often. Because of this, it may be necessary to either use the invincibility frames from a character's Elemental Burst to dodge the attack or to pair her with a healer like Bennett to ensure your On-Field DPS' survivability.
Elemental Burst Is for Grouping Light Enemies
| Icon | Elemental Burst Description |
|---|---|
| Lustrous Moonrise | - Creates a Feathermoon Swallow Array. - Pulls in nearby enemies and objects. - Deals multiple instances of AoE Anemo DMG. - Note: Not all enemies can be grouped. |
This ability is strong into multi-target content with light enemies (such as any small human-type enemy) but isn't wholly essential for Lan Yan or her teammates to function well. If you can't manage to get enough Energy Recharge for her to use her Burst every rotation, it's fine to only deploy the ability whenever it's fully charged.
Shield Can Absorb a Swirlable Element
| Icon | Passive Description |
|---|---|
| Four Sealing Divination Charms | - When Swallow-Wisp Pinion Dance hits a target and reacts with Hydro, Pyro, Cryo, or Electro, the Swallow-Wisp Shield gains Elemental Absorption, giving 250% absorption efficiency against that element. - If Elemental Absorption occurs, Feathermoon Rings will also deal additional Elemental DMG equal to 50% of the original DMG of the corresponding element. - This additional DMG is considered Elemental Skill DMG. |
Lan Yan Ascension 4 Passive essentially makes it so that swirling an Element using the dash on her Skill causes her shield to infuse or absorb said element, turning the Anemo shield into one of the Swirlable elements. Her shield naturally becomes stronger against that element type, resulting in her sustain ability being fairly decent given the right circumstances.
More ATK Equals Better Shielding
| Icon | Elemental Skill Scaling |
|---|---|
| Swallow-Wisp Pinion Dance: Nature's Chorus | Talent Lvl. 10 Shield DMG Absorption: 497% ATK + 2542 |
Lan Yan's shields scale with her ATK stat as seen above, so she prefers to have ATK% main stat Artifacts for better shield durability. For sustain-purposes only, it may be better to focus solely on this stat to be able to utilize her as soon as possible.
Elemental Mastery Is Good for Her Damage
| Icon | Passive Description |
|---|---|
| Skyfeather Evil-Subduing Charm | - Elemental Skill's damage increases by 309% of Lan Yan's Elemental Mastery. - Elemental Burst's damage increases by 774% of Lan Yan's Elemental Mastery. |
Lan Yan can build Elemental Mastery, alongside other offensive stats, as a means of increasing her personal damage. The damage buff from this passive doesn't result in a significant increase in practice, so it's still recommended to prioritize her ATK% stat before trying for any other stat.
Shield Becomes Even Sturdier at C2
| Icon | Constellation Description |
|---|---|
| "Dance Vestments Billow Like Rainbow Jade" | - While shield is active, Normal Attack DMG from the active character restores 40% of the Shield’s absorption, up to its max value. - Can trigger once every 2s. |
Lan Yan's shield sees its first upgrade at her 2nd Constellation, where it now has a stacking mechanic similar to Thoma's shield that triggers via Normal Attacks. Stacking shields this way can accumulate typically means it has higher overall damage absorption, making it a nice boost to her sustain value if you're able to get it.
Hold Skill Can Be Used for Exploration
Similar to other blink or teleport-type abilities, Lan Yan can hold her Elemental Skill to aim her dash in a set direction. You can make use of this in the overworld during exploration to quickly scale to higher ground.
Should You Pull for Lan Yan's Constellation Or Best Weapon?
C2 is a Good Stopping Point
| Constellation Priority |
|---|
| C2 > C6 > C4 |
Lan Yan's C2 is a good stopping point since it allows her shield to be surprisingly durable, provided you meet the conditions, while hopefully costing you less overall funds if you do not want to get the rateup 5-Star character.
Lan Yan's Constellations & Effects
| Rating | Constellation Effect |
|---|---|
| ★★★・・ | C1: As One Might Stride Betwixt the Clouds After triggering the Elemental Absorption from the Passive Talent "Four Sealing Divination Charms," this instance of Lan Yan's Elemental Skill Swallow-Wisp Pinion Dance will produce another Feathermoon Ring when they are thrown at opponents. You must first unlock the Passive Talent "Four Sealing Divination Charms." |
| ★★★★★ | C2: Dance Vestments Billow Like Rainbow Jade While the Swallow-Wisp Shield is active, when your active party member's Normal Attacks deal DMG, 40% of the Shield's DMG absorption will be restored, up to its original maximum absorption. This effect can occur once every 2s. |
| ★★・・・ | C3: On White Wings Pierce Through Cloud and Fog Increases the Level of Swallow-Wisp Pinion Dance by 3. Maximum upgrade level is 15. |
| ★★★・・ | C4: With Drakefalcon's Blood-Pearls Adorned After Lan Yan uses her Elemental Burst Lustrous Moonrise, the Elemental Mastery of all nearby party members increases by 60 for 12s. |
| ★★・・・ | C5: Having Met You, My Heart is Gladdened |
| ★★★★・ | C6: Let Us Away on Slyphic Wing, the Silvered Ornaments to Ring Swallow-Wisp Pinion Dance gains 1 additional charge. |
Lan Yan's Constellation Name is Hirundo Lazuli
| Hirundo Lazuli |
|---|
 |
Ascension Materials for Lan Yan Talents & Level
Materials Needed for Level Ascension
| Materials Needed To Get To Lvl. 80 |
|---|
| Vayuda Turquoise Sliver x 1 Vayuda Turquoise Fragment x 9Vayuda Turquoise Chunk x 9Whopperflower Nectar x 18Shimmering Nectar x 30Energy Nectar x 12Clearwater Jade x 108 Gold-Inscribed Secret Source Core x 26 |
| Materials Needed To Get To Lvl. 90 |
| Vayuda Turquoise Sliver x 1 Vayuda Turquoise Fragment x 9Vayuda Turquoise Chunk x 9Vayuda Turquoise Gemstone x 6Whopperflower Nectar x 18Shimmering Nectar x 30Energy Nectar x 12Clearwater Jade x 168 Gold-Inscribed Secret Source Core x 46 |
| Level 1 | Default |
|---|---|
| Level 2 | Teachings Of Diligence x3Whopperflower Nectar] x6 |
| Level 3 | Guide To Diligence x2 Shimmering Nectar x3 |
| Level 4 | Guide To Diligence x4Shimmering Nectar x4 |
| Level 5 | Guide To Diligence x6 Shimmering Nectar x6 |
| Level 6 | Guide To Diligence x9 Shimmering Nectar x9 |
| Level 7 | Philosophies Of Diligence x4 Energy Nectar x4 Eroded Sunfire x1 |
| Level 8 | Philosophies Of Diligence x6 Energy Nectar x6 Eroded Sunfire x1 |
| Level 9 | Philosophies Of Diligence x12 Energy Nectar x9 Eroded Sunfire x2 |
| Level 10 | Philosophies Of Diligence x16 Energy Nectar x12 Eroded Sunfire x2 Crown Of Insight x1 |
| Level 11 | Unlocked via Constellation |
| Level 12 | Unlocked via Constellation |
| Level 13 | Unlocked via Constellation |
Related Links
Lan Yan Skills & Talents Details
Normal Attack: Black Pheasant Strides On Water
Normal Attack
| Effect |
|---|
| Wields her Feathermoon Rings to perform up to 4 attacks, dealing Anemo DMG. |
| Lv1 | Lv2 | Lv3 | Lv4 | Lv5 | Lv6 | Lv7 | Lv8 | Lv9 | Lv10 | Lv11 | |
|---|---|---|---|---|---|---|---|---|---|---|---|
| 1-Hit DMG | 41.4% | 44.5% | 47.7% | 51.8% | 54.9% | 58% | 62.2% | 66.3% | 70.4% | 74.6% | 78.7% |
| 2-Hit DMG | 20.4% +24.9% | 21.9% +26.8% | 23.5% +28.7% | 25.5% +31.2% | 27% +33.1% | 28.6% +34.9% | 30.6% +37.4% | 32.7% +39.9% | 34.7% +42.4% | 36.7% +44.9% | 38.8% +47.4% |
| 3-Hit DMG | 26.9% +26.9% | 28.9% +28.9% | 31% +31% | 33.7% +33.7% | 35.7% +35.7% | 37.7% +37.7% | 40.4% +40.4% | 43.1% +43.1% | 45.8% +45.8% | 48.5% +48.5% | 51.1% +51.1% |
| 4-Hit-DMG | 64.6% | 69.4% | 74.2% | 80.7% | 85.5% | 90.4% | 96.8% | 103.3% | 109.8% | 116.2% | 122.7% |
▲Use side-scroll to see percentage per level.
Charged Attack
| Effect |
|---|
| Consumes a certain amount of Stamina to throw out a Feathermoon Ring, dealing Anemo DMG. |
| Lv1 | Lv2 | Lv3 | Lv4 | Lv5 | Lv6 | Lv7 | Lv8 | Lv9 | Lv10 | Lv11 | |
|---|---|---|---|---|---|---|---|---|---|---|---|
| Charged Attack DMG | 37.8%×3 | 40.7%×3 | 43.5%×3 | 47.3%×3 | 50.1%×3 | 53%×3 | 56.8%×3 | 60.5%×3 | 64.3%×3 | 68.1%×3 | 71.9%×3 |
| Charged Attack Stamina Cost | 50 | 50 | 50 | 50 | 50 | 50 | 50 | 50 | 50 | 50 | 50 |
▲Use side-scroll to see percentage per level.
Plunging Attack
| Effect |
|---|
| Gathers the power of Anemo and plunges towards the ground from mid-air, damaging all opponents in her path. Deals AoE Anemo DMG upon impact with the ground. |
| Lv1 | Lv2 | Lv3 | Lv4 | Lv5 | Lv6 | Lv7 | Lv8 | Lv9 | Lv10 | Lv11 | |
|---|---|---|---|---|---|---|---|---|---|---|---|
| Plunge DMG | 56.8% | 61.5% | 66.1% | 72.7% | 77.3% | 82.6% | 89.9% | 97.1% | 104.4% | 112.3% | 120.3% |
| Low Plunge DMG | 114% | 123% | 132% | 145% | 155% | 165% | 180% | 194% | 209% | 225% | 240% |
| High Plunge DMG | 142% | 153% | 165% | 182% | 193% | 206% | 224% | 243% | 261% | 281% | 300% |
▲Use side-scroll to see percentage per level.
Swallow-Wisp Pinion Dance (Elemental Skill)
| Effect |
|---|
| Summoning forth the Swallow-Wisp Shield, a secret art passed down across generations, Lan Yan dashes forward and, upon making contact with her target, will leap back into the air. The Swallow-Wisp Shield's DMG absorption scales based on her ATK, and has a 250% absorption efficiency against Anemo DMG. While in mid-air due to the effects of her Elemental Skill: Swallow-Wisp Pinion Dance, pressing her Elemental Skill again or pressing Normal Attack will cause Lan Yan to hurl her Feathermoon Rings at an opponent, and they will spin between nearby opponents twice upon hit, dealing Anemo DMG. Holding the Skill will cause it to behave differently. |
Hold
| Effect |
|---|
| Enter Aiming Mode to adjust the dash direction.. |
| Lv1 | Lv2 | Lv3 | Lv4 | Lv5 | Lv6 | Lv7 | Lv8 | Lv9 | Lv10 | Lv11 | Lv12 | Lv13 | |
|---|---|---|---|---|---|---|---|---|---|---|---|---|---|
| Feathermoon Ring DMG | 96.3% | 103.5% | 110.7% | 120.3% | 127.5% | 134.8% | 144.4% | 154% | 163.6% | 173.3% | 182.9% | 192.5% | 204.5% |
| Shield DMG Absorption | 276.5% +1156 | 297.2% +1271 | 318% +1396 | 345.6% +1531 | 366.3% +1676 | 387.1% +1829.7 | 414.7% +1994 | 442.4% +2167 | 470% +2350 | 497.7% +2542 | 525.3% +2745 | 553% +2957 | 587.5% +3178 |
| Shield Duration | 12.5s | 12.5s | 12.5s | 12.5s | 12.5s | 12.5s | 12.5s | 12.5s | 12.5s | 12.5s | 12.5s | 12.5s | 12.5s |
| CD | 16s | 16s | 16s | 16s | 16s | 16s | 16s | 16s | 16s | 16s | 16s | 16s | 16s |
▲Use side-scroll to see percentage per level.
Lustrous Moonrise (Elemental Burst)
| Effect |
|---|
| Lan Yan creates a Feathermoon Swallow Array, pulling in nearby opponents and objects and dealing multiple instances of AoE Anemo DMG. |
| Lv1 | Lv2 | Lv3 | Lv4 | Lv5 | Lv6 | Lv7 | Lv8 | Lv9 | Lv10 | Lv11 | Lv12 | Lv13 | |
|---|---|---|---|---|---|---|---|---|---|---|---|---|---|
| Skill DMG | 241.1% ×3 | 259.1% ×3 | 277.2% ×3 | 301.3% ×3 | 319.4% ×3 | 337.5% ×3 | 361.6% ×3 | 385.7% ×3 | 409.8% ×3 | 433.9% ×3 | 458% ×3 | 482.1% ×3 | 512.3% ×3 |
| CD | 15s | 15s | 15s | 15s | 15s | 15s | 15s | 15s | 15s | 15s | 15s | 15s | 15s |
| Energy Cost | 60 | 60 | 60 | 60 | 60 | 60 | 60 | 60 | 60 | 60 | 60 | 60 | 60 |
▲Use side-scroll to see percentage per level.
Four Sealing Divination Charms
| Effect |
|---|
| When the dash from the Elemental Skill Swallow-Wisp Pinion Dance hits a target, if it interacts with Hydro/Pyro/Cryo/Electro, the Swallow-Wisp Shield will undergo Elemental Absorption, with the converted shield absorbing DMG from the corresponding element with 250% efficiency. Additionally, if this use of Swallow-Wisp Pinion Dance causes the Swallow-Wisp Shield to undergo Elemental Absorption, the Feathermoon Rings that Lan Yan throws at her foes additionally deal Elemental DMG equal to 50% of the original in the corresponding Elemental Type. This DMG is considered Elemental Skill DMG. |
Skyfeather Evil-Subduing Charm
| Effect |
|---|
| The Elemental Skill Swallow-Wisp Pinion Dance and the Elemental Burst Lustrous Moonrise deal increased DMG equal to 309% and 774% of Lan Yan's Elemental Mastery, respectively. |
Thought And Intent, Like Silken Scent
| Effect |
|---|
| When Lan Yan is in the party, your characters will not startle Crystalflies and certain other animals when getting near them. Check the Other sub-category of the Living Beings / Wildlife section in the Archive for creatures this skill works on. |
Who Is Lan Yan?
Rattan Weaver From Chenyu Vale

Lan Yan is a well-known rattan weaver from Chenyu Vale. She's dedicated to the art of rattan weaving, seeking to continuously better herself in the craft.
Versed In The Qimen Arts
As part of a clan that uses rattan figures for their Qimen Arts, Lan Yan is considered a valued member. However, she doesn't follow after such traditions as she sees the weaving as an art in itself rather than a ritual object.
Lan Yan Voice Actor & Their Notable Roles

English Voice Actor: Anna Devlin
| Notable Roles | |
|---|---|
| Wuthering Waves | Jinhsi |
| Another Eden | Nona |
Japanese Voice Actor: Wakayama Shion
| Notable Roles | |
|---|---|
| Dandadan | Momo Ayase |
| Zenless Zone Zero | Ellen Joe |
| Honkai: Star Rail | Yunli |
| Lycoris Recoil | Takina Inoue |
| takt op. Destiny | Destiny/Cosette Schneider |
Character Related Articles
Character Tier Lists
All Characters
| Characters By Rarity | |||||||||||
|---|---|---|---|---|---|---|---|---|---|---|---|
| Characters By Roles | |||||||||||
| DPS List | Support List | Sustain List | |||||||||
| On-Field List | Off-Field List | ||||||||||
| Characters By Element | |||||||||||
| Hydro | Anemo | Electro | |||||||||
| Dendro | |||||||||||
| Characters By Nation | |||||||||||
| Mondstadt | Liyue | ||||||||||
| Fontaine | Natlan | ||||||||||
| Snezhnaya | Nod-Krai | ||||||||||

