
Comprehensive Arlecchino guide for Genshin Impact. Learn Arlecchino's best build, team, kit, and materials for this 5-Star Pyro DPS Polearm user.
| Arlecchino Related Articles | ||||||||
|---|---|---|---|---|---|---|---|---|
 Best Build Best Build | Best Team | Gacha Banner | ||||||
| Story Quest | Specialty | Signature Weapon | ||||||
Table of Contents
Arlecchino Character Overview, Base Stats, and Tier
Character Profile
 | Rarity | | |
|---|---|---|---|
| Element | |||
| Weapon | Polearm | ||
| Ascend Stat | CRIT DMG 38.4% | ||
| Region | Snezhnaya | ||
| Birthday | August 22 | ||
| Roles | | ||
| How To Get | Can only be pulled during The Hearth's Ashen Shadow Availability: 2025/11/11 - 2025/12/2 ▶ Gacha Simulator for Arlecchino Banner | ||
Base Stats
| Base HP | Base ATK | Base DEF | |
|---|---|---|---|
| Lvl. 90 | 13,103 | 342 | 765 |
| Lvl. 80 (Ascended) | 12,182 | 318 | 711 |
Arlecchino is a 5-star Pyro character that wields a Polearm in Genshin Impact. Her gameplay focuses on being an On-Field DPS, utilizing her Pyro-infused Normal Attacks when she has Bond of Life. She gains Bond of Life when she casts her Elemental Skill or defeating enemies with her mark. Lore-wise, Arlecchino is the “Father” of the House of the Hearth and the 4th Fatui Harbinger known as “The Knave.”
Arlecchino's Tier & Rating
| Overall Tier | ||||||||||||||
|---|---|---|---|---|---|---|---|---|---|---|---|---|---|---|
| S | ||||||||||||||
| On-Field | Off-Field | DPS | Support | Sustain | ||||||||||
| S | - | S | - | - | ||||||||||
What Kind of Character is Arlecchino?
In battle, Arlecchino is a 5-Star
Arlecchino has enough DPS potential to remain competitive with some of the meta teams in Natlan, but because she's usually directly competing with Mavuika for key supports, she's often regarded lower in terms of pull value, especially if you have Mavuika herself.
The Pyro Archon in her premium teams will typically out-damage Arlecchino, so she's taken a back seat in regards to top meta discussions as a result - but she will still allow you to clear endgame content regardless.
Rate Arlecchino!
Roles & Playstyle Of Arlecchino and Her Strengths and Weaknesses
On-Field Pyro DPS with Bond of Life Mechanic
Arlecchino is a considerably strong On-Field Pyro DPS that works well with teammates that allow her to capitalize on her Pyro-Infused attacks, such as Cryo or Hydro teammates that can help setup the Melt, Vaporize and Overload reactions.
Pros and Cons of DPS Arlecchino
| Pros |
|---|
| - Competitive damage in her best teams. |
| - Pyro infusion persisting after swapping makes her ability rotations and combos very forgiving. |
| - Burst can be used as a panic-heal when she is low on HP. |
| Cons |
| - Because she can't be healed traditionally, she can easily be low HP most of the time. |
| - May contest with other Pyro DPSes, like Mavuika, for supports. |
| - Using a shield character may help with comfort, but often her best teams damage-wise don't have a shielder. |
Best Build for Arlecchino
Arlecchino is at her best as an On-Field DPS with her build aimed at maximizing her damage as possible. See below for recommendations:
| Weapon | Crimson Moon's Semblance |
|---|---|
| Best Artifact | Fragment of Harmonic Whimsy |
| Artifact Main Stats | Sands: ATK% or Elemental Mastery Goblet: Pyro DMG Bonus Circlet: CRIT Rate or DMG |
| Priority Sub-Stat | CRIT Rate or DMG > ATK% > Elemental Mastery > Energy Recharge |
| Recommended Team | |
Stat Goals For On-Field DPS Arlecchino
| ATK% | 2200~ |
|---|---|
| CRIT Rate & DMG | 70/140~ or 80/160~ (1:2 CRIT Ratio) |
| Elemental Mastery | 200~ |
Despite Arlecchino's Bond of Life tied to her max HP, most of her actual damage scales with her ATK stat. Additionally, she doesn't really require to have Energy Recharge accounted for since you aren't going to be using her Elemental Burst every rotation. Prioritize her attack, getting her CRIT to a decent 1:2 Ratio and having some Elemental Mastery if you play her in a Melt or Vaporize team.
Arlecchino 's Recommended Talent Priority
| Talent | Level Up Priority |
|---|---|
| Normal Attack: Invitation To A Beheading | ★★★★★ |
| All Is Ash (Elemental Skill) | ★★★・・ |
| Balemoon Rising (Elemental Burst) | ★★★★・ |
Related Links:
Best Weapon for Arlecchino
Arlecchino as an On-Field DPS will very clearly favor the weapons that can increase her DPS and offer her the offensive stats she wants. See below for the recommendations:
Premium Weapons for On-Field Pyro DPS Arlecchino
| Weapon | How to Get Rating | |
|---|---|---|
| Best | Crimson Moon's Semblance | Get from Limited Banner - Arlecchino's Signature Weapon that has a CRIT Rate secondary stat and provides DMG% buffs based on the amount of Bond of Life the user has. - Allows Arlecchino to reach a favorable CRIT Rate and DMG ratio. - Obvious best choice for her since it's tailor-made to fit her abilities. - When equipped by Arlecchino, the polearm takes on the appearance of a scythe, which is a special effect unique to her. |
| 2nd | Primordial Jade Winged-Spear | Get from Weapon Banners - CRIT Rate sub stat helps Arlecchino reach her desired CRIT Rate and DMG ratio - Passive provides a lot of ATK% on a passive that Arlecchino can easily stack just by doing her usual combos. - Performance should be somewhat comparable to her Signature Weapon. |
| 3rd | Staff of Homa | Get from Limited Banner - CRIT DMG sub stat makes it easy for Arlecchino to get her desired CRIT ratio. - Since Arlecchino can be in situations where her HP is below 50%, she's able to sometimes make full use of the passive. - The extra HP% is nice, but doesn't fully increase the amount of Bond of Life she receives. |
| 4th | Staff of the Scarlet Sands | Get from Limited Banner - CRIT Rate secondary stat is good for Arlecchino to get a decent CRIT Rate stat for her to be able to hit CRITS more reliably. - This weapon gives Elemental Mastery, which is good for Vaporize and Melt-base comps. |
| 5th | DeathmatchBallad of the Fjords | Get from Battle Pass - Both battle pass weapons have a CRIT secondary stat, which align with what Arlecchino's favored stat lineup. -Deathmatch gives ATK%, while Ballad of the Fjords has Elemental Mastery. Both are decent enough for most of Arlecchino's teams. |
Arlecchino gains a lot from having a lot of good offensive stats, so any polearm with CRIT is going to provide result in mostly decent performances into specific endgame content.
Free To Play Friendly (F2P Weapons) for On-Field Pyro DPS Arlecchino
| Weapon | How to Get Rating | |
|---|---|---|
| Best F2P | White Tassel | Get From Chests in Liyue - A 3-star polearm that has a CRIT Rate secondary stat. - Can be found in chests in Liyue. - Best at R5. - Overall, Arlecchino's most impactful F2P polearm, thanks to the CRIT Rate secondary and the Normal Attack dmg bonus. |
| 2nd | Blackcliff Pole | Get from Paimon's Bargain - Mostly a stat-stick for the CRIT DMG secondary stat. - Passive gives attack after defeating an enemy, which is good into multi-target content, but has no bearing in single-target content. |
For Free-to-Play options, the 3-star CRIT polearm, White Tassel, is the most accessible, provided you haven't used them to level other weapons. The Passive has more value over Blackcliff Pole that can't be used into all types of content in comparison.
All Weapon ListArlecchino Best Artifacts
Like her weapon options, Arlecchino's artifact choices are catered towards increasing her damage output. See the recommendations below:
| Artifact | Recommendation Details |
|---|---|
| Fragment of Harmonic Whimsy | ★★★★★ - The only set that directly interacts with Bond of Life mechanics, thereby making it very synergistic with Arlecchino. - Boosts damage dealt whenever Bond of Life increases or decreases. |
| Gladiator's Finale | ★★★★・ - A generalist set that provides ATK% and Normal Attack DMG, which are both stat boosts that Arlecchino appreciates. - You can't farm for these Artifacts directly since there's no domain for it, making it a little harder to get a set that offers good stats. |
| 2-pc. Pyro DMG%2-pc. ATK% | ★★★・・ - A 2-piece plus 2-piece mixed set can be a viable option if you're still farming for a good 4-piece set or if the substats on this combo offers more than what you can get from the 4-piece set. - You can use a combination of any of the mentioned artifacts here or the following: ・ 2-pc. Shimenawa's Reminiscence (ATK%) ・ 2-pc. Gilded Dreams or Wanderer's Troupe (Elemental Mastery for Melt and Vaporize) |
| Unfinished Reverie | ★★★・・ - This set is specifically designed to increase the equipping character's DMG when there are enemies nearby with the Burning reaction. - The best choice for Arlecchino if you play her in a Burning-oriented team. |
Recommended Artifact Stats
| Main: Flat HP Sub: CRIT Rate or DMG / ATK% / Elemental Mastery |
|---|---|
| Main: Flat ATK Sub: CRIT Rate or DMG / ATK% / Elemental Mastery |
| Main:ATK% or Elemental Mastery Sub: CRIT Rate or DMG / ATK% / Elemental Mastery |
| Main: Pyro DMG Bonus Sub:CRIT Rate or DMG / ATK% / Elemental Mastery |
| Main: CRIT Rate or DMG Sub: CRIT Rate or DMG / ATK% / Elemental Mastery |
Energy Recharge Isn't a Priority
Arlecchino is made to be built with offensive stats like ATK%, CRIT and Elemental Mastery. Energy Recharge is hardly necessary for her since realistically her Burst is best used only when you need to heal. You can fit in more of her preferred stats as a result of ignoring ER.
Related Articles
Best Team Comp Arlecchino
Arlecchino Melt Team
| DPS | Support | Support | Support |
|---|---|---|---|
| Arlecchino | Citlali | Xilonen | Bennett |
| Details | |||
| - Arlecchino pairs well alongside the premium Melt support Citlali and the Element RES shredder Xilonen. - Citlali is the main source of Cryo to trigger Melt off of and has a shield to help mitigate some damage that your Arlecchino may receive. - Although his healing isn't usually put to good use here, his generous ATK% buff is greatly appreciated by a heavy attack-scaling character like Arlecchino. | |||
Like Mavuika, Arlecchino can output good DPS numbers when slotted into a team that enables her to reliably take advantage of the Melt reaction. Citlali is one of the best supports for a Pyro DPS due to how easily she lets them trigger Melt.
Other Team Comps For Arlecchino
Arlecchino Overload Team
| Team | Detail | |
|---|---|---|
| Arlecchino | Chevreuse | - When paired alongside Chevreuse (ideally C6), Arlecchino's Overload team can record some decently high numbers, provided the team only consists of Pyro and Electro characters. - Chevreuse is the most important part of this team since she provides RES shred for the involved elements. - Fischl and Beidou are a synergistic Electro duo since Fischl generates enough particles for Beidou to reliably use her Elemental Burst for a shield. |
| Fischl | Beidou | |
F2P Friendly Team Comp
| Team | Detail | |
|---|---|---|
| Arlecchino | Sucrose | - A F2P-friendly team comp using free or easily obtainable characters. - This is a low-cost Vaporize team with Xingqiu applying a lot of Hydro through his Burst, which Arlecchino can trigger effectively since she uses a lot of Normal Attacks. - Bennett and Sucrose provide buffs such as ATK%, Elemental Mastery and Elemental RES Shred with Viridescent Venerer equipped on Sucrose. |
| Xingqiu | Bennett | |
Team Rotation of Arlecchino and Combos
Basic Team Rotation for On-Field DPS Arlecchino
| Basic Rotation For On-Field DPS Arlecchino |
|---|
| 1.Start with Arlecchino. Use her Elemental Skill to apply the Blood-Debt Directive to enemies. 2. Switch to her supports. Deploy abilities in order of longest duration to shortest duration. 3. Swap back into Arlecchino to use a Charged Attack. This will let her absorb the Blood-Debts and gain Bond of Life, activating her Pyro Infusion. 4. Perform Arlecchino's preferred combos until her support abillity durations end. 5. Repeat from Step 1. |
The most important part of Arlecchino's rotation is applying the Blood-Debt Directive with her Skill, so she's able to prime them into Blood-Debt Dues after 5 seconds, increasing her Bond of Life gained after absorbing the Dues. After that, the rotation will be fairly flexible considering her infusion doesn't go away after a swap.
Basic Combo for On-Field DPS Arlecchino
| Basic Combo For On-Field DPS Arlecchino |
|---|
| Use skill > Swap to team > Charged Attack to absorb Blood-Debts > Normal Attack (x3) or (x5) into dash cancel. |
Arlecchino can use dash cancels to cut into the time needed to play-out the longer animations of her Normal Attack string. If you're far less concerned with min-maxing, you can just spam Normal Attacks after absorbing the Blood Debts until you need to refresh her support abilities. You can use her Elemental Burst whenever to heal, but you need to reapply her Elemental Skill as a result to regain the Bond of Life.
Basics Of Using Arlecchino
Arlecchino is meant to be an
Bond of Life Equals Pyro Infusion
Arlecchino can be an effective Pyro DPS mostly due to her special enhanced state called 'Masque of the Red Death', which she enters by having any amount of Bond of Life active. This state infuses all her Normal, Charged and Plunging Attacks with Pyro so long as the Bond of Life effect isn't cleared. She primarily receives Bond of Life by using her Elemental Skill, which applies Blood-Debt Directives on enemies hit, and then absorbing the Directives using a Charged Attack to gain a Bond of Life worth a certain amount of her HP.
Bond of Life Prevents Healing
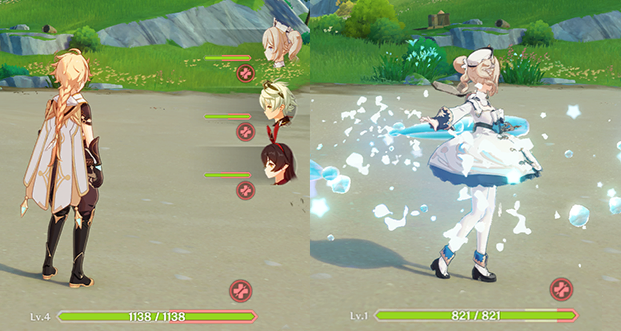
Bond of Life (BoL) is a mechanic introduced in Fontaine that impedes healing from affecting the character's HP bar. Instead, healing will first clear the Bond of Life, which appears as a red border around the HP bar, before the character is able to truly receive any healing. This essentially means you need double the amount of healing when a character has this status.
In Arlecchino's case, she will typically prefer to refrain from being healed completely since clearing her Bond of Life results in the loss of her Pyro Infusion.
Pyro Infusion Stays After Swapping
Arlecchino is among the few On-Field DPSes whose elemental infusion persists even after you swap out of her, since it's tied to her Bond of Life. This gives her the advantage of being able to refresh her supports' abilities later down the rotation without having to worry about tight timings.
Bond of Life Decreases as You Attack
Arlecchino's Masque of the Red Death enhanced state consumes the Bond of Life active on her to increase the damage of her attacks while in this state. At the same time, when she does use up her Bond of Life this way, the cooldown for her Skill is also reduced by 0.8 seconds each time, making it so that she won't really run out of Bond of Life if you maintain a proper rotation.
Elemental Burst Clears Bond of Life
Arlecchino's Elemental Burst immediately clears her Bond of Life using her Elemental Burst, which provides a large amount of healing in a single instance. You're likely to find yourself using this towards the end of the rotation or when Arlecchino accidentally takes too much damage.
Passive Increases the Amount of Bond of Life Granted
Arlecchino's Ascension 1 Passive, 'Agony Alone May Be Repaid', upgrades the Blood-Debt Directives into Blood-Debt Dues after 5 seconds. Absorbing these Dues using a Charged Attack grants a higher percentage of Bond of Life which can therefore prolong the duration of her Masque of the Red Death state. In practice, this usually means she wants to activate her Elemental Skill at the very start of the rotation.
Better With Shields
Her Ascension 4 Passive, called 'Strength Alone Can Defend' gives her Elemental and Physical RES based on her total attack past a certain threshold. The maximum RES she's able to gain from this passive is 20%, which is nice to have, but will not be enough to survive stronger hits or further sustained damage. Arlecchino's gameplay encourages providing her with a shield for a comfortable experience if you aren't able to properly manage her survivability, especially since she can't receive healing outside of her Burst while in combat.
Elemental Skill, Burst and Abilities Guide for Arlecchino
How To Use Arlecchino's Skills & Passives
Strong On-Field Pyro DPS With Wide Team Variety
| Basic Rotation Of Arlecchino |
|---|
| 1.Start with Arlecchino. Use her Elemental Skill to apply the Blood-Debt Directive to enemies. 2. Switch to her supports. Deploy abilities in order of longest duration to shortest duration. 3. Swap back into Arlecchino to use a Charged Attack. This will let her absorb the Blood-Debts and gain Bond of Life, activating her Pyro Infusion. 4. Perform Arlecchino's preferred combos until her support abillity durations end. 5. Repeat from Step 1. |
Arlecchino has a passive that encourages her to use her Elemental Skill first in the rotation so the Blood-Debt Directives turn into Blood-Debt Dues after 5 seconds. This Blood-Debt gives more Bond of Life, which allows her to keep her Pyro Infusion for longer.
Special State Gives Her a Pyro Infusion
| Icon | Masque of the Red Death Summary |
|---|---|
| Invitation to a Beheading: Masque of the Red Death | -When Bond of Life ≥ 30%, Arlecchino enters Masque of the Red Death, converting her Normal, Charged, and Plunging Attacks to Pyro DMG (cannot be overridden). - In this state, Normal Attacks deal bonus DMG based on ATK and a ratio of her current Bond of Life, consuming 7.5% of it per hit (max once every 0.03s). - Each Bond of Life consumption reduces All Is Ash’s (Skill) CD by 0.8s. |
Arlecchino has a special state defined in her Normal Attack description, aptly titled the Masque of the Red Death. This state infuses her Normal, Charged and Plunging with Pyro provided she has any amount of Bond of Life, which she gets from using her Elemental Skill. This is the primary source of her damage and because it's tied to her Normal Attack, her playstyle and combos will naturally have plenty of this included.
Arlecchino doesn't lose her Pyro Infusion even when you swap out of her, since it's tied to the amount of Bond of Life she has. So long as you don't clear the Bond of Life by using her Burst, she will continue to remain in her special state and therefor keep her infusion.
Elemental Skill Activates Bond of Life
| Icon | Elemental Skill Summary |
|---|---|
| All Is Ash | Summons Balemoon Bloodfire, dealing AoE Pyro DMG and applying Blood-Debt Directives to hit enemies. Blood-Debt Directive: - Lasts 30s and deals Pyro DMG every 5s (max 2 instances, counted as Elemental Skill DMG). - When Arlecchino uses a Charged Attack or Elemental Burst, she absorbs and clears nearby Directives, gaining a Bond of Life worth 65% of Max HP per Directive. - Within 35s of using her Skill, she can gain up to 145% of Max HP as Bond of Life. - Using the Skill again resets this duration and limit. |
Arlecchino's Elemental Skill is her only source of Bond of Life to activate her special state. The Skill also interacts with her passive that, upon waiting for five seconds, changes the Blood-Debt Directives into Blood-Debt Dues which offer more Bond of Life percentage. Because of this, and as stated, it's generally recommended to open the rotation with her Skill.
Bond of Life Impedes Healing

Bond of Life is a gameplay mechanic that manifests as a red border around the affected character's HP. When Bond of Life is active, the character cannot receive HP from healing conventionally. Instead, this healing clears the Bond of Life first. Once you clear all of the Bond of Life, the red border around the character's HP bar disappears, and any healing amount received with the Bond of Life cleansed should recover HP as it usually would.
Elemental Burst Can Be Used for Emergency Healing
| Icon | Elemental Burst Summary |
|---|---|
| Balemoon Rising | Arlecchino spreads the Balemoon Bloodfire wings, absorbing and clearing nearby Blood-Debt Directives. - Deals AoE Pyro DMG, clears the cooldown of All Is Ash (Skill), and heals herself based on her Bond of Life value and ATK. |
Arlecchino's biggest 'downside' is the fact that she cannot receive HP from outside sources of healing while in combat. Her Elemental Burst is the only thing that can heal her, but will also remove all of her stored up Bond of Life percentage at the same time.
This will cause her to end her special state and lose her Pyro Infusion, but it might be necessary to use when your Arlecchino receives too much damage and is at risk of dying.
Passives Increase Bond of Life Amount and Survivability
| Icon | Passive Summaries |
|---|---|
| Agony Alone May Be Repaid | When an opponent with Arlecchino’s Blood-Debt Directive (applied by her) is defeated, she gains a Bond of Life worth 130% of her Max HP. - After 5s, a Blood-Debt Directive upgrades to a Blood-Debt Due. When absorbed, it grants a Bond of Life worth 130% of her Max HP. - Bonds of Life gained this way cannot exceed the original limit from All Is Ash. |
| Strength Alone Can Defend | - Arlecchino gains 1% All Elemental and Physical RES for every 100 ATK she has in excess of 1,000. The maximum RES increase she can gain this way for each is 20%. |
Arlecchino's first passive makes it so that she receives more Bond of Life if you wait 5 seconds before absorbing the Blood-Debts using a Charged Attack, which is why she wants to use her Skill at the start of a rotation. Her second passive allows her to be a little more durable against damage, which is appreciated when she can't be healed traditionally.
Note that while her second passive does help her survivability, it isn't strong enough to replace the security given by a shield, which you should consider using if you find your Arlecchino susceptible to dying or taking too much damage.
Charged Attack Can Be Used for Short Travel
| Icon | Charged Attack Description |
|---|---|
| Invitation to a Beheading: Charged Attack | - Consumes a fixed amount of Stamina, dashing toward a nearby opponent and cleaving once. - Continuously holding this button will cause Arlecchino to consume Stamina and engage in up to 5s of high-speed movement. |
Arlecchino has a special interaction with her Charged Attack where she can hold it to move forward in a burst of movement. This can be helpful for traversal in the overworld when you're out exploring, especially in teams or areas with little mobility tools.
Should You Pull for Arlecchino's Constellation Or Best Weapon?
Prioritize Arlecchino's Constellations
| Signature VS Constellation |
|---|
| C1 > Crimson Moon's Semblance > C2 |
C1 is a High Value Constellation
Arlecchino's C1 is a significant boost to her total damage output, since it doubles the damage increase she receives from having Masque of the Red Death active. Additionally, Arlecchino gets increased interruption resistance just by doing her usual rotation while affected by Masque of the Red Death, making it one of the most impactful early constellations you can get for a character. In general, getting C1 first is almost always ideal. You can stop pulling after C1, but it's also fine to consider C2 as your stopping point unless you plan to go all the way to C6.
| Recommendation if You Have Staff of Homa or Primordial Jade Winged-Spear |
|---|
| C1 > C2 > Crimson Moon's Semblance or C6 |
Other 5-Star Crit Polearms are Competitive
Unless you'd prefer to get her Signature Weapon for aesthetic purposes, Arlecchino still performs fairly well with any 5-star polearm with a crit substat. Crimson Moon's Semblance isn't a huge damage increase in comparison to other polearms like Staff of Homa or the Primordial Jade Winged-Spear. More so, Arlecchino is the only character who can properly benefit from Crimson Moon's Semblance as of now, so investing into her constellations will be better overall if you already have a good weapon for her.
| Recommendation if You Don't Have Staff of Homa or Primordial Jade Winged-Spear |
|---|
| Crimson Moon's Semblance > C1 > C2 |
Crimson Moon's Semblance is Still Better Than the 4-Star Polearms
While Arlecchino can do relatively decent damage with other 4-Star Weapons like Deathmatch, her Signature Weapon will provide a significant boost to her performance versus most 4-Star alternatives regardless. If you do not have access to a 5-Star crit polearm, and if the other weapon on the banner is something you can use or would be fine losing your pity to, then pulling for Crimson Moon's Semblance can still be worth considering.
Arlecchino's Constellations & Effects
| Rating | Constellation Effect |
|---|---|
| ★★★★★ | C1: All Reprisals And Arrears Are Mine To Bear... Masque of the Red Death is further enhanced, the value of the increase is 120%. Additionally, Arlecchino's interruption resistance is increased when she performs Normal Attacks while affected by the Masque of the Red Death. |
| ★★★★・ | C2: All Rewards And Retribution, Mine To Bestow... Blood-Dept Directives are now already Blood-Dept Due when first applied. When Arlecchino absorbs such a Due, she unleashes Balemoon Bloodfire in front of her, dealing 900% of her ATK as AoE Pyro DMG. This effect can be trigger once every 10s. You must first unlock the Passive Talent "Agony Alone May Be Repaid". |
| ★★★・・ | C3: You Shall Become A New Member Of Our Family... Increases the Level of Normal Attack: Invitation To A Beheading by 3. Maximum upgrade level is 15. |
| ★★★・・ | C4: You Shall Love And Protect Each Other Henceforth >When Arlecchino successfully absorbs a Blood-Dept Directive, Balemoon Rising's CD will decrease by 2s and 15 Energy will be restored to her. This effect can occur once every 10s. |
| ★★・・・ | C5: For Alone, We Are As Good As Dead... >Increase the Level of Balemoon Rising by 3. Maximum upgrade level is 15. |
| ★★★★・ | C6: From This Day On, We Shall Delight In New Life Together. >The DMG of Balemoon Rising is increased by Arlecchino'S ATK multiplied by 700% of Arlecchino's current Life Bond percentage. For 20s after Arlecchino uses All is Ash, both her Normal Attacks and Elemental Burst gain 10% increase CRIT Rate and 70% increased CRIT DMG. This effect can be triggered up to once every 15s. |
Arlecchino's Constellation Name is Ignis Purgatorius
| Ignis Purgatorius |
|---|
 |
Ascension Materials for Arlecchino Talents & Level
Materials Needed for Level Ascension
| Materials Needed To Get To Lvl. 80 |
|---|
| Agnidus Agate Sliver x 1Agnidus Agate Fragment x 9Agnidus Agate Chunk x 9Recruit's Insignia x 18Sergeant's Insignia x 30Lieutenant's Insignia x 12Rainbow Rose x 108Fragment Of A Golden Melody x 26 |
| Materials Needed To Get To Lvl. 90 |
| Agnidus Agate Sliver x 1 Agnidus Agate Fragment x 9Agnidus Agate Chunk x 9Agnidus Agate Gemstone x 6Recruit's Insignia x 18Sergeant's Insignia x 30Lieutenant's Insignia x 36Rainbow Rose x 168Fragment Of A Golden Melody x 46 |
Rainbow Rose Farm Routes
| Rainbow Rose Farm Routes | |
|---|---|
 |  |
| Level 1 | Default |
|---|---|
| Level 2 | Teachings Of Order x3Recruit's Insignia x6 |
| Level 3 | Guide To Order x2 Sergeant's Insignia x3 |
| Level 4 | Guide To Order x4Sergeant's Insignia x4 |
| Level 5 | Guide To Order x6 Sergeant's Insignia x6 |
| Level 6 | Guide To Order x9 Sergeant's Insignia x9 |
| Level 7 | Philosophies Of Order x4 Lieutenant's Insignia x4 Fading Candle x1 |
| Level 8 | Philosophies Of Order x6 Lieutenant's Insignia x6 Fading Candle x1 |
| Level 9 | Philosophies Of Order x12 Lieutenant's Insignia x9 Fading Candle x2 |
| Level 10 | Philosophies Of Order x16 Lieutenant's Insignia x12 Fading Candle x2 Crown of Insight x1 |
| Level 11 | Unlocked via Constellation |
| Level 12 | Unlocked via Constellation |
| Level 13 | Unlocked via Constellation |
Related Links
Arlecchino Skills & Talents Details
Normal Attack: Invitation To A Beheading
Normal Attack
| Effect |
|---|
| Performs up to 5 consecutive spear strikes. |
| Lv1 | Lv2 | Lv3 | Lv4 | Lv5 | Lv6 | Lv7 | Lv8 | Lv9 | Lv10 | Lv11 | Lv12 | Lv13 | Lv14 | |
|---|---|---|---|---|---|---|---|---|---|---|---|---|---|---|
| 1-Hit DMG | 47.5% | 51.4% | 55.2% | 60.8% | 64.6% | 69% | 75.1% | 81.2% | 87.3% | 93.9% | 100.5% | 107.2% | 113.8% | 120.4% |
| 2-Hit DMG | 52.1% | 56.4% | 60.6% | 66.7% | 70.9% | 75.7% | 82.4% | 89.1% | 95.7% | 103% | 110.3% | 117.5% | 124.8% | 132.1% |
| 3-Hit DMG | 65.4% | 70.7% | 76% | 83.6% | 89% | 95% | 103.4% | 111.8% | 120.1% | 129.3% | 138.4% | 147.5% | 156.6% | 165.8% |
| 4-Hit DMG | 37.2% + 37.2% | 40.2% + 40.2% | 43.2% + 43.2% | 47.5% + 47.5% | 50.5% + 50.5% | 54% + 54% | 58.7% + 58.7% | 63.5% + 63.5% | 68.2% + 68.2% | 73.4% + 73.4% | 78.6% + 78.6% | 83.8% + 83.8% | 89% + 89% | 94.2% + 94.2% |
| 5-Hit DMG | 70% | 75.7% | 81.4% | 89.5% | 95.2% | 101.7% | 110.7% | 119.6% | 128.6% | 138.3% | 148.1% | 157.9% | 167.6% | 177.4% |
| 6-Hit DMG | 85.4% | 92.3% | 99.3% | 109.2% | 116.2% | 124.1% | 135% | 145.9% | 156.9% | 168.8% | 180.7% | 192.6% | 204.5% | 216.4% |
Masque Of The Red Death
| Effect |
|---|
| When Arlecchino has a Bond of Life equal to or greater than 30% of her Max HP, she will enter the "Masque of the Red Death" state, where her Normal, Charged, and Plunging Attacks will be converted to deal Pyro DMG. This cannot be overridden. When in the "Masque of the Red Death" state, Arlecchino's Normal Attacks will deal extra DMG to opponents on hit that scales off her ATK multiplied by a certain ratio of her current Bond of Life percentage. This will consume 7.5% of said current Bond of Life. Her Bond of Life can be consumed this way every 0.03s. When her Bond of Life is consumed in this manner, All Is Ash's CD will decrease by 0.8s. |
| Lv1 | Lv2 | Lv3 | Lv4 | Lv5 | Lv6 | Lv7 | Lv8 | Lv9 | Lv10 | Lv11 | Lv12 | Lv13 | Lv14 | |
|---|---|---|---|---|---|---|---|---|---|---|---|---|---|---|
| Masque of the Red Death Increase | 120.4% | 130.2% | 140% | 154% | 163.8% | 175% | 190.4% | 205.8% | 221.2% | 238% | 254.8% | 271.6% | 288.4% | 305.2% |
▲Use side-scroll to see percentage per level.
Charged Attack
| Effect |
|---|
| Consumes a fixed amount of Stamina, dashing toward a nearby opponent and cleaving once. Continuously holding this button will cause Arlecchino to consume Stamina and engage in up to 5s of high-speed movement. |
| Lv1 | Lv2 | Lv3 | Lv4 | Lv5 | Lv6 | Lv7 | Lv8 | Lv9 | Lv10 | Lv11 | Lv12 | Lv13 | Lv14 | |
|---|---|---|---|---|---|---|---|---|---|---|---|---|---|---|
| Charged Attack DMG | 90.8% | 98.2% | 105.6% | 116.2% | 123.6% | 132% | 143.6% | 155.2% | 166.9% | 179.5% | 192.2% | 204.9% | 217.5% | 230.2% |
| Charged Attack Stamina Cost | 25 | 25 | 25 | 25 | 25 | 25 | 25 | 25 | 25 | 25 | 25 | 25 | 25 | 25 |
| High-Speed Movement Stamina Cost | 40s | 40s | 40s | 40s | 40s | 40s | 40s | 40s | 40s | 40s | 40s | 40s | 40s | 40s |
▲Use side-scroll to see percentage per level.
Plunging Attack
| Effect |
|---|
| Plunges from mid-air to strike the ground below, damaging opponents along the path and dealing AoE DMG upon impact. |
| Lv1 | Lv2 | Lv3 | Lv4 | Lv5 | Lv6 | Lv7 | Lv8 | Lv9 | Lv10 | Lv11 | Lv12 | Lv13 | Lv14 | |
|---|---|---|---|---|---|---|---|---|---|---|---|---|---|---|
| Plunge DMG | 63.9% | 69.1% | 74.3% | 81.8% | 87% | 92.9% | 101.1% | 109.3% | 117.5% | 126.4% | 135.3% | 144.2% | 153.1% | 162.1% |
| Low Plunge DMG | 128% | 138% | 149% | 164% | 174% | 186% | 202% | 219% | 235% | 253% | 271% | 288% | 306% | 324% |
| High Plunge DMG | 160% | 173% | 186% | 204% | 217% | 232% | 253% | 273% | 293% | 316% | 338% | 360% | 383% | 405% |
▲Use side-scroll to see percentage per level.
All Is Ash (Elemental Skill)
| Effect |
|---|
| Summons forth Balemoon Bloodfire, dealing Pyro DMG to multiple nearby opponents and performing a dash-cleave against one of them, dealing AoE Pyro DMG. Opponents hit by the aforementioned attack will have a Blood-Debt Directive applied to them. |
Blood-Debt Directive
| Effect |
|---|
| ・Lasts 30s. Every 5s, it will deal 1 instance of Pyro DMG to the opponent. Max 2 instances. This DMG will be considered Elemental Skill DMG. ・When Arlecchino uses a Charged Attack or her Elemental Burst, Balemoon Rising, she will absorb and clear nearby Blood-Debt Directives. Each Directive absorbed grants her a Bond of Life worth 65% of her Max HP. ・The maximum value of the Bond of Life she can be granted through Blood-Debt Directives within 35s after using her Elemental Skill is 145% of her Max HP. Using the Elemental Skill again during this duration will restart the count on duration and the limit on the value of Bond of Life she may gain from Blood-Debt Directives. |
| Lv1 | Lv2 | Lv3 | Lv4 | Lv5 | Lv6 | Lv7 | Lv8 | Lv9 | Lv10 | |
|---|---|---|---|---|---|---|---|---|---|---|
| Spike DMG | 14.8% | 16% | 17.1% | 18.5% | 19.7% | 20.8% | 22.3% | 23.7% | 25.2% | 26.7% |
| Cleave DMG | 133.6% | 143.6% | 153.6% | 166.9% | 177% | 187% | 200.3% | 213.7% | 227.1% | 240.4% |
| Blood-Debt Directive DMG | 31.8% | 34.2% | 36.6% | 39.8% | 42.1% | 44.5% | 47.7% | 50.9% | 54.1% | 57.2% |
| CD | 30s | 30s | 30s | 30s | 30s | 30s | 30s | 30s | 30s | 30s |
▲Use side-scroll to see percentage per level.
Balemoon Rising
| Effect |
|---|
| Arlecchino's great wing of Balemoon Bloodfire beats as she absorbs and clears Blood-Debt Directives around her. She deals AoE Pyro DMG before clearing the CD of All Is Ash and healing herself. The healing is based on her Bond of Life value and ATK. |
| Lv1 | Lv2 | Lv3 | Lv4 | Lv5 | Lv6 | Lv7 | Lv8 | Lv9 | Lv10 | Lv11 | Lv12 | Lv13 | |
|---|---|---|---|---|---|---|---|---|---|---|---|---|---|
| Skill DMG | 370.4% | 398.2% | 426% | 463% | 490.8% | 518.6% | 555.6% | 592.6% | 629.7% | 666.7% | 703.8% | 740.8% | 787.1% |
| Amount of HP Restored | 150% Bond of Life +150% ATK | 150% Bond of Life +150% ATK | 150% Bond of Life +150% ATK | 150% Bond of Life +150% ATK | 150% Bond of Life +150% ATK | 150% Bond of Life +150% ATK | 150% Bond of Life +150% ATK | 150% Bond of Life +150% ATK | 150% Bond of Life +150% ATK | 150% Bond of Life +150% ATK | 150% Bond of Life +150% ATK | 150% Bond of Life +150% ATK | 150% Bond of Life +150% ATK |
| CD | 15s | 15s | 15s | 15s | 15s | 15s | 15s | 15s | 15s | 15s | 15s | 15s | 15s |
| Energy Cost | 60 | 60 | 60 | 60 | 60 | 60 | 60 | 60 | 60 | 60 | 60 | 60 | 60 |
▲Use side-scroll to see percentage per level.
Agony Alone May Be Repaid
| Effect |
|---|
| Blood-Debt Directives have the following characteristics: ・Arlecchino will be granted a Bond of Life worth 130% of her Max HP when an opponent to which she herself applied a Directive is defeated. ・5s after a Directive is applied, it will be upgraded to a Blood-Debt Due. When absorbed, it will instead grant Arlecchino a Bond of Life worth 130%. A Bond of Life created in the aforementioned ways cannot exceed the original limit on the value of Bonds of Life obtained through All Is Ash. |
Strength Alone Can Defend
| Effect |
|---|
| Arlecchino gains 1% All Elemental and Physical RES for every 100 ATK she has in excess of 1,000. The maximum RES increase she can gain this way for each is 20%. |
The Balemoon Alone May Know
| Effect |
|---|
| While in combat, Arlecchino gains a 40% Pyro DMG Bonus and can only be healed through Balemoon Rising. |
Who Is Arlecchino?
The Knave of the Fatui Harbringers

Arlecchino, the Fourth of the Eleven Fatui Harbringers, with the codename of The Knave is a dangerous person to deal with. Her position as a Harbringer was given to her by a decree of the Tsaritsa after Arlecchino killed the previous Knave, Crucabena.
Head of the House of the Hearth

During the Fontaine Archon Quest, it is revealed that the House of the Hearth, an orphanage led by Arlecchino, is part of the Fatui. Lyney, Lynette, and Freminet's voicelines talk about their "Father" and their relations to the orphanage. Arlecchino sees herself as a strict and unfeeling Father but in reality, she is considered the most dependable person for the orphans she took in.
Descendant of the Crimson Moon Dynasty

In Arlecchino's Character Stories, it was revealed that Arlecchino is a descendant of the Crimson Moon Dynasty, a kingdom that came before the now fallen Eclipse Dynasty of Khaenri'ah. Her bloodline's power manifests in a strange fire and those who met their demise due to it would leave afterimages that Arlecchino calls as shadows.
Arlecchino's Voice Actors & Notable Roles

English Voice Actor: Erin Yvette
| Notable Roles | |
|---|---|
| The Wolf Among Us | Snow White |
| The Walking Dead | Molly |
| Tales from the Borderlands | Sasha |
Japanese Voice Actor: Mori Nanako
| Notable Roles | |
|---|---|
| Spider-Man 2 (2023) | Mary Jane Watson |
| Mobile Suit Gundam SEED Freedom | Cagalli Yula Athha |
| Soulcalibur VI | Taki |
| Fate/Grand Order (Game) | Prince of Lanling (Saber) |
Character Related Articles
Character Tier Lists
All Characters
| Characters By Rarity | |||||||||||
|---|---|---|---|---|---|---|---|---|---|---|---|
| Characters By Roles | |||||||||||
| DPS List | Support List | Sustain List | |||||||||
| On-Field List | Off-Field List | ||||||||||
| Characters By Element | |||||||||||
| Hydro | Anemo | Electro | |||||||||
| Dendro | |||||||||||
| Characters By Nation | |||||||||||
| Mondstadt | Liyue | ||||||||||
| Fontaine | Natlan | ||||||||||
| Snezhnaya | Nod-Krai | ||||||||||

