
Comprehensive Mona guide for Genshin Impact. Learn Mona's best build, best team, and artifact for this 5-Star Hydro Support Catalyst user.
| Mona Related Articles | ||||||||
|---|---|---|---|---|---|---|---|---|
 Best Build Best Build | Best Team | Gacha Banner | ||||||
| Story Quest | Specialty | Signature Weapon | ||||||
Table of Contents
Mona Latest Information & News
Summary of Mona's Buff
| Constellation | - C1, C2, C4, and C6: Provides Hydro Reaction Boost, EM Buff, CRIT DMG Buff and increased Damage during Elemental Burst. |
|---|---|
| Others | - New Passive adding her as a member of Hexenzirkel Faction. Hex Character Buff: When there are 2 or more Hex Characters: └ Increase the Vaporize DMG produced by off-field character. └ Extend Omen for every NA and CA. |
Mona will have a character buff where her constellations increases the buff of her Omen Debuff, making her more efficient support for her teams. Her Charged Attack will also be increased, making her a good on-field damage dealer when paired with other Hexerei characters.
Mona Character Buffs & Changes GuideMona Character Overview, Base Stats, and Tier
Character Profile
 | Rarity | | |
|---|---|---|---|
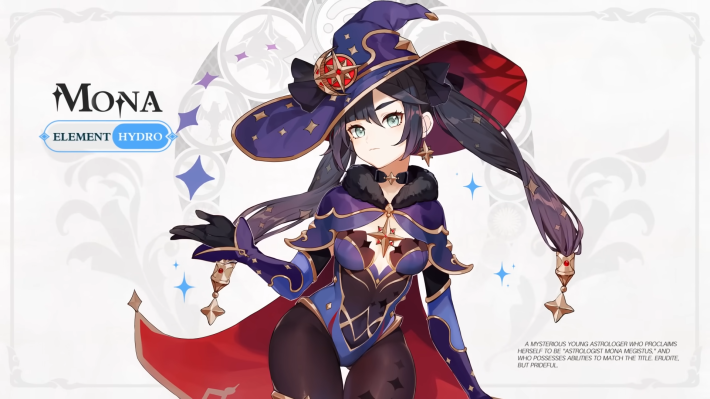
| Element | Hydro | ||
| Weapon | Catalyst | ||
| Ascend Stat | Energy Recharge 32.0% | ||
| Region | Mondstadt | ||
| Birthday | August 31 | ||
| Roles | | ||
| How To Get | Available in all Banners | ||
Base Stats
| Base HP | Base ATK | Base DEF | |
|---|---|---|---|
| Lvl. 90 | 10,409 | 287 | 653 |
| Lvl. 80 (Ascended) | 9,677 | 267 | 607 |
Mona is a 5-star Hydro character who wields a Catalyst weapon. She has a powerful Burst and can be played as either a support unit or an on-field DPS. As a support, she mainly use her Elemental Burst to inflict Omen debuff to enemies, increasing their received DMG. Because of Hexerei Faction buff, Mona can also be played on-field where her Omen debuff can increase the Vaporize damage done by off-field team mates. Lore-wise, Mona is an astrologer residing in Mondstadt and a student of the Witch Barbeloth.
Mona's Tier & Rating
| Overall Tier | ||||||||||||||
|---|---|---|---|---|---|---|---|---|---|---|---|---|---|---|
| A | ||||||||||||||
| On-Field | Off-Field | DPS | Support | Sustain | ||||||||||
| C | A | - | A | - | ||||||||||
Mona is the on-field reaction enabler who can extend her Omen debuff to increase the Vaporize damage done by the off-field Pyro Sub-DPS. Mona's Skill applies Hydro and taunts enemies while her Burst debuffs enemies with Omen and can hold smaller enemies in place.
Rate Mona!
Roles & Playstyle of Mona and Her Strengths and Weakness
Vaporize Support
For teams with a Pyro Damage Dealer, Mona's best role is as a reaction enabler. With her Omen debuff and Mercury stacks, she can greatly boost Vaporize damage while applying Hydro.
Pros and Cons of Vaporize Support
| Pros |
|---|
| - Doesn't require Constellations to be an effective support. |
| - Can be used as the on-field enabler or off-field support since her Hydro attacks can allow the off-field Pyro Sub-DPS to trigger Vaporize. |
| Cons |
| - Requires a second Hexerei character, but Sucrose can be obtained for free by completing the Witch's Homework task. |
| - Burst-reliant for her support abilities, meaning she'll need Energy Recharge built in order to maintain the uptime of her Burst. |
Best Build for Mona
Mona can be played as either an on-field driver or an off-field support, with the main difference in her build being the weapon choice. Building her with sufficient Energy Recharge is highly recommended, as it improves both her Burst uptime and damage, thanks to her passive that increases her Hydro DMG Bonus based on her ER.
| Weapon | Lost Prayer To The Sacred Winds (On-Field)Favonius Codex (Off-Field) |
|---|---|
| Best Artifact | Noblesse Oblige x4 |
| Artifact Main Stats | Sands: Energy Recharge or ATK% Goblet: Hydro DMG Bonus Circlet: CRIT Rate or CRIT DMG |
| Priority Sub-Stats | Energy Recharge > CRIT Rate = CRIT DMG > ATK% |
| Recommended Team | |
Stat Goals for Support Mona
| CRIT Rate | 75% |
|---|---|
| CRIT DMG | 180%~ |
| Energy Recharge | 240%~ |
Mona has a high Energy cost for her Burst, so it's recommended to build enough ER to ensure consistent uptime. Once you've reached the desired ER, you can then focus on improving her CRIT and ATK stats.
Mona 's Recommended Talent Priority
| Talent | Level Up Priority |
|---|---|
| Normal Attack: Ripple of Fate | ★★★・・ |
| Mirror Reflection of Doom (Elemental Skill) | ★★★★・ |
| Stellaris Phantasm (Elemental Burst) | ★★★★★ |
Related Links:
Best Weapon for Mona
Mona's weapon differs depending on the build you want for her. Since using her as an On-Field Enabler means using DPS-oriented weapons while for Support, she needs Energy Recharge weapons and can use support-oriented weapons.
Premium Weapons for On-Field Enabler Mona
| Weapon | How to Get Rating | |
|---|---|---|
| Best | Lost Prayer To The Sacred WindsKagura's Verity | Get from Weapon Banners - Damage-oriented weapons that can boost Mona's CRIT stats and Elemental Damage. - Helps in boosting Mona's own damage but doesn't have utility for her teammates. |
| 2nd | Favonius Codex | Get from Banners - Energy Recharge stat stick that has a great passive for charging the team's Energy. - Doesn't provide damage stats but requires Mona to build CRIT Rate for its passive. |
| 3rd | Wandering Evenstar | Get from Limited Banners - Support oriented weapon that allows Mona to buff ATK based on her Elemental Mastery. - Needs some EM to be built for the ATK buff. |
Damage oriented weapons are preferred for on-field Mona but if you don't have the first two, you can choose to use a support weapon that can be used on-field like Favonius Codex since its passive can be triggered easier with her field time.
Free-to-Play Friendly (F2P Weapons) for On-Field Enabler Mona
| Weapon | How to Get Rating | |
|---|---|---|
| Best F2P | Ballad Of The Boundless Blue | Get from Limited Event - Obtained from Version 4.1's flagship event. - Boosts Energy Recharge and Mona's Normal/Charged Attacks. - Works great as a DPS weapon while also boosting her Energy Recharge. |
| 2nd (Event) | Oathsworn Eye | Get from Limited Event - Obtained from Version 2.5's flagship event. - ATK and Energy Recharge stat stick. - Requires using her Elemental Skill to activate the Energy Recharge buff. |
| 3rd (Forge) | Fruit Of Fulfillment | Sumeru Craftable (Forgeable) Weapon - Craftable weapon from Sumeru that can boost her EM at the cost of lower ATK. - Has a decent Energy Recharge stat. |
Mona's F2P options as an on-field enabler are event-limited options that can no longer be obtained. The Sumeru catalyst can be used by her though it lowers her attack but boosts her reaction damage since it buffs EM.
Premium Weapons for Off-Field Support Mona
| Weapon | How to Get Rating | |
|---|---|---|
| Best | Favonius Codex | Get from Banners - Energy Recharge stat stick and passive for Energy Particle generation works great for Mona's Energy needs and charging the team's Energy as well. |
| 2nd | Thrilling Tales Of Dragon Slayers | Get from Banners - Best support weapon for buffing DPS characters that scale on ATK. |
| 3rd | Wandering Evenstar | Get from Limited Banners - Boosts Mona's Elemental Mastery and uses it for a small ATK buff to the team. |
Thrilling Tales is Mona's best off-field support weapon if she's supporting an ATK scaling DPS. If she's not supporting an ATK DPS, she can use Favonius Codex or Wandering Evenstar.
Free-to-Play Friendly (F2P Weapons) for Off-Field Support Mona
| Weapon | How to Get Rating | |
|---|---|---|
| Best F2P | Oathsworn Eye | Get from Limited Event - Obtained from Version 2.5's flagship event. - Since there's no support-oriented F2P weapon, Mona should use a damage-oriented weapon with a high Energy Recharge stat. |
| 2nd (Event) | Etherlight Spindlelute | Get from Limited Event - Obtained from Version 6.0's flagship event. - 2nd F2P weapon with a high Energy Recharge stat. - Boosts EM for reaction damage. |
| 3rd (Forge) | Fruit Of Fulfillment | Sumeru Craftable (Forgeable) Weapon - Craftable weapon from Sumeru that can boost her EM at the cost of lower ATK. - Has a decent Energy Recharge stat. |
Mona's F2P options for her off-field support role are weapons with a high Energy Recharge and a stat that can boost her damage in some way. If you don't have the first two, the Sumeru weapon can work as ER stat stick.
Mona Best Artifacts
Mona's best artifact set for both support and damage is Noblesse Oblige because it allows her to gain a decent boost to her damage and buff her teammates' ATK as well. For other artifact sets that can be used for Mona, see the recommendations below:
| Artifact | Recommendation Details |
|---|---|
| Noblesse Oblige | ★★★★★ - Best set for both support and damage purposes. - Allows Mona's Burst to do more damage while buffing her teammates' ATK. |
| Emblem Of Severed Fate | ★★★★ ・ - 2nd best set for Mona since it's a pure damage-oriented set but also boosts her Energy Recharge for Burst uptime. |
| Silken Moon's SerenadeEmblem Of Severed Fate | ★★★ ・ ・ - If you don't have a full set of Noblesse Oblige and don't want to build for Mona's damage, you can use two ER 2-piece set effects to greatly increase her Energy Recharge since she needs it for her Burst uptime. - This also boosts Mona's damage a bit since her Hydro DMG Bonus is increased by her ER too. |
Recommended Artifact Stats
| Main: Flat HP Sub: Energy Recharge / CRIT Rate or DMG / ATK% |
|---|---|
| Main: Flat ATK Sub: Energy Recharge / CRIT Rate or DMG / ATK% |
| Main: Energy Recharge or ATK% Sub: Energy Recharge / CRIT Rate or DMG / ATK% |
| Main: Hydro DMG Bonus Sub: Energy Recharge / CRIT Rate or DMG / ATK% |
| Main: CRIT Rate or DMG Sub: Energy Recharge / CRIT Rate or DMG / ATK% |
Focus on CRIT Stats for DPS and Energy Recharge for Support
Mona is able to deal decent damage despite her kit being supportive. Building CRIT Stats, Energy Recharge and ATK can work for her but if you want to focus only on her Energy Recharge, that's fine as well since it can boost her Hydro DMG Bonus.
Related Articles
Best Team Comp Mona
Vaporize Team for Mona
| Support | DPS | Support | Sub-DPS |
|---|---|---|---|
| Mualani | Xilonen | Durin | |
| Details | |||
| - Mualani Vaporize team with Mona as the Vaporize support. - Xilonen and Durin shred Elemental RES while the Hydro resonance boosts Mualani's HP more. | |||
With Hexerei: Secret Rite active, Mona can amplify Vaporize damage for DPS characters like Mualani, Arlecchino and Mavuika. Although she needs a 2nd Hexerei character with her, there are great options like Durin and Sucrose who can also help buff the damage dealt.
Other Team Comps for Mona
Vaporize Team with Pyro Sub-DPS
| Team | Detail | |
|---|---|---|
| Ineffa | - Mona as the on-field reaction enabler for Vaporize while Durin shreds enemy RES for Xiangling. - Ineffa provides a shield for Mona while she's on-field and contribute her own Lunar-Charged damage. | |
| Durin | Xiangling | |
Free To Play Team Comp for Mona
| Team | Detail | |
|---|---|---|
| Sucrose | - A F2P Vaporize team featuring Mona. - Sucrose is a great free-to-play option, as she can be obtained by completing the Witch's Homework task. - Bennett was available for free in a previous event, and Xiangling can be obtained for free by clearing the Spiral Abyss. | |
| Bennett | Xiangling | |
Team Rotation of Mona and Combos
Basic Team Rotation for Off-Field Support Mona (Post-Buff)
| Basic Rotation For Off-Field Support Mona (Post-Buff) |
|---|
| 1. Start the rotation with the supports that have longer ability durations, followed by the shorter ones. If there is an On-Field DPS that requires you to start the rotation with them first, such as Arlecchino, then remember to do so. 2. Switch to Mona, use her Skill, then Burst. You can use Normal Attack (up to x4) to extend the Omen duration a little bit. 3. Swap to the On-Field DPS to deal damage using your preferred combo. 4. Repeat from Step 1 after all other abilities have expired. |
Mona's most common Off-Field rotation is fairly simple, though it'll also depend on who the On-Field DPS is. Letting Mona reach her required Energy Recharge levels ensures a smooth and easy rotation.
Basic Team Rotation for On-Field Enabler Mona (Post-Buff)
| Basic Rotation For Off-Field Support Mona (Post-Buff) |
|---|
| 1. Start the rotation with the supports that have longer ability durations, followed by the shorter ones. 2. Switch to Mona, use her Skill, then Burst, then use Normal Attacks with some Charged Attacks to drive support abilities and to extend her Omen mark. 3. Swap to any Off-Field supports that have the ability to briefly refresh their Skills to continue doing damage. 4. Repeat from Step 1 after all other abilities have expired. |
Mona can also be deployed as an On-Field enabler or driver who uses her Normal or Charged Attacks to not only apply Hydro, but to increase the uptime on her Omen buff for the benefit of any Off-Field Sub-DPSes like Durin in his Denial of Darkness state, where he deals increased Vaporize or Melt damage.
Basics Of Using Mona
Can Be Used As On-Field Enabler or Off-Field Support
Mona's new buffs allow her to be used as an on-field Enabler or off-field Support. The Secret Rite effects allows her to boost her teammates' Vaporize damage and extend Omen duration.
Only Elemental Burst Is Needed for Debuffing
Mona's Omen debuff is a powerful damage boost for Hydro reactions like Vaporize. Outside of that, her Elemental Skill is a typical Hydro applier Skill that can taunt enemies.
Secret Rite Improves Vaporize Damage with and without Omen Debuff
Hexerei: Secret Rite effect allows Mona to use her Normal/Charged Attacks to gain a stacking buff that increases Vaporize damage dealt by her teammates and increase the duration of Omen. This makes her a great Vaporize support and can allow her to be an on-field enabler for Pyro Sub-DPS characters.
Easy and Straightforward to Build As Off-Field Support
While Mona's buffs are great for her on-field role as a reaction enabler, it makes it rather difficult to build her since there's no weapon or artifact set that can enhance her enabler role. But as an off-field Damage Support, she'll need Energy Recharge or support equipment for her.
Elemental Skill, Burst and Abilities Guide for Mona
How To Use Mona Skills & Passives
Off-Field Hydro Support for Hydro Reactions
| Basic Rotation Of Mona |
|---|
| 1. Start other supports with shorter ability durations and use their Elemental Skills or Bursts. 2. Swap to Mona, use her Elemental Skill first before her Elemental Burst. If needed, use Normal Attacks (x4) to extend the duration of her Omen. 3 .Swap to your On-Field DPS to execute their damage combos 4. Repeat from Step 1. |
Mona will typically want to deploy her Burst before swapping into the On-Field DPS in order to get the most out of the DMG% buff that her Burst's mark or 'Omen' applies.
Using her Skill into Burst will be enough for almost all team archetypes, but if you've finished her Witch's Homework task, you can use Normal or Charged Attacks to extend the duration of the Omen mark, alongside other buffs, which is part of her new Hexerei passive. This passive needs another Hexerei member in the party in order to be activated.
Elemental Skill Can Taunt Enemies
| Icon | Elemental Skill Summary |
|---|---|
| Mirror Reflection of Doom | - Tap: Creates an illusory Phantom of Fate that taunts enemies. - Creates an illusory Phantom of Fate that taunts enemies. - When the Phantom expires, it explodes, dealing AoE Hydro DMG. - Hold: Mona swiftly backsteps before summoning a Phantom. - Only one Phantom from this Skill can exist at a time. |
Mona's Skill creates a Phantom that applies Hydro very briefly applies Hydro to nearby enemies, taunting them at the same time. This ability generates particles, so using it before deploying her Burst allows you to catch the Energy particles while the Burst animation plays.
Elemental Burst Is Her Most Important Ability
| Icon | Elemental Burst Summary |
|---|---|
| Stellaris Phantasm | -Traps opponents in an Illusory Bubble, applying Hydro and immobilizing weaker enemies. - When an affected opponent takes DMG, the Bubble pops, dealing Hydro DMG and applying Omen. - Omen increases the DMG the opponent takes for its duration, including boosting the attack that triggered the Bubble’s removal. |
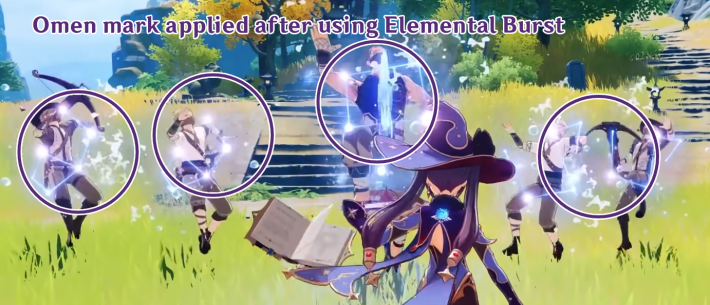
Mona's signature DMG% buff is tied to her Elemental Burst, which applies a special mark enemies known as Omen. Using Mona in her best teams requires you to build enough Energy Recharge on Mona to be able to use the Burst every rotation. Her Burst is also tied to her Hexerei: Secret Rite passive.
Hexerei: Secret Rite Increases Her Potency as a DMG% Support
| Icon | Passive Summary |
|---|---|
| Witch's Eve Rite: Genesis of Starsigns | - After completing Witch's Homework: Of Untested Insight, Mona becomes a Hexerei character, enabling Hexerei: Secret Rite when the party has 2 or more Hexerei members. - Hexerei: Secret Rite Effects: - Mona's Normal/Charged Attacks grant 1 stack of Astral Glow of Mercury (8s duration, max 3 stacks, 1 stack per 0.1 second). - When other party members trigger Vaporize, all stacks are consumed, each granting +5% Vaporize DMG. - Mona’s Normal/Charged Attacks extend Omen duration by 2 seconds, once every 0.5 seconds, up to +8 seconds total. |
Once you've completed Mona's Witch's Homework task, you'll unlock the above passive, which enables her to become a stronger buffer for Vaporize. You can also extend the duration of her Omen mark, allowing you more time to deal boosted damage numbers. Note that all Witch's Eve Rite passives require another Hexerei member in the party to be activated.
All Hexerei CharactersConstellations Have Gone up in Value After the Buffs
| Icon | Buffs Received |
|---|---|
| Prophecy of Submersion | - Reaction DMG bonuses are increased by 160% if an off-field party member triggers the Hydro reaction. |
| Lunar Chain | - Increases all nearby party members' Elemental Mastery by 80 for 12 seconds after Mona's Charged Attack hits an enemy. |
| Prophecy of Oblivion | - CRIT DMG of any Hexerei party member is increased by 15% after they attack an enemy affected by Omen. |
| Rhetorics of Calamitas | - Mona's Charged Attack DMG when attacking an Omen-affected enemy will be increased by 200% of the original DMG. |
Mona's Constellations have also gotten a buff, which are automatically applied after completing her Witch's Homework task. Her C1, C2 and C4 all increase her utility as a buffing support, while her C6 allows her to be played like an On-Field DPS or Driver for an Off-Field DPS like Durin without having to deal negligible damage while doing so.
As of the current version, Mona likely has some of the best Constellations amongst the Standard Banner characters.
Mona Buff GuideSpecial Dash Can Apply Hydro to Enemies
Mona is one of the few characters in the game with an alternate or special dash. Like Ayaka, Mona sinks beneath the ground and traverses the surface as a puddle of water, applying Hydro to enemies after she ends her dash. This dash is slightly faster than regular dashes and can be a great tool for overworld exploration.
Should You Pull for Mona's Constellation Or Best Weapon?
Constellations Are Great But Not Necessary
| Constellation Priority |
|---|
| C4 > C1 |
C1 Boosts Reaction Damage while C4 Boosts CRIT Stats
As of Version 6.2, there are no weapons that can boost Mona's performance as a support, but her Constellations can. C1 increases the damage of Hydro-related reactions (excluding Freeze and Crystallize), while C4 can buff CRIT Rate (and CRIT DMG for Hexerei characters). However, Mona doesn't necessarily need them since her Omen debuff is already powerful enough at C0.
Mona's Constellations & Effects
| Rating | Constellation Effect |
|---|---|
| ★★★★・ | C1: Prophecy Of Submersion When any of your own party members hits an opponent affected by an Omen, the effects of Hydro-related Elemental Reactions are enhanced for 8s: - Electro-Charged DMG increases by 15% - Vaporize DMG increases by 15% - Hydro Swirl DMG increases by 15% - Frozen duration is extended by 15% |
| ★★・・・ | C2: Lunar Chain When a Normal Attack hits, there is a 20% chance that it will be automatically followed by a Charged Attack. This effect can only occur once every 5s. |
| ★★★・・ | C3: Restless Revolution Increases the Level of Stellaris Phantasm by 3. Maximum upgrade level is 15. |
| ★★★★★ | C4: Prophecy Of Oblivion When any party member attacks an opponent affected by an Omen, their CRIT Rate is increased by 15%. |
| ★★・・・ | C5: Mockery Of Fortuna Increases the Level of Mirror Reflection Of Doom by 3. Maximum upgrade level is 15. |
| ★・・・・ | C6: Rhetorics Of Calamitas Upon entering Illusory Torrent, Mona gains a 60% increase to the DMG of her next Charged Attack per second of movement. A maximum DMG Bonus of 180% can be achieved in this manner. The effect lasts for nor more than 8s. |
Mona's Constellation Name is Astrolabos
| Astrolabos |
|---|
 |
Ascension Materials for Mona Talents & Level
Materials Per Ascension Level
| Lvl 20 | Varunada Lazurite Sliver x1Philanemo Mushroom x3Whopperflower Nectar x3 |
|---|---|
| Lvl 40 | Varunada Lazurite Fragment x3Cleansing Heart x2 Philanemo Mushroom x10Whopperflower Nectar x15 |
| Lvl 50 | Varunada Lazurite Fragment x9Cleansing Heart x4 Philanemo Mushroom x20Shimmering Nectar x12 |
| Lvl 60 | Varunada Lazurite Chunk x6Cleansing Heart x8 Philanemo Mushroom x30Shimmering Nectar x18 |
| Lvl 70 | Varunada Lazurite Chunk x3Cleansing Heart x12 Philanemo Mushroom x45Energy Nectar x12 |
| Lvl 80 | Varunada Lazurite Gemstone x6Cleansing Heart x20 Philanemo Mushroom x60Energy Nectar x24 |
Materials Per Talent Level
| Level 1 | Default |
|---|---|
| Level 2 | Teachings Of Resistance x3 Whopperflower Nectar x6 |
| Level 3 | Guide To Resistance x2 Shimmering Nectar x3 |
| Level 4 | Guide To Resistance x4 Shimmering Nectar x4 |
| Level 5 | Guide To Resistance x6 Shimmering Nectar x6 |
| Level 6 | Guide To Resistance x9 Shimmering Nectar x9 |
| Level 7 | Philosophies Of Resistance x4 Energy Nectar x4 Ring Of Boreas x1 |
| Level 8 | Philosophies Of Resistance x6 Energy Nectar x6 Ring Of Boreas x1 |
| Level 9 | Philosophies Of Resistance x12 Energy Nectar x9 Ring Of Boreas x2 |
| Level 10 | Philosophies Of Resistance x16 Energy Nectar x12 Ring Of Boreas x2 Crown Of Insight x1 |
| Level 11 | Unlocked via Constellation |
| Level 12 | Unlocked via Constellation |
| Level 13 | Unlocked via Constellation |
Related Links
Mona Skills & Talents Details
Normal Attack: Ripple Of Fate
Normal Attack
| Effect |
|---|
| Performs up to 4 water splash attacks that deal Hydro DMG. |
| Lv1 | Lv2 | Lv3 | Lv4 | Lv5 | Lv6 | Lv7 | Lv8 | Lv9 | Lv10 | Lv11 | |
|---|---|---|---|---|---|---|---|---|---|---|---|
| 1-Hit DMG | 37.6% | 40.4% | 43.2% | 47% | 49.8% | 52.6% | 56.4% | 60.2% | 63.9% | 67.7% | 71.4% |
| 2-Hit DMG | 36% | 38.7% | 41.4% | 45% | 47.7% | 50.4% | 54% | 57.6% | 61.2% | 64.8% | 68.4% |
| 3-Hit DMG | 44.8% | 48.2% | 51.5% | 56% | 59.4% | 62.7% | 67.2% | 71.7% | 76.2% | 80.6% | 85.1% |
| 4-Hit DMG | 56.2% | 60.4% | 64.6% | 70.2% | 74.4% | 78.6% | 84.2% | 89.9% | 95.5% | 101% | 107% |
▲Use side-scroll to see percentage per level.
Charged Attack
| Effect |
|---|
| Consumes a certain amount of Stamina to deal AoE Hydro DMG after a short casting time. |
| Lv1 | Lv2 | Lv3 | Lv4 | Lv5 | Lv6 | Lv7 | Lv8 | Lv9 | Lv10 | Lv11 | |
|---|---|---|---|---|---|---|---|---|---|---|---|
| Charged Attack DMG | 150% | 161% | 172% | 187% | 198% | 210% | 225% | 240% | 255% | 269% | 285% |
| Charged Attack Stamina Cost | 50 | 50 | 50 | 50 | 50 | 50 | 50 | 50 | 50 | 50 | 50 |
▲Use side-scroll to see percentage per level.
Plunging Attack
| Effect |
|---|
| Calling upon the power of her Wind Spirits, Sucrose plunges towards the ground from mid-air, damaging all opponents in her path. Deals AoE Anemo DMG upon impact with the ground. |
| Lv1 | Lv2 | Lv3 | Lv4 | Lv5 | Lv6 | Lv7 | Lv8 | Lv9 | Lv10 | Lv11 | |
|---|---|---|---|---|---|---|---|---|---|---|---|
| Plunge DMG | 56.8% | 61.5% | 66.1% | 72.7% | 77.3% | 82.6% | 89.9% | 97.1% | 104% | 112% | 120% |
| Low Plunge DMG | 114% | 123% | 132% | 145% | 155% | 165% | 180% | 194% | 209% | 225% | 240% |
| High Plunge DMG | 142% | 153% | 165% | 182% | 193% | 206% | 224% | 243% | 261% | 281% | 300% |
▲Use side-scroll to see percentage per level.
Mirror Reflection of Doom (Elemental Skill)
| Effect |
|---|
| Creates an illusory Phantom of Fate from coalesced waterspouts. |
Phantom
| Effect |
|---|
| Has the following special properties: ・Continuously taunts nearby opponents, attracting their fire. ・Continuously deals Hydro DMG to nearby opponents. ・When its duration expires, the Phantom explodes, dealing AoE Hydro DMG. |
Hold
| Effect |
|---|
| Utilizes water currents to move backwards swiftly before conjuring a Phantom. Only one Phantom created by Mirror Reflection of Doom can exist at any time. |
| Lv1 | Lv2 | Lv3 | Lv4 | Lv5 | Lv6 | Lv7 | Lv8 | Lv9 | Lv10 | Lv11 | Lv12 | Lv13 | |
|---|---|---|---|---|---|---|---|---|---|---|---|---|---|
| DoT | 32% | 34.4% | 36.8% | 40% | 42.4% | 44.8% | 48% | 51.2% | 54.4% | 57.6% | 60.8% | 64% | 68% |
| Explosion DMG | 133% | 143% | 153% | 166% | 176% | 186% | 199% | 212% | 226% | 239% | 252% | 266% | 282% |
| CD | 12s | 12s | 12s | 12s | 12s | 12s | 12s | 12s | 12s | 12s | 12s | 12s | 12s |
▲Use side-scroll to see percentage per level.
Stellaris Phantasm
| Effect |
|---|
| Mona summons the sparkling waves and creates a reflection of the starry sky, applying the Illusory Bubble status to opponents in a large AoE. |
Illusory Bubble
| Effect |
|---|
| Traps opponents inside a pocket of destiny and also makes them Wet. Renders weaker opponents immobile.When an opponent affected by Illusory Bubble sustains DMG, it has the following effects: ・Applies an Omen to the opponent, which gives a DMG Bonus, also increasing the DMG of the attack that causes it. ・Removes the Illusory Bubble, dealing Hydro DMG in the process. |
| Lv1 | Lv2 | Lv3 | Lv4 | Lv5 | Lv6 | Lv7 | Lv8 | Lv9 | Lv10 | Lv11 | Lv12 | Lv13 | |
|---|---|---|---|---|---|---|---|---|---|---|---|---|---|
| Illusory Bubble Duration | 8s | 8s | 8s | 8s | 8s | 8s | 8s | 8s | 8s | 8s | 8s | 8s | 8s |
| Illusory Bubble Explosion DMG | 442% | 476% | 509% | 553% | 586% | 619% | 664% | 708% | 752% | 796% | 841% | 885% | 940% |
| CD | 15s | 15s | 15s | 15s | 15s | 15s | 15s | 15s | 15s | 15s | 15s | 15s | 15s |
| Energy Cost | 60 | 60 | 60 | 60 | 60 | 60 | 60 | 60 | 60 | 60 | 60 | 60 | 60 |
▲Use side-scroll to see percentage per level.
Omen
| Effect |
|---|
| During its duration, increases DMG taken by opponents. |
| Lv1 | Lv2 | Lv3 | Lv4 | Lv5 | Lv6 | Lv7 | Lv8 | Lv9 | Lv10 | Lv11 | Lv12 | Lv13 | |
|---|---|---|---|---|---|---|---|---|---|---|---|---|---|
| DMG Bonus | 42% | 44% | 46% | 48% | 50% | 52% | 54% | 56% | 58% | 60% | 60% | 60% | 60% |
| Omen Duration | 4s | 4s | 4s | 4s | 4s | 4s | 4s | 4s | 4s | 4s | 4s | 4s | 4s |
▲Use side-scroll to see percentage per level.
Illusory Torrent (Alternate Sprint)
Alternate Sprint
| Effect |
|---|
| Mona cloaks herself within the water's flow, consuming stamina to move rapidly. When under the effect of Illusory Torrent, Mona can move at high speed on water.Applies the Wet status to nearby opponents when she reappears. |
| Stamina Consumption | 10 |
|---|---|
| Continuous Stamina Consumption | 15s |
Passive Skills
Come 'n' Get Me, Hag!
| Effect |
|---|
| After she has used Illusory Torrent for 2s, if there are any opponents nearby, Mona will automatically create a Phantom. A Phantom created in this manner lasts for 2s, and its explosion DMG is equal to 50% of Mirror Reflection of Doom. |
Waterborne Destiny
| Effect |
|---|
| Increases Mona's Hydro DMG Bonus by a degree equivalent to 20% of her Energy Recharge rate. |
Principium Of Astrology
| Effect |
|---|
| When Mona crafts Weapon Ascension Materials, she has a 25% chance to refund a portion of the crafting materials used. |
Witch's Eve Rite: Genesis Of Starsigns
| Effect |
|---|
| After completing Witch's Homework: Of Untested Insight, Mona will become a Hexerei character. When the party includes at least 2 Hexerei characters, you will gain the Hexerei: Secret Rite effect, which enhances Hexerei characters. Hexereo: Secret Rite When Mona's Normal Attacks or Charged Attacks hit an opponent, she gains 1 stack of Astral Glow of Mercury, for 8s. Max 3 stacks. This effect can grant at most one stack every 0.1s. When other party members trigger a Vaporize reaction on an enemy, all Astral Glow of Mercury stacks are consumed. Each stack consumed increases the damage of that Vaporize reaction by 5%. Additionally, when Mona's Normal Attacks or Charged Atttacks hit an opponent, the enemy's Omen duration is extended by 2s. This effect can trigger at most once every 0.5s, and can extend the Omen by up to 8s through this method. |
Who Is Mona?
An Enigmatic But Prideful Astrologist

Mona is an astrologist that makes use of hydromancy to see the fate of a person. She leaves little to doubt about her abilities as she has proven time and time again how precise they are.
Often Strapped For Money
Forced to stay in Mondstadt, Mona lives a very frugal life. Although she's a great astrologist, it doesn't really bring in any money. She denies being poor, but her almost always empty wallet might say otherwise.
Student Of Barbeloth
Mona is the student of Barbeloth, one of the Hexenzirkel witches. It's actually because of her master that Mona's staying in Monsdtadt. She unwillingly saw her master's diary and now has to stay in the city to escape her master's wrath.
Mona Voice Actor & Their Notable Roles

English Voice Actor: Felecia Angelle
| Notable Roles | |
|---|---|
| Dr. Stone | Kohaku |
| Borderlands 3 | Ava |
| Honkai: Star Rail | Asta, Hook |
Japanese Voice Actor: KOHARA Konomi
| Notable Roles | |
|---|---|
| Asobi Asobase | Kasumi Nomura |
| Kaguya-sama: Love Is War | Chika Fujiwara |
| Goddess of Victory: Nikke | Soda |
| Wuthering Waves | Roccia |
Character Related Articles
Character Tier Lists
All Characters
| Characters By Rarity | |||||||||||
|---|---|---|---|---|---|---|---|---|---|---|---|
| Characters By Roles | |||||||||||
| DPS List | Support List | Sustain List | |||||||||
| On-Field List | Off-Field List | ||||||||||
| Characters By Element | |||||||||||
| Hydro | Anemo | Electro | |||||||||
| Dendro | |||||||||||
| Characters By Nation | |||||||||||
| Mondstadt | Liyue | ||||||||||
| Fontaine | Natlan | ||||||||||
| Snezhnaya | Nod-Krai | ||||||||||

