Comprehensive Rosaria guide for Genshin Impact. Learn Rosaria's best build, best team, best weapon. for this 4-Star Cryo Sub-DPS Polearm user.
| Rosaria Related Articles | ||||||||
|---|---|---|---|---|---|---|---|---|
 Best Build Best Build | Best Team | Specialty | ||||||
Table of Contents
Rosaria Character Overview, Base Stats, and Tier
Character Profile
 | Rarity | | |
|---|---|---|---|
| Element | |||
| Weapon | Polearm | ||
| Ascend Stat | ATK 24.0% | ||
| Region | Mondstadt | ||
| Birthday | January 24 | ||
| Roles | | ||
| How To Get | Available in all Banners at a low drop rate | ||
Base Stats
| Base HP | Base ATK | Base DEF | |
|---|---|---|---|
| Lvl. 90 | 12,289 | 240 | 710 |
| Lvl. 80 (Ascended) | 11,438 | 223 | 661 |
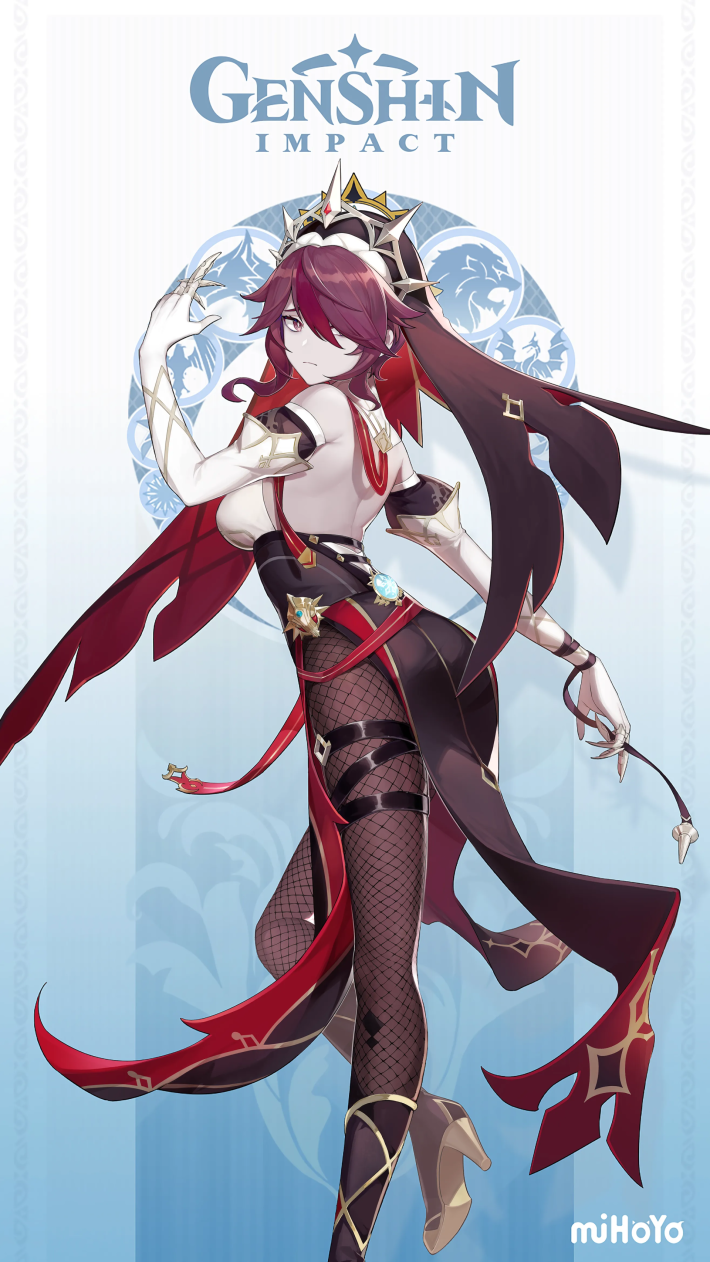
Rosaria is a 4-star Cryo character that wields a Polearm in Genshin Impact. Her gameplay centers on being a quick-swap sub-DPS or support who excels at applying Cryo off-field. Rosaria deals swift burst damage and boosts the team's CRIT Rate, making her valuable in Freeze and Physical damage teams alike.
Rosaria's Tier & Rating
| Overall Tier | ||||||||||||||
|---|---|---|---|---|---|---|---|---|---|---|---|---|---|---|
| B | ||||||||||||||
| On-Field | Off-Field | DPS | Support | Sustain | ||||||||||
| - | B | C | - | - | ||||||||||
In battle, Rosaria is the Off-Field Sub-DPS that applies Cryo to proc reactions with the DPS. Her Elemental Skill allows her to get close to enemies and her Elemental Burst is her source of Off-Field application. Rosaria is able to boost her teammates' CRIT Rate up to 15%, making her a great
Rate Rosaria!
Roles & Playstyle Of Rosaria and Her Strengths and Weaknesses
Flexible Off-Field Cryo Sub-DPS
Rosaria's most popular role in a majority of her teams is centered around her Elemental Burst applying Off-Field Cryo to facilitate specific reactions. Equipping her with specific Artifact sets, such as Noblesse Oblige, allows her value as a teammate to increase since she'll now contribute meaningful buffs alongside her application.
Pros and Cons of Sub-DPS Rosaria
| Pros |
|---|
| - Easy to use. |
| - Cryo application can be used by most Pyro DPSes to trigger Melt. |
| - Skill can create a decent amount of Energy Particles. |
| - Skill can also function as a gap closer due to the teleport effect, allowing you to chase after stray enemies or to reposition. |
| Cons |
| - Burst area isn't very wide. |
| - Burst is also stationary, which requires you to be mindful about its placement, especially into mobile enemies. |
| - CRIT Rate buff isn't maxed when facing large enemies and bosses since she can't teleport behind them. |
Best Build for Rosaria
Rosaria has a very clear build path when you want to maximize your overall team performance, but it may also depend on what you want her role to be in said teams. See below for recommendations:
| Weapon | Favonius Lance |
|---|---|
| Best Artifact | Noblesse Oblige └ You can equip Instructor x 4 on her instead if someone else is already using Noblesse |
| Artifact Main Stats | Sands: Energy Recharge Goblet: Cryo DMG Bonus Circlet: CRIT Rate or DMG |
| Priority Sub-Stat | Energy Recharge > CRIT Rate or DMG > ATK% |
| Recommended Team | |
Stat Goals For Off-Field Cryo Sub-DPS Rosaria
| Energy Recharge | 200-220%~ with a Cryo teammate 220-240%~ without another Cryo teammate |
|---|---|
| CRIT Rate & DMG | 73/140 or 88/160 |
As established, Rosaria needs to be supplied with a generous amount of Energy Recharge for her to fully realize her ideal role as an Off-Field Sub-DPS that is heavily reliant on her Elemental Burst. Having another Cryo teammate is highly recommended not just for the Energy share and Cryo Resonance, but also because having two sources of Cryo application allows the On-Field Pyro DPS to reliably trigger the Melt reaction more often.
Rosaria 's Recommended Talent Priority
| Talent | Level Up Priority |
|---|---|
| Normal Attack: Spear Of The Church | ★★★・・ |
| Ravaging Confession (Elemental Skill) | ★★★★・ |
| Rites of Termination (Elemental Burst) | ★★★★★ |
Related Links:
Best Weapon for Rosaria
Rosaria benefits greatly from polearms that can help with her Energy requirements, but CRIT Rate stat-sticks can be usable when you have a lot of ER on her Artifacts. See below for the recommendations:
Premium Weapons for Off-Field Cryo Sub-DPS Rosaria
| Weapon | How to Get Rating | |
|---|---|---|
| Best | Favonius Lance | Get from Banners - Rosaria's best weapon both for herself and her teammates. - Energy Recharge secondary stat allows her to reach her Energy requirements easily. - Passive generates clear Energy particles that restore a fixed amount of Energy to whoever catches the particles. These can be absorbed by other teammates if they need to do so. - Requires Rosaria to build CRIT Rate to trigger the Passive consistently. - Best at R5. |
| 2nd | Engulfing Lightning | Get from Limited Banner - Provides a lot of Energy Recharge from the secondary stat and passive. - Passive is also more oriented towards the equipping character's personal damage, which not be something you've invested in when it comes to Rosaria. - Less value overall compared to Favonius Lance since Rosaria will not typically contribute a lot to the team DPS regardless. |
| 3rd | Skyward Spine | Get from Weapon Banners - Energy Recharge secondary stat makes it easier for Rosaria to meet her Energy requirements. - Less ER than Engulfing Lightning, hence slightly lower in the ranking, but they should have similar results in practice. - Passive gives a bit of CRIT Rate which can help provide the maximum 15% teamwide CRIT Rate buff. - Damage part of the passive is nice but since Off-Field Rosaria doesn't normally have time to do Normal or Charged Attacks in her rotation, it doesn't see much use overall. |
| 4th | Staff of the Scarlet SandsLumidouce Elegy | Get from Limited Banner - CRIT Rate secondary stat polearms lets Rosaria max out her teamwide CRIT Rate buff. - Most of this weapons' passives aren't very utility-based in comparison to Favonius Lance, and instead lean into the equipping character's personal damage. - Viable choices when you're able to meet Rosaria's ER requirements through her Artifacts alone. |
Favonius Lance is Rosaria's best option despite being a 4-star weapon due to the passive being incredibly useful for the entire party, and not just herself. It's especially good for content where you won't start with fully-energized Elemental Bursts, such as the Stygian Onslaught gamemode.
Free To Play Friendly (F2P Weapons) for Off-Field Cryo Support Rosaria
| Weapon | How to Get Rating | |
|---|---|---|
| Best F2P | The Catch | Get From Fishing - Energy Recharge secondary stat lets Rosaria hit her desired Energy Recharge level much easier. - Passive also provides her Elemental Burst CRIT Rate and more damage, which is a nice bonus but not extremely impactful overall. - Best at R5. |
| 2nd | Prototype Starglitter | Liyue Forgeable (Craftable) Weapon - Has the same Energy Recharge secondary stat value as The Catch, thereby also having the same benefits of Rosaria reaching her ER requirements easily. - Passive is inconsequential in teams where she won't be On-Field (which are a large majority of them). |
For Free-to-Play options, The Catch is a standout mention due to the Energy Recharge statline and the universal passive that lets her Burst do more damage directly. It's biggest downside is involved in the weapon's acquisition, which requires you to catch or fish specific fish in select areas on the map, with some having scarce spawn rates. This can get bothersome to do since the weapon is best used at max refinement, but because a lot of Support Polearm users can make use of it, it should still be worth the effort regardless.
All Weapon ListRosaria Best Artifacts
Rosaria's Artifact choices have a number of options depending on whether you want her to have more utility or more damage. See the recommendations below:
| Artifact | Recommendation Details |
|---|---|
| Noblesse Oblige | ★★★★★ - The typical choice for Rosaria in a lot of her teams due to the ATK% buff she can enable after using her Elemental Burst. - 2-piece effect also boosts Burst damage, which helps to slightly increase her personal damage. |
| Scroll of the Hero of Cinder City | ★★★★・ - Despite not having a Nightsoul Burst, Rosaria can still equip this set to provide a 12% DMG buff when she triggers an Elemental reaction. - Good for DPSes that don't care about ATK, such as DPSes that scale with HP instead. - When you have a Natlan character in your party, the 2-piece effect will give Rosaria a set amount of Energy. |
| Instructor | ★★★★・ - When a different Off-Field Support is already equipped with Noblesse, Instructor can be a good alternative for On-Field DPSes that appreciate it, such as a Pyro DPS for triggering Melt. - Relatively harder to farm for since there's no dedicated domain for it. |
| Emblem of Severed Fate | ★★★・・ - The 2-piece effect gives Energy Recharge%, which greatly helps ease her Energy requirements. - Allows her Burst to deal some damage due to the ER to DMG conversion. |
| 2-pc. Energy Recharge2-pc. Burst DMG | ★★・・・ - While you're farming for a decent 4-piece set, you can make use of a combination of 2 sets whose 2-piece effects is something Rosaria can use. - You can also use any combination between the 2-piece versions of: ・Blizzard Strayer (2-pc. Cryo DMG) ・Gladiator's Finale (2-pc. ATK) ・Shimenawa's Reminiscence (2-pc. ATK) |
Recommended Artifact Stats
| Main: Flat HP Sub: Energy Recharge / CRIT Rate or DMG / ATK% |
|---|---|
| Main: Flat ATK Sub: Energy Recharge / CRIT Rate or DMG / ATK% |
| Main: Energy Recharge Sub: Energy Recharge / CRIT Rate or DMG / ATK% |
| Main: Cryo DMG Bonus Sub:Energy Recharge / CRIT Rate or DMG / ATK% |
| Main: CRIT Rate Sub: Energy Recharge / CRIT DMG / ATK% |
Reach Her Desired Energy Recharge Level First
As stated, Rosaria is likely to perform at her best once she has enough Energy Recharge to use her Elemental Burst every rotation. Once you've met her Energy means, you can move on to building CRIT Rate to be able to get value out of her teamwide CRIT Rate buff and to trigger the Favonius Lance's passive if you have it equipped on her.
Related Articles
Best Team Comp Rosaria
Dual Cryo Mavuika Melt Team
| Sub-DPS | DPS | Support | Support |
|---|---|---|---|
| Rosaria | Mavuika | Citlali | Bennett |
| Details | |||
| - Rosaria can work as a second Cryo applicator for Mavuika alongside Citlali to increase the likelihood of Mavuika triggering more Melts. - Mavuika is currently the strongest overall On-Field DPS as of the current version of the game and can easily breeze through content with the right team and setup. - Citlali provides numerous other buffs alongside her Cryo application, and both she and Rosaria feed off of each other's Cryo particle generation as well. - Bennett activates Pyro Resonance, provides a generous ATK% buff and acts as the primary sustain for the team. | |||
Rosaria can replace Xilonen in Mavuika's best Melt team composition, and with relatively good results to show for it too. Since the Citlali-Mavuika core is by itself very strong, adding an additional Cryo applicator can make it so that there'll at least always be a Cryo aura on the enemy for Mavuika to trigger Melt on.
Other Team Comps For Rosaria
Skirk Freeze Team
| Team | Detail | |
|---|---|---|
| Rosaria | Skirk | - Rosaria can fill the fourth slot of Skirk's premium Freeze team core alongside Escoffier and Furina. - Rosaria benefits from Escoffier's Cryo RES shred just as well. - Escoffier and Rosaria can generate particles for each other, which helps both easily use their Elemental Bursts. |
| Furina | Escoffier | |
F2P Friendly Team Comp
| Team | Detail | |
|---|---|---|
| Rosaria | Kaeya | - A F2P-friendly team comp using free or easily obtainable characters. - Rosaria and Kaeya apply a substantial amount of Cryo so Xiangling can trigger Melt with her Elemental Burst. - Bennett and Xiangling are a strong F2P duo that can deal enough DPS to clear mid-range endgame content like the Spiral Abyss |
| Xiangling | Bennett | |
Team Rotation of Rosaria and Combos
Basic Team Rotation for Off-Field Support Rosaria
| Basic Rotation For Off-Field Support Rosaria |
|---|
| 1.Start with the supports that have longer ability durations. If the team includes an On-Field DPS that needs to use an ability at the very start of the rotation due to mechanics, then be sure to remember to deploy them accordingly. 2. Switch to Rosaria. Use her Elemental Skill, then her Elemental Burst. 3. Swap into any other Supports with shorter durations than Rosaria. 4. Swap to your On-Field DPS to execute their main damage combo. 5. Repeat from Step 1. |
Rosaria will usually not take up much field time in her optimal role as an Off-Field Cryo applicator or support. Using her Elemental Skill triggers the passive that gives her extra CRIT Rate, provided the enemy is small in size. Furthermore, it's best to pair her alongside another Cryo support to help cover for her short Burst duration.
Basics Of Using Rosaria
Rosaria is an
Elemental Skill Teleports Her Behind an Enemy
Rosaria's Skill, upon activation, causes her to appear behind a nearby target, dealing Cryo DMG at the same time. If the enemy is too large, Rosaria simply teleports in-front of them. Similarly, the Skill functions like a short dash when out of combat, thrusting Rosaria forward in the direction she's facing.
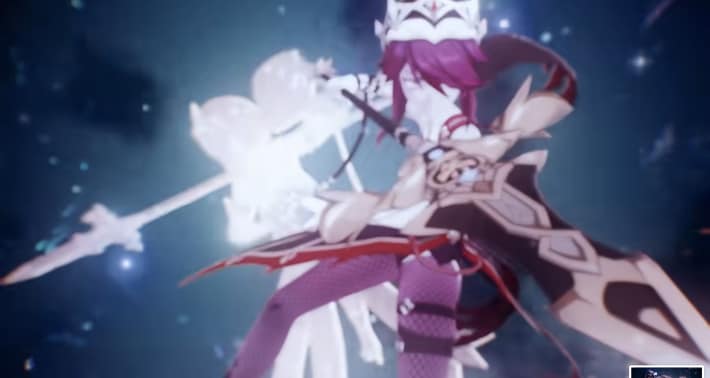
Elemental Burst Applies Cryo At an Interval
After a brief animation, Rosaria's Burst creates an Ice Lance that deals Cryo DMG on the initial hit, and will then periodically apply the element to enemies within a small AoE. Her application rate is decent enough for her to be an Off-Field Cryo source for an On-Field Pyro or Hydro DPS to trigger certain strong reactions with, such as Melt and Freeze.
Prioritize Her Energy Recharge
Because her most important ability is her Elemental Burst, Rosaria would need a fair amount of Energy Recharge (ER) to be able to use it on demand, especially since the duration of the Ice Lance isn't very long. You'll want to ensure she has enough of this stat to be able to use it every rotation before moving to other offensive stats such as CRIT Rate and DMG.
Passive Increases Party Members' CRIT Rate
One of Rosaria's Ascension Passives supplies her teammates with a modest CRIT Rate increase based off of her own CRIT Rate, but this effect cannot apply to herself. This buff has a max limit of 15% CRIT Rate, which is achieved when Rosaria has a total of 100% CRIT Rate after accounting all bonuses from outside sources such as Cryo Resonance and her other passive.
First Ascension Passive Increases Her Own CRIT Rate
Rosaria's other passive, Regina Probationum, boosts her CRIT Rate by 12% after her Elemental Skill lands a critical hit on an enemy from behind. This is one of the many reasons why Rosaria will want to open her combo with her Elemental Skill.
Elemental Skill, Burst and Abilities Guide for Rosaria
How To Use Rosaria's Skills & Passives
Sub-DPS With Off-Field Cryo Application
Rosaria's basic combo is similar to a lot of Off-Field supports who use their Skill first, followed by their Burst. Doing it this way allows her to catch the Energy particles created by her Skill, as well as trigger one of her Ascension Passives that boosts her personal CRIT Rate.
Elemental Skill Blinks Her Behind Enemies
| Icon | Elemental Skill Summary |
|---|---|
| Ravaging Confession | - Rosaria dashes behind her target and strikes with her polearm, dealing Cryo DMG. - Cannot be used to move behind large enemies. |
Rosaria's Skill quickly teleports or blinks her behind a nearby enemy upon activation, dealing damage as soon as she arrives. This Skill generates a good amount of Energy particles, but because of the long cooldown, it's usually more feasible to use it only once within her combo. Equipping her Favonius Lance increases the overall Energy the Skill provides, which enables Rosaria to become a decent battery or energy generator for a Cryo character that relies on their Burst, apart from herself.
Elemental Burst Applies Cryo in a Small Area
| Icon | Elemental Burst Summary |
|---|---|
| Rites of Termination | - Rosaria slashes nearby enemies, then summons an Ice Lance that deals Cryo DMG on impact. - The Ice Lance periodically emits cold air, dealing Cryo DMG to nearby opponents while active. - AoE of the Burst isn't too large but it isn't completely small either. |
Her Elemental Burst is what allows Rosaria to function as an Off-Field Sub-DPS due to its Cryo application and damage potential, and it's arguably her most important ability across multiple team variations. The Ice Lance that the Burst creates Rosaria naturally gravitates to wanting a lot of Energy Recharge to be able to use her Burst on demand every rotation, so it's best to keep that in mind while grinding for her best Artifact pieces.
Crit Buffs From Her Passives
| Icon | Passive Summaries |
|---|---|
| Regina Probationum | When Rosaria strikes an opponent from behind using Ravaging Confession (Skill), Rosaria's CRIT Rate increases by 12% for 5s. |
| Shadow Samaritan | Casting Rites of Termination (Burst) increases CRIT Rate of all nearby party members (except Rosaria herself) by 15% of Rosaria's CRIT Rate for 10s. |
Rosaria's Ascension Passives work together in such a way that the CRIT Rate boost she gets from hitting a critical on an enemy from behind is counted towards her other passive, which grants everyone else in the party CRIT Rate. Because of this, instead of needing 100% CRIT Rate to max out the passive, Rosaria only needs to have a total of 88% CRIT Rate without Cryo Resonance to max out the teamwide buff, and only 73% with the Resonance effect active.
Should You Pull for Rosaria's Constellation Or Best Weapon?
Constellations are Good But Not Necessary
| Constellation Priority |
|---|
| C2 > C6 or C4-C5 |
C2 is a Good Stopping Point
Most of the time, Rosaria at her baseline (C0) will be enough to cover her intended roles, but getting constellation levels on her are still an upgrade in the end. Her notable milestones would be C2 that increases the duration of her Burst, which is the bulk of her Cryo application, C4 that allows her to gain Energy from a Crit hit and C6 which will be nice to have in Physical teams for the additional Physical shred.
Overall, her constellations offers some slight improvements and add-ons, yet most of what Rosaria wants to achieve in a team is already doable at C0. There isn't a strict incentive to chase after them, but any increase to her constellation levels will be a welcome addition regardless.
Rosaria's Constellations & Effects
| Rating | Constellation Effect |
|---|---|
| ★・・・・ | C1: Unholy Revelation When Rosaria deals a CRIT Hit, her ATK SPD increases by 10% and her Normal Attack DMG increases by 10% for 4s. |
| ★★★★★ | C2: Land Without Promise The duration of the Ice Lance creates by Rites Of Termination is increased by 4s. |
| ★★★・・ | C3: The Wages Of Sin Increases the Level of Ravaging Confession by 3. Maximum upgrade level is 15. |
| ★★・・・ | C4: Painful Grace Ravaging Confession's CRIT Hits regenerate 5 Energy for Rosaria. Can only be triggered once each time Ravaging Confession is cast. |
| ★★★★・ | C5: Last Rites Increases the Level of Rites Of Termination by 3. Maximum upgrade level is 15. |
| ★★★★・ | C6: Divine Retribution Rites Of Termination's attack decreases opponents' Physical RES by 20% for 10s. |
Rosaria's Constellation Name is Spinea Corona
| Spinea Corona |
|---|
 |
Ascension Materials for Rosaria Talents & Level
Materials Per Ascension Level
| Lvl 20 | Shivada Jade Sliver x1Valberry x3Recruit's Insignia x3 |
|---|---|
| Lvl 40 | Shivada Jade Fragment x3Hoarfrost Core x2 Valberry x10Recruit's Insignia x15 |
| Lvl 50 | Shivada Jade Fragment x9Hoarfrost Core x4 Valberry x20Sergeant's Insignia x12 |
| Lvl 60 | Shivada Jade Chunk x6Hoarfrost Core x8 Valberry x30Sergeant's Insignia x18 |
| Lvl 70 | Shivada Jade Chunk x3Hoarfrost Core x12 Valberry x45Lieutenant's Insignia x12 |
| Lvl 80 | Shivada Jade Gemstone x6Hoarfrost Core x20 Valberry x60Lieutenant's Insignia x24 |
Materials Per Talent Level
| Level 1 | Default |
|---|---|
| Level 2 | Teachings Of Ballad x3 Recruit's Insignia x6 |
| Level 3 | Guide To Ballad x2 Sergeant's Insignia x3 |
| Level 4 | Guide To Ballad x4 Sergeant's Insignia x4 |
| Level 5 | Guide To Ballad x6 Sergeant's Insignia x6 |
| Level 6 | Guide To Ballad x9 Sergeant's Insignia x9 |
| Level 7 | Philosophies Of Ballad x4 Lieutenant's Insignia x4 Shadow Of The Warrior x1 |
| Level 8 | Philosophies Of Ballad x12 Lieutenant's Insignia x4 Shadow Of The Warrior x1 |
| Level 9 | Philosophies Of Ballad x12 Lieutenant's Insignia x9 Shadow Of The Warrior x2 |
| Level 10 | Philosophies Of Ballad x16 Lieutenant's Insignia x12 Shadow Of The Warrior x12 Crown of Insight x1 |
| Level 11 | Unlocked via Constellation |
| Level 12 | Unlocked via Constellation |
| Level 13 | Unlocked via Constellation |
Related Links
Rosaria Skills & Talents Details
Normal Attack: Spear Of The Church
Normal Attack
| Effect |
|---|
| Performs up to 5 consecutive spear strikes. |
| Lv1 | Lv2 | Lv3 | Lv4 | Lv5 | Lv6 | Lv7 | Lv8 | Lv9 | Lv10 | Lv11 | |
|---|---|---|---|---|---|---|---|---|---|---|---|
| 1-Hit DMG | 52.5% | 56.7% | 61% | 67.1% | 71.4% | 76.3% | 83% | 89.7% | 96.4% | 103.7% | 111% |
| 2-Hit DMG | 51.6% | 55.8% | 60% | 66% | 70.2% | 75% | 81.6% | 88.2% | 94.8% | 102% | 109.2% |
| 3-Hit DMG | 31.8%×2 | 34.4%×2 | 37%×2 | 40.7%×2 | 43.3%×2 | 46.3%×2 | 50.3%×2 | 54.4%×2 | 58.5%×2 | 62.9%×2 | 67.3%×2 |
| 4-Hit DMG | 69.7% | 75.3% | 81% | 89.1% | 94.8% | 101.3% | 110.2% | 119.1% | 128% | 137.7% | 147.4% |
| 5-Hit DMG | 41.6%+43.0% | 45.0%+46.5% | 48.4%+50.0% | 53.2%+55.0% | 56.6%+58.5% | 60.5%+62.5% | 65.8%+68.0% | 71.1%+73.5% | 76.5%+79.0% | 82.3%+85.0% | 88.1%+91.0% |
▲Use side-scroll to see percentage per level.
Charged Attack
| Effect |
|---|
| Consumes a certain amount of Stamina to lunge forward, dealing damage to opponents along the way. |
| Lv1 | Lv2 | Lv3 | Lv4 | Lv5 | Lv6 | Lv7 | Lv8 | Lv9 | Lv10 | Lv11 | |
|---|---|---|---|---|---|---|---|---|---|---|---|
| Charged Attack DMG | 43.9% | 47.4% | 51% | 56.1% | 59.7% | 63.8% | 69.4% | 75% | 80.6% | 86.7% | 92.8% |
| Charged Attack Stamina Cost | 25 | 25 | 25 | 25 | 25 | 25 | 25 | 25 | 25 | 25 | 25 |
▲Use side-scroll to see percentage per level.
Plunging Attack
| Effect |
|---|
| Plunges from mid-air to strike the ground below, damaging opponents along the path and dealing AoE DMG upon impact. |
| Lv1 | Lv2 | Lv3 | Lv4 | Lv5 | Lv6 | Lv7 | Lv8 | Lv9 | Lv10 | Lv11 | |
|---|---|---|---|---|---|---|---|---|---|---|---|
| Plunge DMG | 63.9% | 69.1% | 74.3% | 81.8% | 87% | 92.9% | 101.1% | 109.3% | 117.5% | 126.4% | 135.3% |
| Low Plunge DMG | 128% | 138% | 149% | 164% | 174% | 186% | 202% | 219% | 235% | 253% | 271% |
| High Plunge DMG | 160% | 173% | 186% | 204% | 217% | 232% | 253% | 273% | 293% | 316% | 338% |
▲Use side-scroll to see percentage per level.
Ravaging Confession (Elemental Skill)
| Effect |
|---|
| Rosaria swiftly shifts her position to appear behind her opponent, then stabs and slashes them with her polearm, dealing Cryo DMG. This ability cannot be used to travel behind opponents of a larger build. |
| Lv1 | Lv2 | Lv3 | Lv4 | Lv5 | Lv6 | Lv7 | Lv8 | Lv9 | Lv10 | Lv11 | Lv12 | Lv13 | ||
|---|---|---|---|---|---|---|---|---|---|---|---|---|---|---|
| Skill DMG | 58%+136% | 63%+146% | 67%+156% | 73%+170% | 77%+180% | 82%+190% | 88%+204% | 93%+218% | 99%+231% | 105%+245% | 111%+258% | 117%+272% | 124%+289% | |
| CD | 10s | 6s | 6s | 6s | 6s | 6s | 6s | 6s | 6s | 6s | 6s | 6s | 6s | 6s |
▲Use side-scroll to see percentage per level.
Rites Of Termination
| Effect |
|---|
| Rosaria's unique take on this prayer ritual: First, she swings her weapon to slash surrounding opponents; then, she summons a frigid Ice Lance that strikes the ground. Both actions deal Cryo DMG. While active, the Ice Lance periodically releases a blast of cold air, dealing Cryo DMG to surrounding opponents. |
| Lv1 | Lv2 | Lv3 | Lv4 | Lv5 | Lv6 | Lv7 | Lv8 | Lv9 | Lv10 | Lv11 | Lv12 | Lv13 | |
|---|---|---|---|---|---|---|---|---|---|---|---|---|---|
| Skill DMG | 104%+152% | 118%+163.4% | 120%+175% | 130%+190% | 138%+201% | 146%+213% | 156%+228% | 166%+243% | 177%+258% | 187%+274% | 198%+289% | 208%+304% | 221%+323% |
| Ice Lance DoT | 132% | 142% | 152% | 165% | 175% | 185% | 198% | 211% | 224% | 238% | 251% | 264% | 281% |
| Duration | 8s | 8s | 8s | 8s | 8s | 8s | 8s | 8s | 8s | 8s | 8s | 8s | 8s |
| CD | 15s | 15s | 15s | 15s | 15s | 15s | 15s | 15s | 15s | 15s | 15s | 15s | 15s |
| Energy Cost | 60 | 60 | 60 | 60 | 60 | 60 | 60 | 60 | 60 | 60 | 60 | 60 | 60 |
▲Use side-scroll to see percentage per level.
Regina Probationum
| Effect |
|---|
| When Rosaria strikes an opponent from behind using Ravaging Confession, Rosaria's CRIT Rate increases by 12% for 5s. |
Shadow Samaritan
| Effect |
|---|
| Casting Rites of Termination increases CRIT Rate of all nearby party members (except Rosaria herself) by 15% of Rosaria's CRIT Rate for 10s. CRIT Rate Bonus gained this way cannot exceed 15%. |
Night Walk
| Effect |
|---|
| At night (18:00 – 6:00), your party members gain the Swift Stride effect: Movement SPD increased by 10%. Does not take effect in Domains, Trounce Domains, or Spiral Abyss. Swift Stride does not stack. |
Who Is Rosaria?
A Sister Of The Church Of Favonius

Rosaria is the infamous truant of a sister of the Church of Favonius. While some embodies piousness, she strays away from it. She smokes and drinks as she pleases much to the dismay of the other members of the church.
Protects Mondstadt In The Dark
When nighttime falls, Rosaria takes it upon herself to work. Not for the church, but for Mondstadt. She investigates suspicious individuals and if needed, gets rid of them all for the sake of keeping the peace in Mondstadt.
Rescued By Varka
As a young child, Rosaria was taken in by the very same bandit gang that slaughtered her family. Forced to work with them, she and the gang were eventually caught by the Knights of Favonius. Instead of executing her like the rest, Varka deemed her capable of repentance and placed her in the Church of Favonius.
Rosaria Voice Actor & Their Notable Roles
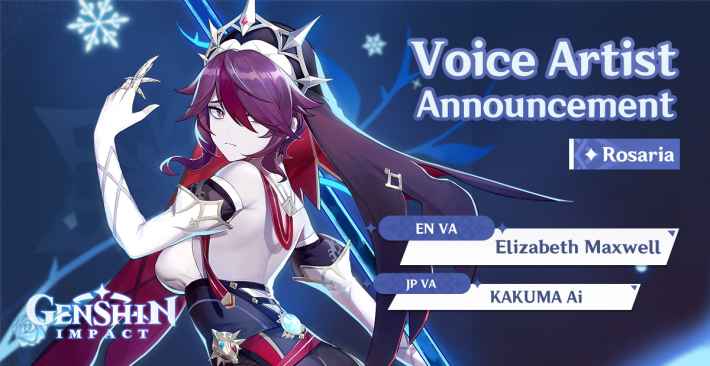
English Voice Actor: Elizabeth Maxwell
| Notable Roles | |
|---|---|
| Attack on Titan | Ymir |
| Legend of Zelda: Breath of the Wild & Tears of the Kingdom | Urbosa & Riju |
| Dragon Ball Super | Caulifla |
| Persona 5 | Sae Nijima |
Japanese Voice Actor: KAKUMA Ai
| Notable Roles | |
|---|---|
| Fire Emblem: Three Houses | Edelgard von Hresvelg |
| Mushoku Tensei | Eris Boreas Greyrat |
| The King of Fighters | Yuri Sakazaki |
| D.Gray-man Hallow | Lenalee Lee |
Character Related Articles
Character Tier Lists
All Characters
| Characters By Rarity | |||||||||||
|---|---|---|---|---|---|---|---|---|---|---|---|
| Characters By Roles | |||||||||||
| DPS List | Support List | Sustain List | |||||||||
| On-Field List | Off-Field List | ||||||||||
| Characters By Element | |||||||||||
| Hydro | Anemo | Electro | |||||||||
| Dendro | |||||||||||
| Characters By Nation | |||||||||||
| Mondstadt | Liyue | ||||||||||
| Fontaine | Natlan | ||||||||||
| Snezhnaya | Nod-Krai | ||||||||||

