
Comprehensive Varka guide for Genshin Impact. Learn about Varka's best build, team, kit, and materials for this 5-Star Anemo Claymore DPS.
| Varka Related Articles | |||||
|---|---|---|---|---|---|
 Best Build Best Build | Best Team | Gacha Banner | |||
| Materials | Signature Weapon | ||||
Table of Contents
Varka Character Overview, Base Stats, and Tier
Character Profile
 | Rarity | | |
|---|---|---|---|
| Element | Anemo | ||
| Weapon | Claymore | ||
| Ascend Stat | CRIT DMG 38.4% | ||
| Region | Mondstadt | ||
| Birthday | February 17 | ||
| Roles | | ||
| How To Get | Can only be pulled during Varka's Limited-Time Banner (Currently unavailable) | ||
Base Stats
| Base HP | Base ATK | Base DEF | |
|---|---|---|---|
| Lvl. 90 | 12,613 | 352 | 795 |
| Lvl. 80 (Ascended) | 11,128 | 311 | 702 |
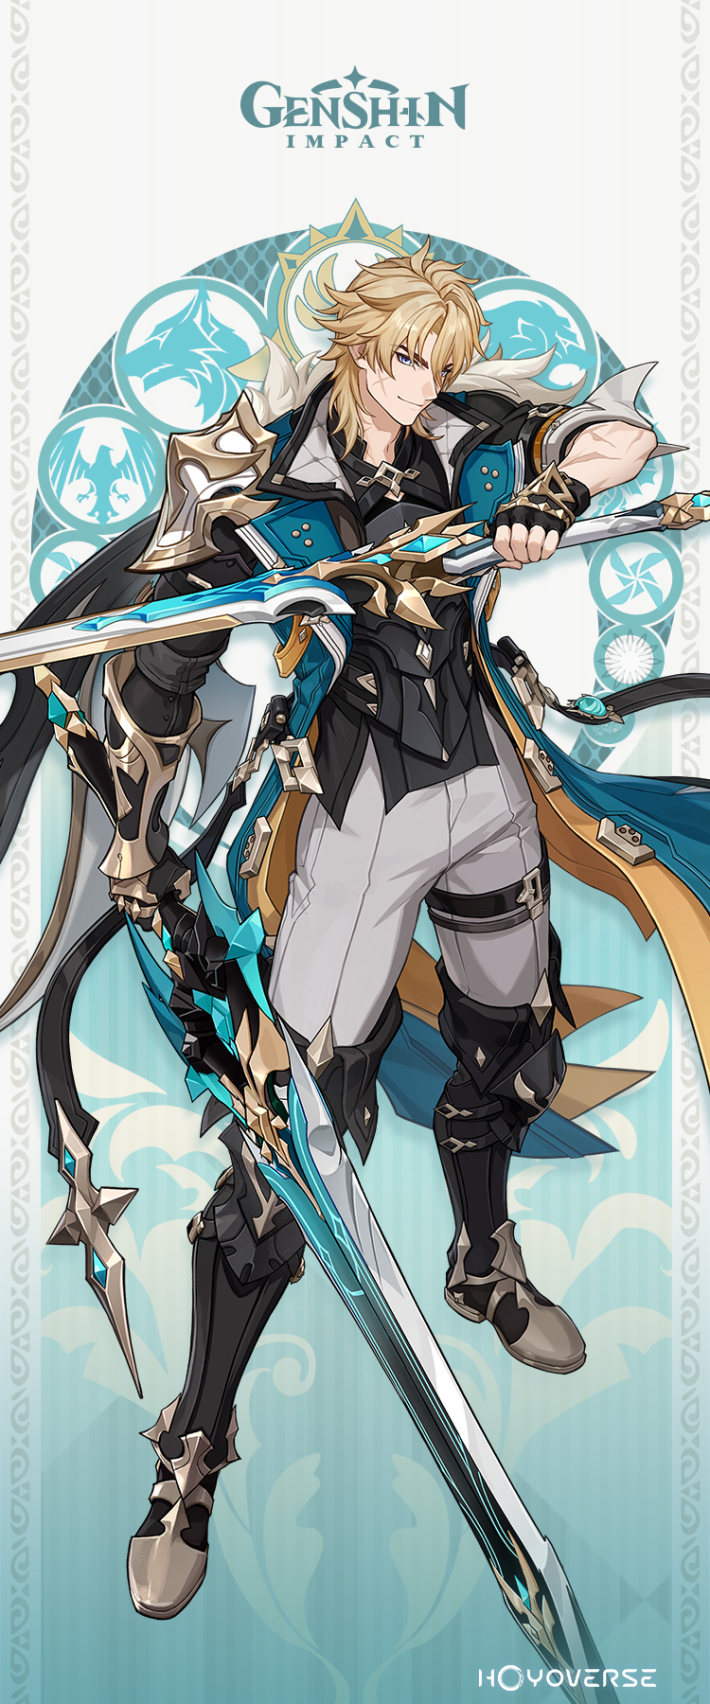
Varka is a 5-star Anemo character in Genshin Impact who wields a Claymore. He is an on-field DPS that utilizes both Anemo and a secondary element (Pyro, Hydro, Electro, or Cryo) in combat. This secondary element is based on his teammates' elements. He is the Grand Master of the Knights of Favonius of Mondstadt.
Varka's Tier & Rating
| Overall Tier | ||||||||||||||
|---|---|---|---|---|---|---|---|---|---|---|---|---|---|---|
| SS | ||||||||||||||
| On-Field | Off-Field | DPS | Support | Sustain | ||||||||||
| SS | - | SS | - | - | ||||||||||
What Kind of Character is Varka?
In battle, Varka is an
Varka also has a Hexerei: Secret Rite passive, which requires other Hexerei members in the party for its activation.
Rate Varka!
Varka's Roles, Playstyle, Strengths, and Weaknesses

On-Field DPS That Wields Two Claymores
Varka is an Anemo DPS whose unique mechanic involves his dual-wielding claymore playstyle. Once he enters his special state after using his Skill, Varka's claymores will each deal different damage types: one will deal raw Anemo damage, while the other takes on the element of one of his teammates (either Pyro, Hydro, Electro, or Cryo). His main combo seems to involve a mix of Normal Attacks, Charged Attacks, and Skill use.
Varka also has a Hexerei passive, which means his best teams should include other Hexerei characters.
Pros and Cons of On-Field DPS Varka
| Pros |
|---|
| - Straightforward gameplay with a unique mechanic. |
| - Flexible teammate options, which may include future characters that have yet to be released. |
| - Benefits from Hexerei teammates. |
| Cons |
| - Mastering his Normal Attack combos and rotations will be necessary to maximize his damage output. |
| - The meta currently favors Lunar Reaction teams, so he might perform slightly worse than most Lunar Reaction DPSes in endgame content. |
Best Build for Varka
Like most traditional damage-oriented characters, Varka is an attack-scaling On-Field DPS that benefits from useful offensive stats such as ATK%, CRIT Rate, and CRIT DMG.
| Weapon | Gest of the Mighty Wolf |
|---|---|
| Best Artifact | A Day Carved From Rising Winds |
| Artifact Main Stats | Sands: ATK% Goblet: DMG Bonus or ATK% Circlet: CRIT Rate or CRIT DMG |
| Priority Substats | CRIT Rate or CRIT DMG > ATK% > Energy Recharge |
| Recommended Team | |
Stat Goals For On-Field DPS Varka
| ATK% | 2,200+ |
|---|---|
| CRIT Rate & DMG | 70/140+ or 80/160-200 (1:2 CRIT Ratio) |
| Energy Recharge (ER) | 100%+ |
| Note! | Since a lot of his DPS is concentrated in his Skill, it is not necessary to build ER on Varka as it is not a fixed part of his combo. This allows you to focus more on offensive stats. |
|---|
On-field DPS characters are typically built with a 1:2 CRIT Rate to CRIT DMG ratio to ensure consistent CRIT hits, which boosts overall damage. Additionally, Varka's Hexerei passive allows him to take full advantage of the 'A Day Carved From Rising Winds' set, which increases the wielder's CRIT Rate by 20%.
It's highly recommended to aim for 100% CRIT Rate on Varka with the 4-piece effect active, which means having 80% CRIT Rate without the set bonus.
Varka 's Recommended Talent Priority
| Talent | Level Up Priority |
|---|---|
| Favonius Bladework: Dancing Radiance | ★ ・ ・ ・ ・ |
| Windbound Execution (Elemental Skill) | ★★★★★ |
| Northwind Avatar (Elemental Burst) | ★★・・・ |
Related Links:
Best Weapon for Varka
Varka has clear preferences when it comes to his weapon choices, focusing on damage-oriented claymores with secondary sub-stats that can help him reach his CRIT and ATK stat goals. See below for the recommendations:
Premium Weapons for On-Field DPS Varka
| Weapon | How to Get Rating | |
|---|---|---|
| Best | Gest of the Mighty Wolf | Get from Limited Banners - Varka's Signature Weapon. It has high Base ATK and a CRIT Rate secondary stat. - Passive provides everything Varka wants: ATK SPD to use more Normal Attacks and thus deal more damage, a DMG% buff after casting Skill or when he starts his Charged Attack, and a CRIT DMG increase when the team has the Hexerei: Secret Rite effect active. - The synergy between him and this weapon isn't hard to see, and it's likely that there'll be a significant gap between this weapon and the alternatives due to the sheer amount of stats Varka gets from it. |
| 2nd | A Thousand Blazing Suns | Get from Limited Banners - CRIT Rate secondary stat allows Varka to reach his optimal CRIT Rate. - This weapon's passive includes a substantial ATK% and CRIT DMG buff that activates after using Skill or Burst. - Base ATK stat is also on the higher-end for claymores. |
| 3rd | Beacon of the Reed Sea | Get from Limited Banners - A CRIT Rate claymore that can help Varka achieve 100% CRIT Rate. - It has a universal passive that gives a decent amount of ATK% buffs after the equipping character damages an enemy with their Skill. - The extra HP% when not protected by a shield is also nice to have for an On-Field DPS. |
| 4th | Verdict | Get from Limited Banners - The CRIT Rate from the weapon's secondary stat allows Varka to reach an ideal CRIT ratio. - He can't make use of the full passive since he is unlikely to have a Geo character that can trigger Crystallize often on his team, but the ATK% buff is still going to be useful since Varka's abilities do scale with ATK%. |
| 5th | Redhorn Stonethresher | Get from Limited Banners - A CRIT DMG claymore that lets you focus on CRIT Rate for Varka's artifacts. - The passive is useless for Varka since he doesn't scale with DEF, but it's still a decent stat-stick otherwise. |
| 6th | Get from Weapon or Standard Banner - A weapon with a lot of ATK% buffs, which lets you forego needing ATK% substats on Varka's artifacts. - A decent option for Varka who appreciates a lot of ATK%, but may be less appealing if you play him with Bennett, since Bennett already provides a generous ATK% buff. | |
| 7th | Serpent Spine | Get from Battle Pass - CRIT Rate claymore, which is good for attaining a balanced CRIT Ratio. - After spending a certain amount of time On-Field, the wielder gains stacks (up to 5) that increase both the damage dealt and damage taken. - Stacks are decreased by 1 every time the wielder takes damage. - Refinements lower the damage taken debuff and raise the damage dealt buff. - Maintaining all five stacks can be difficult without a shield, so realistically, Varka will be at 2-3 stacks. - R5 raises this weapon above Wolf's Gravestone and Redhorn Stonethresher. |
| 8th | Fang of the Mountain King | Get from Limited Banners - A CRIT Rate weapon that will make it easier for Varka to reach his ideal CRIT Rate. - Varka may have a hard time maintaining the passive, especially since part of it requires Burning. This claymore functions closer to a stat-stick in this case. |
Most Claymores with an ATK% buff or increase will be viable alternatives if you don't have his Signature Weapon.
Free-to-Play Friendly (F2P Weapons) for On-Field DPS Varka
| Weapon | How to Get Rating | |
|---|---|---|
| Best F2P | Tidal Shadow | Fontaine Forgeable (Craftable) Weapon - The wielder gains a good amount of ATK% from the secondary stat and when they receive healing. - Aim to get max refinements for this weapon for the best possible results. |
| 2nd | Blackcliff Slasher | Paimon's Bargain - A weapon with a CRIT DMG secondary stat that you can purchase by using your Starglitter, which is a currency you gain as you continue wishing on banners. - The passive gives an ATK% buff after you defeat an enemy, up to a maximum of 3 stacks. - This may be impractical to maintain in endgame modes like Stygian Onslaught which often feature single boss enemies. - It's generally preferable to use Starglitter for characters or for Intertwined Fates, but if you're unable to hit a decent CRIT DMG value with Artifacts alone, this weapon can be very useful even without its passive. |
| 3rd | Ultimate Overlord's Mega Magic Sword | Reward From Past Event (Roses and Muskets) - This weapon has an Energy Recharge secondary stat, which can allow Varka to use his Burst every rotation. - It also has an ATK% buff, which increases for every Melusine you help in Merusea Village. |
For Free-to-Play options, Tidal Shadow, the Fontaine Craftable weapon, has an ATK% buff from its passive that's easily maintained with a healer. Since it's craftable, it's recommended to get it to refinement level 5 to maximize the ATK% buff. If you have the Starglitter to spare, you can also consider the Blackcliff Slasher from Paimon's Bargain, which can help pad out Varka's CRIT DMG stat to achieve a better 1:2 CRIT ratio.
All Weapon ListVarka Best Artifacts
As a main DPS, Varka's ideal artifact sets are those that increase his offensive stats. For our top recommendations, check out the list below:
| Artifact | Recommendation Details |
|---|---|
| A Day Carved From Rising Winds | ★★★★★ - Varka's Hexerei: Secret Rite passive allows him to make full use of the 4-piece effect, which provides a significant CRIT Rate bonus. - This is his best-in-slot set unless a more suitable one is released for him in the future. |
| Shimenawa's Reminiscence | ★★★・・ - The 2-piece set provides an ATK% buff. The 4-piece effect will also be useful since most of Varka's damage comes from his Normal and Charged Attacks. - The Energy drain from the 4-piece set makes it difficult to use his Burst consistently. However, this isn't a major drawback since his Burst is not his main source of damage. |
| Desert Pavilion Chronicle | ★★★・・ - The 2-piece Anemo DMG Bonus is great for an Anemo On-Field DPS. - The 4-piece effect increases Normal, Charged, and Plunging Attack DMG after hitting an enemy with a Charged Attack. This makes the set an okay alternative due to how Varka's DPS is mostly condensed into his Normal and Charged Attacks after he activates his Skill. |
| Gladiator's Finale | ★★・・・ - This set provides a significant and unconditional ATK% buff, but it lacks other useful bonuses like CRIT or DMG%. |
Recommended Artifact Stats
| Main: Flat HP Sub: CRIT Rate / CRIT DMG / ATK% |
|---|---|
| Main: Flat ATK Sub: CRIT Rate / CRIT DMG / ATK% |
| Main: ATK% Sub: CRIT Rate / CRIT DMG / ATK% |
| Main: ATK% or Elemental DMG Bonus Sub: CRIT Rate / CRIT DMG / ATK% |
| Main: CRIT Rate or CRIT DMG Sub:CRIT Rate / CRIT DMG / ATK% |
Prioritize Offensive Stats Like CRIT
Varka seems to have no special gimmicks that would require an unconventional artifact stat priority. Therefore, he should be built as a traditional DPS, focusing on offensive stats like CRIT and ATK%.
For General Use, ATK% Goblet is Recommended
Varka deals less Anemo DMG compared to the damage from his infused element. If you plan to use Varka in a specific elemental team (e.g., a Pyro or Hydro team), an Elemental DMG Bonus Goblet matching that element is ideal. For a more versatile build that works across various teams, an ATK% Goblet is the recommended choice.
Related Articles
Best Team Comp Varka
Varka Anemo-Pyro Team
| DPS | Support | Sub-DPS | Support |
|---|---|---|---|
| Varka | Prune | Durin | Nicole |
| Details | |||
| - Varka works best when paired with other Hexerei members such as Prune, Durin, and Nicole. - At C2, Prune becomes an upgrade to Venti's support capabilities, providing both Sub-DPS and a DMG Buff for the team. - Durin offers Anemo RES Shred and contributes his own damage to the team's total DPS. - Nicole provides powerful shields and an ATK buff, increasing the team's overall damage. She also boosts Varka's interruption resistance, making him more comfortable to play. | |||
This comp features four synergistic Hexerei characters who enable each other's Hexerei: Secret Rite passives while also benefiting from one another's abilities.
Other Team Comps For Varka
Varka Anemo-Cryo Team
| Team | Detail | |
|---|---|---|
| Varka | Venti | - This team pairs Varka with Cryo supports. - It makes use of Escoffier's strong off-field DPS and Cryo RES shred. - Shenhe provides a Cryo DMG% buff. |
| Escoffier | Shenhe | |
F2P-Friendly Team Comp
| Team | Detail | |
|---|---|---|
| Varka | Sucrose | - A F2P-friendly team comp that uses free or easily obtainable characters. - Sucrose fulfills the Hexerei teammate requirement, but her EM buffs aren't very useful for Varka. - This team benefits from Pyro Resonance, which gives a teamwide ATK% buff. - While the damage output may not be optimal, it is sufficient for non-endgame content. |
| Bennett | Xiangling | |
Varka's Team Rotations And Combos
Basic Team Rotation For On-Field DPS Varka
| Basic Rotation For On-Field DPS Varka |
|---|
| 1. Start with your supports and use their abilities. Prioritize abilities with longer durations before using ones with shorter durations. 2. Switch to Varka and use his Skill. 3. Perform a string of 2, or 4 to 5 Normal Attacks followed by a Charged Attack. 4. Repeat step 3 until his Skill state expires. 5. Repeat the rotation from Step 1. |
Varka's ideal combo involves ending his Normal Attack strings with his special Charged Attack. This rotation maximizes his potential DPS. Note that his special Skill and special Charged Attack cannot be used within the same rotation, as the Charged Attack consumes a charge of his special Skill.
Best Varka Attack Combo
| [ Skill > Normal Attack (x2) or (x5) > Charged Attack > Normal Attack (x2) or (x4) > Charged Attack > Normal Attack (x2) into a Charged Attack OR Normal Attack (x2) ] |
Varka can be played either by spamming a rotation of Normal Attack (x2) into a Charged Attack until his Skill state expires or a combo consisting of a specific number of Normal Attacks before every Charged Attack.
The specific rotation will likely net you more DPS, but the simpler Normal Attack (x2) combo is easier to execute and remember.
Basics of Using Varka

Anemo On-Field DPS With Unique Dual-Element Setup
Varka is an On-Field Anemo DPS whose kit mechanics revolve around his ability to 'wield' two elements in combat, which is reflected through his dual-claymore gameplay. One claymore is always infused with Anemo, while the other adopts the element of his teammates. This infusion happens after he activates his Elemental Skill, which causes him to enter a special state called Sturm und Drang.
Wield Two Elements With His Skill
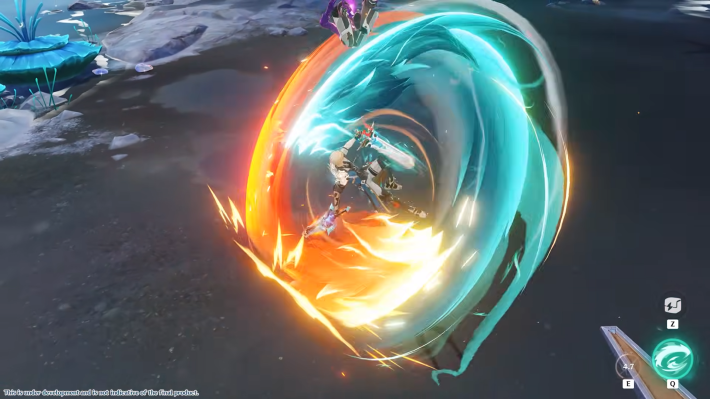
Varka's kit is heavily focused on his Elemental Skill, which infuses his weapons with two elements by allowing him to enter the Sturm und Drang state. Additionally, his Skill is converted to a special Skill called Four Winds' Ascension, which deals corresponding Elemental DMG (aligned with his teammates' elements) and Anemo DMG at the same time. Varka also has a special Charged Attack called Azure Devour while the state is active.
| Note! | Varka will likely spend most of his field time dealing damage through his Normal Attacks, weaving Charged Attacks and Skill usages in between attack strings. |
|---|
Varka's Burst Just Deals Damage
Compared to his Skill, his Elemental Burst is a simple damage nuke. The majority of his damage comes from his Skill, so it can be optimal to skip using his Burst every rotation. This allows you to forego Energy Recharge on Varka and instead prioritize other stats like CRIT.
Infusion Depends on Teammates

As stated, Varka's other claymore takes on the element of his teammates. His passive requires him to have another Anemo teammate, while the other two slots should be filled with party members who share the same element (either Pyro, Hydro, Electro, or Cryo). Pyro may be the strongest option due to the ATK% buff from Pyro Resonance.
Hexerei: Secret Rite Passive
Varka has a Hexerei passive and is ideally paired with other Hexerei units so that they can enable each other's Secret Rite passives. For Varka, his Secret Rite passive causes his special Skill, Four Winds' Ascension, to have its cooldown reduced every time he hits an enemy with a Normal Attack.
Hold Skill For Traversal

His Elemental Skill can be held for a few seconds, which causes him to jump upward. You can then plunge to initiate landing. This ability can be used to briefly travel or leap over obstacles.
Elemental Skill, Burst and Abilities Guide for Varka
How To Use Varka's Skills & Passives
Anemo DPS That Wields Two Elements
| Basic Rotation Of Varka |
|---|
| 1. Start the rotation with your supports, ideally using their abilities from longest to shortest duration. 2. Swap to Varka. Use his Skill (tap), then perform a combo of two to five Normal Attacks into a Charged Attack. Repeat this combo until the Sturm und Drang state ends. 3. Repeat the rotation from Step 1. |
Varka's unique gameplay makes use of two claymores, each infused with a specific Element. The left claymore will always deal Anemo DMG (cannot be overridden). The right claymore can be infused with Pyro, Hydro, Electro, or Cryo, depending on his teammates' Elements.
Skill Triggers the Sturm Und Drang State
Elemental Skill Summary
| Icon | Elemental Skill Summary |
|---|---|
| Windbound Execution | Tap: Leaps forward, dealing AoE Anemo DMG, and enters Sturm und Drang mode. Hold: Charges before leaping forward. The longer the charge, the greater the leap distance. Sturm und Drang - Increases Normal and Charged Attack DMG. - Cannot perform Plunging Attacks. - Dual claymores deal split Elemental DMG: Left-hand claymore will always deal Anemo DMG (cannot be overridden). Right-hand claymore gains an infusion if there are Pyro, Hydro, Electro, or Cryo characters in the party, deals the corresponding Elemental DMG (priority follows that order). Cannot be overridden by infusions. - If the party contains PHEC characters, Windbound Execution converts into Four Winds’ Ascension. - Varka can expend uses of Four Winds’ Ascension to perform Azure Devour, a special Charged Attack that consumes no Stamina. |
| Name | Skill State Abilities Summary |
|---|---|
| Four Winds’ Ascension (Special Elemental Skill) | Activated after entering the Sturm Und Drang state. - Deals AoE Elemental DMG (matching right-hand claymore’s element, cannot be overridden) + AoE Anemo DMG. - Starts on cooldown with 2 max uses. - While in Sturm und Drang, each Normal Attack hit reduces its CD by 0.5s (up to 15 triggers per Sturm und Drang activation). |
| Azure Devour (Special Charged Attack) | Activated after entering the Sturm Und Drang state. - Consumes a use of Four Winds’ Ascension. - Performs a special Charged Attack (no Stamina cost). - Deals 2 instances of corresponding Elemental DMG (right-hand claymore’s element, cannot be overridden) + 2 instances of Anemo DMG. |
Varka enters the Sturm Und Drang state after using his Skill for the first time. This state allows him to wield two Elements. Varka can use either his special Skill, Four Winds' Ascension, or his special Charged Attack (CA), Azure Devour, while in this state.
You can only use one or the other since the special Charged Attack consumes his special Skill's charges. Additionally, his second infusion is dependent on his teammates.
Burst Isn't Essential for His DPS
Elemental Burst Summary
| Icon | Elemental Burst Summary |
|---|---|
| Northwind Avatar | - Unleashes a powerful forward double slash, dealing 2 instances of Anemo DMG. - If there are Pyro, Hydro, Electro, or Cryo characters in the party, the first slash converts to the corresponding Elemental DMG, following the priority order: Pyro → Hydro → Electro → Cryo. |
His Elemental Burst deals two quick slashes, with each slash corresponding to the Element of his claymores.
Since Varka's Burst isn't a core part of most of his optimal combos, you can prioritize other stats like ATK% or CRIT over Energy Recharge on his Artifacts.
Teambuilding Is Restricted Due to Passive
 Ascension 1 Passive Summary
| Icon | Ascension 1 Passive Summary |
|---|---|
| Dawn Wind's March | When there are Pyro, Hydro, Electro, or Cryo characters in the party (priority: Pyro → Hydro → Electro → Cryo): - Every 1,000 ATK grants 10% Anemo DMG Bonus and 10% corresponding Elemental DMG Bonus (only one non-Anemo element can gain this bonus). - Max 25% bonus DMG can be gained this way. While in Sturm und Drang: - If at least 2 Anemo characters OR at least 2 characters of the same element (Pyro/Hydro/Electro/Cryo) are present, Normal Attacks, Charged Attacks, Azure Devour, and Four Winds’ Ascension deal 140% of original DMG. - If both conditions are met simultaneously, the above DMG increases to 220% of original DMG. |
Varka's first passive incentivizes building his ideal teams with 2 Anemo characters (including himself) and 2 other characters of the same Element (Pyro, Hydro, Electro, or Cryo). This provides a substantial increase to his damage if the requirements are met.
This, alongside his Hexerei passive that needs another Hexerei character in the team, greatly restricts Varka's best team setups to only a handful of variations.
Pair With Anemo Teammate for More Damage
Ascension 4 Passive Summary| Icon | Ascension 4 Passive Summary |
|---|---|
| When nearby party members trigger Swirl reaction(s), Varka gains 1 stack of Azure Fang's Oath for 8s: - Increases the DMG of Normal Attacks, Charged Attacks, Azure Devour, and Four Winds’ Ascension by 7.5%. - Max 4 stacks. - Each character can grant 1 stack per second this way. |
One of his Ascension Passives is called Wind's Vanguard. Whenever a party member triggers a Swirl reaction, Varka gains a damage boost to all of his attacks. To maximize his potential, always pair him with an Anemo support to activate both this passive and his Ascension 1 passive.
Hexerei Passive Requires Other Hexerei
| Hexerei Characters That Can Work With Varka | ||||
|---|---|---|---|---|
| Venti | Durin | Fischl | Sucrose | |
| Icon | Hexerei Passive Summary |
|---|---|
| Witch's Eve Rite: Dawn's Return | When the party includes at least 2 Hexerei characters: - Enhances Four Winds’ Ascension. - While in Sturm und Drang, each Normal Attack hit reduces the CD of Four Winds’ Ascension by 1s (replaces the base 0.5s reduction effect). |
Like other Hexerei characters, Varka has a Hexerei: Secret Rite passive that activates when there are at least two Hexerei members in the party, which adds more requirements to Varka's teambuilding. This passive allows his Normal Attacks to reduce the cooldown of his special Skill while in the Sturm Und Drang state.
Remember to unlock Varka's Secret Rite passive by completing his Witch's Homework quest.
| Note! | Note that in his optimal combos, this special skill isn't used. Instead, the main purpose of activating Varka's Hexerei passive is to benefit the other Hexerei teammate (by enabling their own passive), to fully utilize a 4-piece Rising Winds set, and to gain the CRIT DMG buff from his Signature Weapon. |
|---|
Should You Pull for Varka's Constellation Or Best Weapon?
Signature Weapon Is a Significant Upgrade
| Signature VS Constellation |
|---|
| Gest of the Mighty Wolf > C2 |
The hefty amount of offensive stats that Varka's Signature Weapon provides easily puts it above other Claymores and should be the first priority for anyone who wants to vertically invest in Varka. It will grant you a noticeable DPS increase through its DMG% buff, in addition to the CRIT Rate from its secondary stat and CRIT DMG from its passive. The ATK SPD buff also makes his gameplay a little smoother, since most Claymore characters have slower Normal Attack animations than other weapon types.
C2 Is a Good Stopping Point
Varka's Constellations are also a nice boost, and C2 is likely the best Constellation to stop at for its additional Anemo ATK with decent scaling, unless you want to go all the way to C6. However, it's still recommended to aim for Gest of the Mighty Wolf first if you have limited funds.
Varka's Constellations & Effects
| Rating | Constellation Effect |
|---|---|
| ★★★・・ | C1:Come, Friend, Let Us Dance Beneath the Moon's Soft Glow The effects of the Passive Talent "Tag-Team Triple Jump!" are enhanced: When Varka switches to Sturm und Drang, he will obtain an additional use of the special Elemental Skill Four Winds' Ascension. Additionally, after switching to Sturm und Drang, Varka will gain the Lyrical Libation effect: When unleashing the special Elemental Skill Four Winds' Ascension, or when performing the special Charged Attack Azure Devour, Varka can consume this effect to deal 200% of the original DMG dealt by Four Winds' Ascension or Azure Devour. |
| ★★★★★ | C2: When Dawn Breaks, Our Journey Shall Take Flight When unleashing the special Elemental Skill Four Winds' Ascension, or when performing the special Charged Attack Azure Devour, Varka will perform an additional strike, dealing AoE Anemo DMG equal to 800% of Varka's ATK. |
| ★★★・・ | C3: Unbowed Resolve Increases Elemental Skill Windbound Execution Level by 3. Maximum upgrade level is 15. |
| ★★・・・ | C4: For None May Take From Us Our Freedom of Song When Varka triggers a Swirl reaction, based on the Elemental Types involved in the reaction, all nearby party members gain a 20% Anemo DMG Bonus and the corresponding Elemental DMG Bonus for 10s. |
| ★★・・・ | C5: Fill High the Cup With Fine Wine, for Tyrants Come and Go Increases Elemental Burst Northwind Avatar Level by 3. Maximum upgrade level is 15. |
| ★★★★ ・ | C6: Beloved Mondstadt, Steadfast You Shall Shine Sturm und Drang is enhanced: · For a short time after unleashing the special Elemental Skill Four Winds' Ascension, Tapping on Varka's Elemental Skill or Holding his Normal Attack will not expend any uses of Four Winds' Ascension, and will perform one additional instance of the special Charged Attack, Azure Devour. · For a short time after performing the special Charged Attack Azure Devour, tap on Varka's Elemental Skill to unleash an additional instance of Four Winds' Ascension without expending any uses of Four Winds' Ascension. When triggering an additional special Charged Attack, Azure Devour, or unleashing an additional special Elemental Skill, Four Winds' Ascension, in this manner, the above effect cannot be triggered. Additionally, the Azure Fang's Oath effect in Ascension Talent Wind's Vanguard is enhanced: Every stack of Azure Fang's Oath will increase Varka's CRIT DMG by 20%. |
Varka's Constellation Name is Lupus Majoris
| Lupus Majoris |
|---|
| TBA |
Ascension Materials for Varka Talents & Level
Materials Per Ascension Level
| Lvl 20 | Vayuda Turquoise Sliver x1 Wolfhook x3 Broken Drive Shaft x3 |
|---|---|
| Lvl 40 | Vayuda Turquoise Fragment x3New Boss Material x2 Wolfhook x10 Broken Drive Shaft x15 |
| Lvl 50 | Vayuda Turquoise Fragment x9New Boss Material x4 Wolfhook x20 Reinforced Drive Shaft x12 |
| Lvl 60 | Vayuda Turquoise Chunk x3New Boss Material x8 Wolfhook x30 Reinforced Drive Shaft x18 |
| Lvl 70 | Vayuda Turquoise Chunk x6New Boss Material x12 Wolfhook x45Precision Drive Shaft x12 |
| Lvl 80 | Vayuda Turquoise Gemstone x6New Boss Material x20 Wolfhook x60Precision Drive Shaft x24 |
Materials Per Talent Ascension
| Lvl 1 | Default |
|---|---|
| Lvl 2 | Teachings of Freedom x3Broken Drive Shaft x6 |
| Lvl 3 | Guide to Freedom x2Reinforced Drive Shaft x3 |
| Lvl 4 | Guide to Freedom x4Reinforced Drive Shaft x4 |
| Lvl 5 | Guide to Freedom x6Reinforced Drive Shaft x6 |
| Lvl 6 | Guide to Freedom x9Reinforced Drive Shaft x9 |
| Lvl 7 | Philosophies of Freedom x4Precision Drive Shaft x4Ascended Sample: Rook x1 |
| Lvl 8 | Philosophies Of Ballad x6Precision Drive Shaft x6Ascended Sample: Rook x1 |
| Lvl 9 | Philosophies Of Ballad x12Precision Drive Shaft x9Ascended Sample: Rook x2 |
| Lvl 10 | Philosophies of Ballad x16Precision Drive Shaft x12Ascended Sample: Rook x2 |
| Lvl 11 | Unlocked via Constellation Levels |
| Lvl 12 | Unlocked via Constellation Levels |
| Lvl 13 | Unlocked via Constellation Levels |
Related Links
Varka Skills & Talents Details
Normal Attack: Favonius Bladework: Dancing Radiance
Normal Attack
| Effect |
|---|
| Imitating an ancient knightly war-dance, Varka wields dual claymores to perform up to 5 consecutive strikes. |
| Lv1 | Lv2 | Lv3 | Lv4 | Lv5 | Lv6 | Lv7 | Lv8 | Lv9 | Lv10 | Lv11 | Lv12 | Lv13 | Lv14 | Lv15 | |
|---|---|---|---|---|---|---|---|---|---|---|---|---|---|---|---|
| 1-Hit DMG | 65.46% | 70.79% | 76.12% | 83.73% | 89.06% | 95.15% | 103.52% | 111.89% | 120.26% | 129.4% | 138.53% | 147.67% | 156.8% | 165.93% | 175.07% |
| 2-Hit DMG | 23.99%+ 44.55% | 25.94%+ 48.18% | 27.89%+ 51.8% | 30.68%+ 56.98% | 32.64%+ 60.61% | 34.87%+ 64.75% | 37.94%+ 70.45% | 41%+ 76.15% | 44.07%+ 81.85% | 47.42%+ 88.06% | 50.77%+ 94.28% | 54.11%+ 100.5% | 57.46%+ 106.71% | 60.81%+ 112.93% | 64.16%+ 119.15% |
| 3-Hit DMG | 32.44%+ 60.24% | 35.08%+ 65.14% | 37.72%+ 70.05% | 41.49%+ 77.05% | 44.13%+ 81.95% | 47.15%+ 87.56% | 51.29%+ 95.26% | 55.44%+ 102.97% | 59.59%+ 110.67% | 64.12%+ 119.08% | 68.64%+ 127.48% | 73.17%+ 135.89% | 77.7%+ 144.29% | 82.22%+ 152.7% | 86.75%+ 161.1% |
| 4-Hit DMG | 55.43%+ 29.85% | 59.94%+ 32.28% | 64.46%+ 34.71% | 70.9%+ 38.18% | 75.41%+ 40.61% | 80.57%+ 43.38% | 87.66%+ 47.2% | 94.75%+ 51.02% | 101.84%+ 54.84% | 109.57%+ 59% | 117.31%+ 63.17% | 125.04%+ 67.33% | 132.78%+ 71.5% | 140.51%+ 75.66% | 148.25%+ 79.83% |
| 5-Hit DMG | 69.75%+ 37.56% | 75.43%+ 40.61% | 81.1%+ 43.67% | 89.21%+ 48.04% | 94.89%+ 51.1% | 101.38%+ 54.59% | 110.3%+ 59.39% | 119.22%+ 64.2% | 128.15%+ 69% | 137.88%+ 74.24% | 147.61%+ 79.48% | 157.34%+ 84.72% | 167.08%+ 89.96% | 176.81%+ 95.2% | 186.54%+ 100.44% |
▲Use side-scroll to see percentage per level.
Charged Attack
| Effect |
|---|
| Consumes a certain amount of Stamina to charge forward and perform an especially powerful dual blade slash toward the front. |
| Lv1 | Lv2 | Lv3 | Lv4 | Lv5 | Lv6 | Lv7 | Lv8 | Lv9 | Lv10 | Lv11 | Lv12 | Lv13 | Lv14 | Lv15 | |
|---|---|---|---|---|---|---|---|---|---|---|---|---|---|---|---|
| Charged Attack DMG | 85.64%+ 46.11% | 92.61%+ 49.87% | 99.58%+ 53.62% | 109.54%+ 58.98% | 116.51%+ 62.74% | 124.48%+ 67.03% | 135.43%+ 72.92% | 146.38%+ 78.82% | 157.34%+ 84.72% | 169.29%+ 91.15% | 181.24%+ 97.59% | 193.19%+ 104.02% | 205.13%+ 110.46% | 217.08%+ 116.89% | 229.03%+ 123.33% |
| Charged Attack Stamina Cost | 50 | 50 | 50 | 50 | 50 | 50 | 50 | 50 | 50 | 50 | 50 | 50 | 50 | 50 | 50 |
▲Use side-scroll to see percentage per level.
Plunging Attack
| Effect |
|---|
| Plunges from mid-air to strike the ground below, damaging opponents along the path and dealing AoE DMG upon impact. |
| Lv1 | Lv2 | Lv3 | Lv4 | Lv5 | Lv6 | Lv7 | Lv8 | Lv9 | Lv10 | Lv11 | Lv12 | Lv13 | Lv14 | Lv15 | |
|---|---|---|---|---|---|---|---|---|---|---|---|---|---|---|---|
| Plunge DMG | 74.59% | 80.66% | 86.73% | 95.4% | 101.47% | 108.41% | 117.95% | 127.49% | 137.03% | 147.44% | 157.85% | 168.26% | 178.66% | 189.07% | 199.48% |
| Low Plunge DMG | 149.14% | 161.28% | 173.42% | 190.77% | 202.91% | 216.78% | 235.86% | 254.93% | 274.01% | 294.82% | 315.63% | 336.44% | 357.25% | 378.06% | 398.87% |
| High Plunge DMG | 186.29% | 201.45% | 216.62% | 238.28% | 253.44% | 270.77% | 294.6% | 318.42% | 342.25% | 368.25% | 394.24% | 420.23% | 446.23% | 472.22% | 498.21% |
▲Use side-scroll to see percentage per level.
Windbound Execution (Elemental Skill)
| Effect |
|---|
| Manifest the true essence of Favonius Bladework with absolute power. Produces different effects depending on whether the skill is Tapped or Held. Tap Leap forward and slash in one fluid motion, dealing AoE Anemo DMG and switching to Sturm und Drang mode. While in Sturm und Drang, Varka's Normal Attack DMG is increased, and he cannot perform Plunging Attacks. Also, when performing Normal or Charged Attacks, Varka's dual-wielded claymores will deal corresponding Elemental DMG based on the Elemental Types of the characters in the party, respectively. This Elemental DMG cannot be overridden by infusions. Additionally, when in Sturm und Drang, if there are Pyro, Hydro, Electro or Cryo characters in the party, Varka's Elemental Skill Windbound Execution will be converted to the special Elemental Skill, Four Winds' Ascension, dealing corresponding Elemental DMG and Anemo DMG. Additionally, Varka can also expend uses for the special Elemental Skill Four Winds' Ascension to perform a special Charged Attack, Azure Devour, that does not consume stamina to deal corresponding Elemental DMG and Anemo DMG. Hold After charging for a while, leap forward. The duration of the charge will increase the distance of the leap. |
| Lv1 | Lv2 | Lv3 | Lv4 | Lv5 | Lv6 | Lv7 | Lv8 | Lv9 | Lv10 | Lv11 | Lv12 | Lv13 | Lv14 | Lv15 | |
|---|---|---|---|---|---|---|---|---|---|---|---|---|---|---|---|
| Skill DMG | 278.4% | 299.28% | 320.16% | 348% | 368.88% | 389.76% | 417.6% | 445.44% | 473.28% | 501.12% | 528.96% | 556.8% | 591.6% | 626.4% | 661.2% |
| Press CD | 16s | 16s | 16s | 16s | 16s | 16s | 16s | 16s | 16s | 16s | 16s | 16s | 16s | 16s | 16s |
| Hold CD | 8s | 8s | 8s | 8s | 8s | 8s | 8s | 8s | 8s | 8s | 8s | 8s | 8s | 8s | 8s |
| Sturm und Drang Duration | 12s | 12s | 12s | 12s | 12s | 12s | 12s | 12s | 12s | 12s | 12s | 12s | 12s | 12s | 12s |
| Sturm und Drang 1-Hit DMG | 81.82% | 88.48% | 95.15% | 104.66% | 111.32% | 118.93% | 129.4% | 139.86% | 150.33% | 161.75% | 173.16% | 184.58% | 196% | 207.42% | 218.83% |
| Sturm und Drang 2-Hit DMG | 29.99%+ 55.69% | 32.43%+ 60.22% | 34.87%+ 64.75% | 38.35%+ 71.23% | 40.79%+ 75.76% | 43.58%+ 80.94% | 47.42%+ 88.06% | 51.25%+ 95.19% | 55.09%+ 102.31% | 59.27%+ 110.08% | 63.46%+ 117.85% | 67.64%+ 125.62% | 71.83%+ 133.39% | 76.01%+ 141.16% | 80.19%+ 148.93% |
| Sturm und Drang 3-Hit DMG | 40.55%+ 75.3% | 43.85%+ 81.43% | 47.15%+ 87.56% | 51.86%+ 96.31% | 55.16%+ 102.44% | 58.93%+ 109.45% | 64.12%+ 119.08% | 69.3%+ 128.71% | 74.49%+ 138.34% | 80.15%+ 148.85% | 85.81%+ 159.35% | 91.46%+ 169.86% | 97.12%+ 180.37% | 102.78%+ 190.87% | 108.44%+ 201.38% |
| Sturm und Drang 4-Hit DMG | 69.29%+ 37.31% | 74.93%+ 40.35% | 80.57%+ 43.38% | 88.63%+ 47.72% | 94.27%+ 50.76% | 100.71%+ 54.23% | 109.57%+ 59% | 118.44%+ 63.77% | 127.3%+ 68.55% | 136.97%+ 73.75% | 146.64%+ 78.96% | 156.3%+ 84.16% | 165.97%+ 89.37% | 175.64%+ 94.58% | 185.31%+ 99.78% |
| Sturm und Drang 5-Hit DMG | 87.19%+ 46.95% | 94.28%+ 50.77% | 101.38%+ 54.59% | 111.52%+ 60.05% | 118.62%+ 63.87% | 126.73%+ 68.24% | 137.88%+ 74.24% | 149.03%+ 80.25% | 160.18%+ 86.25% | 172.35%+ 92.8% | 184.51%+ 99.35% | 196.68%+ 105.9% | 208.84%+ 112.45% | 221.01%+ 119.01% | 233.18%+ 125.56% |
| Sturm und Drang Charged Attack DMG | 107.05%+ 57.64% | 115.76%+ 62.33% | 124.48%+ 67.03% | 136.92%+ 73.73% | 145.64%+ 78.42% | 155.59%+ 83.78% | 169.29%+ 91.15% | 182.98%+ 98.53% | 196.67%+ 105.9% | 211.61%+ 113.94% | 226.54%+ 121.99% | 241.48%+ 130.03% | 256.42%+ 138.07% | 271.36%+ 146.11% | 286.29%+ 154.16% |
| Four Winds' Ascension DMG | 175.76%+ 94.64% | 188.94%+ 101.74% | 202.12%+ 108.84% | 219.7%+ 118.3% | 232.88%+ 125.4% | 246.06%+ 132.5% | 263.64%+ 141.96% | 281.22%+ 151.42% | 298.79%+ 160.89% | 316.37%+ 170.35% | 333.94%+ 179.82% | 351.52%+ 189.28% | 373.49%+ 201.11% | 395.46%+ 212.94% | 417.43%+ 224.77% |
| Azure Devour DMG | 93.6%× 2+ 50.4%× 2 | 100.62%× 2+ 54.18%× 2 | 107.64%× 2+ 57.96%× 2 | 117%× 2+ 63%× 2 | 124.02%× 2+ 66.78%× 2 | 131.04%× 2+ 70.56%× 2 | 140.4%× 2+ 75.6%× 2 | 149.76%× 2+ 80.64%× 2 | 159.12%× 2+ 85.68%× 2 | 168.48%× 2+ 90.72%× 2 | 177.84%× 2+ 95.76%× 2 | 187.2%× 2+ 100.8%× 2 | 198.9%× 2+ 107.1%× 2 | 210.6%× 2+ 113.4%× 2 | 222.3%× 2+ 119.7%× 2 |
| Four Winds' Ascension CD | 11s | 11s | 11s | 11s | 11s | 11s | 11s | 11s | 11s | 11s | 11s | 11s | 11s | 11s | 11s |
▲Use side-scroll to see percentage per level.
Northwind Avatar (Elemental Burst)
| Effect |
|---|
| In the name of the mightiest Knight of Boreas, unleash a powerful double slash attack toward the front, dealing 2 instances of Anemo DMG.If there are Pyro, Hydro, Electro or Cryo characters in the party, the first slash will be converted to deal corresponding Elemental DMG according to the priority order of the aforementioned Elemental Types. |
| Lv1 | Lv2 | Lv3 | Lv4 | Lv5 | Lv6 | Lv7 | Lv8 | Lv9 | Lv10 | Lv11 | Lv12 | Lv13 | Lv14 | Lv15 | |
|---|---|---|---|---|---|---|---|---|---|---|---|---|---|---|---|
| Skill 1-Hit DMG | 336.96% | 362.23% | 387.5% | 421.2% | 446.47% | 471.74% | 505.44% | 539.14% | 572.83% | 606.53% | 640.22% | 673.92% | 716.04% | 758.16% | 800.28% |
| Skill 2-Hit DMG | 181.44% | 195.05% | 208.66% | 226.8% | 240.41% | 254.02% | 272.16% | 290.3% | 308.45% | 326.59% | 344.74% | 362.88% | 385.56% | 408.24% | 430.92% |
| CD | 15s | 15s | 15s | 15s | 15s | 15s | 15s | 15s | 15s | 15s | 15s | 15s | 15s | 15s | 15s |
| Energy Cost | 60 | 60 | 60 | 60 | 60 | 60 | 60 | 60 | 60 | 60 | 60 | 60 | 60 | 60 | 60 |
▲Use side-scroll to see percentage per level.
Dawn Wind's March
| Effect |
|---|
| When there are Pyro, Hydro, Electro or Cryo characters in the party, according to the aforementioned priority order of the Elemental Types, every 1,000 points of Varka's ATK will grant Varka a 10% Anemo DMG Bonus and corresponding Elemental DMG Bonus (among the aforementioned Elemental Types, only one element can gain bonus DMG this way). Up to 25% bonus DMG can be gained this way. Additionally, if there are at least 2 Anemo characters, or at least 2 characters of the same Element among Pyro, Hydro, Electro or Cryo in the party, the Normal Attacks, Charged Attacks, Special Charged Attack Azure Devour and the special Elemental Skill Four Winds' Ascension that Varka deals or unleashes while in the Sturm und Drang mode will deal 140% of their original DMG. If there are at least 2 Anemo characters and at least 2 other characters of the same element among Pyro, Hydro, Electro or Cryo present in the party at the same time, the aforementioned effect will be increased to 220%. |
Wind's Vanguard
| Effect |
|---|
| When nearby party members trigger Swirl reaction(s), Varka gains one stack of Azure Fang's Oath, increasing the DMG dealt by his Normal Attacks, Charged Attacks, special Charged Attack Azure Devour and special Elemental Skill Four Winds' Ascension by 7.5% for 8s. Max 4 stacks. Each character can grant Varka with 1 stack of Azure Fang's Oath every second this way. |
Witch's Eve Rite: Dawn's Return
| Effect |
|---|
| After completing Witch's Homework: The Untitled Question, Varka will become a Hexerei character. When the party includes at least 2 Hexerei characters, you will gain the Hexerei: Secret Rite effect, which enhances Hexerei characters. Hexerei: Secret Rite Enhances the special Elemental Skill Four Winds' Ascension: When Varka hits an opponent with Normal Attack(s) in Sturm und Drang, the CD of Four Winds' Ascension will be reduced by 1s. |
Homebound Wind's Paean
| Effect |
|---|
| For every party member from Mondstadt, the Hold version of Varka's Elemental Skill Windbound Execution's CD is decreased by 5%.This effect does not trigger in Domains, Trounce Domains, or the Spiral Abyss. |
Who Is Varka?
The Grand Master Of The Knights Of Favonius

Varka is the current Grand Master of the Knights of Favonius. Well-respected throughout the ranks, he leads the Knights of Favonius in both strength and wits.
Currently In Nod-Krai
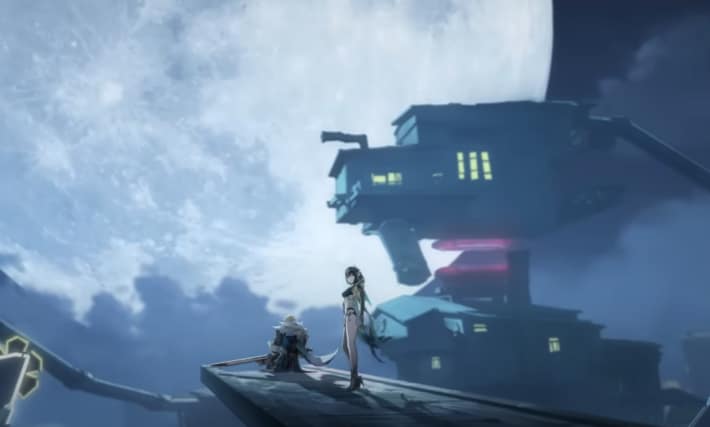
Although Varka has been mentioned by other characters since the beginning of Genshin's story, he did not make his first appearance until the Luna II Update.
This is due to Varka being away on expeditions the whole time. Right before the Traveler left Natlan, Varka was stationed in Nod-Krai to monitor the situation there.
Working Together With The Hexenzirkel & Anemo Archon

Seeking to continuously protect Mondstadt from any danger that could threaten it, Varka entered into a partnership with both the Hexenzirkel and the Anemo Archon.
This partnership was seen in action during the Archon Quest "Paralogism". Although Varka was not directly involved since he was still in Nod-Krai at the time.
Found Razor & Brought In Rosaria
Varka was the one who found Razor in the wild. He took it upon himself to reintroduce Razor to other humans so he could start communicating and socializing.
He was also the one to find Rosaria after the bandit gang that was holding her were all killed off. He then brought her to Mondstadt for a better life. She sees him as her father figure.
Varka's Promotional Videos
Check out the official character preview videos for Varka from Genshin Impact's YouTube account!
Varka Voice Actor & Notable Roles
Voiced By Sugita Tomokazu In JP
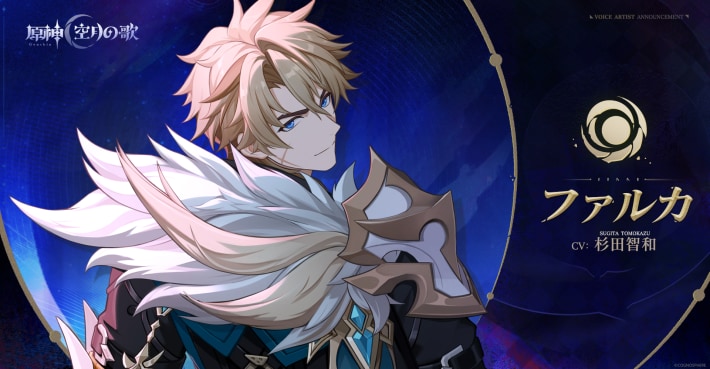
Varka is voiced by Sugita Tomokazu. He is a well-known voice actor, famous for roles such as Sakata Gintoki in Gintama, Gyomei Himejima in Demon Slayer, and many more!
| Title | Character |
|---|---|
| Gintama | Gintoki Sakata |
| Demon Slayer | Gyomei Himejima |
| Sakamoto Days | Taro Sakamoto |
| Jojo's Bizarre Adventure | Joseph Joestar |
Character Related Articles
Character Tier Lists
All Characters
| Characters By Rarity | |||||||||||
|---|---|---|---|---|---|---|---|---|---|---|---|
| Characters By Roles | |||||||||||
| DPS List | Support List | Sustain List | |||||||||
| On-Field List | Off-Field List | ||||||||||
| Characters By Element | |||||||||||
| Hydro | Anemo | Electro | |||||||||
| Dendro | |||||||||||
| Characters By Nation | |||||||||||
| Mondstadt | Liyue | ||||||||||
| Fontaine | Natlan | ||||||||||
| Snezhnaya | Nod-Krai | ||||||||||

