 Great Sword
 Long Sword
 Sword and Shield
 Dual Blades
 Hammer
 Hunting Horn
 Lance
Lance Gunlance
 Switch Axe
 Charge Blade
 Insect Glaive
 Bow
Bow Light Bowgun
 Heavy Bowgun
How to Farm Hunter Symbol in Monster Hunter Wilds (MH Wilds). This guide provides ways to get all Hunter Symbol I,II & III, How to use, and list of Craftable Weapons and Equipment.
Items and Materials ListTable of Content
How to Get Hunter Symbols
Hunt Tempered Monster to Get
Hunter Symbols in Monster Hunter Wilds can be obtained as a reward for hunting Tempered monsters. Hunter Symbols range from 1 to 3 and each symbol can only be obtained from specific monsters.
Tempered MonstersUnlocking Hunter Symbols
| How to Unlock | |
|---|---|
 Hunter Symbol III Hunter Symbol III | 【HR41+】After Completing Chapter 6-1 |
| Hunter Symbol II | 【HR32+】After Completing Chapter 5-2 |
| Hunter Symbol I | 【HR21+】After Completing Chapter 5-1 |
Hunter Symbols 1 to 3 will become obtainable at different times. The Tempered monster you need to hunt will appear as the story progresses, so play the main quests first to unlock all Hunter Symbols.
Full Story Walkthrough and GuideHow to Farm Hunter Symbol III
Hunt ★7-8 Tempered Monsters
| 8 Star Tempered Monster | ||
|---|---|---|
| Arkveld | ||
| 7 Star Tempered Monster | ||
| Rey Dau | Jin Dahaad | Uth Duna |
| Nu Udra | Gore Magala | |
An efficient way to farm Hunter Symbol III is to repeat the quests for Tempered monsters with stars 7 or higher that will appear after completing Chapter 6-1. By saving the quest as a Field Survey before hunting them, the player can challenge the same quest up to 4 times (the first time + 3 times as a saved quest).
Field Survey QuestRest at Camp Until Quest Appears

If the monster you want to hunt is not on the map, you can reset the environment by resting in the tent. It costs 500 points each time, but you can reroll the quests by checking the map and then resting.
Farm Tempered Arkveld
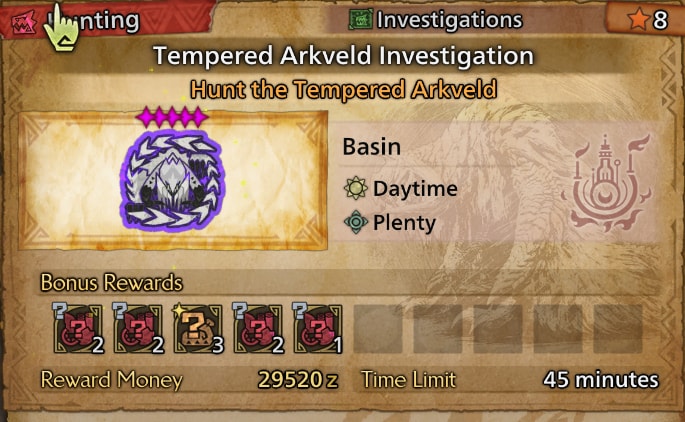
Tempered Arkveld has the highest drop rate for Wyverian Bloodstone Chunk and Wyverian Bloodstone (L) which is required for Melding Artian parts. Also, since Arkveld materials have high refining points, you can efficiently farm the Oricalcite required to enhance Artian parts.
Arkveld GuideFilter and Repeat SOS flares

SOS flare is also an effective method. Filtering quests to find a 7-star monster will also include the normal Arkveld, so if you want Hunter Symbols, we recommend searching for 8-star and above only.
SOS Flare Guide - How to UseHow to Farm Hunter Symbol II
Hunt ★6 Tempered Monsters
| 6 Star Tempered Monster | ||
|---|---|---|
| Doshaguma | Blangonga | Rathalos |
| Ajarakan | Xu Wu | Gravios |
| Guardian Doshaguma | Guardian Rathalos | Guardian Ebony |
| Guardian Fulgur Anjanath | ||
The efficient way to farm Hunter Symbol 2 is to repeat 6-star Tempered monster quests, which will be unlocked after completing Chapter 5-2. By saving it as a Field Survey before hunting them, the player can challenge the same quest up to 4 times (the first time + 3 times as a Field Survey).
Field Survey QuestRest at Camp Until the Quest Appears
If the monster you want to hunt is not on the map, you can reset the environment by resting in the tent. It costs 500 points each time, but you can reroll the quests by checking the map and then resting.
Optional Quests

If you feel that rerolling a Field Survey takes too much time, the 6-star Optional Quest Tempered monsters are another option. Unlike a Field Survey, you can always take on the Quest and there is no limit to the number of times you can try. However, this only works with quests where you hunt multiple monsters, and you are only guaranteed to get one Hunter Symbol, so if you want to be efficient, we recommend the Field Survey.
Applicable Optional Quests
- The Struggle to SurviveOptional★6TargetHunt Tempered Xu Wu and Tempered Guardian EbonyMapRuins of Wyveria(Daytime / Wyvern's Wakening)
ConditionHR31+ / Up to 4 Player
UnlockComplete Side Mission The Struggle to Survive
The Struggle to Survive
The quest "The Struggle to Survive" gives you the most Hunter Rank Points out of all the Optional Quests that you can run. Although you need to play multiplayer, if you can repeat the quest quickly, you can efficiently raise your Hunter rank while collecting Hunter Symbols.
How to Raise Hunter RankHow to Farm Hunter Symbol I
Hunt ★5 Tempered Monsters
| 5 Star Tempered Monster | ||
|---|---|---|
| Chatacabra | Quematrice | Lala Barina |
| Congalala | Balahara | Rompopolo |
| Nerscylla | Hirabami | Yian Kut-Ku |
| Gypceros | Rathian | |
The efficient way to farm Hunter Symbol 1 is to repeat 5-star Tempered monster quests which will be unlocked after completing Chapter 5-1. By saving it as a Field Survey before hunting them, the player can challenge the same quest up to 4 times (the first time + 3 times as a Field Survey).
Field Survey QuestRest at Camp Until the Quest Appears
If the monster you want to hunt is not on the map, you can reset the environment by resting in the tent. It costs 500 points each time, but you can reroll the quests by checking the map and then resting.
Optional Quest

If you feel that rerolling a Field Survey takes too much time, the 5-star Optional Quest Tempered monsters are another option. Unlike a Field Survey, you can always take on the Quest and there is no limit to the number of times you can try. However, this only works with quests where you hunt multiple monsters, and you are only guaranteed to get one Hunter Symbol, so if you want to be efficient, we recommend the Field Survey.
Applicable Optional Quests
- Continuing ConflictOptional★5TargetHunt tempered Rathian and tempered QuematriceMapWindward Plains(Daytime / Plenty)
ConditionHR31+ / Up to 4 Player
UnlockChallenge Side Mission Continuing Conflict - Fur Damagings Are DislikeworthyOptional★5TargetHunt Tempered Lala Barina and Tempered CongalalaMapScarlet Forest(Daytime / Plenty)
ConditionHR31+ / Up to 4 players
UnlockChallenge Side Mission Fur Damagings Are Dislikeworthy
How to Use Hunter Symbol
| ▼Hunter Symbol III | ▼Hunter Symbol II | ▼Hunter Symbol I |
Hunter Symbol III
Weapon Crafting & Upgrade
Armor Crafting
| Use for Crafting | |
|---|---|
| G. Arkveld Helm α (Needs 1) | G. Arkveld Mail α (Needs 1) |
| G. Arkveld Vambraces α (Needs 1) | G. Arkveld Coil α (Needs 1) |
| G. Arkveld Greaves α (Needs 1) | G. Arkveld Helm β (Needs 1) |
| G. Arkveld Mail β (Needs 1) | G. Arkveld Vambraces β (Needs 1) |
| G. Arkveld Coil β (Needs 1) | G. Arkveld Greaves β (Needs 1) |
| Guild Ace Earrings α (Needs 1) | Guild Ace Mail α (Needs 1) |
| Guild Ace Vambraces α (Needs 1) | Guild Ace Coil α (Needs 1) |
| Guild Ace Boots α (Needs 1) | Dragon King α (Needs 3) |
Talisman Craft & Enhancement
| Use for Crafting | |
|---|---|
| Imbibe Charm I (needs 5) | Convert Charm I (needs 5) |
| Use for Enhancement | |
| Challenger Charm II (needs 5) | Unscathed Charm II (needs 5) |
| Fury Charm II (needs 5) | Exploiter Charm II (needs 5) |
| Power Charm II (needs 5) | Mighty Charm II (needs 5) |
| Mushroom Charm III (needs 5) | Grit Charm III (Needs 3) |
| Counter Charm III (Needs 3) | Chain Charm II (needs 5) |
| Counterattack Charm II (needs 5) | Maintenance Charm III (Needs 3) |
| Chainblade Charm II (needs 5) | |
Hunter Symbol II
Weapon Crafting & Upgrade
Talisman Crafting & Upgrade
| Use for Upgrade | |
|---|---|
| Challenger Charm II (Needs 3) | Unscathed Charm II (Needs3) |
| Fury Charm II (Needs 3) | Exploiter Charm II (Needs 3) |
| Power Charm II (Needs 3) | Mighty Charm II (Needs 3) |
| Mushroom Charm III (Needs 3) | Foray Charm II (Needs 3) |
| Chain Charm II (Needs 3) | Counterattack Charm II (Needs 3) |
Hunter Symbol I
Weapon Crafting & Upgrade
Monster Hunter Wilds Related Articles

List of Each Material
| Monster Materials | Ore Materials | Bone Materials | Fish Materials |
| Insect Materials | Plant Materials | Special Item Materials | Rare Materials |
| Ingredients | Armor Spheres | Tickets | Recipes |
In-demand Material Items
| Nightflower Pollen | Powercharm | Armorcharm |
| Guardian Pelt+ | Guardian Scale+ | Ancient Wyvern Coins |
| Hunter Symbol III | Hunter Symbol II | Hunter Symbol I |
| Ancient Orb - Sword | Glowing Orb - Sword | Mystery Orb - Sword |
| Ancient Orb - Armor | Glowing Orb - Armor | Mystery Orb - Armor |
| Gracium | Lightcrystal | Firestone |
| Dragonbone Relic | Monster Hardbone | Tough Guardian Bone |
| Great Stoutbone | Commission Ticket | Oricalcite |
| Comaqchi Carapace | Wingdrake Hide | Arkveld Calloushell |
| Wyvern Gem | Kranodath Skull | Speartuna Fin |

