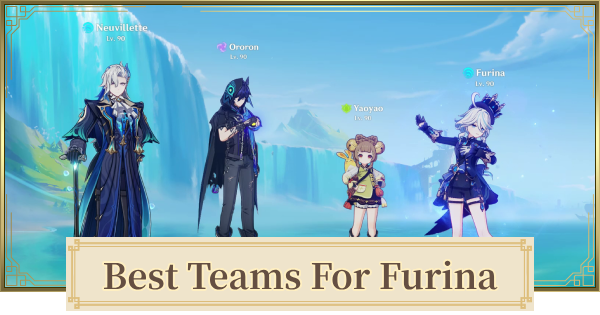
Best Teams for Furina guide for Genshin Impact. Read about taser, vapemelt, freeze, burgeon, rainbow swirl team and characters that work with Furina.
Furina Build & WeaponBest Teams for Furina
Furina Works Best As Hydro Sub-DPS
| Rating | Team Description |
|---|---|
| Best | ▼ Taser Team - Taser team utilizing the synergy of Furina and Neuvillette. - Neuvillette's ability to heal and self HP drain can easily generate Fanfare stacks for Furina. - Double Hydro can lessen the Energy requirement for both Furina and Neuvillette. |
| 2nd | ▼ Vapemelt Team - Pyro DPS-focused team that be changed into a Vaporize team. - Citlali's Passive is used to increase the damage dealt by Furina and Mavuika. - Xilonen's healing can offset Furina's HP drain and she can buff Mavuika and Furina's damage. |
| 3rd | ▼ Freeze Team - Furina is one of the important characters for Skirk's Freeze team. - With Furina buffing everyone at the cost of HP drain, Escoffier can easily heal the team and provide a powerful resistance shred for Hydro and Cryo. |
| 4th | ▼ Burgeon Team - Furina's potent Hydro application is great for Burgeon where you need a lot of Bloom reactions and Hydro to remove Burning. - Baizhu and Lauma activates Dendro Resonance to buff the team's EM. - Pyro Traveler is the Burgeon damage dealer and can buff the active character's damage with C1. |
| 5th | ▼ Rainbow Swirl Team - Furina is great for Anemo On-field DPS characters like Chasca and Mizuki. - She can increase the team's damage and apply Hydro for Swirl trigger. - This team is flexible and can include any combination of PECH characters. |
Furina is one of the best Hydro Sub-DPS in the game. Her summons attack enemies automatically and prioritizes enemies hit by the active character. Her teamwide HP drain allows Marechaussee set to be used by DPS characters in synergy with her, but this also means a healer is required. Her Burst can also buff the damage dealt by the team greatly.
Taser Team
Team Composition & Equipment
| Character | Weapon Artifacts & Stats |
|---|---|
 Furina | Splendor Of Tranquil Waters Golden Troupe x4 Main HP% / Hydro DMG Bonus / CRIT Rate or DMG Sub 1. CRIT Rate or DMG 2. Energy Recharge 3. HP% |
Neuvillette | Tome Of The Eternal Flow Marechaussee Hunter x4 Main HP% / Hydro DMG Bonus / CRIT Rate or DMG Sub 1. CRIT Rate or DMG 2. Energy Recharge 3. HP% |
Ineffa | Fractured Halo Gilded Dreams x4 Main ATK% / ATK% / CRIT Rate or DMG Sub 1. CRIT Rate or DMG 2. Energy Recharge 3. ATK% until 2000 4. Elemental Mastery |
Xilonen | Freedom-Sworn Viridescent Venerer x4 Main EM / EM / EM Sub 1. Energy Recharge 2. Elemental Mastery |
With the release of Ineffa, Furina's Taser team has changed to including Ineffa as the Electro Sub-DPS. Lunar-Charged is a new reaction that enhances the original Electro-Charged reaction.
Rotation Of Taser Team
| No. | Procedure |
|---|---|
| 1 | Start with Furina and use her Skill then Burst |
| 2 | Switch to Xilonen and use her Skill then hit enemies twice with her Normal Attacks |
| 3 | Use Xilonen's Burst once her Source Samples are active |
| 4 | Switch to Ineffa and use her Skill then Burst |
| 5 | Switch to Neuvillette and use his Skill then Burst to create Sourcewater Droplets |
| 6 | Deal damage with Charged Attacks and use Skill/Burst to refresh Sourcewater Droplets |
| 7 | Repeat from 1 once buffs expire |
Substitute Characters
| Character | Sub | Details |
|---|---|---|
| Neuvillette | Mizuki | - While Flins is incompatible with Furina, Ifa and Mizuki can still be used with her even though their healing is not that great. - Both are Anemo On-Field reaction drivers that boost Lunar-Charged damage with their EM scaling. - A Hydro or Electro On-Field DPS can be used as well. |
| Ineffa | OroronFischl | - Ororon is the next best Electro-Charged Sub-DPS for Taser but removing Ineffa will cancel the Lunar-Charged conversion. - Fischl can also be used as an Electro Sub-DPS for applying Electro. |
| Xilonen | SigewinneKuki Shinobu | - Sigewinne can be used as a healer for Taser and she can buff Furina's Off-Field damage with her Elemental Skill damage buff. - Kuki Shinobu can be used as an Electro healer who only needs to use her Skill for healing. |
Always consider having a healer since it can greatly increase survivability and Furina's Off-field damage, even when changing the team to mono Hydro or Hyperbloom.
▲ Return To Best Teams ListVapemelt Team
Team Composition & Equipment
| Character | Weapon Artifacts & Stats |
|---|---|
Furina | Splendor Of Tranquil Waters Golden Troupe x4 Main HP% / Hydro DMG Bonus / CRIT Rate or DMG Sub 1. CRIT Rate or DMG 2. Energy Recharge 3. HP% |
Mavuika | A Thousand Blazing Suns Obsidian Codex x4 Main ATK% / Pyro DMG Bonus / CRIT Rate or DMG Sub 1. CRIT Rate or DMG 2. ATK% |
Xilonen | Peak Patrol Song Noblesse Oblige x4 Main Energy Recharge or DEF% / DEF% / Healing Bonus or DEF% Sub 1. Energy Recharge 2. DEF% |
Citlali | Starcaller's Watch Scroll Of The Hero Of Cinder City x4 Main EM / EM / EM Sub 1. Energy Recharge 2. Elemental Mastery |
Furina is a great Hydro Sub-DPS for Mavuika whose Pyro-infused Charged Attack deals more damage and has bigger range. Citlali can increase the Elemental DMG Bonus of Pyro/Cryo/Hydro as well as increase the Pyro and Hydro DMG taken by enemies. Xilonen is the healer and shreds Elemental resistances even more.
Rotation Of Vapemelt Team
| No. | Procedure |
|---|---|
| 1 | Start with Furina and use her Skill then Burst |
| 2 | Switch to Xilonen and use her Skill then hit enemies twice with her Normal Attacks |
| 3 | Use Xilonen's Burst before switching her out |
| 4 | Switch to Citlali and use her Skill then Burst to gain Nightsoul points |
| 5 | Switch to Bennett and use his Skill then Burst |
| 6 | Switch to Mavuika and use her Skill then Burst |
| 7 | Deal damage with Normal/Charged Attacks then use her Skill to refill her Nightsoul gauge |
| 8 | Repeat from 1 once buffs expire |
Substitute Characters
| Character | Sub | Details |
|---|---|---|
| Mavuika | ArlecchinoYanfei | - Both are Pyro DPS that use Normal Attacks often. - Arlecchino cannot be healed by healers and a shield support is great for increasing her survivability. |
| Xilonen | BennettKokomiSigewinne | - Bennett can be used as alternative to Xilonen since he can buff Mavuika's ATK and provide healing. - Kokomi and Sigewinne are Hydro healers that can be used. - Kokomi can use Thrilling Tales to buff Mavuika's ATK and Sigewinne can buff Elemental Skill DMG. |
| Citlali | DionaLan YanZhongli | - All three are good shield supports that provide buffs and debuffs to help the team. - C6 Diona can buff Elemental Mastery and heal. - Lan Yan can use VV debuff and has a slight Crowd Control ability. - Zhongli can shred enemy resistances and has a very tanky shield. |
Freeze Team
Team Composition & Equipment
| Character | Weapon Artifacts & Stats |
|---|---|
Furina | Splendor Of Tranquil Waters Golden Troupe x4 Main HP% / Hydro DMG Bonus / CRIT Rate or DMG Sub 1. CRIT Rate or DMG 2. Energy Recharge 3. HP% |
Skirk | Azurelight Marechaussee Hunter x4 Main ATK% / Cryo DMG Bonus / CRIT Rate or DMG Sub 1. CRIT Rate or DMG 2. ATK% |
Escoffier | Symphonist Of Scents Golden Troupe x4 Main ATK% / ATK% / CRIT Rate or DMG Sub 1. CRIT Rate or DMG 2. Energy Recharge 3. ATK% |
Shenhe | Calamity Queller Scroll Of The Hero Of Cinder City x4 Main ATK% / ATK% / ATK% Sub 1. Energy Recharge 2. ATK% |
In a Skirk freeze team, Furina helps Skirk gain stacks and buff her damage as well. With Escoffier and Shenhe shredding resistances, Furina and Skirk can deal more damage. Escoffier can be built as a damage dealer but Shenhe is strictly a support in this team.
Rotation Of Freeze Team
| No. | Procedure |
|---|---|
| 1 | Start with Furina and use her Skill then Burst |
| 2 | Switch to Escoffier and use her Skill then Burst for healing |
| 3 | Switch to Shenhe and use her Skill (Hold) then Burst |
| 4 | Switch to Skirk and use her Skill (Tap) then use her Normal Attacks to deal damage |
| 5 | Absorb Void Rifts with Skirk's Charged Attack or Burst when available |
| 6 | Repeat from Step 1 once buffs expire |
Substitute Characters
| Character | Sub | Details |
|---|---|---|
| Skirk | AyakaWriothesley | - Both are good Cryo On-Field DPS characters that can be used. - Wriothesley has a low HP mechanic which is not too compatible with Escoffier's healing. |
| Escoffier | DionaKokomiBarbara | - Any Cryo/Hydro healer can be used to replace Escoffier's healing |
| Shenhe | YelanDahliaCitlali | - If Escoffier is still on the team, Yelan or Dahlia can be used as the 4th member. - If not using Escoffier, Citlali should be used to buff Elemental damage and Furina's Hydro damage via her Hydro shred |
Since Skirk has an Element restriction on her teammates, you should only bring Cryo and Hydro characters in her team.
▲ Return To Best Teams ListBurgeon Team
Team Composition & Equipment
| Character | Weapon Artifacts & Stats |
|---|---|
Furina | Splendor Of Tranquil Waters Golden Troupe x4 Main HP% / Hydro DMG Bonus / CRIT Rate or DMG Sub 1. CRIT Rate or DMG 2. Energy Recharge 3. HP% |
Baizhu | Jadefall's Splendor Ocean-Hued Clam x4 Main Energy Recharge or HP% / HP% / Healing Bonus or HP% Sub 1. Energy Recharge 2. HP% |
Lauma | Nightweaver's Looking Glass Deepwood Memories x4 Main EM / EM / EM Sub 1. Energy Recharge 2. Elemental Mastery |
Pyro Traveler | Iron Sting Flower Of Paradise Lost x4 Main EM / EM / EM Sub 1. Energy Recharge 2. Elemental Mastery |
Baizhu is the On-Field reaction driver who buffs Burgeon damage along with Lauma. Pyro Traveler procs Burgeon and can deal more damage with Lauma's Dendro resistance shred. Furina can deal more damage as well since Lauma can shred Hydro too.
Rotation Of Burgeon Team
| No. | Procedure |
|---|---|
| 1 | Start with Furina and use her Skill then Burst |
| 2 | Switch to Nahida and use her Burst then Skill to mark enemies |
| 3 | Switch to Pyro Traveler and use their Skill then Burst to gain Nightsoul points |
| 4 | Switch to Baizhu and use his Skill then Burst |
| 5 | Apply Dendro with Baizhu's Normal Attacks |
| 6 | Repeat from 1 once buffs expire |
Substitute Characters
| Character | Sub | Details |
|---|---|---|
| Baizhu | Kokomi | - Kokomi is a Hydro healer that is great at overflow healing. - She can be used if wanting more Hydro application. |
| Lauma | NahidaCollei | - Nahida can be used as alternative to Lauma for Dendro Sub-DPS and EM buff. - Collei is a good F2P Dendro Sub-DPS that can be used. |
| Pyro Traveler | ThomaMavuika | - Thoma is a good Burgeon damage dealer that can be used. - Mavuika can be used as Burgeon damage dealer but her Off-Field attacks will prioritize the enemy over the Dendro cores. |
Rainbow Swirl Team
Team Composition & Equipment
| Character | Weapon Artifacts & Stats |
|---|---|
Furina | Splendor Of Tranquil Waters Golden Troupe x4 Main HP% / Hydro DMG Bonus / CRIT Rate or DMG Sub 1. CRIT Rate or DMG 2. Energy Recharge 3. HP% |
Chasca | Astral Vulture's Crimson Plumage Obsidian Codex x4 Main ATK% / Pyro DMG Bonus / CRIT Rate or DMG Sub 1. CRIT Rate or DMG 2. Energy Recharge 3. ATK% |
Bennett | Aquila Favonia Noblesse Oblige x4 Main Energy Recharge or HP% / HP% / Healing Bonus or HP% Sub 1. Energy Recharge 2. HP% |
Ororon | Elegy For The End Scroll Of The Hero Of Cinder City x4 Main ATK% / Electro DMG Bonus / CRIT Rate or DMG Sub 1. CRIT Rate or DMG 2. Energy Recharge 3. ATK% |
Chasca is a straightforward Anemo DPS that can deal Elemental DMG based on her teammates' Elements. Mizuki is another great option for Anemo DPS and has healing in her kit as well. Furina, Bennett, and Ororon are able to buff the damage dealt by the DPS greatly.
Rotation Of Rainbow Swirl Team
| No. | Procedure |
|---|---|
| 1 | Start with Furina and use her Skill then Burst |
| 2 | Switch to Ororon and use his Skill then Burst |
| 3 | Switch to Bennett and use his Skill then Burst |
| 4 | Switch to Chasca and use her Skill |
| 5 | Hold Chasca's Attack button then aim at enemies to deal damage. |
| 6 | Use Chasca's Burst if available |
| 7 | Repeat from 1 once buffs expire |
Substitute Characters
| Character | Sub | Details |
|---|---|---|
| Chasca | MizukiLan YanSucrose | - Mizuki is a Swirl DPS with healing that can be used. - Lan Yan is an Anemo catalyst character that can be used as the DPS. - Sucrose is a Swirl support that buff the team's EM and increase their reaction damage. |
| Bennett | MavuikaDehya | - Mavuika can charge her Fighting Spirit with Chasca and use her Burst to buff her. - Dehya is a defensive Sub-DPS that can mitigate damage taken by the active character. |
| Ororon | FischlRaiden ShogunYae Miko | - All three are good Electro Sub-DPS that can be used. |
When replacing Chasca as the Anemo DPS, you will need to change your characters with no off-field damage to those that can deal off-field damage.
▲ Return To Best Teams ListCharacter Related Articles
Character Tier Lists
All Characters
| Characters By Rarity | |||||||||||
|---|---|---|---|---|---|---|---|---|---|---|---|
| Characters By Roles | |||||||||||
| DPS List | Support List | Sustain List | |||||||||
| On-Field List | Off-Field List | ||||||||||
| Characters By Element | |||||||||||
| Hydro | Anemo | Electro | |||||||||
| Dendro | |||||||||||
| Characters By Nation | |||||||||||
| Mondstadt | Liyue | ||||||||||
| Fontaine | Natlan | ||||||||||
| Snezhnaya | Nod-Krai | ||||||||||

