
Ancient Sacred Mountain is an area at Natlan of Genshin Impact. See how to get to Ancient Sacred Mountain, how to unlock, dragon puzzle, and things to do at the location.
How to Unlock Ancient Sacred Mountain?
Complete A Quest Chain to Unlock
| Map | In-Game |
|---|---|
  |  |
Ancient Sacred Mountain can be unlocked by progressing in the World Quest close to Collective of Plenty. The area itself is a separate location from Natlan and has its own map. You can switch the map by pressing the change map button on the lower right section of the screen.
| Series Quests | |
|---|---|
| The Way Into the Mountain | Path to the Flaming Peaks |
| Chronicler of the Crumbling City | A Finale Emberforged |
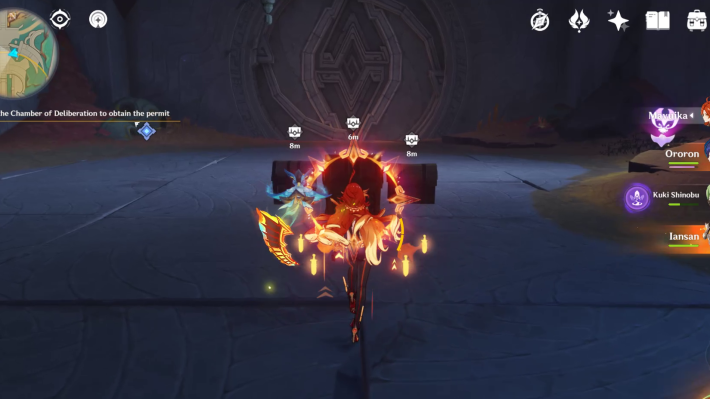
Ancient Sacred Mountain - Elemental Monument Location
| Cave Location With Elemental Monument | |
|---|---|
 |  |
Hit Geothermal Vent Three Times To Light Up The Monuments
▲ Video showing 3rd hit on the Geothermal Vent
The Elemental Monuments to open the door can be turned on by hitting the nearby Geothermal Vent thrice. Plunging Attacks or a Tatanktasaur's normal attack can easily hit it.
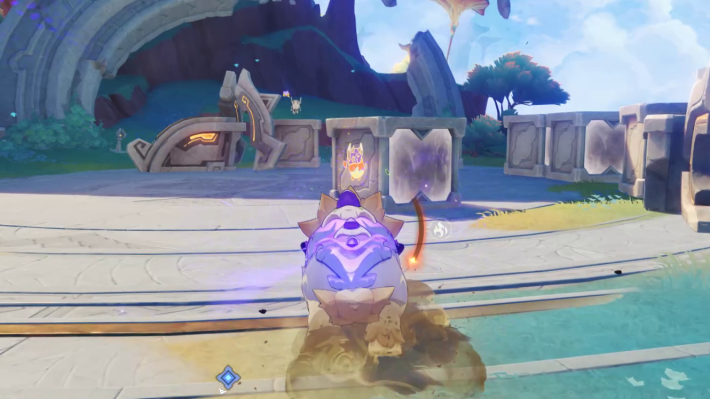
Enter The Newly Opened Door To Get Treasure Chests
| Chests After Defeating the Tenebrous Mimics | Chest Behind Wall Crevice |
|---|---|
 |  |
How To Reach Chest Behind Wall Crevice

Indwell a Tatankasaur and use its enhanced dash ability to break through the rocks. If you have either Varesa or Iansan, both of them can break the rocks as well.

Once further inside the cave, attack the Geothermal Vent thrice to make the Phlogiston pool spew orbs to hit the monuments.

Defeat all three (3) waves of Tenebrous Mimicked Enemies. Don't forget to claim the chests before moving to the next step.

Indwell a Tatankasaur then break through the rocks blocking the path. Proceed onwards and grab the Pyroculus.

Before the doorway going outside, look at the left to see the crevice leading to a hidden area.
Start hitting both of the Geothermal Vents to unlock the chest.

Wait until the Phlogiston Pool is done spewing out orbs then use the Wind Current to glide upwards and grab the chest.
Ancient Sacred Mountain - Secret Source Dragon Puzzles
Location Of Puzzle At the East Island
| Map Location | In-game Location |
|---|---|
 |  |
How To Solve East Island Dragon Puzzle

Head to the East side of the island and indwell a Tatankasaur to break the rocks.

Hit the cracked rock surface on the left with the Tatankasaur's dash attack. Grab the chest then wait until the platform stop ascending.

Head to the breakable rocks on the left side once you reach the upper island. Break it to reveal the head section of the Secret Source Dragon.

Descend to the lower island then head to the southwest end of the island. Successfully chase and hit the matador Monetoo to make it enter one of the unattached sections
Use the Tatankasaur's ability to ram into the section where the Monetoo's graffiti is dancing. It will cause the box to move and attach to the whole body.

Head to the marked area in the map above then chase after the next matador Monetoo. Ram the graffiti version afterwards to make one section of the Dragon Statue fall on the ground.

Once the mechanism is infused with Phlogiston, the two stationary Secret Source Servants will carry the remaining section and assemble the completed Dragon Statue.

Location Of Puzzle At the West Island
| Map Location | In-game Location |
|---|---|
 |  |
How To Solve West Island Dragon Puzzle

Turn to the left side of the puzzle then indwell a Tatankasaur. Enter the room with a gate then break all the rocks inside.

Infuse the Mechanism with Phlogiston. If you don't have enough, exit the room and restore your Phlogiston then re-enter.

Clear the enemies behind the light wall. Your attacks can go through it unless the range is very small then you have to go to the other side to fight them.

Once the light wall is down, grab the chest and click the Start interaction. The section will start floating upwards and bring you to the main body.

The Secret Source Servants will fix the switch. Activate it to reveal the completed body of the Dragon Statue.
Location Of Puzzle At the Lower Layer Northeast Area
| Map Location | In-game Location |
|---|---|
 |  |
How To Solve Lower Layer Dragon Puzzle

Once you reach the puzzle location, turn to your right then break the rocks blocking the tail section.

Go back to the main body and break the two broken sections to make space for new sections.

Break the rocks in front of the Dragon Statue's main body then approach the newly revealed sections.

Rifthound Whelps then a Tenebrous Mimicked Tatankasaur will appear when you reach the revealed section and when it's being transported to the main body.

Ride the Dragon Statue then grab the Pyroculus on top of the floating ring.
Natlan Related Articles
| Natlan Guides | |||||
|---|---|---|---|---|---|
| Natlan Guide | |||||
| Map & Things To Do | |||||
| Pyroculus | Shrine of Depths | ||||
| Tona's Flame | |||||
| Local Specialties | |||||
| Saurian Claw Succulent | Sprayfeather Gill | Quenepa Berry | |||
| Brilliant Chrysanthemum | Glowing Hornshroom | Withering Purpurbloom | |||
| Skysplit Gembloom | Dracolite | - | |||
| Materials | |||||
| Grainfruit | Candlecap Mushroom | Spinel Fruit | |||
| Embercore Flower | Cacahuatl | Red Berryshroom | |||
Natlan Characters
| Natlan 5 Star Characters | |||
|---|---|---|---|
| Chasca | Citlali | Kinich | Mavuika |
| Mualani | Varesa | Xilonen | - |
| Natlan 4 Star Characters | |||
| Iansan | Kachina | Ororon | |
| Other Natlan Characters | |||
| Xbalanque | - | - | - |

