

 Anemo
Anemo  Hydro
Hydro
 Pyro
Pyro
 Electro
 Dendro
 Cryo
Cryo
 Geo
Geo
 Anemo Traveler
 Chasca
 Jean
Jean Kaedehara Kazuha
 Mizuki
 Varka
Varka Venti
Venti Wanderer
 Xianyun
 Xiao
Xiao Vesna
Vesna Childe
 Columbina
 Furina
 Hydro Traveler
 Ayato
Ayato Mona
Mona Mualani
 Neuvillette
 Nilou
Nilou Kokomi
 Sigewinne
 Yelan
Yelan Vodyanitsa
 Albedo
 Arataki Itto
 Chiori
 Geo Traveler
 Linnea
 Navia
Navia Xilonen
 Zhongli
 Zibai
Zibai Clorinde
 Cyno
Cyno Electro Traveler
 Flins
Flins Ineffa
 Keqing
 Raiden Shogun
 Varesa
 Yae Miko
 Dendro
 Alhaitham
 Baizhu
 Dendro Traveler
 Emilie
 Kinich
 Lauma
Lauma Nahida
 Nefer
Nefer Tighnari
 Arlecchino
 Dehya
Dehya Diluc
Diluc Durin
Durin Hu Tao
 Klee
Klee Lyney
Lyney Mavuika
 Nicole
 Pyro Traveler
 Yoimiya
 Aloy
Aloy Citlali
 Escoffier
 Eula
Eula Ganyu
Ganyu Kamisato Ayaka
 Lohen
Lohen Qiqi
Qiqi Sandrone
 Shenhe
 Skirk
Skirk Wriothesley
 Ifa
Ifa Jahoda
 Lan Yan
 Lynette
 Prune
Prune Sayu
Sayu Shikanoin Heizou
 Sucrose
 Aino
Aino Barbara
 Candace
 Dahlia
 Xingqiu
 Gorou
Gorou Illuga
 Kachina
 Ningguang
 Noelle
 Yun Jin
 Beidou
 Dori
Dori Fischl
 Iansan
 Kujou Sara
 Kuki Shinobu
 Lisa
Lisa Ororon
 Razor
Razor Sethos
 Alyosha
 Collei
 Kaveh
Kaveh Kirara
 Yaoyao
 Amber
Amber Bennett
 Chevreuse
 Gaming
 Thoma
Thoma Xiangling
 Xinyan
 Yanfei
 Charlotte
 Chongyun
 Diona
Diona Freminet
 Kaeya
Kaeya Layla
Layla Rosaria
 Danica
 Mitya
Mitya Noy
Noy Tsaritsa
 Valeriy
























 Sword
Sword Claymore
 Polearm
 Catalyst
 Bow
Bow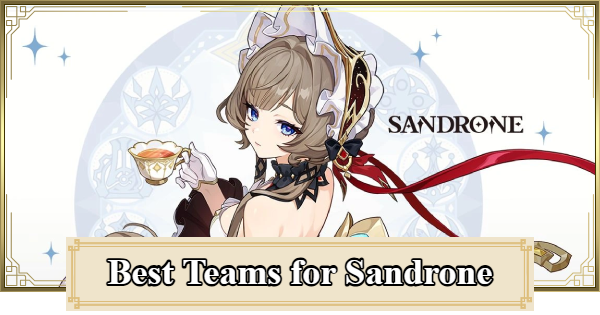
Best Teams for Sandrone guide for Genshin Impact. Read about premium Stellar-Conduct, F2P Stellar-Conduct, and Lunar-Charged Stellar-Conduct teams, as well as her best builds, weapons, and artifacts.
| Sandrone Related Articles | ||||||||
|---|---|---|---|---|---|---|---|---|
 Best Build Best Build | Best Team | Gacha Banner | ||||||
| Materials | Signature Weapon | |||||||
Table of Contents
Best Teams for Sandrone
Sandrone Is Meant For Stellar-Conduct Teams
| Team | Rating Description |
|---|---|
| ▼Premium Stellar-Conduct Team | ★★★★★ - Almost all of Sandrone's abilities have some reliance on the Radiance: Stellar-Conduct state that only activates while within the area of a Polestar Field, which manifests after triggering the new Stellar-Conduct reaction on an enemy. - Maintaining the Radiance state for Sandrone enables her to deal Stellar-Conduct DMG through her Charged Attack, Skill and Burst, so she naturally wants a team that can guarantee consistent Stellar-Conduct triggers. - The newly buffed Electro and Cryo characters have been given synergy with Stellar-Conduct, and some of them stand out as viable teammates for Sandrone. Notably, Yae Miko is the only 5-star Electro Off-Field Sub-DPS on the list, which places her as one of the better Electro pairings for Sandrone as of the current version. - Odette completes the Stellar-Conduct premium team by providing a Stellar-Conduct DMG% boost and her non-negligible personal DMG. |
| ▼F2P Stellar-Conduct Team | ★★★☆☆ - Sandrone still has decent synergy with the buffed 4-star Electro and Cryo supports, so you can form a functional Stellar-Conduct team for her even if you do not own specific 5-star characters. - Alyosha is an Electro character who you can obtain for free as you progress through the Snezhnaya Archon Quest. His decent ATK% and Stellar-Conduct DMG% buffs align with Sandrone's intended use-cases and puts him above other F2P Electro applicators. |
| ▼Lunar-Charged Stellar-Conduct Team | ★★★☆☆ - From our testing, Stellar-Conduct and Lunar-Charged can co-exist on a target, with each reaction maintaining its defining features (the cloud for Lunar-Charged and the Polestar Field for Stellar-Conduct). - The Ineffa-Columbina pairing already deals a decent amount of damage by themselves as Sub-DPSes, so adding Sandrone is still a serviceable DPS gain since she can trigger Stellar-Conduct through Ineffa's elemental application. |
Sandrone is our first introduction to a new reaction called Stellar-Conduct, which is one of the two reactions collectively called Stellar Glimmer. Her main source of damage are her Charged Attacks, and her team setups are generally going to include an Electro applicator, a secondary Cryo character for both application and to activate Cryo Resonance (for the CRIT Rate boost), and a synergistic buffer that can give Stellar-Conduct DMG%, ATK% or Elemental Mastery buffs.
Stellar Glimmer Reactions
Stellar Glimmer Reactions Quick Info
The official umbrella term for both Stellar reactions is Stellar Glimmer.
Stellar-Conduct builds on Superconduct as the base reaction, requiring Electro and Cryo application, but flips its mechanics so that rather than dealing damage, Stellar-Conduct deploys a special area called the Polestar Field that gives Cryo and Electro DMG% to the party while simultaneously lowering the Physical RES of the enemies inside the field.
Stellar Swirl, on the other hand, is converted from Cryo Swirl. Rather than a Polestar Field, this reaction creates a Stellar Vortex that deals damage after exploding and at intervals. The damage and range of the vortex increases the more Stellar Swirls are triggered.
Remaining within the bounds of this Polestar field enables the Radiance: Stellar-Conduct state, while triggering a single Stellar Swirl already applies the Radiance: Stellar Swirl state. The state is active for the entire party and depending on their abilities, this state grants each character specific buffs or advantages.
Sandrone Teammate FAQ
Does Sandrone Need Yae Miko?| Sandrone does not need Miko to function as a Stellar-Conduct DPS, but she is currently the strongest Electro Off-Field Sub-DPS available for Sandrone's Stellar-Conduct team. Miko contributes a significant amount of personal damage to the total team output, so replacing her would cause a noticeable dip in the team's performance. |
| There are currently no proper alternatives to Yae Miko for Sandrone in terms of damage potential. The fact you can pick up Miko's C1 from the "To Temper Thyself and Journey Far" system also means you can get an extra 50% buff to Stellar-Conduct DMG for free. |
| Sandrone should still be usable with other Electro Sub-DPSes (like Beidou), but in order to reach her highest DPS potential, having Yae Miko is strongly recommended. |
| Note! | No Yae Miko? Options to Consider: - Try to vertically invest into Sandrone's Constellations and Signature Weapon. Notably, her Signature is a more accessible upgrade over her Constellations because her C1 is relatively underpowered, unless you have enough resources to aim for C2. └ Check here for more info about Sandrone's Signature Weapon versus her Constellations. - Wait for possible Miko replacements that might release with Snezhnaya. The chance of this happening is not guaranteed. - Invest into Odette's C2, which is her strongest Constellation both in terms of buffing value and personal damage. This should be enough to bridge the gap between a Sandrone team with Miko and one without. - Wait for Miko's rerun. |
|---|
| Assuming Free-to-Play standards, Sandrone without Yae Miko performs around the same level as older DPSes, such as Neuvillette or Arlecchino paired with new Supports like the Ineffa and Columbina duo or Nicole. But her being worth your pulls when your account is missing her current best teammate will still depend on your account state and personal in-game goals. |
| - You really like Sandrone as a character and enjoy her playstyle. - You aren't stressed about meta or clearing Stygian Onslaught at Difficulty 5 and 6. - You're missing a Cryo DPS and/or already have at least one or two other strong, SS or S tier team(s) for endgame content. - You plan to eventually get Yae Miko, or want to vertically invest in Sandrone's Constellations and Signature Weapon to compensate for Miko's absence. |
| Note! | Stygian Onslaught Difficulty 4 (Menacing) and 5 (Fearless) should be manageable even if you only have other Stellar-Conduct supports in Sandrone's team, but results may still vary depending on your character builds, rotation mastery and whether or not Sandrone is good against the featured bosses. |
|---|
| - You already have three different Meta DPSes like Mavuika, Zibai and Nefer and can comfortably bruteforce certain endgame content with such teams already. - You want to clear Stygian Onslaught Difficulty 5 and 6 consistently. - You don't enjoy Sandrone's gameplay. - You do have Yae Miko, but you strongly want to pull for other characters, such as the upcoming Snezhnaya characters. Enjoying the game is more important. - You don't have enough funds or do not want to vertically invest into Sandrone's Constellations or Signature Weapon. |
Premium Stellar-Conduct Team
Team Composition & Equipment
| Character | Weapon Artifacts & Stats |
|---|---|
Sandrone | A Teaspoon of Transcendence Disenchantment in Deep Shadow x4 Main ATK% / ATK% / CRIT Rate or DMG Sub 1. CRIT Rate or DMG 2. ATK% 3. Elemental Mastery |
Yae Miko | Kagura's Verity Disenchantment in Deep Shadow x4 Main ATK% or Energy Recharge / ATK% / CRIT Rate or DMG Sub 1. CRIT Rate or DMG 2. ATK% or Energy Recharge 3. Elemental Mastery └ Remember to complete Yae Miko's Witch's Revelation quest to enable her adjustments and Stellar-Conduct buffs! |
Odette | Whitelake Frostfeather Heart of the Furnace x4 Main ATK% / ATK% / CRIT Rate or DMG Sub 1. CRIT Rate or DMG 2. ATK% 3. Energy Recharge or Elemental Mastery |
| Alyosha | Engulfing Lightning └ Equip Favonius Lance if the team seems to be lacking Energy. Noblesse Oblige x4Main Energy Recharge / ATK% / ATK% or CRIT Rate (for Favonius Lance) Sub 1. Energy Recharge 2. CRIT Rate (for Favonius Lance) or ATK% |
| Note! | Stellar-Conduct follows the same reaction formula as Lunar Reactions. This means that regular elemental DMG% Goblets do not buff Stellar-Conduct like other reactions, which is why Sandrone and Miko want to have ATK% Goblets instead. |
|---|
Since Sandrone is a typical DPS, her ideal team follows the traditional formula of an elemental applicator to enable reactions and complementary buffing Supports.
Yae Miko is one of the few Cryo and Electro characters that will receive a Stellar-Conduct-related buff, and these adjustments allowed her to be paired alongside Sandrone as her best Electro Sub-DPS for this premium Stellar-Conduct setup.
Premium Stellar-Conduct Team Rotation
| No. | Procedure |
|---|---|
| 1 | Start the rotation with Yae Miko. Use her Skill (x3). |
| 2 | Switch to Odette. Use her Skill twice. Burst is optional. |
| 3 | Swap to Alyosha. Use his Skill, then Burst. |
| 4 | Deploy Sandrone. Hold her Normal Attack button to activate a Charged Attack, then use Skill to reset Fagio. Do this several more times until Miko's totems expire. └ Sandrone's optimal combo should be: [ Charged Attack (fire all 3 beams) → Skill ] → Burst → [ Charged Attack (fire all 3 beams) → Skill ] x2 or x3 |
| 5 | Repeat from Step 1. |
Substitute Characters
| Character | Sub | Details |
|---|---|---|
| Alyosha | QiqiEscoffierBeidouDionaNicoleSucrose | - Alyosha's ATK and Stellar-Conduct DMG% are much appreciated, but they aren't too significant enough number-wise to make him a main-stay on Sandrone's team. So he can be replaced by any synergisitic sustain or buffer. - You can opt to include other Stellar-Conduct Off-Fielders such as Beidou and Diona. - Generic buffers like Sucrose, for RES Shred and EM buffs, or Nicole, for a shield and a teamwide ATK% buff, might also be flex options if they aren't occupied in other teams. - Nicole's teamwide ATK% buff and shield also have good mileage in this team, especially since Sandrone has a tendency to get interrupted while she uses her Charged Attacks. |
| Odette | QiqiEscoffierDionaBeidouNicole | - Replacing Odette means the DPS potential of the team is slightly lower due to losing Odette's personal DPS, but you can make do with other Off-Fielders that can either apply Cryo and/or Stellar-Conduct buffs. - Since Qiqi grants a Stellar Glimmer DMG% increase and Off-Field Cryo application, she is one of the stronger Odette substitutes in terms of buffing value. - Alternatively, characters cited as Alyosha alternatives above can also work in this slot. |
| Yae Miko | BeidouFischlAlyosha | - Miko is the only 5-star Electro character that got Stellar-Conduct buffs so this might be hinting at her being the intended best option as of the moment. - However, it is also likely that Beidou, who also received similar buffs, should still produce serviceable results as a Yae Miko alternative. - Other Off-Field Electro characters like Fischl should also be usable in this slot, but more so for her Electro application rather than her damage. - Alyosha can also fill in the role of Electro applicator since his Burst hits are able to sustain the Stellar-Conduct reaction and the stacks associated with it. His personal damage cannot compare to Miko's however. |
F2P Stellar-Conduct Team
Team Composition & Equipment
| Character | Weapon Artifacts & Stats |
|---|---|
Sandrone | Blade of Atonement or Mailed Flower Disenchantment in Deep Shadow x4 Main ATK% / ATK% / CRIT Rate or DMG Sub 1. CRIT Rate or DMG 2. ATK% or Energy Recharge 3. Elemental Mastery |
Diona | Sacrificial Bow Noblesse Oblige x4 Main ATK% / ATK% / CRIT Rate (for Favonius Sword) Sub 1. CRIT Rate (for Favonius Sword) 2. ATK% └ Remember to complete Diona's Witch's Revelation quest to enable her adjustments and Stellar-Conduct buffs! |
| Alyosha | Tamayuratei no Ohanashi └ Equip Favonius Lance if the team seems to be lacking Energy. Heart of the Furnace x4Main Energy Recharge / ATK% / ATK% or CRIT Rate (for Favonius Lance) Sub 1. Energy Recharge 2. CRIT Rate (for Favonius Lance) or ATK% |
Beidou | Favonius Greatsword Tenacity of the Millelith x4 Main ATK% or Energy Recharge / ATK% / CRIT Rate or DMG Sub 1. Energy Recharge 2. CRIT Rate (for Favonius Greatsword) 3. CRIT DMG or ATK% └ Remember to complete Beidou's Witch's Revelation quest to enable her adjustments and Stellar-Conduct buffs! |
| Note! | Stellar-Conduct follows the same reaction formula as Lunar Reactions. This means that regular elemental DMG% Goblets do not buff Stellar-Conduct like other reactions, which is why Sandrone wants to have an ATK% Goblet instead. |
|---|
A Free-to-Play Stellar-Conduct team for Sandrone should include one buffed 4-star Electro or Cryo character, since their new abilities include some form of boost related to this reaction. The fourth slot can be any other generic buffer you have on hand, with RES Shredders and ATK% buffers being a little more preferable.
F2P Stellar-Conduct Team Rotation
| No. | Procedure |
|---|---|
| 1 | Start the rotation with Diona. Use Skill, then Burst. |
| 2 | Swap to Beidou to deploy her Skill. Try to time a parry for more Electro particles. Follow this up with her Burst. |
| 3 | Switch to Alyosha. Use Skill, then Burst. |
| 4 | Deploy Sandrone. Hold her Normal Attack button to activate a Charged Attack, then use Skill to reset Fagio. Do this several more times until Beidou's Electro application expires. └ Sandrone's optimal combo should be: [ Charged Attack (fire all 3 beams) → Skill ] → Burst → [ Charged Attack (fire all 3 beams) → Skill ] x2 or x3 |
| 5 | Repeat from Step 1. |
Substitute Characters
| Character | Sub | Details |
|---|---|---|
| Beidou | IansanRosariaBennettSucrose | - Following her Witch's Revelation buffs, Beidou at C6 provides Electro and Cryo RES shred, but she becomes a lot more replaceable otherwise. - Other options can include another Cryo character to apply more Cryo since Sandrone has low application, or ATK% buffers like Iansan. - Generic Supports that provide stats that Sandrone could make use of, such as Cryo RES shred or Elemental Mastery, can also be considered. |
| Diona | QiqiLayla | - Diona is the direct alternative to Qiqi since they're both sustain-type characters that were buffed to synergize with Stellar-Conduct. You can use Qiqi here if you have her. - Layla is another decent alternative since Sandrone can take advantage of the comfort a shield provides while spamming her Charged Attacks. Her application also comed in handy due to how the Stellar-Conduct reaction operates and how it rewards reliable Cryo or Electro application. |
| Alyosha | FischlOroronLisaShinobu | - Fischl's personal damage should put her slightly ahead of other options when it comes to replacing Alyosha. Oz’s ability to attack from a distance also makes it easier for Sandrone to maintain her range advantage on enemies, which can help against certain situations such as when facing multiple targets or in avoiding hard-hitting boss attacks. - The other options won't have the same DPS and range capability as Fischl, so expect them to simply act as Electro applicators that contribute a modest amount of buffs. |
| Note! | Limited Cryo and Electro 5-star alternatives such as Odette or Yae Miko can always be flexed into the setup above if you happen to have them. |
|---|
Lunar-Charged Stellar-Conduct Team
Team Composition & Equipment
| Character | Weapon Artifacts & Stats |
|---|---|
Sandrone | A Teaspoon of Transcendence Disenchantment in Deep Shadow x4 Main ATK% / ATK% / CRIT Rate or DMG Sub 1. CRIT Rate or DMG 2. ATK% or Energy Recharge 3. Elemental Mastery |
Columbina | Nocturne's Curtain Call Silken Moon's Serenade x4 Main Energy Recharge or HP% / HP% / CRIT Rate or DMG Sub 1. Energy Recharge 2. CRIT Rate or DMG 3. HP% |
Ineffa | Fractured Halo Aubade of Morningstar and Moon x4 Main ATK% / ATK% or Elemental Mastery (EM) / CRIT Rate or DMG Sub 1. CRIT Rate or DMG 2. Energy Recharge 3. ATK% 4. EM |
Sucrose | Wandering Evenstar Viridescent Venerer x4 Main Elemental Mastery (EM) / EM / EM Sub 1. Energy Recharge 2. EM |
| Note! | Stellar-Conduct follows the same reaction formula as Lunar Reactions. This means that regular elemental DMG% Goblets do not buff Stellar-Conduct like other reactions, which is why Sandrone wants to have an ATK% Goblet instead. |
|---|
Lunar-Charged doesn't disrupt Stellar-Conduct triggers, so this the team setup is serviceable enough to some clear mid to endgame content, barring the greater difficulties such as Stygian Onslaught Fearless and Dire.
Additionally, Ineffa and Columbina can be paired with most On-Field DPSes, and Sandrone's kit doesn't have any special gimmick that would prevent her from being played alongside the Lunar-Charged duo.
Lunar-Charged Stellar-Conduct Team Rotation
| No. | Procedure |
|---|---|
| 1 | Start the rotation with Ineffa. Use Skill. Burst can be used every other rotation. |
| 2 | Switch to Columbina. Deploy her Skill, followed by Burst. |
| 3 | Use Sucrose's skill. |
| 4 | Deploy Sandrone. Hold her Normal Attack button to activate a Charged Attack, then use Skill to reset Fagio. Do this several more times until Ineffa's Electro application expires. └ Sandrone's optimal combo should be: [ Charged Attack (fire all 3 beams) → Skill ] → Burst → [ Charged Attack (fire all 3 beams) → Skill ] x2 or x3 |
| 5 | Swap back to Sucrose to re-use her Skill. |
| 6 | Repeat from Step 1. |
Substitute Characters
| Character | Sub | Details |
|---|---|---|
| Sucrose | QiqiEscoffierRosariaYae MikoBeidou | - Sucrose's RES shred with the Viridescent Venerer and her innate EM sharing ability lets her be the ideal third teammate for Ineffa and Columbina. Sucrose becomes even more preferable since Sandrone and Stellar-Conduct do take EM into account - However, you can still replace her with some of Sandrone's favored teammates from either Stellar-Conduct team variants, such as the buffed Electro and Cryo characters, or a secondary Cryo character for Cryo Resonance. |
| Ineffa | Yae MikoBeidouFischlOroronAlyosha | - So long as Columbina is still there to enable Lunar-Charged, you can consider other Electro Sub-DPSes as alternatives to Ineffa. - Yae Miko, Beidou and Alyosha will favor Sandrone's Stellar-Conduct DMG more thanks to their related buffs, while Fischl is a more generic option for the sake of Electro application. - Damage might see a noticeable dip outside of the Stellar-Conduct characters if you replace Ineffa. |
| Columbina | Furina | - Replacing Columbina will depend on whether or not you have Ineffa in the lineup to ensure you can still convert the Electro-charged triggers into Lunar-Charged. - Since Sandrone is an On-Field DPS that will primarily use Charged Attacks, Hydro Supports that do not need Normal Attacks to apply their element will be the appropriate choice. - Only Furina can apply Hydro reliably in this case, but her Fanfare gimmick can cause the team to be on low HP if the team doesn't have a healer. It's recommended to flex a healer in the last slot, such as Escoffier, to mitigate the HP drain. |
Character Related Articles
Character Tier Lists
All Characters
| Characters By Rarity | |||||||||||
|---|---|---|---|---|---|---|---|---|---|---|---|
| ★5 | ★4 | ||||||||||
| Characters By Roles | |||||||||||
| DPS List | Support List | Sustain List | |||||||||
| On-Field List | Off-Field List | ||||||||||
| Characters By Element | |||||||||||
| Pyro | Hydro | Anemo | Electro | ||||||||
| Dendro | Cryo | Geo | |||||||||
| Characters By Nation | |||||||||||
| Mondstadt | Liyue | Inazuma | |||||||||
| Sumeru | Fontaine | Natlan | |||||||||
| Snezhnaya | Nod-Krai | ||||||||||











