Anemo
 Hydro
 Pyro
 Electro
 Dendro
 Cryo
 Geo
 Anemo Traveler
 Chasca
 Jean
 Kaedehara Kazuha
 Mizuki
 Varka
 Venti
 Wanderer
 Xianyun
 Xiao
 Vesna
 Childe
 Columbina
 Furina
 Hydro Traveler
 Ayato
 Mona
 Mualani
 Neuvillette
 Nilou
 Kokomi
 Sigewinne
 Yelan
 Vodyanitsa
 Albedo
 Arataki Itto
 Chiori
 Geo Traveler
 Linnea
 Navia
 Xilonen
 Zhongli
 Zibai
 Clorinde
 Cyno
 Electro Traveler
 Flins
 Ineffa
 Keqing
 Raiden Shogun
 Varesa
 Yae Miko
 Mitya
 Dendro
 Alhaitham
 Baizhu
 Dendro Traveler
 Emilie
 Kinich
 Lauma
 Nahida
 Nefer
 Tighnari
 Arlecchino
 Dehya
 Diluc
 Durin
 Hu Tao
 Klee
 Lyney
 Mavuika
 Nicole
 Pyro Traveler
 Yoimiya
 Aloy
 Citlali
 Escoffier
 Eula
 Ganyu
 Kamisato Ayaka
 Lohen
 Qiqi
 Sandrone
 Shenhe
 Skirk
 Wriothesley
 Ifa
 Jahoda
 Lan Yan
 Lynette
 Prune
 Sayu
 Shikanoin Heizou
 Sucrose
 Aino
 Barbara
 Candace
 Dahlia
 Xingqiu
 Gorou
 Illuga
 Kachina
 Ningguang
 Noelle
 Yun Jin
 Beidou
 Dori
 Fischl
 Iansan
 Kujou Sara
 Kuki Shinobu
 Lisa
 Ororon
 Razor
 Sethos
 Alyosha
 Valeriy
 Collei
 Kaveh
 Kirara
 Yaoyao
 Amber
 Bennett
 Chevreuse
 Gaming
 Thoma
 Xiangling
 Xinyan
 Yanfei
 Charlotte
 Chongyun
 Diona
 Freminet
 Kaeya
 Layla
 Rosaria
 Danica
 Noy
 Tsaritsa


























 Sword
 Claymore
 Polearm
 Catalyst
 Bow

Mitya best build guide for Genshin Impact. Learn Mitya's best weapons, artifacts, team comps, rotations, constellations, and ascension materials for this 5-Star Electro Catalyst who works as both an On-Field and Off-Field Stellar-Conduct DPS.
Table of Contents
| Mitya Related Articles | |||||
|---|---|---|---|---|---|
 Best Build | Best Team | Gacha Banner | |||
| Materials | Signature Weapon | ||||
Mitya Character Overview, Base Stats, and Tier
Build Quick View

Character Profile
 | Rarity | | |
|---|---|---|---|
| Element | Electro | ||
| Weapon | Catalyst | ||
| Ascend Stat | CRIT DMG 38.4% | ||
| Region | Snezhnaya | ||
| Birthday | February 8 | ||
| Roles | | ||
| How To Get | Can only be pulled during Mitya's Rate-Up Banner Banner Duration: 2026/11/04 ~ 2026/11/24 | ||
Base Stats
| Base HP | Base ATK | Base DEF | |
|---|---|---|---|
| Lvl. 90 | 11,634 | 263 | 792 |
| Lvl. 80 (Ascended) | 10,816 | 245 | 736 |
Mitya is a 5-star Electro Catalyst user in Genshin Impact who can work as either an On-Field or Off-Field Stellar-Conduct DPS. As a Stellar Linchpin, he turns any Superconduct triggered by his party into Stellar-Conduct, and his Elemental Skill decides which of his two playstyles he takes on.
Mitya's kit revolves around Gradient Beacons, which he gains whenever the team triggers Stellar-Conduct and from his Elemental Burst. The Beacons follow the active character and create a Polestar Field, so the team never has to stay inside a fixed area to benefit from it.
Mitya's Tier & Rating
| Overall Tier | ||||||||||||||
|---|---|---|---|---|---|---|---|---|---|---|---|---|---|---|
| SS | ||||||||||||||
| On-Field | Off-Field | DPS | Support | Sustain | ||||||||||
| SS | SS | SS | SS | - | ||||||||||
In battle, Mitya takes on an
Mitya’s Roles, Playstyle, Strengths, and Weaknesses
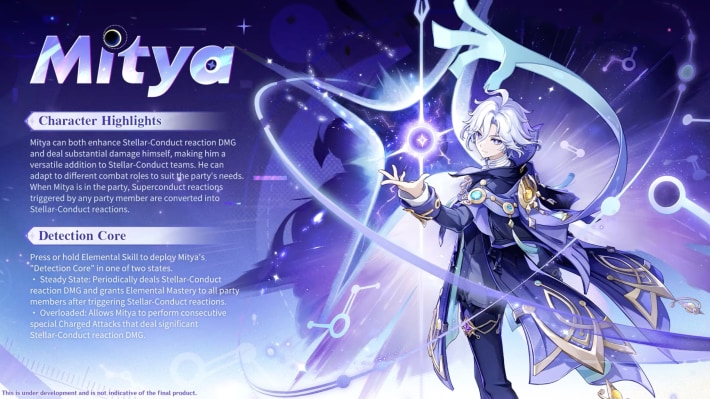
Stellar-Conduct DPS
Mitya is a 5-star Electro Catalyst who can function as an On-Field or Off-Field Stellar-Conduct DPS. His Elemental Skill determines his role on the team: the Hold version powers his On-Field damage, while the Tap version lets him contribute while off-field.
Pros and Cons of Stellar-Conduct Mitya
| Pros |
|---|
| - Can switch between On-Field and Off-Field roles. |
| - Elemental Mastery-focused kit suits reaction teams well. |
| - Off-Field setup requires little field time. |
| - Steady State Core raises the whole party's Elemental Mastery. |
| Cons |
| - Relies on Stellar-Conduct to get the most from his kit. |
| - On-Field Mitya is vulnerable to interruption because he stays in place while using his special Charged Attack. |
| - His best teams overlap heavily with other Stellar-Conduct DPS characters. |
Best Build for Mitya
Mitya is an Electro Character who can work as either an On-Field or Off-Field DPS, with Stellar-Conduct at the center of his gameplay.
He can either stay active to deal damage or switch out after using his Skill, so his build priorities change depending on the role he takes. See below for our top recommendations:Mitya Build Depends on His Role
| Weapon | Starsealed Edict |
|---|---|
| Best Artifact | 2-pc. Elemental Mastery + 2-pc. Elemental Mastery |
| Artifact Main Stats | Sands: Elemental Mastery Goblet: Elemental Mastery Circlet: CRIT Rate or DMG |
| Priority Sub-Stat | CRIT Rate = CRIT DMG > Elemental Mastery > Energy Recharge |
| Recommended Team | |
Recommended Stat Goals for On-Field DPS Mitya
| Elemental Mastery (EM) | 600-800~ |
|---|---|
| CRIT Rate | 60%-70%+~ |
| CRIT DMG | 155%-180%+~ |
| Energy Recharge (ER) | 100% – 120% |
On-Field Mitya focuses on Charged Attacks, making him the main driver of the team's Stellar-Conduct damage. His kit also provides additional CRIT-related benefits.
On-Field Mitya only needs around 100% – 120% Energy Recharge. His Burst costs 60 Energy, and as the active character he catches the full amount of particles from his own Skill and from Yae Miko, who acts as a second Electro battery in his premium team. This lets you skip an Energy Recharge Sands and put your sub-stats into CRIT and EM instead, on top of a flexible baseline of about 500+ EM.
| Weapon | Wandering Evenstar R5 (when paired with ATK Scaler) |
|---|---|
| Best Artifact | Heart of the Furnace x4 |
| Artifact Main Stats | Sands: Elemental Mastery Goblet: Elemental Mastery Circlet: CRIT Rate or DMG |
| Priority Sub-Stat | Elemental Mastery > CRIT Rate = CRIT DMG > Energy Recharge |
| Recommended Team | or |
Recommended Stat Goals for Off-Field Sub-DPS Mitya
| Elemental Mastery (EM) | 450-550~ |
|---|---|
| CRIT Rate | 60%-70%~ |
| CRIT DMG | 155%-180%~ |
| Energy Recharge (ER) | 120% – 170% |
Off-Field Mitya mainly needs enough field time to establish his Skill before handing control to the team's main damage dealer. His support-oriented mode keeps dealing Stellar-Conduct damage without keeping him active, while his accumulated Gradient Beacons also help the team through Elemental Mastery.
Because he spends very little time on the field, Mitya catches fewer particles when his Skill generates Energy while he is off-field, so he needs more Energy Recharge than his On-Field build. Yae Miko's Electro particles bring the requirement down to about 120% – 170%.
Mitya's ER Requirements
Mitya's Burst costs 60 Energy and instantly creates Gradient Beacons for both of his playstyles. On-Field Mitya needs only 100% – 120% ER, so EM/EM/CRIT stays his best main-stat setup. Off-Field Mitya needs 120% – 170%, so an Energy Recharge Sands or ER weapon such as Etherlight Spindlelute becomes worth considering when you don't have a second Electro battery like Yae Miko in the team.
Mitya's Recommended Talent Priority
| Talent | On-Field DPS | Off-Field Sub-DPS |
|---|---|---|
| Chain Reaction (Normal Attack) | ★★★★★ | ★・・・・ |
| Principle: Variable Detection (Elemental Skill) | ★★★・・ | ★★★★★ |
| Analysis: Gradient Theory (Elemental Burst) | ★★★★・ | ★★★★・ |
Prioritize the talent that holds the damage of Mitya's role. On-Field Mitya deals most of his damage with Gradient Detonation, his special Charged Attack, which scales with his Normal Attack level. Off-Field Mitya relies on the Steady State Detection Core, which scales with his Elemental Skill level instead.
His Elemental Burst comes second in both roles. It deals a large hit of AoE Electro DMG that scales with both ATK and Elemental Mastery, and its 3 Gradient Beacons feed either playstyle.
Related Links:
Best Weapon for Mitya
Mitya's damage relies heavily on Elemental Mastery and Stellar-Conduct, so he favors weapons that provide EM alongside CRIT or other personal DMG boosts. His best options vary between his On-Field and Off-Field playstyles. See below for our top recommendations:
Premium Weapons for Mitya
| Weapon | How to Get Rating | |
|---|---|---|
| Best | Starsealed Edict | Get from Limited Banners - Mitya's Signature Weapon and his best-in-slot option. - Its large CRIT DMG bonus directly raises his personal damage. - Its Elemental Mastery bonus also strengthens his Stellar-Conduct DMG. |
| 2nd | Reliquary of Truth | Get from Limited Banners - Grants a generous amount of CRIT DMG that directly improves Mitya's personal damage. - Its straightforward CRIT-focused stats make it a reliable option for On-Field Mitya, even though he can't fully utilize the other passive effects. |
| 3rd | Sunny Morning Sleep-In | Get from Limited Banners - Provides a large amount of Elemental Mastery, directly improving Mitya's Stellar-Conduct damage. - Its passive grants additional Elemental Mastery after his Elemental Skill and Burst hit opponents. |
| 4th | A Thousand Floating Dreams | Get from Limited Banners - Provides Elemental Mastery and increases Elemental DMG or Elemental Mastery based on the elements in the party. - Its reaction-focused passive makes it a strong choice for teams where Mitya consistently triggers Elemental Reactions. |
| 5th | Starcaller's Watch | Get from Limited Banners - Provides a large amount of Elemental Mastery and can further increase Mitya's EM after creating a shield. - Its teamwide DMG buff also adds value when Mitya is used alongside a shielded active character. |
| 6th | Kagura's Verity Surf's Up | Get from Limited Banners - Both weapons provide high CRIT stats that help boost Mitya's DPS. - Their passives are not fully tailored to Mitya, but their strong secondary stats make them useful for On-Field builds. |
| 7th | Nightweaver's Looking Glass | Get from Limited Banners - Its stat increases complement Mitya's playstyle, since he scales heavily with Elemental Mastery. - The passive provides additional value depending on Mitya's team and rotation. |
| 8th | Winter's Heavy Heart | Get from Limited Rate-Up Banners - Has a CRIT DMG main-stat, while its passive grants Elemental Mastery based on the number of Cryo characters in the party. - Its additional effects also work well with Mitya's Electro teams and gameplay. - Can be better than other 5-star Catalysts with extra refinements. |
| 9th | Dawning Frost | Get from Limited Rate-Up Banners - Another CRIT DMG main-stat weapon that also gives an Elemental Mastery buff after Mitya's Charged Attacks and Elemental Skill hit. - Can be better than other 5-star Catalysts with extra refinements. |
| 10th | The Widsith | Get from Banners - One of the other 4-star CRIT DMG catalysts, with one of its buffs being a decent Elemental Mastery increase. - Its other buffs are less effective for Mitya's personal damage, and its passive depends on random chance, so its performance on him varies heavily. |
| 11th | Clash of Kings | Get from Battle Pass - A CRIT Rate catalyst, which is especially good for DPS characters like Mitya. - Its passive grants Elemental Mastery after using an Elemental Skill. - A strong option for On-Field Mitya when additional CRIT Rate is needed. - Better with extra refinement levels. |
| 12th | Wandering Evenstar | Get from Limited Rate-Up Banners - A strong support option for Off-Field Mitya thanks to its Elemental Mastery secondary stat and team-wide ATK buff. - Its passive activates while Mitya is off the field, letting him contribute a useful team buff without taking field time. - The EM also fits naturally into Mitya's own build, making it more useful for him than a support weapon whose main stat does not benefit his damage. |
| 13th | Sacrificial Jade | Get from Battle Pass - A CRIT Rate catalyst whose passive grants Elemental Mastery while Mitya is off the field. - Mitya has to stay off the field for 5s first, so it fits Off-Field Mitya better. - With Disenchantment in Deep Shadow, his CRIT Rate can overflow easily. |
| 14th | Sacrificial Fragments | Get from Banners - A standard-banner catalyst with an Elemental Mastery secondary stat, which directly raises Mitya's Stellar-Conduct DMG. - Its Skill cooldown reset is of little use to him. |
Mitya benefits the most from weapons that provide Elemental Mastery while also supporting his CRIT requirements. His signature weapon, Starsealed Edict, is his best option because it combines substantial CRIT DMG with EM-related benefits, while other EM-focused 5-Star Catalysts remain competitive.
For On-Field builds, CRIT stats become especially valuable, while Off-Field builds place greater emphasis on EM and Energy Recharge.
Free-to-Play Friendly (F2P Weapons) for Mitya
| Weapon | How to Get Rating | |
|---|---|---|
| Best F2P (Event) | Etherlight Spindlelute | Reward from Past Event (Clink Clank Clash) - Has an Energy Recharge main-stat, while its passive increases Elemental Mastery after Mitya uses his Elemental Skill. - Its combination of EM and Energy Recharge makes it one of his strongest F2P options. - No longer obtainable if you didn't participate in the event. |
| 2nd (Forge) | Echoes of the Heart | Snezhnaya Craftable (Forgeable) Weapon - Increases Mitya's Elemental Mastery after triggering an Elemental Reaction, helping support his EM-focused playstyle. - Triggering Stellar Glimmer also increases the corresponding reaction DMG, and both effects can activate while Mitya is off-field. |
For F2P options, Etherlight Spindlelute is one of Mitya's strongest F2P choices thanks to its combination of Energy Recharge and Elemental Mastery. However, due to it being an event weapon, it may not be available to some Travelers.
The craftable Snezhnaya catalyst is the next best option until you can secure a better, preferably CRIT-based weapon for Mitya instead.
All Weapon ListMitya Best Artifacts
Mitya's Artifact choices mainly depend on whether he is used as an On-Field DPS or an Off-Field support. Since his damage scales heavily with Elemental Mastery, EM-focused sets and stats are his strongest choices. See the recommendations below:
| Artifact | Recommendation Details |
|---|---|
| 2-pc. Elemental Mastery2-pc. Elemental Mastery | ★★★★★ - Mitya's best set in most teams, giving him a flat 160 Elemental Mastery from two 2-piece bonuses. - Mitya's teams commonly run several Electro characters (e.g. Yae Miko and Valeriy in his premium team). Gilded Dreams' 4-piece only gives EM for teammates of a different Element, so in these teams two EM 2-piece sets give him more EM. - It needs no reaction to stay active, and you can mix any two EM 2-piece sets to get the best CRIT, EM, and Energy Recharge sub-stats. |
| Disenchantment in Deep Shadow | ★★★★・ - A strong option for On-Field Mitya thanks to its Stellar-Conduct DMG bonus and additional CRIT Rate against affected enemies. - The extra CRIT Rate makes it easier to balance his offensive stats, especially when combined with his own CRIT-related effects. - Its 2-piece ATK bonus is less valuable to Mitya than EM, so the set's main appeal comes from its 4-piece effect. |
| Gilded Dreams | ★★★・・ - Its 2-piece effect supports his EM-heavy scaling, while the 4-piece effect adds EM for each teammate whose Element differs from Mitya's. - Electro teammates give ATK instead of EM through the 4-piece, so in his usual multi-Electro teams it gives less EM than two EM 2-piece sets (130 vs 160 EM with two other Electro characters). - It also needs Mitya to trigger an Elemental Reaction to activate the 4-piece effect, which is less consistent in some Stellar-Conduct teams. It catches up only in teams with at most one other Electro character. |
Artifact Stat Priority
| Main: Flat HP Sub: Elemental Mastery / CRIT Rate / CRIT DMG / Energy Recharge |
|---|---|
| Main: Flat ATK Sub: Elemental Mastery / CRIT Rate / CRIT DMG / Energy Recharge |
| Main: Elemental Mastery Sub: CRIT Rate / CRIT DMG / Energy Recharge / Elemental Mastery |
| Main: Elemental Mastery Sub: CRIT Rate / CRIT DMG / Energy Recharge / Elemental Mastery |
| Main: CRIT Rate/DMG or Elemental Mastery Sub: CRIT Rate / CRIT DMG / Energy Recharge / Elemental Mastery |
Mitya Wants Plenty of Elemental Mastery
Mitya's On-Field build strongly favors Elemental Mastery. His damage benefits heavily from EM, so we recommend two EM 2-piece sets with an EM/EM/CRIT main-stat setup for most teams. An EM Circlet can also work when Mitya already has enough CRIT from his weapon, teammates, or other effects. Focus on CRIT and Energy Recharge through sub-stats after getting enough EM for the build.
No current set fully matches Mitya's kit, since he is an EM-scaling Stellar-Conduct DPS and no set gives both an EM 2-piece and a Stellar-Conduct 4-piece. Two EM 2-piece sets and Disenchantment in Deep Shadow deal very similar damage, so pick whichever has the better sub-stats, and don't over-farm until a set that fits him better is released.
Account for Mitya's Passive CRIT Rate
Mitya's Explosive Reagent: Safe Limits Exceeded passive gives him up to 20% CRIT Rate in combat (5% for each Gradient Beacon created in the last 15s, up to 4 stacks). Aim for no more than 80% CRIT Rate on his character screen before combat. With Disenchantment in Deep Shadow, also subtract the set's CRIT Rate bonus, so about 64% is enough.
| Artifact | Recommendation Details |
|---|---|
| Heart of the Furnace | ★★★★★ - One of the best choices for Off-Field Mitya when the team does not already have another character using this set. - Its effect increases the team's Stellar Glimmer reaction damage even while Mitya is off-field, giving him a useful support role beyond his personal damage. - The set also gives ATK, although this is less important to Mitya than the team-wide reaction bonus. |
| Tenacity of the Millelith | ★★★★・ - Works well for Off-Field Mitya when boosting the team's ATK is more valuable than maximizing his own damage. - His off-field Skill can continue dealing hits, giving him a practical way to keep the 4-piece effect active during the rotation. - It is most useful alongside ATK-dependent damage dealers, while teams that scale primarily from HP or Elemental Mastery gain less from the buff. |
| Gilded Dreams | ★★★・・ - A flexible option when Mitya still wants to contribute meaningful personal damage from Off-Field. - Its 2-piece EM bonus remains useful, while the 4-piece adds EM for teammates of a different Element (Electro teammates give ATK instead). - The reaction requirement for the 4-piece effect means its consistency depends on the team. |
| Disenchantment in Deep Shadow | ★★★・・ - Mitya can still make use of the Stellar-Conduct DMG bonus and CRIT Rate from this set while dealing damage off-field. - It is more focused on Mitya's personal damage than team support, so it becomes less attractive when another character can make better use of a team-buffing set. - The 2-piece ATK bonus is also not particularly valuable for an EM-focused Mitya. |
| 2-pc. Elemental Mastery2-pc. Elemental Mastery | ★★★・・ - An easy way to give Off-Field Mitya a flat 160 Elemental Mastery for his personal Stellar-Conduct damage. - It needs no reaction to stay active, and in his multi-Electro teams it matches or beats the EM from Gilded Dreams' 4-piece. - You can mix any two EM 2-piece sets to get the best Energy Recharge, EM, and CRIT sub-stats. |
| 2-pc. Elemental Mastery2-pc. Energy Recharge | ★・・・・ - A practical combination for players who want Mitya to maintain his Burst more comfortably without sacrificing his EM investment. - The setup is easy to assemble and can be replaced once better 4-piece options become available. - Prioritize pieces with CRIT and Energy Recharge sub-stats alongside EM. |
Artifact Stat Priority
| Main: Flat HP Sub: Energy Recharge / Elemental Mastery / CRIT Rate / CRIT DMG |
|---|---|
| Main: Flat ATK Sub: Energy Recharge / Elemental Mastery / CRIT Rate / CRIT DMG |
| Main: Energy Recharge or Elemental Mastery Sub: Elemental Mastery / CRIT Rate / CRIT DMG / Energy Recharge |
| Main: Elemental Mastery Sub: Energy Recharge / Elemental Mastery / CRIT Rate / CRIT DMG |
| Main: CRIT Rate/DMG or Elemental Mastery Sub: Energy Recharge / Elemental Mastery / CRIT Rate / CRIT DMG |
Off-Field Mitya Can Focus More on Team Support
Off-Field Mitya has more flexibility with his Artifact set. Heart of the Furnace is particularly useful when Mitya is the character enabling its team buff, while Gilded Dreams, Disenchantment in Deep Shadow, and two EM 2-piece sets are equally good choices for builds that still want to maximize his own damage. If another teammate already holds a team-supporting set, prioritize Mitya's personal damage instead.
Related Articles
Best Team Comp Mitya
Premium On-Field Stellar-Conduct Mitya
| DPS | Support | Support | Support |
|---|---|---|---|
| Mitya | Odette | Yae Miko | Valeriy |
| Details | |||
| - A premium team built around Mitya's On-Field Stellar-Conduct damage. - Odette enables Stellar-Conduct while boosting its damage. - Yae Miko adds strong Off-Field Electro damage and helps with Energy. - Valeriy provides shielding and additional support. | |||
This is one of Mitya's strongest On-Field setups. Odette supports his Stellar-Conduct damage while Yae Miko contributes from off the field, letting Mitya spend most of the rotation attacking.
The main downside is its high investment, as several premium characters are used. Mitya can also be swapped to his Off-Field mode in the Sandrone team below if you want to make use of a different On-Field DPS.
Other Team Comps For Mitya
Off-Field Mitya Sandrone Team
| Team | Detail | |
|---|---|---|
| Sandrone | Mitya | - Mitya takes an Off-Field position while Sandrone takes the On-Field DPS role. - Mitya adds Electro application and Off-Field Stellar-Conduct damage. - Odette enables Stellar-Conduct and boosts its damage. - Yae Miko adds consistent Off-Field Electro damage. |
| Odette | Yae Miko | |
Mitya's Polestar Field follows the active character, so Sandrone keeps her Stellar-Conduct buffs even when she moves away from enemies. As a Sub-DPS, Mitya deals slightly less damage than a C1 Yae Miko, so this setup is best if you don't have Yae Miko or if your Mitya is C1 or higher.
Cyno Stellar-Conduct Team
| Team | Detail | |
|---|---|---|
| Cyno | Mitya | - Cyno and Mitya deal Stellar-Conduct DMG together, with Mitya tapping his Skill as the Sub-DPS. - Odette and Valeriy boost Stellar-Conduct DMG for the whole team. - Three Electro characters give Electro Resonance, making it easier to keep Bursts ready. - Valeriy's shield keeps Cyno from being interrupted. |
| Valeriy | Odette | |
This team plays Mitya off the field next to Cyno. Easier Burst uptime and Valeriy's shield let Cyno play at full strength.
F2P Friendly Team Comp
| Team | Detail | |
|---|---|---|
| Mitya | Fischl | - A F2P-friendly team comp that uses free or easily obtainable characters. - Fischl adds reliable Off-Field Electro damage and Energy generation. - Diona provides Cryo application and sustain, alongside an EM and Stellar Glimmer buff at C6. - Sucrose buffs Elemental Mastery and reduces Elemental RES by equipping Viridescent Venerer. |
| Diona | Sucrose | |
Mitya's Team Rotations and Combos

Basic Team Rotation for On-Field DPS Mitya

| Basic Rotation For On-Field DPS Mitya |
|---|
| 1. Start the rotation with your Off-Field supports and Sub-DPS characters, preferably using their abilities to trigger Stellar-Conduct to start stacking Gradient Beacons. 2. Switch to Mitya and hold his Elemental Skill to create an Overloaded Detection Core. 3. Use Mitya's special Charged Attacks to consume Gradient Beacons and deal Stellar-Conduct DMG. 4. Use Mitya's Elemental Burst when available to generate additional Gradient Beacons, then continue using his special Charged Attacks. 5. Continue consuming Gradient Beacons with special Charged Attacks until it runs out. 6. Repeat from Step 1. |
Mitya's On-Field rotation focuses on creating Gradient Beacons through Stellar-Conduct with his team before using his special Charged Attacks with an Overloaded Detection Core from his Elemental Skill.
Consume the Gradient Beacons created from his team with special Charged Attacks before using his Elemental Burst to generate additional Gradient Beacons, then consume them again before switching back to your supports.
Basic Team Rotation for Off-Field DPS Mitya

| Basic Rotation For Off-Field DPS Mitya |
|---|
| 1. Start the rotation with your Off-Field supports and Sub-DPS characters, preferably using their abilities to trigger Stellar-Conduct and start stacking Gradient Beacons. 2. Switch to Mitya and tap his Elemental Skill to create a Detection Core in Steady State and establish his Off-Field setup. 3. Switch to your other supports and Sub-DPS characters if there are any. 4. Switch to your On-Field DPS and proceed with their rotation. 5. Repeat from Step 1. |
Like other Sub-DPSes, Mitya's Off-Field rotation focuses on using his Detection Core: Steady State from tapping his Elemental Skill to provide off-field Electro DMG before swapping to the primary On-Field DPS.
Basics of Using Mitya (Beginner Guide)
On-Field DPS Or Off-Field Support
Mitya is an Electro Catalyst who can work as either an On-Field DPS or an Off-Field Sub-DPS and support character. His gameplay revolves around collecting a resource called Gradient Beacons and using them through his Elemental Skill.
Turn Superconduct Into Stellar-Conduct
Mitya shares a special passive with other Stellar Linchpin characters where they can convert Superconduct into Stellar-Conduct when he is in the party.
This is an overall stronger version of the base reaction Stellar-Conduct, with its defining feature being the Polestar Field that the reaction creates.
| Note! | When triggering Stellar-Conduct, Mitya actually creates a special version of the reaction wherein the reaction creates Gradient Beacons instead of the Starlight Prisms of the Polestar Field. |
|---|
Collect Gradient Beacons
Gradient Beacon Effects| Gradient Beacon | Mitya can carry up to 4 Gradient Beacons at C0. - Beacons can be generated when the team triggers Stellar-Conduct: 1 every 1.5s, with 1 more in the Overloaded State. - Mitya's Elemental Burst also creates 3 Beacons. - The Beacons follow the active character and create a Polestar Field around them. - Some Elemental Skill and special Charged Attack DMG becomes Stellar-Conduct DMG. - In the Steady State, each Beacon gives all party members 30 Elemental Mastery. - Each Beacon created gives Mitya 5% CRIT Rate for 15s (up to 4 stacks). - The Beacons can be used by his Elemental Skill for different effects depending on the Skill mode. |
|---|
Gradient Beacons are the main resource Mitya needs to keep track of. They can come from triggering Stellar-Conduct or from his Elemental Burst. You do not need to constantly count every Beacon; simply remember that more Beacons generally mean more value from Mitya's kit.
Choose Between Steady And Overloaded States
Mitya's Elemental Skill, Principle: Variable Detection, has two versions depending on whether you tap or hold the Skill.
▲Tapping his Skill gives continuous AoE Electro DMG from off the field.
Tapping the Skill creates a Detection Core: Steady State. This is Mitya's main Off-Field option, allowing the Detection Core to remain active while Mitya switches to another character.
Holding the Skill instead creates a Detection Core: Overloaded State. This is designed for Mitya's On-Field playstyle and lets him use his Gradient Beacons for his special Charged Attack.
Quickswap Playstyle
Mitya can play as either the primary On-Field DPS or an Electro Sub-DPS, and can also combine both playstyles in a "Quickswap" setup. Within 6s of using his Skill, tapping it again switches the Detection Core's state, once every 1.5s.
This lets him deploy his Off-Field Core while still keeping the option to spend Gradient Beacons on a special Charged Attack. It takes more practice than either standard playstyle, so we recommend learning the On-Field and Off-Field rotations first.
Use Burst To Quickly Gain Beacons
▲Go straight into a fully charged special Charged Attack after the Burst.
Mitya's Elemental Burst, Analysis: Gradient Theory, deals AoE Electro DMG and immediately creates 3 Gradient Beacons. This makes his Burst a simple way to build up his Beacon count without waiting for several Stellar-Conduct reactions. Its own hit is regular Electro DMG rather than Stellar-Conduct DMG, so treat it as a Beacon source rather than a damage source.
For On-Field Mitya, the Burst can quickly give him more Beacons for an additional special Charged Attack. Off-Field Mitya can also use it for faster setup, but usually does not need to stay on the field just to cast it.
Use Gradient Detonation For On-Field Damage
▲Hold Skill → 4 special Charged Attacks → Burst → 4 special Charged Attacks.
When Mitya has an Overloaded State Detection Core and at least 1 Gradient Beacon, his Charged Attack changes into Gradient Detonation, which is a special Charged Attack.
Instead of using a normal Charged Attack, Mitya continuously consumes his stored Gradient Beacons to deal additional Stellar-Conduct DMG. The basic On-Field loop is: Hold Skill → 4 special Charged Attacks → Burst → 4 special Charged Attacks. Each Gradient Detonation can consume up to 4 Beacons, so keep the team triggering Stellar-Conduct to refill them.
| Note! | Mitya stays in place when he uses his special Charged Attacks, so a shield is preferable to a healer as a sustain teammate. |
|---|
Off-Field Mitya Can Buff The Team
Mitya's Off-Field setup is centered around the Steady State Detection Core. Each Gradient Beacon he carries increases the Elemental Mastery of nearby party members.
This lets Mitya contribute more than just Electro and Stellar-Conduct DMG. He can set up his Skill, give the team additional Elemental Mastery, and then leave the field for the main DPS.
Get at Least 500 Elemental Mastery
| Mitya's Elemental Mastery Buff |
|---|
| Each point of Mitya's Elemental Mastery increases the team's Stellar-Conduct base DMG by 0.028% Up to 14%, reached at 500 Elemental Mastery |
Mitya's Stellar Jubilee passive raises the team's Stellar-Conduct DMG by up to 14%, which needs 500 Elemental Mastery on Mitya. Secure at least 500 EM through artifacts and team buffs. EM above 500 is not wasted, since his talent scaling also uses Elemental Mastery.
Elemental Skill, Burst and Abilities Guide for Mitya
How To Use Mitya's Skills & Passives?

Use Gradient Beacons To Support Stellar-Conduct
| Basic Rotation Of Mitya |
|---|
| 1. Start with Mitya's teammates and apply their buffs and elements first, especially Cryo and Electro characters that can trigger Superconduct. 2. Use Mitya's Elemental Skill to create the appropriate Detection Core for the team's playstyle. 3. Use his Elemental Burst when available to create 3 Gradient Beacons. 4. For Off-Field Mitya, set up his Skill and return to the main DPS. For On-Field Mitya, stay active and use his enhanced attacks to consume his available Beacons. 5. Repeat from step 1. |
Mitya's gameplay revolves around his Detection Core type, which is determined by either holding or tapping his Elemental Skill. Additionally, the Core consumes a resource called Gradient Beacons to either deal Stellar-Conduct DMG or enable Mitya to use his special Charged Attack.
Managing his Gradient Beacons is the key to getting the most from Mitya, whether he is being played On-Field or Off-Field.
Skill Determines Playstyle
| Detection Core Type | Attack Type |
|---|---|
| Steady State | Deals Electro damage to an enemy even while Mitya is not the active character. |
| Overloaded State | Consume Gradient Beacons to perform Special Charged Attacks. |
Mitya's Skill is what separates his two main playstyles. Tapping the Skill activates his Steady State Detection Core, which is suited to his Off-Field role, while holding it creates an Overloaded State Detection Core for his On-Field setup.
You can also combine both playstyles, since Mitya's Skill can be used to switch quickly between modes for a short time.
Use Burst To Create Gradient Beacons
Mitya's Elemental Burst deals AoE Electro DMG and creates 3 Gradient Beacons. The Beacons follow the active character and transform the surrounding area into a Polestar Field.
Core Passive Effect Depends on Skill
| Steady State | + Elemental Mastery to all party members for each Gradient Beacon |
|---|---|
| Overloaded State | + 1 Gradient Beacon for every Stellar-Conduct triggered |
One of Mitya's Ascension passives provides a conditional benefit that depends on the current state of his Detection Core, matching the playstyle intended for either state.
Trigger Superconduct To Create Stellar-Conduct
Like other Stellar Linchpin characters, Mitya has a Stellar Jubilee passive that transforms any Superconduct reaction triggered by his party into Stellar-Conduct. This passive also increases the base DMG dealt by the reaction.
Triggering Stellar-Conduct reactions generates Gradient Beacons, so we highly recommend that you pair Mitya with Cryo teammates with consistent application to get the most out of his personal damage.
Core Can Mine Nearby Rocks
Mitya's utility passive lets his Detection Core quickly destroy nearby rocks or ore veins after he uses his Tap Skill.
Additionally, using the Basic Heat Source Prime Ice Construct will no longer consume Kresnik Energy as long as Mitya is in the active party.
Should You Pull for Mitya's Constellation Or Best Weapon?
Prioritize Mitya's Constellations
| Signature VS Constellations |
|---|
| C2 > C1 ≥ Starsealed Edict |
Mitya's C2 Is His Strongest Constellation
Mitya's C2 is his best personal investment. While his Detection Core is out, enemies inside the Polestar Field lose 20% Cryo and Electro RES, which covers both elements of Stellar-Conduct. It also grants 123 Elemental Mastery to the whole party with a Steady State Core, or 234 to the active character with an Overloaded Core, so it boosts both of his playstyles and the rest of the team.
His C1 comes next. It raises his Gradient Beacon cap to 5, gives him an extra Beacon whenever he uses his Skill, and adds 40% CRIT DMG to the active character, along with some extra Energy for his Burst.
Pulling for his constellations also gives you more chances at the featured 4-star Valeriy, who appears on the same banner as Mitya and fits right into his premium team.
Mitya's Signature Weapon Is Strong but Riskier to Pull
Starsealed Edict is still Mitya's best weapon. Its large CRIT DMG bonus and Elemental Mastery bonus both feed directly into his Stellar-Conduct damage, and it is flexible enough to work in both of his roles.
However, it shares its weapon banner with Furina's Splendor of Tranquil Waters, which is not a strong pick in the current meta. The risk of pulling that weapon instead makes Starsealed Edict a lower priority than his first two constellations.
Mitya's Constellations & Effects
| Rating | Constellation Effect |
|---|---|
| ★★★★・ | C1: The Observer Seeking What Is Missing The maximum number of Gradient Beacons Mitya can carry is increased to 5. Using the Elemental Skill Principle: Variable Detection additionally creates 1 Gradient Beacon. While the Detection Core is present, your own active character's CRIT DMG is increased by 40%. Additionally, Mitya regenerates 10 Elemental Energy when a Gradient Beacon is created. This effect can be triggered once every 8s. |
| ★★★★★ | C2: The Matter That Slumbers Beyond Inertness While the Detection Core is present, all opponents within the Polestar Field have their Cryo RES and Electro RES decreased by 20%. Additionally, if the Detection Core created is: · Steady State: All nearby party members gain 123 Elemental Mastery; · Overloaded: Your own active character gains 234 Elemental Mastery. |
| ★★★・・ | C3: The Knotted String of Invariant Topology Increases the Level of the Elemental Skill Principle: Variable Detection by 3. Maximum upgrade level is 15. |
| ★★★★・ | C4: The Isotopes Born of Decay Detection Cores created by Mitya himself deal 1 instance of AoE Electro DMG equal to 300% of Mitya's Elemental Mastery to nearby opponents for every 5 Gradient Beacons consumed while it is on the field. This DMG is considered Stellar-Conduct reaction DMG. |
| ★★★・・ | C5: The Periodic Law That Orders All Increases the Level of Normal Attack: Chain Reaction by 3. Maximum upgrade level is 15. |
| ★★★★・ | C6: Elemental Transition at the Gate of Reason Detection Core is enhanced. If the Detection Core: · Is in the Steady State: Detection Core deals 115% of its original DMG. · Is Overloaded: There is a 34% chance to create 1 new Gradient Beacon whenever Mitya consumes a Gradient Beacon with the Detection Core. Additionally, Stellar-Conduct reaction DMG dealt by all nearby party members is Elevated by 20%. |
Mitya's Constellation Name is Nodus Gordianus
Mitya's constellation is Nodus Gordianus, as revealed on his official character card.
Ascension Materials for Mitya Talents & Level
Materials Per Ascension Level
| Lvl 20 | Vajrada Amethyst Sliver x1Kristallfold x3Chimeric Core x3 |
|---|---|
| Lvl 40 | Vajrada Amethyst Fragment x3 Shattered Stability Anchor x2Kristallfold x10Chimeric Core x15 |
| Lvl 50 | Vajrada Amethyst Fragment x6 Shattered Stability Anchor x4Kristallfold x20Symbiotic Chimeric Nucleus x12 |
| Lvl 60 | Vajrada Amethyst Chunk x3 Shattered Stability Anchor x8Kristallfold x30Symbiotic Chimeric Nucleus x18 |
| Lvl 70 | Vajrada Amethyst Chunk x6 Shattered Stability Anchor x12Kristallfold x45Prime Chimeric Nexus x12 |
| Lvl 80 | Vajrada Amethyst Gemstone x6 Shattered Stability Anchor x20Kristallfold x60Prime Chimeric Nexus x24 |
Materials Per Talent (Skill) Level
| Level 1 | Default |
|---|---|
| Level 2 | Teachings Of Charity x3Chimeric Core x6 |
| Level 3 | Guide To Charity x2 Symbiotic Chimeric Nucleus x3 |
| Level 4 | Guide To Charity x4Symbiotic Chimeric Nucleus x4 |
| Level 5 | Guide To Charity x6 Symbiotic Chimeric Nucleus x6 |
| Level 6 | Guide To Charity x9 Symbiotic Chimeric Nucleus x9 |
| Level 7 | Philosophies Of Charity x4 Prime Chimeric Nexus x4 Mask of the Virtuous Doctor x1 |
| Level 8 | Philosophies Of Charity x6 Prime Chimeric Nexus x6 Mask of the Virtuous Doctor x1 |
| Level 9 | Philosophies Of Charity x12 Prime Chimeric Nexus x9 Mask of the Virtuous Doctor x2 |
| Level 10 | Philosophies Of Charity x16 Prime Chimeric Nexus x12 Mask of the Virtuous Doctor x2 Crown of Insight x1 |
| Level 11 | Unlocked via Constellation |
| Level 12 | Unlocked via Constellation |
| Level 13 | Unlocked via Constellation |
Related Links
Mitya Skills & Talents Details
Normal Attack: Chain Reaction
Normal Attack
| Effect |
|---|
| Performs a maximum of 3 attacks that deal Electro DMG. |
| Lv1 | Lv2 | Lv3 | Lv4 | Lv5 | Lv6 | Lv7 | Lv8 | Lv9 | Lv10 | Lv11 | Lv12 | Lv13 | |
|---|---|---|---|---|---|---|---|---|---|---|---|---|---|
| 1-Hit DMG | 58.8% | 63.2% | 67.6% | 73.5% | 77.9% | 82.3% | 88.2% | 94.1% | 100% | 105.8% | 111.7% | 117.6% | 124.9% |
| 2-Hit DMG | 48.3% | 51.9% | 55.5% | 60.4% | 64% | 67.6% | 72.5% | 77.3% | 82.1% | 86.9% | 91.8% | 96.6% | 102.6% |
| 3-Hit DMG | 69% | 74.2% | 79.4% | 86.3% | 91.5% | 96.6% | 103.5% | 110.4% | 117.3% | 124.2% | 131.1% | 138% | 146.7% |
▲Use side-scroll to see percentage per level.
Charged Attack
| Effect |
|---|
| Consumes a certain amount of Stamina to deal AoE Electro DMG to the area in front after a short casting time. Mitya will instead perform the special Charged Attack Gradient Detonation, which consumes no Stamina, if a Detection Core: Overload created by Mitya himself is currently on the field and he has at least 1 Gradient Beacon: Deals 1 instance of AoE Electro DMG to the area in front and continuously consumes Gradient Beacons while held. Each Gradient Beacon consumed deals 1 instance of AoE Electro DMG to the area in front that is considered Stellar-Conduct reaction DMG. |
| Lv1 | Lv2 | Lv3 | Lv4 | Lv5 | Lv6 | Lv7 | Lv8 | Lv9 | Lv10 | Lv11 | Lv12 | Lv13 | |
|---|---|---|---|---|---|---|---|---|---|---|---|---|---|
| Charged Attack DMG | 136.9% | 147.1% | 157.4% | 171.1% | 181.4% | 191.6% | 205.3% | 219% | 232.7% | 246.4% | 260.1% | 273.8% | 290.9% |
| Charged Attack Stamina Cost | 50 | 50 | 50 | 50 | 50 | 50 | 50 | 50 | 50 | 50 | 50 | 50 | 50 |
| Gradient Detonation DMG | 168% | 180.6% | 193.2% | 210% | 222.6% | 235.2% | 252% | 268.8% | 285.6% | 302.4% | 319.2% | 336% | 357% |
| Gradient Detonation Stellar-Conduct DMG (Elemental Mastery) | 224% | 240.8% | 257.6% | 280% | 296.8% | 313.6% | 336% | 358.4% | 380.8% | 403.2% | 425.6% | 448% | 476% |
▲Use side-scroll to see percentage per level.
Plunging Attack
| Effect |
|---|
| Plunges from mid-air to strike the ground below, damaging opponents along the path and dealing AoE Electro DMG upon impact. |
| Lv1 | Lv2 | Lv3 | Lv4 | Lv5 | Lv6 | Lv7 | Lv8 | Lv9 | Lv10 | Lv11 | Lv12 | Lv13 | |
|---|---|---|---|---|---|---|---|---|---|---|---|---|---|
| Plunge DMG | 56.8% | 61.5% | 66.1% | 72.7% | 77.3% | 82.6% | 89.9% | 97.1% | 104.4% | 112.3% | 120.3% | 128.2% | 136.1% |
| Low Plunge DMG | 113.6% | 122.9% | 132.1% | 145.3% | 154.6% | 165.2% | 179.7% | 194.2% | 208.8% | 224.6% | 240.5% | 256.3% | 272.2% |
| High Plunge DMG | 141.9% | 153.5% | 165% | 181.5% | 193.1% | 206.3% | 224.5% | 242.6% | 260.8% | 280.6% | 300.4% | 320.2% | 340% |
▲Use side-scroll to see percentage per level.
Principle: Variable Detection (Elemental Skill)
| Tap Skill |
|---|
| Hold Skill |
| Effect |
|---|
| Conducts a theoretically relatively safe experiment at a theoretically relatively safe yield, dealing AoE Electro DMG and creating a Detection Core in different ways depending on whether the Skill is tapped or held. Tapping the Elemental Skill Principle: Variable Detection again within 6s after using it changes the Detection Core's state. The Detection Core's state can be changed in this way every 1.5s. |
Detection Core: Steady State
| Effect |
|---|
| ·Continuously follows nearby opponents and intermittently deals AoE Electro DMG; ·When Mitya has reached the maximum number of Gradient Beacons he can have, the device will consume any newly generated Gradient Beacon and deal AoE Electro DMG that is considered Stellar-Conduct reaction DMG; ·When its duration ends or another Detection Core is created, the device will consume all Gradient Beacons Mitya has and deal AoE Electro DMG that is considered Stellar-Conduct reaction DMG based on the number consumed. |
Detection Core: Overloaded
| Effect |
|---|
| ·While this device is present and Mitya has at least 1 Gradient Beacon, he can perform the special Charged Attack Gradient Detonation without consuming Stamina. |
Gradient Beacons
| Effect |
|---|
| When Mitya is in the party and a Stellar-Conduct reaction is triggered, a Gradient Beacon that lasts for 6s will be created instead of a Starlight Prism. Mitya can consume Gradient Beacons to trigger various effects. Gradient Beacons follow the active character and transform a larger nearby area into a Polestar Field when a Gradient Beacon is created. Mitya can have multiple Gradient Beacons, with an initial maximum of 4. Creating a Gradient Beacon will reset the duration of all Gradient Beacons. |
| Lv1 | Lv2 | Lv3 | Lv4 | Lv5 | Lv6 | Lv7 | Lv8 | Lv9 | Lv10 | Lv11 | Lv12 | Lv13 | |
|---|---|---|---|---|---|---|---|---|---|---|---|---|---|
| Tap Skill DMG | 90.7% | 97.5% | 104.3% | 113.4% | 120.2% | 127% | 136.1% | 145.2% | 154.2% | 163.3% | 172.4% | 181.4% | 192.8% |
| Hold Skill DMG | 129.6% | 139.3% | 149% | 162% | 171.7% | 181.4% | 194.4% | 207.4% | 220.3% | 233.3% | 246.2% | 259.2% | 275.4% |
| Steady State Core DMG | 72% | 77.4% | 82.8% | 90% | 95.4% | 100.8% | 108% | 115.2% | 122.4% | 129.6% | 136.8% | 144% | 153% |
| Steady State Core Gradient Beacon Consumption DMG (Elemental Mastery) | 80% | 86% | 92% | 100% | 106% | 112% | 120% | 128% | 136% | 144% | 152% | 160% | 170% |
| Steady State Core Detonation DMG (Elemental Mastery per Beacon) | 92% | 98.9% | 105.8% | 115% | 121.9% | 128.8% | 138% | 147.2% | 156.4% | 165.6% | 174.8% | 184% | 195.5% |
| Detection Core Duration | 25s | 25s | 25s | 25s | 25s | 25s | 25s | 25s | 25s | 25s | 25s | 25s | 25s |
| CD | 18s | 18s | 18s | 18s | 18s | 18s | 18s | 18s | 18s | 18s | 18s | 18s | 18s |
▲Use side-scroll to see percentage per level.
Analysis: Gradient Theory (Elemental Burst)
| Effect |
|---|
| Let the elements burst forth like inspiration itself! Deals AoE Electro DMG and creates 3 Gradient Beacons. |
| Lv1 | Lv2 | Lv3 | Lv4 | Lv5 | Lv6 | Lv7 | Lv8 | Lv9 | Lv10 | Lv11 | Lv12 | Lv13 | |
|---|---|---|---|---|---|---|---|---|---|---|---|---|---|
| Skill DMG | 333.6% ATK + 667.2% EM | 358.6% ATK + 717.2% EM | 383.6% ATK + 767.3% EM | 417% ATK + 834% EM | 442% ATK + 884% EM | 467% ATK + 934.1% EM | 500.4% ATK + 1000.8% EM | 533.8% ATK + 1067.5% EM | 567.1% ATK + 1134.2% EM | 600.5% ATK + 1201% EM | 633.8% ATK + 1267.7% EM | 667.2% ATK + 1334.4% EM | 708.9% ATK + 1417.8% EM |
| Gradient Beacons Generated | 3 | 3 | 3 | 3 | 3 | 3 | 3 | 3 | 3 | 3 | 3 | 3 | 3 |
| CD | 15s | 15s | 15s | 15s | 15s | 15s | 15s | 15s | 15s | 15s | 15s | 15s | 15s |
| Energy Cost | 60 | 60 | 60 | 60 | 60 | 60 | 60 | 60 | 60 | 60 | 60 | 60 | 60 |
▲Use side-scroll to see percentage per level.
Stellar Jubilee: Top-Secret Protocol
| Effect |
|---|
| When party members trigger Superconduct, it will be changed to Stellar-Conduct. Stellar-Conduct reactions will no longer create Starlight Prisms, and will instead create 1 Gradient Beacon nearby every 1.5s for 3s. These Beacons can be carried by Mitya and transform the area around them into an even larger Polestar Field. Triggering another Stellar-Conduct reaction will refresh the duration of the aforementioned effects. Additionally, the Base Stellar-Conduct DMG dealt by all nearby party members will be increased based on Mitya's Elemental Mastery: Every point of Elemental Mastery he has increases Base Stellar-Conduct DMG by 0.028%. The maximum Base DMG increase that can be gained this way is 14%. While within a Polestar Field, Mitya will also enter the Radiance: Stellar-Conduct state. |
Baseline Stress Test
| Effect |
|---|
| The Detection Core created by the Elemental Skill Principle: Variable Detection is enhanced. Depending on the state of the Detection Core created: ·Steady State: All nearby party members gain 30 Elemental Mastery for each Gradient Beacon Mitya has; ·Overloaded: After nearby party members trigger Stellar-Conduct reactions, instead obtain 1 Gradient Beacon every 1.5s for 6s. |
Explosive Reagent: Safe Limits Exceeded
| Effect |
|---|
| The duration of Gradient Beacons is increased to 10s. Additionally, Mitya's CRIT Rate increases by 5% for 15s after creating a Gradient Beacon. This effect can stack up to 4 times. |
Energy Catalysis
| Effect |
|---|
| When destructible rocks are nearby, Detection Core: Steady State can quickly clear them. Additionally, when Mitya is in the party, creating Prime Ice Construct: Basic Heat Source does not consume Kresnik Energy. |
Who Is Mitya?
The Amazing Snezhnaya Scientist, Mitya
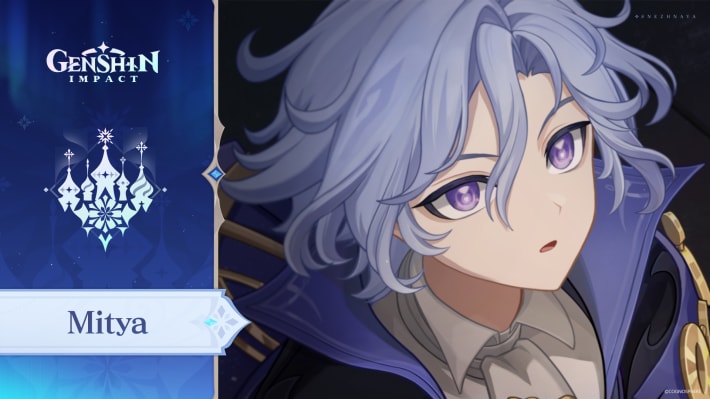
Mitya is the renowned scientist from the Royal Energy Commission of Snezhnaya. He also appears a couple of times during the Archon Quest, and his quirky, unpredictable habits make him exceptional.
A Glimpse of Mitya's Everyday Life

Mitya's everyday life includes reading the Complete Compendium of Fae and reflecting on scientific questions, such as whether he can cook soup using a centrifuge. He also handles ordinary tasks, like cleaning a scarf without leaving marks. His inquisitive and eccentric habits often keep Mr. Valeriy busy as well.
Mitya Promotional Videos & In-Game Appearances
Official Snezhnaya Trailer
| Mitya Appearances | |
|---|---|
| Transcendence Trailer - Sudden Snow | Version 7.0 Livestream |
| Archon Quest: Everwinter Without Mercy | Archon Quest: Wraith's Nocturne |
Mitya's Official Character Design
#GenshinImpact #Mitya "Research differs from production — efficiency is not the gold standard. I have worked alongside many gifted individuals, and I know well that talent and eccentricity tend to go hand in hand. But the one thing that never disappoints is the 'answers' they provide."— Pierro, "The Jester," responding to the insinuation that Mitya holds special privileges"I've applied for his scarf to be granted greater authority to help prevent leaks of classified information. In the vast majority of security inquiries, bystanders are considered innocent."— Valeriy, Commander, Special Assignments Battalion◆Name: Mitya◆Title: Rules Set at Naught◆Specialist, Royal Energy Commission of Snezhnaya◆ Stellar Linchpin: Electro◆Constellation: Nodus Gordianus
— Genshin Impact (@GenshinImpact) September 29, 2026
Mitya's Specialty Dish
| Item | Ingredients |
|---|---|
“Energy-Replenishing Meal” | Sausage x1Pepper x1 |
| Effect | Restores 16% of Max HP and an additional 1,350 HP to the selected character. |
| How to Get | Chance to get when Mitya cooks Podvorye Smoked Sausage. |
| Recipe | Bought from the NPC Buturlina in Snezhnaya |
Voicelines About Mitya
Character Voicelines About Mitya
| Vodyanitsa | I wish that Mr. Smarty Pants would stop trying to make scientific breakthroughs while he's watching the show. The theater is not a glorified study hall, and it's certainly not a refugee camp for escaped office workers. He'd better start taking our performances seriously... or I'll be forced to... *sigh* What am I saying — there's nothing I can do about it, especially since he technically does abide by theater etiquette... Hmph, next time I see him in the audience, I'll have to perform one of my louder pieces. Let's see how well he can concentrate on his work then. |
|---|---|
| Alyosha | I've never really had much formal schooling, so I thought it would be hard to get along with someone like Mitya. But he's helped me modify my rifle more than once, without me even having to ask, so clearly I was worried for nothing. Mitya is easy to talk to. I just treat him like any other neighbor, and it works out fine. Word to the wise, though... If he's off on one of his science tangents, steer clear. |
| Odette | Hm... I suppose you could call him a "fan" of the theater. He comes to see me and Vodyanitsa perform often enough. But as soon as the show starts, he always buries his head in his notes, writing away about goodness knows what. It's hard to ignore, especially when the rest of the audience has their eyes glued to the stage. I wouldn't be surprised if there's more true appreciation for the arts in his scarf than his entire body. |
| Vesna | Mitya often joins me for hijinks. He's forever sneaking out of the Armory, and the three of us always have a blast! Why "three," you ask? Because there's me, Mitya, and his ever-so-clever scarf. |
Mitya's Voice Actor & Profile
Mitya's Profile Details
| Profile |
|---|
| Affiliation: Snezhnaya - Royal Energy Commission of Snezhnaya |
Mitya's Voice Actors: EN & JA
Kobayashi Yuusuke's Notable Roles
| Character Name | Anime/Show Name |
|---|---|
| Subaru Natsuki | Re:Zero − Starting Life in Another World |
| Senku Ishigami | Dr. Stone |
| Kiyoshi Kurotani | Persona 5: The Phantom X |
Brian Ballance's Notable Roles
| Character Name | Anime/Show Name |
|---|---|
| Billy | The Tree Whisperer |
| Tech | M.I.A. |
| Elias | The Depths |
Character Related Articles
Character Tier Lists
All Characters
| Characters By Rarity | |||||||||||
|---|---|---|---|---|---|---|---|---|---|---|---|
| ★5 | ★4 | ||||||||||
| Characters By Roles | |||||||||||
| DPS List | Support List | Sustain List | |||||||||
| On-Field List | Off-Field List | ||||||||||
| Characters By Element | |||||||||||
| Pyro | Hydro | Anemo | Electro | ||||||||
| Dendro | Cryo | Geo | |||||||||
| Characters By Nation | |||||||||||
| Mondstadt | Liyue | Inazuma | |||||||||
| Sumeru | Fontaine | Natlan | |||||||||
| Snezhnaya | Nod-Krai | ||||||||||