

 Anemo
Anemo  Hydro
Hydro
 Pyro
Pyro
 Electro
 Dendro
 Cryo
Cryo
 Geo
Geo
 Anemo Traveler
 Chasca
 Jean
Jean Kaedehara Kazuha
 Mizuki
 Varka
Varka Venti
Venti Wanderer
 Xianyun
 Xiao
Xiao Vesna
Vesna Childe
 Columbina
 Furina
 Hydro Traveler
 Ayato
Ayato Mona
Mona Mualani
 Neuvillette
 Nilou
Nilou Kokomi
 Sigewinne
 Yelan
Yelan Vodyanitsa
 Albedo
 Arataki Itto
 Chiori
 Geo Traveler
 Linnea
 Navia
Navia Xilonen
 Zhongli
 Zibai
Zibai Clorinde
 Cyno
Cyno Electro Traveler
 Flins
Flins Ineffa
 Keqing
 Raiden Shogun
 Varesa
 Yae Miko
 Dendro
 Alhaitham
 Baizhu
 Dendro Traveler
 Emilie
 Kinich
 Lauma
Lauma Nahida
 Nefer
Nefer Tighnari
 Arlecchino
 Dehya
Dehya Diluc
Diluc Durin
Durin Hu Tao
 Klee
Klee Lyney
Lyney Mavuika
 Nicole
 Pyro Traveler
 Yoimiya
 Aloy
Aloy Citlali
 Escoffier
 Eula
Eula Ganyu
Ganyu Kamisato Ayaka
 Lohen
Lohen Qiqi
Qiqi Sandrone
 Shenhe
 Skirk
Skirk Wriothesley
 Ifa
Ifa Jahoda
 Lan Yan
 Lynette
 Prune
Prune Sayu
Sayu Shikanoin Heizou
 Sucrose
 Aino
Aino Barbara
 Candace
 Dahlia
 Xingqiu
 Gorou
Gorou Illuga
 Kachina
 Ningguang
 Noelle
 Yun Jin
 Beidou
 Dori
Dori Fischl
 Iansan
 Kujou Sara
 Kuki Shinobu
 Lisa
Lisa Ororon
 Razor
Razor Sethos
 Alyosha
 Collei
 Kaveh
Kaveh Kirara
 Yaoyao
 Amber
Amber Bennett
 Chevreuse
 Gaming
 Thoma
Thoma Xiangling
 Xinyan
 Yanfei
 Charlotte
 Chongyun
 Diona
Diona Freminet
 Kaeya
Kaeya Layla
Layla Rosaria
 Danica
 Mitya
Mitya Noy
Noy Tsaritsa
 Valeriy

























 Sword
Sword Claymore
 Polearm
 Catalyst
 Bow
Bow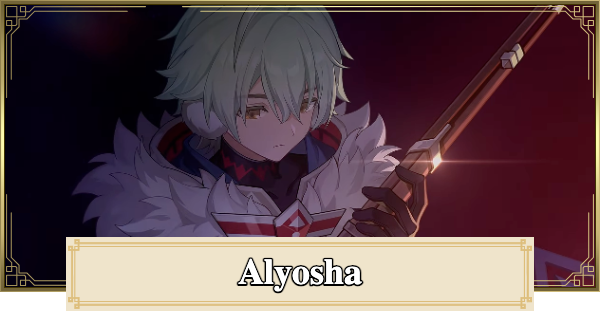
Comprehensive Alyosha guide for Genshin Impact. Learn Alyosha's best build, team, kit, and materials for this 4-Star Electro Polearm user.
| Alyosha Related Articles | |||||
|---|---|---|---|---|---|
 Best Build Best Build | Best Team | Material Guide | |||
Table of Contents
Alyosha Character Overview, Base Stats, and Tier
Character Profile
 | Rarity | | |
|---|---|---|---|
| Element | Electro | ||
| Weapon | Polearm | ||
| Ascend Stat | Energy Recharge 26.7% | ||
| Region | Snezhnaya | ||
| Birthday | February 9 | ||
| Roles | | ||
| How To Get | Available in all Banners at a low drop rate. | ||
Base Stats
| Base HP | Base ATK | Base DEF | |
|---|---|---|---|
| Lvl. 90 | 11,962 | 265 | 703 |
| Lvl. 80 (Ascended) | 11,134 | 247 | 654 |
Alyosha is a 4-star, off-field Electro Polearm user in Genshin Impact. His Elemental Skill applies a mark on enemies that, when activated, gives an ATK and Stellar-Conduct buff. His Elemental Burst taunts enemies, deals Electro DMG, and heals the active character.
Alyosha's Tier & Rating
| Overall Tier | ||||||||||||||
|---|---|---|---|---|---|---|---|---|---|---|---|---|---|---|
| A | ||||||||||||||
| On-Field | Off-Field | DPS | Support | Sustain | ||||||||||
| - | A | - | A | A | ||||||||||
In battle, Alyosha is played as an
Rate Alyosha!
Alyosha's Roles, Playstyle, Strengths, and Weaknesses

Off-Field Support for Stellar-Conduct
Alyosha is intended to be a support for Stellar-Conduct. Given that the DPS characters who received buffs for it scale on ATK, his ability to buff both ATK and the Reaction DMG makes him a good teammate for them.
Pros and Cons of Stellar-Conduct Support Alyosha
| Pros |
|---|
| - Elemental Burst can apply Electro off-field. |
| - His ability to buff both ATK and Stellar-Conduct DMG makes him a good support for the team. |
| Cons |
| - DMG% Buffs are limited to Stellar-Conduct DMG, so he isn't as universal as Odette. |
Off-Field Healing Support
Alyosha can be used as a healer and off-field Electro applier outside of Stellar-Conduct. His ATK buff is also still available.
Pros and Cons of Healing Support Alyosha
| Pros |
|---|
| - Can heal, apply Electro and buff ATK to teammates. |
| - Elemental Burst's taunt ability can be used for crowd control effects. |
| Cons |
| - Healing is tied to his Elemental Burst and only affects the active character, meaning you still need to supply him with enough Energy Recharge so he can use it every rotation. |
Best Build for Alyosha
Alyosha's intended and therefore best use case is in a Stellar-Conduct team with ATK-scaling DPSes, so he fits well into already the already established Stellar-Conduct teams with ease, especially since he supplies the damage dealers with an ATK% and Stellar-Conduct DMG% buff. See below for our top recommendations:
Build ATK and Energy Recharge for Alyosha
| Weapon | Engulfing Lightning |
|---|---|
| Best Artifact | Noblesse Oblige x4 |
| Artifact Main Stats | Sands: Energy Recharge Goblet: ATK% Circlet: Healing Bonus or ATK% or CRIT Rate (if using Favonius Lance) |
| Priority Sub-Stats | CRIT Rate (if using Favonius Lance) > ATK% = Energy Recharge |
| Recommended Team | |
Stat Goals For Off-Field Support Alyosha
| Energy Recharge | 180-200%~ |
|---|---|
| CRIT Rate | 65%+ (if using Favonius Lance) No CRIT Rate goal if using a different weapon. |
| ATK | 2000+ (less if you don't need his healing) |
Alyosha's stat goals focus on his ATK and Energy Recharge (ER) since both can affect his healing and damage. ER should be your priority since a lot of Alyosha's usefulness and buffing value is tied to his Burst, and because it has a somewhat high Energy cost, you will need a decent amount of ER to use his Burst every rotation consistently and just by pressing Alyosha's Skill.
Alyosha 's Recommended Talent Priority
| Talent | Level Up Priority |
|---|---|
| Normal Attack: Skirmishing Spear | ★・・・・ |
| Thunderbolt Strike (Elemental Skill) | ★★★★★ |
| Hunter's Advance (Elemental Burst) | ★★★・・ |
Related Links:
Best Weapon for Alyosha
As a support who relies on his Burst to activate buffs, Energy Recharge weapons are a good choice for Alyosha. He also needs ATK to heal, so weapons that provide both stats are preferred. Weapons that grant team-wide buffs are also viable options. See below for our top recommendations:
Premium Weapons for Alyosha
| Weapon | How to Get Rating | |
|---|---|---|
| Best | Engulfing Lightning | Get from Limited Banner - An Energy Recharge (ER) main stat weapon with relatively high base ATK. - The passive further increases both Energy Recharge and ATK, which are Alyosha's priority stats. - The large amount of ER you can get from this weapon allows you to build the other stats Alyosha needs to maximize his Burst DMG and healing. |
| 2nd | Symphonist of Scents | Get from Limited Banner - A CRIT DMG main-stat weapon with the same base ATK as Engulfing. - It has a modest ATK% buff on the passive, so it still benefits Alyosha's mostly utility-based playstyle, since his healing scales with his ATK stat. - This weapon also provides an additional ATK% buff to all the teammates healed by the active character. Since Alyosha's healing via Tugarin only affects the active character, the weapon buff won't be teamwide. - Unlike Engulfing, Symphonist does not have any Energy-providing means, so you'll have to compensate this with high Energy Recharge rolls on Alyosha's Artifacts. |
| 3rd | Favonius Lance | Get from Banners - An ER main-stat weapon with slightly lower base ATK. - This is Alyosha's best 4-star weapon choice for both his Energy requirements and additional utility. - Passive has a unique chance-based effect where a CRIT hit from the equipping holder generates an Energy particle. - You can swap out of the holder to have the particle be absorbed by other teammates, so the benefit isn't isolated. - Requires CRIT Rate to consistently generate Energy Particles for the team. - Best at Refinement Level 5 (R5). |
| 4th | Frostbreath | Get from Battle Pass - An Energy Recharge main-stat polearm that increases the equipping character's ATK and regens a little bit of flat Energy after triggering a Cryo or Hydro reaction. - A synergistic Battle Pass weapon for Alyosha whose stats and passive align with what he needs to perform well in his intended role. - No other utility so it can be slightly less appealing when considering optimization (or minmaxing) . - Best at Refinement Level 5 (R5). |
Engulfing Lightning is the best weapon for Alyosha as a result of its high Energy Recharge and ATK% increases. However, ff you don't have it, other supportive or utility weapons like Symphonist or Favonius Lance are still viable premium options.
Free-to-Play Friendly (F2P Weapons) for Alyosha
| Weapon | How to Get Rating | |
|---|---|---|
| Best F2P (Event) | Tamayuratei No Ohanashi | Reward From Past Event (Enchanted Tales of the Mikawa Festival) - Similar to Engulfing Lightning, this is a weapon that grants ER (via the main-stat) and ATK increases to Alyosha. - The ATK buff is triggered after using an Elemental Skill, which aligns well with his usual combos. - Best at Refinement Level 5 (R5). - No longer obtainable if you did not participate in the event. |
| 2nd (Forge) | Song of the Vigil | Snezhnaya Craftable (Forgeable) Weapon - This polearm has an Elemental Mastery (EM) main-stat, which, while its not a priority stat for Alyosha, can help him contribute higher Stellar-Conduct numbers. - Passive gives flat energy after the equipping character triggers a reaction. This might be hard for Alyosha to do consistently in some teams or situations, but it is still a nice bonus that other polearms do not provide. - It also has an ATK buff after the equipping character triggers a Stellar Glimmer reaction instead. Again, due to being Electro, this may be difficult for Alyosha to consistently do, so don't expect full uptime. |
| 3rd | The CatchPrototype Starglitter | Inazuma Fishing Association Shop / Craftable (Forgeable) Weapon - Both weapons listed have a high Energy Recharge stat and can be left at Refinement Level 1 for Alyosha since their passives do not benefit Alyosha. - Mostly stat-sticks. |
For F2P options, Alyosha's best choice will be the Tamayuratei no Ohanashi since it provides both stats he needs as a support. The Snezhnnayan Craftable polearm is a much more accessible weapon choice if you missed out on the Event weapon, but any other Energy Recharge (ER) polearms are serviceable alternatives even if their effects aren't the best for Alyosha.
All Weapon ListAlyosha Best Artifacts
As a character who can be used as a Stellar-Conduct support or generalist healer support, Alyosha has different artifact sets viable for both roles. See below for our top recommendations.
| Artifact | Recommendation Details |
|---|---|
| Noblesse Oblige | - When paired alongside ATK-scaling DPSes (such as in Sandrone's Stellar-Conduct team), the teamwide ATK buff benefits both Alyosha's healing and his teammates' damage output. - For optimization purposes, this is typically going to be Alyosha's go-to set on teams with Odette, since she is better suited to equip the Heart of the Furnace set than Alyosha. |
| Heart Of The Furnace | - A generous ATK% buff source from the 2-piece effect and the 4-piece passive after triggering a Stellar Glimmer reaction. - Has an added Stellar Glimmer DMG% increase to everyone in the party as well. - If no one else in the party can use this set, it can be given to Alyosha. - Note that due to how Stellar-Conduct works and interacts with Cryo and Electro application, there may be some issues with uptime for this set's effect when equipped by Alyosha. |
| 2-piece ATK% 2-piece Energy Recharge | - A combination of 2-pc ATK and 2-pc ER sets are the best option to equip on Alyosha while you are farming for a full 4-pc set. |
| Artifact | Recommendation Details |
|---|---|
| Song Of Days Past | - Song of Days Past can boost Alyosha's healing and buff the damage dealt by his teammates. - This set delegates Alyosha to a purely supportive role, as it doesn't buff his personal damage. |
| Noblesse Oblige | - A damage-oriented support set that can buff teamwide ATK. - Elemental Burst DMG buff can allow Alyosha to deal more damage as a Sub-DPS. - Best used alongside an ATK-scaling DPS, but as appealing for other damage characters that scale off of other stats. |
| Emblem Of Severed Fate | - Only good if Alyosha is using Engulfing Lightning. - Boosts both damage and healing he can give even without the Healing Bonus stat. |
| Any Healing Bonus Any ER | - Best 2-pc set effects for Alyosha in a support role. - 2-pc ATK sets can also work, but they don't provide as much value compared to Healing Bonus or Energy Recharge, which can boost his Burst's uptime and damage. |
Recommended Artifact Stats
| Main: Flat HP Sub: Energy Recharge / ATK% / CRIT Rate (if using Favonius Lance) |
|---|---|
| Main: Flat ATK Sub: Energy Recharge / ATK% / CRIT Rate (if using Favonius Lance) |
| Main: ATK% or Energy Recharge Sub: Energy Recharge / CRIT Rate (if using Favonius Lance) |
| Main: ATK% Sub: Energy Recharge / Healing Bonus / CRIT Rate (if using Favonius Lance) |
| Main: Healing Bonus, ATK% or CRIT Rate (if using Favonius Lance) Sub: Energy Recharge / ATK% |
Find a Balance Between ATK% and Energy Recharge
Since Alyosha needs both stats for his healing and personal damage, filtering your choice of Artifacts based on these two stats is recommended. If you do not care for Alyosha's DPS, it's fine to prioritize Energy Recharge over ATK, since Alyosha's damage potential isn't enough to warrant actively chasing ATK% sub-stats first, especially since he's very reliant on his Burst to activate his Hunter's Marks.
Related Articles
Best Team Comp Alyosha
Premium Stellar-Conduct Team
| Support | DPS | Sub-DPS | Sub-DPS |
|---|---|---|---|
| Alyosha | Sandrone | Odette | Yae Miko |
| Details | |||
| - Alyosha's teamwide ATK% and Stellar Glimmer DMG% buff are used to their fullest in relevant Stellar-Conduct teams where the damage distribution is relatively even between the DPS characters. - Sandrone serves as the Main On-Field DPS for this Stellar-Conduct team, but she can be replaced by either Cyno or Cryo Traveler. - Odette and Yae Miko act as Sub-DPS characters who will also contribute to the team's overall damage. | |||
Any of the Stellar-Conduct DPS characters' premium teams are ideal for Alyosha as a support. Since he can't enable the reaction, it's recommended to pair him with Stellar Linchpin characters who can.
Other Team Comps for Alyosha
Lunar-Charged Team
| Team | Detail | |
|---|---|---|
| Alyosha | Flins | - Alyosha can be used as a support for Lunar-Charged teams since Flins and Ineffa scale on ATK. - His healing is additional sustain as a safety net if Ineffa's shield breaks. |
| Ineffa | Columbina | |
Free-to-Play Stellar-Conduct Team
| Team | Detail | |
|---|---|---|
| Alyosha | Cryo Traveler | - Cryo Traveler outputs convincing Stellar-Conduct DMG by themselves, and is the perfect F2P alternative to other dedicated Stellar-Conduct DPSes. - Diona and Sucrose can provide appropriate Elemental Mastery and Stellar Glimmer DMG% buffs that can also further boost Cryo Traveler's DMG alongside Alyosha. |
| Diona | Sucrose | |
Alyosha's Team Rotations and Combos
Basic Team Rotation for Off-Field Support and Healer Alyosha
| Alyosha's Basic Rotation |
|---|
| 1. Start the rotation with the other supports. Deploy their abilities in order of their abilities durations, with the longest ability going first. 2. Swap to Alyosha. Use his Elemental Skill to apply his Mark. 3. Use Alyosha's Elemental Burst to activate the mark. 4. Switch to any other Off-Field character with a shorter ability duration than Alyosha. 5. Swap to your On-Field DPS to execute their full damage combo. 6. Repeat from step 1. |
Alyosha is used similarly to other off-field supports and Sub-DPS characters that will use their Skill, then Burst, before swapping out. His order in the rotation will depend on the buff and ability durations between the off-field characters.
Basics of Using Alyosha (Beginner Guide)

Stellar-Conduct Support and Healer
Alyosha is an Electro support who can buff ATK, Stellar-Conduct DMG, and provide healing. His ability to apply Electro from Off-Field also makes him a viable sub-DPS or reaction enabler.
Enter Radiance: Stellar-Conduct State Inside Polestar Field
When Stellar-Conduct is triggered, it creates a Polestar Field. Alyosha enters the Radiance: Stellar-Conduct state while inside this field. The state provides character-specific buffs and combat advantages based on what is stated in their abilities.
For Alyosha, being in the Radiance: Stellar-Conduct state is required in order for him to provide a Stellar-Conduct DMG% buff to his teammates.
| Note! | Characters within the Polestar Field gain a special icon under their HP bars, indicating that they are in the Radiance: Stellar Conduct state. |
|---|
Elemental Skill Applies Hunter's Mark

Alyosha can apply an effect called Hunter's Mark on enemies that is activated when the mark is reapplied or when his Elemental Burst's summon, Tugarin, hits the marked enemies.
Activate Mark for Buffs

Activating Alyosha's Hunter's Mark triggers an additional effect called Hunter's Precision. This gives the entire party, including himself, a modest ATK buff. One of his passives also makes it so that, if Alyosha is in the Radiance: Stellar-Conduct state, he will also grant an additional Stellar-Conduct DMG% buff.
| How to Activate the Hunter's Mark? | |
|---|---|
| Elemental Skill | - Reusing it will activate the mark but will consume on-field time. |
| Final Normal Attack | - Alyosha's last Normal Attack in his NA string will also activate the mark. - 2nd best method to activate it without wasting much time. |
| Elemental Burst | - Also activates the mark, best way to gain the buffs. - Doesn't apply the mark beforehand, so you need to use Alyosha's Skill or Normal Attacks to apply it again if it expires. |
Burst Summons Tugarin

Alyosha's Burst is what summons Tugarin, his hunting hound and companion. It will also turn a small area into a Fulgurite Hunting Field where Tugarin can taunt and attack nearby enemies, activating any Hunter's Mark. This field will also periodically apply AoE Electro DMG to enemies that enter its radius.
Tugarin will always prioritize attacking marked enemies over unmarked ones.
| Note! | Tugarin's attack range can actually extend towards enemies outside the Fulgurite Hunting Field's main radius, but only by a few more steps. |
|---|
Passive Lets Tugarin Heal
Alyosha's ability to act as a sustain is tied to his Burst, and more specifically to Tugarin's attacks. This is thanks to his first Ascension Passive, where the active character receives healing based on Alyosha's ATK every time Tugarin lands a successful hit on an enemy.
Energy Recharge Is a High Priority Stat
Alyosha's Elemental Burst is vital for his role as both a buffer and healer on his best teams, but its slightly higher Energy cost encourages a high Energy Recharge (ER) stat on Alyosha if you want to use it every rotation. Check ▼here to view Alyosha's ER requirements.
Elemental Skill, Burst and Abilities Guide for Alyosha
How To Use Alyosha's Skills & Passives?
- ▼Stellar-Conduct buffer and healer.
- ▼Enter Radiance state after triggering Stellar-Conduct.
- ▼Mark enemies with Skill and Normal Attack.
- ▼Activate Mark with Burst through Tugarin.
- ▼Heals are tied to Tugarin's attacks.
- ▼Energy Recharge increases Alyosha's personal DMG.
- ▼Claim a free copy of Alyosha through the Archon Quest.
Stellar-Conduct Buffer and Healer
| Basic Rotation Of Alyosha |
|---|
| 1. Begin the rotation with the other supports first, ideally starting with the supports that have longer ability durations, then shorter durations. 2. Swap to Alyosha. Use his Skill (tap) to mark enemies. 3. Deploy Tugarin with his Burst to activate his marks. 4. Swap to other supports with shorter ability durations if there are any. Otherwise, field your chosen On-Field DPS to execute their damage combo. 5. Repeat from Step 1. |
Alyosha is designed to be played as an Off-Field support and healer that buffs the ATK% and Stellar-Conduct DMG dealt by his teammates in a Stellar-Conduct team. Since he will be activating his essential buffs through his Elemental Burst most of the time (especially if you have Noblesse Oblige) on him), supplying Alyosha enough Energy Recharge (ER) is crucial for smooth rotations and optimal average DPS.
Enter Radiance State After Triggering Stellar-Conduct
Radiance Passive Description| Icon | Radiance Passive Description |
|---|---|
| Into the Fray | Alyosha will enter the Radiance: Stellar-Conduct state when inside a Polestar Field. ⯁Radiance: Stellar-Conduct: The Hunter's Precision effect obtained when the ▼Hunter's Mark is activated will also increase Stellar-Conduct reaction DMG dealt by the character when on the field by 20%. |
| Polestar Field Description |
|---|
 |
| When Stellar-Conduct is triggered, the surrounding area will transform into a Polestar Field for a short period of time, and when inside a Polestar Field, certain characters will enter the Radiance: Stellar-Conduct state, which grants various skill buffs. |
| Elements | Effect |
|---|---|
| Cryo + Electro | Base Reaction |
- Deals AoE Cryo DMG - Reduces Physical RES of enemies affected by the reaction. | |
| Stellar Version | |
- Creates a ▲ Polestar Field and grants Cryo and Electro DMG bonus to everyone inside. - Starlight Prism at the center of the field will store energy generated by Cryo and Electro hits, later increasing the DMG buff and the base damage dealt by Stellar-Conduct. - Reduces Physical RES of enemies affected by the reaction. - Party enters the Radiance: Stellar-Conduct state. |
Unlike other Snezhnaya characters, Alyosha does not possess a Stellar Linchpin, so he can't enable a team to trigger Stellar Glimmer Reactions by himself, so he needs to be paired with characters like Sandrone or Odette to access his third passive, which requires him to be in the Radiance: Stellar-Conduct state.
This state can be triggered once you trigger Stellar-Conduct and erect Polestar Field, and the state will apply to everyone in the party. What the state does differs for each character, and for Alyosha, it gives the ability to provide extra buffing value for his teammates through his ▼ Hunter's Mark.
| Note! | Stellar-Conduct follows the same formula trends as Lunar Reactions. The only DMG% buffs that boost it are those labeled as "Stellar DMG%". This means that items like Elemental goblets or passives that grant Skill DMG% are suboptimal for Alyosha. |
|---|
Mark Enemies With Skill and Normal Attack
Elemental Skill Summary
| Icon | Elemental Skill Summary |
|---|---|
| Thunderbolt Strike | Tap - Fires at opponents in front of Alyosha. - Deals AoE Electro DMG. - Applies ▼Hunter's Mark to hit opponents. Hold - Enters Aiming Mode. - Targets opponents within a certain area in front of him. - Increases Alyosha's interruption resistance while aiming. - Deals Electro DMG to the targeted opponents when the hold ends. - Applies ▼Hunter's Mark to hit opponents. |
| Icon | Hunter's Mark Summary |
|---|---|
| Hunter's Mark | - A special effect that Alyosha can apply to opponents. Applying Hunter's Mark to an opponent who is already affected by it will activate Hunter's Mark instead: - Removes the existing Hunter's Mark. Grants all nearby party members Hunter's Precision. - Hunter's Precision increases the ATK of affected characters while they are on the field. |
Alyosha's role as a buffer starts with his Skill. Attacking enemies with either the Tap or Hold version applies a special status called Hunter's Mark on hit targets. Alyosha needs to activate these marks either by reapplying them to gain the upgraded effect, called Hunter's Precision, or by using his Elemental Burst.
Activate Mark With Burst Through Tugarin
Elemental Burst Summary
| Icon | Elemental Burst Summary |
|---|---|
| Hunter's Advance | - Summons Tugarin to fight alongside Alyosha. - Creates a Fulgurite Hunting Field in front of him for a short duration. Fulgurite Hunting Field While active: - Continuously taunts nearby opponents. - Every 2s, deals AoE Electro DMG to opponents that enter the field. Tugarin While active: - If opponents are nearby, quickly moves toward an opponent and attacks every 2s. - Deals Electro DMG. If Tugarin hits an opponent affected by Hunter's Mark: - ▲ Hunter's Mark is activated. - When multiple opponents are present: - Prioritizes opponents affected by Hunter's Mark. |
Alyosha's Burst is what summons Tugarin and the Fulgurite Hunting Field that both help activate Alyosha's Hunter's Marks. This is achieved once Tugarin attacks enemies both within and slightly outside of the Fulgurite Hunting Field range, so deploying Alyosha's Elemental Burst is the second but most important step in his combo every rotation.
Apart from gaining an ATK% buff from directly upgrading Hunter's Mark into Hunter's Precision, activating the marks are also needed to gain the Stellar-Conduct DMG% buff from one of Alyosha's ▲passives.
| Note! | Alyosha can also activate his marks after hitting an enemy with his 4th Normal Attack. This is harder to achieve in practice than just using his Burst, however. Having Alyosha on Noblesse Oblige also further necessitates the use of his Burst every rotation due to the set's passive requirement. |
|---|
Heals Are Tied to Tugarin’s Attacks
Ascension 1 Passive Description
| Icon | Ascension 1 Passive Description |
|---|---|
| Awakened by the Baying Hounds | When ▲Tugarin attacks, it will also restore HP to nearby active characters at 120% of Alyosha's ATK. |
Apart from providing buffing, Alyosha's utility as an Off-Fielder also consists of his healing. The sustain is limited to the active character and whenever Tugarin hits an enemy, which is another reason as to why Alyosha's Burst is important and is worth building a sufficient amount of Energy Recharge (ER) for.
Energy Recharge Increases Alyosha’s Personal DMG
Ascension 2 Passive Description| Icon | Ascension 2 Passive Description |
|---|---|
| Suffer the Winter Wheat Will | Increases the DMG Alyosha deals with his Elemental Skill and Elemental Burst by 0.35% for every 1% of his Energy Recharge. Up to a 70% increase can be obtained in this way. |
Alyosha's other Ascension Passive rewards you for actively building him with Energy Recharge (ER) through his Weapons and Artifact substats by increasing the damage he deals based on his ER stat. While Alyosha's personal DPS is unlikely to come close to dedicated damage-dealers like Odette, this is still a nice, if not modest, increase to the total team DPS regardless.
Claim a Free Copy of Alyosha Through the Archon Quest

Like Aino, everyone will gain a free copy of Alyosha once they've progressed or completed a specific sub-quest in the Snezhnaya Archon Quest: Everwinter Without Mercy. This is great for players who cannot afford or weren't lucky enough to secure a copy of him through the wish system, especially since Alyosha is already usable at base (C0).
| Note! | Alyosha's Constellations are good to have, but not extremely important to his overall playstyle. Click ▼here to check out Alyosha's Constellation ranking and priority. |
|---|
Should You Pull for Alyosha's Constellation Or Best Weapon?
C2 Is a Good Stopping Point
Alyosha's early Constellations give him a decent amount of quality-of-life upgrades that help make his gameplay even smoother. This includes the conditional flat energy regen he gains with his Constellation 1 (C1), and the ability for Tugarin to apply the Hunter's Mark himself through Alyosha's Constellation 2 (C2), which is especially nice against multi-target content where enemies come in waves.
Hunter's Mark Can Be Stacked at C6
Alyosha's Constellation 6 (C6) compounds an additional Elemental Mastery (EM) increase to the On-Field character if they have the upgraded Hunter's Mark effect, but the more appealing portion of his C6 is the fact that it will now let Alyosha stack Hunter's Mark on enemies, with a maximum limit of 2 stacks.
This doubles the ATK% and Stellar-Conduct DMG that Alyosha grants, but in practice, the % increase that the team receives from his C6 is marginal in comparison to his base performance (C0).
Alyosha's Constellations & Effects
| Rating | Constellation Effect |
|---|---|
| ★★★★・ | C1: Frostvale Thunderclap Alyosha regenerates 15 Elemental Energy when nearby party members trigger an Electro-related reaction on an opponent. This effect can trigger once every 18s. |
| ★★★★・ | C2: Howl From Afar The duration of the Elemental Burst Hunter's Advance is extended by 6s. Additionally, each time Tugarin attacks the opponent, he will also apply the Hunter's Mark to a target. This effect does not activate existing Hunter's Marks. |
| ★★★・・ | C3: Friendly Call Increases the Level of the Elemental Skill Thunderbolt Strike by 3. Maximum upgrade level is 15. |
| ★★★・・ | C4: Harvest the Spoils When Tugarin attacks, he will also restore 60% of Alyosha's ATK as HP to the nearby party member with the lowest HP by percentage. |
| ★★★・・ | C5: When the Nightbird Falls Silent Increases the Level of the Elemental Burst Hunter's Advance by 3. Maximum upgrade level is 15. |
| ★★★★★ | The Hunter's Precision effect obtained from activating a Hunter's Mark can now stack, max 2 stacks. When the stack count reaches 2, characters affected by Hunter's Precision will also have their Elemental Mastery increased by 100 if they are on the field. |
Alyosha's Constellation Name is Canis Borzoides
| Canis Borzoides |
|---|
 |
Ascension Materials for Alyosha Talents & Level
Materials Needed for Level Ascension
| Alyosha Materials Per Ascension Level | |
|---|---|
| Lvl 20 | Vajrada Amethyst Sliver x1Flockingweed x3Chimeric Core x3 |
| Lvl 40 | Vajrada Amethyst Fragment x3Severed Tail of the Sky-Roamer x2 Flockingweed x10Chimeric Core x15 |
| Lvl 50 | Vajrada Amethyst Fragment x9Severed Tail of the Sky-Roamer x4 Flockingweed x20Symbiotic Chimeric Nucleuss x12 |
| Lvl 60 | Vajrada Amethyst Chunk x6Severed Tail of the Sky-Roamer x8 Flockingweed x30Symbiotic Chimeric Nucleus x18 |
| Lvl 70 | Vajrada Amethyst Chunk x3Severed Tail of the Sky-Roamer x12 Flockingweed x45Prime Chimeric Nexus x12 |
| Lvl 80 | Vajrada Amethyst Gemstone x6Severed Tail of the Sky-Roamer x20 Flockingweed x60Prime Chimeric Nexus x24 |
Materials Per Talent Level
| Note! | The amount Of materials shown below is for one talent only. You need three times the amount To max out all talents. |
|---|
| Level 1 | Default |
|---|---|
| Level 2 | Teachings Of Fortitude x3Chimeric Core x6 |
| Level 3 | Guide To Fortitude x2 Symbiotic Chimeric Nucleus x3 |
| Level 4 | Guide To Fortitude x4Symbiotic Chimeric Nucleus x4 |
| Level 5 | Guide To Fortitude x6 Symbiotic Chimeric Nucleus x6 |
| Level 6 | Guide To Fortitude x9 Symbiotic Chimeric Nucleus x9 |
| Level 7 | Philosophies Of Fortitude x4 Prime Chimeric Nexus x4 Elixir Of the Heretic x1 |
| Level 8 | Philosophies Of Fortitude x6 Prime Chimeric Nexus x6 Elixir Of the Heretic x1 |
| Level 9 | Philosophies Of Fortitude x12 Prime Chimeric Nexus x9 Elixir Of the Heretic x2 |
| Level 10 | Philosophies Of Fortitude x16 Prime Chimeric Nexus x12 Elixir Of the Heretic x2 Crown Of Insight x1 |
| Level 11 | Unlocked via Constellation |
| Level 12 | Unlocked via Constellation |
| Level 13 | Unlocked via Constellation |
Related Links
Alyosha Skills & Talents Details
Normal Attack: Skirmishing Spear
Normal Attack
| Effect |
|---|
| Performs up to 4 consecutive spear strikes and applies the Hunter's Mark to the opponent hit by the final strike. |
| Lv1 | Lv2 | Lv3 | Lv4 | Lv5 | Lv6 | Lv7 | Lv8 | Lv9 | Lv10 | Lv11 | Lv12 | Lv13 | Lv14 | Lv15 | |
|---|---|---|---|---|---|---|---|---|---|---|---|---|---|---|---|
| 1-Hit DMG | 47.82% | 51.71% | 55.6% | 61.16% | 65.05% | 69.5% | 75.62% | 81.73% | 87.85% | 94.52% | 101.19% | 107.86% | 114.54% | 121.21% | 127.88% |
| 2-Hit DMG | 48.16% | 52.08% | 56% | 61.6% | 65.52% | 70% | 76.16% | 82.32% | 88.48% | 95.2% | 101.92% | 108.64% | 115.36% | 122.08% | 128.8% |
| 3-Hit DMG | 34.23% + 31.82% | 37.01% + 34.41% | 39.8% + 37% | 43.78% + 40.7% | 46.57% + 43.29% | 49.75% + 46.25% | 54.13% + 50.32% | 58.51% + 54.39% | 62.88% + 58.46% | 67.66% + 62.9% | 72.44% + 67.34% | 77.21% + 71.78% | 81.99% + 76.22% | 86.76% + 80.66% | 91.54% + 85.1% |
| 4-Hit DMG | 75.85% | 82.03% | 88.2% | 97.02% | 103.19% | 110.25% | 119.95% | 129.65% | 139.36% | 149.94% | 160.52% | 171.11% | 181.69% | 192.28% | 202.86% |
▲Use side-scroll to see percentage per level.
Charged Attack
| Effect |
|---|
| Consumes a certain amount of Stamina to lunge forward, dealing damage to opponents in his path. |
| Lv1 | Lv2 | Lv3 | Lv4 | Lv5 | Lv6 | Lv7 | Lv8 | Lv9 | Lv10 | Lv11 | Lv12 | Lv13 | Lv14 | Lv15 | |
|---|---|---|---|---|---|---|---|---|---|---|---|---|---|---|---|
| Charged Attack DMG | 111.03% | 120.06% | 129.1% | 142.01% | 151.05% | 161.38% | 175.58% | 189.78% | 203.98% | 219.47% | 234.96% | 250.45% | 265.95% | 281.44% | 296.93% |
| Charged Attack Stamina Cost | 25 | 25 | 25 | 25 | 25 | 25 | 25 | 25 | 25 | 25 | 25 | 25 | 25 | 25 | 25 |
▲Use side-scroll to see percentage per level.
Plunging Attack
| Effect |
|---|
| Plunges from mid-air to strike the ground below, damaging opponents along the path and dealing AoE DMG upon impact. |
| Lv1 | Lv2 | Lv3 | Lv4 | Lv5 | Lv6 | Lv7 | Lv8 | Lv9 | Lv10 | Lv11 | Lv12 | Lv13 | Lv14 | Lv15 | |
|---|---|---|---|---|---|---|---|---|---|---|---|---|---|---|---|
| Plunge DMG | 63.93% | 69.14% | 74.34% | 81.77% | 86.98% | 92.93% | 101.1% | 109.28% | 117.46% | 126.38% | 135.3% | 144.22% | 153.14% | 162.06% | 170.98% |
| Low/High Plunge DMG | 127.84% / 159.68% | 138.24% / 172.67% | 148.65% / 185.67% | 163.51% / 204.24% | 173.92% / 217.23% | 185.81% / 232.09% | 202.16% / 252.51% | 218.51% / 272.93% | 234.86% / 293.36% | 252.7% / 315.64% | 270.54% / 337.92% | 288.38% / 360.2% | 306.22% / 382.48% | 324.05% / 404.76% | 341.89% / 427.04% |
▲Use side-scroll to see percentage per level.
Thunderbolt Strike (Elemental Skill)
| Effect |
|---|
| Follows his hunter's instincts. Tap or hold to produce different effects as well as apply the Hunter's Mark effect to the hit opponents. Tapping Fires at opponents in front of him, dealing AoE Electro DMG. Holding Enters aiming mode, then targets opponents within a certain area in front of him. Alyosha's Interruption RES is enhanced when in this mode. At the end of the button hold, he deals Electro DMG to the targeted opponents. |
Hunter's Mark
| Effect |
|---|
| A special effect Alyosha can apply on the opponent. When this effect is applied to an opponent who is already under the Hunter's Mark effect, it will activate Hunter's Mark instead, which removes said mark and grants all nearby party members the Hunter's Precision effect, which increases their ATK when they are on the field. |
| Lv1 | Lv2 | Lv3 | Lv4 | Lv5 | Lv6 | Lv7 | Lv8 | Lv9 | Lv10 | Lv11 | Lv12 | Lv13 | Lv14 | Lv15 | |
|---|---|---|---|---|---|---|---|---|---|---|---|---|---|---|---|
| Press DMG | 286.72% | 308.22% | 329.73% | 358.4% | 379.9% | 401.41% | 430.08% | 458.75% | 487.42% | 516.1% | 544.77% | 573.44% | 609.28% | 645.12% | 680.96% |
| Hold DMG | 358.4% | 385.28% | 412.16% | 448% | 474.88% | 501.76% | 537.6% | 573.44% | 609.28% | 645.12% | 680.96% | 716.8% | 761.6% | 806.4% | 851.2% |
| CD | 15s | 15s | 15s | 15s | 15s | 15s | 15s | 15s | 15s | 15s | 15s | 15s | 15s | 15s | 15s |
| Hunter's Mark Duration | 15s | 15s | 15s | 15s | 15s | 15s | 15s | 15s | 15s | 15s | 15s | 15s | 15s | 15s | 15s |
| Hunter's Precision ATK Bonus | 11.66% | 12.72% | 13.78% | 14.84% | 15.9% | 16.96% | 18.02% | 19.08% | 20.14% | 21.2% | 22.47% | 23.74% | 25.02% | 26.29% | 27.56% |
| Hunter's Precision Duration | 15s | 15s | 15s | 15s | 15s | 15s | 15s | 15s | 15s | 15s | 15s | 15s | 15s | 15s |
▲Use side-scroll to see percentage per level.
Hunter's Advance (Elemental Burst)
| Effect |
|---|
| Summons his trusted companion Tugarin to fight alongside him on the field. This also turns an area in front of him into a Fulgurite Hunting Field for a short time. Fulgurite Hunting Field · Continuously taunts nearby opponents to incite them to attack. · Every 2s, deals an instance of AoE Electro DMG to any opponent that enters the field. Tugarin · If there are any opponents nearby, Tugarin will quickly move close to an opponent and maul them every 2s, dealing Electro DMG. · If an opponent affected by the Hunter's Mark effect is hit, the Hunter's Mark will also be activated. · Where there are multiple opponents, Tugarin will attack those affected by the Hunter's Mark effect first. |
| Lv1 | Lv2 | Lv3 | Lv4 | Lv5 | Lv6 | Lv7 | Lv8 | Lv9 | Lv10 | Lv11 | Lv12 | Lv13 | Lv14 | Lv15 | |
|---|---|---|---|---|---|---|---|---|---|---|---|---|---|---|---|
| Fulgurite Hunting Field DMG | 74.96% | 80.58% | 86.2% | 93.7% | 99.32% | 104.94% | 112.44% | 119.94% | 127.43% | 134.93% | 142.42% | 149.92% | 159.29% | 168.66% | 178.03% |
| Tugarin DMG | 50.22% | 53.99% | 57.76% | 62.78% | 66.55% | 70.31% | 75.33% | 80.36% | 85.38% | 90.4% | 95.42% | 100.45% | 106.72% | 113% | 119.28% |
| Duration | 14s | 14s | 14s | 14s | 14s | 14s | 14s | 14s | 14s | 14s | 14s | 14s | 14s | 14s | 14s |
| CD | 18s | 18s | 18s | 18s | 18s | 18s | 18s | 18s | 18s | 18s | 18s | 18s | 18s | 18s | 18s |
| Energy Cost | 70 | 70 | 70 | 70 | 70 | 70 | 70 | 70 | 70 | 70 | 70 | 70 | 70 | 70 | 70 |
▲Use side-scroll to see percentage per level.
Into the Fray
| Effect |
|---|
| Alyosha will enter the Radiance: Stellar-Conduct state when inside a Polestar Field. Radiance: Stellar-Conduct: The Hunter's Precision effect obtained when the Hunter's Mark is activated will also increase Stellar-Conduct reaction DMG dealt by the character when on the field by 20%. |
Awakened by the Baying Hounds
| Effect |
|---|
| When Tugarin attacks, it will also restore HP to nearby active characters at 120% of Alyosha's ATK. |
Suffer the Winter Wheat Will
| Effect |
|---|
| Increases the DMG Alyosha deals with his Elemental Skill and Elemental Burst by 0.35% for every 1% of his Energy Recharge. Up to a 70% increase can be obtained in this way. |
Treetop Watch
| Effect |
|---|
| Displays the location of nearby resources unique to Snezhnaya on the mini-map. |
Who Is Alyosha?
A Hunter of Sretomorozsk

In the remote village of Sretomorozsk, Alyosha is known as an exceptional hunter. Villagers often share tales of his bravery, highlighting how he fearlessly protects the community from dangerous monsters. His reputation as a kind and reliable provider makes him a central, heroic figure in the region.
Surviving the Snezhnayan Wilderness
Alyosha’s survival depends on navigating the unforgiving Snezhnayan wilderness. Beyond his hunting skills, he faces the brutal, life-consuming cold that threatens everything in its path. This harsh environment poses a constant, deadly threat to anyone attempting to cross its frozen snowfields.
Alyosha Promotional Videos
Check out the official character preview videos for Alyosha from Genshin Impact's YouTube account!
Voicelines About Alyosha
To Be Added
There are currently no voicelines about Alyosha. Check back after her release for updates!
Alyosha's Voice Actors
Alyosha's Voice Actors & Their Notable Roles

Japanese Voice Actor: Gen Sato
| Series | Character |
|---|---|
| Dr. Stone | Chrome |
| Arknights | Qanipalaat |
| Heavenly Delusion | Maru |
| Bottom-tier Character Tomozaki | Fumiya Tomozaki |
English Voice Actor: Kevin Andrew Rivera
| Series | Character |
|---|---|
| Arknights: Endfield | Catcher |
| Fate/strange Fake | Hansa Cervantes |
| AFK Journey | Nazrik |
Character Related Articles
Character Tier Lists
All Characters
| Characters By Rarity | |||||||||||
|---|---|---|---|---|---|---|---|---|---|---|---|
| ★5 | ★4 | ||||||||||
| Characters By Roles | |||||||||||
| DPS List | Support List | Sustain List | |||||||||
| On-Field List | Off-Field List | ||||||||||
| Characters By Element | |||||||||||
| Pyro | Hydro | Anemo | Electro | ||||||||
| Dendro | Cryo | Geo | |||||||||
| Characters By Nation | |||||||||||
| Mondstadt | Liyue | Inazuma | |||||||||
| Sumeru | Fontaine | Natlan | |||||||||
| Snezhnaya | Nod-Krai | ||||||||||











