Biomes Location Map and Points of Interests in Subnautica 2! Read on for coordinate locations of each point of interest, map of different biomes as well as the resources there!
Biomes in Subnautica 2 & Their Map Coordinates
*Some biome names are currently provisional. Since many areas in Subnautica 2 Early Access do not yet have clearly confirmed in-game names, certain locations are labeled using descriptive placeholder names based on their geography or distinguishing features.
| Biome | Resources | POIs |
|---|---|---|
  Shallows Shallows-341670, 431289, -769 |
| - Welcome Center - Spider Dome - Colonist Bunker (Anita's Garden) |
 Leadzone Leadzone-306063, 405091, -7412 | - Cicada Wreck (Lander Garage) | |
 Plateaus Plateaus-332299, 406061, -2098 |
| - Old Habitat - Camp One - Colonist Bunker (Sophie's Retreat) |
 Anemone Hills Anemone Hills-347419, 406469, -1852 |
| |
 Blighted Coral Blighted Coral-353600, 423089, -2315 | ||
 Tufa Towers Tufa Towers-337782, 464620, -8744 |
| - Cicada Wreck (Canteen) - Colonist Bunker (Unauthorized MoA Modification) |
 North Raceway North Raceway-321845, 434279, -1083 | - Colonist Bunker (Quaker's Meetinghouse) | |
 South Raceway South Raceway-306201, 469486, -7385 | - Colonist Bunker (Nahema's Lab) | |
 Graveyard Graveyard-291791, 449888, -14119 | - Tailings Village - Tadpole Pens - Cicada Wreck (Empty Hold) - Hot Cave Base Camp | |
 Observatory Observatory-235383, 431106, -12458 |
| - Rosetta Stone - Needler Nest - Protected Zone Base Camp - Axum Observatory |
 Power Plant Power Plant-175763, 438260, -38798 |
| - Cicada Wreck (EVA Prep) - Cicada Wreck (Therapy Room) |
 Root Canyon Root Canyon-130435, 399815, -46658 |
| - Metal Farms - Cicada Wreck (Stairway to Heaven) |
All Points of Interest
Click to jump to a section!
| ▼ Shallows | ▼ Leadzone | ▼ Plateaus |
| ▼ Tufa Towers | ▼ North Raceway | ▼ South Raceway |
| ▼ Graveyard | ▼ Observatory | ▼ Power Plant |
| ▼ Root Canyon | ||
Items marked with “(Nearby)” are found outside the area rather than directly within it, but are still close enough to reach with a short detour. Be sure to explore the surrounding area as well!
Shallows POIs
Welcome Center

| Coordinates | -333398, 438991, -697 |
|---|---|
| Location | Located approximately 70m South East of the Lifepod. |
Welcome Center Notable Scans
- Display Tank
- New Life Poster
- Dive Elevator (Nearby)
- Beacon (Nearby)
The Welcome Center is likely the first POI you'll visit in Subnautica 2 since it's the closest to the Lifepod. Try to prepare a Basic Battery before entering to avoid multiple trips.
Spider Dome

| Coordinates | -358496, 447297, -543 |
|---|---|
| Location | Located approximately 235m, (240°–255°) West-southwest of the Lifepod. |
Spider Dome Notable Scans
- Sonic Resonator
- Portable Locker
- 2x Beacons (Nearby)
- Dive Elevator (Nearby)
The Spider Dome is found along the wester edge of the map. There is an abundance of Quartz inside the dome, but underneath it, you'll find relics of the Cicada crew and some scans for new Blueprints.
Colonist Bunker (Anita's Garden)

| Coordinates | -321359, 428326, -3786 |
|---|---|
| Location | Located approximately 168m, 75° East-northeast of the Lifepod. |
Anita's Garden Notable Scans
- Biobed
- Single Bed
- Wakemaker Fragment (Nearby)
Anita's Garden is hidden inside a cave. From the Lifepod, head 70m Northeast to see some Cicada debris and some Mimic Pyons next to a cave with multiple entrances. Take the water current that leads inwards, then face Northeast to see a small hole in the cave wall. Enter that hole and follow it until you find Anita's Garden.
Leadzone POIs
Cicada Wreck (Lander Garage)

| Coordinates | -307189, 404957, -6017 |
|---|---|
| Location | Located approximately 380m, Northeast of the Lifepod. |
Lander Garage Noteable Scans
- Rebreather
- Tadpole Fragment
- Processor
- Bioreactor
Lander Garage Data Cards
- Anomaly
You can enter the Lander Garage from underneath the wreckage. The Data Card is locked behind some broken doors, so if you can, fabricate the Repair Tool before visiting.
Plateaus POIs
Old Habitat

| Coordinates | -336796, 398436, -4372 |
|---|---|
| Location | Located approximately 370m, North of the Lifepod. |
Old Habitat Notable Scans
- 2x Sonic Resonators
- Scanner Station
- Bioreactor
- 2x Processors
- 2x Battery Terminals
- 2x Wakemaker Fragments
- 4x Biobeds
- Safety First Poster
- Dining Table
- Lab Chair
- Small Coral Jar
Old Habitat Data Cards
- Cicada Debris
- Room
You can enter the Old Habitat through one of the working hatches in the back of structure. There are plenty of useful scans inside, so prepare batteries for your Scanner as needed.
Colonist Bunker (Sophie's Retreat)

| Coordinates | -332059, 393959, -6401 |
|---|---|
| Location | Located approximately 300m, 10° North-northeast of the Lifepod. Found in a cave next to the Old Habitat. |
Sophie's Retreat Notable Scans
- Biobed
- Floor Locker
- Single Bed
- Lab Chair
Sophie's Retreat is hidden inside the cave just next to the Old Habitat. Face the northwestern side of the Old Habitat and enter the northeastern cave opening. Hug the left cave wall and floor until you see two Medical Gel Sacs side by side, then turn around to see the hatch entrance to Sophie's Retreat.
Camp One

| Coordinates | -327717, 413341, -1658 |
|---|---|
| Location | Located approximately 270m, 30° North-northeast of the Lifepod. |
Camp One Notable Scans
- Scanner Station
- Wakemaker Fragment
- Habitat Builder
- Power Cell Terminal
- S Shelf
- Dining Table
- Dining Chair
Camp One is segmented into two halves, and is patrolled by an aggressive Marrowbreach. You can access the upturned room by flooding it via a button located within a broken corridor.
Tufa Towers POIs
Cicada Wreck (Canteen)

| Coordinates | -336293, 457759, -9405 |
|---|---|
| Location | Located approximately 260m South of the Lifepod. |
Canteen Notable Scans
- Repair Tool
- Processor
- Just Keep Swimming Poster
Canteen Data Cards
- Moonpool
The Canteen is found next to the Great Jaw (Giant Clam). You can enter through a small opening on the southwestern side. Be sure to grab the Moonpool Data Card for crafting your Tadpole.
Colonist Bunker (Unauthorized MoA Modification)

| Coordinates | -352892, 451311, -8766 |
|---|---|
| Location | Located approximately 250m Southwest of the Lifepod. |
Unauthorized MoA Modification Notable Scans
- Tadpole Fragment
- Rebreather
- Power Storage
- S Shelf
- Lab Chair
- Biobed
- Single Bed
- Floor Locker
- Dive Elevator (Nearby)
- Processor (Nearby)
- Lab Chair (Nearby)
- Power Transmitter (Nearby)
- Processor (Nearby)
- Floor Locker (Nearby)
Unauthorized MoA Modification Data Cards
- Room
- High Capacity Air Tank
The hatch entrance of the Unauthorized MoA Modification is located 150m Northwest of the Great Jaw. Be sure to investigate the unnamed Cicada debris nearby for additional scans.
North Raceway POIs
Colonist Bunker (Quaker's Meetinghouse)

| Coordinates | -321943, 449345, -4212 |
|---|---|
| Location | Located approximately 222m Southeast of the Lifepod. |
Quaker's Meetinghouse Notable Scans
- Repair Tool
- Bioreactor
- Biobed
- Single Bed
Quaker's Meetinghouse is hidden inside a cave that you enter from the bottom of a stone pillar. Be sure to interact with the Biobed after scanning it to expand your inventory.
South Raceway POIs
Colonist Bunker (Nahema's Lab)

| Coordinates | -307260, 451066, -8807 |
|---|---|
| Location | Located approximately 360m, 120° East-southeast of the Lifepod. |
Nahema's Lab Notable Scans
- Biobed
- Power Transmitter
- Power Storage
- Power Cell Terminal
- Lab Chair
Nahema's Lab Data Cards
- Nook
To spot Nahema's Lab, make sure you are level with the entrance as it is hidden from above. Keep your depth between 80-90m, and face North as you search along the walls for the crevace.
Graveyard POIs
Tailings Village

| Coordinates | -286367, 449300, -12844 |
|---|---|
| Location | Located approximately 540m, (105°–120°) East-southeast of the Lifepod. |
- 2x Tailing Chests
- Tailing Barrel
- Coral Jar
- Small Coral Jar
- Dive Elevator
- Axum Jar
- Repair Tool
- Tailing Drum
- Tadpole Fragment
- Thermal Plant
- Tailing Jar
- Processor
- Tailing Table
Tailings Village Data Cards
- Half Round Room
The Tailings Village is a general "area" as opposed to the usual structure. Thoroughly investigate each of the alien huts to ensure you don't miss anything important.
Tadpole Pens

| Coordinates | -272549, 435139, -15053 |
|---|---|
| Location | Located approximately 685m East of the Lifepod. |
Tadpole Pens Notable Scans
- 3x Tadpole Fragments
- Repair Tool
- Scout Ray Chassis
- Scout Ray Poster
- 4x Dining Chairs
- 2x Wall Lights Small
- Trash Can
- Power Transmitter
- Tall Axum Jar
- Axum Jar
- Small Axum Jar
- Coral Jar
- Small Coral Jar
- Hydroelectric Turbine (Nearby)
- S Shelf (Nearby)
- Processor (Nearby)
- Power Cell Terminal (Nearby)
Tadpole Pens Data Cards
- Half Round Room
- Small Crate
There are enough Tadpole Fragments within the Tadpole Pens to unlock the vehicle. Also, be sure to explore the debris outside of the pens for additional scans and data cards.
Cicada Wreck (Empty Hold)

| Coordinates | -28421, 436462, -4553 |
|---|---|
| Location | Located approximately 480m East of the Lifepod. |
Empty Hold Notable Scans
- Rebreather
- Biobed
- Power Cell Terminal
Empty Hold Data Cards
- Half Round Room
You can enter the Empty Hold through an opening on the North side, or through a small tear above the structure. Inside are valuable scans like the Rebreather and a Biobed that expands your inventory.
Hot Cave Base Camp

| Coordinates | -308063, 460092, -20692 |
|---|---|
| Location | Located approximately 460m Southeast of the Lifepod. |
Hot Cave Base Camp Notable Scans
- Biobed
- Power Cell Terminal
- Power Storage
Hot Cave Base Camp Data Cards
- Interior Wall
The Hot Cave Base Camp is found just below Nahema's Lab. Exit Nahema's Lab and move forward until you see 3 large holes on the seafloor. Enter the middle hole and head all the way to the bottom, then face Southeast to spot the camp.
Obeservatory POIs
Rosetta Stone

| Coordinates | -214074, 449280, -13234 |
|---|---|
| Location | Located approximately 1,250m, 100° East-southeast of the Lifepod. |
Rosetta Stone Notable Scans
- Spotlight
- Power Storage
- Time of Day Display
- Lab Chair
The Rosetta Stone is located approximately 255m Southeast of the entrance to the Axum Observatory. Despite lacking any notable scans, scanning the Rosetta Stone itself is the prize, as it allows the player to understand Alien writings and glyphs.
Axum Observatory

| Coordinates | -231855, 431539, -12654 |
|---|---|
| Location | Located approximately 1,080m East of the Lifepod. |
The Axum Observatory is the first structure you will find after crossing the Sparse Plains
and facing off against a Collector Leviathan. Initially, you'll be unable to enter the Observatory as you will need to progress through latter sections of the game first.
Needler Nest

| Coordinates | -192107, 445870, -27022 |
|---|---|
| Location | Located approximately 1,410m, 103° East-southeast of the Lifepod. |
Needler Nest Notable Scans
- Tadpole Haul Chassis
- Time of Day Display (Nearby)
- Modification Station (Nearby)
- Improved Fins (Nearby)
- Lab Chair (Nearby)
Needler Nest Data Cards
- Tadpole Depth Module Mk.1
Locate approximately 400m, 120° East-southeast of the Axum Observatory, almost underneath the Rosetta Stone, the Needler Nest is home to numerous, aggressive fish known as Needler Mangos. Prepare plenty of Distraction Flares before entering this area for the best chances of survival.
Protected Zone Base Camp

| Coordinates | -207243, 428504, -13590 |
|---|---|
| Location | Located approximately 1,300m East of the Lifepod. |
Protected Zone Base Camp Notable Scans
- Lab Chair
- Dining Table
- Trashcan
- Floor Locker
- Modification Station
- Power Storage
- Processor
- Rebreather (Nearby)
- Processor (Nearby)
- Improved Fins (Nearby)
- 2x Hydroelectric Turbines (Nearby)
Protected Zone Base Camp Data Cards
- High Capacity Air Tank
- Engine Efficiency
The Protected Zone Base Camp is found 250m East of the Axum Observatory and is marked by a Research Outpost
sign. Be sure to follow the wire leading out of the base camp for additional scans.
Power Plant POIs
Cicada Wreck (EVA Prep)

| Coordinates | -161396, 452118, -7862 |
|---|---|
| Location | Located approximately 1,800m, 103° East of the Lifepod. |
EVA Prep Notable Scans
- Bioscanner
- 3x Floor Lockers
- Improved Fins
- Dining Table
- Lab Chair
- Modification Station
- New Life Poster
- Biolab
EVA Prep Data Cards
- Photovoltaic Charger
The Cicada Wreck (EVA Prep) is the wreck being referred to in the audio logs found inside the Protected Zone Base Camp. EVA Prep is approximately 580m, 120° East-southeast of the Protected Zone Base Camp's hatch entrance.
Cicada Wreck (Therapy Room)

| Coordinates | -135502, 450172, -20295 |
|---|---|
| Location | Located approximately 2,050m East of the Lifepod. |
Therapy Room Notable Scans
- Modification Station
- Dining Table
- Sonic Resonator
- Work Light
- Tadpole Haul Chassis (Nearby)
- Advanced Battery (Nearby)
The Therapy Room is found approximately 960m East of the Observatory. About 105° East from EVA Prep. Just outside the Therapy Room is a ruined platform with more scans and loot, and if you continue to follow the trail of debris towards the sea floor, there's even more resources you can pocket.
Root Canyon POIs
Metal Farms

| Coordinates | -134722, 402468, -46628 |
|---|---|
| Location | Located approximately 2,170m, 85° East-northeast of the Lifepod. |
Metal Farms Notable Scans
- Numerous Metal Farms
- 2x Feedback Resonators
- Tadpole Haul Chassis
The Metal Farms is the furthest biome from the Lifepod, and is a very dangerous area filled with predatory sea creatures. Note that you can scan any of the visible Metal Farms to unlock the blueprint, and you can scare away the Tonguethief species by using the Resonator.
Cicada Wreck (Stairway to Heaven)

| Coordinates | -120424, 424878, -30046 |
|---|---|
| Location | Located approximately 2,170m East of the Lifepod. |
Stairway to Heaven Notable Scans
- Modification Station (Nearby)
- Advanced Battery (Nearby)
- Thermal Plant (Nearby)
Stairway to Heaven Data Cards
- 2x High Capacity Air Tank
The Stairway to Heaven is found along the eastern border of the game. Most notable are the scans found outside the structure as the wreckage itself serves as the entrance to a juvenile Angel Comb.
How to Check Biome Locations
View Coordinates

| X | -260428 |
|---|---|
| Y | 459659 |
| Z | -23171 |
Your current coordinates are found on the lower right side of the screen whenever you pause the game. These coordinates are in an XYZ format
.
Use the Life Pod and Compass

The Life Pod that you start the game in is stationary, so you can use it as a landmark in combination with the compass to get your bearings.
Out of Bounds Appears as Red Lines

When you're nearing the edge of the map, red lines will appear, and going further past these lines triggers a prompt that mentions how the game is still in early access. You can use the boundary as an additional tool for navigation.
Is There a Map in Subnautica 2?
No, There is No Map
Just like in the previous Subnautica games, Subnautica 2 does not have a map. You will have to rely on your compass and landmarks to navigate the new, hostile planet.
Related Articles
Recommended Guides
 Walkthrough (Early to Late-Game) Walkthrough (Early to Late-Game) |  Where to Go and What to Do Next Where to Go and What to Do Next | 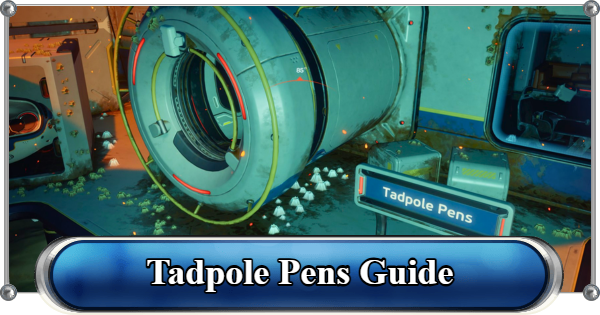 Tadpole Pens: How to Open the Locked Door Tadpole Pens: How to Open the Locked Door |
 Plant Farming Guide Plant Farming Guide |  Cooking and Recipes Guide Cooking and Recipes Guide |  Best Biomods Best Biomods |
 Best Tadpole Upgrades Best Tadpole Upgrades |  Metal Farm Guide Metal Farm Guide |
| Progression & Priorities | ||
|---|---|---|
 Early Game Early Game |  Mid-Game Mid-Game |  Endgame Endgame |
Lists
 All Leviathans All Leviathans |  All Items List All Items List | 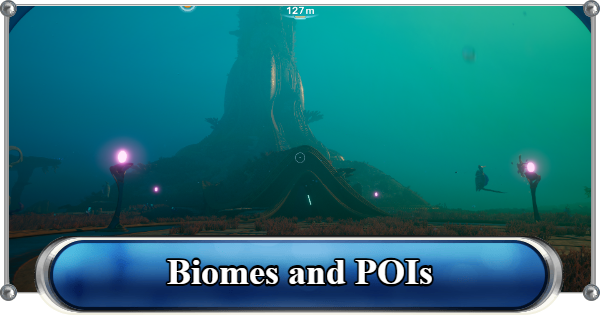 Biomes & PoI List Biomes & PoI List |
 Blackbox List Blackbox List |  Recipe Data Cards (Blueprints) Recipe Data Cards (Blueprints) |  Vehicle List Vehicle List |
 Buildings & Facilities List Buildings & Facilities List |  Best Base Locations Best Base Locations |  Best Tools to Craft Best Tools to Craft |
 Salt
Salt Silver
 Copper
 Lead
Lead Lucifer Rotsac
 Conduit Crystals
 Creature Enamel
 Enameled Glass
 Troilite
 Celestine
 Multiplayer Guide
 How to Eat Food (Digestion)
 How to Craft Items
 Drinking Water Guide
 How to Craft Air Tank?
 How to Get Basic Fins
 Scanner Station Guide
 How to Manage Your Oxygen?
 Base Guide
 Alien Ruins
 How to Use Coordinates
 Tadpole Guide
 How to Get More Storage
 How to Get a Rebreather
 Bioscanner Guide
 Night Survival Guide
 How to Heal
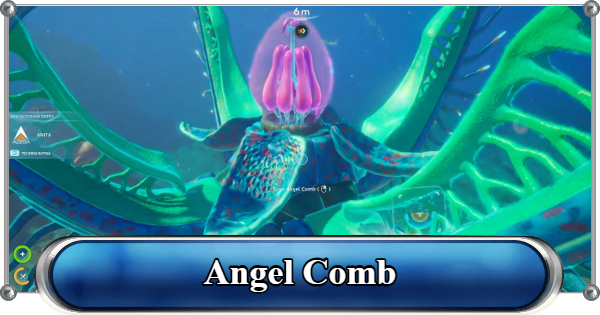 Angel Comb Guide
 How to Power Your Base
 How to Recharge Batteries and Tools
 How to Get the Repair Tool
 World Tree Guide
 Flashlight Guide
 Strong Acid Guide
 How to Get Heat Tolerance
 Scanner Guide
 How to Get Tadpole Depth Module Mk. 2
 How to Get a Wakemaker
 How to Get Fibrous Pulp
 How to Get a Wiring Kit
 How to Get Advanced Wiring Kit
 How to Get the Entangled Power Cell
 How to Refund Bases
 Specs Requirements
 New Game Features
 Is There Crossplay?
 Supported Devices
 Update & Roadmap
 How Long to Beat?
 Can You Play Subnautica 2 on PS5 and PS4?
 Is Subnautica 2 on Xbox?
 Is Subnautica 2 on Steam?
 Is Subnautica 2 on Switch?
