Refund Bases feature in Subnautica 2. See how to remotely delete bases, the step-by-step process to refund bases, and useful tips to keep in mind.
What Is the Refund Bases Feature?
Delete Bases and Recover Materials


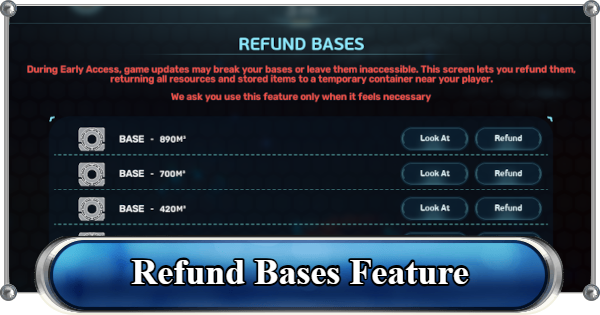
The Refund Bases feature in Subnautica 2 is a feature that allows you to instantly remove an entire constructed base from anywhere. Instead of manually dismantling every module with a tool, this feature removes the selected base and returns the building materials and stored items to you.
Temporary Containers Hold Materials

Once the refund is completed, a temporary container will appear directly beside your character. This container stores all recovered building materials from the base, along with any items left inside storage lockers, including Battery Terminals.
How to Refund Bases
- Open the Pause Menu and Click "Refund Bases"
- Verify the Base Using the "Look At" Button
- Click Refund to Remove the Base
- Open the Temporary Container
Open the Pause Menu and Click "Refund Bases"

Open the Pause Menu using the ESC key on PC or the Menu button on console. After that, click "Refund Bases."
Verify the Base Using the "Look At" Button

Click the "Look At" button beside the base name. Your character will automatically face the selected base, allowing you to confirm that you have chosen the correct one before proceeding.
Click "Refund" to Remove the Base

Once you have confirmed the location, click the Refund button beside it. The base will immediately disappear, and a temporary container containing all refunded materials will appear in front of your character.
No Undo Option Available
You cannot undo a base refund. There is currently no in-game undo feature, so double-check the selected base before confirming the refund. There is also no confirmation pop-up after clicking Refund, so make sure you only select the base you intend to remove.
Open the Temporary Container

After refunding the base, open the temporary container that appears in front of your character. Inside, you'll find all recovered building materials and any items that were stored in the refunded base.
Tips When Refunding Bases
Always Use the Look At Button First
Treat the Look At option as an important confirmation step. Since the list only displays base names or coordinates, it can be easy to select the wrong outpost by mistake. Always use "Look At" first to verify that you are refunding the correct base.
Travel to Your New Base Location First

Because the temporary container appears exactly where your character is standing when you select "Refund," avoid using the feature while far from your destination. Travel to your preferred biome or new base location first, then refund the old base to reduce the amount of time to move materials.
Best Base LocationsTemporary Containers Can't Be Moved

The temporary container created by the Refund Bases feature cannot be picked up or moved. Make sure you have enough inventory space available to collect all the recovered materials.
Empty Temporary Containers Disappear
Once every item has been removed from the temporary container, it will automatically disappear. It will remain in place as long as it still contains materials.
Cannot Be Used as Storage

Keep in mind that the temporary container is not a storage solution. You can only take items from it, and inventory items are grayed out, preventing you from placing anything inside.
Base Refund Marker Will Appear

If you swim away from the location of the temporary container, the game automatically creates a dedicated Base Refund marker. This makes it easy to relocate your recovered materials if you need to free up inventory space before collecting everything.
Related Articles
Recommended Guides
 Walkthrough (Early to Late-Game) Walkthrough (Early to Late-Game) |  Where to Go and What to Do Next Where to Go and What to Do Next |  Tadpole Pens: How to Open the Locked Door Tadpole Pens: How to Open the Locked Door |
 Plant Farming Guide Plant Farming Guide |  Cooking and Recipes Guide Cooking and Recipes Guide |  Best Biomods Best Biomods |
 Best Tadpole Upgrades Best Tadpole Upgrades |  Metal Farm Guide Metal Farm Guide |
| Progression & Priorities | ||
|---|---|---|
 Early Game Early Game |  Mid-Game Mid-Game |  Endgame Endgame |
Lists
 All Leviathans All Leviathans |  All Items List All Items List |  Biomes & PoI List Biomes & PoI List |
 Blackbox List Blackbox List |  Recipe Data Cards (Blueprints) Recipe Data Cards (Blueprints) |  Vehicle List Vehicle List |
 Buildings & Facilities List Buildings & Facilities List |  Best Base Locations Best Base Locations |  Best Tools to Craft Best Tools to Craft |
 Salt
Salt Silver
 Copper
 Lead
Lead Lucifer Rotsac
 Conduit Crystals
 Creature Enamel
 Enameled Glass
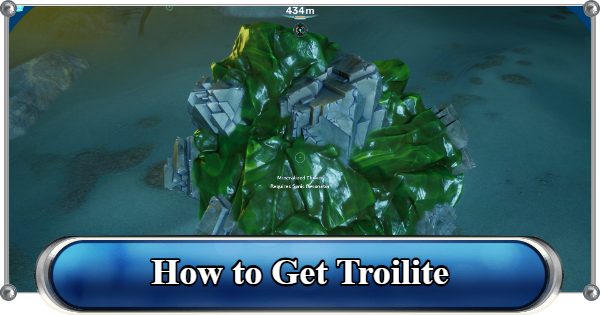 Troilite
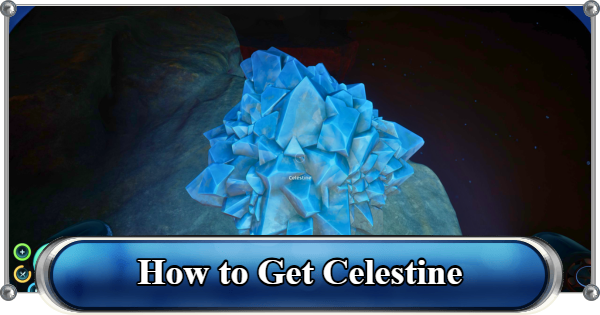 Celestine
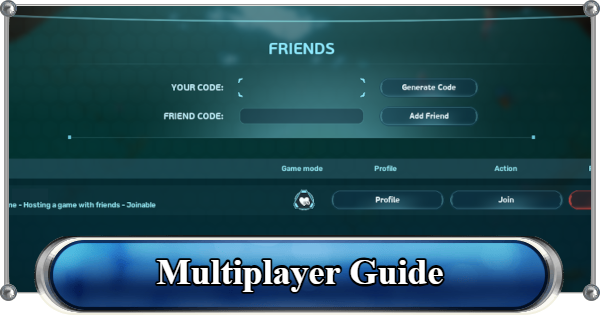 Multiplayer Guide
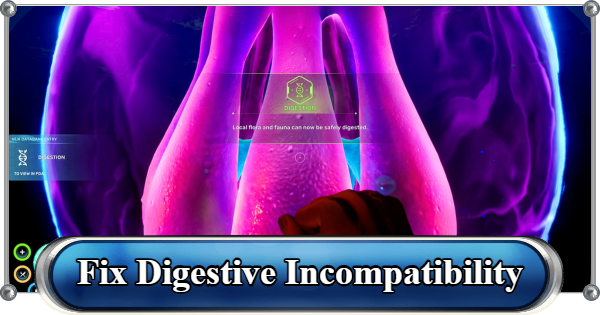 How to Eat Food (Digestion)
 How to Craft Items
 Drinking Water Guide
 How to Craft Air Tank?
 How to Get Basic Fins
 Scanner Station Guide
 How to Manage Your Oxygen?
 Base Guide
 Alien Ruins
 How to Use Coordinates
 Tadpole Guide
 How to Get More Storage
 How to Get a Rebreather
 Bioscanner Guide
 Night Survival Guide
 How to Heal
 Angel Comb Guide
 How to Power Your Base
 How to Recharge Batteries and Tools
 How to Get the Repair Tool
 World Tree Guide
 Flashlight Guide
 Strong Acid Guide
 How to Get Heat Tolerance
 Scanner Guide
 How to Get Tadpole Depth Module Mk. 2
 How to Get a Wakemaker
 How to Get Fibrous Pulp
 How to Get a Wiring Kit
 How to Get Advanced Wiring Kit
 How to Get the Entangled Power Cell
 Specs Requirements
 New Game Features
 Is There Crossplay?
 Supported Devices
 Update & Roadmap
 How Long to Beat?
 Can You Play Subnautica 2 on PS5 and PS4?
 Is Subnautica 2 on Xbox?
 Is Subnautica 2 on Steam?
 Is Subnautica 2 on Switch?
