











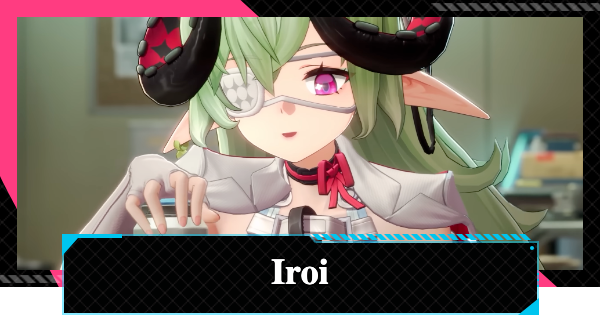
Iroiguide for Neverness to Everness (NTE). Find Iroi's best build, best team comp, character kit, recommended Arcs, Cartridges, and Modules.
Table of Contents
| Related Articles | |
|---|---|
 Character Tier List Character Tier List | Best Team Comp |
Iroi - Overview
 Liquid
Iroi is an Anima healer and support who provides both healing and attack buffs. By managing her exclusive resource, "Imagination," she can deploy powerful continuous healing. Her greatest strength, however, is her unique ability to control and revive fallen allies.
Rating
| Best Tier | Reroll Tier | Life Skills | Exploration |
|---|---|---|---|
| | | |
User Score
Best Build & Console for Iroi
Recommended Console for Iroi: Speedy Hedgehog
| Cartridge | Effect |
|---|---|
| Speedy Hedgehog | Epic: Charge Efficiency +12% Legendary: After the wearer triggers Ultimate, all team members' ATK +15% for 20s. This effect does not stack. |
*▲ Epic: 2-Set Effect, Legendary: 4-Set Effect
The recommended Console for Iroi is Speedy Hedgehog. It features an effect that increases the entire team's ATK after using an Ultimate. While it doesn't boost ATK-scaling buffs, it significantly increases the damage-over-time (DoT) of Iroi's Ultimate. This makes it ideal for an off-field playstyle where you cast her skills and swap to your main damage dealer.
"Fireflies and the Forest" For Attacker Builds
Speedy Hedgehog's team buff does not stack, so you should only equip one per team. If another teammate is already using it, we recommend equipping Fireflies and the Forest to build Iroi as an attacker. For this setup, prioritize Cartridge stats that directly boost her damage output.
Prioritizing Healing Bonus Is Optional
You can obtain Healing Bonus as a main stat on a Cartridge, but investing heavily in healing means sacrificing damage-oriented stats. If you take minimal damage during normal combat, lower the priority of healing stats and adjust your build for more offensive power.
Needed Modules
| Type III (┗) | Type III (┏) | Type III (┓) | Type III (┛) |
Sample Full Module

| Required Modules | |||
|---|---|---|---|
| Type II (Vertical)×1 | Type III (Horizontal)×2 | Type III (┗)×1 | Type III (┏)×1 |
| Type III (┓)×1 | Type III (┛)×1 | ||
Stat Priority
| Best Main Stats |
|---|
| ATK Bonus>Healing Bonus>Anima DMG Up>CRIT Rate |
| Best Sub-Stats |
| ATK Bonus>Flat ATK>CRIT Rate>CRIT DMG |
| Module Bonus |
| For each Module Type III equipped, ATK +10% |
Best Arc / Weapon for Iroi
The Wrong Gate is Recommended
| Arc | Detail |
|---|---|
| The Wrong Gate | ・ATK increase sub-stat ・Increases Anima DMG after healing ・Above effects last for 20 seconds and can be refreshed |
The recommended Arc for Iroi is The Wrong Gate. Its unique effect increases the wielder's own Anima DMG and all allies' DMG Dealt upon healing. Because Iroi frequently uses healing skills, this Arc perfectly synergizes with her kit to maximize her overall support capabilities.
Other Recommended Arcs
| Arc | Effect |
|---|---|
| Youthful Fantasy | ・ATK Increase Sub-Stat ・Increases Break Intensity ・Unlocks a Support Skill command |
| Mind Royale | ・Break Intensity Increase Sub-Stat ・Gains Ultimate Energy via Redirect Skill ・Can only trigger once every 20s |
| Call of the Twisted City | ・HP Increase Sub-Stat ・Increases healing efficiency via Redirect Skill ・Lasts 10s and cannot stack |
Iroi Best Team Composition
Charge Team Composition
| Support | Main DPS | Lakshana | Instant Cycle |
|---|---|---|---|
| Iroi | Shinku | Hathor | Esper Zero |
This team composition features Iroi as a support for Shinku, who serves as your main DPS. You can also trigger Charge and provide buffs and healing by weaving in Skills, Ultimates, and Cycle activations as needed.
Basic Gameplay Strategy
| Order | Strategy |
|---|---|
| Use Iroi's Skill or Ultimate to apply buffs. | |
| Switch to Shinku and build Defiant Spirit to prep for her Ultimate. | |
| When Cycle is ready, swap back to Iroi to reapply buffs, then switch to Esper Zero. | |
| Trigger Instant Cycle with Esper Zero and swap to Hathor to proc Remora and Charge. | |
| Unleash Shinku's Ultimate and execute her Surging Crimson combo. |
Alternative Characters
| Character | Features |
|---|---|
| Skia | - Replaces Hathor - Shorter Charge duration, but works well as a substitute - Can reapply Remora - Recommended to adjust Ascension effects and Arc |
| Chaos | - Replaces Hathor - Great option if you want a sub-DPS alongside Shinku - Gains Ultimate Energy while off-field, making high-damage attacks easier to set up |
| Hotori | - Replaces Esper Zero - Offers support in place of Instant Cycle - Record Skill usage still allows for decent Charge uptime |
Blossom-Focused Build
| Support | Main | Sub | Instant Chain |
|---|---|---|---|
| Iroi | Nanally | Jiuyuan | Esper Zero |
This beginner-friendly team composition maximizes Blossom enhancements provided by Iroi and other Anima characters. Nanally serves as your main attacker. The core strategy revolves around maintaining Iroi's buffs while triggering frequent Chain attacks to deal massive damage.
Basic Strategy Rotation
| Order | Strategy |
|---|---|
| Step 1: Start by casting Iroi's Redirect Skill or Ultimate to apply team buffs. | |
| Step 2: Switch to Esper Zero and trigger Instant Chain, then quickly tag in Nanally to activate the Blossom effect. | |
| Step 3: Stay on Nanally for your main attack phase. Once the Chain meter is fully charged, swap back to Esper Zero to use another Instant Chain. | |
| Step 4: Swap to Iroi to refresh your buffs, or tag in Jiuyuan to stall while waiting for Nanally to recover. | |
| Step 5: Repeat this rotation loop to maintain maximum damage uptime. |
Replacement Candidates
| Character | Features |
|---|---|
| Mint | - Great alternative if you are missing Anima characters. - Provides a Redirect Skill with a very short Cooldown (CT). - Expands the overall damage Area of Effect (AoE) for Blossom. - Can function as a solid sub-attacker with higher Ascension levels and proper training. |
| Shinku | - Direct replacement for Esper Zero. - Unlocking Ascensions 3 and 4 enables Instant Chain. - Adding Shinku makes a Charge-focused build a strong alternative option. |
Low-Rarity Team Composition
| Main | Instant Cycle | Lakshana | Anima |
|---|---|---|---|
| Iroi | Esper Zero | Skia | Mint |
This free-to-play team triggers Charge using Iroi's buffs alongside Esper Zero's instant Cycle. Mint turns Blossom into an AoE attack, which pairs nicely with Iroi's crowd-control grouping.
Basic Strategy
| Order | Strategy |
|---|---|
| Use Iroi's Redirect Skill or Ultimate to set up buffs. | |
| Swap to Esper Zero, activate instant Cycle, then swap to Mint to proc Blossom. | |
| Fight on Mint, and once Cycle maxes out, swap back to Esper Zero for instant Cycle. | |
| Switch to Skia to proc Remora and Charge. | |
| Loop this rotation. |
Alternative Characters
| Character | Features |
|---|---|
| Shinku | - Replaces Mint - Serves as your main DPS - Trades Blossom buffs for higher raw damage |
| Nanally | - Replaces Skia - Focuses further on boosting Blossom - Strong candidate for main DPS |
| Hotori | - Replaces Esper Zero - Offers support instead of instant Cycle - Using her Record Skill still allows decent Charge uptime |
Iroi - How To Play & Rotations
Basic Playstyle
- Heal allies while providing ATK buffs with skills
- Build up "Imagination" to unleash a powerful Ultimate
- Can temporarily revive defeated allies
Heal Allies While Granting ATK Buffs
Iroi is a support character who heals the entire team with her Redirect Skill while granting buffs based on her own ATK. She can also group enemies together and follow up with sheep attacks, making her an exceptional support for both offense and defense.
Buff Effect Breakdown| Buff Effect Breakdown | ||
|---|---|---|
| Redirect Skill | ATK Increase 20% of Iroi's Base ATK | 20 seconds |
| Support Skill "Sympathetic Nerves" | 5% DEF Ignore upon healing | 20 seconds |
| Trait: Transparent (Awakening 5) | Adds an ATK Increase effect to Sympathetic Nerves 15% of Iroi's Base ATK | 20 seconds |
| Arc "The Wrong Gate" | 15% Outgoing Damage Increase upon healing (up to 30% with Arc Ascension) | 20 seconds |
Build Up "Imagination" to Unleash a Powerful Ultimate
Iroi's Ultimate changes its effects based on the amount of her exclusive resource, "Imagination," that has been accumulated. Fill the "Imagination" gauge with Basic Attacks and skills before activating her Ultimate to grant continuous healing to the team while dealing sustained Anima damage to enemies.
Temporarily Revive Defeated Allies
When Iroi is in the party, defeated allies enter the "Regression" state, allowing them to continue performing support attacks. In addition, activating her Ultimate with a full "Imagination" gauge will temporarily revive allies in the Regression state, letting them rejoin the battle.
Recommended Ascension Effect for Iroi
A1 "Iterated Prisoner's Dilemma" Is Top Priority
It's highly recommended to get A1 "Iterated Prisoner's Dilemma." It lets her continuously build Imagination off-field, filling it to max right as battle starts, massively improving her overall usability.
A2 "Trait: Transparent" Is Recommended
If you plan to push further, her A2 upgrade "Trait: Transparent" is another great pick. It boosts her base ATK to scale up her healing output while also beefing up her buffing capabilities, greatly enhancing her overall support capabilities.
Ascension Effects at a Glance

| Awakening | Effect |
|---|---|
| Iterated Prisoner's Dilemma | [Recommendation] ★★★ Restores 3 Imagination per second while Iroi is off-field. Increases Imagination gain by 30% and grants Iroi maximum Imagination upon entering battle. |
| Strategy: Tit for Tat | [Recommendation] ★★★ Summons Morpheus, Icelos, or Phantasos at random when any ally casts a skill, performing 1 assist attack that deals DMG equal to 200% of Iroi's ATK. Cooldown: 5s. |
| Trait: Cooperative | [Recommendation] ★★・ Increases Iroi's healing effects by 36% |
| Trait: Retaliatory | [Recommendation] ★・・ Increases ATK Ratio for allies in the Regression state. Morpheus: Sweet Dreams: up by 30% Deep Slumber: up by 30% Icelos: Little Prick: up by 30% Double Dose: up by 30% Phantasos: Lullaby Time: up by 30% Off-Key: up by 30% |
| Trait: Transparent | [Recommendation] ★★★ Additional Sympathetic Nerves Effect: Increases all team members' ATK by 15% of Iroi's Base ATK for 20s. |
| Trait: Forgiving | [Recommendation] ★★・ Grants 100% HP, 50 Cycole Energy, and 50 Ultimate Energy to the character revived after Iroi ccast 3.8-Billion-Year Mirage. |
Resonance Effect (A3 & A6 Effects)
| Resonance | Effect |
|---|---|
| Primate Among All Things (A3) | Increases the skill level of Collaboration, Future Self Continuity, and 3.8-Billion-Year Mirage by 1. Increases all team members' DEF by 30% while Iroi is on the team. |
| Self-Proclaimed Crown of Creation (A6) | Increases all team members' Crit DMG by 25% while Iroi is on the team. Increases Iroi's DMG dealt by 15% and Crit Rate by 5% for each ally in the Regression state. |
Iroi Stats & Leveling Priority
Stats
| ATK | 75 |
|---|---|
| DEF | 75 |
| HP | 1420 |
| CRIT Rate | 5% |
| CRIT DMG | 50% |
| DMG Up | 0% |
Esper Ability Leveling Priority
| Basic Attack | Redirect Skill | Ultimate | Support |
|---|---|---|---|
| ★★★・・ | ★★★★・ | ★★★★★ | ★★・・・ |
Basic Attack: Collaboration
Collaboration
| Cycle Rate: 36 Summons lambs to perform up to 5 consecutive attacks, dealing Anima DMG. Builds up Imagination when attacks hit. |
Daydream
| Hold Basic Attack to charge up, consuming Imagination based on the charge duration to unleash up to 3 instances of Daydream, dealing Anima DMG. Hold Basic Attack during Reflexive Responce, Bang!, Future Self Continuity, and 3.8-Billion-Year Mirage, consuming Imagination to unleash the 3rd instance of Daydream, dealing Anima DMG. |
Lucid Dream
| Hold Basic Attack again after Iroi uses Basic Attack: Daydream to consume Imagination and summon Morpheus to unleash sustained fire that deals Anima DMG. |
Wakey-Wakey
| Press Basic Attack while airborne to plunge, dealing 1 instance of Anima DMG to an area upon impact. Increases DMG based on fall height, up to 100%. Builds up Imagination on hit. |
Reflexive Response
| Triggers when using Basic Attack: Collaboration after performing a Critical Dodge. Throws Morpheus at the target, dealing 1 instance of Anima DMG and reducing Break. Builds up Imagination on hit. |
Attributes
| Collaboration: 1st Instance DMG Ratio & Builds up Imagination: 76% , 2 Collaboration: 2nd Instance DMG Ratio & Builds up Imagination: 15.9%×3,3 Collaboration: 3rd Instance DMG Ratio & Builds up Imagination: 10.3%×8,3 Collaboration: 4th Instance DMG Ratio & Builds up Imagination: 70.2% , 4 Collaboration: 5th Instance DMG Ratio & Builds up Imagination: 25.8%×3,8 Plunge DMG Ratio & Builds up Imagination: 36% , 2 Daydream: 1st Instance DMG Ratio: 36.8%×3 Daydream: 1st Instance DMG Ratio: 88.4% Daydream: 1st Instance DMG Ratio: 39.8% Daydream: Imagination Cost: 20 Lucid Dream: DMG Ration & IImagination Cost: 23.7%×35,10 Critical Riposte Ratio & Builds up Imagination: 134% , 4 Cycle Energy: 36 |
Redirect Skill: Future Self Continuity
Self-Identity Extension
| Cooldown: 12 Sec. Press to activate. Summons lambs to heal all team members once and grant them an ATK bonus based on Iroi's Base ATK. Summons three lambs to attack respectively, dealing Anima DMG and pulling in nearby enemies. Using this skill builds up Imagination. |
Future Self Continuity
| Cooldown: 12 Sec. Hold to activate. Creates dreamlike illusions during battle, causing 3 allies to enter the Regression state and assist in battle. Regression is automatically removed after leaving combat. |
Passive
| Cooldown: - Sec. While Iroi is on the team and in combat, any ally who falls enters the Regression state. Builds up Imagination when any fallen ally enters the Regression state. |
Attributes
| Redirect Skill: Three Lambs' Attack Ratio: 150%+17.9%×7+125% Bonus Ratio Based on Iroi's Base ATK: 20% ATK Bonus Duration: 20s Healing Ratio: 94.3% Redirect Skill Cooldown: 12s Redirect Skill Cycle Rate: 8 Redirect Skill: Builds up Imagination: 16 Builds up Imagination when an ally falls: 20 Regression: Morpheus - Sweet Dreams Base Attack Ratio: 55.5% Regression: Morpheus - Deep Slumber Base Attack Ratio: 41.6%×5 Regression: Icelos - Little Prick Base Attack Ratio: 89.2% Regression: Icelos - Double Dose Base Attack Ratio: 178.4% Regression: Phantasos - Lullaby Time Base Attack Ratio: 94.2% Regression: Phantasos - Off-Key Base Attack Ratio: 188.4% |
Ultimate
3.8-Billion-Year Mirage
| Energy Cost: 100 Cooldown: 16 Sec. Return to the first dream. Opens the gate to a dream and triggers different effects based on the amount of Imagination built up. If Imagination has not reached the required threshold: Iroi opens the Dream of the Horned Gate, continuously healing all allies. If Imagination has reached the required threshold: Iroi opens the Dream of the Ivory Gate, continuously dealing Anima DMG to enemies inside the dream. During this time, press and hold the avatar icon of a character in the Regression state to revive them and restore some HP. This effect can revive up to 1 character during each dream. The dream continuously consumes Imagination. When Imagination is depleted, the dream ends, and revived characters return to the Regression state. While the dream is active, Imagination cannot be built up, but casting Daydream and Lucid Dream do not consume Imagination. |
Attributes
| Post-Cast Healing Ratio: 141.3% Continuous Healing Ratio: 31.4% Post-Cast DMG Ratio: 300% DoT Ratio: 25% Imagination Limit: 100 Within the Dream: Imagination Cost per Second: 8 Cooldown: 16s Ultimate Energy Cost: 100 |
Support Skill
Bang!
| Just in time! Picks up Morpheus and strikes forward, dealing 1 instance of Anima DMG, healing all team members, and building up Imagination. |
Mirror Image
| Blossom Enhancement: Generates a Vita Bud Copy when the current Vita Bud has existed for 3s. This copy cannot duplicate and does not count towards the Vita Bud limit. The copy produces 20 Copied Vita Pistils. Every 0.5s, once Copied Vita Pistils flies towards a target within range and explodes, dealing 37.5% of the original Vita Pistil's DMG. |
Sympathetic Nerves
| Grants all team members an additional 5% DEF Ignore for 20s when performing healing. |
Attributes
| DMG Ratio: 200% Healing Ratio: 60% Builds up Imagination: 10 |
Iroi Life Skill & Exploration
Increase Visitor Count and Reduce Ingredient Consumption

Iroi possesses management-related Life Skills. Assigning her to a shop increases visitor count and reduces ingredient consumption rate, allowing you to earn Fons efficiently.
The Cafe by Origen - Coffee Shop GuideImprove Swift Travel Efficiency

Iroi also has skills that raise the base fare and satisfaction limit for Swift Travel, helping you boost your Fons earnings efficiently.
Swift Travel GuideGet Growth Items From Small Animals

Iroi has a unique character trait where interacting with small animals in the field grants random growth items. Since rewards can be obtained up to 3 times per day, make full use of this during your daily exploration.
Small Animals Location MapIroi Life Skill
Welcome!
| Lv1 | Iroi increases Traffic by 18. |
|---|---|
| Lv2 | Iroi reduces Ingredient Consumption Rate by 1%. |
| Lv3 | Iroi increases Traffic by 18. |
| Lv4 | Iroi reduces Ingredient Consumption Rate by 1%. |
| Lv5 | Iroi increases Traffic by 27. |
Ride-Along Chat
| Lv1 | Grants an additional 1000 Fons in Base Fare for each order in Swift Travel. |
|---|---|
| Lv2 | Increases each customer's satisfaction limit in Swift Travel by 25 points. |
Iroi Ascension Materials & Number Needed
Ascension Materials
| A1 | Fading Silhouette×5Beetle Coin×25000 |
|---|---|
| A2 | Fading Silhouette×12A Page from Delusion's Shore×2Beetle Coin×50000 |
| A3 | Blurred Silhouette×6A Page from Delusion's Shore×8Beetle Coin×75000 |
| A4 | Blurred Silhouette×12A Page from Delusion's Shore×16Beetle Coin×100000 |
| A5 | Chaos Silhouette×6A Page from Delusion's Shore×24Beetle Coin×125000 |
| A6 | Chaos Silhouette×9A Page from Delusion's Shore×36Beetle Coin×150000 |
Esper Ability Enhancement Materials
| Lv.2 | FNG×2Fading Silhouette×2Beetle Coin×2000 |
|---|---|
| Lv.3 | FNG×3Fading Silhouette×3Beetle Coin×5000 |
| Lv.4 | FNG×5Fading Silhouette×5Beetle Coin×10000 |
| Lv.5 | CO×2Blurred Silhouette×2Beetle Coin×20000 |
| Lv.6 | CO×3Blurred Silhouette×3Beetle Coin×40000 |
| Lv.7 | CO×5Blurred Silhouette×5Good Boy Stamp×1Beetle Coin×60000 |
| Lv.8 | White Rose×3Chaos Silhouette×3Good Boy Stamp×1Beetle Coin×100000 |
| Lv.9 | White Rose×5Chaos Silhouette×5Good Boy Stamp×2Beetle Coin×100000 |
| Lv.10 | White Rose×8Chaos Silhouette×8Good Boy Stamp×4Beetle Coin×150000 |
Life Skill Enhancement Materials
| Lv.1 | Dreamless Seed×2Fons×500 |
|---|---|
| Lv.2 | Dreamless Seed×4Fons×1500 |
| Lv.3 | Dreamless Seed×10Fons×3600 |
| Lv.4 | Dreamless Seed×16Fons×6400 |
| Lv.5 | Dreamless Seed×24Fons×10000 |
Life Skill 2 Enhancement Materials
| Lv.1 | Dreamless Seed×16Fons×6400 |
|---|---|
| Lv.2 | Dreamless Seed×24Fons×10000 |
Iroi - Favorite Gifts
Refulgent Agreement Is the Best Gift

The best gift for Iroi is the Refulgent Agreement. It provides a large boost to Affection while remaining relatively inexpensive, making it the most efficient choice for daily gifting.
Puka Sweet Dreams Marshmallow for a Budget Option
If you want to save your Fons, the Puka Sweet Dreams Marshmallow is a fantastic alternative. While it grants less overall Affection, it is the absolute cheapest item among her favorite gifts.
List of Favorite Gift
- Affection400Price15000 FonsHow to Get- DSD POP (New Herland District)
- Affection1200How to Get- Obtained from Paid Products
- Affection100Price660 FonsHow to Get- Puka Candy Vending Machine
- Puka Candy Shop (Bridge Crossings)
- Puka Candy Shop (Miguel District)
- Puka Candy Shop (New Herland District) - AffectionPrice10000 FonsHow to Get- Oops! Chest Gift Shop (Illusion Town)
- Affection400Price15000 FonsHow to Get- Electronics Store (Illusion Town)
- Affection200Price4500 FonsHow to Get- Florist (Illusion Town)
- Affection200Price5000 FonsHow to Get- Oops! Chest Gift Shop (Bridge Crossings)
- Affection400Price10000 FonsHow to Get- Oops! Chest Gift Shop (Illusion Town)
How To Get Iroi?
- Limited Gacha
Iroi - Skins (Costumes)
| Skin |
|---|
 【Skin】Dreamweaver 【Character】Iroi 【Obtain】3,280 Riftcrystals *Currently on sale at a discount if eligible for the limited-time offer (2,680 Riftcrystals) |
 【Skin】Summer Dream 【Character】Iroi 【Obtain】2,480 Riftcrystals *Currently on sale at a discount if eligible for the limited-time offer (1,680 Riftcrystals) |
 【Skin】Archmage 【Character】Iroi 【Obtain】Scarborough Fair (Limited-Time Gacha) |
 【Skin】Starlit Night 【Character】Iroi 【Obtain】Bond Level 10 Reward |
 【Skin】Channeling... 【Character】Iroi 【Obtain】999 Nights - Button Shop |
Iroi Character Profile
Profile
| Esper Type | Anima |
|---|---|
| Birthday | 12/21 |
| Faction | Bureau of Anomaly Control, CSU-2 |
| Esper Ability | 「Infant Dream」 |
Oneiroi is a well-behaved kid who ticks all the boxes.
NTE Related Articles
Return to HomeRecommended Articles
Recommended Guide Articles
 Early Game Guide
 Mid-Game Guide
 Daily Things to Do
 Team Building Tips
 Hunter Level
 Appraisal Level
 Anomaly Commission List
 Beyond the Rails
 Get Chiz for Free
 Get Free S-Rank Arcs
 Mall Guide
 Oracle Stone
 Interactive Map
 Best In-Game Purchases
 How to Min-Max Consoles
 Hunter Exchange
 Latest Updates
Database
 All Items List All Items List |  All Furniture List All Furniture List |  Fish List Fish List |
 Vehicles List Vehicles List |  Hidden Achievements Hidden Achievements |  Voice Actor Cast Voice Actor Cast |
 Outfits and Skins Outfits and Skins |  Arcs Weapon List Arcs Weapon List |  All Cartridges List All Cartridges List |
 Gacha Machine Locations Gacha Machine Locations |  Achievements List Achievements List |  Common Enemy List Common Enemy List |











