











Learn how to unlock the Core Vault and defeat Mammon in the NTE Pink Paws Heist. Find all access cards, beat golden enemies, and maximize your Fons rewards.
| Related Articles | |
| Hethereau Hobbies | City Delivery |
| Racing | Swift Travel |
| Pink Paws Heist | Sea Angler |
| Mahjong Inferno | Tetrominoes |
| Owner's Selection | Super Sound |
| Fight Club | |
Table of Contents
- Major Updates in Version 1.3
- Pink Paws Heist Map and Phone Booths
- No-Combat Route for 190–220k Fons
- 270 - 360k Fons Route (with Hotori)
- How to Farm Fons Efficiently
- How to Enter Core Vault (Mammon)
- How to Access Manager Storage Room
- What to Do After Reaching Cap?
- Useful Characters for Pink Paws Heist
- What is the Pink Paws Heist?
- How to Play Pink Paw Heist
- Access Card Uses and Location
- Solo vs Multiplayer Differences
Major Updates in Version 1.3
Minimap Added


Starting in Ver. 1.3, a minimap will be added to Pink Paws Heist. This lets players check in-game information that previously had to be memorized, making the mode easier to navigate, especially for beginners and new players.
Changes to the Reward System

The 1,000,000 reward in Ver. 1.3 will be changed to Tycoon Incentive Fund. Details will need to be confirmed after the update, but the rewards appear to be shared with Going, Going, Gone! and other content that will become permanently available.
Going, Going, Gone! EventPink Paws Heist Map and Phone Booths
G Reception and Office


LG2 Collections & LG3 Vault


No-Combat Route for 190 - 220k Fons
Route Video
This is a route in NTE's Pink Paws Heist where you can earn 190–220k Fons without combat.
Step-by-Step Walkthrough
This walkthrough does not require use of a keycard.
- Open the door on the right and head to the lower floor
- Move to "LG1 - Office Floor"
- Take the left path at the fork
- Collect items and move to the room further in
- Collect the items in the room and go to the back room
- Go to the blue portal
- Proceed to the back while collecting items in the hall
- Enter the room on the right and collect the items
- Proceed to the back through the door on the left
- Go to the blue portal
- Go to the room with the red phone
- Return to the hall and enter the yellow portal
- Proceed right and collect the items
- Enter the portal and move to the room ahead
- Exit the room and enter the portal on the right
- Proceed to the back and collect the items
- Return to the portal and move to the hall
- After collecting items in the hall, enter the portal
- Move to the stairs and enter the portal
- Use Hotori's or Skia's skill to head to the elevator
- Collect items along the walls of the hall
- Move to the room on the left
- Follow the path while collecting items
- Enter the door on the right and proceed
- Move to the 2nd floor
- Collect items in a counter-clockwise direction
- Collect the items near the stairs
- Collect the items on the opposite side
- Collect the items in the Razor room
- Go down to the 1st floor through the door on the right
- Enter the room on the right
- Follow the path while collecting items
- Retreat to a nearby extraction point
From the starting point, open the locked door in the right corner and head through another locked door to the stairs.

Head down the stairs — enemies will spawn, ignore them — force open the elevator and ride it to LG1 - Office Floor.

At the fork, go left and enter the room immediately on your left.

Loot the room, then go through the non-entrance door to the room further in.

Loot this room too, then follow the path deeper in.
Step through the blue portal into the deposit room and grab everything inside.

Exit the portal and head straight back through the hall, looting as you go.
| Note! | Target time remaining at this point is 10 minutes. |

Midway down the hall, duck into the room on the right to loot it, then return to the hall and collect the remaining items.
At the end of the hall, go through the door to the left of the yellow portal.
Follow the path to the blue portal and loot inside. This room usually has multiple safes — if you have Arc: Time Bandit, use "Picky" to open them all at once.
Backtrack, enter the room on the left, and while looting, count the red telephones on the desks. Report the number to Nayi for 5,000 Fons.
| Note! | The telephone count is random each run. |

The room has both red and white telephones. Only the red ones count — check carefully before moving on.

Exit the room and step through the yellow portal on the right side of the hall.

Head right and collect items from the safe near the portal and the rooms on either side.
Step through the portal and collect the items in the room directly ahead.
Exit the room, head to the back right, and enter the portal hidden behind a board.
| Note! | Target time remaining here is 7 minutes. If you're running low, skip this portal and jump to step 18. |

Dodge the lasers and loot the room. The large safe here is slow to crack — use Picky to save time.

Backtrack through the portal and return to the hall.
Loot what remains in the hall, then step through the yellow portal.

Follow the path while looting, and enter the portal at the top of the stairs.
Use Hotori's or Skia's skill to slip past enemies and unlock the elevator, then ride up to LG2.
| Note! | Target time remaining here is 5 minutes. |
Let an enemy spot you, then duck into the room on the left. Once the search ends and the enemy resets, head to the elevator.

Start from the right side of LG2 and loot the walls and desks down the hall.
Once the hall is clear, head into the room on the left.

Loot the room, then cut through the hallway into the next room.
Go through the right door and loot the room just ahead.
Backtrack and take the stairs up to the 2nd floor.
Work through the room counter-clockwise, then follow the path out.

Head toward the stairs on your right and loot the area beside them.

Cross to the far side, loot everything, then enter through the door.

This room has the best loot in the run — check everything, including inside the glass cases.
| Note! | Target time remaining here is 2 minutes 30 seconds. If you're short on time, retreat from a nearby extraction point. |

Follow the path out of the Razor room and take the right door back down to the 1st floor.

At the bottom of the stairs, go right and loot the room.

Once you're done, follow the path and keep looting on the way out.

Return to the 1st floor hall and leave from the nearest extraction point.
Getting Spotted: What to Do
If spotted, move to another room and wait for it to deactivate.
Some Areas Have No Escape Route
In some spots, the Razor won't deactivate until you defeat the enemy. Use Hotori's or Skia's skill to avoid getting caught in the first place.
Use Picky on Rooms with Multiple Safes

Use Picky to crack all safes in a room at once instead of unlocking them one by one.
Time Bandit: Rating and Best CharactersExit with at Least 1 Minute Left

Aim to hit the extraction screen with at least a minute to spare. You fail if the timer expires before you confirm the retreat, so don't cut it close.
270 - 360k Fons Route (with Hotori)
Route Video
This is a route in NTE's Pink Paws Heist to earn 270–360k Fons. It follows the same chart as in the article.
Step-by-Step Walkthrough
This chart does not use a keycard.
- Open the door on the right and head to the lower floor
- Move to "LG1 - Office Floor"
- Take the left path at the fork
- Collect items and move to the room further in
- Collect the items in the room and move further in
- Go to the blue portal
- Proceed to the back while collecting items in the hall
- Enter the room on the right and collect the items
- Proceed to the back through the door on the left
- Go to the blue portal
- Go to the room with the red phone
- Return to the hall and enter the yellow portal
- Proceed right and collect the items
- Enter the portal and move to the room ahead
- Collect the items in the hall
- Head to the boss room and defeat the boss
- Use Hotori's or Skia's skill to head to the elevator
- Collect items along the walls of the hall
- Move to the room on the right
- Go to the room with the boss and defeat it
- Proceed to the room on the 2nd floor
- Move to the room at the back
- Defeat the golden armor anomaly
- Collect the items near the stairs
- Collect the items on the opposite side
- Collect the items in the Razor room
- Go down to the 1st floor through the door on the right
- Enter the room on the right
- Follow the path while collecting items
- Collect the items in the hall
- Retreat to a nearby extraction point
From the starting point, open the locked door in the back right twice and go down the stairs.
Head down the stairs — 3 enemies will spawn, defeat or ignore them — then take the elevator to LG1 - Office Floor.
At the fork, go left and enter the room immediately on your left.
Loot the room, then go through the non-entrance door to the room further in.
Loot this room too, then follow the path deeper in.
Step through the blue portal and collect the items inside.
Exit the portal and head straight back through the hall, looting as you go.
| Note! | Target time remaining at this point is 10 minutes. |
Midway down the hall, duck into the room on the right to loot it, then return and finish the hall.
At the end of the hall, go through the door to the left of the yellow portal.
Follow the path to the blue portal and loot inside. This room often has multiple safes, use Picky to save time.
Backtrack, enter the room on the left, and while looting, count the red phones on the desks. Report the number to Nayi in the room for 5,000 Fons.
| Note! | The phone count is random each run — check carefully. |
The room has both red and white telephones. Only the red ones count, check carefully before moving on.
Exit the room and step through the yellow portal on the right side of the hall.
| Note! | Target time remaining here is 8 minutes. |
Head right and collect items from the safe near the portal and the rooms on either side.
Step through the portal and collect the items in the room directly ahead.

Exit the room and collect the items in the hall.
If the boss room at the back of the hall is open, defeat the boss, collect the items, and proceed. If sealed, go back and check the boss at the warp point on the opposite side.
| Map Image |
|---|
 |
If both boss rooms are sealed, follow the path from the yellow portal to the elevator.
Use Hotori's or Skia's skill to slip past enemies and unlock the elevator, then ride up to LG2.
| Note! | Target time remaining here is 6 minutes. |
Let an enemy spot you, then duck into the room on the left. Once the search ends and the enemy resets, head to the elevator.

Start from the right side of LG2 and loot the walls of the hall counter-clockwise.
If the route under the front stairs is open, defeat the Phone Booth anomaly there. Then backtrack and continue exploring. If the path is closed, you'll handle it in Step 20.
Once the hall walls are clear, move to the room on the right and loot as you go.
Follow the path as shown in the video, move to the golden boss room, and defeat it.
If you skipped the Phone Booth in Step 18, defeat it at the portal destination in the back of this room. Enter the same portal to come back. If you already cleared it, skip this.
After defeating the boss, backtrack, take the stairs to the right of the Phone Booth up to the 2nd floor, and collect the items in the room.
| Note! | Target time remaining here is 4 minutes. If you're low on time, see the note below. |
If about 3 minutes remain, head to the hall via the corridor on the right (no door), then move to the Razor room at the back right. From there, continue from Step 26.
Go through the door at the back right and move to the room behind it.

Loot the room, then return to the elevator, open the shutter, and activate and defeat the golden armor anomaly in the hall beyond.

Head toward the stairs and loot the area beside them. If there's a golden enemy, activate and defeat it.
Cross to the far side, loot everything, and defeat any golden enemy you find. Then enter through the door.

This room has the best loot in the run — check everything, including inside the glass cases.
| Note! | Target time remaining here is 2 minutes. If you're short on time, head straight to an extraction point. |
Follow the path out of the Razor room and take the right door back down to the 1st floor.
At the bottom of the stairs, go right and loot the room.
Once you're done, follow the path and keep looting on the way out.
Back on the 1st floor, loot the central desk and surrounding areas. Activate and defeat any golden enemy you find.
Leave from the nearest extraction point.

If you have time to spare, take the stairs in the hall, head straight to the elevator, and drop down to LG3 - Safe Floor to grab the items there.
LG2 Is Your Priority Floor

LG2 items are worth more than LG1, so it's the more efficient floor for Fons. If time is tight in LG2, just check the LG1 golden boss and head straight up.
Prioritize Defeating Golden Enemies

Golden enemies drop a large number of items when defeated, more efficient than picking up scattered loot, so take them out whenever you see one.
Skip the Umbrella Golden Enemy Early On

The golden enemy carrying an Umbrella that appears early often drops nothing. Getting to LG2 is more valuable at that point, so leave it and move on.
Use Picky on Rooms with Multiple Safes
Use Picky to crack all safes in a room at once instead of unlocking them one by one.
Time Bandit: Rating and Best CharactersExit with at Least 1 Minute Left
Aim to hit the extraction screen with at least a minute to spare. You fail if the timer expires before you confirm the retreat, so don't cut it close.
How to Farm Fons Efficiently
One Set of Priority at a Time

Due to the time limit, collecting access cards, loot, opening vaults, and defeating the boss cannot all be completed in a single run, so multiple runs are expected. Plan your priorities based on your available resources.
Recommended Heist Runs
- Collect Earnings, Chaotic Core, and Vault Card
- Spider Boss, Laser Room, Gold Lantern, and Phone Booth Boss
- Open Vaults and Core Vault (Boss Fight)
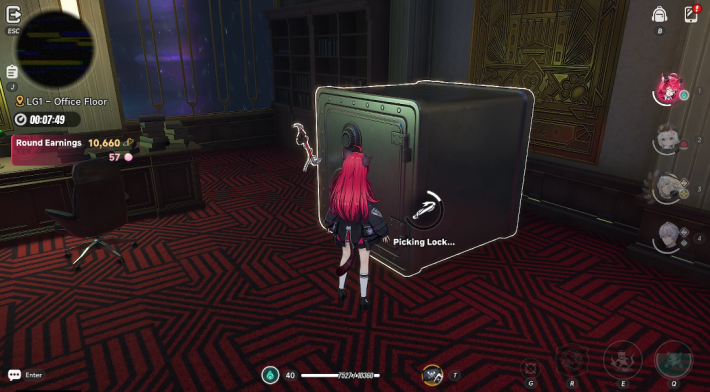
First, if you don’t yet have a Vault Access Card, an Advanced Clearance Card I, or a Chaotic Core, prioritize collecting them during your initial runs.
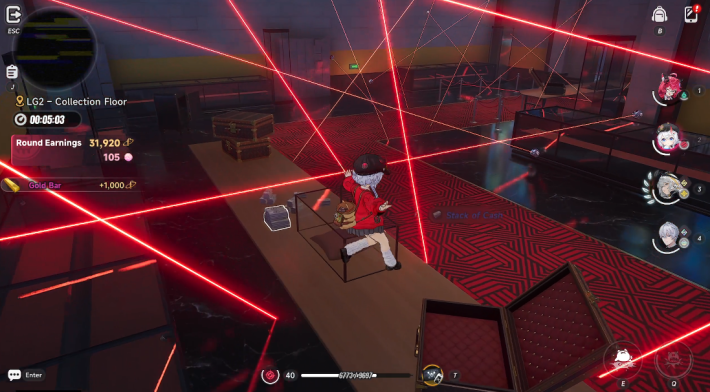
Second, if you skip looting rooms, defeat the Spider Boss, the Gold Lantern, the Phone Booth Boss, and Golden Enemies for solid Fons and a chance at Vault Access Cards. Loot the LG2 Laser Room if time allows.
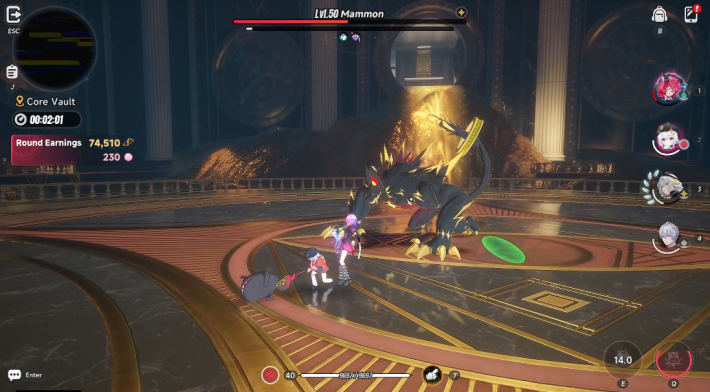
Third, once you have gathered enough Vault Access Cards, an Advanced Clearance Card I, and a Chaotic Core, dedicate a full run to opening vaults and focusing on the Final Boss, Mammon.
Skip LG1 Unless Spider Boss Appears
 Spider Boss Room "Open" Spider Boss Room "Open" |  Spider Boss Room "Close" Spider Boss Room "Close" |
Collectibles in LG1 rarely yield high rewards, so it is usually best to skip this floor. The exception is when the Spider Boss appears. The Spider Boss can spawn on the "LG1 - Office Floor" and can be checked via the door to its room. If it does not appear, skip LG1 and proceed to LG2.
Don't Forget to Open Two Safes
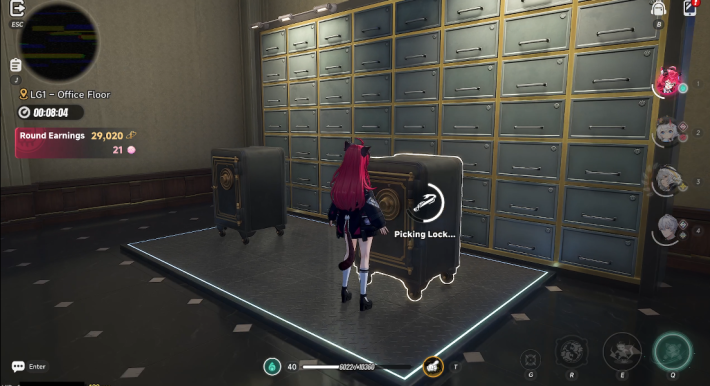
After defeating the Spider Boss, a connected room will open with a gold door and four safes. You can open at least two safes before the rest disappear.
LG1 Laser Room is Optional

If the Spider Boss does not appear and you still need Vault Access Cards, use the Laser Room for extra earnings. On the same floor, head right past the pillar and tables to reach the Blue Room. The LG1 Laser Room has multiple loot points and can spawn up to two safes.
Focus on LG2 - Collection Floor
- Collect in the Laser Room
- Defeat Gold Lantern Boss
- Defeat Phone Booth (Appears by Chance)
- Defeat Golden Enemies
The Laser Room on LG2 - Collection Room contains plenty of items, including gold bars, cash, and a safe.
The Gold Lantern is located in LG2 - Collection Room and may drop several gold bars, including Access Cards. The video demonstrates the easiest route to reach the Gold Lantern.
 Tip! Tip! | To maximize earnings, collect all items in each room as you make your way toward the Gold Lantern Boss. |
|---|
After defeating the Gold Lantern, a new door may open that leads to the Phone Booth Boss; otherwise, the path is blocked. The Phone Booth Boss fight begins when you interact with "Leave."

Unlike other floors, LG2 - Collection Floor features multiple Golden Enemies that drop chunks of gold bars, with a chance to drop Access Cards. Defeat them to increase your earnings.
Heist Farm Route Example (No Final Boss)
The Pink Paw Heist Farm Route Example demonstrates a basic route that yields at least 100k per run. Remain flexible based on the situation and time limit, such as opening Access Card doors encountered along the route.
Check Time Limit Before Final Boss
If you plan to attempt the Final Boss Mammon in LG3, ensure you have at least 8 minutes in solo or 4 minutes in a 3-4 player run due to his high HP.
| Note! | You might need to forgo most standard farming routines to secure enough time. Manage your time carefully to avoid failing. |
|---|
How to Enter Core Vault (Mammon)
Enter "LG3 - Vault Floor"

The Main Safe is located at the far end of the "LG3 - Safe Floor". Defeat the enemies encountered along the way as you advance.
Advanced Clearance Card I & Chaotic Core Needed

To access the Main Safe, you will need the "Advanced Clearance Card I" and the "Chaotic Core". Since there is no guaranteed method to obtain the Advanced Clearance Card I, you will need to repeatedly farm the Pink Paws Heist until it drops.
Chaotic Core Is Obtained: LG2 - Collections

The Chaotic Core is a guaranteed drop from defeating the four knights on the 2nd floor of the "LG2 - Collection Floor". Since the item appears with a short delay after the enemies are defeated, wait in the area briefly before moving on.
Battle with Mammon

Inside the Main Safe, you will face Mammon in battle. Its attack patterns are identical to those used during Anomaly encounter, so carefully observe its movements and focus on dodging and counterattacking to defeat it safely.
Mammon Strategy GuideCan Obtain About 70,000 Fons

Defeating Mammon will cause "Mammon's Treasure" to drop. Each treasure grants 10,000 to 20,000 Fons, allowing you to obtain approximately 70,000 Fons in total. After collecting the rewards, escape through the Phone Booth located inside the Vault.
How to Access Manager Storage Room
Manager Storage Route
This chart requires the Manager Storage Room Access Card.
- Head to the LG2 - Collection Floor
- Force Open the Door at the Back of 2nd Floor
- Move to the Room on the Right
- Use the Keycard on the Bookshelf Behind the Desk

First, head towards the "LG2 - Collection Floor".

After reaching the "LG2 - Collection Floor", go up to the 2nd floor and force open the door at the back.
After unlocking it, go through the door on the right.
You can approach the bookshelf behind the desk and use the "Manager Storage Room Access Card" to enter.
Electrical Room Route Chart
This chart requires the Electrical Room Access Card.
- Head to the LG2 - Collection Floor
- Move to the Room on the Right
- Move to the Room on the Left
- Exit Door and Enter Room on the Right
- Use the Keycard on the Front Door

Once you reach LG2 - Collections, proceed to the room on the right.

After taking the right, proceed to the room on the left.
Move to the room on the right after exiting the door.
Use the "Electrical Room Access Card" to unlock and enter the door ahead.
What to Do After Reaching Heist Cap?
Complete "Current" Challenge Targets
 Pink Paw Credits Pink Paw Credits |  Challenge Targets Challenge Targets(Current) |
It is recommended to complete the "Current" Challenge Targets after reaching the maximum Pink Paw Cap. Each completed "Current" target rewards 500 Paw-Paw Coins.
| Note! | The "Current" Challenge Targets reset every two weeks alongside the Pink Paw Heist reset, so make sure to complete them before then. |
|---|
Reset for Difficult Target

If you receive difficult targets, such as those requiring a high quantity of items, prioritize completing the easier targets first before using "Refresh." Refreshing will randomly generate a new set of targets, but it can only be used once per reset period.
Complete "Common" for Credits
 Common Rewards Common Rewards |  Credit Rewards Credit Rewards |
After reaching the Pink Paw Heist cap, the "Common" Challenge Targets should also be completed. If not, run the heist a few more times to finish the remaining targets and earn additional Pink Paw Credit. Reaching specific Pink Paw Credit milestones rewards players with Fons, Development Materials, and other valuable items.
Multiplayer Benefits and Drawbacks
Playing Pink Paw Heist in Co-op makes runs easier and helps complete certain Challenge Targets, such as earning enough Fons or clearing the run without any knockouts. However, some targets are less convenient in multiplayer. For example, the "Defeat Mammon" target only counts if you land the final hit on Mammon.
▼Jump to Multiplayer Pros and ConsOther Pink Paw Challenges

Other Pink Paw Challenges are optional and do not have a reset timer or completion deadline. You can complete them gradually while doing regular runs, and the rewards will unlock naturally over time.
Collect Pink Paw Coin in Heist Anytime

Unlike other Hethereau Hobbies, Pink Paw Heist does not consume City Stamina, allowing you to participate at any time even after reaching the maximum cap. Collecting valuable items during the heist rewards Pink Paw Coins, and it is possible to earn over 300 Pink Paw Coins in a single run.
Useful Characters for Pink Paws Heist
Hotori's Time-Stopping Ability
Hotori's Ultimate, which stops time, can also temporarily pause the mission timer. Use it against powerful enemies to gradually reduce their HP while preserving valuable time.
| Tip! | If used in multiplayer, time will not stop. and items cannot be collected, so solo play is recommended. |
|---|
Can Stop Time Outside of Combat
While out of combat, you can stop time by long-pressing the Basic Attack button. Use this mechanic to reduce travel time between objectives.
Lacrimosa's Life Skill & Bat Form

Lacrimosa's second Life Skill, Exclusive Bat-efit, increases the amount of Fons and Paw-Paw Coins earned from Pink Paw Heist as long as she is in the team. Additionally, her Character Trait, Sleepwalk (Bat Form), makes navigating and exploring Pink Paw Heist much easier.
Sleepwalk (Bat Form) Bypasses Lasers
Lacrimosa's Sleepwalk Character Trait allows her to pass through lasers. Additionally, while in Bat Form, contact with lasers does not deal damage. This allows her to bypass enemy encounters and efficiently collect loot from laser-protected rooms.
| Tip! | To activate Lacrimosa's Bat Form, press and hold the Dodge / Dash button. Note that maintaining the form continuously consumes Stamina. |
|---|
What is the Pink Paws Heist?
A Minigame at Pink Paws Bank HQ

| Unlock Condition | Tycoon Level 10 |
The Pink Paws Heist in NTE is a minigame that can be started at the Pink Paws Bank HQ. In this mode, you can earn a large amount of Fons based on your performance. There is a 12-minute time limit, so collect as many Collection items as possible within the time limit to maximize your earnings.
▼Location of Pink Paws Bank HQ
Does Not Consume City Stamina

The Pink Paws Heist challenge does not consume City Stamina, allowing unlimited attempts. Participate whenever time permits.
Fons Capped per Update Cycle
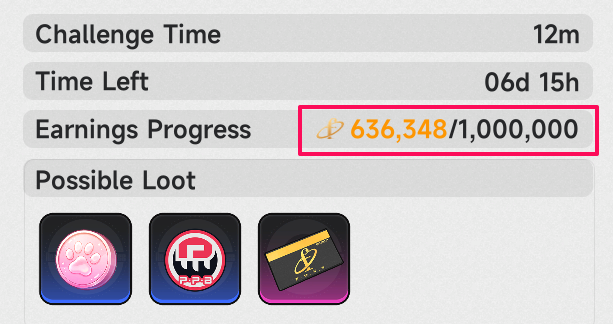
The amount of Fons obtained from the Pink Paws Heist is capped per update cycle (2 weeks), with a maximum limit of 1 million Fons. Since Fons are used for various purposes such as purchasing vehicles, run the challenge repeatedly during the period to accumulate as much as possible up to the cap.
Why Farm Pink Paw Heist Until Cap?

Fons is required to increase your Tycoon Level. Reaching specific Tycoon Level milestones unlocks additional high-value materials in the Hunter Exchange, including Annulith, Tri-Key, Dreamless Seed, and more.
Each Tycoon Level also grants over 300 Hunter Level EXP (increases as you level up Tycoon Levels) , allowing you to level up faster. Because of this, Pink Paw is one of the most efficient locations for farming Fons until you reach the cap.
| Related Article | |
|---|---|
| Hunter Exchange Shop | Hunter Level Guide |
Get Vehicles and Outfits

In the Pink Paws Heist exchange shop, you can trade Paw-Paw Coins for various items. Vehicles and outfits are exclusive to this shop, so run the challenge repeatedly to collect more Paw-Paw Coins.
Heist Multiplayer Also Available
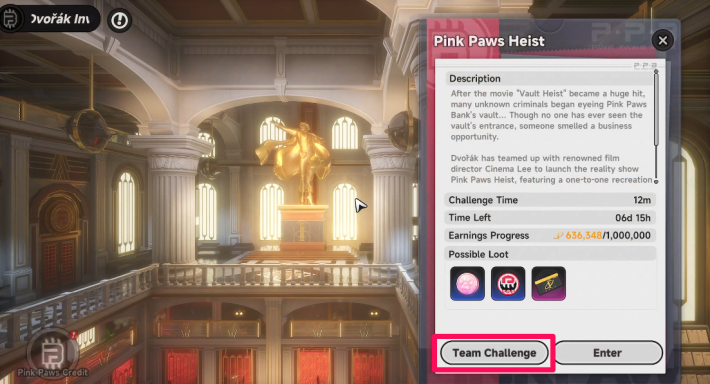
The Pink Paws Heist can be initiated by the World host and completed cooperatively with other players in the same World.
Pink Paws Heist Walkthrough
Go to the Pink Paws Bank HQ
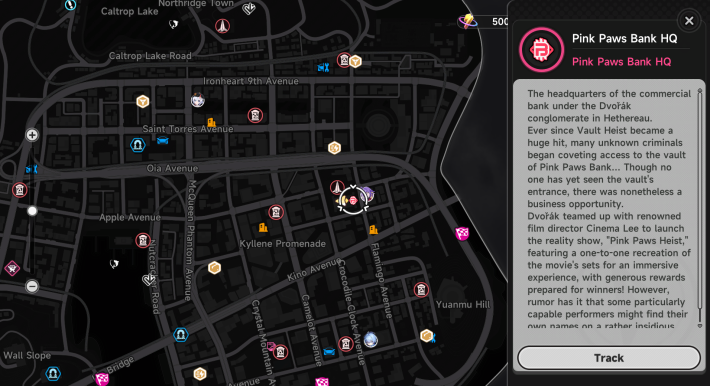
The Pink Paws Heist can be started at the "Pink Paws Bank HQ" in the New Herland District. A Fast Travel Point is located nearby, so be sure to unlock it the first time you visit.
| Tip! | To reduce travel time, use the Wertheimer Tower near Pink Paw Bank as a teleport point. |
|---|
Start by Talking to Chiz in the Bank
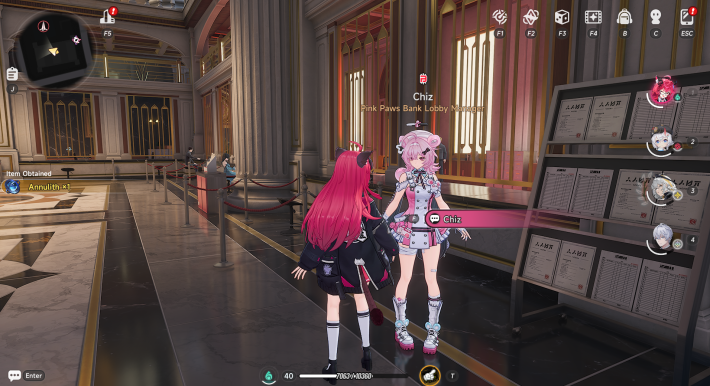
You can start the Pink Paws Heist by speaking to Chiz inside the bank. You can also ask her for additional details, so if it is your first time, make sure to talk to her beforehand.
Aim to Complete Challenge Targets
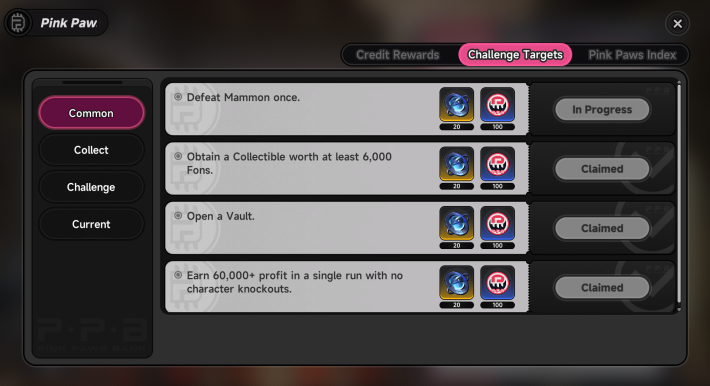
Challenge Targets include objectives such as "Defeat Mammon," and completing them rewards items like Fons and Annulith. Some targets are difficult to complete unless specifically prioritized, so review them before starting the challenge.
Collect the Loot
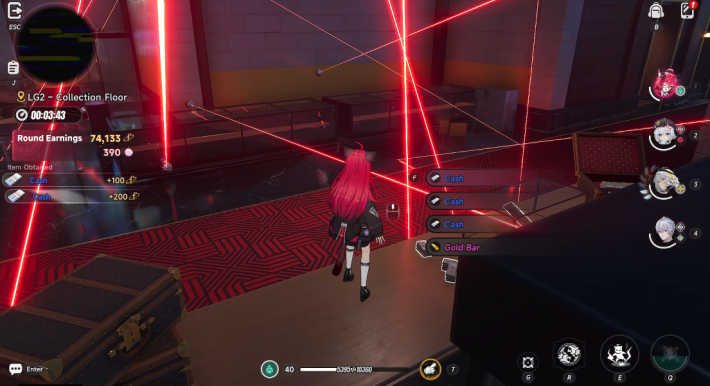
Loot is placed in various locations, such as on desks, so search thoroughly to collect it. Doors can be opened by picking locks, so make sure to explore every area.
Open Safes After Defeating Enemies
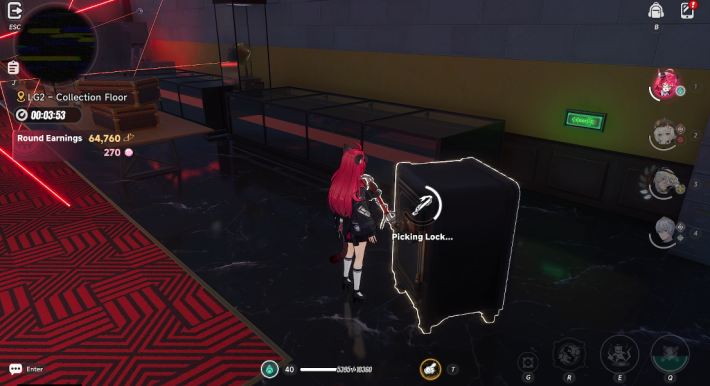
Some valuable Collections are stored inside Safes. It takes time to pick the lock to open a Safe, so defeat the surrounding enemies before you start.
Avoid Getting Hit by Enemies

If you are hit by an enemy, you may lose some of your loot, so avoid taking damage whenever possible. However, in certain areas, such as in front of elevators, you may need to engage enemies, as you will have to pick locks otherwise.
Some Enemies Call for Backup
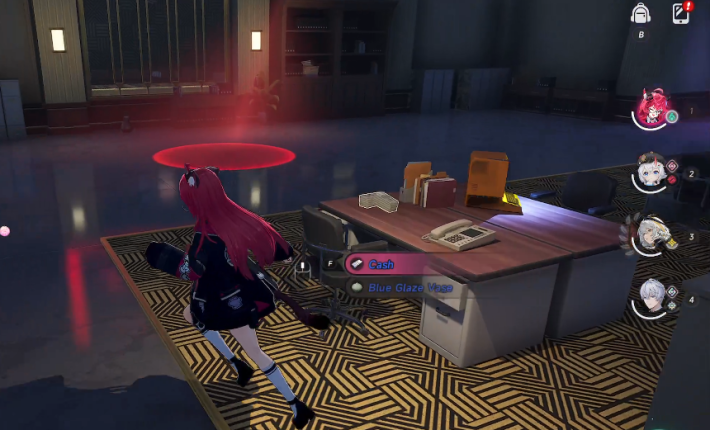
If you're spotted by a searchlight, many enemies will appear. While there's no direct penalty like failing the Pink Paws Heist, fighting multiple enemies can lead to losing your earnings or running out of time, so try your best to stay undetected.
| Tip! | Alerted enemies will not pursue if you immediately transition to another room or floor. |
|---|
Finish Within the Time Limit
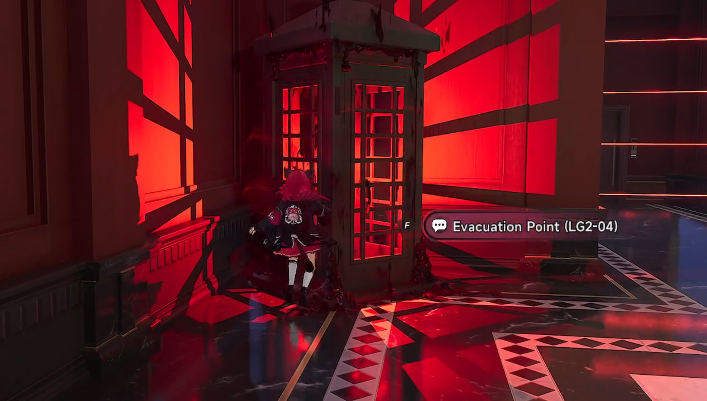
You can retreat from the Pink Paws Heist using Phone Booths located across the map. If the timer runs out or your entire team is defeated, all earnings will be lost. If your HP is low, consider ending the run early.
Healing Not Required for Heist Runs
Note that healing before entering Pink Paw Heist runs is unnecessary. All team members are automatically restored to full health upon entry.
Access Card and Location
It is only recommended to unlock Access Card Rooms if they are along your farming route. Otherwise, skip them to conserve time for hunting high-value gold enemies.
| Card Usage Location | Details |
 Vault Pass Elevator Vault Pass Elevator (G Floor) | [Requirement] Vault Pass Grants direct elevator access to the Vault Floor (LG3). Elevator located on the Underground Level of Reception Hall (G). |
 Collection Floor Elevator Collection Floor Elevator (G Floor) | [Requirement] Collection Floor Pass Grants direct elevator access to the Collection Floor (LG2). Elevator located on the Underground Level of Reception Hall (G). |
 Assistant Manager Office Assistant Manager Office(LG1) | [Requirement] Assistant Manager Office Access Card Unlocks the Assistant Manager Office in LG1, Floor 2, Right Route |
 Recreation Room Recreation Room(LG1) | [Requirement] Recreation Room Access Card Unlocks the Recreation Room Door in LG1, Floor 2, Left Route |
 Electrical Room Electrical Room (LG2) | [Requirement] Electrical Room Access Card Unlocks the Electrical Room in LG2 Ground Floor, before the Golden Door leading to the Gold Lantern *Electrical Room is connected to Manager Storage |
 Meeting Room Meeting Room (LG2) | [Requirement] Meeting Room Access Card Unlocks the Meeting Room in LG2 Ground Floor, after you enter the Golden Door leading to the Gold Lantern |
 Security Room Security Room (LG2) | [Requirement] Security Room Access Card Unlocks the Security Room in LG2 2nd Floor, left wing when facing the Chaotic Core. |
 Temporary Visitor Elevator Temporary Visitor Elevator (LG2) | [Requirement] Temporary Visitor Pass Unlocks the Elevator leading to LG3 (Vault Room) without alerting the Hollow Knights. |
 Manager Storage Room Manager Storage Room (LG2) | [Requirement] Manager Storage Room Access Card Unlocks the hidden Storage Room behind the bookshelf in the Manager’s Room, located in the right hallway near the LG3 (Vault Room) elevator *Storage is connected to Electrical Room |
 Core Vault Core Vault (LG3) | [Requirement] - Advanced Clearance Card I - Chaotic Core Unlocks the Core Vault in LG3, leading to the boss fight with Mammon. |
Solo vs Multiplayer Differences
Pros and Cons Chart
| Solo Heist Run | |
| Pros | Cons |
| - Higher Chance to Obtain Access Card - No Competition in Picking Up Earnings - Steady 100K+ Fons per Run | - Defeating Enemies Is Time-Consuming - Finding an Active Phone Booth Takes Time - Slow Final Boss Clear |
| Multiplayer Heist Run | |
| Pros | Cons |
| - Defeat Enemies Quickly - Use Multiple Access Cards - Locate Active Phone Booths Faster - Quick Final Boss Clear | - Competition When Collecting Earnings - Earnings May Be 60K or Less per Run - "Challenge Target" Progression Not Shared |
Loot Is Shared and Can Only Be Picked Up Once
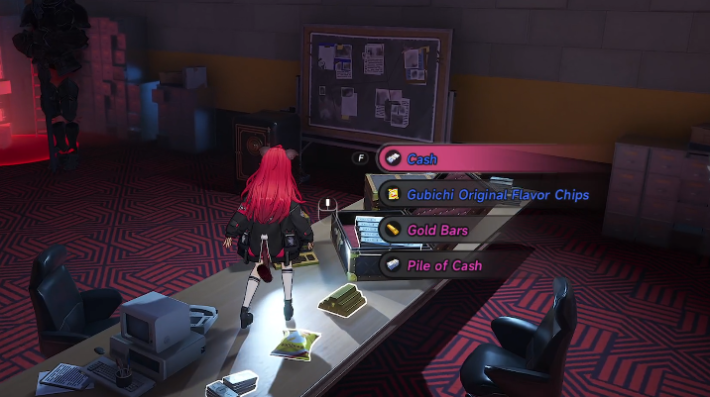
In a multiplayer Pink Paws Heist, items collected by one player will disappear and cannot be picked up by others. Therefore, when playing in multiplayer, it's best to spread out and explore different rooms as you progress deeper into the area.
Earnings Are Calculated Individually
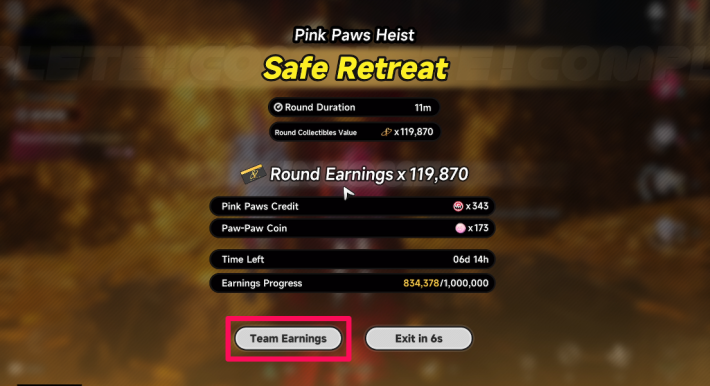
In multiplayer, earnings are calculated individually, and each player receives Fons based on the Collections they acquired. Upon retreating, you can view each teammate's earnings, allowing you to compare results and compete for the highest score.
Work Together to Defeat Enemies
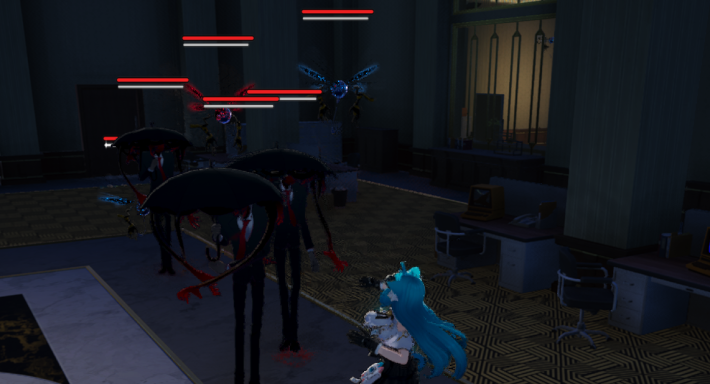
In areas where combat is required, such as in front of elevators, enemies can be defeated more efficiently by coordinating with other players. If an enemy has high HP and is difficult to take down, one effective strategy is to have one player pick the lock on the door while the others engage in combat.
Easier to Find Access Cards by Splitting Up
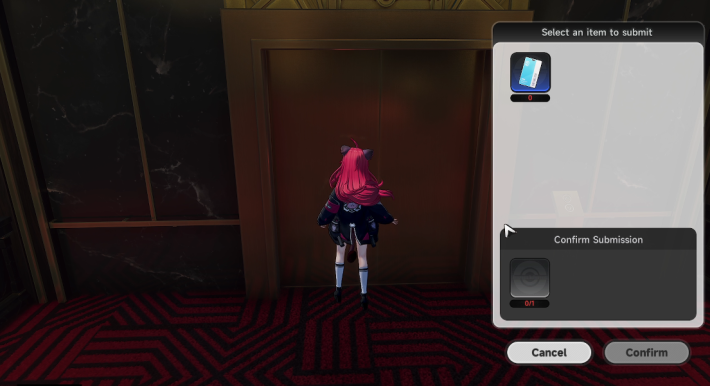
Some doors require an access card to pass through. Like Collections, access cards must be found in the field, so splitting up and searching different areas can help you locate them more efficiently.
Find Active Phone Booths as a Team

Phone Booths can close over time, becoming unusable for retreat. In multiplayer, multiple people can use a single Phone Booth, and searching for one together makes it less likely to run out of time.
NTE Related Articles
Hethereau Hobbies
 The Cafe by Origen The Cafe by Origen |  Owner's Selection Owner's Selection |  Pink Paws Heist Pink Paws Heist |
 Sea Angler Sea Angler |  Mahjong Inferno Mahjong Inferno |  Tetrominoes Tetrominoes |
 Super Sound Super Sound |  Racing Racing |  City Delivery City Delivery |
 Swift Travel Swift Travel |  Fight Club Fight Club | Super Sound |
Hethereau Recommended Guides
 City Stamina Guide City Stamina Guide |  How to Raise Tycoon Level How to Raise Tycoon Level |  Fons Farming Guide Fons Farming Guide |
 Life Skill Tier List Life Skill Tier List |  Oracle Stone Locations Oracle Stone Locations |  Parody Locations Parody Locations |
 Safe Locations Safe Locations |
Things To Do At Hethereau
 Housing
 Interior
 The Witch's House
 Nacupeda's Pool
 Lost Items
 Auction
Detention Center Related
 Hethereau Detention Center Hethereau Detention Center |  Wanted Level Wanted Level |  How to Escape Prison Guide How to Escape Prison Guide |
| Take Without Permission |  Tornado Boss Guide Tornado Boss Guide | - |











