


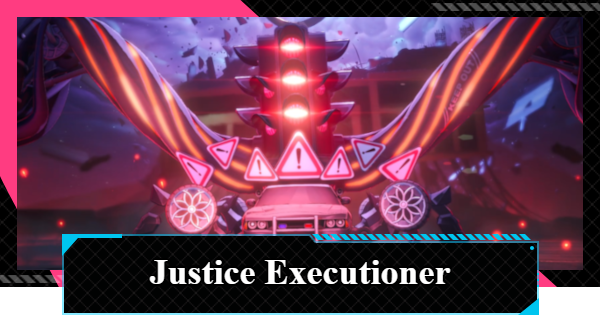
Justice Executioner boss guide for NTE (Neverness to Everness). See its location, rewards, best team comps, tips, and how to counter all attack patterns.
Table of Contents
| Justice Executioner - Tips and Best Team | Justice Executioner - How to Unlock and Rewards |
Justice Executioner Boss Counters
Extremely High Damage Output


The Justice Executioner is level 99 and possesses damage worthy of that level. Since getting hit will almost certainly result in an instant knockout, approach the fight with the mindset of avoiding every attack.
Psyche Attribute Attacks Are Effective

The Justice Executioner's weakness Attribute is Psyche. Attacking with its weakness Attribute allows you to efficiently reduce the enemy's Break resistance, giving you a significant advantage in battle.
Psyche Characters ListBest Team for Justice Executioner

The Justice Executioner has extremely high HP due to its level. While it does have an Attribute weakness, building around your strongest and most developed DPS is generally the most consistent approach.
Best Team Builds and CompositionsBlossom-Focused Team
| DPS | Anima | Instant Esper Cycle | Support |
|---|---|---|---|
| Nanally | Jiuyuan | Esper Zero | Hotori |
This Blossom-focused team requires little setup while providing reliable damage output, making it an excellent choice against the Justice Executioner. Hotori's Ultimate can also create valuable breathing room during the fight.
Justice Executioner Boss Fight Tips
Prepare Revival Items

Be sure to stock up on items before challenging the Justice Executioner. By preparing revival items sold at Puka Candy and Shigezou Tofu Shop, you can revive characters that are knocked out during the battle.
| Mall Locations (Examples) | |
|---|---|
 |  |
| Purchasable Items | |
| Premium Tofu Steak | Puka Sweet Dreams Marshmallow |
Learn Attack Patterns and Dodge

Almost every attack from the Justice Executioner can instantly knock out your character. Since each attempt requires preparation, learning its attack patterns beforehand will make dodging much more consistent.
Be Careful When Switching Characters
If you frequently switch characters while attacking, be extra cautious. The character leaving the field can still be struck by incoming attacks, so always make sure the boss is not about to attack before switching.
Justice Executioner Attack Patterns
- ▼Arm Slam Into Double Arm Stab
- ▼Pounce
- ▼Double Horizontal Arm Swipe
- ▼Double Horizontal Swipe Into Follow-Up
- ▼Horizontal Swipe Into Delayed Bullet Drop
- ▼Double Arm Thrust
- ▼Jump Into Ground Explosion
- ▼Triple Jump Attack
- ▼Charge Into Follow-Up Attack
- ▼Sign Summon
- ▼Wide-Range Explosion Field
- ▼Thick Beam Blast
- ▼[HP 50% or Below] Pull-In Force Field Explosion
- ▼[HP 50% or Below] Beam Into Jump Attack
Arm Slam Into Double Arm Stab
It slams one arm at a time for 3 consecutive hits, then drives both arms into the ground to create a circular shockwave. A Parry Attack can be triggered on any of the 3 slams, so even if you Dodge the first hit, be ready to time your Parry Attack on the following strikes.
Pounce
It leaps high into the air before smashing down with its arm. There is no warning indicator, but the red effect left on the ground after landing has no hitbox. Focus only on dodging the impact itself.
Double Horizontal Arm Swipe
It performs 2 horizontal swipes back and forth with one arm. Only the first hit has a warning indicator, and the delay between attacks gives you enough time to aim for a Critical Riposte. However, the second hit comes without a warning, so stay alert after the first Dodge.
Double Horizontal Swipe Into Follow-Up
It alternates arms for 2 horizontal swipes before transitioning into a follow-up attack. Only the first swipe has a warning indicator, while the follow-up can be countered with a Parry Attack. Since the Parry timing is always the same, it becomes very consistent once you learn the pattern.
Horizontal Swipe Into Delayed Bullet Drop
It steps backward while performing a horizontal swipe with a warning indicator, leaving delayed light bullets along the attack path. After a short delay, the bullets drop and explode. Quickly move away from the marked area to avoid the follow-up attack, which has no warning.
Double Arm Thrust
A two-hit attack that begins with a sliding advance followed by powerful arm thrusts. Only the first hit has a warning indicator. Compared to its slam and swipe attacks, this move activates much faster, so quick reactions are essential to avoid being knocked out instantly.
Jump Into Ground Explosion
It jumps backward, stabs both arms into the ground, and sends circular explosions toward the player. A warning indicator appears when the arms strike the ground, so pay close attention to the explosion path and position yourself safely.
Triple Jump Attack
A three-hit jumping combo that creates a circular shockwave with each landing. Only the first jump has a warning indicator. Dodging toward the boss is the most reliable option. After the third landing, lasers erupt from the ground, so stay focused and continue dodging.
Charge Into Follow-Up Attack
It digs its arms into the ground and launches itself forward in a charge attack with a warning indicator. Dodging usually creates distance, but the boss may immediately follow up with attacks such as a pounce or a thin vertical beam slash, so be ready for the next action.
Sign Summon
It summons a road sign and violently drives it into the ground. A warning indicator appears beforehand, and the attack has a slight startup delay, making it one of the easier attacks to react to.
Wide-Range Explosion Field
It retreats and braces itself before generating a massive field that explodes after a few seconds. There is no warning indicator, but simply sprinting away will allow you to escape the area before detonation. Thin lasers remain afterward, so avoid moving too close to them.
Thick Beam Blast
It retreats, gathers energy with both arms, and fires a massive beam. Although a warning indicator appears, the actual hitbox is much larger than it looks. Continue dodging until you are completely clear of the beam's path.
[HP 50% or Below] Pull-In Force Field Explosion
Using a stance similar to its beam attack, it pulls targets toward the center before triggering 2 explosions. Monitor both the warning indicator and the energy orb's charge size, then time your Dodge carefully and prioritize survival.
[HP 50% or Below] Beam Into Jump Attack
A powerful attack that fires a beam from outside the arena before ending with a crushing jump attack. None of the hits have warning indicators, and the attacks come out quickly. However, just before the beam fires, the effect changes color and a thin line appears, use that visual cue to time your Dodge.
Justice Executioner Location and Rewards
Appears When Wanted Level Reaches 4

The NTE Justice Executioner appears when your Wanted Level, which increases from committing Illegal Acts, reaches the maximum 4★.
How to Unlock Justice ExecutionerSafely Raise Wanted Level at the BAC

Security Officers that normally appear as your Wanted Level increases will not spawn inside the Bureau of Anomaly Control. This allows you to safely raise your Wanted Level there, making it a convenient place to prepare for the Justice Executioner fight.
Wanted Level GuideDefeat Rewards

Defeating the Justice Executioner lowers your Wanted Level, and turning yourself in at the Security Office rewards you with the S-Rank Arc "Hethereau's Keeper".
Defeat Rewards
NTE Related Articles
Return to HomeRecommended Articles
Recommended Guide Articles
 Early Game Guide
 Mid-Game Guide
 Daily Things to Do
 Team Building Tips
 Hunter Level
 Appraisal Level
 Anomaly Commission List
 Beyond the Rails
 Get Chiz for Free
 Get Free S-Rank Arcs
 Mall Guide
 Oracle Stone
 Interactive Map
 Best In-Game Purchases
 How to Min-Max Consoles
 Hunter Exchange
 Latest Updates
Database
 All Items List All Items List |  All Furniture List All Furniture List |  Fish List Fish List |
 Vehicles List Vehicles List |  Hidden Achievements Hidden Achievements |  Voice Actor Cast Voice Actor Cast |
 Outfits and Skins Outfits and Skins |  Arcs Weapon List Arcs Weapon List |  All Cartridges List All Cartridges List |
 Gacha Machine Locations Gacha Machine Locations |  Achievements List Achievements List |  Common Enemy List Common Enemy List |

