


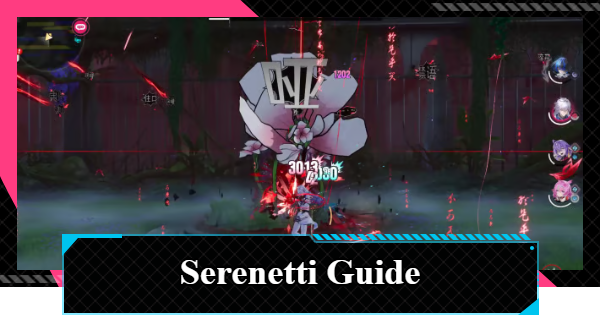
Serenetti boss guide for NTE (Neverness to Everness). Includes Serenetti Manor Anomaly Hunt location, best teams for boss fight, attack patterns, battle strategy, tips, and more.
Table of Contents
Serenetti Boss Location & Rewards
Serenetti Manor in Unheard Shores


Serenetti is a boss found at Serenetti Manor in the Unheard Shores. After defeating it for the first time, you can Fast Travel directly from the map, making it much easier to farm.
How to Unlock Serenetti

To challenge this boss, you must complete the Spinoff Quest "Where Words Sprout, Fall Unfolds". If it is not yet unlocked, complete the required quest from the Anomaly Commission list first.
Where Words Sprout, Fall Unfolds GuideSerenetti Boss Rewards

Defeating the Anomaly Hunt Serenetti rewards you with "Confessional Flower Seed". This is an essential material for character development and enhancement, so make sure to farm it actively. Additionally, defeating it for the first time rewards you with the S-rank Arc "Camellia Society."
Defeat Reward List
Anomaly Hunt Boss Material Drops by Difficulty
The numbers confirmed by our team are listed below. We will verify and add the drop counts for each Appraisal Level as we confirm them.
| Appraisal Level | Drop Count |
|---|---|
| Appraisal Level 1 | Currently under investigation |
| Appraisal Level 2 | 5 |
| Appraisal Level 3 | Currently under investigation |
| Appraisal Level 4 | 7 |
| Appraisal Level 5 | 7 |
| Appraisal Level 6 | 7 |
| Appraisal Level 7 | Currently under investigation |
Serenetti Boss Counters
Doesn't Move and Cannot Parry Attacks

Serenetti is a stationary boss. Also, since none of its attacks can be parried, you should focus purely on dodging and attacking.
Weak Against the Incantation Attribute

Serenetti's weakness is the Incantation Attribute. Using characters with this attribute will efficiently reduce the boss's Break resistance, so prioritize Incantation characters to gain an advantage.
Best Team Composition for Serenetti

A team centered around Baicang, who has the Incantation Attribute and can activate the composite Esper Cycle Discord, is highly recommended. Using the percentage-based reduction of the Break gauge from Discord makes it easier to interrupt the boss's troublesome healing with a Break.
Scorch Team
This Scorch team uses Baicang as the main attacker to deal damage over time. Use Daffodill to help Break the boss, then finish it off by activating Scorch with Baicang and Daffodill. Sakiri buffs the team's damage over time, while Fadia provides healing and support.
Serenetti Boss Fight Tips
Watch for the Vines' Incoming Attacks

Many of Serenetti's attacks are projectiles or swings using the surrounding "vines". Before an attack, there's a wind-up animation, like the vines making a large motion, so observe the boss's movements carefully and aim for a Critical Dodge with the right timing.
Break the Green Aura to Stop Healing
During the battle, the boss will envelop itself in a green aura to restore its HP. This can prolong the fight, so when you see this motion, rapidly deplete its Break gauge to interrupt the healing and make the fight easier.
Attacks Intensify when Its HP Drops

When the boss's HP drops below half, its attack pattern intensifies with wide-range attacks and knockbacks that have no warning indicators. It's important to conserve HP during the first half of the fight and save your strongest attacks for the second half.
More Attacks in High-Risk Commission

Serenetti's High-Risk Commission version uses many of the same core attack patterns, but the number of consecutive attacks increases as the difficulty goes up. Some attacks also have slightly different timings, so stay alert and adjust your dodges accordingly.
Serenetti Phase 1 Battle
Chained Spinning Attacks
Two consecutive attacks erupt from the ground around the boss. The attack locations are inconsistent, making it difficult to time a Critical Dodge, so it's safer to move out of range instead of trying to force a counter.
Follow-Up Spinning Attack
After a motion where it stabs 4 vines into the ground, a circular attack occurs immediately. Its motion is easy to see, and a red warning indicator appears clearly, so time it right and aim for a Critical Dodge.
Wide-Area Sweep with Four Vines
It lifts four vines high and sweeps a wide area. It's difficult to avoid by moving away, so it's easier to trigger a Critical Dodge by dodging into the attack.
Straight Shot Followed by Tri-Fan Burst
It extends two vines straight toward you, launching a 3-way fan-shaped attack from the impact point. After seeing the tell, create some distance, and you can reliably perform a Critical Dodge by dodging into the attack as it approaches.
Shockwave Roar with Pulse Hits
Along with the boss's roar, it generates a shockwave that deals periodic damage within its range. Performing a Critical Riposte carries the risk of rushing into the damage zone, so you should either focus on dodging, or dodge again immediately after the riposte.
Five Homing Shots
Five orbs generated around the boss fly toward the player one after another. Their projectile speed is slow, so it's a chance to calmly .
Green Aura Appears While Healing
It envelops itself in a green aura and restores HP after a certain period. It becomes defenseless while activating, so hit it with high-damage skills or the composite Esper Cycle "Discord" during the motion and aim to cause a Break to interrupt it.
Serenetti Phase 2 Battle
Shockwaves Followed by an AoE Blast
When the boss reaches half HP, a large number of orbs will appear. It then unleashes three shockwaves that pull you in, followed by a final 8-way attack. Countering the first wave is risky, so it's safer to stay away during the shockwaves and only counter the final 8-way attack.
7 Consecutive Vine Slams
It performs a series of consecutive slam attacks with its vines. After impact, a circular warning gauge appears at the player's feet before the ground attack occurs, so if you time it right, you can land multiple Critical Ripostes.
Instant Knockback and Burst Fire
After a subtle animation where it shrinks its body, it unleashes an area-wide knockback followed by a projectile attack. If you can dodge the initial knockback, you'll prevent the follow-up projectile, so prioritize dodging it. If you fail to dodge, focus on evading the projectiles to regroup.
Pattern Changes with Orbs
If orbs appear around it when the knockback occurs, the orbs will turn into projectile attacks. Conversely, if no orbs appear, the attack won't occur, so check your surroundings carefully.
Serenetti New Attacks (Difficulty III+)
Beam Blast
This attack fires a continuous beam. It has strong tracking and will follow your character as you move, so keep Dodging to avoid the beam and look for opportunities to counterattack.
Rush Attack
After a telegraphed animation where it launches red projectiles into the air, the boss follows up with a rapid combo that chains together several of its previous attacks. Dodging toward the predicted attack path on the ground makes this sequence much easier to avoid consistently.
NTE Related Articles
Return to HomeRecommended Articles
Recommended Guide Articles
 Early Game Guide
 Mid-Game Guide
 Daily Things to Do
 Team Building Tips
 Hunter Level
 Appraisal Level
 Anomaly Commission List
 Beyond the Rails
 Get Chiz for Free
 Get Free S-Rank Arcs
 Mall Guide
 Oracle Stone
 Interactive Map
 Best In-Game Purchases
 How to Min-Max Consoles
 Hunter Exchange
 Latest Updates
Database
 All Items List All Items List |  All Furniture List All Furniture List |  Fish List Fish List |
 Vehicles List Vehicles List |  Hidden Achievements Hidden Achievements |  Voice Actor Cast Voice Actor Cast |
 Outfits and Skins Outfits and Skins |  Arcs Weapon List Arcs Weapon List |  All Cartridges List All Cartridges List |
 Gacha Machine Locations Gacha Machine Locations |  Achievements List Achievements List |

