


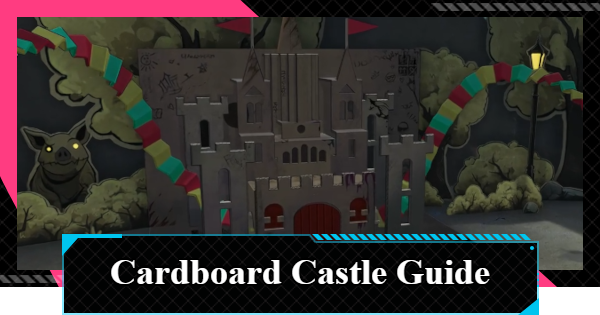
Cardboard Castle boss guide for Neverness to Everness (NTE). Learn Cardboard Castle counters, the best team comp, tips, and how to counter all attack patterns.
Table of Contents
Cardboard Castle Boss Counters
Stationary Enemy With Tricky Attacks


Cardboard Castle is a stationary enemy that never moves from its position. It attacks by extending its moving parts and firing projectiles, making its attack patterns difficult to read until you become familiar with the fight.
Lakshana Attacks Are Effective

Cardboard Castle's weakness Attribute is Lakshana. Attacking with its weakness Attribute lets you break through the enemy's Break resistance more efficiently, giving you a significant advantage during the battle.
Best Team for Cardboard Castle

Against Cardboard Castle, with its Lakshana weakness and multiple fast-startup attacks, a team centered around Hathor as the main damage dealer is highly recommended. Triggering an Esper Cycle between Hathor and a Cosmos Esper Ability allows you to apply Remora and makes dodging incoming attacks much easier.
Charge Team
| DPS | Anima | Instant Esper Cycle | Buff |
|---|---|---|---|
| Hathor | Nanally | Esper Zero | Haniel |
This team is built around Hathor while also taking advantage of Charge activations. Including Haniel also provides an opportunity to apply Stain while supplying additional buffs.
Cardboard Castle Guide and Tips
Fight at Close Range

Although Cardboard Castle remains stationary, it has a variety of long-range attacks, so fighting up close is recommended. Staying near the boss creates more openings to deal damage safely.
Watch the Sweep Attack

After performing the sweeping attack with its extended arm-like parts, it frequently follows up with a fast-startup castle gate attack. Learning this pattern will help you react to attacks that are otherwise difficult to dodge.
Beware of Projectiles With No Warning

Projectile attacks fired from the castle itself have no warning indicators. Learn the boss's attack patterns and be prepared to dodge these projectiles on reaction.
Cardboard Castle Attack Patterns
Turret Fire
An attack where it extends the gun turrets on both sides and fires two shots. You can avoid it reliably by dodging according to the red warning indicators, but be aware that the actual attack range can be slightly deceptive.
Artillery Barrage
It fires two arcing shots from its turret cannons. This attack often follows Turret Fire, and although there is no warning indicator, the projectiles travel slowly in a high arc, making them easy to avoid by baiting them toward your position before moving.
Ground Slam
It slams the arm-like parts on both sides into the ground, creating a shockwave. A warning indicator appears beforehand, and the slam itself also has a hitbox, so time your Dodge carefully to avoid both the impact and the expanding shockwave.
Sweep and Slam
It sweeps the arm-like parts back and forth before bringing them together in a slam. A warning indicator appears, and while the sweep covers a large area, dodging the first pass will also position you safely to avoid the return sweep.
Gate Attack + Explosion
It extends a component from the central castle gate, performs a sweeping attack followed by a slam, and then triggers a large explosion. The startup is extremely fast, so learn to recognize that this attack frequently follows Sweep and Ground Slam.
Vacuum Pull
It performs a suction motion using the arm-like parts on both sides. While this move does not deal damage on its own, it serves as the setup animation for the three projectile attacks below: Homing Paper Planes, Three Ball Attack, and Can Launch.
Homing Paper Planes
It fires a total of nine homing paper planes (three shots across three waves) from the castle body. There is no warning indicator, but the projectiles move slowly in an arc, allowing you to avoid them consistently by drawing them in before dodging.
Three Ball Attack
It launches three rolling balls forward from the castle body. There is no warning indicator, and the boulders continue rolling away from the castle after landing. Even at close range, Dodging backward is usually the most reliable way to trigger a Critical Dodge.
Can Launch
It launches a 3×3 spread of can-like objects across the battlefield. There is no warning indicator, and the cans remain on the field for a short time before exploding. Be mindful of their locations to avoid accidentally stepping into an explosion during combat.
NTE Related Articles
Return to HomeRecommended Articles
Recommended Guide Articles
 Early Game Guide
 Mid-Game Guide
 Daily Things to Do
 Team Building Tips
 Hunter Level
 Appraisal Level
 Anomaly Commission List
 Beyond the Rails
 Get Chiz for Free
 Get Free S-Rank Arcs
 Mall Guide
 Oracle Stone
 Interactive Map
 Best In-Game Purchases
 How to Min-Max Consoles
 Hunter Exchange
 Latest Updates
Database
 All Items List All Items List |  All Furniture List All Furniture List |  Fish List Fish List |
 Vehicles List Vehicles List |  Hidden Achievements Hidden Achievements |  Voice Actor Cast Voice Actor Cast |
 Outfits and Skins Outfits and Skins |  Arcs Weapon List Arcs Weapon List |  All Cartridges List All Cartridges List |
 Gacha Machine Locations Gacha Machine Locations |  Achievements List Achievements List |  Common Enemy List Common Enemy List |

