


Lacrimosaguide for Neverness to Everness (NTE). Find Lacrimosa's best build, best team comp, character kit, recommended Arcs, Cartridges, and Modules.
Table of Contents
| Related Articles | |
|---|---|
 Character Tier List Character Tier List | Best Team Comp |
Lacrimosa - Overview
 Liquid
Lacrimosa is a Chaos main DPS who fights by switching between two attack modes. Her playstyle is defined by inflicting Nightmare to deal DoT to enemies while copying their skills to fight, giving her flexible options that adapt to any situation.
Rating
| Best Tier | Reroll Tier | Life Skills | Exploration |
|---|---|---|---|
User Score
Lacrimosa - How To Play & Rotations
Basic Playstyle
- A Chaos-attribute attacker who can handle both melee and ranged combat
- Deals damage by applying a lasting "Nightmare" effect
- Copies enemy skills to unleash powerful attacks
A Chaos-Attribute Attacker Who Can Handle Both Melee and Ranged Combat
Lacrimosa is a Chaos-attribute Main DPS who fights by switching between melee and ranged attack modes. Switch between modes based on the distance to enemies and the situation. Her Ultimate's attack method also changes depending on the mode.
Melee Mode Is Recommended by Default
Melee mode has more hits, so it's easier to stack Nightmare, and its 5th Basic Attack hit is especially strong. Since Lacrimosa's Basic Attack right after her Redirect Skill "Morning Tomato" becomes the 5th hit, melee mode synergizes well with it.
In Ranged Mode, Cancel the Motion on the 4th Hit
In ranged mode, the 4th Basic Attack hit deals especially strong damage. Right after triggering the 4th Basic Attack hit, cancel the 5th hit with a dodge or jump and return to the 1st hit to extend your damage output.
Deal Damage by Applying a Lasting "Nightmare" Effect
Lacrimosa can apply the
Copy Enemy Skills to Unleash Powerful Attacks
Attacking an enemy with "Devilish Inspiration" lets you learn that enemy's combat techniques. The learned skill is stored in the "Redirect Skill: Devilish Gift" slot, letting you summon a copy of that same monster to unleash a powerful attack.
How to Copy Skills with Lacrimosa and Recommended AbilitiesLacrimosa Best Team Composition
Discord Team
A team that uses Lacrimosa as the main to aim for triggering Discord. Since Daffodill is also included, the Discord enhancements stack, and if you can trigger it, you can deal massive damage. As Lacrimosa's Ascensions progress, Discord becomes easy to trigger.
Basic Playstyle
| No. | Playstyle |
|---|---|
| Fight with Lacrimosa, and once the Cycle is built up, switch to Daffodill | |
| Cast the Ultimate with Daffodill, apply | |
| Fight with Sakiri, and once the Cycle is built up, switch to Lacrimosa after applying buffs | |
| Use the Cycle built up on Lacrimosa and switch to Fadia to trigger Discord | |
| Loop steps 1-4; during the loop, switching to Daffodill when a Parry Attack is possible to land it extends damage even further |
Swap Candidates
| Character | Notes |
|---|---|
| Baicang | - Swaps with Daffodill - Deals high damage in exchange for self-inflicted damage - Moderate Working effect unlocks abilities suited for exploration |
| Haniel | - Swaps with Fadia - When you want a buffer - Has buffs that function while on standby |
Low-Rarity Team Comp
This is a team comp with Lacrimosa as the main. It primarily aims for the Nova of the Esper Cycle. Triggering Discord is also possible, but if you aim for it, the setup is difficult and harder to keep stable.
Basic Playstyle
| Order | Playstyle |
|---|---|
| Fight with Lacrimosa as the core, and once Cycle Energy is full, switch to the Psyche character | |
| Fight with the Psyche character you swapped to, and once Cycle Energy is full, switch back to Lacrimosa | |
| Loop steps (1) through (2); when you want a shield during the loop, slot in Adler |
Replacement Candidates
| Character | Traits |
|---|---|
| Fadia | - Swaps with Adler - Can distribute HP across the whole party - Nova-focused team comp |
| Daffodill | - Swaps with Aurelia - Charges the Ultimate as support when a Parry Attack lands - Discord team comp |
| Lakshana or Psyche | - Swaps with the Psyche character - Discord team comp; makes setup easier |
Best Arc / Weapon for Lacrimosa
The Last Rose is Recommended
| Arc | Detail |
|---|---|
| The Last Rose | ・CRIT Rate Increase Sub-Stat ・Stacks a buff via DoT damage ・Can extend the Broken state |
The recommended Arc for Lacrimosa is "The Last Rose." Each time DoT is dealt, CRIT DMG increases, so it pairs well with Lacrimosa's trait of inflicting
Other Recommended Arcs
| Arc | Effect |
|---|---|
| Fluff of Fleetness | ・CRIT DMG Increase Sub-Stat ・Buff applies when wearer is the active character ・Buff resets when switched to Standby |
| Shiny Days | ・ATK Increase Sub-Stat ・Increases Break Intensity ・Increases DMG dealt to enemies in the Broken state |
| Youthful Fantasy | ・ATK Increase Sub-Stat ・Increases Break Intensity ・Unlocks a Support Skill command |
Best Console for Lacrimosa
Recommended Console for Lacrimosa: Diabolos
| Cartridge | Effect |
|---|---|
| Diabolos | Epic: Chaos DMG +10% Legendary: Ignores 12% of enemy Chaos RES. After the wearer triggers a Nova or Scorch reaction, the ignore effect increases to 24% for 20s. |
*▲ Epic: 2-Set Effect, Legendary: 4-Set Effect
The recommended Gear for Lacrimosa is Diabolos. It boosts Chaos DMG while letting you ignore up to 24% of the enemy's Chaos RES by triggering an Esper Cycle. It pairs well with her because it raises Lacrimosa's overall damage output.
Raising Cycle Intensity Is Also Recommended
For a Scorch or Discord team, making Lacrimosa's Cycle Intensity higher than the team's Incantation Esper characters can increase Scorch damage.
Cycle Intensity Effects and How to Increase Esper Cycle DamageNeeded Modules
| Type II (Vertical) | Type III (┏) | Type III (┛) | Type IV (Horizontal) |
Sample Modules

| Required Number of Blocks | |||
|---|---|---|---|
| Type II (Vertical)×1 | Type II (Horizontal)×1 | Type III (Vertical)×1 | Type III (Horizontal)×1 |
| Type III (┏)×1 | Type III (┛)×1 | Type IV (Horizontal)×1 | |
| Best Main Stats |
|---|
| Chaos DMG Up>CRIT Rate>CRIT DMG>ATK Bonus |
| Best Sub-Stats |
| CRIT Rate>CRIT DMG>Universal DMG Bonus>ATK Bonus |
| Module Bonus |
| For each Module Type III equipped, Chaos DMG +10% |
Recommended Ascension Effect for Lacrimosa
If Prioritizing DPS: Tempered Glass Judgment
Tempered Glass Judgment reduces the target's max HP each time they gain a stack of Nightmare. Since Lacrimosa spends a long time attacking as the main DPS, she can stack Nightmare quickly, allowing you to whittle down the enemy's HP at a good pace.
If Prioritizing Playstyle: Morning Spell
Activating "Morning Spell" grants an effect similar to Instant Cycle. It makes Esper Cycle easier to trigger and lets you easily activate the hard-to-set-up Discord, and extends the amount of time you can fight with Lacrimosa as your main character, making it an effect you'll want to prioritize obtaining.
Unlocking Requires Completing a Spinoff Quest
"Morning Spell" cannot be unlocked from the start. You can meet the unlock requirement by progressing through the Spinoff quest Tomato Jelly Rampage: Live Report!.
Trigger Conditions and Walkthrough for Tomato Jelly Rampage: Live Report!Ascension Effects at a Glance

| Awakening | Effect |
|---|---|
| Clock Out Clemency | [Recommendation] ★★・ The DMG Ratio of Nightmare increases, rising to 8% at the current skill level. |
| Rise and Shine | [Recommendation] ★・・ Increases Lacrimosa's damage dealt by 15% for 15s when she switches in using a Support Skill. |
| Molten Ice Cream | [Recommendation] ★★・ Triggers all accumulated Nightmare effects on the target at once when the 5th hit of Tomato Metal or Tomato Percussion lands. |
| Almighty Lord of Tomatoes | [Recommendation] ★★・ Extends Nightmare duration to 6s. |
| Tempered Glass Judgement | [Recommendation] ★★★ When Lacrimosa deals Nightmare DMG, she additionally reduces the target's Max HP. The reduction amount is 200% of the Nightmare DMG dealt. Every 3 seconds, Lacrimosa restores her own HP based on the Nightmare DMG she dealt during that period. The healing amount is 1.5% of the total Nightmare DMG during that period. Even when the target receives a healing effect, the Nightmare stacks no longer decrease. |
| Morning Spell | [Recommendation] ★★★ If you switch to Lacrimosa from a character capable of triggering the Nova, Scorch, or Discord Esper Cycle within 5 seconds after she activates Redirect Skill: Devilish Gift, the Support Skill activates immediately without accumulating Cycle Rate, and the corresponding cycle occurs. This effect can only activate once every 5 seconds. |
Resonance Effect (A3 & A6 Effects)
| Resonance | Effect |
|---|---|
| The Heart's Drowsy Flames (A3) | Skill level +1 for Basic Attack: Sweet and Sour, Redirect Skill: Morning Tomato, Redirect Skill: Devilish Gift, and Ultimate: Working Day Judgement. When flying in Bat Form, Stamina Cost -85%. |
| Lullaby (A6) | Lacrimosa's dealt damage ignores 20% of the target's DEF. When flying in Bat Form, Stamina Cost -70%. |
Lacrimosa Stats & Leveling Priority
Stats
| ATK | 80 |
|---|---|
| DEF | 75 |
| HP | 1320 |
| CRIT Rate | 5% |
| CRIT DMG | 50% |
| DMG Up | 0% |
Esper Ability Leveling Priority
| Basic Attack | Redirect Skill | Ultimate | Support |
|---|---|---|---|
| ★★★★★ | ★★★・・ | ★★★★・ | ★★・・・ |
Basic Attack: Sweet and Sour
Tomato Metal
| Cycle Rate: 32/36 Lacrimosa swings her Frying Pan to perform up to 5 consecutive attacks, dealing Chaos DMG. The projectile generated by the 2nd attack can be destroyed by landing follow-up attacks, triggering an explosion that deals additional Chaos DMG. |
Tomato Percussion
| Manipulates Red Jelly, performing up to 5 consecutive attacks, dealing Chaos DMG. |
Flavor Variation
| You can use Flavor Variation at any time with the aim button. When Lacrimosa uses Basic Attack: Tomato Metal, she throws her Frying Pan and performs a forward flying kick, dealing Chaos DMG once to each target hit. Afterward, her attack mode switches to Basic Attack: Tomato Percussion. When she uses Basic Attack: Tomato Percussion, she leaps and slams the ground, dealing Chaos AoE DMG once. Afterward, her attack mode switches to Basic Attack: Tomato Metal. The attack method of Ultimate: Working Day Judgement is determined based on the current Basic Attack mode. |
Devilish Inspiration
| Hold to make Lacrimosa enter an aiming state, dealing Chaos DMG once to a single enemy within the aiming range and learning that enemy's combat technique. The learned combat skill temporarily replaces Morning Tomato. The learned combat skill is stored in Lacrimosa's long-term memory, so when it is overwritten by a new skill or you make her forget the learned skill on the skill screen, she recalls Redirect Skill: Morning Tomato. |
fff Rest
| Triggers when Basic Attack is used immediately after a Critical Dodge. Lacrimosa seizes the opening from the enemy's missed attack and violently smashes a large amount of Bright Red Jelly down onto the enemy's head, dealing Chaos AoE DMG 6 times and reducing a certain amount of Break resistance. |
Stats
| Melee Basic Attack: 1st Instance Ratio: 64.2%+23.2% Melee Basic Attack: 2nd Instance Ratio: 19.9%×2 Melee Basic Attack: 3rd Instance Ratio: 24.6%+14.7%×3 Melee Basic Attack: 4th Instance Ratio: 70.9%+27.3% Melee Basic Attack: 5th Instance Ratio: 23.3%×3+123.3% Melee Basic Attack Burst: 19.4% Ranged Basic Attack: 1st Instance Ratio: 37.1% Ranged Basic Attack: 2nd Instance Ratio: 16%×3 Ranged Basic Attack: 3rd Instance Ratio: 113.9% Ranged Basic Attack: 4th Instance Ratio: 15.8%×3+193.7% Ranged Basic Attack: 5th Instance Ratio: 123.9% Flavor Variation: Melee to Ranged: 40%×2 Flavor Variation: Ranged to Melee: 79% Nightmare DMG Ratio: 6% Nightmare Duration: 3 seconds Aim DMG Ratio: 13% Plunge DMG Ratio: 88.3% Melee Basic Attack Cycle Energy: 32 Ranged Basic Attack Cycle Energy: 36 Critical Riposte Ratio: 100%+22.8%×5 |
Redirect Skill: Morning Tomato
Morning Tomato
| Cooldown: 16 Sec. A-A-Achoo! Lacrimosa's hand slips and an unfinished Esper construct flies out! Deals Chaos DMG once to all targets within range and applies the Nightmare status. Activating Redirect Skill: Morning Tomato triggers the 5th hit of Basic Attack: Tomato Metal or Basic Attack: Tomato Percussion. |
Devilish Gift
| Cooldown: 16 Sec. Lacrimosa can do it too. Through her Esper Ability, she creates a monster identical to the skill's owner and makes it attack. The skill's additional effects also activate at this time. The skill's duration is the same as the original owner's. While active, Lacrimosa cannot move, but she can cancel the activation or switch characters to return to battle. If she is attacked while the skill is active, she takes damage. When Redirect Skill: Devilish Gift is activated, Lacrimosa's ATK increases by a certain percentage of the skill owner's ATK. |
Stats
| Morning Tomato DMG Ratio: 300% Morning Tomato Nightmare Stacks: 5 stacks Devilish Gift ATK Gain: 30% Devilish Gift Max ATK Gain: 200 Devilish Gift Min ATK Gain: 10 Devilish Gift Duration: 15 seconds Cooldown: 16 seconds Cycle Energy: 10 |
Ultimate
Working Day Judgement
| Energy Cost: 120 Cooldown: 20 Sec. When Lacrimosa uses Basic Attack: Tomato Metal, she controls a Truck, dealing 10 hits of Chaos AoE DMG and applying the Nightmare status to all targets within range. When she uses Basic Attack: Tomato Percussion, she dismantles a Car, dealing 5 hits of Chaos AoE DMG and applying the Nightmare status to all targets within range. |
Stats
| Truck DMG Ratio: 253.3%×2+42.7%×5+93.3%×3 Car DMG Ratio: 94.2%×4+623.3% Nightmare Stacks: 5 stacks Cooldown: 20 seconds Ultimate Energy Cost: 120 |
Support Skill
Microwake
| Lacrimosa get this done, and Lacrimosa get to sleep… Manipulates Esper Ability Constructs, dealing 1 instance of Chaos DMG to an area. |
Tomato Banquet
| Discord Enhancement: When Discord is triggered, if the target is already Broken, it deals additional damage equal to 400% of ATK to the target. |
Sleep In
| Grants 1 additional attempt of Morning Tomato after Lacrimosa uses Tomato Metal or Tomato Percussion 5 times during the skill cooldown. Activates only 1 time per skill cooldown. |
Stats
| DMG Ratio: 200% |
Lacrimosa Life Skill & Exploration
Higher Menu Prices and Reduced Ingredient Use

Lacrimosa has Life Skills related to management. The more Dessert tags there are, the higher menu prices climb, and ingredient consumption is also reduced, so her strength is earning Fons efficiently with fewer resources.
Café Management Guide | The Cafe by OrigenSpecial Tomato Juice Unlocked with Owner's SP

With the Owner's Selection, "Special Tomato Juice" is added to the menu. Special Tomato Juice has a short serving process and is priced high at 75, so it helps with clearing the Owner's Selection.
How to Play the Café Minigame | Owner's SelectionHold Dodge to Fly
When out of combat, holding Dodge transforms Lacrimosa into a bat and lets her fly through the air while consuming Stamina. You can move across terrain such as elevation gaps without wall-running, which is helpful for exploration.
Switching to Baicang Enables a Super Jump
If you have unlocked Baicang's Support Skill "Moderate Working," you can use a Super Jump by switching from Lacrimosa to Baicang while flying. When heading to high places, the Super Jump means you do not have to fly all the way up to the top, as you can jump mid-flight, making it more convenient.
Dodging the Pink Paws Heist Laser
Using Lacrimosa's flight in the Pink Paws Heist lets you dodge the lasers that deal damage when hit.
More Fons Earned in the Pink Paws Heist

When you unlock Lacrimosa's Life Skills and add her to your team, the amount of Fons and Paw-Paw Coins you earn in the Pink Paws Heist increases by up to 20%. This is a powerful effect that improves the efficiency of farming Fons and Paw-Paw Coins.
Lacrimosa Life Skill
Chef Tomato
| Lv1 | When a menu displayed at a shop where Lacrimosa is present has 1 dessert tag, that shop's menu unit price is increased by an additional +1%. |
|---|---|
| Lv2 | Lacrimosa reduces ingredient consumption rate by 1%. |
| Lv3 | In Owner's Selection, a special dish "Special Tomato Juice" appears, made by adding tomato juice to a glass. |
| Lv4 | Lacrimosa reduces ingredient consumption rate by 1%. |
| Lv5 | When a menu displayed at a shop where Lacrimosa is present has 2 dessert tags, that shop's menu unit price is increased by an additional +1.5%. |
Exclusive "Bat Perk"
| Lv1 | When Lacrimosa is on the team, the Fons and Paw-Paw Coins earned upon the settlement of the Pink Paws Heist are increased by +15%. (Cannot exceed the acquisition limit.) |
|---|---|
| Lv2 | When Lacrimosa is on the team, the bonus to Fons and Paw-Paw Coins earned upon the settlement of the Pink Paws Heist is increased by +20%. (Cannot exceed the acquisition limit.) |
Lacrimosa Ascension Materials & Number Needed
Ascension Materials
| A1 | Lost Whispers×5Beetle Coin×25000 |
|---|---|
| A2 | Lost Whispers×12Confessional Flower Seed×2Beetle Coin×50000 |
| A3 | Obscure Whispers×6Confessional Flower Seed×8Beetle Coin×75000 |
| A4 | Obscure Whispers×12Confessional Flower Seed×16Beetle Coin×100000 |
| A5 | Paradoxical Whispers×6Confessional Flower Seed×24Beetle Coin×125000 |
| A6 | Paradoxical Whispers×9Confessional Flower Seed×36Beetle Coin×150000 |
Esper Ability Enhancement Materials
| Lv.2 | Hesitation of the Waves×2Lost Whispers×2Beetle Coin×2000 |
|---|---|
| Lv.3 | Hesitation of the Waves×3Lost Whispers×3Beetle Coin×5000 |
| Lv.4 | Hesitation of the Waves×5Suspended Delusions×5Beetle Coin×10000 |
| Lv.5 | Suspended Whispers×2Obscure Whispers×2Beetle Coin×20000 |
| Lv.6 | Suspended Whispers×3Obscure Whispers×3Beetle Coin×40000 |
| Lv.7 | Suspended Whispers×5 Paradoxical Whispers×5 Dress Sleeves of Vanity×1Beetle Coin×60000 |
| Lv.8 | The Second Self×3 Paradoxical Whispers×3 Dress Sleeves of Vanity×1Beetle Coin×80000 |
| Lv.9 | The Second Self×5 Paradoxical Whispers×5 Dress Sleeves of Vanity×2Beetle Coin×100000 |
| Lv.10 | The Second Self×8 Paradoxical Whispers×8 Dress Sleeves of Vanity×4Beetle Coin×120000 |
Life Skill Enhancement Materials
| Lv.1 | Dreamless Seed×2 |
|---|---|
| Lv.2 | Dreamless Seed×4 |
| Lv.3 | Dreamless Seed×10 |
| Lv.4 | Dreamless Seed×16 |
| Lv.5 | Dreamless Seed×24 |
Lacrimosa - Favorite Gifts
Chill Out Is Recommended

Lacrimosa's recommended Gift is Chill Out. It has high Affection and a relatively low price, so you can raise her Affection efficiently every day.
List of Favorite Gift
- Affection1200How to Get- Obtained from Paid Products
- Affection200Price6600 FansHow to Get- Florist (Bridge Crossings)
- Affection400Price20000 FansHow to Get- Electronics Store (Bridge Crossings)
- Affection100Price480 FansHow to GetTomato 100 Vending Machine
- Affection100Price480 FansHow to GetTomato 100 Vending Machine
- Affection100Price480 FansHow to GetTomato 100 Vending Machine
- Affection100Price300 FansHow to GetTomato 100 Vending Machine
- Affection200Price4000 FansHow to Get- Bookstore (Bridge Crossings)
- Bookstore (Illusion Town)
- Bookstore (Miguel District)
How To Get Lacrimosa?
- Limited Gacha
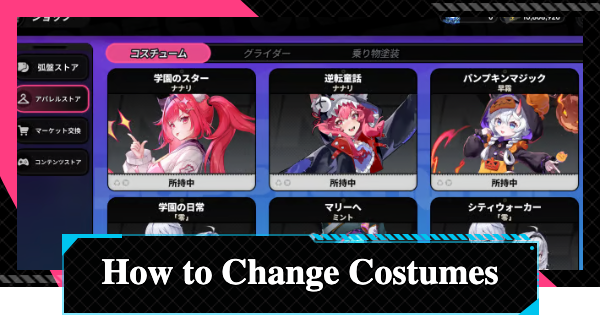
Lacrimosa - Skins (Costumes)
How to Get Skins (Costumes)Lacrimosa Character Profile
Profile
| Esper Type | Chaos |
|---|---|
| Birthday | 06/26 |
| Faction | Bureau of Anomaly Control, ETD-4 |
| Esper Ability | 「Requiem」 |
Holds the record for most maintenance requests submitted by BAC staff.
NTE Related Articles
Return to HomeRecommended Articles
Recommended Guide Articles
 Early Game Guide
 Mid-Game Guide
 Daily Things to Do
 Team Building Tips
 Hunter Level
 Appraisal Level
 Anomaly Commission List
 Beyond the Rails
 Get Chiz for Free
 Get Free S-Rank Arcs
 Mall Guide
 Oracle Stone
 Interactive Map
 Best In-Game Purchases
 How to Min-Max Consoles
 Hunter Exchange
 Latest Updates
Database
 All Items List All Items List |  All Furniture List All Furniture List |  Fish List Fish List |
 Vehicles List Vehicles List |  Hidden Achievements Hidden Achievements |  Voice Actor Cast Voice Actor Cast |
 Outfits and Skins Outfits and Skins |  Arcs Weapon List Arcs Weapon List |  All Cartridges List All Cartridges List |
 Gacha Machine Locations Gacha Machine Locations |  Achievements List Achievements List |

