











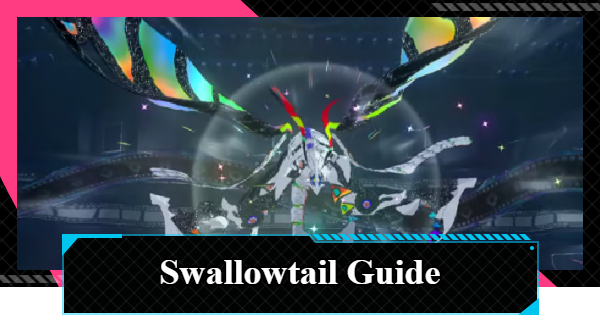
Swallowtail boss guide for NTE (Neverness to Everness). See Floe Cinema Anomaly Hunt unlock conditions, Anomaly Commission boss location, best teams, attack pattern, tips and more.
Table of Contents
| Related Articles | |
|---|---|
| Let's Go See a Movie | Reality Refuge |
Swallowtail Location and Rewards
Floe Cinema in New Herland District
The Swallowtail in NTE appears in the Floe Cinema in the New Herland District. You'll need to enter the challenge area from the projection room at the back, so go inside the cinema and check the projection room.
Unlock Conditions


To challenge this boss, you must first clear the 'Let's Go See a Movie' Anomaly Commission. If it's not unlocked yet, be sure to complete that quest from the Anomaly Commission list.
Let's Go See a Movie GuideSwallowtail Boss Rewards

Defeating the Anomaly Hunt Swallowtail rewards you with Colorful Ticket Stub, an essential material used for character growth and enhancement. Be sure to farm it regularly whenever you need upgrade materials. Additionally, your first clear rewards you with the S-rank Arc "Reality Refuge".
Boss Rewards List
Anomaly Hunt Boss Material Drops by Difficulty
The numbers confirmed by our team are listed below. We will verify and add the drop counts for each Appraisal Level as we confirm them.
| Appraisal Level | Drop Count |
|---|---|
| Appraisal Level 1 | Currently under investigation |
| Appraisal Level 2 | 5 |
| Appraisal Level 3 | Currently under investigation |
| Appraisal Level 4 | 7 |
| Appraisal Level 5 | 7 |
| Appraisal Level 6 | 7 |
| Appraisal Level 7 | Currently under investigation |
Swallowtail Boss Features
Hovers and Uses Ranged Attacks
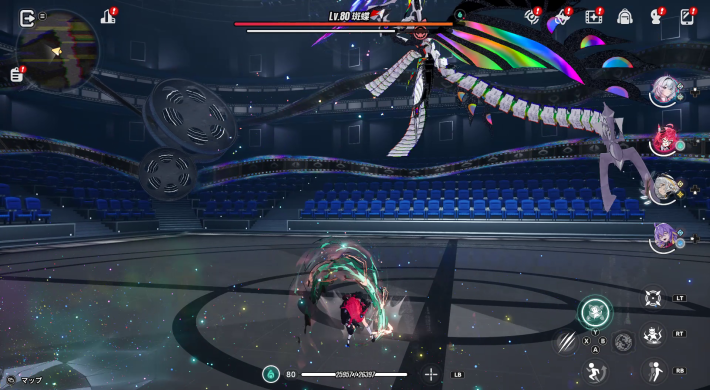
The Swallowtail constantly hovers, which can make it difficult for melee characters to land their attacks. It's more effective to fight from a distance or use ranged attacks.
Anima Attacks Are Effective
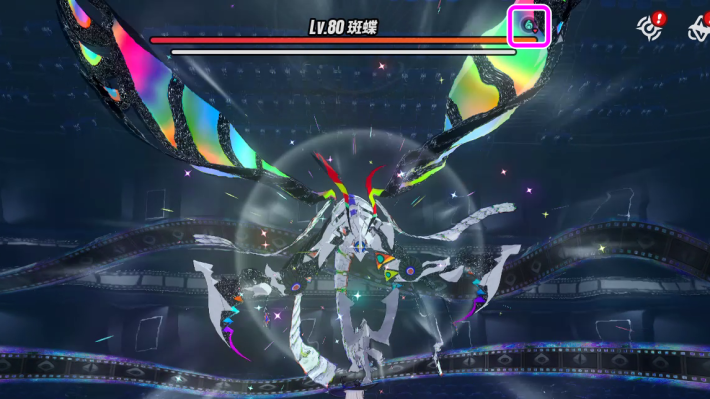
The Swallowtail's weakness is the Anima type. Attacking with Anima characters will quickly deplete the enemy's Break gauge, so prioritize them in your team to gain an advantage in battle.
Best Team for Swallowtail

A team centered around Jiuyuan is recommended, as she has the Anima type to exploit the weakness and can activate Esper Cycle: Blossom. Her gun's ranged attacks make it easy to damage the boss while it's in the air, and her auto-targeting Vita Buds can reliably chip away its HP.
Charge Team
| DPS | Anima | Lakshana | Survival |
|---|---|---|---|
| Jiuyuan | Esper Zero | Hathor | Fadia |
This team takes advantage of Jiuyuan's Blossom Enhancement. Activate Remora through coordination with Hathor while dealing damage by making full use of Esper Zero's Instant Cycle.
Swallowtail Boss Fight Tips
Learn Which Attacks to Parry

The Swallowtail has multiple attacks that can be parried. If you learn to recognize the wind-up animations and consistently land a counter, you can create a large opening and finish the fight much faster.
Focus on Generating Vita Buds

There will be times when the boss moves far away or hovers high in the air, so it's a good strategy to focus on generating Vita Buds, as they have high homing capabilities and a wide attack range. They will reliably deal damage even while you are focused on dodging.
Track Its Position After It Warps
During the fight, it scatters Scale Powder and warps. After this warp, its next attack pattern changes depending on where it reappears, so the key to reducing damage is to quickly locate its new position with your camera.
More Attacks in High-Risk Commission

The Swallowtail in High-Risk Commission uses many of the same core attack patterns, but the number of consecutive attacks increases as the difficulty rises. Warning indicators are also removed, making it important to learn and recognize each attack pattern.
Swallowtail Attack Patterns
Homing Projectile (Simultaneous)
It creates four projectiles around itself and fires them all at once. The projectiles are fast and have strong homing, but since they hit at the same time, you can avoid all of them with a single Critical Dodge. Dodging forward to close the distance creates an opportunity to counterattack.
Homing Projectile (Sequential)
It places multiple projectiles along its flight path and fires them sequentially. There is no warning indicator, and the projectiles often come from off-screen or your blind spots, so it's best to stop attacking and focus on continuously dodging towards the incoming projectiles.
Beam Attack
It fires a beam attack twice from a distance. The beam lands instantly after a short charge. It will use this even at close range, so be ready to dodge as soon as you see the wind-up animation. It's a single hit, so there is no continuous damage.
3-Hit Slam
After a left and right scythe slam, it slams down with both hands from above. The final slam can be countered with a Parry Attack, but since the boss is high in the air, melee characters will need to use skills to land their attacks. You can also aim for a Parry Attack after two Critical Ripostes.
5-Hit Combo
This is a 5-hit combo combining scythe swings and a tail sweep. Every hit has a warning indicator, and the first hit can be countered with a Parry Attack. The intervals between attacks are consistent, so stay calm and perform consecutive Critical Dodges in time with the warnings.
Spinning Tail Sweep
It spins its body once to perform a tail sweep. While not a 360-degree attack, its range is wide. If you panic at the flashy wind-up animation and dodge too early, you'll get hit, so watch for the red warning indicator carefully before performing a Critical Dodge.
Tail Attack
It performs a backflip while attacking a wide area with its tail. The attack has a large vertical hitbox, so if you find the timing difficult, dodging sideways makes it easier to avoid even without activating a Critical Dodge.
Tail Slam
It performs a forward flip and slams its tail down, creating a circular shockwave from the point of impact. If you successfully perform a Critical Dodge towards the impact point against the tail attack, you can also pass through the following shockwave at the same time.
Scale Scatter
Without a warning indicator, it creates a diamond-shaped area around the player and generates a damage zone (Scale Powder) after a few seconds. Either escape the area before it appears or perform a Critical Dodge as it appears. Be careful, as the Scale Powder will linger for a while.
Emerge Attack
After burrowing underground, it emerges from a location marked by ripples and attacks. The motion is unique and easy to counter with a Parry Attack, so placing AoE skills or similar attacks on its emergence point beforehand is highly effective.
[Below 50% HP] Burrow Attack
It starts using this attack when its HP drops below half. It attacks from underground with the same motion as the 5-Hit Combo, but the Parry Attack window is generous, and you can easily counter it even with a Basic Attack. Land multiple counters to knock it down.
Swallowtail New Attacks (Difficulty III+)
4-Hit Combo
A 4-hit combo with two possible finishing attacks. Both variants leave a lingering hitbox on the ground after the final strike, so avoid rushing in to attack too early.
5-Hit Combo 2
A different version of the standard 5-hit combo. It is often chained into the regular 5-hit combo, so be ready to use a Parry Attack to create more counterattack opportunities.
Slash Projectile
A quick attack that launches slashes and homing projectiles. The slashes travel quickly, so watch the startup animation carefully and react as soon as you see it.
Light Beam
The boss jumps to the edge of the arena before firing an light beam. It also creates a rotating hitbox and shockwave-like attacks, so keep moving while dodging the shockwaves to avoid taking damage.
NTE Related Articles
Return to HomeRecommended Articles
Recommended Guide Articles
 Early Game Guide
 Mid-Game Guide
 Daily Things to Do
 Team Building Tips
 Hunter Level
 Appraisal Level
 Anomaly Commission List
 Beyond the Rails
 Get Chiz for Free
 Get Free S-Rank Arcs
 Mall Guide
 Oracle Stone
 Interactive Map
 Best In-Game Purchases
 How to Min-Max Consoles
 Hunter Exchange
 Latest Updates
Database
 All Items List All Items List |  All Furniture List All Furniture List |  Fish List Fish List |
 Vehicles List Vehicles List |  Hidden Achievements Hidden Achievements |  Voice Actor Cast Voice Actor Cast |
 Outfits and Skins Outfits and Skins |  Arcs Weapon List Arcs Weapon List |  All Cartridges List All Cartridges List |
 Gacha Machine Locations Gacha Machine Locations |  Achievements List Achievements List |  Common Enemy List Common Enemy List |











