











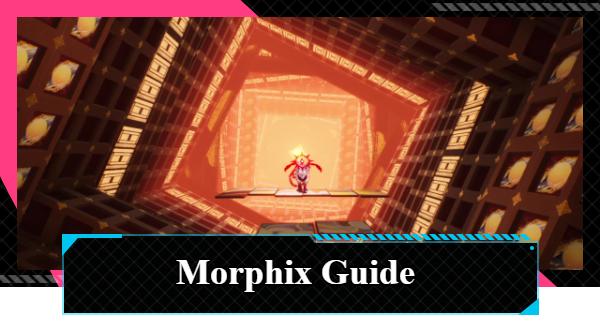
Morphix boss guide for NTE (Neverness to Everness). Includes Pawn Moonlight Anomaly pilgrimage location, best teams for boss fight, attack patterns, strategy, tips, and more.
Table of Contents
| Related Articles | |
|---|---|
| Pawn Moonlight | Good Boy's Grand Adventure |
Morphix Boss Location
Green Wall Slope in Bridge Crossings


In NTE, Morphix is a boss that appears near Emerald Hill in "Bridge Land." Once you defeat it, you can fast travel directly to its location from the map, making farming much easier.
Morphix Unlock Condition

To challenge this boss, you must have cleared the special episode If you haven't unlocked it yet, complete the required quest from the quest list first.
Morphix Clear Rewards

Defeating Morphix in the Anomaly Pilgrimage rewards you with "Good Boy Stamp", an essential material for character growth and enhancement. Be sure to farm this content regularly to stock up on it. Additionally, your first clear rewards you with the S-rank Arc "Good Boy's Grand Adventure."
Morphix Boss Defeat Reward List
Morphix Boss Features
Has Long-Range Flying Disc Attacks

Morphix primarily uses close-range attacks, but it also has long-range flying disc attacks. Keeping your distance does not guarantee safety, so you need to constantly watch the enemy's movements to position yourself correctly.
Cosmos Attacks Are Effective

Morphix's weakness is set to the "Cosmos" attribute. Attacking with the weakness attribute allows you to efficiently reduce the enemy's break value resistance, giving you an advantage in battle.
Best Team for Morphix

The most recommended team is a team centered around Esper Zero, which covers the enemy's Cosmos weakness and can activate the Dual Esper Cycle "Charge". Activating Charge lets you use your Ultimate more frequently, making the fight much easier.
Charge Team
| DPS | Anima | Lakshana | Survival |
|---|---|---|---|
| Esper Zero | Jiuyuan | Hathor | Fadia |
This team is built around Esper Zero's Charge enhancements. It focuses on activating Charge through Instant Cycle to repeatedly unleash Ultimates and maximize damage output.
Morphix Boss Fight Tips
Keep a Proper Distance
If you get too far from Morphix, it will use powerful long-range attacks that are difficult to dodge. Unless you need to evade a specific attack, it's best to stay close to the boss.
Watch Out for the Flying Disc Rail Counter
The flying disc attacks show a red warning, but even if you successfully use a rail counter, you will only deflect the disc and cannot stun the enemy. The ultimate dodge also won't trigger automatically, so it's better to prioritize evasion over counter-attacking.
No Special Mechanics

The version of Morphix encountered during anomaly pilgrimage farming has This fight is a straightforward test of your team's power, so make sure your characters are well-trained before challenging the boss.
Morphix Attack Patterns
Flying Disc Attack into Charge
This is a combo where the flying disc is followed by a charge. A rail counter is possible, but we recommend deflecting the disc with a normal attack and timing your ultimate dodge for the charge.
Flying Disc Attack into Pounce 1
This is an attack where Morphix warps backward, throws a disc, and then pounces. The motion is long, and using a skill to counter the disc can prevent you from dodging the pounce in time, so be careful.
Flying Disc Attack into Pounce 2
In this variant, Morphix warps backward, throws a disc, and then pounces. The difference is that it warps to a position on the ground, and the disc homes in on you for a period of time.
Double Claw
The Double Claw is an attack where Morphix claws with its forearm, warps, then claws again. Because the position changes with the warp, dodging backward makes it easier to consistently land an ultimate dodge or counter.
Full-Range Circle Attack
This is a flashy, wide-ranging attack performed after a large wind-up. This attack is often followed by the Double Claw, so be prepared to dodge again immediately.
Claw, Tail, and Charge Combo
This is a combo where a claw attack after warping leads into an aerial charge. The first claw can trigger a rail counter, so be ready to counter it as soon as you see the warp.
Spin Charge into Claw
This is an attack where Morphix warps with a feint, performs a spin charge, warps again, and then claws. The final claw can trigger a rail counter, so stay calm and aim for the counter once you see the spin charge.
Field Explosion and Charge
This is a powerful technique where Morphix floats in the air and causes three explosions before charging. Even if you use an ultimate dodge on the explosions, the enemy remains airborne and your counter won't connect, so focus on evasion and save your counter for the final charge.
[HP Below 50%] Bite and Pounce
The Bite and Pounce is a combo that branches from the Double Claw when the boss's HP is below 50%. All hits show red warnings, so watch the boss's movements carefully and time your dodges.
[HP Below 50%] Double Claw into Combo
This combo consists of two Double Claw attacks followed by the Claw, Tail, and Charge combo. The first claw of the final combo sequence can trigger a rail counter, so if the bite variant doesn't appear, calmly aim for the counter.
NTE Related Articles
Return to HomeRecommended Articles
Recommended Guide Articles
 Early Game Guide
 Mid-Game Guide
 Daily Things to Do
 Team Building Tips
 Hunter Level
 Appraisal Level
 Anomaly Commission List
 Beyond the Rails
 Get Chiz for Free
 Get Free S-Rank Arcs
 Mall Guide
 Oracle Stone
 Interactive Map
 Best In-Game Purchases
 How to Min-Max Consoles
 Hunter Exchange
 Latest Updates
Database
 All Items List All Items List |  All Furniture List All Furniture List |  Fish List Fish List |
 Vehicles List Vehicles List |  Hidden Achievements Hidden Achievements |  Voice Actor Cast Voice Actor Cast |
 Outfits and Skins Outfits and Skins |  Arcs Weapon List Arcs Weapon List |  All Cartridges List All Cartridges List |
 Gacha Machine Locations Gacha Machine Locations |  Achievements List Achievements List |  Common Enemy List Common Enemy List |











