

 Anemo
Anemo  Hydro
Hydro
 Pyro
Pyro
 Electro
 Dendro
 Cryo
Cryo
 Geo
Geo
 Anemo Traveler
 Chasca
 Jean
Jean Kaedehara Kazuha
 Mizuki
 Varka
Varka Venti
Venti Wanderer
 Xianyun
 Xiao
Xiao Vesna
Vesna Childe
 Columbina
 Furina
 Hydro Traveler
 Ayato
Ayato Mona
Mona Mualani
 Neuvillette
 Nilou
Nilou Kokomi
 Sigewinne
 Yelan
Yelan Vodyanitsa
 Albedo
 Arataki Itto
 Chiori
 Geo Traveler
 Linnea
 Navia
Navia Xilonen
 Zhongli
 Zibai
Zibai Clorinde
 Cyno
Cyno Electro Traveler
 Flins
Flins Ineffa
 Keqing
 Raiden Shogun
 Varesa
 Yae Miko
 Dendro
 Alhaitham
 Baizhu
 Dendro Traveler
 Emilie
 Kinich
 Lauma
Lauma Nahida
 Nefer
Nefer Tighnari
 Arlecchino
 Dehya
Dehya Diluc
Diluc Durin
Durin Hu Tao
 Klee
Klee Lyney
Lyney Mavuika
 Nicole
 Pyro Traveler
 Yoimiya
 Aloy
Aloy Citlali
 Escoffier
 Eula
Eula Ganyu
Ganyu Kamisato Ayaka
 Lohen
Lohen Qiqi
Qiqi Sandrone
 Shenhe
 Skirk
Skirk Wriothesley
 Ifa
Ifa Jahoda
 Lan Yan
 Lynette
 Prune
Prune Sayu
Sayu Shikanoin Heizou
 Sucrose
 Aino
Aino Barbara
 Candace
 Dahlia
 Xingqiu
 Gorou
Gorou Illuga
 Kachina
 Ningguang
 Noelle
 Yun Jin
 Beidou
 Dori
Dori Fischl
 Iansan
 Kujou Sara
 Kuki Shinobu
 Lisa
Lisa Ororon
 Razor
Razor Sethos
 Alyosha
 Collei
 Kaveh
Kaveh Kirara
 Yaoyao
 Amber
Amber Bennett
 Chevreuse
 Gaming
 Thoma
Thoma Xiangling
 Xinyan
 Yanfei
 Charlotte
 Chongyun
 Diona
Diona Freminet
 Kaeya
Kaeya Layla
Layla Rosaria
 Danica
 Mitya
Mitya Noy
Noy Odette
 Tsaritsa
 Valeriy


















 Sword
Sword Claymore
 Polearm
 Catalyst
 Bow
Bow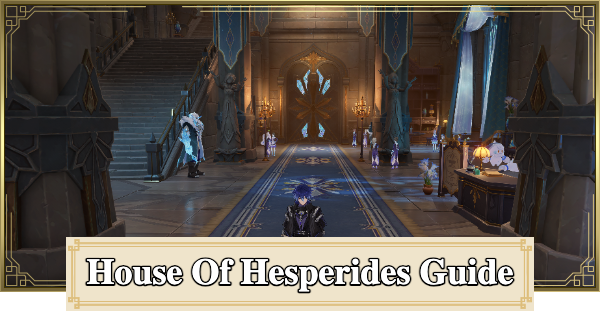
House Of Hesperides To Do, Map, & Gimmicks guide for Genshin Impact Version 7.0. Guide includes House Of Hesperides, location, map, paintings, VIP Lounge, Hide-and-Seek, puzzles and more!
Table of Contents
Note: We are currently updating this article, please check back again to get more updates, thank you.
House Of Hesperides Puzzle List & Guide
| Table of Contents | ||
|---|---|---|
| ▼Painting Collection | ▼VIP Lounge | ▼Suspicious Ceiling |
| ▼Hide-and-Seek | ▼Empty Room | ▼Statues |
| ▼Garden Chest | ||
Painting Puzzle Locations
| Collect 5 to Open the Door | Location Map |
|---|---|
  |  |
In the House of Hesperides, there are a total of 5 paintings you can pick up. After collecting all of them, you can obtain treasure chests as rewards.
How to Get the First Painting
| Map | Detailed Location |
|---|---|
 |  |
First, go to the 1F (marked as the Front Hall on the map). Upon entering the hall, go left, where you can see a handful of Matryoshka dolls on the table. Only one doll is frozen and you need to remove it using the Fab-Vision.

After removing the frozen state of the doll, interact with it 4 times until it gives you the key.

Head to the door under the stairs and unlock it using the key you got from the dolls. After unlocking the door, a Jack Frost will greet you in the entrance, and inside the room, you can get the first painting.

The moment you pick it up, a message will display saying that the painting was returned to its original place, so it will not be saved in your inventory.

After picking up the painting, follow the Jack Frost that was inside the room. Upon reaching the other Jack Frost who was standing beside the location of the dolls, you will automatically complete the puzzle and get a treasure chest as a reward.
Location of the Second Painting
| Map | Detailed Location |
|---|---|
 |  |
Head to the first floor of the House of Hesperides (marked as the Front Hall on your map). Take the stairs immediately to the right of the main entrance to locate the Paintbrush-Holding Jack Frost. After the dialogue finishes, sit in the chair to complete the artwork, then interact with the finished piece to collect it.
How to Get the Third Painting
| Map | Detailed Location |
|---|---|
 |  |
Proceed to the south room on the 2nd floor of House of Hesperides.

Upon entering the room, you will see that there are paintings on the wall. First, rotate the large painting above the bed → Second, rotate the small painting beside it (left).

Next, there are two paintings on the right side of the room. Behind the large cabinet, another painting is hidden behind it. Interact with the painting and rotate it one time → Lastly, put a cube under the hanging painting to correct its position.

Upon correcting all the paintings in the room, the wall behind the hanging painting will be unlocked. Go inside the hidden room and pick up the third painting and obtain also the treasure chests,
Location of the Fourth Painting
| Map | Detailed Location |
|---|---|
 |  |
For the fourth painting, you must first progress the Hesperides of Love and Hate quest until you reach the "House of the Soulless" stage, unlocked upon entering the palace. Proceed with the quest, as the painting is located in a small room accessed by solving an ice statue puzzle
How to Get the Fifth Painting
| Map | Detailed Location |
|---|---|
 |  |
Head to the third floor of the House of Hesperides, then exit to the outdoor area.

Follow the path and you'll find an enemy, 'Tsvetaev.' Defeat it.

After defeating the enemy, place a link mechanism, connecting it to the other link mechanism above. Once placed, use the link mechanism to travel to the top of the tower.

Once you reach the top of the tower, dismantle the ice floor and then go down.
Ring the bell to call down the Seelie and then ring the bell to the other one so it can pass through the elemental monument. Once it passes through the mechanism, quickly hit the mechanism with a Cryo element.

After breaking the window seal, follow the Seelie.

You'll find the same puzzle ahead, so solve it using the same steps. Once the puzzle is solved, go down to the bottom area.
There's another similar puzzle, but this time the Elemental Monument is not in a straight line between the bells. Ring one bell, and while the Seelie is moving, ring another bell to make it pass by the Elemental Monument.

Once the puzzle is solved, go to the Seelie near the Elemental Monument. When the Seelie settles at its torch, the walls on both sides will open, revealing treasure chests and the painting.

The painting you're looking for is on the left wall. Be sure to collect both the painting and the treasure chests.
How to Enter the VIP Lounge & Abuzova's Answers

To enter the VIP Lounge, start from the front of the south room on the 2nd floor and head southwest on the map. The VIP Lounge is the place blocked by a guard.

You can talk to the guard if you want, but you must talk to the pair of Snegovik Waiters resting in the chairs beside the room. If you don't talk to them, you won't be able to trigger the 'Guest's Token' in Step 3.

After talking to the Snegovik Waiters, investigate the light near the boxes at the end of the hall to get the 'Guest's Token'.

After obtaining the Guest's Token, return to the guard and talk to him to enter the VIP Lounge. Next, talk to 'Abuzova' in the center of the room.

Upon entering, talk to Abuzova and hear her request. After talking to her, go talk to Zlatov next to the pillar.

Zlatov will ask you to block a gap. In the next room, place two 'Cubes' using object creation on the desk in the back. It's correct if it looks like the image above.

After blocking the gap, talk to Zlatov and select the conversation option about resting in the side room. After saying it to Zlatov, you will get a treasure chest.

After Zlatov, talk to 'Iskelina' next to him. At the end of the conversation, you need to talk to her and let her know she will be guided by a staff member towards the main hall.

After Iskelina, talk to 'Koshakova,' the person on the left of the pair near Abuzova. Tell her that she will be guided in the main hall.

After Koshakova is 'Khmelyova' next to her. Just tell her to that she will be resting in the 'Side Room '.

After assigning the four people, return to report to Abuzova. Select 'I'm ready' in the conversation to proceed with the event and complete it.
Ceiling Puzzle and Solution

To reach the ceiling puzzle, which is visible from the rooftop outside but cannot be entered directly, you must start from the 2F north room entrance.

After teleporting to the designated area, go up the stairs on the left.

Once you reach the top of the stairs, place a grappling gun on the floor facing the chandelier. Before placing it, make sure that the line extends from the launcher to the top of the chandelier to avoid wasting prime ice material.
| 1st/3rd |
|---|
 |
| 2nd/4th |
 |
Once the path above the chandelier appears, activate the four Cryo monuments in order from fewest to most nearby Ikhor Dolls. There will be branches of trees that block some of the monuments, so it is recommended to use Cryo bow characters like Diona.

Once you've cleared the Cryo Monuments, open the chest ahead. The wall behind it will automatically spin open, so walk right through the opening to keep going.

Head through the hidden door to reach the ceiling. There will be a Seelie trapped inside the glass at the back. Freeing it will make exploring this area much easier.
Hide-and-Seek Puzzle
| Map | Detailed Location |
|---|---|
 |  |
Near the 2nd-floor entrance, you'll find four Jack Frosts gathered together. As you get close, three of them will scatter, leaving one behind. Track them all down to claim a treasure chest—check the locations below if you need help finding them.
Locations of the Hidden Jack Frosts
| 1st |
|---|
  |
The blue hook on the shelf is the target. Place a Grappling Gun mechanism.
| 2nd |
|---|
 |
The top part of the decoration on the wall is where the Jack Frost is located. Approach it and remove it.
| 3rd |
|---|
 |
The last one is disguised as a barrel. Paimon will speak when you get close to it. Destroy the barrel by attacking it to reveal the Jack Frost.
Empty Room

Start at the southwest teleport waypoint on the 3rd floor, then head down.

Go to the left gate, as shown in the image above.

When you reach the exhibit room, leave the two link mechanisms already there. As shown in the image above. Then place a Simple Heat Source, Launch Pad, and Grappling Gun. It is also recommended to break the cube behind the hidden door so you can pass through it.
Elegant Snegurochka Statues Puzzle
| Map | Actual Location |
|---|---|
 |  |
Adjust the Statues to Their Respective Paintings
| Left Statue | Right Statue |
|---|---|
 |  |
Get close to the statues to start rotating them, and stop them whenever you want to lock in a direction. Just line each statue up so it's facing the matching painting nearby.
How to Get the Garden Chest

The garden chest of House of Hesperides is in an underground cave, though it's not quite visible on the map. It's unrelated to the House of Hesperides itself. Follow the railway track extending from Svetloledovka to reach the designated area.
| Map | Detailed Location |
|---|---|
 |  |
You can reach the chest's location by taking the side path along the railway. Refer to the map above for the location of the trail.

The side path is a single road, so you won't get lost. Defeat all the enemies lurking around the chest to unlock it.
Navigating The House Of Hesperides Map
Recommended To Use Eye of Graeae

The overall map of House of Hesprides is quite intimidating to navigate, however, you can easily check the overall map of the house through Eye of Graeae and see where to go. You can check the image above for reference.
Steps to View the Map Using the Eye of Graeae

Open your inventory and equip the Eye of Graeae

After equipping it, open it and then select the messages from the Eye of Graeae. You can check the image above for reference.

After opening the message, select the message containing the House of Hesperides Map. If you haven't opened this message, a conversation will start and at the end of the chat, a map will be provided by the Eye of Graeae.

Once you open the map, select the map you are interested in and choose the exclamation point or picture icons. If it hasn't been collected, you can track it. Completed ones will have a green checkmark, so it's a good idea to explore.
How to Get to the House Of Hesperides
Progress Through the World Quest 'Hesperides of Love and Hate'

| Condition | Activates upon approaching the Statue of the Seven in the south of Svetloledovka |
|---|
To get to the House Of Hesperides, you first need to accept the World Quest 'Hesperides of Love and Hate' and complete the steps to reach the palace. You can get to the palace itself early in the quest, so if you're heading there now, look for the Statue of the Seven mentioned above.
Genshin Impact Related Articles
| Related Guides | |||||
|---|---|---|---|---|---|
| 7.0 Update | |||||
| New & Rerun Characters | |||||
| Odette | Arlecchino | ||||
| Ineffa | Flins | ||||
| New Non-Limited Characters | |||||
| Alyosha | Cryo Traveler | ||||
| Useful Tools | |||||
| Event Calendar & To Do List | |||||
| Best Girl Ranking Tool | Best Boy Ranking Tool | ||||
| Item Locations & Databases | |||||
| Interactive Map Guide Of All Items & Chests | |||||
| Anemoculus | Geoculus | ||||
| Electroculus | Dendroculus | ||||
| Hydroculus | Pyroculus | ||||
| Lunoculus | Cryoculus | ||||
| Other Popular Guides | |||||
| Best Character Tier List | Reroll Tier List | ||||
| Best Team Comps | - | ||||
| Other Guides | |||||
| Artifact List + Set Bonuses | Artifacts Guide | ||||
| How To Reroll Fast | All Characters List | ||||
| All Weapons List | How To Download Genshin? | ||||











