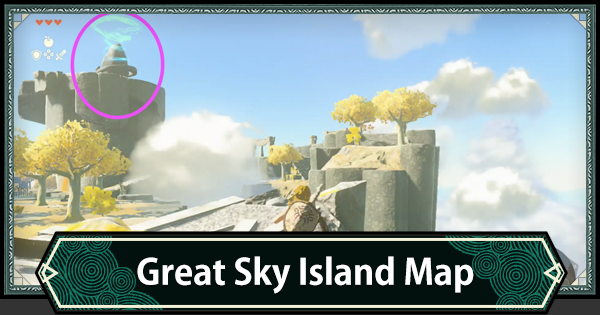
Great Sky Island map guide in The Legend of Zelda: Tears of the Kingdom (TotK). See Great Sky Island location, how to go, how to reach the 3 islands, Sky Map & walkthrough tips!
| Related Guides | |
|---|---|
Table Of Contents
Great Sky Island - Koroks, Shrine, Treasure Chest Map
Three Shrines Recommended Route
Recommended Shrine Route

The pink line is the Surface and the green line is the route through the cave.
You will be asked to visit the three shrines, but you will need to figure out how to get there and what route to take. You can start in any order, but for the sake of efficiency, this site recommends going counterclockwise as shown in the image above,
| No. | Shrine | Ability Unlocked |
|---|---|---|
| ① | Ukouh Shrine | Ultrahand |
| ② | In-isa Shrine | Fuse |
| ③ | Gutanbac Shrine | Ascend |
Travel Is Not Available Until You Return To The Temple Of Time
Travel to the shrines is not available until you return to the Temple of Time after visiting the three shrines. It will take a lot of time to finish all of Sky because of the detour if you take any other route than the above.
① Until Arrival At Ukouh Shrine
| Order | Step By Step Guide |
|---|---|
 With your back to The Closed Door, aim first at the shrine on the right side With your back to The Closed Door, aim first at the shrine on the right side | |
 Go down to the ground below, then straight ahead and up the stairs to the shrine Go down to the ground below, then straight ahead and up the stairs to the shrine | |
| At the shrine, the Ultrahand will be released, so learn how to use it as you go |
② To The Arrival At In-Isa Shrine
| Order | Step By Step Guide |
|---|---|
 Take the route shown on the map Take the route shown on the map | |
 Cross the bridge by connecting the wooden planks with Ultrahand and get down to the cliff on the south side Cross the bridge by connecting the wooden planks with Ultrahand and get down to the cliff on the south side | |
 Take the route shown on the map Take the route shown on the map | |
| Cross the bridge by connecting the wooden planks with Ultrahand Bow and arrow tutorial next to the Construct | |
| Go toward where the animal was at and climb the cliff | |
 Go down the other side to find the Construct's base Go down the other side to find the Construct's baseYou can fight or go around | |
| Go to the lake behind the Construct base | |
 Build a raft, float it on the lake, and go to the land ahead Build a raft, float it on the lake, and go to the land ahead | |
| Go ashore and climb the stairs to the In-isa Shrine |
③ Until Arrival At Gutanbac Shrine
| Order | Step By Step Guide |
|---|---|
 When you exit the shrine, go to the right When you exit the shrine, go to the right | |
| Go through the Constructs and head to the cave in the back Pick up any items you can | |
 After exiting the cave, use Ultrahand to build a raft to cross the river After exiting the cave, use Ultrahand to build a raft to cross the river* Fan and other Zonai Devices are activated by hitting them with a weapon | |
| Follow the path up the hill and enter the cave again * In the dark cave, it is good to throw Brightbloom | |
 Get the Fan from the Construct before the exit, attack it to the Mine Cart and run Get the Fan from the Construct before the exit, attack it to the Mine Cart and run | |
 Use the Mine Cart as a gondola and proceed along the broken rail Use the Mine Cart as a gondola and proceed along the broken rail | |
| Once on land, jump off the cliff into the pond Go further into the cave | |
 Collect Spicy Pepper and use Food for Cold Resistance Collect Spicy Pepper and use Food for Cold Resistance▶ Food Guide | |
 After the cave, climb up the tree roots After the cave, climb up the tree rootsAfter climbing up, you will see a shrine |
How To Return To The Temple Of Time
| Order | Step By Step Guide |
|---|---|
 After leaving the shrine, ascend the ledge with Ascend and proceed After leaving the shrine, ascend the ledge with Ascend and proceedOn the way, you will get some Archaic Warm Greaves | |
 Take it to the runway, get in, and take off Take it to the runway, get in, and take off* You don't need to attach the Fan | |
 Go straight toward the Temple of Time Go straight toward the Temple of Time* Fan plane can be controlled by shifting your weight |
Walkthrough Chart To The Fourth Shrine
Get Recall At The Back Of The Temple Of Time
Open the door to the Temple of Time and get the Recall ability at the back. Use the Recall to go further in.
Recall - How To Use & EffectsYou Will Need To Clear The Fourth Shrine

It will be necessary to go to the fourth shrine to conquer it because four Hearts are needed to open the door at the innermost part of the temple.
| Order | Step By Step Guide |
|---|---|
 Map→Travel to Room of Awakening Map→Travel to Room of Awakening | |
| Ascend to the upper level near the cogweel Use Recall to maneuver your way to the hole in the back of the room | |
| Clear the Nachoyah Shrine | |
 Travel to Ukouh Shrine, ascend to the bottom of the temple, and return to the Temple of Time Travel to Ukouh Shrine, ascend to the bottom of the temple, and return to the Temple of Time | |
| Receive the Heart Container, open the door at the back, go ahead, jump down, and return to the Surface |
Zonai Devices/Gimmick Puzzle Points
Iron Rods/Rails

Iron Rods can be moved easily by using Ultrahand when hook and wooden Boards or logs are Building Blocks. If you can't rotate them well, use Ultrahand with the hooks directly in front of you.
Moving On Water
| Sail + Log | Fan + Log |
|---|---|
 |  |
If a sail or Fan is down, you can combine it with a log to make a raft, which is useful for moving on the water. This is useful when moving on the water, so keep it in mind. Fan can be activated by hitting it with a weapon.
Floating Scaffolding

Floating Scaffolding can be moved by Ultrahand. By moving them alternately, they can climb to high places.

▲ By starting with the Fan on the bottom, Scaffolding can be raised to go up
Mine Cart

The Mine Cart moves when placed on rails and when combined with Zonai Devices' Fan, it can move from low to high.

▲ Fuse Mine Cart to Shield and Shield Surf, so you can also run on the rails. Shield Surf can be done by pressing ZL+A
Shield Surf Guide - How To Use & EffectGlider (Wing)

This gimmick is located near the shrine on the snowy mountain. When placed on the rail, the glider begins to descend. The distance varies depending on the position on the wing, and if you are in front of the wing, you can adjust the position of your fall as you descend rapidly. It disappears after about two minutes, so it cannot fly indefinitely.
Wing Guide - How To Use & GetDevice Dispenser

The Device Dispenser, also known as the Zonai Gacha, can be found in several locations in Sky. When Materials such as Zonai Charge are inserted, Zonai Devices are randomly ejected.
| Gear | Effects & Usage |
|---|---|
| Attach to Wing, Raft, and others to gain propulsion by Energy Cell consumption | |
| Can be used anywhere as a one-time use way to cook Food | |
| Consumes Energy Cells to burst into flames and melt attacks, ice |
Great Sky Island - Walkthrough Guide
Start The Main Quests
| Challenge | Strategy |
|---|---|
| Find Princess Zelda | After the opening - until the Purah Pad is obtained |
| The Closed Door | Right-Hand Ability is released by clearing 3 shrines |
| To the Kingdom of Hyrule | From clearing the chart of the Sky Islands to getting down to the Surface |
Sky is a tutorial throughout this area, where you will learn basic knowledge and controls that you can use throughout the game.
Learn About Food
In Sky, there are some snowy mountains that require Cold Resistance. In order to enter these mountains, you will need to wear cold protection or eat Cold-Resistant Food. At first, it is necessary to take measures with Food, so let's just learn the following Food Recipes.
| Food | Material | Effect |
|---|---|---|
| Spicy Pepper x2 Apple ×2 | 4 Hearts Recovery Cold Resistance Lv1 6:00 | |
| Spicy Pepper x4 | 4 Hearts Recovery Cold Resistance Lv1 10:00 |

Cooking Pots can be found in various locations, but the location closest to the Temple of Time is shown in the image. There is also a Spicy Pepper in the vicinity, so collect it.
Collect All Nearby Materials

Collect all materials you see, such as apples and mushrooms, because managing resources is an important element of the strategy, and running out of materials can lead to a pinch.
Defeat Construct To Obtain The Zonai Charge

Constructs drop an item called "Zonai Charge" when defeated. This is an item that can be used for the Device Dispenser (Zonai Gacha) described below, so try to collect as many of these as possible.
Zonai Charge Guide - How To Get?Ore Deposit Should Also Be Destroyed

Ore deposits located in the cave can be destroyed to obtain ore. It is not used for anything immediately, but it can be sold of a good amount of money, so it is a good way to make money in the early stages of the project.
Ore Deposit - How To Mine Black Rocks GuideKoroks Can Also Be Found In Many Places

If you have BotW, you know that Koroks or forest fairies are hidden all over the map. Finding them will give you a Korok Seed, an item that can be used to expand your Inventory, so look for them as much as possible.
Korok Seed Locations Map & UsesHow To Get To The Flux Construct Location & Strategy
How To Get There
| Order | Step By Step Guide |
|---|---|
 Map of where the Flux Construct is located Map of where the Flux Construct is located | |
 Use scaffolding floating in the air Use scaffolding floating in the airGet the Fan from Zonai Devices at the Device Dispenser | |
 Set the Fan so that the wind is facing the opposite direction of travel and activate it Set the Fan so that the wind is facing the opposite direction of travel and activate it | |
| When you get there, get off the island, and when you get close enough, you will be in a battle |
How To Beat It
Remove The Different Colored Cores With Ultrahand
Blocks that look different are Construct's weak point. Pulling it with Ultrahand will cause the Construct to break apart, giving you a chance to attack the core.
Flux Construct Core - How To Use & GetThere Are Three Patterns Of Forms

Flux Construct has three patterns it can morph to: the two-legged Guardian Stalk, the square block type, and the flat type shown in the video above.
| 2 Leg Guardian Stalker | Attacks such as hitting The position of the core moves each time you attack |
|---|---|
| Square Block Type | Follow this while rolling Let's go off the core while running away |
| Plane | Fly and attack by skipping blocks Avoid the blocks you've skipped, get on the block with Recall |
Square Block Type Guide
As it approaches while rolling, take out its core with Ultrahand while running away so that it is not crushed. If you are inside, it is better to remove other blocks and aim for the core.
Flat-Type Capture
The flat type cuts and throws its own block. It will be damaged when hit, so avoid it while running sideways. After that, you can ride the fell part with a recall and get on the main unit. Then, it is okay if you take out the core with Ultrahand and attack.
 Return To Top
 Great Sky Island Guide
 Main Quest Walkthrough List
 Find Princess Zelda
 The Closed Door
 To the Kingdom of Hyrule
 Crisis at Hyrule Castle (1st Time)
 Regional Phenomena
 Impa and the Geoglyphs
 Camera Work In The Depths
 A Mystery In The Depths
 Tulin of Rito Village
 Yunobo of Goron City
 Sidon of the Zora
 Riju of Gerudo Town
 Dragon's Tears
 Crisis at Hyrule Castle (2nd Time)
 Find the Fifth Sage
 Guidance From Ages Past
 Trail of the Master Sword
 Destroy Ganondorf
 Wind Temple
 Water Temple
 Fire Temple
 Lightning Temple
 Spirit Temple
 Colgera
 Marbled Gohma
 Mucktorok
 Queen Gibdo
 Seized Construct
 How To Unlock True Ending
 Post Game Guide & What To Do After Game?
