



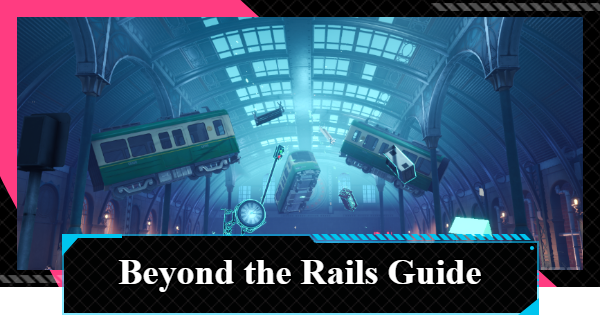
Beyond the Rails location and progression guide for NTE (Neverness to Everness). Learn how to clear stops, use Train Logs, and build the right teams in this endgame mode.
Table of Contents
| Related Articles | |
|---|---|
| Beyond the Rails Guide | Prime Circle Guide |
How to Play Beyond the Rails
Anomaly Zone North of Miguel District


Beyond the Rails in NTE is high-difficulty endgame content. Enemies are around level 60, so wait until your characters are well-developed before challenging it.
All-Day and Special Routes

The mode has the always-open "All-Day Routes" and "Special Routes" that unlock once you clear the former. Both types give rewards upon completion, so be sure to challenge them.
Prime Circle Walkthrough and Best TeamsAll-Day Routes has Permanent Stages

The All-Day Routes is comprised of 10 permanent stages that are always available. There is also the Big Owl
Event where you can earn Haniel by clearing the 10th stage.
Rewards Based on Seals Collected

Each stop has three targets such as "Time Remaining: ** seconds or more," and clearing them awards Platform Seals. With 10 stages total, there are up to 30 seals available, and every 3 collected grants "Annulith" and "Train Log" as rewards.
Exchange Train Logs for Items

"Train Logs" can be exchanged at the Mall's Otherworld Salvage Station for character-strengthening "Elite Hunter Guides" and Arc-strengthening "Chaotic Dyes," among other items.
Special Routes Refresh Every 14 Days
Special Routes are updated every 14 days, with Platform Seals reset and Anomalies at each stop changed. Rewards become claimable again, so be sure to progress as far as you can again after the reset.
Tips for Clearing Beyond the Rails
Check Enemy Weaknesses

You can check the weaknesses of monsters that will appear at each stop in advance. Attacking with the weak element shortens Challenge Duration and makes targets easier to hit.
Two Teams Required from Sixth Stop
From the Sixth Stop, both "Inbound" and "Outbound" appear, requiring two parties with no overlapping characters. The latter is a boss fight, so pick characters who can deal heavy single-target damage rather than wide-area attackers.
Check Otherworld Resonance Effects

Each route has "Otherworld Resonance" set as a stage gimmick. Buffs like "increased Basic Attack damage" are configured, so fight with these effects in mind.
Build Teams That Leverage Esper Cycle
Fielding the specified character types together activates additional skills, giving you an edge in battle. Try to trigger Esper Cycle while still including characters who hit monster weaknesses.
Esper Cycle Combinations and Effects
Use Otherworld Supply Stops on Tough Stages
At the Otherworld Supply Stop, you can spend "Shadowquill" to activate various skills. The skills you activate are only effective at that stop and cannot carry over, so save them for time-consuming stages like the "Outbound" boss from the Sixth Stop onward.
Skills Cannot Be Used Multiple Times

Exchanged skills can only be active in one slot at a time. If you want to reuse a skill elsewhere, you'll need to reset its status by clearing the Train Station where it's equipped using a team with a different skill applied. On top of that, if you accidentally bought a skill or no longer need it, you can refund it to get your Shadowquill back.
Best Teams for Fracture Circle
Fracture Circle Guide*Click below to jump to a section!
| Starting Station | Second Stop | Third Stop | Fourth Stop | Fifth Stop |
| Sixth Stop | Seventh Stop | Eighth Stop | Ninth Stop | Terminal Station |
Exploit Enemy Weaknesses

In Beyond the Rails, enemy weaknesses are displayed, so build a team with characters that can exploit those weaknesses. Being mindful of Esper Cycles will also allow you to deal damage more efficiently.
Esper Cycle GuideBest Team for Starting Station
| Recommended Formation | |||
 Esper Zero Esper Zero |  Edgar Edgar |  Nanally Nanally |  Adler Adler |
| Enemy Lv/Weakness | Rec. Lv | Recommended Gift | |
Lv43 Cosmos Cosmos  Incant. Incant. | Lv30+ | Esper Resonance - DMG+ | |
This team is built around Cosmos and Incantation characters, which are attributes that the enemy is weak to. By including an Anima character, you can aim to trigger the Esper Cycles: Blossom and Hexed.
Best Team for Second Stop
| Recommended Formation | |||
| Esper Zero | Edgar |  Hathor Hathor |  Skia Skia |
| Enemy Lv/Weakness | Rec. Lv | Recommended Gift | |
Lv46 Cosmos  Lakshana Lakshana | Lv30+ | Esper Resonance - DMG+ | |
This is a team built around Cosmos and Lakshana characters. You can aim to trigger the Esper Cycle Remora.
We also recommend including Anima characters to trigger Charge.
Best Team for Third Stop
| Recommended Formation | |||
| Esper Zero |  Sakiri Sakiri | Nanally | Adler |
| Enemy Lv/Weakness | Rec. Lv | Recommended Gift | |
Lv49 Cosmos Incant.  Psyche Psyche | Lv40+ | Esper Resonance - DMG+ | |
This team is built around Cosmos and Incantation characters. By including Anima characters, you can also trigger Esper Cycles: Blossom and Hexed.
Best Team for Fourth Stop
| Recommended Formation | |||
 Baicang Baicang | Sakiri |  Daffodill Daffodill | Adler |
| Enemy Lv/Weakness | Rec. Lv | Recommended Gift | |
| Lv52 Incant. | Lv40+ | Off-Rail Resonance - Incantation | |
This team is centered around Incantation Espers that can exploit the enemy's weaknesses. You can proc Scorch
with Daffodill, but we also recommend including Anima characters for Hexed.
Best Team for Fifth Stop
| Recommended Formation | |||
| Esper Zero | Edgar | Nanally |  Chiz Chiz |
| Enemy Lv/Weakness | Rec. Lv | Recommended Gift | |
| Lv55 Cosmos | Lv50+ | Off-Rail Resonance - Cosmos | |
This team composition is centered around Cosmos characters. You want to trigger Blossom
with Anima characters like Nanally, but we also recommend including Lakshana characters for Remora.
Best Team for Sixth Stop
| Recommended Inbound Formation | |||
| Esper Zero | Sakiri |  Jiuyuan Jiuyuan |  Mint Mint |
| Enemy Lv/Weakness | Rec. Lv | Recommended Gift | |
Lv58 Cosmos  Anima Anima | Lv50+ | Esper Resonance - Cycle Intensity | |
| Recommended Outbound Formation | |||
| Nanally | Hathor | Chiz |  Haniel Haniel |
| Enemy Lv/Weakness | Rec. Lv | Recommended Gift | |
| Lv58 Anima Laksha. | Lv50+ | Esper Resonance - DMG+ | |
Inbound Strategy
Favor using Esper Zero and Jiuyuan, whose attacks affect a wide range and can exploit weaknesses. Mint's Blossom is also ideal for defeating multiple enemies. Including Sakiri allows you to apply buffs and restrain mobs.
Outbound Strategy
Fight with Nanally and Hathor as your main units. Use Chiz for Charge procs, and rack up damage with Hathor's Cyclone Strike during damage windows.
Best Team for Seventh Stop
| Recommended Inbound Formation | |||
| Jiuyuan | Nanally | Hathor | Esper Zero |
| Enemy Lv/Weakness | Rec. Lv | Recommended Gift | |
| Lv60 Anima Laksha. | Lv55+ | Omnidirectional Vortex | |
| Recommended Outbound Formation | |||
| Daffodill | Sakiri | Baicang |  Fadia Fadia |
| Enemy Lv/Weakness | Rec. Lv | Recommended Gift | |
Lv60 Cosmos  Chaos Chaos | Lv55+ | Esper Resonance - DMG+ | |
Inbound Strategy
Fight with Jiuyuan as the main DPS as she can exploit weaknesses. Hathor acts as a secondary attacker since her range is narrow outside of her Ultimate and Cyclone Strike, so tag her in when her Ultimate Energy is full.
Outbound Strategy
There are numerous weaknesses present in the Outbound, so we recommend building your team around either Cosmos or Chaos. Since Cosmos was used previously, a Chaos formation may be easier to build for the Outbound. Center your team around Daffodill, and if you can, try to activate Discord as well.
Best Team for Eighth Stop
| Recommended Inbound Formation | |||
| Sakiri | Baicang |  Aurelia Aurelia | Daffodill |
| Enemy Lv/Weakness | Rec. Lv | Recommended Gift | |
| Lv62 Incant. Psyche | Lv55+ | Omnidirectional Vortex | |
| Recommended Outbound Formation | |||
| Esper Zero | Nanally | Jiuyuan | Hathor |
| Enemy Lv/Weakness | Rec. Lv | Recommended Gift | |
| Lv62 Cosmos Anima | Lv55+ | Esper Resonance - DMG+ | |
Inbound Strategy
Baicang will act as the main DPS since he can land wide-range attacks and exploit weaknesses. Try to apply Scorch to multiple enemies simultaneously to make defeating them much easier.
Outbound Strategy
Prioritize keeping Nanally active and aim to proc Charge. You can rack up damage by increasing the frequency of Ultimate Skills.
Best Team for Ninth Stop
| Recommended Inbound Formation | |||
| Daffodill | Fadia | Aurelia | Haniel |
| Enemy Lv/Weakness | Rec. Lv | Recommended Gift | |
| Lv63 Chaos Psyche | Lv60+ | Instant Judgement | |
| Recommended Outbound Formation | |||
| Esper Zero | Nanally | Jiuyuan | Hathor |
| Enemy Lv/Weakness | Rec. Lv | Recommended Gift | |
| Lv63 Cosmos Anima | Lv60+ | Esper Resonance - DMG+ | |
Inbound Strategy
This Formation is centered on Daffodill as the main DPS, activating combos with allies that can heal and buff. Since there are 3 characters Psyche characters included, try to inflict Nova on as many enemies as you can for a faster clear.
Outbound Strategy
Same as the 8th Stop, Prioritize keeping Nanally active and aim to proc Charge. You can rack up damage by increasing the frequency of Ultimate Skills.
Best Team for Terminal Station
| Recommended Inbound Formation | |||
| Esper Zero | Jiuyuan | Mint | Sakiri |
| Enemy Lv/Weakness | Rec. Lv | Recommended Gift | |
| Lv65 Cosmos Anima | Lv60+ | Esper Resonance - Cycle Intensity | |
| Recommended Outbound Formation | |||
| Nanally | Chiz | Hathor | Haniel |
| Enemy Lv/Weakness | Rec. Lv | Recommended Gift | |
| Lv65 Cosmos Anima | Lv60+ | Esper Resonance - DMG+ | |
Inbound Strategy
Cycle between using Esper Zero and Jiuyuan, whose attacks can both hit a wide range and exploit enemy weaknesses. Mint's Blossom AoE is ideal for defeating multiple enemies. Using Sakiri also allows for buffs and disabling enemies.
Outbound Strategy
Prioritize keeping Nanally on the field. The main strategy revolves around Blossom with Chiz, and using Hathor's Cyclone Strike and Charge to maximize damage during large openings such as Breaks.
Best Teams for Cresting Circle Stage 11-12
Best Team for Cresting Circle Eleventh Stop
| Recommended Inbound Formation | |||
 Chaos Chaos | Hathor | Esper Zero | Haniel |
| Enemy Lv/Weakness | Rec. Lv | Recommended Gift | |
| Lv85 Cosmos Lakshana | Lv80+ | Omnidirectional Vortex | |
| Recommended Outbound Formation | |||
 Lacrimosa Lacrimosa | Baicang | Sakiri | Daffodill |
| Enemy Lv/Weakness | Rec. Lv | Recommended Gift | |
| Lv85Incantation Chaos | Lv80+ | Esper Resonance - DMG+ | |
Inbound Strategy
Group enemies effectively using the Omnidirectional Vortex gift to trigger Remora reactions between Esper Zero and Chaos. Once Delivery Power reaches maximum stacks, activate Hathor's Ultimate and chain her Redirect Skill to deal massive AoE damage across the field. Haniel serves as the primary offensive support, keeping team-wide damage buffs active continuously.
Outbound Strategy
Focus on maximizing field time for Lacrimosa as your main DPS while using Daffodil and Baicang to break enemy shields during large vulnerability windows. Utilize Sakiri's buff triggers to amplify total team damage, coordinating Ultimate activations right after successful enemy Breaks.
Best Team for Cresting Circle Twelfth Stop
| Recommended Inbound Formation | |||
| Lacrimosa | Baicang | Sakiri | Daffodill |
| Enemy Lv/Weakness | Rec. Lv | Recommended Gift | |
| Lv90Cosmos Incantation | Lv85+ | Strike the Weak | |
| Recommended Outbound Formation | |||
| Chaos | Hathor | Esper Zero | Haniel |
| Enemy Lv/Weakness | Rec. Lv | Recommended Gift | |
| Lv90Cosmos Lakshana | Lv85+ | Esper Resonance - CRIT DMG | |
Inbound Strategy
Focus purely on single-target DPS and breaking the boss's shield. Use Baicang and Sakiri to aggressively deplete the shield gauge. Once broken, burst heavily with Lacrimosa to maximize the Strike the Weak damage bonus.
Outbound Strategy
Hathor helps deal damage and break the boss's shield. Trigger Remora using Esper Zero and Chaos to deal massive damage with Chaos's passive skill. Make sure to set up Haniel's buffs before using Chaos's Ultimate and charged attacks to clear the boss faster.
List of Miss Levi's Gifts
| Gift | Cost | Effect |
|---|---|---|
| Essence Surge | 200 | Restores the current character's Ultimate Energy to maximum. |
| Core Lock | 200 | Inflicts a Fury mark on the in-range enemy with the highest Max HP, lasting 30s. Reduces their damage by 30%, and increases damage dealt by all allies to them by 30%. |
| Instant Judgement | 200 | Deals damage equal to 10% of Max HP to all enemies in the scene upon activation. |
| Sync Restart | 200 | Resets all allies' Skill cooldowns upon activation. |
| Omnidirectional Vortex | 200 | Summons a Black Hole that lasts for 30s, continuously pulling in nearby enemies and dealing 5,000 fixed Chaos DMG to all enemies within range every 3s. |
| Zero Hour Restart | 100 | Resets the current character's Redirect Skill cooldown. |
| Esper Resonance - ATK | 100 | Increases Team ATK by 20% for 60s. |
| Esper Resonance - DEF | 100 | Increases Team DEF by 20% for 60s. |
| Esper Resonance - HP | 100 | Increases Team HP by 20% for 60s. |
| Esper Resonance - CRIT RATE | 100 | Increases Team Crit Chance by 16% for 60s. |
| Esper Resonance - CRIT DMG | 100 | Increases Team Crit DMG by 32% for 60s. |
| Esper Resonance - DMG+ | 100 | Increases Team DMG by 20% for 60s. |
| Esper Resonance - Break Intensity | 100 | Increases Team Break Intensity by 100 for 60s. |
| Esper Resonance - Cycle Intensity | 100 | Increases Team Cycle Intensity by 100 for 60s. |
| Esper Resonance - Strike the Weak | 100 | Deals 25% bonus damage to Broken enemies. |
| Esper Resonance - Lone Hero | 100 | Increases a character's DMG by 50% and Max HP by 50% when they are the only one deployed. |
| Off-Rail Resonance - Cosmos | 50 | Team Cosmos DMG +8%. |
| Off-Rail Resonance - Chaos | 50 | Team Chaos DMG +8%. |
| Off-Rail Resonance - Anima | 50 | Team Anima DMG +8%. |
| Off-Rail Resonance - Incantation | 50 | Team Incantation DMG +8%. |
| Off-Rail Resonance - Psyche | 50 | Team Psyche DMG +8%. |
| Off-Rail Resonance - Lakshana | 50 | Team Lakshana DMG +8%. |
| Off-Rail Resonance - CRIT RATE | 50 | Team Crit Chance +6%. |
| Off-Rail Resonance - ATK | 50 | Team ATK +8%. |
| Off-Rail Resonance - DEF | 50 | Team DEF +15%. |
| Off-Rail Resonance - HP | 50 | Team HP +8%. |
| Off-Rail Resonance - Break Intensity | 50 | Team Break Intensity +40. |
| Off-Rail Resonance - Cycle Intensity | 50 | Team Cycle Intensity +48. |
| Off-Rail Resonance - CRIT DMG | 50 | Increases Team CRIT DMG by 16%. |
NTE Related Articles
Return to HomeRecommended Articles
Recommended Guide Articles
 Early Game Guide
 Mid-Game Guide
 Daily Things to Do
 Team Building Tips
 Hunter Level
 Appraisal Level
 Anomaly Commission List
 Get Chiz for Free
 Get Free S-Rank Arcs
 Mall Guide
 Oracle Stone
 Interactive Map
 Best In-Game Purchases
 How to Min-Max Consoles
 Hunter Exchange
 Latest Updates
Database
 All Items List All Items List |  All Furniture List All Furniture List |  Fish List Fish List |
 Vehicles List Vehicles List |  Hidden Achievements Hidden Achievements |  Voice Actor Cast Voice Actor Cast |
 Outfits and Skins Outfits and Skins |  Arcs Weapon List Arcs Weapon List |  All Cartridges List All Cartridges List |
 Gacha Machine Locations Gacha Machine Locations |  Achievements List Achievements List |  Common Enemy List Common Enemy List |











