


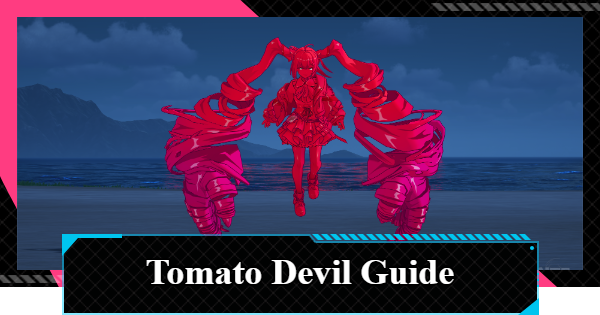
Tomato Devil boss guide for the Hunter's Crucible event in Neverness to Everness (NTE). See Tomato Devil's mechanics, best team, and how to counter Tomato Devil's attack patterns.
Tomato Devil Boss Mechanics
A Boss With Liquid-Based Attacks


The Tomato Devil is a boss that uses Liquid to create weapons and unleash a variety of attacks. It features wide-area, delayed, and ranged attacks. While its overall move count is average, it is a well-rounded boss that can be challenging to deal with.
Chaos Attacks Are Effective

The Tomato Devil's weakness Attribute is set to "Chaos." Attacking with its weakness Attribute allows you to efficiently reduce the enemy's Break resistance, making it easier to gain the advantage in battle.
Best Team for Tomato Devil

A Lacrimosa-centered team is one of the best teams against the Chaos-weak Tomato Devil. The boss features a unique mechanic tied to landing Parry Attacks, and Lacrimosa's Redirect Skill can be reset on the fifth hit of her Basic Attack, making it easier to respond to these mechanics.
Discord Team
This team is built around Lacrimosa and can activate Discord. By using Discord to control the boss's Break gauge, you can also interrupt some of its more dangerous attacks.
Tips to Defeat Tomato Devil
Focus on Maintaining Visibility

Some of the Tomato Devil's attacks can cover the screen with a paint-splatter effect. In addition, some of its larger attacks can obstruct your view, so make sure to keep track of the boss's position at all times.
Manage Your Break Timing
The Tomato Devil has several dangerous attacks, but its tractor attack is especially threatening due to its wide range and high damage, making it difficult to dodge consistently. If you can trigger a Break during the wind-up before the tractor attack, the fight becomes much easier to manage.
Be Careful When Parrying Attacks
If you successfully land a Parry Attack against the Tomato Devil, it will transition into a special attack pattern. Be prepared for the follow-up, as you can easily get caught off guard if you are unfamiliar with the mechanic. Successfully landing another Parry Attack during the special attack will knock the boss down.
Tomato Devil Attack Patterns
Triple Uppercut
Generates 3 fist-shaped attacks from the ground in succession. A warning indicator appears for all hits, but depending on where they land, the attack effects may cover the screen, making it difficult to track the enemy's next move.
Fist Attack Combo
Connects a 4-hit fist combo into a 3-shot aerial fist barrage. Only the 2nd hit has no warning. All hits have a delay, so Dodge to match the warning indicators, and make sure to Dodge the final barrage as well rather than relying solely on the Critical Dodge from the first hit.
Spike Barrage
Dashes at high speed, spawning spikes along the trail and launching them. A warning indicator appears. The launched spikes spawn additional linear spikes upon impact, so be sure to Dodge the continuous hitbox around the impact point.
Retreating Spike Spawn
Retreats while spawning numerous linear spikes from the ground. A warning indicator appears. Chasing with melee attacks makes it easy to get caught in the area of effect, but since the spikes are slow to spawn, calmly Dodge them or attack from a distance.
Aerial Spike Barrage Combo
Launches spikes from the air, followed by an explosion, then lands and attacks with fists 4 times. Only the explosion and the 2nd fist hit have no warning. Dodge the barrage using the warning indicators as a guide, and for the fist attacks in the latter half, since the range is narrow, aim for Critical Dodges by dodging forward or backward.
Axe Slam
Generates 3 axes and slams them down. A red warning indicator appears. The hitbox range is wider than it visually appears, so pay close attention to the warning indicator and make sure to Dodge reliably.
Spear Generation and Launch
Generates a spear horizontal to the ground and launches it. A warning indicator appears. The hitbox appears to be as precise as it looks visually, and there are cases where you may not achieve a Critical Dodge even when timed correctly, so do not push your luck.
Sword Attack Combo
A 4-hit combo using a sword. The 2nd hit has no warning, and a Parry Attack is possible on the 3rd hit. If the Parry Attack fails, the 4th hit has an extremely long delay, so be careful not to assume the enemy has finished attacking.
Spear Attack Combo
A 5-hit follow-up attack that triggers upon a successful Parry Attack. All hits have warnings, and a Parry Attack is possible again on the 4th hit. Since the Parry Attack position is high up, you need to choose a move that can reach it, and successfully landing this Parry Attack allows you to knock it down.
Counter
A counterattack that activates when attacked during the curling motion. The first straight punch allows for a Parry Attack, but the subsequent rapid fist barrage has a wide hitbox and is easy to get caught in, so rather than spam Dodge, move well outside the range to avoid it.
Tractor Slam
A powerful move that throws a tractor from the air, then launches it to both sides with a time delay before exploding. The range is wider than it appears. It is most reliable to Dodge the throw the moment it leaves the hand, and Dodge the explosion the moment the tractor glows white.
NTE Related Articles
Return to HomeRecommended Articles
Recommended Guide Articles
 Early Game Guide
 Mid-Game Guide
 Daily Things to Do
 Team Building Tips
 Hunter Level
 Appraisal Level
 Anomaly Commission List
 Beyond the Rails
 Get Chiz for Free
 Get Free S-Rank Arcs
 Mall Guide
 Oracle Stone
 Interactive Map
 Best In-Game Purchases
 How to Min-Max Consoles
 Hunter Exchange
 Latest Updates
Database
 All Items List All Items List |  All Furniture List All Furniture List |  Fish List Fish List |
 Vehicles List Vehicles List |  Hidden Achievements Hidden Achievements |  Voice Actor Cast Voice Actor Cast |
 Outfits and Skins Outfits and Skins |  Arcs Weapon List Arcs Weapon List |  All Cartridges List All Cartridges List |
 Gacha Machine Locations Gacha Machine Locations |  Achievements List Achievements List |

