Sword Shield
Pokemon Sword and Shield Wiki Guide
Double Battles Best Pokemon Tier List

Double Battles Best Pokemon Tier List | Pokemon Sword Shield

Last Updated:
Double Battles Best Pokemon Tier List | Pokemon Sword Shield - GameWith
Hot Topic
Crown Tundra Now Out - Learn About It Here

Learn the Best Pokemon to catch & breed for Ranked Double Battles for the official VGC rules format in Pokemon Sword and Shield! Includes a detailed tier list, combos, & more!!!

Best Pokemon Tier List For DoublesDouble Battles Information

Featured Articles

Double Battles - Best Pokemon Tier List

*This article will be updated as the Double Battle meta develops.

Best Pokemon Chart

*Tap the Pokemon to see details!!!

Popular Combos In The Meta

*Tap the Pokemon to see details!!!

Sandstorm Combo
Tyranitar Icon▼Tyranitar Excadrill Icon▼Excadrill
Justified / Beat Up Combo
Whimsicott Icon▼Whimsicott Arcanine Icon▼Arcanine
Drizzle / Swift Swim Combo
Pelipper Icon▼Pelipper Ludicolo Icon▼Ludicolo

S Tier Pokemon - Double Battles

Dragapult (Rating: S)

Dragapult
Total Base Stats600
TypeDragonGhost

Dragapult's varied move pool and high base stats make it great even in doubles. High speed & access to Light Screen and Reflect also make it an ideal first Pokemon to set up defenses. Phantom Force also allows it to buy time during Dynamax.

Pair WithReason
Corviknight
Corviknight
Corviknight can counter Fairy types that Dragapult is weak to.
Excadrill
Excadrill
Can get out of the way of Earthquake with Phantom Force.
Check Out Dragapult's Stats and Location Here

Tyranitar (Rating: S)

Tyranitar
Total Base Stats600
TypeRock Icondark Icon

Tyranitar's Sandstorm ability is helpful for Pokemon with Sand Rush. It is also able to deal damage using Stone Edge and has a high Sp. Def stat thanks to the Sandstorm bonus. Try to use this with the Weakness Policy.

Pair WithReason
ExcadrillExcadrill Summons a Sandstorm to buff Excadrill's speed.
Check Out Tyranitar's Stats and Location Here

Excadrill (Rating: S)

Excadrill
Total Base Stats508
Type Ground IconSteel Icon

Excadrill's high attack stat & good typing, coupled with Sand Rush, make it an excellent sweeper. It's a good candidate for Dynamaxing since it's able to boost its team's defense with Max Steelspike. Running Protect is also recommended on most builds.

Pair WithReason
TyranitarTyranitar Summons a Sandstorm to buff Excadrill's speed.
BraviaryBraviary Provides a Tailwind for Excadrill, can be during or after Sandstorm. Preferable to Corviknight, so as not to stack too many steel types.
Check Out Excadrill's Stats and Location Here

Whimsicott (Rating: S)

Whimsicott
Total Base Stats480
TypeGrass IconFairy Icon

Whimsicott's main role is as a Tailwind setter, boosting its team's speed. It's also currently popular alongside Arcanine, to activate its Justified ability with Bulk Up. It is strong Tailwind setter candidate overall.

Pair WithReason
ArcanineArcanine Can attack its allied Arcanine to trigger Justified.
DracovishDracovish Provides a speed boost in order to get off a double-power Fishious Rend.
Check Out Whimsicott's Stats and Location Here

Corviknight (Rating: S)

Corviknight Icon
Total Base Stats495
Type Steel IconFlying Icon

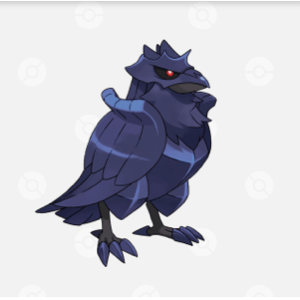
The ability to heal with Roost coupled with great physical defense. Corviknight can also set Tailwind and boost the team's defense with Max Steelspike.

Pair WithReason
DragapultDragapult Lets Dragapult outspeed almost anything.
DracovishDracovish Provides a speed boost in order to get off a double-power Fishious Rend.
Check Out Corviknight's Stats and Location Here

Arcanine (Rating: S)

Arcanine Icon
Total Base Stats555
Type Fire

Great attacker with two viable abilities. Intimidate is the most common and is useful for lowering opponent's attack. Justified is usable in certain combos too. Priority Extreme Speed is also excellent for finishing off opponents.

Pair WithReason
WhimsicottWhimsicott Beat Up can trigger Justified 4 times for a massive attack boost.
DragapultDragapult Can increase Dragapult's attack with Max Knuckle.
Check Out Arcanine's Stats and Location Here

A Tier Pokemon - Double Battles

Togekiss (Rating: A)

Togekiss Icon
Total Base Stats545
Type Fairy IconFlying Icon

Togekiss is an excellent doubles Pokemon that is being seen more and more recently. With access to some great support moves like Follow Me and Helping Hand, as well as powerful STAB Flying and Fairy moves, it can fulfill both support and offensive roles at the same time.

Pair WithReason
DragapultDragapult Togekiss can support Dragapult excellently by either boosting its power with Helping Hand or drawing attention away from it with Follow Me.
ExcadrillExcadrill Togekiss isn't affected by Earthquake and can support Excadrill.
Check Out Togekiss's Stats and Location Here

Wash Rotom (Rating: A)

Wash Rotom Icon
Total Base Stats520
Type electric Iconwater Icon

Wash Rotom's strong defensive stats and good typing allow it become one of the most commonly used Pokemon out there. Levitate provides particularly good protection against allies' Ground attacks.

Pair WithReason
ExcadrillExcadrill Isn't affected by Earthquake. Deals with water types for Excadrill.
ArcanineArcanine Covers for Arcanine's Rock, Ground, and Water weaknesses.
Check Out Wash Rotom's Stats and Location Here

Braviary (Rating: A)

Braviary Icon
Total Base Stats510
TypeFlying IconNormal Icon

Braviary is an alternative Tailwind setter that also has good offensive capabilities. It often works better with Excadrill than Corviknight, purely because they don't overlap in typing. Braviary's Brave Bird also hits significantly harder.

Pair WithReason
ExcadrillExcadrill Isn't affected by Earthquake. Can provide Tailwind to boost its speed.
DracovishDracovish Provides a Tailwind to ensure double damage on Fishious Rend.
Check Out Braviary's Stats and Location Here

Gastrodon (Rating: A)

Gastrodon Icon
Total Base Stats475
Type water Icon Ground Icon

Gastrodon's Storm Drain ability redirects water moves to it and grants it Sp. Attack, making this Pokemon amazing in double battles. It's Ground type also gives it Electric immunity, easily switching into Rotom.

Pair WithReason
ArcanineArcanine Absorbs a Water attack bound for Arcanine and allows it to continue sweeping.
Rotom-HeatHeat Rotom Absorbs Water attacks on Heat Rotom, allowing it to live long enough to Volt Switch.
Check Out Gastrodon's Stats and Location Here

Hatterene (Rating: A)

Hatterene Icon
Total Base Stats510
TypePsychic IconFairy Icon

Hatterene's incredible Special Attack stat and low speed make it perfect for Trick Room.

Pair WithReason
IndeedeeIndeedeeIndeedee can absorb hits while Hatterene sets up Trick Room.
TorkoalTorkoalTorkoal can set up Harsh Sunlight with its Drought ability to boost Hatterene's Mystical Fire and also has very low speed, benefiting greatly from Trick Room.
Check Out Hatterene's Stats and Location Here

Grimmsnarl (Rating: A)

Grimmsnarl
Total Base Stats510
Type dark IconFairy Icon

Grimmsnarl's priority status moves are incredibly useful in doubles. Prankster also allows it to have the strategic option of paralyzing a sweeper if necessary.

Pair WithReason
DracovishDracovish Grimmsnarl can paralyze a target before Dracovish hits it to ensure double damage on Fishious Rend.
DragapultDragapult Works well in terms of potential to focus fire a target after causing to flinch with Fake Out.
Check Out Grimmsnarl's Stats and Location Here

Duraludon (Rating: A)

Duraludon Icon
Total Base Stats535
Type Steel IconDragon Icon

Duraludon's good typing, stats, and moveset allow it to be a serious threat. Assault Vest variants are particularly common to give it more survivability.

Pair WithReason
WhimsicottWhimsicott Works well with Tailwind to gain a speed boost. Afterward, a Helping Hand Draco Meteor can one shot most threats.
DragapultDragapult Takes care of Fairy types that Dragapult is weak to.
Check Out Duraludon's Stats and Location Here

Heat Rotom (Rating: A)

Heat Rotom Icon
Total Base Stats520
Type electric Iconfire Icon

Fire typing is very useful against the many steel types currently in the meta. Access to Will-o-Wisp and immunity to Ground moves are also incredible. Volt Switch gives it freedom to swap out to other Pokemon after using Overheat.

Pair WithReason
ExcadrillExcadrill Levitate allows Excadrill to freely use Earthquake. Can take out their mutual weakness of Water.
Check Out Heat Rotom's Stats and Location Here

Sylveon (Rating: A)

Sylveon Icon
Total Base Stats525
Type Fairy Icon

Throat Spray and Hyper Voice can deal massive AoE damage to enemies. Access to a Fire move is also really useful.

Pair WithReason
DragapultDragapult Can use Hyper Voice while Dragapult is using Phantom Force or Protect.
Check Out Sylveon's Stats and Location Here

B Tier Pokemon - Double Battles

Torkoal (Rating: B)

Torkoal Icon
Total Base Stats470
Type fire Icon
Pair WithReason
HattereneHatterene Sets up Trick Room for Hatterene, allowing it to outspeed due to its very low speed.
IndeedeeIndeedeeWorks well with Hatterene to set up Trick Room.
Check Out Torkoal's Stats and Location Here

Pelipper (Rating: B)

Pelipper Icon
Total Base Stats440
Type water IconFlying Icon

Pelipper's main function is as a Rain setter with Drizzle, but it has the added bonus of being able to use Tailwind. Tailwind + Swift Swim will allow Ludicolo and Barraskewda to outspeed everything.

Pair WithReason
LudicoloLudicolo Drizzle activates Ludicolo's Swift Swim, allowing it to run wild.
DracovishDracovish Rain boosts Fishious Rend's power, while Tailwind ensures Dracovish can strike first.
DragapultDragapult Provides a Tailwind for Dragapult, allowing it to outspeed almost anything.
Check Out Pelipper's Stats and Location Here

Cinderace (Rating: B)

Cinderace
Total Base Stats530
Typefire Icon

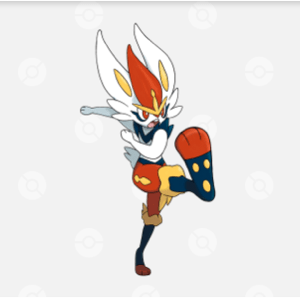
Cinderace is useful due to its relatively high speed and strong moves. U-Turn allows it so swap out quickly, while Pyro Ball can make short work of some common Steel types in the meta, like Corviknight and Excadrill. Good candidate for Dynamaxing too, due to Max Knuckle.

Pair WithReason
Rotom-WashWash Rotom Takes care of Grass types for Rotom.
DuraludonDuraludon Good switch-in choice when U-Turning out of an incoming water move.
Check Out Cinderace's Stats and Location Here

Dracovish (Rating: B)

Dracovish
Total Base Stats505
Type water IconDragon Icon

Fishious Rend deals double damage if it strikes first, so speed boosts are extremely important to Dracovish. It works excellently with Tailwind and Rain setters for this reason.

Pair WithReason
WhimsicottWhimsicott Speed boost from Tailwind is amazing. Helping Hand + Fishious Rend is a lethal combo.
PelipperPelipper Can also set up Tailwind, as well as provide rain to boost Fishious Rend.
Check Out Dracovish's Stats and Location Here

Rhyperior (Rating: B)

Rhyperior Icon
Total Base Stats535
TypeGround Icon Rock Icon

Rhyperior's low speed makes it a good candidate for Trick Room builds. With an excellent 140 attack, a STAB Rock Slide that hits both opponents is extremely dangerous. Weakness Policy is currently the go-to item for Rhyperior.

Pair WithReason
TorkoalTorkoal Another fellow Trick Room Pokemon. Can lower the effect of water moves with Drought.
HattereneHatterene Sets up Trick Room for Rhyperior while also being an extremely powerful sweeper itself.
Check Out Rhyperior's Stats and Location Here

Indeedee (Rating: B)

Indeedee Icon
Total Base Stats475
TypePsychic IconNormal Icon

Indeedee's ability Inner Focus and the move Follow Me make it a great combination with Pokemon that require setting up. For this reason, Indeedee is often seen paired with Trick Room users.

Pair WithReason
HattereneHatterene Hatterene can freely set up Trick Room with Indeedee's help.
TorkoalTorkoal Torkoal benefits massively from Trick Room, which Indeedee can help set up.
Check Out Indeedee's Stats and Location Here

Barraskewda (Rating: B)

Barraskewda Icon
Total Base Stats490
Typewater Icon

Barraskewda is a surprisingly dangerous threat when given the opportunity to strike first. With Close Combat and Poison Jab, its move coverage is also quite formidable. This Pokemon works best on a Rain team.

Pair WithReason
LudicoloLudicolo A fellow Swift Swim user, Ludicolo's good coverage moves work well alongside Barraskewda.
PelipperPelipper Pelipper sets up Barraskewda's much needed rain.
Check Out Barraskewda's Stats and Location Here

Ludicolo (Rating: B)

Ludicolo Icon
Total Base Stats480
Typewater IconGrass Icon

Ludicolo is an excellent addition to any rain team, with good typing and moves. Although Assault Vest is currently very common, Life Orb and Weakness Policy may also be good choices for it.

Pair WithReason
PelipperPelipper Pelipper sets up rain for Ludicolo, allowing it to sweep.
BarraskewdaBarraskewda Often found on the same rain team together, they complement each other well with their move variety.
Check Out Ludicolo's Stats and Location Here

Malamar (Rating: B)

Malamar Icon
Total Base Stats482
Typedark IconPsychic Icon

Malamar's good typing and access to some excellent moves make it a good addition to many teams. Contrary also allows it to turn Intimidate into a boon, so make sure to switch it in vs. Arcanine or Gyarados.

Pair WithReason
WhimsicottWhimsicott Malamar is somewhat slow, so a Tailwind really helps keep it competitive.
DragapultDragapult Good coverage alongside Dragapult.
Check Out Malamar's Stats and Location Here

Mow Rotom (Rating: B)

Mow Rotom Icon
Total Base Stats520
Type electric Icon Grass Icon

Great typing, good at taking care of some common threats like Gastrodon, Wash Rotom, and Dracovish. Can burn opposing physical attackers with Will-o-Wisp as well.

Pair WithReason
ExcadrillExcadrill Levitate allows Excadrill to freely use Earthquake. Deals well with water types Excadrill is weak against.
ArcanineArcanine Takes care of Arcanine's Water, Ground, and Rock weaknesses.
Check Out Mow Rotom's Stats and Location Here

Charizard (Rating: B)

Charizard Icon
Total Base Stats534
Typefire Icon Flying Icon

Charizard is a powerful special attacker with great move coverage, especially for its access to Solar Beam (and therefore Max Overgrowth).

Pair WithReason
WhimsicottWhimsicott Helps set up speed, and also covers Water weakness.
DuraludonDuraludonCovers Charizard's weaknesses very well, also benefits from the Tailwind speed buff being up.
Check Out Charizard's Stats and Location Here

Gyarados (Rating: B)

Gyarados
Total Base Stats540
Typewater IconFlying Icon

Gyarados is a strong physical attacker with the ability Intimidate, allowing it to cut its opponents attack on entry.

Pair WithReason
ExcadrillExcadrill Immune to Earthquake and can take care of many of Excadrill's weaknesses.
DragapultDragapult Complements Dragapult well with type coverage, can also speed it up using Max Airstream. Intimidate damage reduction is also useful.
Check Out Gyarados's Stats and Location Here

Coalossal (Rating: B)

Coalossal
Total Base Stats510
TypeRock Icon fire Icon

Great Weakness Policy user. With its ability Steam Engine, a water-type hit will give it incredible speed. This allows it to set up sweeps easily.

Pair WithReason
DragapultDragapult Dragapult can learn Surf, which will also hit Coalossal and trigger Weakness Policy and Steam Engine.
GastrodonGastrodon Gastrodon's Storm Drain draws in Water type moves, which can be useful to prevent Coalossal from getting knocked out after it has triggered its item/ability.
Check Out Coalossal's Stats and Location Here

Lucario (Rating: B)

Lucario Icon
Total Base Stats490
Type Steel IconFighting Icon

Lucario's good typing and move coverage make a good addition to many teams. Capable of being both a physical and special attacker, Lucario is quite versatile. It also has the Justified ability, so it can be used alongside Whimsicott in a similar way.

Pair WithReason
WhimsicottWhimsicott Works well with a Tailwind to help it sweep. Can proc Justified.
DragapultDragapult Deals with Fairy types for Dragapult.
Check Out Lucario's Stats and Location Here

Clefable (Rating: B)

Clefable Icon
Total Base Stats483
TypeFairy Icon

Clefable is a great support Pokemon that can divert attention away from allies and also heal itself in a pinch.

Pair WithReason
ExcadrillExcadrill Excadrill deals with Steel and Poison types for Clefable. Follow Me can also allow Excadrill to survive even longer and sweep.
ShiinoticShiinotic Can take damage while Shiinotic puts opponents to sleep with Spore.
Check Out Clefable's Stats and Location Here

Differences Between Single and Double Battles

Pokemon Use Different Moves

Some particular moves are significantly more important in double battles than singles. Don't immediately assume you can bring over a Singles Pokemon into Doubles without changing its moveset.

Protect Is Far More Important

The move Protect will block all damage you receive for one turn (except from Max Moves). You'll find that Protect timing can determine the outcome of your matches, so it's worth running it on most Pokemon.

Multi-Target Moves Are Common

Bringing moves that can hit multiple targets is incredibly advantageous because you are effectively doubling a move's power. For example, Toxtricity's Overdrive and Discharge have the same 80 power, but Discharge will hit all targets (even allies). When using such moves, consider how your own Pokemon will handle it too. You can use this to your advantage to trigger a combo, such as Surfing your Coalossal to trigger Steam Engine.

Swap Positions With Ally Switch

Ally Switch is a move which allows you to switch places with an opponent. You can use this move to reposition an ally who is about to be hit with a dangerous move. It can catch your opponent off-guard, and a surprising amount of Pokemon can learn this, such as Dragapult, Rotom, Togekiss, and more.

Weather Combos

Weather combinations are much more viable in double battles. Although it's possible to set up weather with Max Moves in singles, it's much more efficient to have another partner Pokemon to do it for you. This is one of the reasons why the Tyranitar + Excadrill combo is so popular right now. Consider creating a team that works around weather.

Have some feedback? Click here

Your feedbacks will be checked by our staffs and will be attended to accordingly. Please be advised that we may not reply to every individual feedbacks.


Reader Comments
Max. 300 Characters

By clicking Submit you are agreeing to the Terms of Use.
*Offensive, insulting or inappropriate use of forum may lead to ban/restriction.
To avoid griefing, you will not be able to post or report for the first %d hours upon visiting this forum for the first time.

Close
Anonymous 1

G. Darmantitan- gorilla tactics, bully drum, icicle crash/avalanche, and sitrus berry.
G. Weezing- Nutrulizing Gas and focus item

Cancel gorilla tactics for 2 turns, darman will use belly drum, then the move you want to use then return weezing and darmantitan will have a 4.5 power boost.

Copyright Notice

©2021 Pokémon.
©1995–2021 Nintendo / Creatures Inc. / GAME FREAK inc. All Rights Reserved.
All trademarks, character and/or image used in this article are the copyrighted property of their respective owners.
▶Pokemon Sword & Shield Official Website

Article Menu
Pokemon Sword and Shield
Expansion (DLC)
Crown Tundra
Isle Of Armor
How To Get & Beat
Isle Of Armor Walkthrough
Map & Locations
Latest News
Pokemon Trading Forums
Useful Tools
Featured Guides
Tier Lists & Meta Report
Must Reads For Beginners
Story Walkthrough
Main Story
Base Stat Ranking Perfect Breeding Guide Catching High IV Ditto Battle Tower Guide & Reward Best Pokemon For Max Raids
Game Database
Beginner Tips
New Features
Competitive Breeding
Story Walkthrough
Vs. Gym Leader
Useful Information
Pokemon Related Guide
日本語版ポケモン剣盾攻略