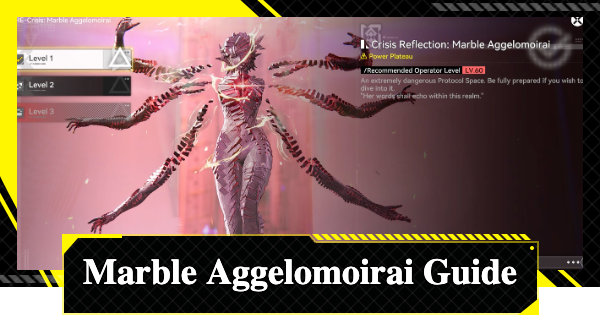
Marble Aggelomoirai boss guide in Arknights: Endfield. This guide includes how to beat Marble Aggelomoirai, recommended teams, attacks & moves, how to unlock, and rewards.
Table of Contents
| Boss Strategy Guides | |||
|---|---|---|---|
 Rhodagn Rhodagn | Triaggelos | Marble Aggelomoirai | Ruan Yi |
Marble Aggelomoirai First Phase Guide
How to Beat Phase 1
- Prepare Healing Items
- Focus on Tentacles First
- Watch Out for the Quick Sweep Attack
- Avoid Ranged Attacks by Checking Other Tentacles
- Destroy the Core to Enter Phase 2
During the first phase, keep an eye out for its ranged attacks as you attack the tentacles. It's best to save your Ultimate for when the core is exposed to destroy it quickly.
Prepare Healing Items
The first phase of the battle will require defeating the tentacles, and then its core. At the second phase, you will fight Angeromira directly. Equip healing items before starting the fight since it hit quite hard, especially in the second phase.
 | Bring characters that can provide healing like Ardelia to increase survivability. |
|---|
Focus on Tentacles First


The goal for the first phase is to defeat all 4 of its tentacles and then destroy its core. The faster you defeat the tentacles, the quicker you will transition to the second phase.
Watch Out for the Quick Sweep Attack
When you're close to the tentacles, it can perform a sweeping attack with a very short wind-up. One of your ally characters will give a warning as a signal that the attack is coming.
Avoid Ranged Attacks by Checking Other Tentacles

Distant tentacles can perform ranged attacks as you focus on one of them. Keep an eye out on the other ones to see any incoming attacks.
Destroy the Core to Enter Phase 2

The core of the main body will become exposed when you defeat all 4 tentacles. Destroying the core will bring the battle to its second phase. Use your SP and Ultimates to deplete it as soon as possible.
| To destroy the core in one go, build your Ultimate from the Tentacles, then use it on the core. |
|---|
Two Tentacles Spawn if Core Survives

If the core is not destroyed on time, it will retract, and another two tentacles will spawn. You will have to destroy the two tentacles to expose the core again.
Marble Aggelomoirai Second Phase Guide
How to Beat Phase 2
- Know Its Weapons: Spear, Sword, & Arm
- Flash of Light Signals an Attack
- Interrupt Charge Attack With Battle Skill
- Counterattack After Dodging an Attack
Consistently doing Perfect Dodges is essential in the second phase of the fight. The Marble Aggelomoirai has several attacks, so move carefully as you fight it.
Know Its Weapons: Spear, Sword, & Arm
| Spear | Sword | Arm |
 |  |  |
The Marble Aggelomoirai attacks with three types of weapons: a spear, a sword, and an arm. You will be able to predict which attack it will use based on the weapon it holds.
Flash of Red Light Signals an Attack
Most Marble Aggelomoirai attacks will be preceded by a flash of red light, which signals the perfect time to dodge. Do not base your dodges on its moves, base the dodge on the light.
Interrupt Charge Attack With Battle Skill

A red circle will appear during the wind up for the Marble Aggelomoirai's Charge Attack. Use a Battle Skill or a Combo Skill to interrupt the attack. This will create an opening to attack and deal damage to its Stagger Meter.
| Since it has multiple Charged Attacks, it's best to always have enough SP for at least one Battle Skill. |
|---|
Counterattack After Dodging an Attack
Marble Aggelomoirai becomes vulnerable after completing most of its attacks. Prioritize evasion and retaliate only after its attack sequence ends.
Marble Aggelomoirai Attacks & Moves
Phase 1 Attacks & Moves
| Attack Patterns | |
| ▼ Sweep | ▼ Consecutive Slams |
| ▼ Circular AoE + DoT | ▼ Energy Blast |
| ▼ Stab + Ground Explosion | |
Sweep

When you are at close range, the tentacle can deal a sweep attack with a very short wind-up. Listen to your allies as they will warn you of the incoming attack!
Consecutive Slams

The tentacle will consecutively slam down 5 times after stretching upwards. The fifth slam will target your character so either distance yourself or time a Perfect Dodge.
Circular AoE + DoT

The tentacle can attack with a red sphere that will create a field on the floor that will damage you over time. It's not hard to dodge, but be mindful of the area of effect before it eventually expires.
Energy Blast
When the tentacle glows red and contracts, it's a sign that will deal a 3-shot energy blast. If you Perfect Dodge the first shot, you will also avoid the rest of the attack!
Stab + Ground Explosion
 |  |
The tentacle's thrust attack starts when it stretches upwards, and a red circle appears where your character is standing. The area will explode after, so move away to avoid it.
Second Phase Attacks & Moves
Pounce + Shockwave
The Marble Aggelomoirai grows large wings and jumps into the air. It will pounce on you twice, then on the third pounce, it will create a shockwave that will cover the whole area. Avoid the shockwave by jumping when the column of light that appears flashes white.
Meteor
When the Marble Aggelomoirai jumps into the air and spreads its wings, it will unleash meteors that will rain down continuously for a period of time. There will be small AoEs that will target you specifically, as well as larger AoEs appearing randomly. Watch the ground and continue to run to dodge them.
2-Hit Scattershot
The Marble Aggelomoirai's body will glow red, then it will jump up. This signals that it will do a two-hit scattershot attack. Time your dodge to Perfect Dodge it.
3-Hit Spear

This attack starts with the Marble Aggelomoirai taking out a spear and holding it high. This 3-hit combo is pretty easy to read, so time your dodge to it.
2-Hit Spear Combo → Arm Slam

The 3-hit spear combo has a variation wherein the third hit becomes a jumping arm slam.
Spear Thrust
When it draws its spear and leans forward, it will do a thrust. The lunge range is pretty far, so it's better to dodge in time with the flash of light rather than avoid it.
Spear Thrust Combo
The thrust can also transition into another combo. Since this transition can be pretty quick, don't let your guard down after the thrust to check for the follow-up.
Spear Throw
During this attack, it will jump into the air and throw a spear at your character's location. An AoE will appear where the spear lands, so make sure to be ready to dodge both instances.
3-Hit Sword Combo
A 3-hit combo will follow when it raises its sword. The third hit will be a charge attack that you can interrupt with a Battle Skill or a Combo Skill.
Circling Sword Combo
There's also a variation of the 3-hit combo where the first attack is a thrust after it moves into your blind spot. When it disappears from your view, this variation is guaranteed to take place.
2-Hit Sword → 2-Hit Spear Combo
Alternatively, it can also vary, wherein the third hit transitions into a spear combo. This will not feature a charge attack, so it cannot be interrupted.
Vertical Sword Combo → Arm Swing
The Marble Aggelomoirai will contort its body and float while drawing its sword. It will then unleash a series of attacks that end with an arm swing. This attack's timing can be hard to read, so watch for the red flash to time your dodges.
Consecutive Arm Slams
After charging, it will unleash 5 consecutive slams, followed by an arm swing. The first and fourth attacks are charged attacks, so they can be interrupted by a Battle Skill or Combo Skill.
Charged Arm Slam
Once it charges its arm, it will dangle it on the ground before it jumps up and slams it down. It will follow this up with a charged swing attack that can be dodged or interrupted with a Combo Skill or Battle Skill.
Arm Slam → Spear Stab
In this attack, it will generate its arm and then slam it down. It will follow this with a jump, then spear stab. The spear will explode after a few seconds, so be sure to avoid the explosion.
Marble Aggelomoirai Recommended Teams
240 Second Clear Team
| DPS | DPS | Support | Support |
 Endministrator Endministrator |  Chen Qianyu Chen Qianyu |  Pogranichnik Pogranichnik |  Ardelia Ardelia |
This team is confirmed to be able to defeat the boss within 240 seconds. Apply Physical Susceptibility with Ardelia to coincide with the Stagger, then focus on unleashing Fire It Up. Pogranichnik will mainly be for SP recovery, so his Battle Skill will not be used.
Edministrator Team for Story Progression
| DPS | DPS | DPS Support | HP Recovery |
| Endministrator | Chen Qianyu |  Perlica Perlica | Ardelia |
This is a purely free-to-play Physical Team. This team focuses on building up Vulnerable through Chen, which the Edministrator then consumes with their Battle Skill. Apply Physical Susceptibility with Ardelia's Ultimate, then Battle Skill.
Basic Rotation
| 1 | Endministrator Final Strike → Ardelia Ultimate → Ardelia Battle Skill → Endministrator Ultimate |
| 2 | Chen's Battle Skill → Chen's Ultimate → Endministrator's Battle Skill |
Substitute Characters
| Character | Details |
 Estella Estella | - Substitute for Perlica - Has Solidification/Physical Susceptibility, which is great for a Physical Team |
 Alesh Alesh | - Substitute for Perlica or Ardelia - Vanguard with SP Recovery - Has Solidification, which will work great in a Physical Team |
 Akekuri Akekuri | - Substitute for Perlica or Ardelia - Vanguard with SP Recovery - Grants Link using her Charged Attack after her Ultimate |
 Snowshine Snowshine | - Substitute for Perlica or Ardelia - Good healing when HP is low |
Laevatain is Recommended for RE: Crisis


This Laevatain team is recommended for fighting the Marble Aggelomoirai in the RE:Crisis. Apply Combustion and Corrosion while building Laevatain's Ultimate. Unleash her Ultimate, then use her Basic Attacks to shred enemy HP.
Rotation to Build Melting Flame
| 1 | Akekuri Battle Skill → Wolfgard Ultimate → Laevatain Final Strike |
| 2 | Ardelia Ultimate → Ardelia Battle Skill |
| 3 | Laevatain Ultimate → Akekuri Battle Skill → Laevatain Final Strike |
These are the rotations you can follow to consistently build Laevatain's Melting Flame Stake. Once you reach 4 Melting Stacks, use her Battle Skill for increased damage.
Substitute Characters
| Character | Details |
 Antal Antal | - Swap with Akekuri - Head Susceptibility and Heat Amp work great for this team |
If You Find it Too Difficult
Can Win Without Developing the AIC
The Marble Aggelomoirai can be a wall for some players due to its overall difficulty as a boss, but you can win against it without relying on developing the AIC. If you do get stuck, it will make it a lot easier if you progress your Exploration or take some time to develop your factory.
Automated Industry Complex (AIC) Guide
Level Up Characters to 60

It's recommended to level up your characters to 60 before you fight this boss. Prioritize character upgrades first!
Promotion Guide - Character Level Caps
Raise Exploration Level to 4

Increasing your Exploration Level to 4 is considered a must-do for any player. The Marble Aggelomoirai is significantly harder than the regular enemies you will face after reaching Exploration Level 4.
How to Increase Exploration Level
Complete Trial Mission at Exploration Level 4
You will need to complete the Trial Mission that becomes available at Exploration Level 4 to further increase your level. It's not difficult since all you need to do is complete a Protocol Space for your Exploration Level.
Obtain/Enhance Weapons at Arsenal Exchange
When you pull on the character banners, you will gain Arsenal Tickets that can be used to pull on the Arsenal Exchange. Make sure to make use of your Arsenal Tickets to get weapons. After that, enhance the 5-star and 6-star weapons.
| Related Articles | |
| Recommended Weapons | Weapon Enhancement |
| Best Weapons | Curated Weapon Supply |
Obtain & Equip Essence From Energy Alluvium

You can run Severe Energy Alluvium at Exploration Level 4. You don't need tickets to get perfect Essence, but it's recommended to have at least one Essence that matches your character's weapons.
Essence can be Equipped & Unequipped
Essence is not a consumable resource. It can be switched, equipped, or unequipped at any time.
Collect Umbraline & Firebuckle

Increase the healing amount from items for your team's survivability. Collect at least 30 Umbraline and Firebuckle to create a supply of healing items and let your characters hold it.
Recommended to Have Extra

Any items used during boss battles will not be returned if you lose. The number you need will vary depending on your Exploration Level, so it's recommended to have as much as you can.
Produce Bottles

Produce Amethyst Bottles and Ferrium Bottles to create Buck Pills and Arts Tubes. This is recommended for those who want to efficiently gather recovery items. Additionally, with these ingredients, you can make Arts Vial.
Crafting Gear is Also Recommended

You can beat Marble Aggelomoirai by just leveling up your character, enhancing weapons, and collecting items. However, if your team still struggles, you should start investing in your Gear.
Get Materials from Exploration & Authority Level

It is faster to produce the materials for your Gear using the AIC, but the required materials can also be gained through Exploration and by increasing your Authority Level. You can destroy Powder Kegs with Industrial Explosives or obtain Ferrium Components from Authority Level 16 and Cryston Components from Authority Level 28. If you're not using the AIC, it's recommended to raise your Authority Level.
How to Unlock Marble Aggelomoirai
Appears in the Main Story
The Marble Aggelomoirai is a boss found in the Main Story Chapter 1, Process IV "Unextinguished Embers". This begins when you talk to Perlica, so be sure to prepare prior to starting it.
Story Walkthrough Chart - Main Missions
Challenge Again In Protocol Space
After defeating it in the main story, it becomes an available battle through the Protocol Space RE-Crisis. You can get rewards for your first clear in RE-Crisis, so make sure to challenge it again later.
RE-Crisis Marble Aggelomoirai Rewards
Gain a Badge by Defeating It Within the Time Limit
| How to Get | Defeat the Marble Aggelomoirai within 240 seconds |
Defeat the Marble Aggelomoirai within the time limit to unlock a badge. The time limit is 240 seconds, so it's recommended to try for this only after building your characters and weapons.
Reward List by Level
| Level | Reward |
| Lv.1 | [First Time Reward] - Oroberyl × 50 - T-Creds × 4050 - Elementary Cognitive Carrier × 5 - Protohedron × 1 - Arms INSP Kit × 9 - Operation EXP × 200 |
| Lv.2 | [First Time Reward] - Oroberyl × 50 - T-Creds × 5750 - Elementary Cognitive Carrier × 5 - Protohedron × 1 - Arms INSP Kit × 9 - Operation EXP × 200 |
| Lv.3 | [First Time Reward] - Oroberyl × 50 - Tachyon Screening Lattice × 3 - Operation EXP × 200 [Normal Rewards (Common)] - Tachyon Screening Lattice - Operation EXP [Normal Rewards (Random)] - Quadrant Fitting Fluid - Triphasic Nanoflake |
Related Arknights: Endfield Articles
Back to Top PageTier List
 Characters Tier List
 Reroll Tier List
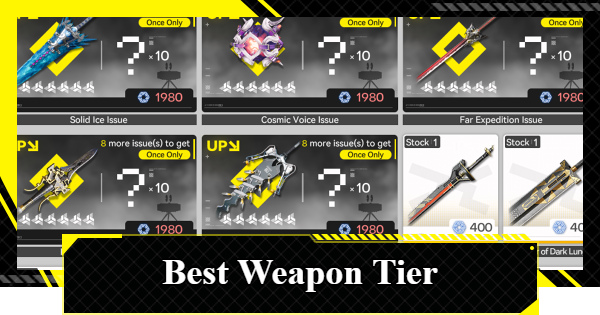 Best Weapons Tier List
Gacha Information
 Which Banner Should You Pull?
 Gacha Pity System & Rates
 Gacha Currency
 Basic Headhunting Permit
Recommended Articles
 Early Game Guide
 Redeem Codes List
 How to Add Friends
 Points of No Return
 Authority Level Guide
 Daily Tasks To Do
 Starter Banner Best Weapon
 How to Farm T-Creds
 How to Get Aketine
 How to Get 2 Stock Redistributors
 Depot Nodes Location
 How to Get Origeometry
 Monthly Pass Guide
 Trust & Operator Gift Guide
Events
 Umbral Monument Event Guide Umbral Monument Event Guide |  Survive the Gas Survive the Gas |  Unorthodox Tactics Unorthodox Tactics |
 Ballista and Axe Ballista and Axe |  Bolts and Shadows Bolts and Shadows |  Rampaging Shields Rampaging Shields |
 Rock Solid Rock Solid |  Supply: Exploration Day Supply: Exploration Day |
Things to Know Before Release
 Release Date Release Date |  How to Pre-Download How to Pre-Download |  PS5 Pre-Order Bundle PS5 Pre-Order Bundle |
 How to Link Account How to Link Account |  Is Cross-Play Available? Is Cross-Play Available? |  How to Reroll How to Reroll |
 Operator Class Guide Operator Class Guide |
 Combat System Guide
 How to Win Battles
 Dodge and Perfect Dodge
 Elemental Weakness Chart
 Arts Reactions / Physical Status
 Team Composition Tips
 Best Team Comps
 Potential
 Talents and Base Skills
 How to Craft Gear
 Best Food List
 Artificing and Stats Priority
 All Fast Travel Points
 Protocol Datalogger
 Aurylene
 Interactive Map
 Ferrium Ore Map Location
