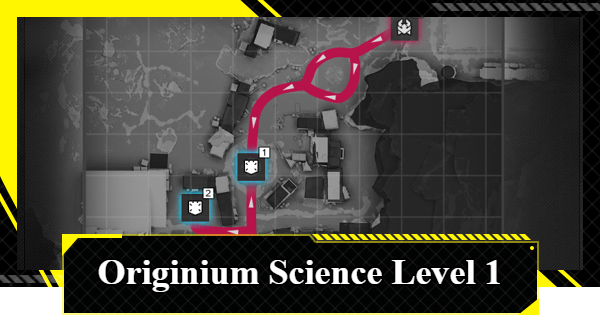
Area Defense Originium Science Park Level 1 Guide for the Early Warning Terminal in Endfield. See strategies for Auto Defense, Operator Intervention, and facilities to use.
Table of Contents
| Infra-Station Defense Articles | |
| - | Level 2 |
Originium Science Park Level 1 Auto-Defense Tips
Use Heavy Gun Towers and LN Towers

For Auto-Defense, it is recommended to use the Heavy Gun Tower and the LN Tower combo. Since the invasion comes from two directions, you will need to split your towers. Place the facilities on both the northern and southern routes.
Recommended to Use 3:1 Ratio
| 3 Heavy Gun Towers | 1 LN Tower |
 |  |
LN Towers act as support units that slow enemies instead of dealing direct damage. Placing one on each path gives you an advantage in clearing waves faster. Set up three Heavy Gun Towers and one LN Tower per area for efficient coverage.
Secure the Southside Command Core

Do not let enemies reach the southern fork near the Command Core, or your towers will struggle to cover both lanes. The split lowers your total damage output and allows enemies to slip through. Instead, set up a kill zone at the corner in advance. The northern route can be ignored, as it naturally funnels into a single path.
Originium Science Park Level 1 Operator Intervention Tips
2 Sets of 2 Heavy Gun Towers and 1 LN Tower

As for the Operator Intervention, it is recommended to create a balanced setup of two Heavy Gun Towers and one LN Tower per lane. Position your characters near the first Command Core to act as a final line of defense, ensuring that no enemy survives.
Take Advantage of the Solidification

Maximize crowd control by triggering Solidification, which quickly eliminates enemies. This stage has no resistance to the effect, so a well-built team can clear waves with ease.


