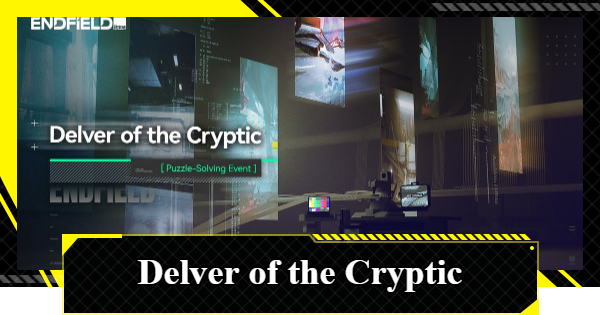
Cryptic First Revealed Event Guide for Arknights: Endfield. See the event overview, how to complete each Spatial Set, puzzle solutions, and all available rewards in AKEF.
Table of Contents
| Delver of the Cryptic Guide | |
| - | Grotto Survey |
Delver of the Cryptic Stage Guides
| Jump to a Section! | ||
|---|---|---|
| ▼ Pressure Sensitive | ▼ Crane Support | ▼ Ride the Wind |
| ▼ Industrial Labyrinth | ▼ Heat Interception | ▼ External Detonation |
| ▼ Long-ear Invitation | ▼ Ode of Bombardment | ▼ Beam Dodger |
Pressure Sensitive Guide
Stage Objectives
| Challenge Goal | Use heavy objects and pressure switches to reach the exit |
|---|---|
| Bonus Objective | Open 3 Storage Crates |
Pressure Sensitive Walkthrough
- Move the Crate into the opening
- Lift the Crate with the elevator
- Open the shutter with the terminal
- Bridge the gap using the crate
- Lower the shutters
- Place tall Crate on pressure plate
- Claim rewards


You'll spawn into the stage with a Crate on your left side. Activate the Crate and move it into the gap along the ledge. Afterwards, hop onto the crate to reach the other side.

Activate the Crate on the right side and move it onto the elevator on the left. Trigger the elevator and then place the crate on top of the pressure plate.
Just beyond the shutters is the first Storage Crate. Activate the tall Crate and bring it around the metal box where the Storage Crate is placed. Position the tall crate in such a way that you can use the right ledge to jump onto the crate and then onto the metal box.
Afterwards, move the tall Crate onto the pressure plate to open the next section.

Hop down from the ledge and follow the orange line on the ground around the corner to locate a terminal that will open some shutters. This allows you re-access the tall Crate for the next section.
Use the tall Crate as a platform to reach the second Storage Crate by placing it within the gap.

Bring the tall crate back towards the initial entrance of this section and place it between the short and tall ledges, in front of the closed shutters.

Hop up onto some boxes and use the nearby terminal to lower the shutters. After, follow the path around to reach the elevator and lower that to lift the tall Crate.
Lift the tall Crate using the elevator and then bring it across the short bridge. Follow the orange line back to the terminal and place the tall Crate on the nearby pressure plate.

On the other side of the shutters should be the final Storage Crate needed to complete the bonus objective. Don't forget to loot it before claiming your rewards.

Interact with the anomaly to Claim your rewards and exit the stage.
Crane Support Guide
Stage Objectives
| Challenge Goal | Operate the machinery in the training site and reach the exit |
|---|---|
| Bonus Objective | Open 3 Storage Crates |
Crane Support Walkthrough
- Lift the nearby ramp
- Access the Seesaw Ramp
- Manipulate the twin Ramps
- Open the shutter
- Deactivate the lasers
- Move platforms to the right
- Move platforms to the middle
Upon entering the first open area, the first Storage Crate is hidden under the stairs on the right side.

After looting the first Storage Crate, turn around and use the terminal to lift the ramp.
Head upstairs and use the lifted ramp to climb up and loot the second Storage Crate.
After looting the second Storage Crate, head back down and use the terminal to lift the platform which lets you cross. From there, stand on the near end of the Seesaw Ramp to raise the far end before running upwards and hopping off.

When you reach the room housing the two ramps, start by lifting Ramp 1, and rotating Ramp 2 twice. Doing so will create a singular, larger ramp that leads to the upper section on the left side.

After climbing Ramps 2 and 1, you'll enter a room with a Seesaw Ramp. Hop onto the Seesaw Ramp from the far corner of the room to reach the terminal that opens the nearby shutters.
After opening the shutters, turn around to spot the final Storage Crate. Use the same Seesaw Ramp to reach it and then exit the room through the newly opened shutters.

Run past the shutters and drop down back into the area with the twin ramps. Deactivate the lasers, and access the terminal that allows you to rotate Ramp 1.
Rotate Ramp 1 twice, and then lower it. Next, rotate Ramp 2 twice, and then lift it. This should create a large ramp that leads to the opposite side, allowing you to access the next area.

The next area will have platforms suspended above an abyss. Interact with the first terminal twice to move the nearest platform to the right side. Then, jump across and do the same for the next platform. Finally, interacting with the farthest terminal lowers the platform in the middle.

As you return to the start of this area, interact with the middle terminal to move the furthest platform to the middle, and then return to the starting terminal to move the nearest platform to the middle, allowing you safe passage across the chasm.

Use the suspended platforms to cross the abyss and interact with the anomaly to claim your rewards.
Ride the Wind Guide
| Challenge Goal | Use the vortices to accelerate and reach the exit as quickly as you can |
|---|---|
| Bonus Objective | Reach the exit in 300s |
Ride the Wind is a stage where you must utilize the vortices to boost your movement speed. Use the faster movement to make big jumps and quickly reach the goal.
Reach the Goal within 300s
For this stage, the bonus object is achieved by reaching the finish line within 5mins. As long as you consistently use the vortices, clearing the bonus objective is fairly easy.
Industrial Labyrinth Guide
| Challenge Goal | Find the Right path |
|---|---|
| Bonus Objective | Open 3 Storage Crates |
The Industrial Labyrinth stage consists of a multi-layered maze with integrated puzzle mechanics. Selecting an incorrect path triggers automatic backtracking, requiring careful navigation to progress efficiently.
Check the Numbers Above the Door

The numbered doors in the latter half of the Industrial Labyrinth must be activated in the sequence "2→1→3→2→3". An incorrect choice sends you back several rooms. The 5-digit code is displayed on the collapsing platform immediately before the doors, so take note of it.
 | If the number matches the required sequence, you may proceed. For instance, if multiple doors are labeled "2" when the next door in the sequence is "2," any of them will lead to the correct path. |
|---|
Side Objective: Collect 3 Crates

Collect all 3 Crates to complete the side objective. The third crate may appear tricky, but it's simple: Enter any of the portals and one of them will have a crate on the other side. Then you can enter the portal below it to get it.
Heat Interception Guide
| Challenge Goal | Use the vortices to accelerate, dodge the beams, and reach the exit as quickly as you can |
|---|---|
| Bonus Objective | Reach the exit in 300s |
Heat Interception is a stage where you must avoid lasers as you progress towards the goal. Some lasers may be difficult to see depending on the viewing angle, so carefully avoid them and proceed deeper into the stage. Towards the end of the stage, you will also need to interact with four switches to deactivate the laser barrier.
Reach the Goal within 300s
Similar to Ride the Wind, reaching the goal within 300s will complete the bonus objective. Since this is plenty of time, it's better to take your time with avoiding obstacles since touching lasers and falling out of bounds results in a bigger time loss.
External Detonation Guide
External Detonation is a stage wherein you need to rely on explosives to trigger switches to reach the goal. Use attacks and explosives to align platforms, and open up the path towards the end of the stage.
Aim for the Back Wall
In most cases, you can trigger switches using the explosion instead of the actual impact. If you are having a hard time hitting targets, try to aim for the back wall or towards the ground to hit your targets.
Long-ear Invitation Guide
Long-ear Invitation is a stage where you have to herd
the long-ears into their dens. You will also need to utilize explosives to clear obstacles such as fences and walls in order to progress.
Follow the Footprints


In cases where you lose sight of the Long-ear, retrace your steps by following the glowing, golden footprints that they leave behind!
Wait for Long-ears at the End of Pipes
When a Long-ear enters a pipe, it sometimes becomes impossible to continue following them. In these cases, move forward a little bit until you find the other end of the pipe, and wait for the Long-ear to emerge.
Ode of Bombardment Guide
Ode of Bombardment is a stage riddled with artillery fire and flames. As you progress, you will encounter Aggeloi who regularly fire at your Operator, and walls of fire that will block your path. Avoid the assault as best you can as you make your way towards the goal.
| In Ode of Bombardment, the challenge will fail if the Operator's HP runs out. It's okay to take some hits, so long as you can reach the goal before dying. |
|---|
You can Perfect Dodge Artillery
The artillery fire used by the Aggeloi can be Perfect Dodged, but the walls of flame cannot. So hurry forward when there are no flames in your way.
Turn Right at the Fork

Partway through the stage, you'll come across a fork in the path. Turning left leads to a dead end that can be complicated to backtrack from, so make sure to turn right to continue through the stage.
Bonus Objective: 3 Storage Crates
The Bonus Objective can be completed by collecting all 3 Storage Crates. Be careful as the first one is easy to miss. It is located directly behind you after crossing the fallen pillar and jumping down from the next ledge.
Beam Dodger Guide
In Beam Dodger, you have to avoid the lasers scattered throughout the stage to reach the goal. The number of lasers is much higher than in previous stages, so be careful to avoid each one as you make your way to the goal.
Adjust the Camera Angle

Sometimes it can be difficult to determine the exact direction of the laser. In such cases, adjust your camera angle to get a better view of the lasers and the areas you should avoid.
| Touching a laser will force a respawn at the nearest checkpoint. Since there is no risk of failing the stage, try again until you've achieved a perfect clear. |
|---|
Bonus Objective: 3 Storage Crates
The Bonus Objective can be completed by collecting all 3 Storage Crates. The 3rd and final crate is found in the corridor attached to the room that houses the exit portal, so be sure to grab it before exiting the stage.
How to Progress Delver of the Cryptic
- Check Fiona's Message
- View the Event Screen
- Review Stage Mechanics
- Attempt the Stage

Open the Baker and access the the Tasks
tab. From there, view the message from Fiona that will explain how the Delver of the Cryptic
project, which was started by the Endmin a long time ago, will be resumed.

From the menu, click on the button labelled Events
on the right side of the screen. From there, you can access the Delver of the Cryptic screen, as well as other available events.

A total of 9 stages will be released for the Delver of the Cryptic event. Note that each stage is time-gated, so you depending on when you start, you might not be able to access every stage immediately.

Clicking on Go
will bring you to the confirmation screen. From here, you can check the Mechanics on the top right side of the screen before pressing Enter
.

The number of Storage Crates hidden in each stage is displayed in the rewards section, so be sure to check it before entering.

If you forgot to review the stage mechanics and check on the bonus objectives, you can still track your progress from within the stage. As you search for Storage Crates, solve puzzles and move on to the next stage.
The stages released for the Delver of the Cryptic event have no combat. You will primarily be solving puzzles or racing through stages to complete challenges, so don't worry about bringing your strongest Operators.
Delver of the Cryptic Event Details and Rewards
Delver of the Cryptic Event Period

| Event Period | Permanently available from Feb 24, 2026 |
| How to Unlock | Complete Main Story Chapter 1 Process II “Paving the Way” |
The “Delver of the Cryptic” event are challenges where you explore the protocol spaces to receive rewards.
| You can obtain a medal by clearing all protocol spaces. Additionally, upgrading the medal requires completing every sub‑objective in each space, so be sure to give it a try. |
|---|
Delver of the Cryptic Rewards
In Delver of the Cryptic, you will receive rewards for each Protocol Space you clear. You can earn additional rewards by completing sub-objectives. The 6th and subsequent spaces will be unlocked in stages.
First-Time Clear Rewards
| Oroberyl x200 | T-Creds x20,000 |
| Advanced Cognitive Carrier x2 | Protohedron x6 |
| Mark of Perseverance x1 | Arms INSP Set x1 |
Storage Crate Rewards
| T-Creds x3,000 | Elementary Cognitive Carrier x4 |
| Protohedron x1 | Arms INSP Kit x7 |
Bonus Objective Rewards
| T-Creds x10,000 | Advanced Cognitive Carrier x1 |
| Protohedron x3 | Arms INSP Kit x2 |
Event Medal Reward

Clearing all stages in the Cryptic First Revealed tab of the Delver of the Cryptic Event will award the player with the In the Cryptics of the Valley
event medal. Like other medals, this can be displayed on your player profile.
Arknights: Endfield Event Articles
All Events List Cleanse and Rinse Cleanse and RinseUntil Apr 19, 2026 04:00 AM (UTC -5) |  Monumental Etching: Scorch Mark Monumental Etching: Scorch MarkUntil Next Version Update |
 Cryptic First Revealed Cryptic First RevealedPermanent Event | 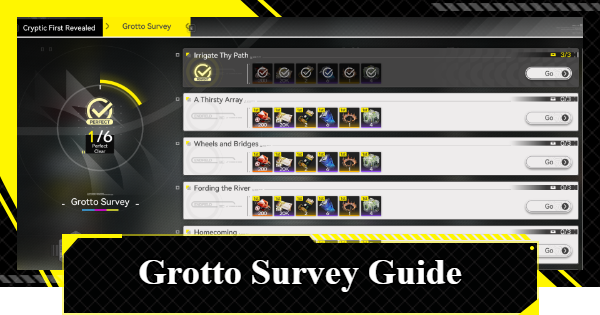 Grotto Survey Grotto SurveyPermanent Event |
Narrative Events
 The Red Knight The Red Knight | [Event Period] Until Next Version Update [Main Rewards]    |

