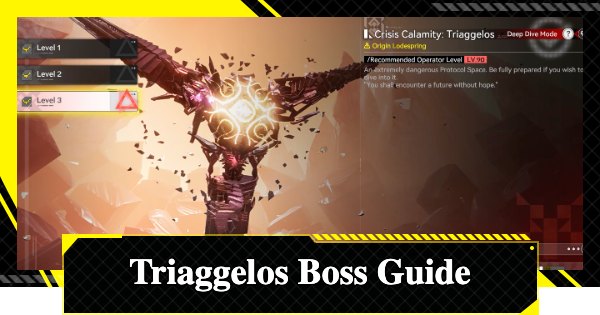
Triaggelos boss fight guide in Arknights: Endfield. This includes three phase walkthrough, tips, how to beat, how to unlock, recommended teams, and more.
Table of Contents
| Boss Strategy Guides | |||
|---|---|---|---|
 Rhodagn Rhodagn | Triaggelos | Marble Aggelomoirai | Ruan Yi |
Triaggelos Boss Overview
Attacks & Moves Differ Between Phases
| Phase 1 | Phase 2 | Phase 3 |
 |  |  |
Triaggelos features three distinct phases during its boss encounter. Upon fully depleting its HP bar, it will transition to the next phase and restore its health to full. Its attack patterns and mechanics change with each phase.
Triaggelos First Phase Guide & Tips
First Phase Tips
- Prepare Healing Items
- Dodge Meteors by Running
- Interrupt Charge Attacks
In its first phase, the Triaggelos mostly uses melee attacks. By reading Triaggelos' moves, perform Perfect Dodges and interrupt its Charge Attacks.
Prepare Healing Items
The Triaggelos encounter is a lengthy, multi-phase battle. To ensure sustained survivability, equip healing support prior to engaging the fight.
 | Having characters that can heal on your team will make the fight easier. Ardelia is a good pick for this. |
|---|
Dodge Meteors by Running
As soon as the battle starts, Triaggelos will drop a meteor into the arena. Keep running to dodge the meteor since it doesn't track your position and will land straight down.
Number of Meteors Will Increase
After the initial meteor, all subsequent meteor attacks will release 3 meteors one after the other. Keep moving to avoid them, but be mindful of the arena to avoid running out of space to run.
Interrupt Charge Attacks
The Triaggelos will frequently use Charge Attacks during its first phase. You can interrupt them to create an opening by landing a Final Strike, Battle Skill, or Combo Skill when the red circle around it shows up.
Triaggelos Second Phase Guide & Tips
Second Phase Tips
- Block the Ankhor Shockwave
- Becomes Invincible & Releases Mobs
- Avoid the Shockwave by Jumping or Dodging
In the second phase of the fight, the Triaggelos will unleash AoE attacks and summon smaller enemies. Focus on defeating the mobs first since the Triaggelos will be invincible while they're on the field.
Block the Ankhor Shockwave
One of its major attacks in the second phase is a high-damage AoE attack that covers the entire area. Avoid it by staying in the barrier deployed by the Origininum Sampling.
Becomes Invincible & Releases Mobs


Triaggelos becomes invincible after it summons mobs into the area. To remove the invincibility, you must first defeat all of the mobs it summoned.
Watch Out For AoE Attacks During This
Triaggelos generates AoE fields while players clear surrounding mobs. Avoid standing within these zones, as they continuously deal damage. During phases with additional enemies are present, this is its primary attack pattern.
Dodge the Meteorite's Shockwave by Jumping
It will still do the meteorite attack even in its second phase. What's different here is that the meteorites create a shockwave upon impact. You will have to dodge the meteorite and the shockwave. Run from the meteorite, then jump or dodge for the shockwave.
Triaggelos Third Phase Guide & Tips
Phase 3 Tips
- Disable its Invisibility by Attacking
- Prioritize Dodging Its Combos When Its HP is Low
During this phase, the Triaggelos primarily uses ranged attacks. When it is invisible, it becomes difficult to track, so it's best to focus on moving and dodging upcoming attacks.
Disable its Invisibility by Attacking
Interrupt its invisibility by striking it just before the cast completes. Successfully doing so will cancel the ability and inflict damage to its stagger meter.
Use Combo Skills to Stop Its Invincibility
Basics Attacks and Battle Skills cannot hit it from a distance. It's best to use Combo Skills for this instead since you can immediately land a hit on it when it initiates its invincibility.
Triaggelos Moves & Attacks
Phase 1 Moves & Attacks
| Attack Patterns | |
| ▼ Meteor | ▼ 2-Hit Thrust Attack |
| ▼ Slam + Sweep | ▼ Charge |
Meteor
It will rise high in the sky and fire a meteor at your location. The meteor will explode upon impact. Run away from the blast site to avoid it.
2-Hit Thrust Attack
After a windup, it will stab at your character with its left and right parts. This can be interrupted with a Battle Skill, but it can also be avoided with a Perfect Dodge.
Slam + Sweep
This attack starts with it rising and spinning, then slamming down. After a brief delay, it will follow this up with a sweeping attack. You will need to dodge twice.
Charge
After crouching, it will perform a forward charge. Although classified as a Charge Attack and technically interruptible, the window to do so is extremely brief. Prioritize dodging over attempting an interrupt.
Phase 2 Moves & Attacks
| Attack Patterns | |
| ▼ Ankhor Shockwave | ▼ Invincibility + Summon Mobs |
| ▼ AoE Attack (With Mobs) | ▼ AoE Attack (Just the Boss) |
| ▼ Meteor + Shockwave | ▼ Shockwave |
Ankhor Shockwave
Triaggelos will only use Ankhor Shockwave during its second phase. This deals massive damage and will cover the entire area. A barrier will appear when you get close to the Origininum Sampling found around the map. Use the barrier to shield yourself from the attack.
Invincibility + Summon Mobs
After the Ankhor Shockwave, the Triaggelos will become invincible and then will summon mobs. Remove its invincibility by defeating every mob that has appeared.
AoE Attack (With Mobs)
While there are smaller enemies, Triaggelos will place AoE fields on the ground. Stepping on them will damage you. Keep an eye out for them as you fight the mobs.
AoE Attack (Just the Boss)
The AoE fields it creates are different when you're fighting just Triaggelos. The safe zone is at its feet, so fighting close to it will allow you to avoid them.
Meteor + Shockwave
During the second phase, the meteor attack will now include a shockwave after its impact. Run from the meteor and make sure to dodge the shockwave that follows. You can either jump or dash to dodge it.
Shockwave
Triaggelos' crouching will signal its shockwave attack. The attack timing can be hard to read. To be safe, it's better to distance yourself from it and jump when the shockwave comes rather than to dodge it.
Phase 3 Moves & Attacks
| Attack Patterns | |
| ▼ Invisibility | ▼ Dual Energy Blasts |
| ▼ Homing Barrage | ▼ Laser |
| ▼ 3-Way Laser | ▼ Orb Barrage |
| ▼ Combo Attack (Laser + Homing Barrage) |
Invisibility
During Phase 3, Triaggelos can turn invisible as part of an attack. Landing an attack on Triaggelos will cancel the invisibility. It will also deal a small damage to its Stagger Meter.
Dual Energy Blasts
When it turns invisible, it will move away and then fire two consecutive energy blasts. It can repeat several times, so avoid them by dashing or Perfect Dodging.
Homing Barrage
After it leans forward, it will release a barrage from the air. Where they land will be marked by red circles on the ground, allowing you to easily avoid them.
Laser
Triaggelos lowers its components and aims forward to charge a laser before firing. It will slowly rotate while maintaining the beam. Evade this attack by strafing sideways or repositioning behind it.
3-Way Laser
This attack has three lasers with a wider range. Since this has a wider range, take note of the AoE displayed on the ground and avoid it.
Orb Barrage
The orb barrage attack will not hit you if you stay close to Triaggelos. It's quite fast and can be difficult to dodge if you just react to it. It's better to fight close to Triaggelos to avoid this.
Combo Attack
At low HP, Triaggelos will simultaneously fire its laser and launch a homing barrage, creating a highly lethal attack pattern. Maintain awareness of its positioning and attack cues to time your dodges accurately.
Triaggelos Recommended Teams
Edministrator Team for Story Progression
| DPS | DPS | DPS Support | HP Recovery |
 Endministrator Endministrator |  Chen Qianyu Chen Qianyu |  Perlica Perlica |  Ardelia Ardelia |
This is a purely free-to-play Physical Team. This team focuses on building up Vulnerable through Chen, which the Edministrator then consumes with their Battle Skill. Apply Physical Susceptibility with Ardelia's Ultimate, then Battle Skill.
Basic Rotation
| Final Strike | → | Combo | → | Battle Skill | → | Ultimate | → |
| Battle Skill | → | Combo | → | Battle Skill | |
Substitute Characters
| Character | Details |
 Estella Estella | - Substitute for Perlica - Has Solidification/Physical Susceptibility, which is great for a Physical Team |
 Alesh Alesh | - Substitute for Perlica or Ardelia - Vanguard with SP Recovery - Has Solidification, which will work great in a Physical Team |
 Akekuri Akekuri | - Substitute for Perlica or Ardelia - Vanguard with SP Recovery - Grants Link using her Charged Attack after her Ultimate |
 Snowshine Snowshine | - Substitute for Perlica or Ardelia - Good healing when HP is low |
Laevatain is Recommended for RE-Crisis
This Laevatain team is recommended for fighting the Marble Aggelomoirai in the RE:Crisis. Apply Combustion and Corrosion while building Laevatain's Ultimate. Unleash her Ultimate, then use her Basic Attacks to shred enemy HP.
Rotation to Build Melting Flame
| Battle Skill | → |  Combo Combo | → |  Final Strike Final Strike | → | Combo | → |
| Battle Skill | → | Combo | → | Battle Skill | → | Final Strike |
These are the rotations you can follow to consistently build Laevatain's Melting Flame Stake. Once you reach 4 Melting Stacks, use her Battle Skill for increased damage.
Substitute Characters
| Character | Details |
 Antal Antal | - Swap with Akekuri - Head Susceptibility and Heat Amp work great for this team |
Triaggelos How to Unlock
Fight During the Main Story
Triaggelos is the final boss of the Main Story Chapter 1 Progress III. The fight with Triaggelos will begin once the mission starts, so prepare before progressing through it.
Can be Challenged Again In RE-Crisis
After defeating it in the story mission, it can be challenged again in RE-Crisis. You can earn rewards for clearing it the fire time.
Triaggelos RE-Crisis Rewards
Obtain A Badge by Defeating It Within the Time Limit
| How to Get | Defeat the Triaggelos within 240 seconds |
Defeat the Triaggelos within the time limit to unlock a badge. The time limit is 240 seconds, so it's recommended to try for this only after building your characters and weapons.
Rewards List by Level
| Level | Reward |
| Lv.1 | [First Time Reward] - Oroberyl x 50 - T-Creds x 4050 - Elementary Cognitive Carrier x 5 - Protohedron x 1 - Arms INSP Kit x 9 - Operational EXP x 200 |
| Lv.2 | [First Time Reward] - Oroberyl x 50 - T-Creds x 5750 - Elementary Cognitive Carrier x 5 - Protohedron x 1 - Arms INSP Kit x 9 - Operational EXP x 200 |
| Lv.3 | [First Time Reward] - Oroberyl x 50 - D96 Steel Sample IV×3 - Operational EXP x 200 [Normal Rewards (Common)] - D96 Steel Sample IV - Operation EXP [Normal Rewards (Random)] - Quadrant Fitting Fluid - Tachyon Screening Lattice |
Related Arknights: Endfield Articles
Back to Top PageTier List
 Characters Tier List
 Reroll Tier List
 Best Weapons Tier List
Gacha Information
 Which Banner Should You Pull?
 Gacha Pity System & Rates
 Gacha Currency
 Basic Headhunting Permit
Recommended Articles
 Early Game Guide
 Redeem Codes List
 How to Add Friends
 Points of No Return
 Authority Level Guide
 Daily Tasks To Do
 Starter Banner Best Weapon
 How to Farm T-Creds
 How to Get Aketine
 How to Get 2 Stock Redistributors
 Depot Nodes Location
 How to Get Origeometry
 Monthly Pass Guide
 Trust & Operator Gift Guide
Events
 Umbral Monument Event Guide Umbral Monument Event Guide |  Survive the Gas Survive the Gas |  Unorthodox Tactics Unorthodox Tactics |
 Ballista and Axe Ballista and Axe |  Bolts and Shadows Bolts and Shadows |  Rampaging Shields Rampaging Shields |
 Rock Solid Rock Solid |  Supply: Exploration Day Supply: Exploration Day |
Things to Know Before Release
 Release Date Release Date |  How to Pre-Download How to Pre-Download |  PS5 Pre-Order Bundle PS5 Pre-Order Bundle |
 How to Link Account How to Link Account |  Is Cross-Play Available? Is Cross-Play Available? |  How to Reroll How to Reroll |
 Operator Class Guide Operator Class Guide |
 Combat System Guide
 How to Win Battles
 Dodge and Perfect Dodge
 Elemental Weakness Chart
 Arts Reactions / Physical Status
 Team Composition Tips
 Best Team Comps
 Potential
 Talents and Base Skills
 How to Craft Gear
 Best Food List
 Artificing and Stats Priority
 All Fast Travel Points
 Protocol Datalogger
 Aurylene
 Interactive Map
 Ferrium Ore Map Location
