This article provides a blueprint code list for Endfield, including the best early-game blueprint codes for buck capsules, gear parts, explosives, infinite plants, and more.
Table of Contents
* To make it easier to distinguish between 0 (zero) and O (the letter O), a font with a slash through 0 is used. The same applies to 1 (the number) and I (the letter I). Additionally, in Endfield, l (lowercase L) is not used in blueprint codes.
This display may not appear correctly on some unsupported browsers. Please use Chrome, Safari, or similar browsers.
Best Blueprints by Progression
Blueprints to Earn Stock Bills Efficiently
Here is a list of blueprints and codes to help you efficiently earn Stock Bills based on your progression. For each stage, we've included a setup where you can "just install it and start earning right away".
| Related Articles | |
| Valley Stock Bills | Wuling Stock Bills |
This setup assumes you have progressed the story to Originium Science Park ~ Origin Lodespring. Before building, unlock Depot Bus 1 from the "AIC Steward" near the AIC Area.
Hub Base


EFO01194o0AaO1U7e34O7 EFO01iOe55O3O92a272U4 |
This blueprint produces a wide range of products using Ferrium Ore.
You can manufacture "Ferrium Component" for Gear, along with "Buck Capsule [B]" and "SC Valley Battery" for Outpost Trading. Batteries can also support your power generation.
Valley Pass

EFO014E6iOu5a43a1E71A EFO01A5i445850E269ieO |
This blueprint produces a wide range of products using Amethyst Ore.
You can manufacture "Amethyst Component" for Gear, "Industrial Explosive" for exploration, and "LC Valley Battery" for both power generation and Outpost Trading.
Hub Base

| #1. | EFO0101O36e920i3iE179 EFO01iOe55O3O92au72U4 |
| #2. | EFO01a6589i0EaAeUoe5e EFO01O3E88363AIou9Ee4 |
| #3. | EFO01602IaU156799O83e EFO01u1I661e1O03uAoOU |
All three blueprints produce HC Valley Batteries. Use what you need for power and send the excess to Outpost Trading.
Blueprint #1 uses three Thermal Banks and #3 uses two, but adjust based on your power needs.
Valley Pass

EFO014E6iOu5a430aE71A EFO01u1I661e1O056AoOU |
This blueprint produces Buck Capsule [A] using the full PAC Output Ports. It’s useful for both Outpost Trading and healing.
Originium Science Park

EFO01194o0AaO1Ua634O7 EFO01eE7OOEuE640AoAi8 |
This is a manufacturing blueprint for Buck Capsule [A] that uses the entire PAC Output Ports. This uses the same Buck Capsule [A] setup as Valley Pass.
Power Plateau

EFO01A7u1e2ioAE479ieO |
This is a manufacturing blueprint for Buck Capsule [A] that uses the entire PAC Output Ports. This is a reduced version of the same blueprint due to resource limits, using only half of the full setup.
Wuling City
Some facilities cannot be included in blueprints. Place the Fluid Pump manually at the top before building.

| #1. | EFO01194o0AaO1Ua934O7 |
| #2. | EFO01a6589i0EaAI3oe5e |
| #3. | EFO01521eEIO05uIaeIoe |
This setup covers all essential production in Wuling from unlocking Wuling AIC up to obtaining Cuprium Ore.
You can produce "LC Wuling Battery" for power and Outpost Trading, "Yazhen Syringe [C]" for healing and trade, and "Xiranite Components" for Gear crafting.
PAC Output Ports Are Not Used
This setup skips PAC Output Ports since Wuling alone already maximizes Xiranite and Rare Mineral usage.
Wuling City
Place the Fluid Pump and Inlet Conduit manually at the top, then connect them following the blue and yellow lines.

| #1. | EFO01602IaU1567A3O83e |
| #2. | EFO01602IaU1567oiO83e |
| #3. | EFO01ouiO3187o6ouIieO |
| #4. | EFO01521eEIO05u17eIoe |
| #5. | EFO0101O36e920iA0E179 |
| From Valley IV via Regional Transfer |  Dense Originium Powder Dense Originium Powder |
This is the final blueprint for Ver. 1.1 "Old Deep Water Dies, by Rising Tide It is Denied".
You can produce "SC Wuling Battery" for power and Outpost Trading, "Yazhen Syringe [A]" for healing and trade, and "Cuprium Component" for high-tier Gear.
Provide Power with HC Valley Battery
Since this setup doesn’t use Ferrium Ore, supplement power by transferring Dense Originium Powder from Valley IV to produce HC Valley Batteries.
PAC Output Ports Are Not Used
This setup skips PAC Output Ports because Wuling alone already maximizes available resources.
Blueprints and Process for Major Items
 ▼Sandleaf ▼Sandleaf(Doesn't require water) |  ▼Yazhen ▼Yazhen(Requires water) | ▼Dense Originium Powder |
 ▼Xiranite ▼Xiranite |  ▼Xircon ▼Xircon |  ▼Cuprium Component ▼Cuprium Component |
 ▼SC Wuling ▼SC WulingBattery |  ▼Yazhen Solution ▼Yazhen Solution |  ▼Yazhen Syringe [A] ▼Yazhen Syringe [A] |
Sandleaf (Doesn't Require Water)

| EFO01a6589i0EaAIioe5e EFO0172UEE2I21533O0Ai |
| Other Compatible Plants With This Blueprint | ||
 Buckflower Buckflower |  Citrome Citrome |  Aketine Aketine |
- Sandleaf is produced in a Planting Unit
- Input Sandleaf Seed into the Planting Unit - Sandleaf Seed is produced in a Seed-Picking Unit
- Input Sandleaf into the Seed-Picking Unit - Connecting the Seed-Picking Unit and Planting Unit allows for infinite production
This blueprint works best when placed in pairs. Sandleaf is a key material used in many AIC Products.
▲Tap to return to the list of major items
Yazhen (Requires Water)

| EFO01u8U4o9Iiu09UAoOU EFO01Eu233u1uioeI3uIa |
| Other Compatible Plants With This Blueprint |
 Jincao Jincao |
- Yazhen is produced in a Planting Unit
- Input Yazhen Seed into the Planting Unit - Yazhen Seed is produced in a Seed-Picking Unit
- Input Yazhen into the Seed-Picking Unit - Connecting the Seed-Picking Unit and Planting Unit allows for infinite production
Compared to plants that don't require water, water-based setups like Yazhen require a slightly different layout. Yazhen is used for key Wuling products such as Xiranite and Yazhen Syringe.
▲Tap to return to the list of major items
Dense Originium Powder

| EFO01A7u1e2ioAE8U9ieO EFO0136u996i65aEo0579 |
| Separately Required Blueprints | |
| EFO01a6589i0EaAIioe5e EFO0172UEE2I21533O0Ai |
- Dense Originium Powder is produced in a Grinding Unit
- Input Originium Powder and Sandleaf Powder into the Grinding Unit - Originium Powder is produced in a Shredding Unit
- Input Originium Ore into the Shredding Unit - Sandleaf Powder is produced in a Shredding Unit
- Input Sandleaf into the Shredding Unit
Dense Originium Powder is mainly used for battery production. Be careful not to run out of Originium Ore, as supply in Wuling is limited.
▲Tap to return to the list of major items
Xiranite

| EFO01iUIa74e8i2a372U4 EFO01iOe55O3O92oE72U4 |
- Xiranite is produced in the Forge of the Sky
- Input water and Stabilized Carbon into the Forge of the Sky - Stabilized Carbon is produced in a Refining Unit
- Input Dense Carbon Powder into the Refining Unit - Dense Carbon Powder is produced in a Grinding Unit
- Input Carbon Powder and Sandleaf Powder into the Grinding Unit - Carbon Powder is produced in a Shredding Unit
- Input Carbon into the Shredding Unit - Carbon is produced in a Refining Unit
- Input Yazhen into the Refining Unit - Yazhen and Sandleaf are produced in Planting Units
- Infinite production by looping between the Seed-Picking Unit and Planting Unit
Xiranite is a core material for Wuling industry. The Forge of the Sky has a shared placement limit, which can be expanded to 4 by unlocking the Wuling AIC Plan.
▲Tap to return to the list of major items
Xircon

| EFO0101O36e920i36E179 EFO01U4A224o4aOo97Oa8 |
| Separately Required Blueprints | |
| EFO01iUIa74e8i2a372U4 EFO01iOe55O3O92oE72U4 |
- Xircon is produced in a Reactor Crucible
- Input Xircon Effluent and Ferrium Powder into the Reactor Crucible
- The discharged Sewage must be processed using a Water Treatment Unit - Xircon Effluent is produced in a Reactor Crucible
- Input Liquid Xiranite and Sewage into the Reactor Crucible
- The discharged Inert Xircon Effluent must also be processed using a Water Treatment Unit - Liquid Xiranite is produced in a Reactor Crucible
- Input Xiranite and water into the Reactor Crucible - Xiranite is produced in the Forge of the Sky
- Click here for details on the Xiranite process - Sewage mainly comes from the production line of Cuprium products
- You can supply it remotely using Conduits - Ferrium Powder is produced in a Shredding Unit
- Input Ferrium Ore into the Shredding Unit
Xircon is used to craft SC Wuling Batteries. Make sure to connect both water and Sewage to the Outlet Conduit for consistent production. Since Sewage is generated from Cuprium product lines, plan your layout so resources flow efficiently.
| Blueprints That Discharge Sewage | |
| ▼Cuprium Component | ▼Yazhen Syringe [A] |
▲Tap to return to the list of major items
Cuprium Component

| EFO01194o0AaO1Ui134O7 EFO01U4A224o4aO2e7Oa8 |
| Separately Required Blueprints | |
| EFO01iUIa74e8i2a372U4 EFO01iOe55O3O92oE72U4 |
- Cuprium Component is produced in a Gearing Unit
- Input Cuprium Parts and Xiranite into the Gearing Unit - Cuprium Parts are produced in a Fitting Unit
- Input Cuprium into the Fitting Unit - Cuprium is produced in a Refining Unit
- Input Cuprium Ore and water into the Refining Unit
- Connect water and switch to Fluid Mode
- The discharged Sewage must be processed using a Water Treatment Unit
Cuprium Component is used to craft certain gold Gear. If you already use Sewage in other production lines, you can replace the Water Treatment Unit with an Inlet Conduit to improve efficiency.
▲Tap to return to the list of major items
SC Wuling Battery

| EFO01194o0AaO1U6534O7 EFO01U4A224o4aOoI7Oa8 |
| Separately Required Blueprints | |
| EFO0101O36e920i36E179 EFO01U4A224o4aOo97Oa8 |
| EFO01a6589i0EaAIioe5e EFO0172UEE2I21533O0Ai |
- SC Wuling Battery is produced in a Packaging Unit
- Input Xircon and Dense Originium Powder into the Packaging Unit - Xircon is produced in a Reactor Crucible
- Click here for details on the Xircon process - Dense Originium Powder is produced in a Grinding Unit
- Click here for details on the Dense Originium Powder process
The SC Wuling Battery is used for power generation and Outpost Trading. This should be one of your top priorities to produce after obtaining Cuprium.
Yazhen Solution

| EFO01E50U4826EoOU3uIa EFO01iOe55O3O924I72U4 |
- Yazhen Solution is produced in a Reactor Crucible
- Input Yazhen Powder and water into the Reactor Crucible - Yazhen Powder is produced in a Shredding Unit
- Input Yazhen into the Shredding Unit - Yazhen is produced in a Planting Unit
- Click here for details on the Yazhen process
This material is used for the Yazhen Injector in Stock Redistribution. Since liquid products cannot be stored, connect the Reactor Crucible directly to the facility that uses Yazhen Solution.
Yazhen Syringe [A]

| EFO01O4a72oE9OIE394e4 EFO010U977U4UIia9E179 |
| Separately Required Blueprints | |
| EFO01E50U4826EoOU3uIa EFO01iOe55O3O924I72U4 |
- Yazhen Syringe [A] is produced in a Packaging Unit
- Input Cuprium Bottle (Yazhen Solution) and Cuprium Parts into the Packaging Unit - Cuprium Bottle (Yazhen Solution) is produced in a Filling Unit
- Input Yazhen Solution and Cuprium Bottle into the Filling Unit - Yazhen Solution is produced in a Reactor Crucible
- Click here for details on the Yazhen Solution process
- Can also be supplied remotely using Conduits - Cuprium Bottle is produced in a Moulding Unit
- Input Cuprium into the Moulding Unit - Cuprium Parts are produced in a Fitting Unit
- Input Cuprium into the Fitting Unit - Cuprium is produced in a Refining Unit
- Input Cuprium Ore and water into the Refining Unit
- Connect water and switch to Fluid Mode
- The discharged Sewage must be processed using a Water Treatment Unit
Yazhen Syringe [A] can be used for Outpost Trading and as a healing item. The Sewage generated from the Refining Unit can be reused in other production lines by replacing the Water Treatment Unit with an Inlet Conduit.
▲Tap to return to the list of major items
Blueprint Codes and Items List
From Unlocking the AIC to Originium Science Park
*Click the Green Button to Copy the Code. Blueprint Codes are case-sensitive
| Production Item | Blueprint Code |
 Origocrust ▼View Design | EFO017i8e0373E588OIAi EFO01u1I661e1O0oAoOU |
 Amethyst Part ▼View Design | EFO017i8e0373E585O2Ai EFO0158Ooo898UuueIoe |
 Amethyst Component ▼View Design | EFO01Ue379uUu2Oou71a8 EFO0172UEE2I21555O0Ai |
Buckflower ▼View Design | EFO01ouiI5eoea6EoI2eO EFO01U4A224o4aO2o7Oa8 |
 Buck Capsule [C] ▼View Design | EFO01a651oOaOeAe2oe5e EFO0136u996i65au90579 |
 Industrial Explosive ▼View Design | EFO017i8e0373E53EO2Ai EFO01U4A224o4aOEO7Oa8 |
 Canned Citrome [C] Canned Citrome [C]▼View Design | EFO01602IaU156710O83e EFO01u1I661e1O0aIAoOU |
 Originium Ore Power Generation ▼View Design | EFO01Ue379uUu2OO71a8 EFO01iOe55O3O92e472U4 |
 LC Valley Battery ▼View Design | EFO01ouiI5eoea6o2IieO EFO01Eu233u1uio5O3uIa |
LC Valley Battery Power Generation ▼View Design | EFO01Ue379uUu2O2U71a8 EFO018IeoO78701A3Ui73 EFO010U977U4UIi17E179 EFO012I4uuIaIe867eIOo |
From Obtaining Ferrium Ore to Power Plateau
*Click the Green Button to Copy the Code. Blueprint Codes are case-sensitive
| Production Item | Blueprint Code |
 Ferrium Part ▼View Design | EFO017i8e0373E585O2Ai EFO0158Ooo898UuueIoe |
 Ferrium Component ▼View Design | EFO01Ue379uUu2Oou71a8 EFO0172UEE2I21555O0Ai |
 Buck Capsule [B] ▼View Design | EFO01a651oOaOeAe2oe5e EFO0136u996i65au90579 |
 Canned Citrome [B] Canned Citrome [B]▼View Design | EFO01602IaU156710O83e EFO01u1I661e1O0aIAoOU |
 SC Valley Battery ▼View Design | EFO01a651oOaOeAU1oe5e EFO012I4uuIaIe85OeIOo |
SC Valley Battery Power Generation ▼View Design | EFO01u8U32AuA603aAoOU EFO01A5i445850EIU9ieO |
From Obtaining Sandleaf to All of Valley IV
*Click the Green Button to Copy the Code. Blueprint Codes are case-sensitive
| Production Item | Blueprint Code |
 HC Valley Battery ▼View Design | EFO01O4a5e0O08Iou9oe4 EFO0172UEE2I2155aO0Ai |
HC Valley Battery Power Generation ▼View Design | EFO01iUIa7I1iI2e472U4 EFO01o08aa0U0263UIieO |
 Cryston Part ▼View Design | EFO013o78EU3U9aU40579 EFO016i1AAiOi8713O83e |
 Cryston Component ▼View Design | EFO01I3Au4iIi192U5o08 EFO01u1I661e1O0a7AoOU |
 Buck Capsule [A] ▼View Design | EFO0101O36O80Oi17E179 EFO01eE7OOEuE64Eoui8 |
Buck Capsule [A] (Minimal) ▼View Design | EFO013o78EU3U9aU20579 EFO01U4A224o4aOEu7Oa8 |
 Canned Citrome [A] Canned Citrome [A]▼View Design | EFO01Ue36i39U3OEu7Oa8 EFO0158Ooo898Uua5eIoe |
| Canned Citrome [A] (Minimal) ▼View Design | EFO01521eEIO05uaAeIoe EFO01eE7OOEuE64A3oAi8 |
Wuling (Up to Chapter II, Process II)
*Click the Green Button to Copy the Code. Blueprint Codes are case-sensitive
| Production Item | Blueprint Code |
 Stabilized Carbon Stabilized Carbon▼View Design | EFO01u8U4oU2uU0oAoOU EFO01A5i445850EeI9ieO |
 Xiranite ▼View Design | EFO01iUIa74e8i2a372U4 EFO01iOe55O3O92oE72U4 |
 LC Wuling Battery ▼View Design | EFO01A7u1eu6AuEo9ieO EFO0172UEE2I21588O0Ai |
 Xiranite Component ▼View Design | EFO01ouiI5eoea60AIieO EFO01A5i445850EI39ieO |
 Yazhen Syringe [C] ▼View Design | EFO01iUIA1oio524672U4 EFO01iOe55O3O92e072U4 |
 Jincao Drink ▼View Design | EFO01Ue36i39U3Oi7Oa8 EFO0136u996i65a9U0579 |
  Cuprium Component & SC Wuling Battery ▼View Design | EFO01a6589i0EaA4Eoe5e EFO01u1I661e1O0eOAoOU |
Best Blueprint Code List
Automated Origocrust Blueprint

*Press the Green Button to Copy the Blueprint Code.
EFO017i8e0373E588OIAi EFO01u1I661e1O0oAoOU |
This blueprint allows you to produce Origocrust from Originium. Origocrust is used to craft various items or exchanged for Valley Stock Bills. Due to limited early-game production options, acquiring and producing this item is highly recommended.


Set Materials at the Output Port

Approach the PAC, select the Output Port, and then set Originium Ore as the target. To begin production, you must supply the necessary raw materials to the Transport Belt connected to the facility.
 | Each item requires different materials. Always check the production recipe to confirm which materials need to be supplied to the Transport Belt. |
|---|
Amethyst and Ferrium Part Blueprint

*Press the Green Button to Copy the Blueprint Code.
EFO017i8e0373E585O2Ai EFO0158Ooo898UuueIoe |
This blueprint allows you to produce Amethyst Parts, which are required during the early game missions. It is also used for creating Ziplines and other AIC Facilities.


Items Are Stored in the Depot

When you connect a Transport Belt to the entry point, all transported items will be stored in the Depot. You can access the Depot by opening your Backpack while inside the AIC Area.
Amethyst and Ferrium Component Blueprint

*Press the Green Button to Copy the Blueprint Code.
EFO01Ue379uUu2Oou71a8 EFO0172UEE2I21555O0Ai |
This blueprint allows you to produce Amethyst Components or Ferrium Components by changing the input materials. It is sufficient to produce only enough to craft Gear for your team members.


Craft Gear in the Gear Assembly

These are required to progress through the early story. Set up a production line as soon as possible. Gear can be crafted from 'Menu → Gear Assembly'.
Infinite Plant Production (Single Item) Blueprint

*Press the Green Button to Copy the Blueprint Code.
EFO01ouiI5eoea6EoI2eO EFO01U4A224o4aO2o7Oa8 |
This blueprint enables infinite production of plant materials. Once seeds or plants are loaded into the device, it will continue producing them indefinitely.


Infinite Plant Production for Stability
Some blueprints include mechanisms for infinitely producing necessary plant materials. Use them for specific items you want to grow individually to stabilize your combat and exploration.
| Infinitely Producible Plants | |
 Buckflower Buckflower |  Citrome Citrome |
 Aketine Aketine |  Sandleaf Sandleaf |
Be Careful as Sandleaf Depletes Quickly
Sandleaf, in particular, is consumed quickly due to its use in multiple production processes. Be sure to secure a stable supply using an infinite plant production blueprint.
Sandleaf Locations, Blueprint & Uses
Buck Capsule [C] / [B] Blueprint

*Press the Green Button to Copy the Blueprint Code.
EFO01a651oOaOeAe2oe5e EFO0136u996i65au90579 |
This blueprint produces Buck Capsule [C] and [B]. By changing the input materials, it can also be used as a production line for other items, such as Canned Citrome. To operate it, load Buckflower into a Planting Unit.
Buck Capsule [C] Blueprint for Valley Stock Bills
This blueprint is recommended for efficiently earning Valley Stock Bills in the early game. To produce Buck Capsule [C], load Amethyst Ore into the Refining Unit line.
How to Farm Valley Stock Bills


Set Buckflower in the Seed-Picking Unit

To start this production line, you must manually place Buckflower into the Seed-Picking Unit after construction. This is a necessary step for all plant-based production lines, so keep this in mind for future setups.
Ferrium Ore Needed for Buck Capsule [B]
The Ferrium Ore required to produce Buck Capsule [B] can be found in locations such as the north side of the Hub Base and Originium Science Park. For a stable supply, install an Electric Mining Machine on a Ferrium Ore Bed and provide it with power.
Industrial Explosive Blueprint

*Press the Green Button to Copy the Blueprint Code.
EFO017i8e0373E53EO2Ai EFO01U4A224o4aOEO7Oa8 |
This blueprint produces Industrial Explosives. In addition to dealing damage to enemies, explosives can destroy certain rock formations to expand your exploration area. To use it, load Aketine into a Planting Unit.


If Power Is Insufficient

As you build more production facilities, power will become insufficient. Facilities will eventually shut down if power runs out, so you must address this. To resolve a power shortage, install a Thermal Bank.
Originium Ore Thermal Bank Blueprint

*Press the Green Button to Copy the Blueprint Code.
EFO01Ue379uUu2OO71a8 EFO01iOe55O3O92e472U4 |
This blueprint creates a power generation line using Originium Ore, capable of supplying an additional 320 Power.


Originium Ore Thermal Bank for Early Power
The Originium Ore Thermal Bank is primarily used in the early game. Once more efficient batteries become available for power generation, you should switch to a different power setup.
LC Valley Battery Blueprint

*Press the Green Button to Copy the Blueprint Code.
EFO01ouiI5eoea6o2IieO EFO01Eu233u1uio5O3uIa |
This blueprint produces the LC Valley Battery. It is recommended for efficiently earning Valley Stock Bills in the early game, so set it up as soon as production becomes available.


Generate Power Efficiently with Batteries

You can generate power efficiently by placing batteries into a Thermal Bank. For example, one Originium Ore supplies 50 Power for 8 seconds, whereas one LC Valley Battery supplies 220 Power for 40 seconds.
Sub-PAC Power Generation + LC Battery Blueprint

*Press the Green Button to Copy the Blueprint Code.
EFO01Ue379uUu2O2U71a8 EFO018IeoO78701A3Ui73 EFO010U977U4UIi17E179 EFO012I4uuIaIe867eIOo |
This blueprint supplies 660 × 2 power while producing LC Valley Batteries. Since the Sub-PAC is located far away and frequent operation is time-consuming, it is recommended to set up a line that can operate passively for easier management.
| Switching off unnecessary Thermal Banks will improve battery production efficiency. |
|---|

The PAC Can Be Moved

You can move the PAC by approaching it and selecting 'Protocol Management' → 'Move'. Relocating it expands your options for constructing production lines.
Buck Capsule [A] Blueprint

*Press the Green Button to Copy the Blueprint Code.
EFO0101O36O80Oi17E179 EFO01eE7OOEuE64Eoui8 |
This optimized blueprint for Buckflower Capsule [A] achieves maximum efficiency by supplying two Steel Bottles and two Ground Buckflower Powders to the Filling Unit. Due to its large layout, you may need to expand your AIC Area to fit the full setup.
| By replacing Buckflower with Citrome in the setup shown, you can produce Canned Citrome [A]. |
|---|
Produce Steel Bottles and Ground Buckflower Powder
Buckflower Capsule [A] requires Steel Bottles and Ground Buckflower Powder as crafting materials. The base resources needed to produce these components are Ferrium Ore, Buckflower, and Sandleaf.
| Sandleaf can be gathered in the Power Plateau. If it is not yet available, continue progressing through the main quests to unlock access. |
|---|
8 Outputs for Max Efficiency
To maximize Buckflower Capsule [A] production, configure the system to output 80 Ferrium Ore every 10 seconds. With 8 outputs, you can produce one Buckflower Capsule [A] every 10 seconds.
| If maximum efficiency is not required, the number of facilities can be greatly reduced. Refer to the Buckflower Capsule [A] (Minimal) blueprint for a more compact setup. |
|---|
Buck Capsule [A] (Minimal) Blueprint

*Press the Green Button to Copy the Blueprint Code.
EFO013o78EU3U9aU20579 EFO01U4A224o4aOEu7Oa8 |
This blueprint is designed to produce Buck Capsule [A]. By adjusting the input materials, it can also function as a production line for Canned Citrome [A]. For optimal efficiency, it is recommended to set up a separate production line to continuously produce and store Sandleaf and Buckflower in a Depot.

SC Valley Battery Blueprint

*Press the Green Button to Copy the Blueprint Code.
EFO01a651oOaOeAU1oe5e EFO012I4uuIaIe85OeIOo |
This is a recommended manufacturing blueprint for SC Valley Batteries utilizing a Depot Unloader for efficient material handling. If you require power generation instead, refer to the dedicated SC Valley Battery Power Generation Blueprint for setup details.

Generate Power by Using Batteries
As your industry expands and more facilities are placed, power shortages will become more common. Produce batteries based on your current power needs to maintain a stable supply. The amount of power generated varies depending on the type of battery used.
Recommended Power Transport Routes
SC Valley Battery Power Generation Blueprint

*Press the Green Button to Copy the Blueprint Code.
EFO01u8U32AuA603aAoOU EFO01A5i445850EIU9ieO |
This blueprint integrates Thermal Banks into the SC Valley Battery production line. While supplying 1,260 Power, it continues to manufacture batteries simultaneously for improved efficiency.
| Disabling unnecessary Thermal Banks will improve overall efficiency and increase battery production output. |
|---|
HC Valley Battery Blueprint

*Press the Green Button to Copy the Blueprint Code.
EFO01O4a5e0O08Iou9oe4 EFO0172UEE2I2155aO0Ai |
This blueprint is designed for the Large-Capacity (HC) Valley Battery. Primarily used for mid- to late-game base trading, it also supports more efficient large-scale power generation. For stable supply, set up a separate production line to continuously produce and store Sandleaf in a Depot.
| Disabling unnecessary Thermal Banks will improve overall efficiency and increase battery production output. |
|---|

Generate Power by Using Batteries
As your industry expands and more facilities are placed, power shortages will become more common. Produce batteries based on your current power needs to maintain a stable supply. The amount of power generated varies depending on the type of battery used.
HC Valley Battery + Power Generation Blueprint

*Press the Green Button to Copy the Blueprint Code.
EFO01iUIa7I1iI2e472U4 EFO01o08aa0U0263UIieO |
This blueprint is designed for efficient HC Valley Battery production. Maximum output is achieved by supplying Steel Parts and Dense Originium Powder to the Packaging Unit at a 2:3 ratio. Due to its large footprint, you may need to expand your AIC Area to accommodate the full layout.
Producing Steel Parts and Dense Originium Powder
HC Valley Batteries require Steel Parts and Dense Originium Powder as crafting components. The base materials needed to produce these are Ferrium Ore, Originium, and Sandleaf.
| Sandleaf can be obtained in the Power Plateau. If it is not yet available to you, continue progressing through the Main Story to unlock access. |
|---|
10 Outputs for Maximum Efficiency
To achieve maximum production efficiency for HC Valley Batteries, configure the system to output 40 Ferrium Ore and 60 Originium every 10 seconds. With 10 active output lines, the setup can produce one HC Valley Battery every 10 seconds.
Cryston Part Blueprint

*Press the Green Button to Copy the Blueprint Code.
EFO013o78EU3U9aU40579 EFO016i1AAiOi8713O83e |
This blueprint is designed for Cryston Parts production. For continuous supply, set up a separate production line to endlessly produce and store Sandleaf in a Warehouse.
Cryston Component Blueprint

*Press the Green Button to Copy the Blueprint Code.
EFO01I3Au4iIi192U5o08 EFO01u1I661e1O0a7AoOU |
This blueprint is optimized for Cryston Components production. Set up a separate production line to continuously manufacture and store Sandleaf in a Depot to maintain stable supply. Production only needs to meet your team’s Gear crafting requirements, so large-scale overproduction is unnecessary.
Yazhen Syringe [C] Blueprint

*Press the Green Button to Copy the Blueprint Code.
EFO01iUIA1oio524672U4 EFO01iOe55O3O92e072U4 |
This blueprint is designed for Yazhen Syringe [C] production and can be used to efficiently farm Wuling Stock Bills. As the process consumes a large amount of Water, it is recommended to deploy this setup in the AIC Area of Wuling City to ensure stable resource supply. To operate, place Yazhen into the Planting Unit.
Mine Ferrium Ore North of Wuling City
To obtain Ferrium Ore in the Wuling area, deploy an Electric Mining Machine at the mineral deposit north of Wuling City. The site is close to the Sub-PAC, making it easy to supply with power for continuous extraction.
Xiranite Blueprint

*Press the Green Button to Copy the Blueprint Code.
EFO01iUIa74e8i2a372U4 EFO01iOe55O3O92oE72U4 |
This blueprint is designed for Xiranite production. By placing Sandleaf and Yazhen into a Planting Unit and supplying sufficient Water, you can enable continuous production. As the process consumes a high volume of water, it is recommended to deploy this setup in the AIC Area of Wuling City to maintain a stable water supply.
Xiranite Component Blueprint

*Press the Green Button to Copy the Blueprint Code.
EFO01ouiI5eoea60AIieO EFO01A5i445850EI39ieO |
This blueprint is designed for Xiranite Components. Required for crafting Gold Gear, it plays a key role in mid- to late-game progression. Set up separate production lines to continuously manufacture and store Xiranite and Sandleaf in a Warehouse. For high-volume production, connect a Protocol Stash to expand storage capacity and maintain output stability.
| Gold Gear is also used in Artificing, but it consumes a large amount of Stock Bills. |
|---|
Canned Citrome [C] / [B] Blueprint

*Press the Green Button to Copy the Blueprint Code.
EFO01602IaU156710O83e EFO01u1I661e1O0aIAoOU |
Canned Citrome is essential in large quantities for efficiently obtaining Valley Stock Bills in the early game. Prioritize its production. By switching input materials (Amethyst Ore for [C] and Ferrium Ore for [B]), you can produce both versions of Canned Citrome.
How to Farm Valley Stock Bills


Set Citrome in the Seed-Picking Unit

To operate this Logistics Connection, you need to insert Citrome into the Seed-Picking Unit once when placing it. Make sure not to forget this step, as it is required for running Logistics Connections that use plants in the future.
Canned Citrome [A] Blueprint

*Press the Green Button to Copy the Blueprint Code.
EFO01Ue36i39U3OEu7Oa8 EFO0158Ooo898Uua5eIoe |
This optimized blueprint for Canned Citrome [A] achieves maximum efficiency by feeding two Steel Bottles and two Ground Citrome Powders into the Filling Unit. Due to its large layout, you may need to expand your AIC Area to accommodate the full setup.
Produce Steel Bottles and Ground Citrome Powder
Canned Citrome [A] requires Steel Bottles and Ground Citrome Powder as crafting materials. The base resources needed to produce these components are Ferrium Ore, Citrome, and Sandleaf.
| Sandleaf can be collected in the Power Plateau. If you have not unlocked it yet, continue progressing through the Main Story. |
|---|
8 Output for Maximum Efficiency
To achieve maximum production efficiency for Canned Citrome [A], configure the system to output 80 Ferrium Ore every 10 seconds. With 8 active output lines, the setup can produce one Canned Citrome [A] every 10 seconds.
| If maximum efficiency is not required, you can greatly reduce the number of facilities used. Refer to the Canned Citrome [A] (Minimal) blueprint for a more compact setup. |
|---|
Canned Citrome [A] (Minimal) Blueprint

*Press the Green Button to Copy the Blueprint Code.
EFO01521eEIO05uaAeIoe EFO01eE7OOEuE64A3oAi8 |
This is the blueprint for Canned Citrome [A]. Place Sandleaf and Citrome on separate lines and store them in the Depot.
Stabilized Carbon Blueprint

*Press the Green Button to Copy the Blueprint Code.
EFO01u8U4oU2uU0oAoOU EFO01A5i445850EeI9ieO |
This is a blueprint for Stabilized Carbon. Stabilized Carbon is a material needed to produce Xiranite. Since the only raw materials are plants, no Output Port is required. Building a separate production line for Stabilized Carbon will be useful when the number of Forge of the Sky installations increases.
LC Wuling Battery Blueprint

*Press the Green Button to Copy the Blueprint Code.
EFO01A7u1eu6AuEo9ieO EFO0172UEE2I21588O0Ai |
This is a blueprint for the LC Wuling Battery. Once you have a mass production system for Xiranite, you can secure a high amount of power together with Originium. Also, any surplus can be used for outpost trading.
Producing Xiranite and Dense Originium Powder
Producing the LC Wuling Battery requires Xiranite and Dense Originium Powder. Dense Originium Powder are crafted using Originium and Sandleaf.
| Xiranite can be produced using the Forge of the Sky. Since it is also used in other Wuling industrial production beyond batteries, it is recommended to keep Xiranite Logistics Connections separate. |
|---|
Jincao Drink Blueprint

*Press the Green Button to Copy the Blueprint Code.
EFO01Ue36i39U3Oi7Oa8 EFO0136u996i65a9U0579 |
This is a blueprint for Jincao Drink. It operates by putting Jincao Power into the Reactor Crucible and supplying water to the pipes. Jincao Drink is a healing item and can also be used for Wuling's outpost trading.
Cuprium Comp & SC Battery Blueprint

*Press the Green Button to Copy the Blueprint Code.
EFO01a6589i0EaA4Eoe5e EFO01u1I661e1O0eOAoOU |
This blueprint produces Cuprium Components and SC Wuling Battery at the same time. Both are generated at a rate of 3 per minute, so overall efficiency is relatively low, making it best suited for players who have just unlocked Wuling Industry II. To activate it, connect water to the Pipe Splitter located in the upper left.
Wuling Industry II Unlock Required
This blueprint uses Cuprium Ore, so unlocking Wuling Industry II is required. If you haven’t unlocked it yet, continue progressing through the main story.
Connect Water to the Pipe Splitter

Once water is connected to the Pipe Splitter in the upper left, the facilities will start operating. Place a Fluid Pump near a water source and connect it with pipes to supply water.
Manage Cuprium Component Overflow
If Cuprium Components reach storage capacity, Sewage production will stop, which will also halt the production of SC Wuling Battery. If they begin to pile up, use base trading to consume them.
Produce Xiranite and Sandleaf
To run this setup, Xiranite and Sandleaf must be produced elsewhere. Both are widely used in Wuling industry, so start by setting up separate production blueprints for Xiranite and Sandleaf.
How to Use Blueprints
- Select 'Blueprints' in AIC Mode
- Select a Blueprint and then "Place"
- Place the Blueprint in Any Location
- How to Save and Share Blueprints
- How to Use Other Players' Blueprints?
- In Case the Power Generation is Insufficient
Select 'Blueprints' in AIC Mode
To access a blueprint, switch to AIC Mode, open the Blueprints menu, and proceed to the selection screen. Blueprints can be viewed not only near your base but also while exploring.
Select a Blueprint and then "Place"

After selecting the desired blueprint, press "Place" in the lower-right corner of the screen to deploy it in the field. The right panel displays the overall size, required materials, and other placement details before confirmation.
▼How to Use Other People's Blueprints?
Place the Blueprint in Any Location

After selecting "Place", choose the placement location in the field. Verify available space and orientation to avoid misalignment before confirming. If placed incorrectly, select the facility, stash it, and redeploy it in the correct position.
| If you do not have enough required facilities in stock, the affected sections will enter a 'Pending' state. Select the pending facility to open the construction screen, craft the missing facilities, then submit the required quantity to complete the blueprint setup. |
|---|
How to Save and Share Blueprints

On PC, select the desired area and press Ctrl + S to save a blueprint. To share it with other players, use "Share with Others" to generate an image and provide the code displayed in the bottom-left corner.
How to Use Other Players' Blueprints?

To use another player’s blueprint, open the "Shared Blueprints" tab, import it using the code, and then save it to your list. ▲Return to Step 2 and apply the blueprint.
In Case the Power Generation is Insufficient

Importing a large blueprint can cause a power shortage. If stored power drops to 0, the production line will stop. If power consumption exceeds generation, temporarily remove the blueprint or add additional power sources before redeploying.
AIC is Required for Story Progression
Full Production Unlocks in Chapter 1 Process II
Starting with “Paving the Way” in Chapter 1, Process II of the main story, missions will begin to include production and item delivery, marking the start of full-scale industry. Before expanding further, learn the basics by completing the relevant tutorials in the Simulation Space.
Complete Simulations for More Blueprints
Master the use of production facilities by completing Simulations. Completing Simulations also rewards the players with sample Blueprints for specific facilities.
How to Use the Simulation

You can access the Simulation by opening the “Basic AIC Plan” from the menu or via the icon in the top-right corner. From there, select “Simulation” in the top-right to choose what you want to learn, or enter it through the “Guide” button next to the research section in the Basic AIC Plan.
| You can earn rewards by completing Simulation missions, with additional rewards available for clearing sub-missions. |
|---|
Easy Build Production Lines with Blueprints

![]()
Building a complex Automated Industry Complex (AIC) takes a significant amount of time. If you want to reduce the setup time for production facilities, using blueprints is highly recommended.
Blueprints Unlock with "Paving the Way"
As you progress through the main story quest “Paving the Way,” the top-down view and blueprint features are unlocked. After the system introduces built-in blueprints, you’ll also be able to import player-created designs from “Shared Blueprints”.
Blueprint Tips and Important Notes
Get Basic AIC Index with Protocol Dataloggers

You can obtain the Basic AIC Index required for the Basic AIC Plan from Protocol Dataloggers. Click the icon next to the Research Cost in the Basic AIC Plan → select “Source” → choose the Protocol Datalogger area → then select “Track” to locate them.
Unavailable Without Facility Unlock
If a certain facility has not been researched, you won’t be able to use Blueprints that rely on the corresponding facilities. Advance your research by spending the Basic AIC Index in the Basic AIC Plan to unlock them.
| The Protocol Datalogger area information highlights uncollected Dataloggers, making it easier to earn the Basic AIC Index efficiently. |
|---|
Pay Attention to the Blueprint Size as Well

| How to Unlock | Side Mission “Building an Outpost” |
|---|
The buildable area of the Automated Industry Complex (AIC) can be expanded, meaning larger blueprints may not fit until you do so.
Buy Expansions with Valley Stock Bills
Expanding the buildable area
of your bases requires paying Valley Stock Bills, so gather as much as you can by trading Elastic Goods
and advancing your Outposts.
How to Farm Valley Stock Bills

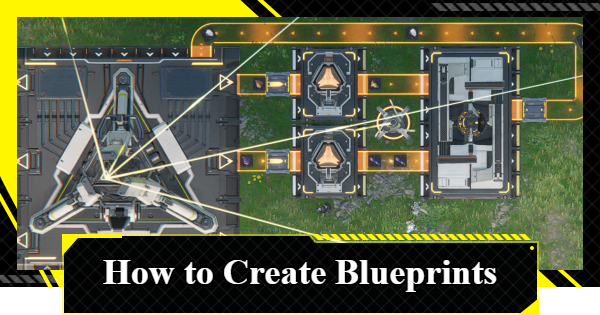 How to Create Blueprints
 How To Share Blueprints
 Basic AIC Controls
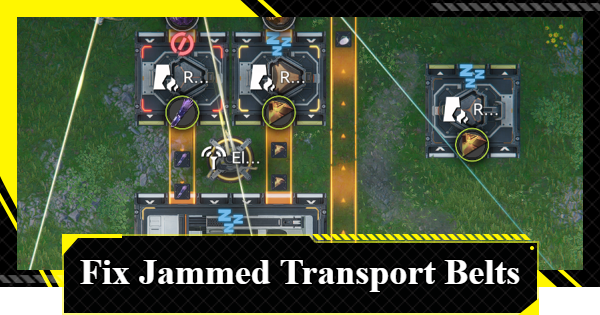 Clogged Transport Belts
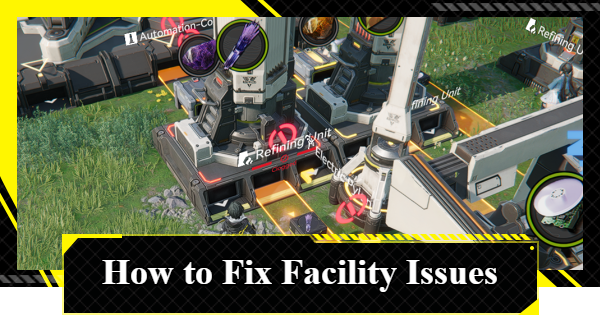 Fixing AIC Facility Issues
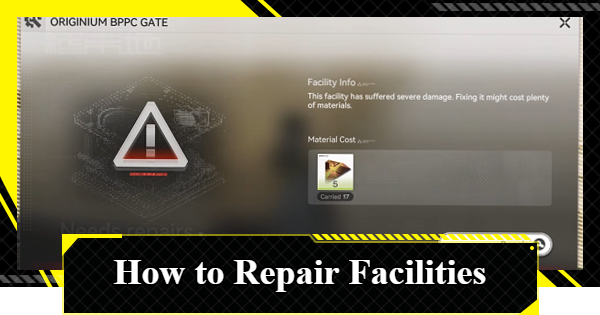 Repair Broken Facilities
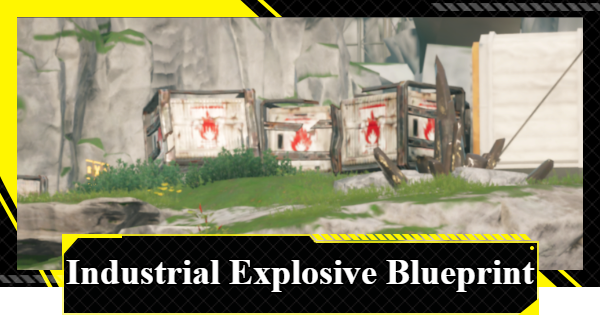 How to Craft Bombs
 Best Zipline Locations and Routes
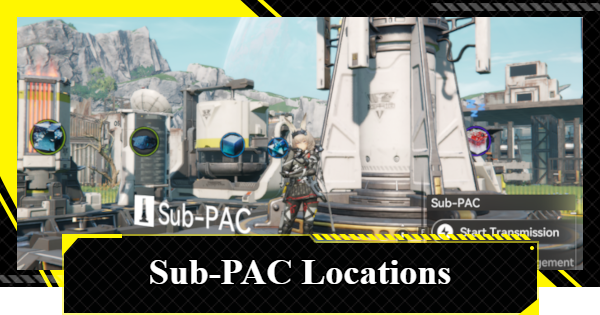 Sub-PAC Locations and Uses
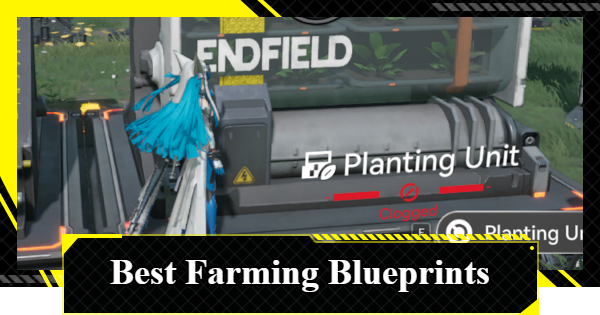 Best Farming Blueprints
 PAC Locations
 Wuling AIC Guide and Tips
 Reroll Tier List
 How to Reroll
 Best Characters Tier List
 Early Game Guide
 Redeem Codes List
 Best Team Comps
 Points of No Return
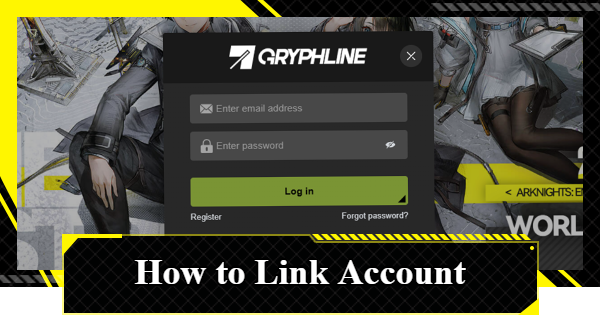 Linking GRYPHLINE Account
 How to Add Friends
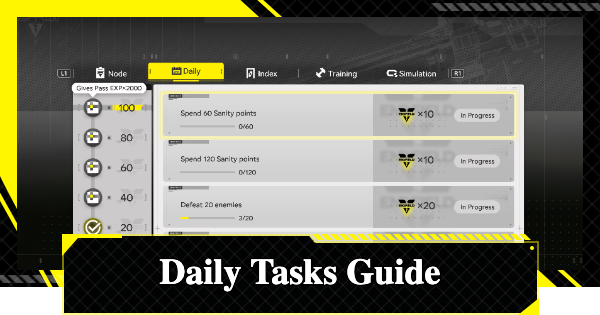 Daily Tasks To Do
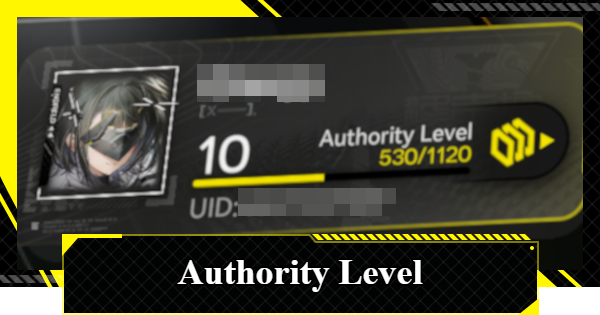 Authority Level Guide
 Interactive Map
