Need help with Lodespring Crossing in Arknights: Endfield? Learn how to use Originium Sapling shields to destroy the Ankhors and defeat the Walking Chrysopolis!
| Previous/Next Story | |
|---|---|
| Shattered Veins | Cradle of Ages |
Lodespring Crossing Overview
| Story Classification | Chapter 1 |
|---|---|
| Unlock Condition | Complete Chapter 1 Process III: Shattered Veins |
| Unlocks | None |
| Rewards | - Origeometry x2 - T-Creds x6,500 - Intermediate Combat Record x19 - Protoprism x11 - Arms INSP Kit x15 - Valley Stock Bill x200 - Operational EXP x400 |
Lodespring Crossing Walkthrough
Take Shelter in Originium Saplings


Start making your way toward the Ankhor. The Ankhor emits deadly shockwaves that will incapacitate you, so you'll need to use the shields projected by the Originium Sapling to safely move forward.
Destroy the First Ankhor

Once you're close enough, target the Ankhor's core to destroy it. You can also lob explosives from a safe distance inside the barrier.
Go to the Second Ankhor

With the first Ankhor dealt with, you'll gain access to the Old Mines. Follow the objective marker and push forward to the next Ankhor. Each Ankhor emits shockwaves, so you need to rely on the shields from the Originium Saplings and Originium Slugs to advance.
Twiggly Originium Slugs Also Provide Shields
You'll encounter Twiggly Originium Slugs. These critters have Originium Saplings growing on their backs, so they also project shields. The only catch is that they are mobile, so you'll have to keep pace with them as they move.
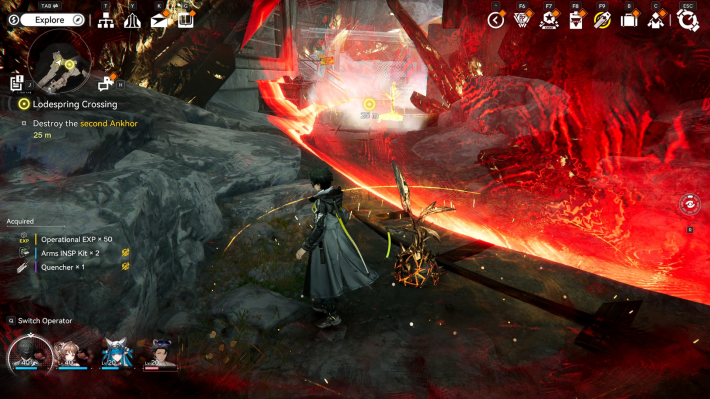
Destroy the Second Ankhor

When you close the gap on the second Ankhor, destroy it just like the first one.
Talk to the Survey Team Member

After the second Ankhor is destroyed, chat with the nearby survey team member to progress the story event. There's also a Teleport Point nearby which you can activate.
Go to the Third Ankhor

Once your conversation with the survey team member wraps up, start heading toward the final Ankhor.
Defeat the Walking Chrysopolis

Before you can reach the third Ankhor, you'll be ambushed by a boss: the "Walking Chrysalis". This enemy boasts heavy frontal armor and uses it like a shield, making it highly effective to flank and attack from behind.
Destroy the Third Ankhor

With the Walking Chrysopolis defeated, go to the location of the third Ankhor. Destroying the final Ankhor will complete the Lodespring Crossing mission.
Watch Out for Brittle Originium Branches

Keep in mind that the shields projected by the Brittle Originium Branches along the path to the third Ankhor will break after absorbing a shockwave. The shield will regenerate after a brief cooldown, so you'll need to time your movements carefully.
| Previous/Next Story | |
|---|---|
| Shattered Veins | Cradle of Ages |
Related Arknights: Endfield Articles
Back to Top PagePrologue: Force Start
 Process: Cold Start
 Process: Awakening
Chapter 1: Process I
 Break the Siege Break the Siege |  Valley Reboot Valley Reboot |  Rally and Unite Rally and Unite |
 Westward Into the Vale Westward Into the Vale |  Secure Sanctuary Secure Sanctuary |  Building an Outpost Building an Outpost |
 Through the Haze Through the Haze |  Fort Showdown Fort Showdown | - |
Chapter 1: Process II
 Paving the Way
 Work Preparation
 Maintenance Progress
Chapter 1: Process III
 The Mission Continues The Mission Continues |  Cross the Science Park Cross the Science Park |  Park Way Party Park Way Party |
 Walk in the Park Walk in the Park |  Mystery in the Building Mystery in the Building |  Down the Hill Down the Hill |
 Shattered Veins Shattered Veins | 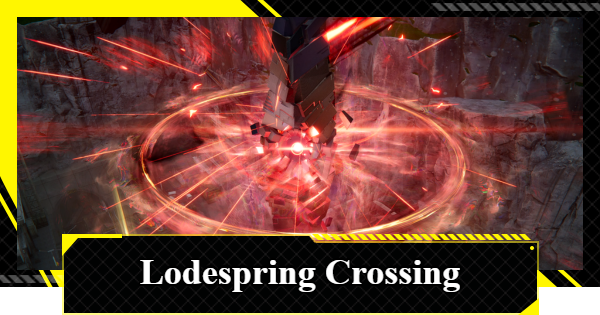 Lodespring Crossing Lodespring Crossing | 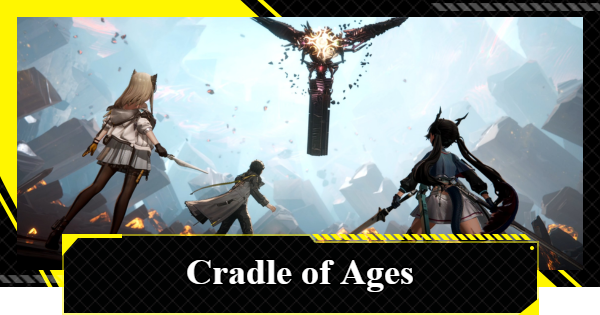 Cradle of Ages Walkthrough Cradle of Ages Walkthrough |
 Eve of Battle Walkthrough Eve of Battle Walkthrough | - | - |
Chapter 1: Process IV
 Entering the Endgame Entering the Endgame |  Counterstrike Brewing Counterstrike Brewing |  Scaldings of Utjug Scaldings of Utjug |
 Frontline Rush Frontline Rush |  Undying Cinders Undying Cinders |  Temporary Peace Temporary Peace |
 Mysterious Signal Mysterious Signal |  Conference of the Four Conference of the Four |  Work Preparation II Work Preparation II |
 Arrival at Wuling
 Stumbling Into Qingbo Stockade
 Destination Wuling
 A Glance of Astonishment
 A Breeze Away
 Of Grace and Gentle Might
 The Surging Tide
 Where Danger Sleeps
 Unexpected Attack
 Deep in the Mire
 The Flow Splits Course
 Surging From a Withered Spring
 A River Restless in Still Winds
 Another Wave Comes Crashing In
 Ripples Spread Throughout the Flow
  Purity Reveals the Stubborn Stone
 Twas One River That Gave Us Drink
