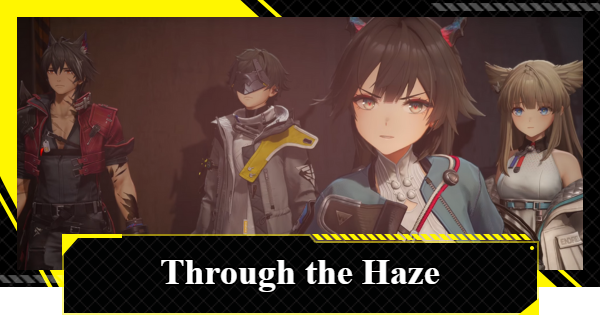
Clear the Through the Haze mission in Arknights: Endfield! Our guide helps you destroy all Ankhors, rescue the UWST crew, and reach Valley Fort to earn Origeometry rewards.
| Previous/Next Story | |
|---|---|
| Building an Outpost | Fort Showdown |
Through the Haze Overview and Rewards
| Story Chapter | Chapter 1 |
|---|---|
| Start Conditions | Complete Process I: Building an Outpost |
| Unlocked Content | None |
| Rewards | - Origeometry x3 - T-Creds x5,300 - Intermediate Combat Record x27 - Arms INSP Kit x21 - Operational EXP x600 |
Through the Haze Walkthrough Chart
- Return to the Shelter
- Enter the Ventilation Tunnel and Blast the Rubble
- Investigate the Nearby Area
- Follow the Path to Exit Outside
- Fight Your Way to the First Ankhor
- Destroy the First Ankhor With an Explosive
- Go to the Next Ankhor
- Destroy the Second Ankhor With Explosives
- Destroy the Final Ankhor
- Rescue the Trapped UWST Crew Mate
- Climb the Rope and Secure the Explosive Barrel
- Destroy the Final Ankhor
- Reach the Valley Fort
Return to the Shelter


To start Through the Haze, follow the objective marker back to the shelter. A conversation will automatically trigger once you get close to Daniel and Karja.
Enter the Ventilation Tunnel and Blast the Rubble

After speaking with Daniel, head into the ventilation tunnel. A Destructible object blocks the path ahead, so grab an explosive from the nearby Originium explosive barrel and use it to blast through the rubble.
Investigate the Nearby Area

Proceed past the rubble into the small back room. Reaching the marker triggers a scene and two investigation points will appear. Investigate both of these to learn why the Landbreakers are using blighted waste.
Follow the Path to Exit Outside

Once the investigation is complete, follow the path to the exit. Stepping outside will trigger a cutscene where you'll hear Nefarith's voice.
Heal Up at the Nearby Teleport Point

Upon exiting the tunnel, look to your right and you'll find a Teleport Point. Make sure to activate it and heal up, as you are about to face a series of tough battles.
Fight Your Way to the First Ankhor

Follow the marker toward an Ankhor. You will encounter two Bonekrushers: one at the bottom of the stairs and another guarding the Ankhor itself. A Level 17 Bonekrusher Pyromancer guarding the Ankhor has significantly higher HP, so be ready for a tough fight ahead.
Destroy the First Ankhor With an Explosive

After clearing all enemies, grab an explosive from the Originium barrel inside the nearby trailer and throw it at the small denstack.
Go to the Next Ankhor

Head toward the second Ankhor marker. Be prepared for another battle with a Bonekrusher blocking your path.
Destroy the Second Ankhor With Explosives

Once again, pick up an explosive from the Originium barrel and hurl it at the Ankhor to sever the connection.
Destroy the Final Ankhor

Use the rope to descend and wipe out the Bonekrusher squad below. Once the area is clear, follow the marker toward the final Ankhor location.
Rescue the Trapped UWST Crew Mate

As you approach the second enemy group, you'll encounter a UWST crewmate calling for help. Defeat the enemies guarding him and interact with the nearby device to set her free.
Climb the Rope and Secure the Explosive Barrel

After rescuing the trapped UWST crew member, climb up the rope and ascend the stairs to find a lone Bonecrusher guarding an Originium explosive barrel. Defeat him to gain access to the explosives.
Destroy the Final Ankhor

Grab the explosive, but don’t try carrying it down, because the moment you move too far, the explosive will disappear from your hand. Instead, throw it straight down at the Ankhor below.
Reach the Valley Fort

Destroying the final Ankhor will cause the smoke blocking the area to dissipate, and opens the path forward. Follow the marker toward the Valley Fort to complete Through the Haze.
| Previous/Next Story | |
|---|---|
| Building an Outpost | Fort Showdown |
Related Arknights: Endfield Articles
Back to Top PagePrologue: Force Start
 Process: Cold Start
 Process: Awakening
Chapter 1: Process I
 Break the Siege Break the Siege |  Valley Reboot Valley Reboot |  Rally and Unite Rally and Unite |
 Westward Into the Vale Westward Into the Vale |  Secure Sanctuary Secure Sanctuary |  Building an Outpost Building an Outpost |
 Through the Haze Through the Haze |  Fort Showdown Fort Showdown | - |
Chapter 1: Process II
 Paving the Way
 Work Preparation
 Maintenance Progress
Chapter 1: Process III
 The Mission Continues The Mission Continues |  Cross the Science Park Cross the Science Park |  Park Way Party Park Way Party |
 Walk in the Park Walk in the Park |  Mystery in the Building Mystery in the Building |  Down the Hill Down the Hill |
 Shattered Veins Shattered Veins |  Lodespring Crossing Lodespring Crossing |  Cradle of Ages Walkthrough Cradle of Ages Walkthrough |
 Eve of Battle Walkthrough Eve of Battle Walkthrough | - | - |
Chapter 1: Process IV
 Entering the Endgame Entering the Endgame |  Counterstrike Brewing Counterstrike Brewing |  Scaldings of Utjug Scaldings of Utjug |
 Frontline Rush Frontline Rush |  Undying Cinders Undying Cinders |  Temporary Peace Temporary Peace |
 Mysterious Signal Mysterious Signal |  Conference of the Four Conference of the Four |  Work Preparation II Work Preparation II |
 Arrival at Wuling
 Stumbling Into Qingbo Stockade
 Destination Wuling
 A Glance of Astonishment
 A Breeze Away
 Of Grace and Gentle Might
 The Surging Tide
 Where Danger Sleeps
 Unexpected Attack
 Deep in the Mire
 The Flow Splits Course
 Surging From a Withered Spring
 A River Restless in Still Winds
 Another Wave Comes Crashing In
 Ripples Spread Throughout the Flow
  Purity Reveals the Stubborn Stone
 Twas One River That Gave Us Drink
