Looking to beat RE-Crisis: Rhodagn under 120 seconds? Discover the best team builds, Stagger strategies, and phase 2 tips to earn your Trimmed Medal in Arknights: Endfield.
Table of Contents
| Boss Strategy Guides | |||
|---|---|---|---|
 Rhodagn Rhodagn | Triaggelos | Marble Aggelomoirai | Ruan Yi |
Rhodagn Strategy and Tips
- Control a Character with Ranged Attacks
- Watch Out for the Blast Zone
- Unleash Burst Damage During Stagger
- Hide Behind Walls to Survive the Ultimate
- Recover SP by Chain-Dodging the Flamethrower
Control a Character with Ranged Attacks
Rhodagn heavily favors close-quarters combat. By taking control of a ranged character like Perlica, Wulfgard, and even Ardelia, you can maintain a safe distance when he charges in, significantly reducing the damage you take.
Watch Out for the Blast Zone
When Rhodagn winds up an attack, a red danger zone appears, accompanied by a smaller inner circle expanding outward. If you're stuck in the blast radius, the hit will connect the exact moment the inner circle meets the outer edge. Use this visual cue to time your dodges perfectly.
Time Your Counters
Characters like Snowshine or Akekuri can drastically reduce incoming damage and counter-attack if their Battle Skills are timed right. Anticipating when Rhodagn will land will massively improve your success of countering him, so keep your eyes peeled.
Unleash Burst Damage During Stagger
When Staggered, Rhodagn is immobilized and takes increased damage. This is your window to unleash your hardest-hitting Battle Skills and Ultimates. During his normal phases, focus on building up the Stagger gauge using Final Strikes and Combo Skills.
Hide Behind Walls to Survive the Ultimate
After shifting forms, if Rhodagn leaps to the center of the arena, brace yourself, he's charging his ultimate attack. He'll summon four protective walls while he winds up; duck behind one to survive the blast. Ranged characters can actually keep attacking from behind this cover. If you're feeling bold, you can technically "Perfect Dodge" this attack, but the timing is tight.
Recover SP by Chain-Dodging the Flamethrower
Rhodagn's flamethrower is lethal since it hits multiple times and inflicts Combustion. However, you can turn this to your advantage by continuously dodging the flames. Not only do you avoid damage, but you also rapidly recover your SP. Repeatedly dodging left or right makes this much easier.
Dodge Backward to Protect Your AI Teammates
While strafing left or right is great for SP farming, it causes Rhodagn to swing the flamethrower in a wide arc, which will likely roast your AI-controlled allies. If your team is taking a beating, dodging backward to pull him away is a safer tactical choice.
Rhodagn's Attack Patterns and Cue
A Two‑Stage Showdown
Rhodagn starts in Phase 1, but after his health drops to a certain point, a brief cutscene triggers, signaling the start of Phase 2. He always opens Phase 2 with his ultimate move, and his entire moveset becomes much more aggressive.
 Tips! Tips! | The mid-fight cutscene can be skipped! |
|---|
Phase 1: Keep Your Distance and Dodge
In Phase 1, Rhodagn relies on heavy melee strikes and sweeping AoE attacks. Simply dodge the AoEs and maintain distance to easily evade his melee combos. Keep an eye out for his double-swipe into a slam.The final slam can be interrupted if you hit him with a skill.
Dodge the Opening Slam
Rhodagn always starts the fight with a Jump Press. He leaps into the air and crashes down after a short delay, covering a massive area that's hard to simply walk out of. Time the expanding circle and aim for a Perfect Dodge right before impact.
Perfect Dodge On Rhodagn's Pull Combo
Phase 1's most lethal move is the Pull followed by a Slam. The area of effect of this attack is huge, which makes running away a gamble. So, just like with his opening slam, lock onto the timing of both circles on the ground and execute a Perfect Dodge.
Interrupt the Double Swipe-Slam
After he swipes twice, Rhodagn briefly charges up, and a warning circle appears. The blast radius is small enough to simply step out of, but you can also interrupt the attack entirely by hitting him with a skill while the circle is active.
Watch Out for the Charged Dash
Rhodagn's Charged Dash combo has very little wind-up, making it easy to miss if you're stuck in melee range. There is a split-second pause between the dash and the punch, so use that window to calmly reposition yourself.
Phase 2: Larger AoEs and Fire
In Phase 2, Rhodagn incorporates fire and shockwaves into his arsenal. His attack ranges are significantly larger, so Perfect Dodging becomes crucial. Also, remember that you can survive his recurring ultimate attack by taking cover behind the summoned walls.
Hide Behind Walls to Dodge Rhodagn's Ultimate
When Rhodagn summons four pillars, he's prepping his ultimate. If you try to face-tank this to keep attacking, the two-part blast will deal Massive DMG and Knockback. Play it safe and get behind a wall.
| Tips! | It is possible to survive by executing two back-to-back Perfect Dodges! This is risky, but highly recommended if you're gunning for the 120-second speed-clear achievement. |
|---|
Fireballs Leave Hazardous Zones
He'll launch a barrage of fireballs that deal heavy direct damage and leave lingering hazards on the ground. However, hitting him with an interrupt skill while the warning circle is up will reduce the number of projectiles, making the attack much easier to handle.
Rhodagn's Slam Has 3 Shockwaves
The Phase 2 version of his Jump Press sends out three shockwaves upon landing. Eating all three hits will result in Massive DMG. Either step entirely out of the blast radius or Perfect Dodge into the shockwaves.
Flamethrower Variations: Sweeping and Steady
The Phase 2 flamethrower comes in two flavors: a sweeping attack that tracks your movement, and a straight-line blast that explodes. For both variations, the best defense is to chain your dodges while moving out of the danger zone.
Recommended Teams for Rhodagn
Story-Friendly Endministrator Comp
| Attacker | Attacker | Inflict Vulnerable | HP Recovery |
 Perlica Perlica |  Endministrator Endministrator |  Chen Qianyu Chen Qianyu |  Ardelia Ardelia |
This Endministrator-focused team uses only the initial free roster. Ranged combat makes dodging and positioning significantly easier, so we highly recommend controlling Perlica manually.
Perlica + Wulfgard Originium Arts Comp
 Wulfgard
 Antal
AntalA solid Heat and Electric hybrid team that can be built entirely for free-to-play. Since Rhodagn fights alone, Antal's Focus passive is incredibly effective here. Your goal is to unleash Wulfgard's Enhanced Battle Skill, which can be boosted by Electrification, buffs, and debuffs the moment Rhodagn is staggered.
Laevatain Comp for RE-Crisis Agony
 Laevatain
 Akekuri
This Laevatain-centric squad is designed to completely overwhelm the boss during her Ultimate. Keep Combustion and Corrosion applied while charging Laevatain's energy, then drop her Ultimate the second Rhodagn is Staggered to melt his HP bar.
| Tips! | Note that triggering Laevatain's Ultimate will automatically swap your active control over to her, even if you were playing as Wulfgard or Ardelia. |
|---|
How to Unlock Rhodagn
Fight Him in Chapter 1: Valley Fort Battle

Your first encounter with Rhodagn happens during Chapter 1, Process I: Fort Showdown. The fight kicks off the moment you enter the Valley Fort, so make absolutely sure your squad is geared up before advancing the story. There's a handy Teleport Point just outside the entrance where you can heal and manage your Backpack.
Fort Showdown WalkthroughRematch Him in Protocol Space (RE-Crisis)

Once you've beaten him in the story, Rhodagn becomes available for rematches via the RE-Crisis mode in the Operational Manual screen. RE-Crisis offers substantial First-Clear rewards, making these challenges well worth your time.
Protocol Space GuideRE-Crisis: Rhodagn Rewards
Beat Rhodagn in Under 120 Seconds

| Acquisition Condition | Clear "RE-Crisis: Rhodagn - Agony" within 120 seconds. |
If you can beat Rhodagn under 120 seconds in Deep Dive difficulty, you'll be rewarded with a Trimmed Medal. 2 minutes is incredibly tight, so we strongly recommend waiting until your roster is highly leveled and geared before attempting this.
First-Clear Rewards by Difficulty Level
| Level | Rewards |
| Lv.1 (Normal) | [First-Time Rewards] - Oroberyl x50 - T-Creds x3350 - Intermediate Combat Record x9 - Protoprism x5 - Arms INSP Kit x7 - Operational EXP x200 |
| Lv.2 (Hard) | [First-Time Rewards] - Oroberyl x50 - T-Creds x4050 - Elementary Cognitive Carrier x5 - Protohedron x1 - Arms INSP Kit x9 - Operational EXP x200 |
| Lv.3 (Despair) | [First-Time Rewards] - Oroberyl x50 - T-Creds x5750 - Elementary Cognitive Carrier x5 - Protohedron x1 - Arms INSP Kit x9 - Operational EXP x200 |
| Lv.4 (Agony) | [First-Time Rewards] - Oroberyl x50 - Long-Range Spectroscope x3 - Operational EXP x200 [Normal Rewards (Common)] - Long-Range Spectroscope - Operational EXP [Normal Rewards (Random)] - Tachyon Screening Lattice - D96 Steel Sample |
Related Arknights: Endfield Articles
Back to Top PageTier List
 Characters Tier List
 Reroll Tier List
 Best Weapons Tier List
Gacha Information
 Which Banner Should You Pull?
 Gacha Pity System & Rates
 Gacha Currency
 Basic Headhunting Permit
Recommended Articles
 Early Game Guide
 Redeem Codes List
 How to Add Friends
 Points of No Return
 Authority Level Guide
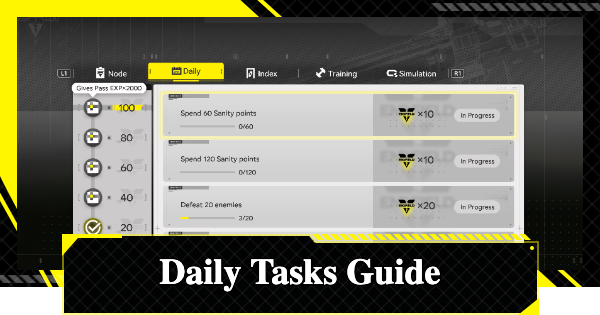 Daily Tasks To Do
 Starter Banner Best Weapon
 How to Farm T-Creds
 How to Get Aketine
 How to Get 2 Stock Redistributors
 Depot Nodes Location
 How to Get Origeometry
 Monthly Pass Guide
 Trust & Operator Gift Guide
Events
 Umbral Monument Event Guide Umbral Monument Event Guide |  Survive the Gas Survive the Gas |  Unorthodox Tactics Unorthodox Tactics |
 Ballista and Axe Ballista and Axe |  Bolts and Shadows Bolts and Shadows |  Rampaging Shields Rampaging Shields |
 Rock Solid Rock Solid |  Supply: Exploration Day Supply: Exploration Day |
Things to Know Before Release
 Release Date Release Date |  How to Pre-Download How to Pre-Download |  PS5 Pre-Order Bundle PS5 Pre-Order Bundle |
 How to Link Account How to Link Account |  Is Cross-Play Available? Is Cross-Play Available? |  How to Reroll How to Reroll |
 Operator Class Guide Operator Class Guide |
 Combat System Guide
 How to Win Battles
 Dodge and Perfect Dodge
 Elemental Weakness Chart
 Arts Reactions / Physical Status
 Team Composition Tips
 Best Team Comps
 Potential
 Talents and Base Skills
 How to Craft Gear
 Best Food List
 Artificing and Stats Priority
 All Fast Travel Points
 Protocol Datalogger
 Aurylene
 Interactive Map
 Ferrium Ore Map Location
