
Stranded Graveyard is an area for Elden Ring. Guide includes the map location, how to get, rewards, & boss of Stranded Graveyard.
Location Of Stranded Graveyard
Losing To Grafted Scion Will Transport You Here

When you lose to the Grafted Scion boss in the first area "Chapel Of Anticipation", you will be forcibly moved to the Stranded Graveyard after the cutscene.
Ride The Elevator Down From The First Step

It is possible to return at any time to The First Step in Limgrave, even after you progress through the story. Head south from the The First Step Site of Grace and enter the building in front you. The elevator is the disc surrounded by the six pillars, which can be activated by stepping on the protrusion at the center of the disc.
Stranded Graveyard Walkthrough Chart
| ① |  |
|---|---|
| ① Go down to the bottom of the cliff on the right side to start the tutorial └ Obtain the gesture at the end of the tutorial ② If you take the stairs at the far left, you can skip the tutorial to proceed immediately | |
| ② |  |
| After interacting with the Site of Grace, follow the road | |
| ③ |  |
| Jump (X Button) to advance. | |
| ④ |  |
| Enemies with large shields can be staggered by using two-handed attacks | |
| ⑤ |  |
| Cross the stone bridge and go further └ Avoid Bow attacks by using lateral movement └ No need to explore what's under the bridge since it is the very same path you took to get there | |
| ⑥ |  |
| Head left at the back (the gap in the wall to the left) | |
| ⑦ |  |
| Pass by the Stake of Marika and proceed to the fog at the back | |
| ⑧ |  |
| Defeat the Soldier of Godrick boss and advance further | |
| ⑨ |  |
| Continue on the cliff and obtain the Strength! Gesture | |
| ⑩ |  |
| Go down the cliff and go behind the door at the top of the stairs | |
| ⑪ |  |
| Interact with the Site of Grace in Stranded Graveyard └ Examine the statue at the far right and use the Stonesword Key to get to the Fringefolk Hero's Grave Proceed to the stairs in the back | |
| ⑫ | |
| Go down the cliff and go behind the door at the top of the stairs | |
| ⑬ |  |
| 1. Interact with the Site of Grace in Stranded Graveyard └ Examine the statue at the far right and use the Stonesword Key to get to the Fringefolk Hero's Grave Multiplayer is unlocked by examining the lost object at the right of the stairs 3. Proceed to the stairs. | |
| ⑭ |  |
| Ride the Elevator (step on the protrusion in the middle to activate) | |
| ⑮ |  |
| 1. Go straight outside and interact with The First Step Site of Grace 2. Head to the ▶Church of Elleh |
Strength! Gesture Is Obtained By Completing Tutorial

If you head down to the cliff first and play the tutorial, you will be able to get the Strength! gesture at the end. Veteran players can complete it quickly to obtain the gesture.
Boss Battles Restart Before Losing
A boss will appear at the end of tutorial. However, since there is a Stake of Marika nearby, you can immediately retry to fight the boss. Don't forget to collect the runes you lost first each time you retry.
Unlock Multiplayer By Obtaining Finger Severer

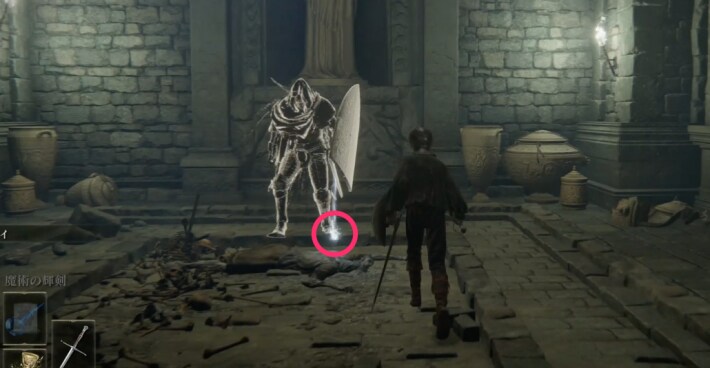
Examine the lost object near the Stranded Graveyard Site of Grace to obtain Finger Severer and Tarnished's Wizened Finger. The Finger Severer is an essential item for multiplayer, while the Tarnished's Wizened Finger is an item for leaving messages online. These are important items, so be sure to get them.
Next Area: ▶ Church of EllehHow To Defeat Solider Of Godrick (Boss)
Use Guard Counter To Break The Enemy's Stance
The Soldier of Godrick appears as a boss for the guard counter tutorial. If you can execute a guard counter, you can inflict heavy damage and break their stances. To do a guard counter, attack with R2 immediately after blocking an attack.
Where To Use Stonesword Key
Use Two Stonesword Keys At The Statue Near The Site Of Grace

You can will find an impassable wall because of the fog near the Stranded Graveyard Site of Grace, which is located beyond the door. Check the statue nearby and use the Stonesword Key to clear the fog to proceed. Two of the Stonesword Key are required, so be sure to get them.
Items Available
| Item | Details |
|---|---|
 Poisonbone Dart Poisonbone Dart | Consumables Can be thrown at an opponent to inflict poison |
 Golden Rune Golden Rune | Consumables Earn a lot of runes |
 Dragonwound Grease Dragonwound Grease | Consumables Grant a weapon special anti-dragon effects. |
 Grave Glovewort Grave Glovewort | Refinement Material Ashes can be upgraded |
 Dragon Communion Seal Dragon Communion Seal | Sacred Seal (Weapon) Required Stat Value: (Faith:10、Arcane:10) |
 Erdtree's Favor Erdtree's Favor | Talisman (Equipment) Increases Max HP, stamina and equip load ▼Click here for detailed information on how to obtain the product. |
How To Proceed After Using The Key (Fringefolk Hero's Grave)
| ① |  |
|---|---|
| Dash through the poisoned area └ Heavy weight load will poison you before you can get out. └ Pick up the Poisonbone Dart at the end of the path | |
| ② |  |
| Proceed to the alcove at the bottom right of the first slope (safe area) └ Use the three alcoves (safe areas) on each side to go down the slope while avoiding the chariot | |
| ③ |  |
| Jump down from the bottom rightmost alcove to the next slope └ The right timing is when the chariot descends to bottom of the slope and turns around to go up | |
| ④ |  |
| From the landing point, go all the way down to the bottom of the slope └ Pick up the Golden Rune | |
| ⑤ |  |
| Go up to the slope and pick up the Dragonwound Grease in the room with a poweful enemy └ Dragon Communion Seal is randomly dropped from the enemies └ All enemies can be hit by the chariot to take them down in one hit | |
| ⑥ |  |
| Return to the ⑤ location and proceed downhill └ Pick up the Grave Glovewort at the middle of the path | |
| ⑦ |  |
| 1. After descending, take the street on the right side of the road 2. After passing through the fog, you will encounter the Ulcerated Tree Spirit boss └ Reward: Golden Seed, Banished Knight Oleg (Spirit) |
Avoid The Chariot On The First Slope
The Fringefolk Hero's Grave area has a series of slopes. The first slope doesn't have a wall on the side, which means you can easily jump down to the next slope. When the chariot reaches the bottom of the first slope, turn around and go down to the next slope as fast as you can before the chariot reaches you.
Enemies Can Be Defeated By The Chariot
The chariot will kill you in a single hit once it reaches you. The same is true for enemies, where even stronger enemies (those who drop the Dragon Communion Seal) can be killed by it. Since they can be quite troublesome in the early game, you can lure them out of the room and let them get him by the chariot.
How To Obtain Erdtree's Favor
| ① | |
|---|---|
| Dash through the poisoned area └ Heavy weight load will poison you before you can get out. └ Pick up the Poisonbone Dart at the end of the path | |
| ② |  |
| Wait for the chariot to reach the top └ Wait around the third pillar from the back. | |
| ③ |  |
| 1. As soon as the chariot starts to descend, run along the left wall and descend 2. There are three indentations with one on each side, so enter the second one on the left └ If the weight load is too heavy, remove your equipment | |
| ④ |  |
| As soon as you pass the chariot coming from below, enter the third indentation on the right side and drop to the back └ Ignore the enemies in the indentations | |
| ⑤ |  |
| Dash down the slope and exit at the left side └ The foothold is narrow, so falling from the right might be safer | |
| ⑥ |  |
| Defeat two enemies and continue straight └ If you can defeat the first enemy from the landing site using a long-ranged attack, the other enemy will not attack you └ It is easier if you have a shield with 100 Physical Resistance | |
| ⑦ |  |
| When you go down the stairs, a flamethrower will be activated, so head down immediately once you trigger it └ It is alright if you go slowly and proceed as the flame goes out. ▼Detailed instructions on how to proceed. | |
| ⑧ |  |
| The moment the flames stop, dash along the right wall and take shelter in the indentation along the way └ There is one enemy inside , so use your shield to get through or defeat it | |
| ⑨ |  |
| 1. The moment the flame stops again, proceed to the end of the flamethrower 2. Continue straight ahead | |
| ⑩ | |
| Cross the bridge in the middle and pick up the Erdtree's Favor in front of the statue └ The boss will spawn just before you cross over, but ignore it for now and collect the item |
How To Evade Flamethrower
The flamethrower will take a bit of time before it activates again. Trigger it once and find shelter in the indentation on the wall until it stops.


