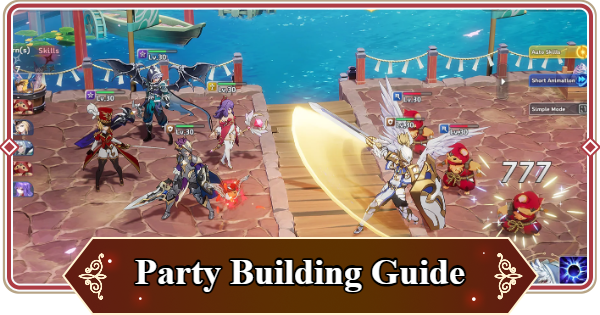
Team party guide for Seven Knights Re: Birth. Includes best party members list, farming team compositions, adventure team formations, group placement, team-building tips, and more.
Table of Contents
Party Building Tips
Party Formation Elements

Element | Formation Tips |
▼Hero | Use a balance of each type |
▼Pet | Prioritize high rarity in the early game → Form a team based on the dungeon |
▼Formation | Early game: Basic/Balance Formation → Attack/Defense Formation |
▼Skill Queue | Prioritize defensive, status effect, and high-damage skills |
▼Equipment | Prioritize high Rank |
Party formation consists of five elements: Heroes, Pets, Formations, Skill Queue, and Equipment. Auto-formation is fine in the early game, but once you get used to it, try building a party based on your available units and the dungeon's characteristics.
Balance Hero Types in Your Formation
Type | Features | Recommended Number |
![]() | High attack power Physical attacker. HP and Defense are low. | 0-3 Heroes |
![]() | High attack power Magic attacker. HP and Defense are low. | 0-3 Heroes |
![]() | High HP and Defense tank. Attack power is low. | 1 Hero |
![]() | Supporter with relatively high HP and Defense. Attack power is somewhat low. | 1 Hero |
![]() | Balanced between attack and defense. | 0-3 Heroes |
Heroes have types, and each type has different characteristics. The composition may vary slightly depending on the dungeon, but the basic formation is to include one Defense type and one Support type, then fill the remaining slots based on your available units and the dungeon.
![]() | A Hero's type can be identified by the icon displayed near the Rank stars. You can also filter by type on the Team Formation screen. |
---|
Prioritize High-Rarity Pets in Early Game

Pets are stronger the higher their rarity (Legendary > Rare), so prioritize high-rarity pets in the early game. Once you're more experienced, it's ideal to build around pets that provide Physical/Magic/All Attack, Defense, or Crit Rate Boosts, depending on the dungeon.
Switch to Attack/Defense Formations Once You Have More Heroes
Formation Types and Effects
Formation | Lv. 20 Effect Recommended Use |
![]() | Front Row (2 Heroes): Defense +13% Back Row (3 Heroes): Attack +8% - Until you have a solid roster in the early game - When you have 3 attackers |
![]() | Front Row (3 Heroes): Defense +8% Back Row (2 Heroes): Attack +13% - Until you have a solid roster in the early game - When you want to further increase attacker damage |
![]() | Front Row (1 Hero): Defense +26% Back Row (4 Heroes): Attack +6.5% - Use when your roster is more complete - When one Defense Hero can tank all the damage - For formations with many attackers - When you want to maximize damage (e.g., in Castle Rush) |
![]() | Front Row (4 Heroes): Defense +6.5% Back Row (1 Hero): Attack +26% - Use when your roster is more complete - For farming, place a Hero with an AoE attack in the back row - When you want to make one attacker extremely powerful - For formations with many supporters |
In formations, the Front Row is more likely to be attacked. In the early game, the easy-to-use Basic and Balance Formations are recommended.
Once you have more Heroes and can create a balanced team with various types, try using the Attack and Defense Formations.
Recommended Placement for Each Hero Type
Type | Recommended Placement |
![]() | Back Row |
![]() | Back Row |
![]() | Front Row |
![]() | Front Row/Back Row |
Generally, it's recommended to place Attack and Magic types in the Back Row, and Defense types in the Front Row. Place Universal types according to your team's needs.
Support types have relatively high Defense and low attack, making them suitable for the Front Row, but they are sometimes placed in the Back Row to ensure they can continue supporting without being defeated.
Set Up Skill Queue Before Battle

You can queue up to three skills in advance. By using a defensive skill first, or by stopping the enemy's movement with status effects like Stun or Freeze, you can fight even if there's a slight power difference. It's also recommended to defeat them all at once with a wide-range, high-damage skill.
Prioritize High-Rank Equipment
Example Recommended Equipment Effects for Each Hero Type
Type | Example Recommended Equipment Effects | |
![]() | - Physical Attack Boost - All Attack Boost - Crit Rate Boost - Crit Damage Boost | |
![]() | - Magic Attack Boost - All Attack Boost - Crit Rate Boost - Crit Damage Boost | |
![]() | ![]() | - HP Boost - Defense Boost - Block Rate Boost |
![]() | - If an attacker, recommended equipment for Attack/Magic types - If a supporter, recommended equipment for Defense/Support types |
Equipment is equipped from the Hero information screen, not the party formation screen, so be sure to equip it beforehand. Higher Rank equipment tends to be more powerful, so it's recommended to prioritize equipping it, but using the Equip Recommeded feature is fine in the early game.
Example Party Formations for Each Formation Type
Basic Formation (2 Front Row)
Front Row | Front Row | Back Row | Back Row | Back Row |
---|---|---|---|---|
![]() Tank | ![]() Healer | ![]() Physical Attack | ![]() Magic Attack | ![]() Physical Attack |
The Basic Formation is effective when placing three attackers in your party. It's a good idea to primarily use this formation until your early-game roster is established.
Balance Formation (3 Front Row)
Front Row | Front Row | Front Row | Back Row | Back Row |
---|---|---|---|---|
![]() Tank | ![]() Healer | ![]() Physical Attack Sub-DPS | ![]() Magic Attack Main DPS | ![]() Physical Attack Main DPS |
The Balance Formation is effective when you want to disperse attacks more, such as when your tank or healer gets defeated in the Basic Formation.
Also, since the Attack Boost per Back Row Hero is higher than in the Basic Formation, it's a viable option if you get a particularly high-damage Hero early on.
Attack Formation (1 Front Row)
Front Row | Back Row | Back Row | Back Row | Back Row |
---|---|---|---|---|
![]() Tank | ![]() Healer | ![]() Physical Attack | ![]() Magic Attack | ![]() Physical Attack |
The Attack Formation, as its name suggests, specializes in offense, concentrating attacks on a single Front Row Hero. This formation is effective when you have a strong, well-leveled tank, or when you want to increase your party's damage output, like in Castle Rush.
Defense Formation (4 Front Row)
Front Row | Front Row | Front Row | Front Row | Back Row |
---|---|---|---|---|
![]() Tank | ![]() Healer | ![]() Physical Attack Sub-DPS | ![]() Magic Attack Sub-DPS | ![]() Physical Attack Main DPS |
In the Defense Formation, four Heroes with increased Defense can disperse incoming attacks, making your Heroes harder to defeat. It's suitable for boss battles where you want to make one powerful attacker even stronger, or when you need to focus on durability.
![]() | When leveling up through Repeat Battle, you can level efficiently by using the Defense Formation, placing a high-damage attacker in the Back Row, and filling the four Front Row slots with the Heroes you want to level up. It's not just a formation for wars of attrition! |
---|
Example Party Formations for Dealing with Status Effects
Burn Immunity Party (Fire Particle Dungeon)
Front Row | Back Row | Back Row | Back Row | Back Row |
---|---|---|---|---|
![]() Tank | ![]() Healer Burn Immunity | ![]() Magic Attack Burn Immunity | ![]() Magic Attack Inflicts Freeze | ![]() Physical Attack Inflicts Freeze |
For a Burn Immunity party, it's recommended to include either Yui or Ariel. Since you only need one of them in the formation, if you have Yui, you can replace Ariel with another attacker for a smoother clear.
Freeze Immunity Party (Water Particle Dungeon)
Front Row | Back Row | Back Row | Back Row | Back Row |
---|---|---|---|---|
![]() Tank | ![]() Healer | ![]() Magic Attack Freeze Immunity | ![]() Support Unable to Recover | ![]() Physical Attack Inflicts Poison |
An example of a Freeze Immunity party is shown above. In situations where you need additional support like Unable to Recover, you might end up with a party formation that includes two Support Heroes.
Stun Immunity Party (Earth Particle Dungeon)
Front Row | Back Row | Back Row | Back Row | Back Row |
---|---|---|---|---|
![]() Tank Stun Immunity | ![]() Healer | ![]() Physical Attack Inflicts Burn | ![]() Physical Attack Inflicts Burn | ![]() Magic Attack |
Evan, whom you get at the start of the game, has Stun Immunity, so you just need to form a party with one healer and three attackers from your roster. If you don't have Rachel, it's a good idea to include a different debuffer.
Shock Immunity Party (Light Particle Dungeon)
Front Row | Back Row | Back Row | Back Row | Back Row |
---|---|---|---|---|
![]() Tank | ![]() Healer | ![]() Support Shock Immunity | ![]() Magic Attack Multi-hit Attack | ![]() Physical Attack Debuff |
An example of a Shock Immunity party is shown above. This formation uses two Support types for Shock Immunity and healing, leaving two slots for attackers.
Death Immunity Party (Dark Particle Dungeon)
Front Row | Back Row | Back Row | Back Row | Back Row |
---|---|---|---|---|
![]() Tank | ![]() Healer | ![]() Support Death Immunity Inflicts Bleed | ![]() Support Debuff Removal | ![]() Physical Attack Inflicts Bleed |
An example of a Death Immunity party is shown above. In battles where Debuff Removal is not necessary, you can replace the Debuff Removal slot with an attacker or a debuffing support.
Related Seven Knights Re: BIRTH Articles
Ranking Articles
Ranking Articles | |
---|---|
![]() | ![]() |
Recommended Articles
Articles To Check | ||
---|---|---|
![]() | ![]() | ![]() |
For Early Game | ||
![]() | ![]() | ![]() |
![]() | ![]() | ![]() |
![]() | ![]() | ![]() |
Lists | ||
All Characters | Voice Actor List | Statuses and Effects |
Hero Per Specialty
By Grade | |||||||||||||||||||
---|---|---|---|---|---|---|---|---|---|---|---|---|---|---|---|---|---|---|---|
Legendary | Rare | Uncommon | Common | ||||||||||||||||
By Max Star Rank | |||||||||||||||||||
6★ | 5★ | 4★ | 3★ | ||||||||||||||||
Per Type | |||||||||||||||||||
![]() | ![]() | ![]() | ![]() | ![]() | |||||||||||||||
By Attack-Type | |||||||||||||||||||
Physical | Magic |
Legendary Characters
Seven Knights | |||
---|---|---|---|
![]() | ![]() | ![]() | ![]() |
![]() | ![]() | ![]() | ![]() |
Seven Knights of the Old | |||
![]() | ![]() | ![]() | ![]() |
![]() | ![]() | ![]() | |
Apprentice Priest | |||
![]() | ![]() | ![]() | ![]() |
![]() | |||
Four Lords | |||
![]() | ![]() | ![]() | ![]() |
Four Lords of Old | |||
![]() | ![]() | ![]() | ![]() |
Night Crow | |||
![]() | ![]() | ![]() | ![]() |
![]() | |||
Hidden Masters | |||
![]() | ![]() | ![]() | ![]() |
???? | |||
![]() | |||
Adventurer | |||
![]() | |||
Terra | |||
![]() | ![]() | ![]() | ![]() |
![]() | |||
Holy Cross Crusaders | |||
![]() | ![]() | ![]() | ![]() |
![]() | |||
Shadow Clan | |||
![]() | |||
Purgatory | |||
![]() | |||
Moonlit Isle | |||
![]() | ![]() | ||
Eastern Aisha | |||
![]() | ![]() | ||
Sanctuary of Darkness | |||
![]() |
Rare Heroes
This article provides tips and examples for party building in Seven Knights Re:Birth. It covers party formation tips, recommended placements, and example formations for dealing with status effects in Seven Knights Re:Birth. Use this guide to help with your party formations.
Table of Contents
- Party Building Tips
- Party Formation Elements and Tips
- Balance Hero Types in Your Formation
- Prioritize High-Rarity Pets in the Early Game
- Switch to Attack/Defense Formations Once You Have More Heroes
- Queue Defensive, Status Effect, and High-Damage Skills
- Prioritize High-Rank Equipment
- Example Party Formations for Each Formation Type
- Example Party Formations for Dealing with Status Effects
Party Building Tips
Party Formation Elements and Tips

Element | Formation Tips |
▼Hero | Use a balance of each type |
▼Pet | Prioritize high rarity in the early game → Form a team based on the dungeon |
▼Formation | Early game: Basic/Balance Formation → Attack/Defense Formation |
▼Skill Queue | Prioritize defensive, status effect, and high-damage skills |
▼Equipment | Prioritize high Rank |
Party formation consists of five elements: Heroes, Pets, Formations, Skill Queue, and Equipment. Auto-formation is fine in the early game, but once you get used to it, try building a party based on your available units and the dungeon's characteristics.
Balance Hero Types in Your Formation
Type | Features | Recommended Number |
![]() | High attack power Physical attacker. HP and Defense are low. | 0-3 Heroes |
![]() | High attack power Magic attacker. HP and Defense are low. | 0-3 Heroes |
![]() | High HP and Defense tank. Attack power is low. | 1 Hero |
![]() | Supporter with relatively high HP and Defense. Attack power is somewhat low. | 1 Hero |
![]() | Balanced between attack and defense. | 0-3 Heroes |
Heroes have types, and each type has different characteristics. The composition may vary slightly depending on the dungeon, but the basic formation is to include one Defense type and one Support type, then fill the remaining slots based on your available units and the dungeon.
![]() | A Hero's type can be identified by the icon displayed near the Rank stars. You can also filter by type on the Team Formation screen. |
---|
Prioritize High-Rarity Pets in Early Game

Pets are stronger the higher their rarity (Legendary > Rare), so prioritize high-rarity pets in the early game. Once you're more experienced, it's ideal to build around pets that provide Physical/Magic/All Attack, Defense, or Crit Rate Boosts, depending on the dungeon.
Switch to Attack/Defense Formations Once You Have More Heroes
Formation Types and Effects
Formation | Lv. 20 Effect Recommended Use |
![]() | Front Row (2 Heroes): Defense +13% Back Row (3 Heroes): Attack +8% - Until you have a solid roster in the early game - When you have 3 attackers |
![]() | Front Row (3 Heroes): Defense +8% Back Row (2 Heroes): Attack +13% - Until you have a solid roster in the early game - When you want to further increase attacker damage |
![]() | Front Row (1 Hero): Defense +26% Back Row (4 Heroes): Attack +6.5% - Use when your roster is more complete - When one Defense Hero can tank all the damage - For formations with many attackers - When you want to maximize damage (e.g., in Castle Rush) |
![]() | Front Row (4 Heroes): Defense +6.5% Back Row (1 Hero): Attack +26% - Use when your roster is more complete - For farming, place a Hero with an AoE attack in the back row - When you want to make one attacker extremely powerful - For formations with many supporters |
In formations, the Front Row is more likely to be attacked. In the early game, the easy-to-use Basic and Balance Formations are recommended.
Once you have more Heroes and can create a balanced team with various types, try using the Attack and Defense Formations.
Recommended Placement for Each Hero Type
Type | Recommended Placement |
![]() | Back Row |
![]() | Back Row |
![]() | Front Row |
![]() | Front Row/Back Row |
Generally, it's recommended to place Attack and Magic types in the Back Row, and Defense types in the Front Row. Place Universal types according to your team's needs.
Support types have relatively high Defense and low attack, making them suitable for the Front Row, but they are sometimes placed in the Back Row to ensure they can continue supporting without being defeated.
Queue Defensive, Status Effect, and High-Damage Skills

You can queue up to three skills in advance. By using a defensive skill first, or by stopping the enemy's movement with status effects like Stun or Freeze, you can fight even if there's a slight power difference. It's also recommended to defeat them all at once with a wide-range, high-damage skill.
Prioritize High-Rank Equipment
Example Recommended Equipment Effects for Each Hero Type
Type | Example Recommended Equipment Effects | |
![]() | - Physical Attack Boost - All Attack Boost - Crit Rate Boost - Crit Damage Boost | |
![]() | - Magic Attack Boost - All Attack Boost - Crit Rate Boost - Crit Damage Boost | |
![]() | ![]() | - HP Boost - Defense Boost - Block Rate Boost |
![]() | - If an attacker, recommended equipment for Attack/Magic types - If a supporter, recommended equipment for Defense/Support types |
Equipment is equipped from the Hero information screen, not the party formation screen, so be sure to equip it beforehand. Higher Rank equipment tends to be more powerful, so it's recommended to prioritize equipping it, but using the Equip Recommeded feature is fine in the early game.
Example Party Formations for Each Formation Type
Basic Formation (2 Front Row)
Front Row | Front Row | Back Row | Back Row | Back Row |
---|---|---|---|---|
![]() Tank | ![]() Healer | ![]() Physical Attack | ![]() Magic Attack | ![]() Physical Attack |
The Basic Formation is effective when placing three attackers in your party. It's a good idea to primarily use this formation until your early-game roster is established.
Balance Formation (3 Front Row)
Front Row | Front Row | Front Row | Back Row | Back Row |
---|---|---|---|---|
![]() Tank | ![]() Healer | ![]() Physical Attack Sub-DPS | ![]() Magic Attack Main DPS | ![]() Physical Attack Main DPS |
The Balance Formation is effective when you want to disperse attacks more, such as when your tank or healer gets defeated in the Basic Formation.
Also, since the Attack Boost per Back Row Hero is higher than in the Basic Formation, it's a viable option if you get a particularly high-damage Hero early on.
Attack Formation (1 Front Row)
Front Row | Back Row | Back Row | Back Row | Back Row |
---|---|---|---|---|
![]() Tank | ![]() Healer | ![]() Physical Attack | ![]() Magic Attack | ![]() Physical Attack |
The Attack Formation, as its name suggests, specializes in offense, concentrating attacks on a single Front Row Hero. This formation is effective when you have a strong, well-leveled tank, or when you want to increase your party's damage output, like in Castle Rush.
Defense Formation (4 Front Row)
Front Row | Front Row | Front Row | Front Row | Back Row |
---|---|---|---|---|
![]() Tank | ![]() Healer | ![]() Physical Attack Sub-DPS | ![]() Magic Attack Sub-DPS | ![]() Physical Attack Main DPS |
In the Defense Formation, four Heroes with increased Defense can disperse incoming attacks, making your Heroes harder to defeat. It's suitable for boss battles where you want to make one powerful attacker even stronger, or when you need to focus on durability.
![]() | When leveling up through Repeat Battle, you can level efficiently by using the Defense Formation, placing a high-damage attacker in the Back Row, and filling the four Front Row slots with the Heroes you want to level up. It's not just a formation for wars of attrition! |
---|
Party Formations for Countering Status Effects
Burn Immunity Party (Fire Particle Dungeon)
Front Row | Back Row | Back Row | Back Row | Back Row |
---|---|---|---|---|
![]() Tank | ![]() Healer Burn Immunity | ![]() Magic Attack Burn Immunity | ![]() Magic Attack Inflicts Freeze | ![]() Physical Attack Inflicts Freeze |
For a Burn Immunity party, it's recommended to include either Yui or Ariel. Since you only need one of them in the formation, if you have Yui, you can replace Ariel with another attacker for a smoother clear.
Freeze Immunity Party (Water Particle Dungeon)
Front Row | Back Row | Back Row | Back Row | Back Row |
---|---|---|---|---|
![]() Tank | ![]() Healer | ![]() Magic Attack Freeze Immunity | ![]() Support Unable to Recover | ![]() Physical Attack Inflicts Poison |
An example of a Freeze Immunity party is shown above. In situations where you need additional support like Unable to Recover, you might end up with a party formation that includes two Support Heroes.
Stun Immunity Party (Earth Particle Dungeon)
Front Row | Back Row | Back Row | Back Row | Back Row |
---|---|---|---|---|
![]() Tank Stun Immunity | ![]() Healer | ![]() Physical Attack Inflicts Burn | ![]() Physical Attack Inflicts Burn | ![]() Magic Attack |
Evan, whom you get at the start of the game, has Stun Immunity, so you just need to form a party with one healer and three attackers from your roster. If you don't have Rachel, it's a good idea to include a different debuffer.
Shock Immunity Party (Light Particle Dungeon)
Front Row | Back Row | Back Row | Back Row | Back Row |
---|---|---|---|---|
![]() Tank | ![]() Healer | ![]() Support Shock Immunity | ![]() Magic Attack Multi-hit Attack | ![]() Physical Attack Debuff |
An example of a Shock Immunity party is shown above. This formation uses two Support types for Shock Immunity and healing, leaving two slots for attackers.
Death Immunity Party (Dark Particle Dungeon)
Front Row | Back Row | Back Row | Back Row | Back Row |
---|---|---|---|---|
![]() Tank | ![]() Healer | ![]() Support Death Immunity Inflicts Bleed | ![]() Support Debuff Removal | ![]() Physical Attack Inflicts Bleed |
An example of a Death Immunity party is shown above. In battles where Debuff Removal is not necessary, you can replace the Debuff Removal slot with an attacker or a debuffing support.
Related Seven Knights Re: BIRTH Articles
Ranking Articles
Ranking Articles | |
---|---|
![]() | ![]() |
Recommended Articles
Articles To Check | ||
---|---|---|
![]() | ![]() | ![]() |
For Early Game | ||
![]() | ![]() | ![]() |
![]() | ![]() | ![]() |
![]() | ![]() | ![]() |
Lists | ||
All Characters | Voice Actor List | Statuses and Effects |
Hero Per Specialty
By Grade | |||||||||||||||||||
---|---|---|---|---|---|---|---|---|---|---|---|---|---|---|---|---|---|---|---|
Legendary | Rare | Uncommon | Common | ||||||||||||||||
By Max Star Rank | |||||||||||||||||||
6★ | 5★ | 4★ | 3★ | ||||||||||||||||
Per Type | |||||||||||||||||||
![]() | ![]() | ![]() | ![]() | ![]() | |||||||||||||||
By Attack-Type | |||||||||||||||||||
Physical | Magic |
Legendary Characters
Seven Knights | |||
---|---|---|---|
![]() | ![]() | ![]() | ![]() |
![]() | ![]() | ![]() | ![]() |
Seven Knights of the Old | |||
![]() | ![]() | ![]() | ![]() |
![]() | ![]() | ![]() | |
Apprentice Priest | |||
![]() | ![]() | ![]() | ![]() |
![]() | |||
Four Lords | |||
![]() | ![]() | ![]() | ![]() |
Four Lords of Old | |||
![]() | ![]() | ![]() | ![]() |
Night Crow | |||
![]() | ![]() | ![]() | ![]() |
![]() | |||
Hidden Masters | |||
![]() | ![]() | ![]() | ![]() |
???? | |||
![]() | |||
Adventurer | |||
![]() | |||
Terra | |||
![]() | ![]() | ![]() | ![]() |
![]() | |||
Holy Cross Crusaders | |||
![]() | ![]() | ![]() | ![]() |
![]() | |||
Shadow Clan | |||
![]() | |||
Purgatory | |||
![]() | |||
Moonlit Isle | |||
![]() | ![]() | ||
Eastern Aisha | |||
![]() | ![]() | ||
Sanctuary of Darkness | |||
![]() |