 Aris
Aris
 Mon
Mon Tue
Tue Wed
Wed Thur
Thur Fri
Fri Sat
Sat Sun
Sun Physical
 Magic
Magic Tank
Tank Death
Death Gaze
Gaze Ox
Ox Iron
Iron Leo
Leo Ast
Ast Cali
Cali Fire
Fire Water
Water Light
Light Dark
Dark Earth
Earth Gold
Gold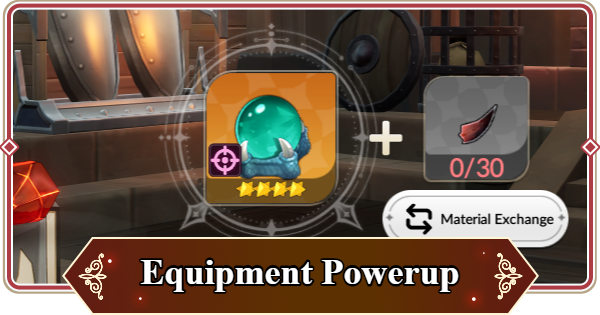
Equipment Powerup Guide in Seven Knights Re:BIRTH. Includes how to get equipment, craft, equip presets, enhance weapons, accessories, recommend set effects, & reset in 7K Rebirth.
Table of Contents
Gear & Accessory Inventory Expansion


The maximum capacity in Inventory for Weapon, Armor, and Accessories has been expanded. Inventory slots can be expanded using Rubies, with the required amount increasing for each additional expansion.
 | Inventory Expansion becomes available after reaching Adventurer Level 80 and can be accessed from [Inventory] → [Expand] (bottom-right). |
|---|
Tap to See Ruby Costs per Expansion
| Inventory | Stage | Slots | Price |
|---|---|---|---|
| Weapon | 1 | 50 | Ruby x250 |
| 2 | 50 | Ruby x500 | |
| 3 | 50 | Ruby x750 | |
| 4 | 50 | Ruby x1,000 | |
| 5 | 50 | Ruby x1,250 | |
| 6 | 50 | Ruby x1,500 | |
| 7 | 50 | Ruby x1,750 | |
| 8 | 50 | Ruby x2,000 | |
| Armor | 1 | 50 | Ruby x250 |
| 2 | 50 | Ruby x500 | |
| 3 | 50 | Ruby x750 | |
| 4 | 50 | Ruby x1,000 | |
| Accessories | 1 | 50 | Ruby x250 |
| 2 | 50 | Ruby x500 |
Equipment [Details] Feature
 |  |
A new feature has been added to the Inventory Equipment Filter Tab. Selecting Details will display the equipment's Main Stat and Substats as icons and values.
The UI in the Hero Equipment, Inventory, Upgrade Equipment, and Equipment Management tabs will also be updated when the Details option is enabled.
| The Details option settings are applied individually to each UI. It is not applied to the Sell All function within the Equipment Sell Preset. The Details feature is not available for Accessories. |
|---|
How to Obtain and Types
Special Type Equipment and Effects
| Equipment Type | How to Obtain | Effect |
| Common Equipment (Weapons/Armor) | Adventure | Stat Increase |
| Raid Equipment (Weapons/Armor) | Raid, Equipment Crafting | |
| Seven Knights Equipment (Weapons/Armor) | Topaz Exchange Shop | |
| Four Lords of Old Equipment (Weapons/Armor) New! | Advent Expedition | |
| [Time Limited] Solo Leveling Collaboration Equipment (Weapons/Armor) New! | Clear Collab Event | |
| Dedicated Equipment New! | Crafting, Summon, Total War Shop, Guild War Shop, Events, Adventure | |
| Sudden Raid Equipment (Weapons/Armor) New! | Sudden Raid | |
| Accessory | Adventure (Nightmare), Crafting | Stat Increase +Skill Effect |
Four Lords of Old Equipment
| Equipment | Type and Effect |
 Kyle's Reaper Chain-Sickle Kyle's Reaper Chain-Sickle | [Physical Weapon] Physical Attack 64 Guardian / Paladin / Gatekeeper / Orchestrator |
 Karma's Diamond Halberd Karma's Diamond Halberd | [Magic Weapon] Magic Attack 64 Guardian / Paladin / Gatekeeper / Orchestrator |
 Kyle's Deathly Robe Kyle's Deathly Robe | [Armor] Defense 39 HP 224 Guardian / Paladin / Gatekeeper / Orchestrator |
 Karma's Blue-Horned Divine Robe Karma's Blue-Horned Divine Robe | [Armor] Defense 39 HP 224 Guardian / Paladin / Gatekeeper / Orchestrator |
 Teo's Black Sword Teo's Black Sword | [Physical Weapon] Physical Attack 64 Vanguard / Bounty Tracker / Assassin / Avenger / Spellweaver |
 Yeonhee's Golden Thread Crown Yeonhee's Golden Thread Crown | [Magic Weapon] Magic Attack 64 Vanguard / Bounty Tracker / Assassin / Avenger / Spellweaver |
 Teo's Demon-Face Robe Teo's Demon-Face Robe | [Armor] Defense 39 HP 224 Vanguard / Bounty Tracker / Assassin / Avenger / Spellweaver |
 Yeonhee's Hundred Flower Lotus Garment Yeonhee's Hundred Flower Lotus Garment | [Armor] Defense 39 HP 224 Vanguard / Bounty Tracker / Assassin / Avenger / Spellweaver |
[Collab Equipment] Solo Leveling

![]()
4 New Legendary Solo Leveling Equipment have been added and can be obtained by clearing the Collaboration Event.
| Equipment Name | Sung Jinwoo's Coat |
|---|---|
| Grade | Legendary |
| Type | Armor |
| Set Effect | Assassin |
| Main Stat (%) | All Attack |
| Substats (%) | All Attack / Crit Rate / Crit Damage / Weakness Hit Rate |
| Equipment Name | Knight Killer & Baruka’s Dagger |
|---|---|
| Grade | Legendary |
| Type | Magic |
| Set Effect | Assassin |
| Main Stat (%) | Crit Rate |
| Substats (%) | All Attack / Crit Rate / Crit Damage / Weakness Hit Rate |
| Equipment Name | Cha Hae-in’s Combat Suit |
|---|---|
| Grade | Legendary |
| Type | Armor |
| Set Effect | Avenger |
| Main Stat (%) | All Attack |
| Substats (%) | All Attack / Crit Rate / Crit Damage / Weakness Hit Rate |
| Equipment Name | Cha Hae-in’s Sword |
|---|---|
| Grade | Legendary |
| Type | Physical |
| Set Effect | Avenger |
| Main Stat (%) | Crit Rate |
| Substats (%) | All Attack / Crit Rate / Crit Damage / Weakness Hit Rate |
| Main and Substats are fixed, but the order of substats may vary by equipment. The fixed main stats of this equipment are comparable to those of the Four Lords of Old. |
|---|
Sudden Raid Equipment
| Boss | Equipment | Set Effect |
| Calistra | 6★ Brilliant Dual Blades of Dusk (Physical Weapons) 6★ Brilliant Feather Fan of Dusk (Magic Weapons) 6★ Brilliant Cape of Dusk (Armor) | Vanguard / Bounty Tracker / Paladin |
| Astrea | 6★ Brilliant Spear of Dawn (Physical Weapons) 6★ Brilliant Staff of Dawn (Magic Weapons) 6★ Brilliant Miter of Dawn (Armor) | Gate Keeper / Guardian / Assassin |
| Leonid | 6★ Brilliant Sword of Night (Physical Weapons) 6★ Brilliant Mirror of Night (Magic Weapons) 6★ Brilliant Shield of Night (Armor) | Avenger / Spellweaver / Orchestrator |
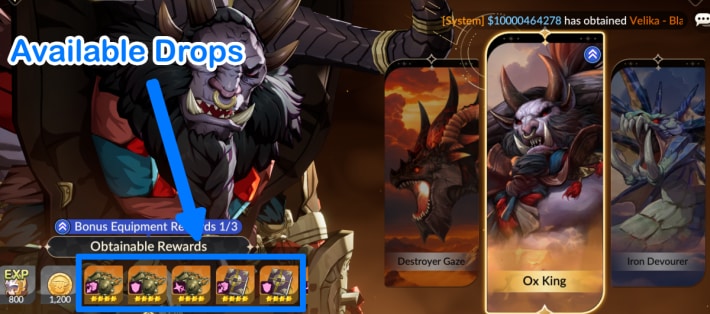
Best Equipment to Prioritize
Leonid
The Night equipment set from Leonid is equivalent to Iron Devourer, featuring Avenger Set, Spellweaver, and Orchestrator Setp as set effects. It is highly recommended to prioritize Leonid when aiming to build multiple heroes for PvP content such as Arena, Total War, and Guild War. Both Orchestrator and Spellweaver are commonly used in PvP, while Avenger is one of the best PvE sets when fully optimized.
Astrea
The Dawn equipment set from Astrea is equivalent to Ox King, featuring Gate Keeper, Guardian, and Assassin as set effects. These sets are generally strong and can be used on most heroes, making them a solid mid game option when building multiple characters.
Calistra
The Dusk equipment set from Calistra is equivalent to Destroyer Gaze, featuring Vanguard, Bounty Tracker, and Paladin as set effects. It is generally not recommended to prioritize this set, as it caters to niche use cases or requires a hero at Transcendence 6 to fully utilize its effects.
Crafting (Dedicated Equipment)

Through Workshop > Crafting > Dedicated Equipment Conversion, you can use four pieces of Legendary Common Equipment as materials to convert them into an Dedicated Equipment Selection Box by Hero type. This is a viable option until you have gathered most of your necessary Dedicated Equipment.
Required materials vary by Hero Type
| Dedicated Equipment Selection Box | Conversion Materials |
|---|---|
| Attack-Type Hero | - Brilliant Terra Kingdom Greatsword +15 x4 |
| Magic-Type Hero | - Brilliant Magic Academy Staff +15 x4 |
| Defense-Type Hero | - Brilliant Terra Kingdom Greatsword +15 x3 - Brilliant Magic Academy Staff +15 x1 |
| Support-Type Hero | - Brilliant Terra Kingdom Greatsword +15 x1 - Brilliant Magic Academy Staff +15 x3 |
| Universal-Type Hero | - Brilliant Terra Kingdom Greatsword +15 x2 - Brilliant Magic Academy Staff +15 x2 |
The type and quantity of required materials for the Dedicated Equipment Selection Box vary by Hero type. Note that it is not enough to just have Legendary Common Equipment; they must be enhanced to +15.
Use Dedicated Equipment Summon

There is an Dedicated Equipment Summon where you can pull for 80 Rubies per draw. You can register two items to your Wishlist to increase their drop rates, and you are guaranteed to receive one of them on your 100th summon.
Adventure (Common Rarity)
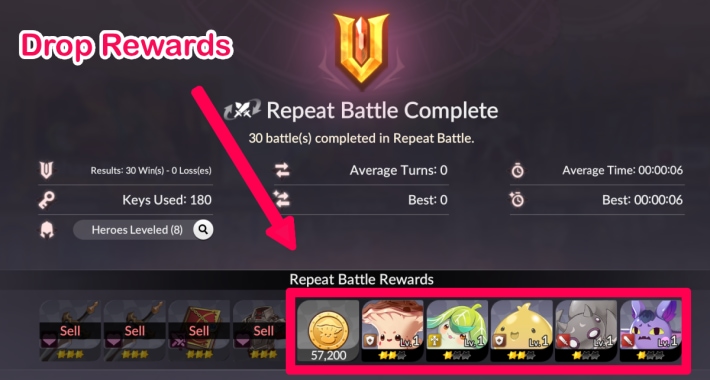
You may get Heroes, Common Equipment, or Accessories as drops when you clear an Adventure. Note that Accessories only drop in Nightmare, which is accessible after clearing Adventure 14-50.
Raid (Raid Equipment)
The main reward for Raids, which are high-difficulty battles where you defeat bosses, is equipment. Once your heroes are well-trained, this will become the main way to get weapons and Armor.
Equipment Crafting (Raid Equipment)
You can also use Materials obtained from Raids to craft Raid equipment weapons and Armor. Once you've gathered enough Materials, give this a try.
Advance Crafting (Raid Equipment)

![]()
In the Crafting Menu, there is a new Advance Crafting menu added. It consumes general Raid Materials for each piece of equipment, Essence of Memories, and Gold.
In Advance Crafting, the number of substats is fixed at 4. You can proceed with crafting after selecting a Main Stat. Substats can be changed repeatedly until you obtain your desired stats.
| Advance Crafting can be accessed after clearing Adventure 4-10. Essence of Memories can be obtained as a reward in the Sudden Raid content. |
|---|
Topaz Exchange Shop
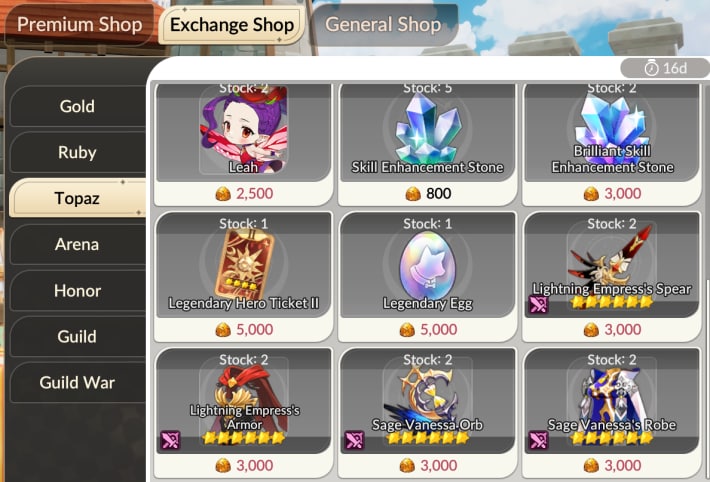
You can get 6-star Seven Knights equipment from the Topaz Exchange Shop. You can also exchange for Legendary Heroes and other items in the Topaz Exchange Shop, so you'll need to consider your priorities, but all of this equipment is very powerful.
Expedition of the Ring
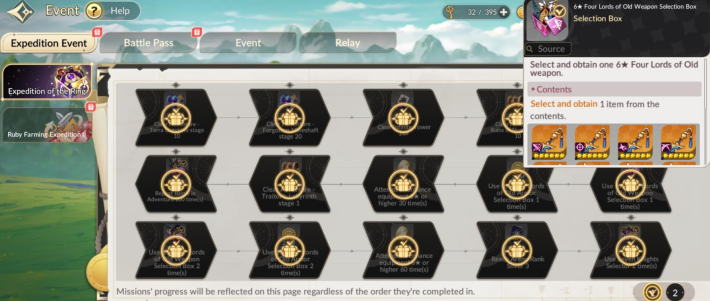
Expedition of the Ring was introduced with 11/13/2025 update. By meeting conditions, you can get ★6 equipments selection boxes as well as legendary accessory selection box.
Crafting (Accessories)

You can also obtain specific accessories through crafting. If you have any unwanted accessories on hand, consider using them to craft the ones you need.
How to Equip and Recommendations
Equipped from the Hero Screen
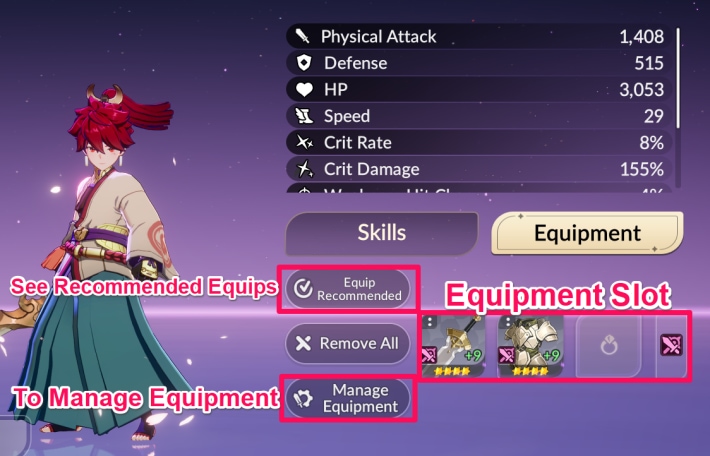
Equipment can be equipped from Home ➜ Hero's equipment slots or Manage Equipment. In the early game, it's fine to use Equip Recommeded, but once you get used to it, you should equip items to your liking.
Equipment Presets Make It Easier
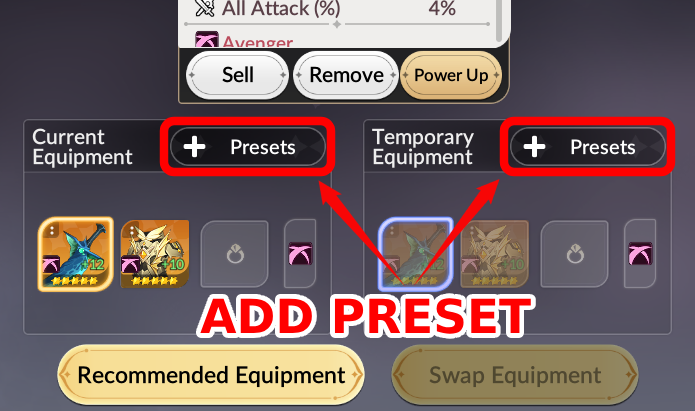
You can set up Equipment Presets from the Manage Equipment screen. Presets can be saved using either your currently equipped gear or gear you're previewing. Once saved, you can quickly swap loadouts through the Preset tab. For Heroes used across different game modes, creating multiple presets makes it easy to switch gear based on the content type.
 | Keep in mind that switching presets also consumes gold, just like regular equipment changes. |
|---|
Higher Rarity has Better Effects
For weapons and Armor, there is Seven Knights equipment, Raid equipment, and Common equipment, and rarer equipment tends to have better effects. For items like 5-star or 6-star, it's recommended to equip the highest rarity equipment you have.
Completing a Set Grants a Set Effect
| Set | Set Effect |
| Vanguard | 2-Set: All Attack Boost 20% 4-Set: All Attack Boost 45% + Effect Accuracy 20% |
| 2-Set: Weakness Hit Chance 15% 4-Set: Weakness Hit Chance 35% + Weakness Hit Damage 35% | |
| 2-Set: Max HP 17% 4-Set: Max HP 40% + Healing Received 20% | |
| Gatekeeper | 2-Set: Block Rate 15% 4-Set: Block Rate 30% + Damage Reduction on Block 10% |
| Guardian | 2-Set: Defense 20% 4-Set: Defense 45% + Effect RES 20% |
| Seasoned Assassin | 2-Set: Crit Rate 15% 4-Set: Crit Rate 30% + Ignore Defense 15% |
| Avenger | 2-Set: Damage Dealt 15% 4-Set: Damage Dealt 30% + Damage to Bosses 40% |
| Spellweaver | 2-Set: Effect Hit Rate 17% 4-Set: Effect Hit Rate 35% + Effect Probability 10% |
| Orchestrator | 2-Set: Effect Resistance 17% 4-Set: Effect Resistance 35% + Gain Crowd Control Immunity for 1 turn at the start of battle |
For weapons and Armor, you get an additional set effect by matching the icon types in the bottom left, so be sure to equip items from the same set. Note that to activate the 4-set effect, you need to increase the Hero's equipment slots through Ultimate Enhancement.
| It's up to you whether you want to use two 2-set effects or just one 4-set effect, but for sets that grant an additional effect at 4 pieces, the 4-set effect is recommended. |
|---|
Best Equipment Effects by Hero Type
| Type | Recommended Equipment Effect Examples | Recommended Sets |
| Attack | - Physical/Magic Attack Boost - All Attack Boost - Crit Rate Boost - Crit Damage Boost | VanguardSeasoned AssassinAvenger |
| Magic | ||
| Universal (DPS) | ||
| Defense | - HP Boost - Defense Boost - Block Rate Boost | Gatekeeper Guardian Spellweaver Orchestrator |
| Support | ||
| Universal (Support) |
The recommended equipment effects for each Hero type are as shown above. Recommended equipment varies slightly depending on the content, but generally, you should equip attackers with gear that boosts Attack, and supporters with gear that boosts HP or Defense.
| In the Arena where first strikes are important, Speed becomes a higher priority. Equip gear according to the content that the Hero excels in. |
|---|
Recommended Accessory Setups
| Accessory | Effect/Hero to Equip On |
| Uncommon Ring of Resurrection | Revive once with 100% HP upon death (Does not stack with passives) Core heroes of the party (e.g., your most developed hero or a healer) |
| Uncommon Ring of Immortality | Gain Immortality for 3 turns upon death (Does not stack with passives) Core heroes of the party (e.g., your most developed hero or a healer) |
| Uncommon Ring of Authority | Guts + creates a Barrier equal to 150% of Attack for 2 turns after Guts activates (Does not stack with passives) Core heroes of the party (e.g., your most developed hero or a healer) |
| Uncommon Ring of Magic | 12% chance to remove 1 buff on Basic Attack Supporter |
| Uncommon Ring of Time | 12% chance to reduce turn-based buff duration by 1 turn on Basic Attack Supporter |
| Uncommon Ring of Chance (Status Effect Ring) | 10% chance to inflict Stun for 1 turn upon using a Basic Attack Attacker |
Accessories have effects similar to a Hero's Passive Skill, and the higher the rarity, the better the effect. For other stat-boosting Accessories, equip them according to the recommended equipment effect examples for weapons and Armor.
How to Power Up Weapons and Armor
Use Gold in Equipment Enhancement
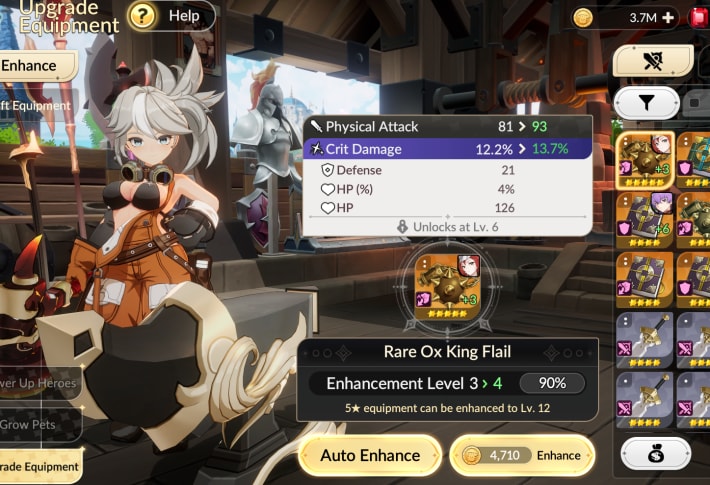
You can Power Up weapons and Armor from Home ➜ Equipment Enhancement. Using Gold gives you a chance to successfully Power Up equipment, which increases its effects. Also, every +3 Power Up will randomly unlock a Substat, granting an additional effect.
Equipment Enhancement Success Rate List
Max Equipment Level Varies by Rank
| Rank | Max Level |
| 1-Star | +3 |
| 2-Star | +3 |
| 3-Star | +6 |
| 4-Star | +9 |
| 5-Star | +12 |
| 6-Star | +15 |
The max level for equipment varies by Rank. 4-star and higher weapons/Armor are powerful because they can have up to a maximum of 4 Substats. Note that at +12 and +15 Power Up, a random Substat will be enhanced.
Some Equipment Has Higher Stats Despite Their Level
There are times when equipment can roll decent stats even at lower enhancement levels. It’s a good idea to check their performance at +6 first. If the stats are good enough, you can hold off on further enhancements and save resources for higher-grade weapons.
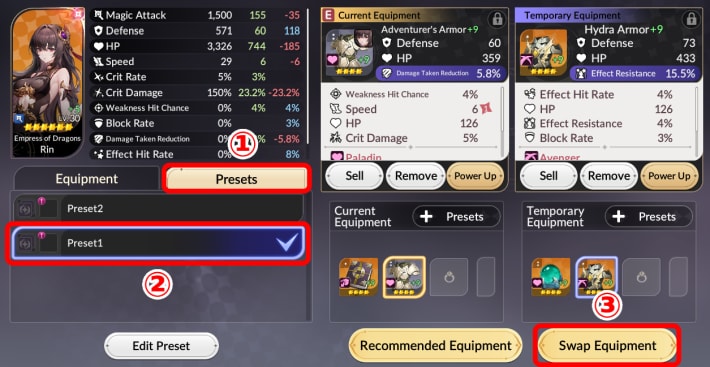
Stat Value Display

![]()
The Stat Value Display in the Equipment Management Tab has been changed. It will now display stats based on the Hero's current stats.
| Color | After |
| White | Current Stats Value |
| Neon Light Green | Temporary Stats Value |
| Blue (Stat gain relative to temporary equipment) | Increased Stats Value |
| Red (Stat loss relative to temporary equipment) | Decreased Stats Value |
| Orange (Stat surplus relative to temporary equipment) | Exceeded Stats Value |
| Defaults to currently equipped gear if no temporary equipment is displayed. |
|---|
Use Whetstone to Upgrade Substats
This feature is planned to be added in a future update and will be implemented at a later date.
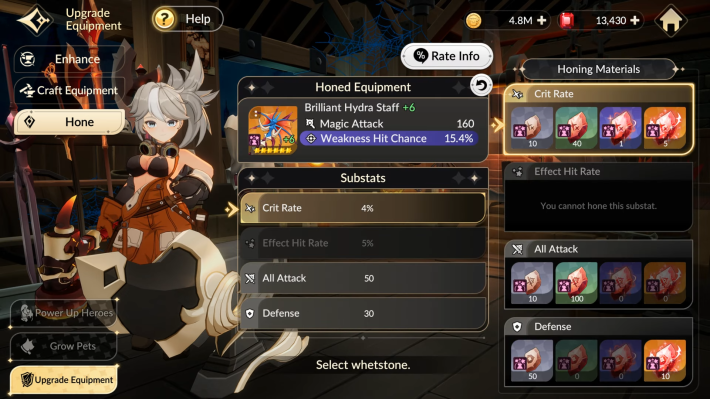
With the upcoming update a new item called Whetstone will be introduced as an additional method to upgrade Equipment. It allows players to further enhance a piece of equipment’s Substats. Whetstones are categorized by equipment set, stat type, and come in four grades: Common, Uncommon, Rare, and Legendary. :h4:List of Substat Upgrades
| Stat | Common | Uncommon | Rare | Legendary |
| Attack % Defense % HP % | 1 ~ 3 | 2 ~ 4 | 3 ~ 5 | 4 ~ 7 |
| Attack | 28 ~ 40 | 36 ~ 50 | 45 ~ 65 | 60 ~ 90 |
| Defense | 16 ~ 24 | 20 ~ 30 | 25 ~ 39 | 34 ~ 54 |
| HP | 100 ~ 140 | 130 ~ 180 | 165 ~ 235 | 215 ~ 325 |
| Speed | 1 ~ 2 | 1 ~ 3 | 2 ~ 4 | 3 ~ 6 |
| Crit Rate % | 1 ~ 2 | 1 ~ 3 | 2 ~ 4 | 3 ~ 6 |
| Crit Damage % | 2 ~ 3 | 3 ~ 5 | 4 ~ 6 | 5 ~ 9 |
| Block Rate % | 1 ~ 2 | 1 ~ 3 | 2 ~ 4 | 3 ~ 6 |
| Weakness Hit Chance % | 1 ~ 3 | 2 ~ 4 | 3 ~ 5 | 4 ~ 7 |
How to Power Up Accessories
| Accessory Articles | |
|---|---|
| Accessory Guide | Best Accessories |
Same as Weapons and Armor
You can Power Up Accessories with a certain probability by using Gold from Home ➜ Equipment Enhancement. When the Power Up is successful, all of the Accessory's effects will increase. There are no Substats like with weapons and Armor.
Add Additional Effects with Refining
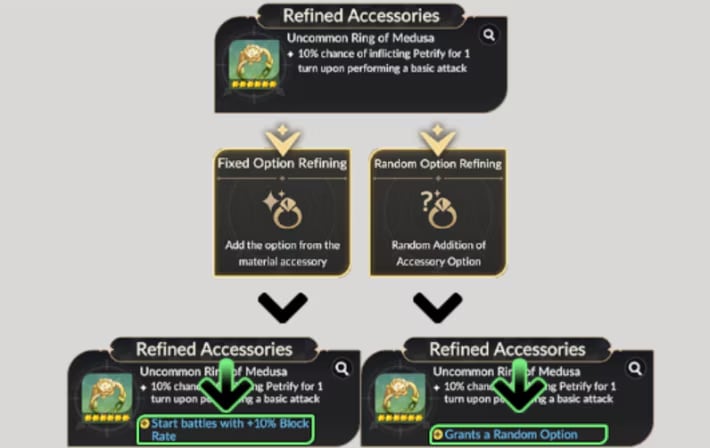
You can add one additional effect (option) by performing Accessory Refining from Home ➜ Equipment Enhancement ➜ Refine. There are two types of Refining: Fixed Stat Refining and Random Stat Refining.
Fixed Stat Refining
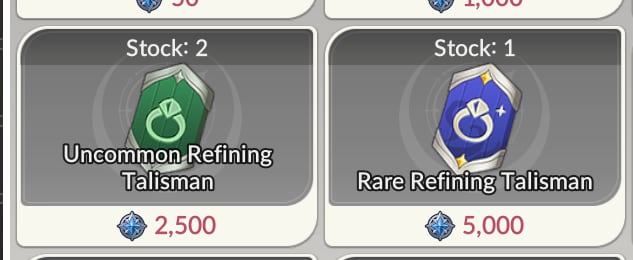
In Fixed Stat Refining, you have a chance to transfer the special effect of a Material Accessory to the target Accessory. You can increase the success rate by adding a "Refining Talisman", a success rate up Material available as a Guild War reward.
Random Stat Refining
In Random Stat Refining, you can use an Accessory as a Material to grant a random additional effect. The success rate is 100%, but the effect granted is random, which is the difference from Fixed Stat Refining.
Accessory Refinement Separation
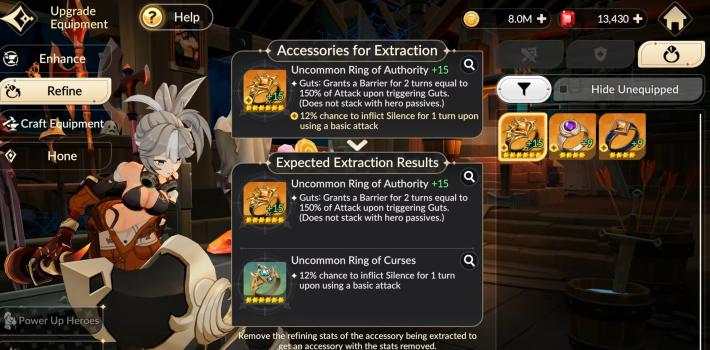
A new feature will be added that allows players to separate and restore refined accessories. This is useful for transferring refinements to different accessories. To separate refinements, a Refine Extract Solution is required, and the process is guaranteed to succeed.
How to Craft Equipment
Craft Equipment with Materials

![]()
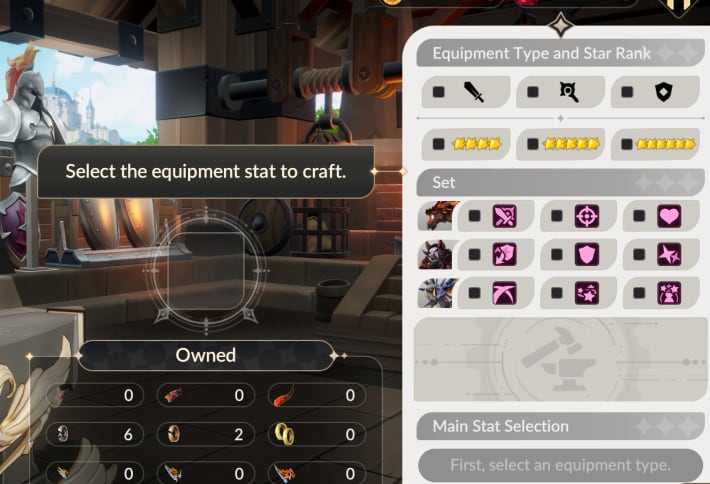
In Home ➜ Upgrade Equipment ➜ Craft Equipment, you can consume equipment crafting Materials obtained from Raids to craft equipment. Once you've gathered the materials, set the Star Rank, choose an equipment, set 1 Main Stat Effect, and press the craft button.
Main and Substats are Random

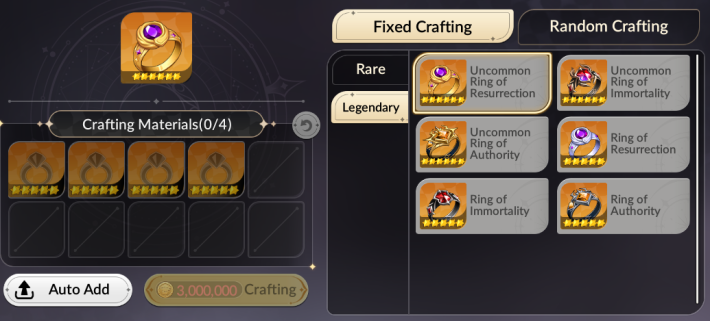
![]()
Equipment crafting never fails, and with the new update, you can now choose 1 Main stat Effect while Substat Effects are determined randomly. Crafting equipment made it easy, as you can craft in bulk up to 20 pieces of equipment in one go.
Reconfigure Equipment

Reconfigure Equipment is a feature that allows you to reroll and reset your equipment substat and enhancement. The feature can be accessed through Upgrade Equipment → Reconfigure Equipment.
| Reconfigure Equipment is unlocked upon clearing Adventure 4-10. |
|---|
Reroll Equipment Substat

The Reroll Equipment Substats function allows players to re-randomize an equipment substat using Chaos Essence, while retaining the total enhancement levels. Only equipment of 6★ grade or higher can be rerolled.
Can Lock Substat

Before rerolling, you can lock one substat. Locking a substat increases the cost, and its type and enhancement level will remain unchanged.
| After rerolling a substat, you can select either the pre-reroll or post-reroll value before confirming the change. |
|---|
Reset Equipment Enhancement Level

Reset Equipment Enhancement Level is a function that allows players to revert an equipment’s enhancement level back to +0 using Oblivion Essence, providing another opportunity to unlock more favorable substats. Only 6★ with enhanced +3 or higher equipment can be reset.
| The substats added by the enhancement level increase will be removed. While enhancement will reset to +0, any Gold previously spent will not be refunded. |
|---|
How to Get Chaos Essence & Oblivion Essence
Chaos Essence and Oblivion Essence are obtainable from the Arena Exchange Shop and Raids (Destroyer Gaze, Ox King, and Iron Devourer) 11 Tier or higher.
| Related Article | |
|---|---|
| Shop Guide | Raid Battle Guide |
How to Power Up Dedicated Equipment New!
Enhance Dedicated Equipment

Just like regular equipment, perform enhancement to increase its level. Dedicated Equipment can be enhanced up to +15. Note that you can perform steps 2 and 3 in any order.
Tune using Tuning Crystals

Use Tuning Crystals to perform Tuning and add options. It is best to first add four options to all the Dedicated Equipment you own, then prioritize selecting the best options for the Heroes you use most frequently.
What are Tuning Crystals
Tuning Crystals are used to adjust the sub-stats of your Dedicated Equipment.There are 9 types of effects available in three rarities: Uncommon, Rare, and Legendary. One of these effects is randomly granted based on a probability.
Sub Stats can be Adjusted
By performing Tuning again on a slot that has already been attuned, you can overwrite the current effect with a new one. It is recommended to first perform Tuning on all the Dedicated Equipment you use, and then strictly select the best options once your basic setup is complete.
How to Obtain Tuning Crystals
Dismantle Common Equipment

| Equipment Rarity | Tuning Crystals Obtained |
|---|---|
| Legendary | 250 |
| Rare | 50 |
| Uncommon | 20 |
| Common | 15 |
By dismantling Common Equipment from Inventory > Dedicated Equipment, you will receive Tuning Crystals based on the equipment's rarity. Once you have enough Dedicated Equipment, start dismantling them actively.
Exchange at the Total War Shop

In the Total War Content Shop, you can exchange 400 Total War Tokens for 50 Tuning Crystals. This is an option if you have tokens left after getting all Brilliant Skill Enhancement Stones.
Total War GuideExchange at the Guild War Shop
 :p:At the Guild War Shop, you can exchange 120 Pendants of Glory for 50 Tuning Crystals. While 6-star transcendence for Amelia and Diaochan or the Dedicated Equipment Selection Box should be prioritized, exchanging for crystals is a good idea once your equipment collection is stable. Guild War Guide
Exchange at the Weekly Ruby Shop

:p:In the Weekly Ruby Shop, you can exchange 150 Rubies for 50 Tuning Crystals. Generally, you should prioritize Brilliant Skill Enhancement Stones, but this is an option if you have Rubies to spare.
Obtained Through Events

Certain events like the Dedicated Equipment Support Event may offer Tuning Powder as a reward. Be sure to complete missions during these limited-time events to stock up.
Related Seven Knights Re: BIRTH Articles
 ▶Back to Top Page
Ranking Articles
| Ranking Articles | ||
|---|---|---|
 Best Hero Tier Best Hero Tier |  Reroll Tier Reroll Tier |  Best Pet Tier Best Pet Tier |
Recommended Articles
 Latest News & Updates
 Coupon Codes
 Daily Things to Do
 Solo Leveling Collaboration
 Hero Guesser Game
 Player Profile Introduction Card Maker
 Sudden Raid Guide
 Should You Pull for Aris and Rudy?
 Aris - Features and Release Date
 Early Game Guide
 Adventurer Skills
 Level & Ruby Farming
 Error Guide
 Battle Statistics
 Gold Farming
 Accessory Guide
 Fodder Hero
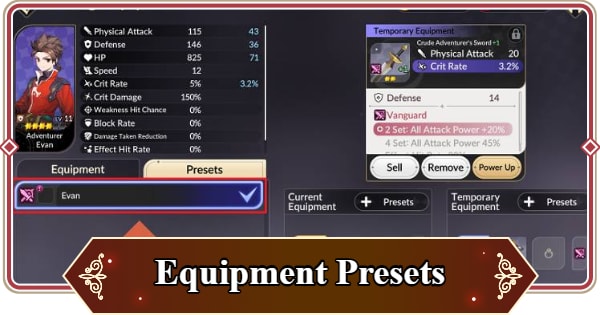 Equipment Preset
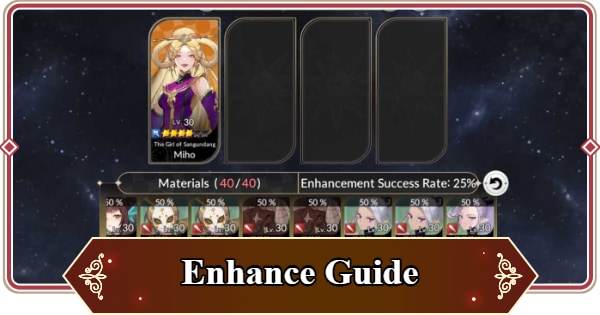 Enhance Guide
 Weakness Hit
 Hero Stats Guide
 Reroll Guide
 Low Rarity Heroes
 Refining Dust and Secure Refining Talisman Guide
 What is Awakening?
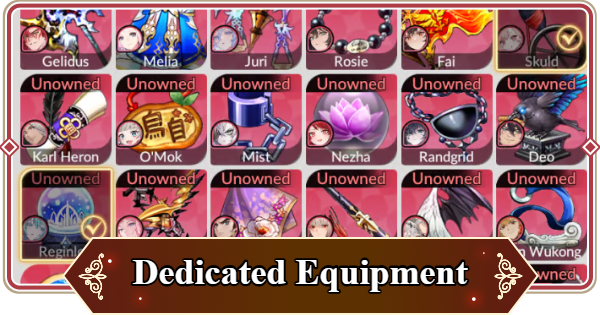 Dedicated Equipment Guide
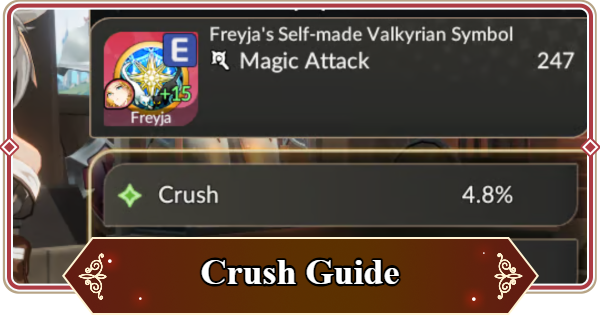 Crush Guide
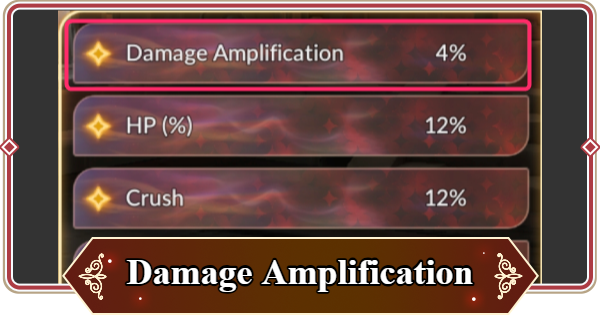 Damage Amplification Guide
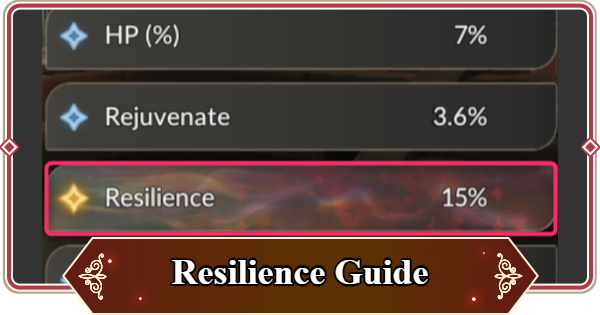 Resilience Guide
 Rejuvenate Guide
 Tuning Guide
 Guild Guide
 Arena Guide
 Guild War Guide
 Real Time Arena
 Seven Knights Cup
 Advanced Arena
 Formation Guide
 Party Guide
 Best Heroes & Teams
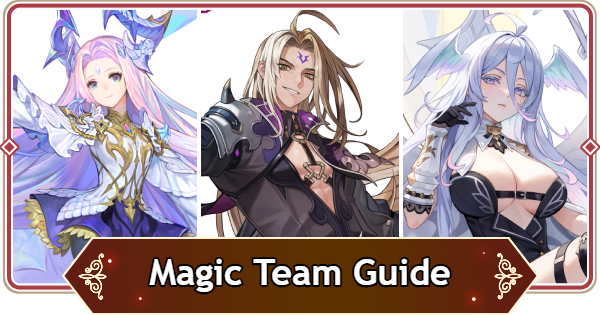 Magic Team Party
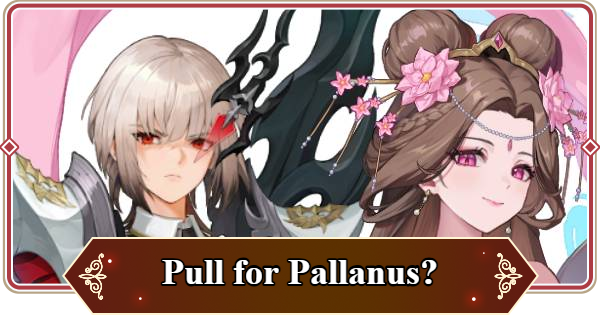 Tank Team Party
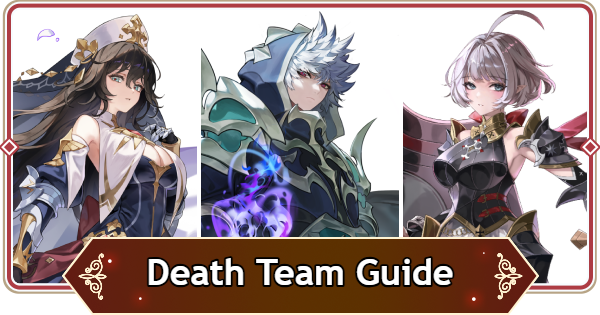 Death Team Party
 Physical Team Party
 Pet Guide
 7K Chess
 Story Event
 Gacha Animation Effects
 Relay Purchases
 Web Shop Guide
 Shop Guide
 Best Premium Shop
Dungeon, Raids, and Towers
| Tower Guides | |
|---|---|
 Tower of Trials Tower of Trials |  Infinite Tower Infinite Tower |
 Teo
Teo Kyle
Kyle Yeonhee
 Karma
Karma God of Destruciton
| Lists | ||
|---|---|---|
| All Characters | Voice Actor List | Status & Effects |
| Story Cinematics | ||

