
This is a guide to recommended versatile cards to create in Shadowverse: Worlds Beyond. We list the best and recommended general-purpose cards to create by class in Shadowverse WB.
| Related Articles on Creating | |
|---|---|
| How to Get Cards | Best Cards to Craft |
Table of Contents
Best Versatile Cards to Craft Guide
Missing Deck Cards Are Top Priority
We generally recommend creating the cards that are missing from the deck you're trying to build. Decide on the deck you want to build, and then figure out what to craft.
Deck Ranking Tier ListNeutral Cards Are Especially Best
Neutral cards can be used by all classes. They are especially Best because even if you switch to another class, you might be able to use them in your next deck.
Neutral Card ListBest Neutral Cards to Craft
- World of GamesNeutral
 Required: 3- A draw engine that can be played for 1 Cost
- Synergizes well with decks that chain multiple cards of the same cost
- Easy to use in Destroy Portalcraft - Lyria, SkydestinedNeutral
 Required: 3- Low-cost follower with Barrier.
- Small search pool means you can grab exactly what you need.
- Commonly used in decks with key 7+ cost cards. - Grimnir, Heavenly GaleNeutral
 Required: 3- Great for filling your side of the table early on while helping you reach your super-evolution faster
- Really helpful for decks that focus on super-evolution, which sometimes struggle to take out enemy followers
- While it can protect you, don't rely on it too much since its own strength is mediocre - Gilnelise, Voracity ManifestNeutral
 Required: 2- A valuable Restore card that can be used by all Deck Classes
- Offers multi-target removal through both Fanfare and Evolution effect
- Can serve as a late-game finisher thanks to Sweetness of Voracity  Required: 3- A highly versatile card that lets you choose between destroy or draw.
- - Its Skybound Art helps mitigate tempo loss.
- High cost limits its use to select decks.- Fate of the WorldNeutral
 Required: 1〜2- A versatile card that provides both draw power and removal
- Its random destroy effect can take out even troublesome enemy follower
- Works well with Crest Bishop decks where removal is especially valuable - Odin, Twilit FateNeutral
 Required: 2- A valuable damage card that can be used by all Classes
- Excellent for chipping away at health before a finisher
- Easy to Play due to destroy
Best Swordcraft Cards to Craft
- Yidmetra, Eld SwordSwordcraft
 Required: 3 - A core card for Enhance Swordcraft
- The 1-Cost Spell is strong enough to also see use in Loot Swordcraft
- Can grant massive buffs through the Faith effect - Octrice, Hollowness ManifestSwordcraft
 Required: 3- Remnant of Hollowness is a cost-effective Damage card
- Combine with Sinciro, Heir to Usurpation or Albert, Levin Stormsaber for massive Damage
- Be careful not to forget its Crest - Albert, Levin StormsaberSwordcraft
 Required: 3- A Storm finisher with a destroy effect via Enhance
- High damage, capable of dealing 12 damage with Super-Evolution
- Good Stats even as a 5-Cost Storm follower - Knightly ArdorSwordcraft
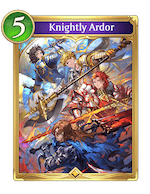 Required: 2- Great for breaking out of board locks.
- Loses value if no followers are left on the field.
- Run it for effects number 1 and 2 or keep it for its number 3 and 4 effects as a safety net. - Sinciro, Heir to UsurpationSwordcraft
 Required: 3- Can use a powerful AoE if you can Fuse
- Strong against Barrier with its 2-stage Super-Evolution AOE
- Drawing Gilded cards are a challenge - Amelia, Silver CaptainSwordcraft
 Required: 2- The Barrier you get from its Super-Evolution is incredibly strong
- Getting a 4/4 follower for 3 play points that also draws 2 cards is very powerful
- Extremely flexible and fits well in almost any deck - Golden Knight, True King's BladeSwordcraft
 Required: 2- High control ability
- A solid choice for slower Swordcraft decks.
- Provides high defensive value by clearing the field and being able to restore defense points. - Ravening TentaclesSwordcraft
 Required: 1- Offers strong burn damage and a large amount of healing
- Doesn’t fit well with the deck because it doesn’t add anything to your side
- Can cause Board Lock
Best Runecraft Cards to Craft
- Homework Time!Runecraft
 Required: 3- Turns into a powerful engine for destroying followers and drawing cards after 5 Spellboosts
- A cornerstone for Spellboost Runecraft decks during the early game
- A top-tier keep when you're deciding your starting hand during the mulligan - Sagelight TeachingsRunecraft
 Required: 3- Each Mode is powerful
- Used in Earth Rite Decks - Norman, Adamant AlchemistRunecraft
 Required: 3- Mode 1 can flood the field with strong followers
- Mode 3 offers excellent healing
- Helps your deck last longer when used in Earth Rite Spellboost Runecraft decks - Rune PortalRunecraft
 Required: 1- Can provide both AoE and Restore
- It's a 7 cost card
Best Dragoncraft Cards to Craft
- Filene, Whitefrost BloomDragoncraft
 Required: 3- A low-Cost Follower that is useful from the early to late game
- Its Evolve ability is excellent for countering Aggro
- Can counter Combo Decks with Whitefrost Whisper - Liu Feng, Goldennote WardDragoncraft
 Required: 3- Good Ramp-Up card
- Powerful auto-Evolution
- A must-have for both Ramp-Up and Evolution decks - Galmieux, Ardor ManifestDragoncraft
 Required: 3- Excellent for mid-game destroy.
- High damage and straight up powerful attacker.
- Gets more powerful depending on other synergy cards. - Zooey, Ally of the WorldDragoncraft
 Required: 1〜3- A long-awaited card that boosts Play Points.
- Especially strong when played right after a turn 3 Revelation.
- Its Enhance effect offers high risk with high reward. - Forte, Blackwing DragoonDragoncraft
 Required: 3- Durable thanks to Intimidate
- Hits the opponent's leader directly while locking down their field
- The main way to finish the game for Dragoncraft decks - Neptune, Arbiter of TidesDragoncraft
 Required: 3- A key defensive card for Dragoncraft decks, offering Restore, removal, and Ward
- Can heal even more when paired with cards that create Marine
- A strong follow‑up play after you’ve gained extra play points through Ramp‑Up - Sagatsumatsu, Fair BeheaderDragoncraft
 Required: 2- Gives you two 1-cost cards to help clear the field
- Uses Storm and Bane to take down enemy followers without spending an Evolution Point
- Incredibly hard for your opponent to target and remove thanks to its Aura ability - Wilnas, Flame PersonifiedDragoncraft
 Required: 2~3- Highly effective when played at 7 Play Points after ramping
- Generates a game-winning advantage if left unchecked
- The number of copies run frequently can sometimes fluctuate depending on the meta - Garyu, Fabled DragonkinDragoncraft
 Required: 2- Builds a strong field with a single card through Super-Evolution
- You want to play it early with Ramp-Up or Bonus Play Points
- Strong even without Super-Evolution - Erntz, Governing JusticeDragoncraft
 Required: 3- A versatile card that can switch between removal, restoration, and direct damage
- Highly efficient since it doesn’t require Super‑Evolution
- Has strong synergy with Ramp‑Up Storm Dragoncraft and Fennie, Prismatic Phoenix Dragoncraft - Genesis Dragon RebornDragoncraft
 Required: 2- Deals the most damage of any card you can play without needing a Super-Evolution
- A great way to end the game in Dragoncraft decks
- You’ll want to make sure this attack lands to win the match
Best Abysscraft Cards to Craft
- Reaper's DeathslashAbysscraft
 Required: 3- Trade weak followers for strong followers
- Exceptional destroy performance for a 1-Cost
- Beneficial when used for your own Super-Evolution - Rage of SerpentsAbysscraft
 Required: 3- A very efficient burn damage card
- Be careful as it also deals damage to yourself
- You can win when the opponent's DP is 3 or less and your DP is 2 or less - Bibatii, Eld SightAbysscraft
 Required: 3- Serves as a key card for Evolution Abysscraft decks
- Provides excellent utility by replenishing your resources
- Difficult to use effectively until you accumulate 4 Necromancy - Fickle NecromancerAbysscraft
 Required: 3- Excels in both Aggro and Mid-range deck builds
- Summons a Rotting Zombie when evolved
- Fills the field with three followers, and has synergy with Nehan, Dispenser of Samsara and Cerberus, Hellfire Unleashed - Milteo & LuzenAbysscraft
 Required: 3- Extremely powerful once you master Crest mechanics
- Comes with a significant drawback and needs a dedicated deck to shine
- Attack by making full use of Auto-Evolutions - Fediel, Darkness PersonifiedAbysscraft
 Required: 3- Builds a strong field presence from a single card
- Helps accelerate the total evolution count
- Excels as a reactive play thanks to its area-of-effect removal - Belial, Archangel of CunningAbysscraft
 Required: 3- A Crest with an extremely powerful finisher effect.
- Solid 7-Cost card with a destroy effect.
- Requires a long setup time to activate Crest.
Best Havencraft Cards to Craft
- Resolve of the MistbloomHavencraft
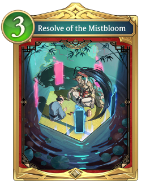 Required: 3- Powerful as it combines both destroy and hand replacement.
- A drawback is that you cannot choose which card to return.
- Powerful when combined with Kukishiro, Mistbloom's Crest. - De La Fille's Gleaming GemsHavencraft
 Required: 3- A useful Amulet that lets you choose between destroy and draw.
- Simple to use thanks to its zero Engage Cost.
- Works like Unholy Vessel to stall opponent's board plays. - Supplicant of ReposeHavencraft
 Required: 3- Granting a Crest for just 3 Cost offers great value
- An exceptional amount of health restored for only a 3-Cost card
- Highly valued in both Ward B and Crest B, thanks to its versatility - Marwynn, Despair ManifestHavencraft
 Required: 3- A Crest that deals damage to the field or leader every turn.
- If you attack, its ability won't activate, making it difficult to play.
- Requires a clever way to deal damage to the leader. - Salefa, Guardian of WaterHavencraft
 Required: 3- Can destroy a wide field with Evolution
- High durability with Ward + Restore + Destroy
- Difficult to play without using an Evolution - Wilbert, Desolate PaladinHavencraft
 Required: 3- The Crest that boosts your Ward followers is very strong
- Its Last Words effect is also great for keeping your leader safe
- The big stat increase lets you take control of the fight quickly - Aether, Empyrean GuardianHavencraft
 Required: 3- Develops a large board of low-cost Followers from the Deck
- You can control which cards are played by limiting the types of cards included
- Strong synergy in Ward Havencraft - Kukishiro, MistbloomHavencraft
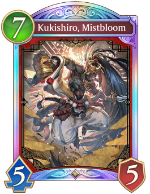 Required: 3- Fills your side of the field with followers every time you draw a card
- Shines brightest when played in a dedicated deck built around its effect
- Incredibly strong once you master its unique playstyle - Jeanne, Saintly KnightHavencraft
 Required: 3- Versatile card that can take out enemies and buff your followers
- Works really well with cards that help you fill your side of field
- Especially strong when a follower comes into play from an Amulet - Lyanthoth, Eld TomeHavencraft
 Required: 1- Can also destroy Amulets by destroying other cards on the field
- The Spell obtained by achieving Faith is a powerful source of damage
- High Cost and also requires Evolution after achieving Faith, making it difficult to use
Best Portalcraft Cards to Craft
- Sincerity of the DewdropPortalcraft
 Required: 3- An ability that can transform any card on the field
- Can destroy an opponent's powerful Last Words or Amulets
- Also recommended for use on your own weak followers - Lovestruck PuppeteerPortalcraft
 Required: 3- Best used to trade with large Followers by granting Bane
- Uses up a lot of your Necromancy to activate
- Works really well when you have a bunch of Ghosts ready to go - Imari, DewdropPortalcraft
 Required: 3- Powerful for its ability to gain tempo while searching for key pieces
- Excels in Artifact Portalcraft, where cycling can be crucial
- Becomes even stronger when paired with spells that amplify its value - Yog-Zentha, Eld AxePortalcraft
 Required: 2- Lowers costs and lets you reuse your followers
- Provides basic field control using the Rush ability
- Effectiveness depends heavily on your current field setup - Axia, Heir to DestructionPortalcraft
 Required: 3- High-performance low-Cost Ward
- Powerful when cards with Destroy and synergy are added
- This Super-Evolution has poor cost-performance when used normally and is intended for a Combo. - Lishenna, Melody ManifestPortalcraft
 Required: 3- Can deal burn damage and restore a defense point when evolved.
- Melodious Monody is a very versatile destroy card.
- Stronger when paired with cards that destroy units on the field - Zwei, Symphonic HeartPortalcraft
 Required: 3- It's nice to be able to bridge the mid-game without using EP (Evolution Point).
- It's possible to survive the late-game with multiple Ward followers.
- Strong in long games, as it can destroy while leaving a 6 Attack follower on the field. - Congregant of DestructionPortalcraft
 Required: 3- Can Destroy a large number of an opponent's Followers depending on the Field
- Becomes powerful depending on the addition of strong cards that are good when Destroyed
- Underwhelming when used on its own - Beelzebub, Supreme KingPortalcraft
 Required: 2- Makes enemy leader more vulnerable to combos.
- Easy to play thanks to its removal.
- A bit slow to hit the board.
Related Articles

 All Cards List
