Even Havencraft Deck Recipe Guide and How to Play. See needed card list, cost, how to use, strategy and tips.
 Best Deck Meta Tier List
 Best F2P Decks List
Table of Contents
Even Havencraft - Deck Recipe and Rating
Deck Recipe

 See it on the official deck portal


Follower 26 Spell 0 Amulet 14 Deck Cost 73,970 | <1 2 3 4 5 6 7 8> |
- Awed and Inspired×1000
- Serene Sanctuary×31
- Devotee of Repose×2204
- Luminous Censer×32
- Grimnir, Heavenly Gale×2323
- Gilnelise, Voracity Manifest×3303
- Tablet of Tribulations×13
- Supplicant of Repose×3314
- De La Fille's Gleaming Gems×33
- Resolve of the Mistbloom×3300
- Mjerrabaine, Great Manifest×3433
- Salefa, Guardian of Water×3533
- Congregant of Repose×2524
- Himeka, Heir to Repose×3604
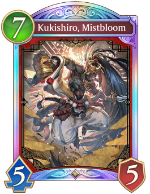
- Kukishiro, Mistbloom×3755
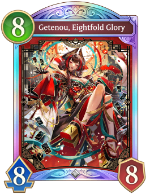
- Getenou, Eightfold Glory×1888
- Jeanne, Saintly Knight×1866
Alternate Cards
 |     - Effective for early-game destruction |
 | - Provides a steady stream of healing - Can also be used to power up your team |
 |   - Secures your Crest count - Can clear the field with Crests - Has poor synergy with Board Lock |
Rating
| Deck Rating | |
|---|---|
| Tier - | |
| Range | Play Difficulty |
| Control | Challenging |
| Detail | |
| - A deck that builds up units on the opponent’s field and uses Himeka, Heir to Repose to create a board lock. - Once set up, the deck can close out the game through control. - Requires many cards to assemble its win condition. | |
Board Lock Using Kukishiro, Mistbloom’s "Even" Ability
Even‑Cost Havencraft is a control deck that aims to lock the opponent’s field. It does so by using Kukishiro, Mistbloom’s ability to place a follower on the opponent’s field whenever you draw a card that costs 2, 4, or 6. The deck is highly technical and requires strong gameplay knowledge, but it feels powerful and exciting when you successfully pull off the lock.
User Score
Even Havencraft Deck - How to Play
Find Your Combo Pieces Early

In the early game, use draw engines like Serene Sanctuary and De La Fille's Gleaming Gems to find your key cards such as Kukishiro, Mistbloom and Himeka, Heir to Repose. Since your deck really only picks up speed once your combo is ready, it's vital to gather these pieces as fast as possible.
Protect Your Health While You Prepare
While gathering your pieces, destroy your opponent's followers on the Field with cards like Resolve of the Mistbloom. Entering the late game with high DP will make it easier to pull off your combo.
Save Your Draws for the Big Turn
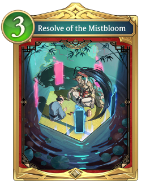
The Engage abilities of De La Fille's Gleaming Gems and Resolve of the Mistbloom are powerful when used after playing Kukishiro, Mistbloom. With Kukishiro's Crest, you can build up your own field or lock your opponent's side of the field each time you draw.
Activate Kukishiro’s Crest
Once you play Kukishiro and activate her Crest, your draws will trigger special effects. Since this deck uses a mix of even-cost and odd-cost cards, you will need to decide in the moment whether to lock your opponent's field or buff your own followers.
Trap the Opponent with a Board Lock

If your opponent has a few followers out, you can draw multiple cards using Mjerrabaine or your amulets to trigger a Board Lock. Kukishiro's Crest will summon weak followers to your opponent's side to fill their space while giving you followers with Ward. This prevents them from attacking you or even playing new cards.
Mjerrabaine Can Fill Both Fields at Once
Playing Mjerrabaine after Kukishiro allows you to flood both sides of the field instantly. Because Mjerrabaine draws a card at the end of every turn, he can automatically re-lock the opponent's field after you've cleared their Wards and attacked their leader, which is what makes him so dangerous.
Use Himeka for an Even Stronger Board Lock
If you have a high Crest count, Himeka can lock down the opponent's field even if you don't have any Ward followers out. Just be careful, because if you Super-Evolve her, the AoE damage from Grimnir's effect might destroy the weak followers you used to lock the opponent's field, accidentally breaking your own trap!
Launch an All-Out Attack


Once your opponent is stuck and can't play any cards, you can either keep the lock going or use Jeanne or Gilnelise to buff your team and wipe out the opponent's followers for a clean finish. This is the moment to push for lethal and end the game.
Mulligan Guide for the Even Havencraft
Keep Draw Engines and Kukishiro, Mistbloom
Keep cards that help you draw more and Kukishiro, Mistbloom, which is central to the deck. Examples include Serene Sanctuary and De La Fille’s Gleaming Gems.
Keep Useful Followers Alongside These Cards
It’s also good to keep low‑ to mid‑cost followers you can play in the early or mid‑game. Having followers on the field makes it easier to protect your DP.
Keep Salefa Against Swarming Decks
If your opponent’s deck is strong at putting followers on the field early, keep Salefa even on its own. By evolving Salefa during your evolution turn, you can swing the game back in your favor even if you were behind.
Related Articles

| Rankings & Recommended Decks | |
|---|---|
| Best Decks | Pro-Curated Decks |
| First Farer Missions | F2P Decks |
 Spellboost Runecraft
 Rhinoceroach Forestcraft
 Midrange Swordcraft
 Mid-range Abysscraft
 Earth Rite Runecraft
 Puppet Portalcraft
 Artifact Portalcraft
 Aggro Abysscraft
 Ward Havencraft
 Face Dragoncraft
 Ramp Dragoncraft
 Storm Havencraft
 Aggro Swordcraft
