Loot Swordcraft Deck Recipe Guide and How to Play. See needed card list, cost, how to use, strategy and tips.
 Best Deck Meta Tier List
 Best F2P Decks List
Table of Contents
Loot Swordcraft - Deck Recipe and Rating
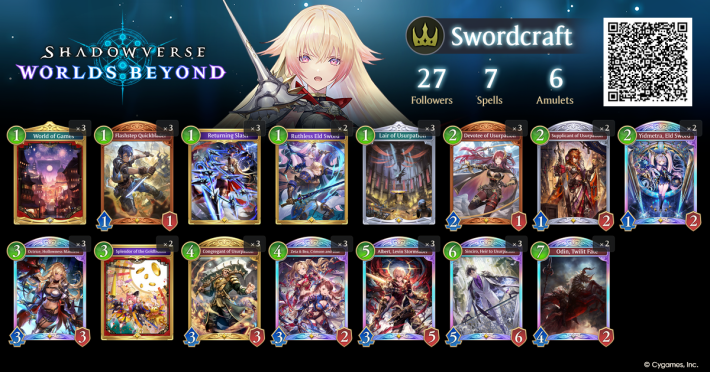
Deck Recipe

 See it on the official deck portal


Follower 28 Spell 6 Amulet 6 Deck Cost 69,100 | <1 2 3 4 5 6 7 8> |
- World of Games×31
- Flashstep Quickblader×3111
- Returning Slash×31
- Ruthless Eld Sword×31
- Lair of Usurpation×31
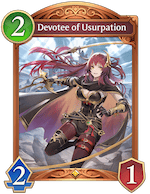
- Devotee of Usurpation×3221
- Supplicant of Usurpation×2212
- Yidmetra, Eld Sword×3212
- Octrice, Hollowness Manifest×3333
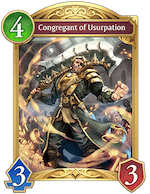
- Congregant of Usurpation×3433
- Zeta & Bea, Crimson and Blue×3432
- Albert, Levin Stormsaber×3535
- Sinciro, Heir to Usurpation×3656
- Odin, Twilit Fate×2742
Featured Card Analysis
 | - A fantastic 1-cost spell that easily destroys an enemy by dealing 3 damage. - Helps you charge up your "Grand Game" count while clearing extra cards out of your hand. |
 | - Her "Abyss" ability is a super flexible and easy way to destroy an enemy threat. - Being able to play her as early as turn 2 is incredibly strong. |
Alternate Cards
 |  - It has a very unique way of pushing the opponent closer to defeat while stopping them from using "Drain" to heal themselves. |
 | - A great emergency option to wipe out multiple enemies at once if you don't have Sinciro, Heir to Usurpation ready to go. - Its biggest strength is healing your leader so you can survive the opponent's final attacks. |
 | - An incredible all-in-one card that fills your side of the field, attacks instantly with "Storm", heals you with "Drain", and destroys enemy threats. - Perfect for setting up a massive attack from a fully-powered Albert, Levin Stormsaber on your next turn. |
Rating
| Deck Rating | |
|---|---|
| Tier | |
| Range | Play Difficulty |
| Mid-Range | Challenging |
| Detail | |
| - A deck that hits incredibly hard, with Sinciro, Heir to Usurpation leading your attack. It’s packed with cards that can strike the enemy leader and take big chunks out of their health. Since Oluon, Raging Chariot was nerfed in a recent update, you have fewer "big finish" moves to end the game instantly, so you'll need to stay aggressive throughout the match. | |
A Hyper-Offensive Deck that Revolves Around Loot
Loot Swordcraft is a high-pressure deck that deals powerful damage through cards using Sinciro, Heir to Usurpation and Albert, Levin Stormsaber. It's stacked with cards that can deal great damage and provide relentless tempo. Its appeal lies in overwhelming firepower that few decks can endure.
User Score
Loot Swordcraft Deck - How to Play
Fill the Board with Followers While Collecting Loot Early On
Destroy Enemy Followers with 1-Cost Spells While Playing Your Own
| Cards to Prioritize Playing | ||
|---|---|---|
| Flashstep Quickblader (1T) | Devotee of Usurpation | Supplicant of Usurpation |
| Cards to Destroy Enemies and Make It Easier to Attack the Leader | ||
| Yidmetra, Eld Sword | Returning Slash | Valse, Silent Sniper |
In the early game, focus on putting your followers on the field while gathering Loot cards. Take out weak enemy followers using your Loot, Returning Slash, or Depths of the Eld Sword, and attack the enemy leader as often as you can to lower their health. Getting these early hits in makes it much easier to win with fast attacks or strike the final blow later on.
Play Octrice to Activate Her Crest
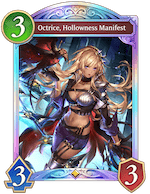
If you have Octrice, Hollowness Manifest in your hand, play her as soon as possible. Try to finish her Crest's countdown around turns 6 or 7 so you can add Remnant of Hollowness to your hand. If you are going first, your best move is to play and Evolve her on turn 3. If you are going second, turn 4 is perfect.
Speed Up Octrice's Crest by Fusing Cards
| Cards That Fuse Loot | |
|---|---|
| Returning Slash | Sinciro, Heir to Usurpation |
When you have Sinciro or Returning Slash, feeding a Loot card into them is amazing because it speeds up Octrice's Crest without spending any Play Points. The countdown only ticks down by 1 per Fuse, no matter how many cards you feed at once, so try to Fuse a different Loot card into Sinciro once every single turn.
Adapt Your Strategy to the Mid-Game Situation
Set Up Your Winning Combo by Advancing Crests and Fusing
| Role of Mid-Game Cards | |
|---|---|
 | - The perfect mid-game play, as it wipes out enemies while speeding up your Crests and Fuses - Helps you save your Evolution Points for massive damage later - Crucial for destroying enemies when Sinciro isn't in your hand |
 | - Attacks the leader while taking down a single enemy follower - If you play Loot followers first to dodge the extra 'Enhance' cost, you can destroy two enemies at once and gather Loot - A key card for turn 6 if you are playing fast and aggressively |
During the middle turns, focus on gathering the specific Loot cards you need while speeding up Octrice's Crest and Sinciro's Fuse count. This will set you up to unleash a massive wave of damage in the late game. Congregant of Usurpation is fantastic for this, safely taking out enemies while pushing your game plan forward.
Switch to Fast Attacks When the Time is Right
| Damage Cards up to Turn 6 | ||
|---|---|---|
| Flashstep Quickblader | Albert, Levin Stormsaber | Zeta & Bea, Crimson and Blue |
| Damage Cards for Super-Evolution Turns | ||
| Sinciro, Heir to Usurpation | Odin, Twilit Fate | |
While you are busy gathering Loot and advancing your combos, it is often a great idea to start attacking aggressively with 'Storm' followers. This depends on the cards in your hand, what is on the table, and what kind of deck your opponent is playing.
When to Switch to an Aggressive Plan
| You have been putting followers in play and attacking since turn 1 |
| You have a clear path to hit the leader with an Evolved Albert on turn 5 |
| You have Sinciro, Remnant of Hollowness, and Odin ready to go for turns 7 or 8 |
| Your opponent is playing a slow, defensive deck that wins if the game goes on too long |
| They keep hiding behind "Ward" (Blocker) followers that stop your fully-powered Albert from getting a clean hit |
| You aren't in danger of taking massive counter-attacks that could knock you out first |
If any of the above situations apply, start attacking their health directly and push for an early win around turn 7 or 8. Just make sure you pay attention to your opponent's tricks and don't let healing cards or 'Ward' blockers ruin your final attack, and always make sure they can't suddenly knock you out first!
Unleash Your Saved-Up Damage to Win
Explanation of Your Finishing Cards
| Unleash a Wave of Damage Followers | |
|---|---|
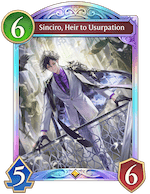 | - Your strongest finishing card, with an incredible Super-Evolution after you feed him 4 different types of cards - Also excellent for destroying a massive enemy army - Clear their side of the field and combine him with Remnant of Hollowness to blast them for 12 damage |
 | - His fully-powered Super-Evolution strikes for a massive 12 damage - Simply holding onto an Evolution Point until turn 9 forces your opponent to panic and waste cards trying to survive Albert - If they build a huge army to block him, destroy it with Sinciro instead! - Be careful, as he is easily stopped by beefy "Ward" blockers with 4 or more health |
| - His ability to smash straight through a single 'Ward' blocker and guarantee 7 damage is incredible - Often your best finishing move if you've been attacking quickly all game |
 | - Gives you incredible value if you can wipe out the enemy army using Sinciro, Albert, or Odin, letting this spell hit the leader for a free 4 damage |
In the late game, focus on unleashing huge bursts of damage from Sinciro or Albert. You will win much more often if you , making sure you deal enough damage to break through whatever they throw at you.
Knowledge and Techniques
How to Use Different Loot Cards
| How to Use Your 1-Cost Loot | |
|---|---|
 | - In the early game, usually save it to feed into your Fuse cards - Can save your life by healing your leader - Keep this safe if you are losing or the game is dragging on, as it is incredibly valuable late in the game |
 | - Give your followers instant 'Storm' attacks, help them win fights, or buff allies already on the field - Putting boots on Congregant of Usurpation lets her easily destroy multiple enemies without using an Evolution Point - Giving them to a fully-powered Albert adds 2 extra damage! |
 | - Generally, feed your very first copy to Sinciro - Use it early on to give your followers extra health so they survive fights - Later on, give "Ward" to your biggest Super-Evolved followers to block incoming instant attacks - It is harder to find than other Loot cards, so use it wisely! |
 | - Perfect in the early game to snipe weak enemies from afar - Unlike the Boots, this guarantees damage even if your followers can't attack instantly - Great for finishing off 4-health enemies when paired with Congregant or Albert - Makes a great snack for Returning Slash if you don't have other Loot |
If you have plenty of Loot to spare, spend your leftover Play Points on Loot cards to keep the pressure high. Gilded Blade and Gilded Boots are fantastic for winning fights over the board and sneaking in extra damage, so use them aggressively!
Feed Cards to Make Room in Your Hand
| Cards That Fuse Loot | |
|---|---|
| Returning Slash | Sinciro, Heir to Usurpation |
Loot Swordcraft gives you so many cards that you must 'Fuse' your extra Loot to stop your hand from overflowing. Try to feed away cards early so you only have 6 or 7 in hand, especially right before Octrice's Crest or the "World of Games" amulet activates!
Mulligan Guide for the Loot Swordcraft
Best Cards to Keep By Themselves
| Always Keep These | |
|---|---|
| World of Games | Returning Slash |
| Devotee of Usurpation | Octrice, Hollowness Manifest |
| Keep Only If You Go First | |
| Flashstep Quickblader | Supplicant of Usurpation |
Hold onto cheap Loot cards that you want to play right away in the early turns. You should also keep cards like World of Games and Flashstep Quickblader, as they are incredibly strong on turn 1 and help your deck run smoothly!
Best Cards to Keep Together as a Combo
| Pair Sinciro or Congregant with Loot Cards | ||
|---|---|---|
| Devotee of Usurpation or Supplicant of Usurpationor Octrice, Hollowness Manifest | Sinciro, Heir to Usurpation or Congregant of Usurpation | |
| Pair 1-Cost Cards with World of Games | ||
| World of Games | Flashstep Quickblader or Lair of Usurpationor Ruthless Eld Sword | |
Always try to keep Sinciro or Congregant in your opening hand if you also have a card that gives you Loot. It is also a fantastic idea to hold onto cheap 1-cost cards if you start with World of Games, so you can quickly speed up its countdown!
How to Counter the Loot Swordcraft
Clear the Field from the Early Game to Reduce Damage

Clear the field from the early game to keep your DP high. If you take a lot of damage early on, it becomes easier for the opponent to achieve lethal in the mid-game with Sinciro, Heir to Usurpation or Storm followers, so you'll want to keep low-cost followers and removal cards from your opening hand.
Remember the Loot Cards in Their Hand
Keep track of the number and types of Loot cards your opponent has in their hand. Sinciro, Heir to Usurpation needs to Fuse up to 4 different types of Loot cards, but if your opponent only has 2 types, it will only deal 4 damage with Super-Evolution.
If the Opponent has a Goblet, They Can Escape Lethal
If your opponent has a Gilded Goblet, they can restore 2 defense and potentially escape lethal range. Plan for lethal by anticipating their use of the Gilded Goblet.
If the Opponent has Boots, Damage is +1
If Gilded Boots are used on a follower remaining on the field or a Storm follower, it will deal +1 damage. Since Enhance Albert, Levin Stormsaber can attack twice, be careful as a single card can increase the damage by 2, resulting in 14 damage with Super-Evolution.
If the Opponent has a Blade, Deal 1 Damage Regardless of Ward
The Gilded Blade can deal 1 damage directly to the leader, so it cannot be countered by Ward. When your defense is at 1, if you know they have a Gilded Blade, you need to restore defense instead of playing a Ward follower.
Determine if They Have Sinciro
After playing Octrice, Hollowness Manifest, if they have Sinciro, Heir to Usurpation, they will often Fuse every turn to advance Octrice's Crest. Be wary if you suspect they have Sinciro, Heir to Usurpation.
Prevent Lethal Over Multiple Turns with Restore and Ward


Loot Swordcraft has difficulty dealing 20 damage in a single turn, so prevent lethal over multiple turns by using restore effects and developing Ward followers. After taking a big hit, restore your defense to escape lethal, and from 9 play points onward, it's important to play around Albert, Levin Stormsaber by playing a Ward follower with 4 or more defense.
Make it Difficult to Use Albert with Ward
Loot Swordcraft often finishes the game with an Enhanced Albert, Levin Stormsaber, who removes followers with a 3-damage AOE while dealing massive damage with a double-attacking Storm follower. Since a Ward follower with 4 or more defense won't be destroyed by the AOE, you can reduce the damage you take from the Storm attack.
Be Careful if They Have Glittering Gold

If your opponent has Glittering Gold, be careful, as they can deal 2 damage for 0 cost after Albert, Levin Stormsaber's 3-damage AOE to break through your Ward follower. Keep track of the number of Gold cards they have and prepare a Ward follower with enough defense to survive.
Deter Odin by Establishing 2 or More Followers
In the mid-game, by establishing two or more followers on your field, you can make it harder for your opponent to damage your leader with Odin, Twilit Fate. In addition to making it easier to survive by maintaining your field and taking less damage, it also makes it easier to aim for a counter-lethal if your field is ignored.
You Might Also be Able to Bait out Sinciro
Since if you have two followers with high stats on the field, the opponent will have no choice but to use Congregant or Sinciro, Heir to Usurpation to deal with them, you can force them to use Sinciro, Heir to Usurpation at an inopportune time. If you then build your field, it's possible to create a win condition through field advantage.
Related Articles

| Rankings & Recommended Decks | |
|---|---|
| Best Decks | Pro-Curated Decks |
| First Farer Missions | F2P Decks |
 Spellboost Runecraft
 Rhinoceroach Forestcraft
 Midrange Swordcraft
 Mid-range Abysscraft
 Earth Rite Runecraft
 Puppet Portalcraft
 Artifact Portalcraft
 Aggro Abysscraft
 Ward Havencraft
 Face Dragoncraft
 Ramp Dragoncraft
 Storm Havencraft
 Aggro Swordcraft
