
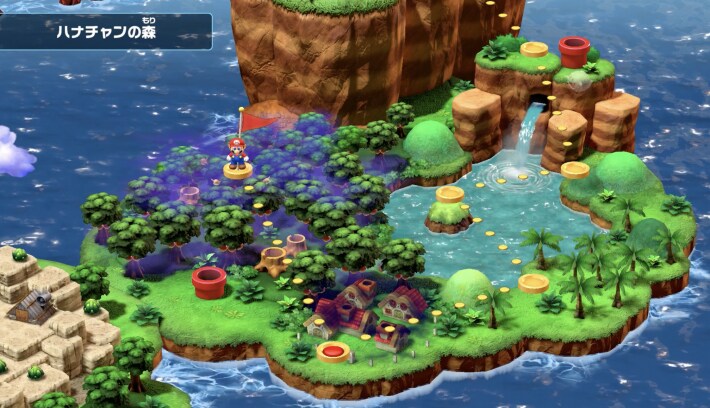
This is the story walkthrough chart for Super Mario RPG Remake. In this Mario RPG story walkthrough, we have a list of charts for each Star Piece by map, so please use it as a reference.
Table of Contents
- Story Walkthrough List
- Walkthrough Chart up to the 1st Star Piece
- Walkthrough Chart up to the 2nd Star Piece
- Walkthrough Chart up to the 3rd Star Piece
- Walkthrough Chart up to the 4th Star Piece
- Walkthrough Chart up to the 5th Star Piece
- Walkthrough Chart up to the 6th Star Piece
- Walkthrough Chart up to the 7th Star Piece
Story Walkthrough List
Walkthrough Chart by Progress


The story of Super Mario RPG is a tale of collecting seven Star Pieces. When you obtain the seventh one, you'll fight the final boss and then reach the ending.
Walkthrough Chart up to the 1st Star Piece
Until Bowser's Keep is Cleared
Proceed Deeper
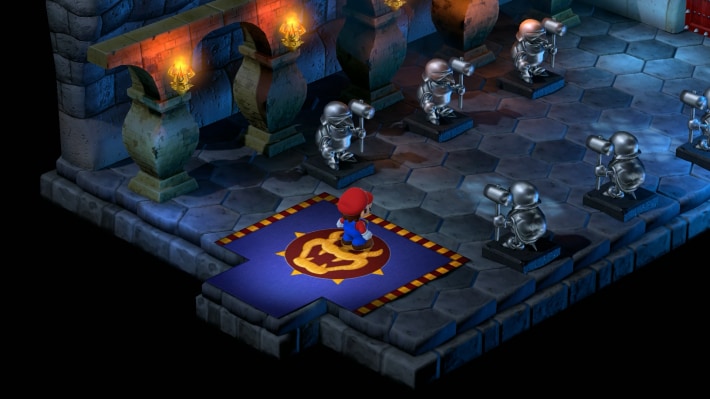
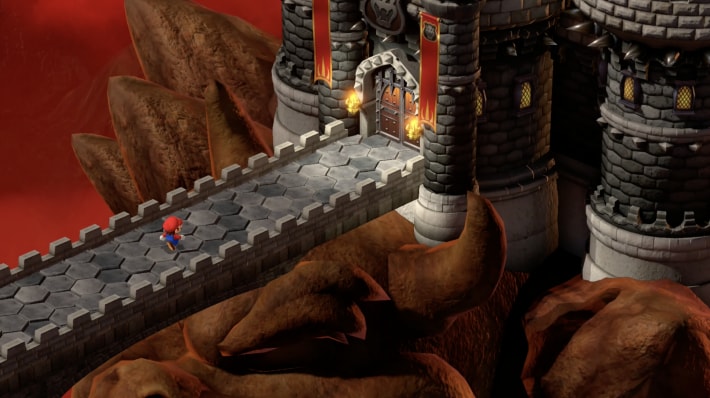
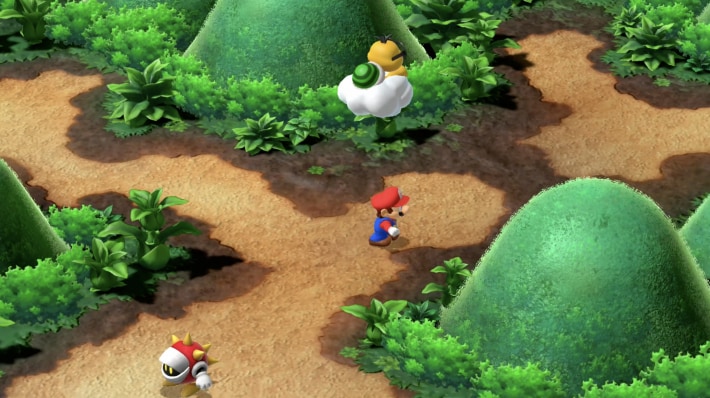
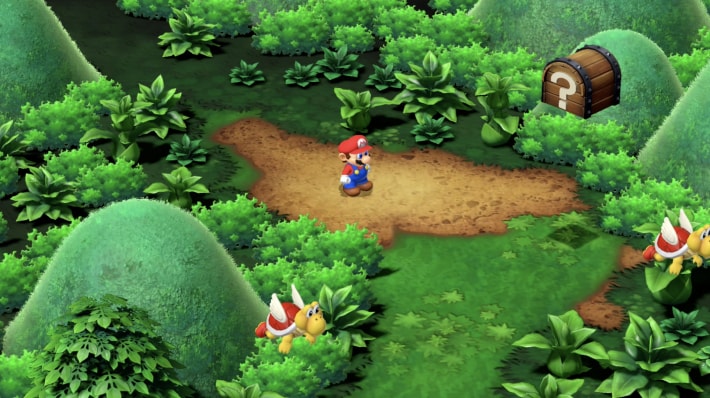
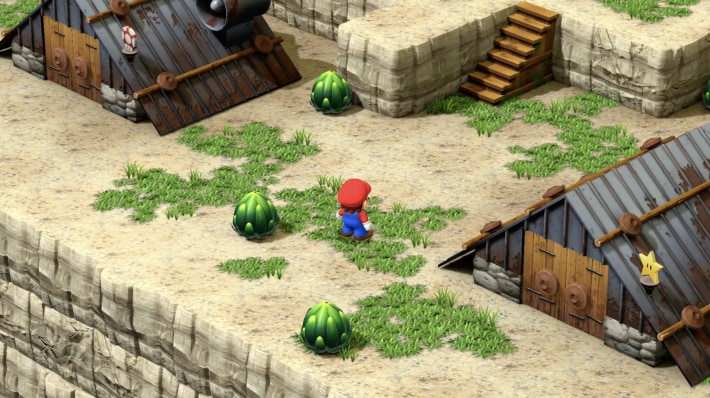
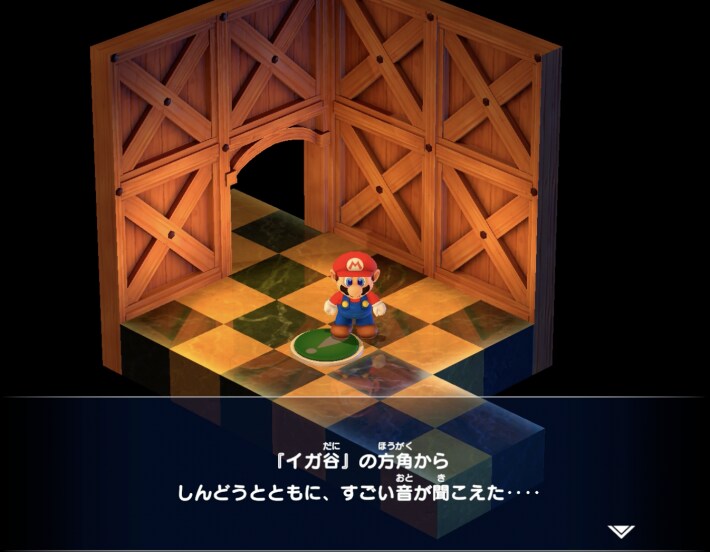
When you start the game, the opening event will begin, and you'll start from where you arrive at Bowser's Keep. This is a straight path, so head straight.
Fight Koopa Troopa x2
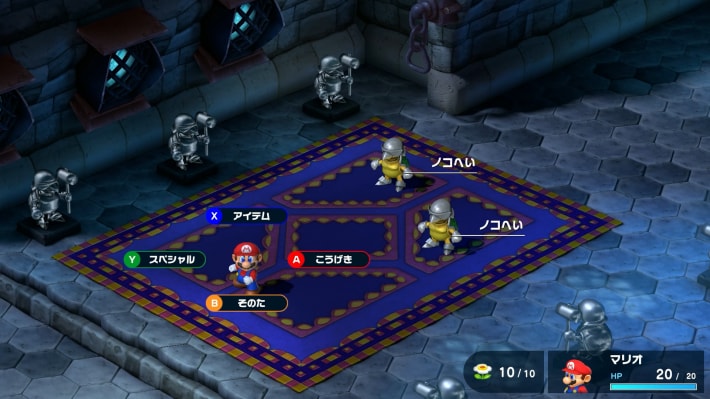
In the area where Koopa Troopas walk, two Koopa Troopas are waiting at the far end, and you'll be forced into battle. Defeat them while checking the battle system.
Attack the Chaindelier to make Bowser fall
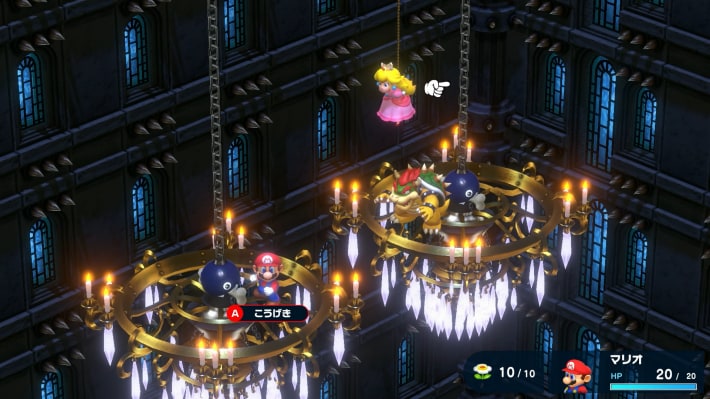
- Attack the Chandelieron
- Use the special move 'Jump'
Proceed to the end to fight Bowser. No matter how much you attack Bowser, you can't defeat him, so change your target to the Chaindelier at the back, attack and defeat it to make Bowser fall, and you'll win.
Until Mario's Pad is Cleared
Exit the house and talk to Toad
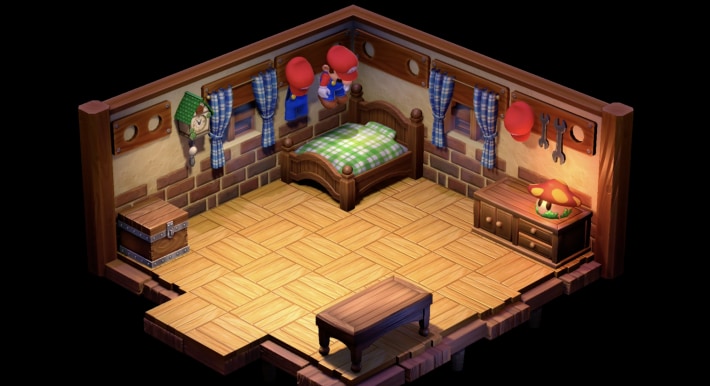
You're blown away from Bowser's Keep and start hanging on the wall of Mario's Pad. You can get off the wall with the B button, so exit the house and talk to Toad.
Head to Bowser's Keep
If you head to Bowser's Keep, Exor will destroy the bridge and you'll be returned to the world map, so go back to Mario's Pad.
Talk to Toad at Mario's Pad
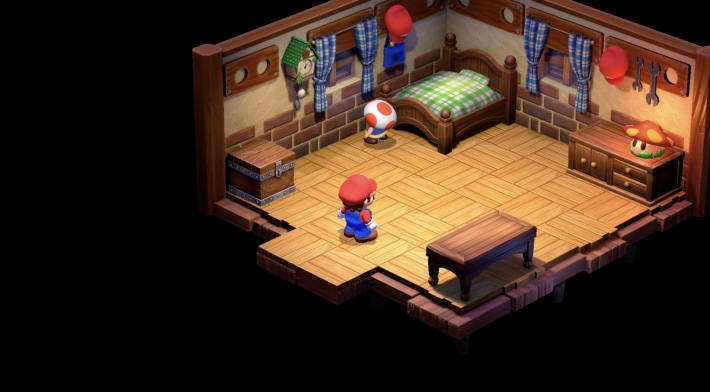
Toad is inside Mario's Pad, so talk to him. After that, if you try to go to the world map, Toad will appear and you can receive a tutorial.
Receive a tutorial from Toad
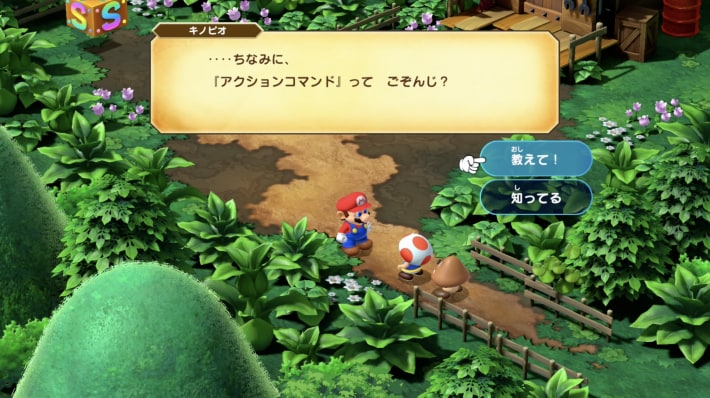
You can receive a tutorial on "Action Commands" from Toad. You can also skip it by choosing "I know".
Until Mushroom Way is Cleared
Defeat enemies while proceeding
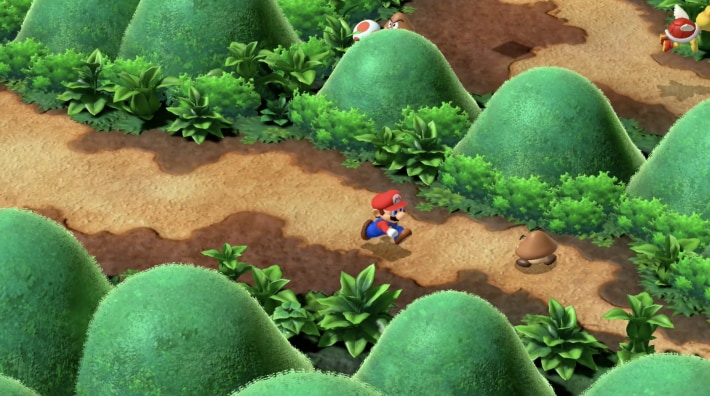
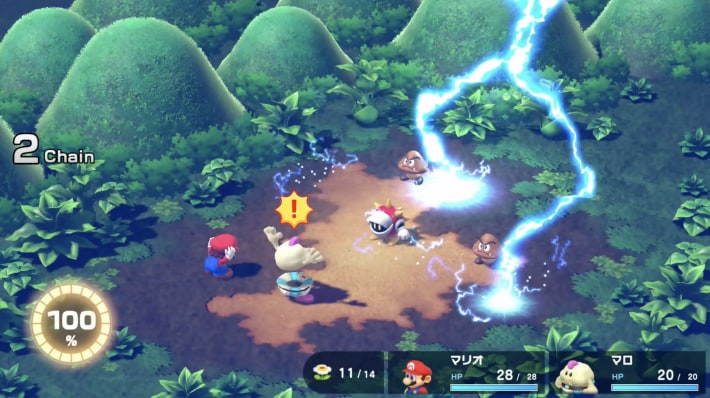
At the end of Mushroom Way, the boss "Hammer Bros." will appear. Just being level 2 makes the fight much easier, so defeat enemies along the way to level up.
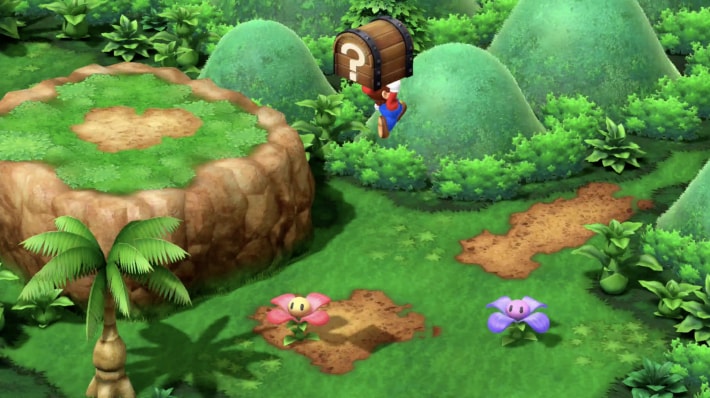
Jump on treasure chests until the ? disappears
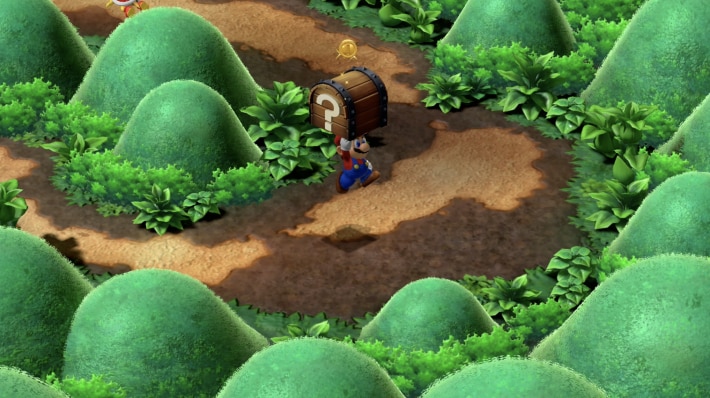
In the first area of Mushroom Way, there are two treasure chests, both containing coins. You get one coin per jump, so keep jumping until the ? disappears.
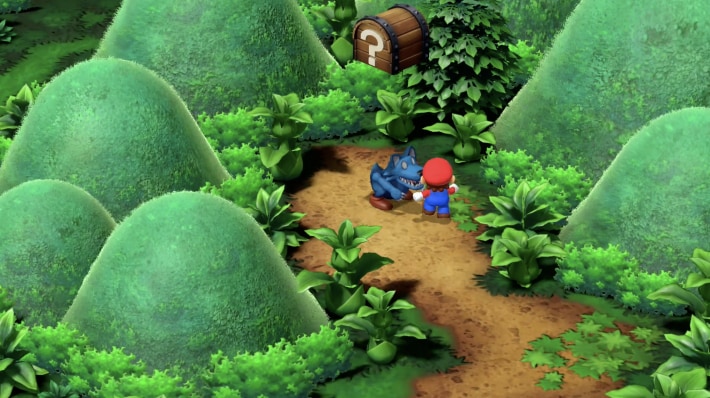
Rescue the captured Toad
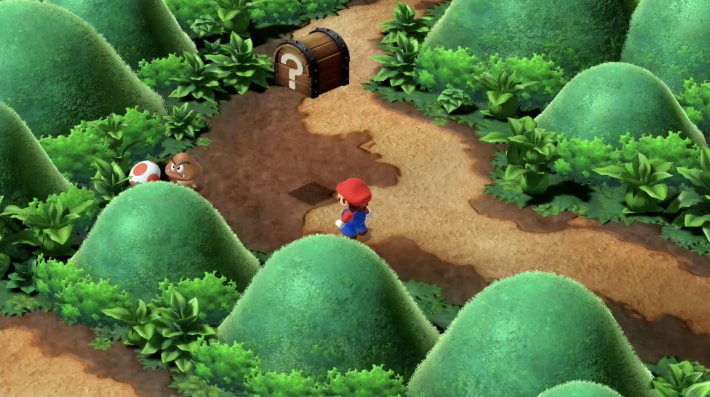
In the first area, there's a Toad captured by a Goomba. If you defeat the Goomba, you'll receive a "Honey Syrup" as a thank you.
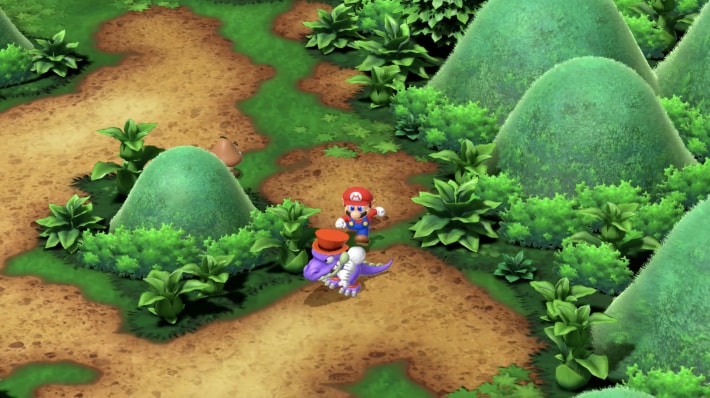
Enter the small path the Goomba ran from
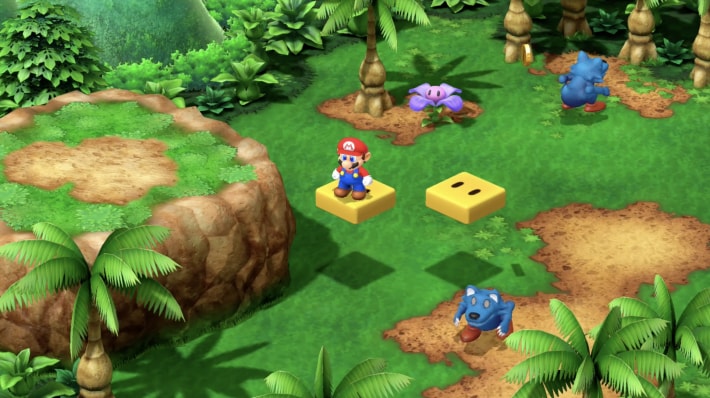
As soon as you enter the second area, a Goomba will run from the left. You can avoid it or defeat it, but afterwards, enter the small path the Goomba ran from. At the end, there's a "Flower Tab" item that increases your FP limit.
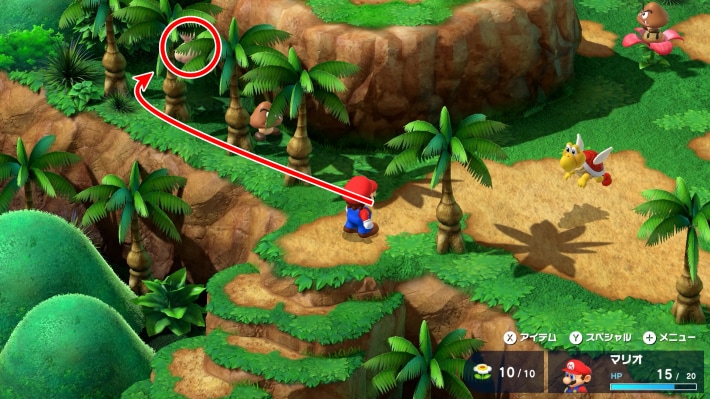
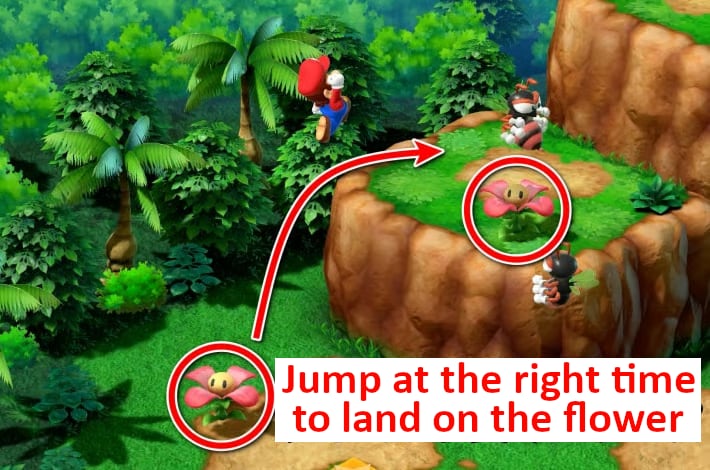
Ride the flower to get on the ledge
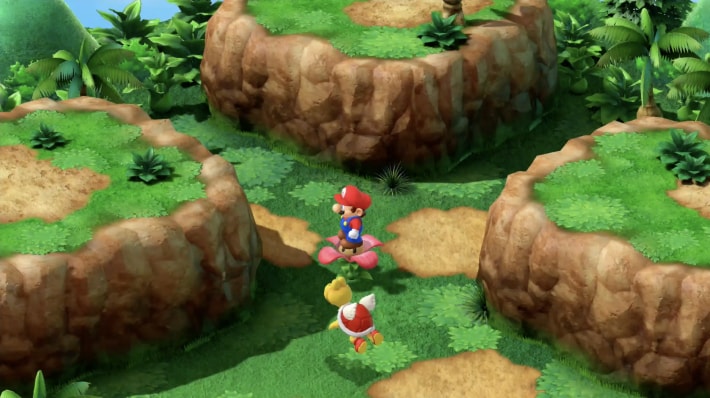
In the second area, there's a flower blooming in the center of the area. If you step on the flower, it will rotate, so by jumping at the right time, you can get on the surrounding ledges.
Items on the left and center ledges, Toad on the right ledge
You can get on three ledges: top, left, and right. The top ledge has a Pick Me Up, and the treasure chest on the left contains a Flower that increases your FP limit by 1. On the right, a Toad is captured by a Sky Troopa, and rescuing him will give you a "Flower Tab".
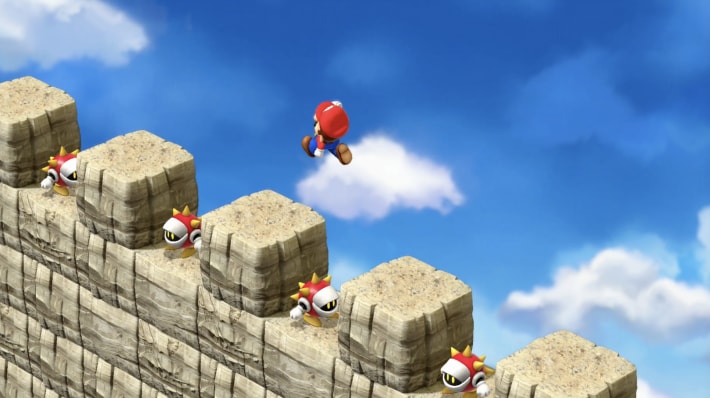
Spikeys appear from the 3rd area
From the third area, Lakitus in the air will throw Spikeys. You can't fight the Lakitus, and Spikeys are slightly tougher enemies compared to Goombas. The boss is also close, so it's recommended to proceed while avoiding unnecessary battles.
Hammer Bros. Battle
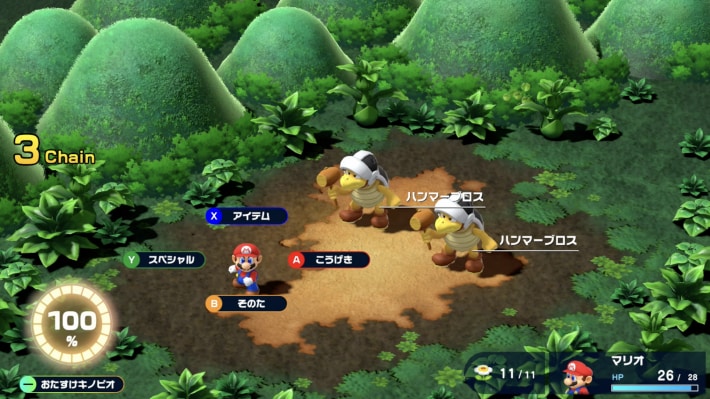
- Restore HP and FP before the battle
- Reduce the HP of both enemies evenly
- If you're unsure, defeat them one by one
Approaching the Hammer Bros. at the far end of the area will trigger a boss battle. Two enemies will appear, and if you defeat one, the remaining Hammer Bro will use a defense up.
Equip the Hammer when you get it
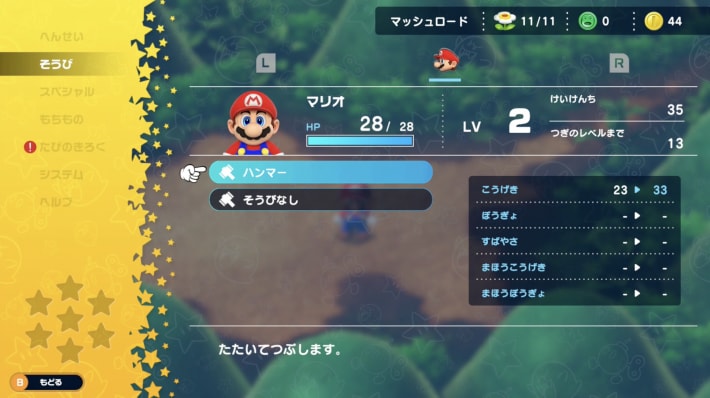
Defeating the Hammer Bros. will reward you with the "Hammer" weapon. Weapons are not equipped automatically, so equip it from the menu.
Until Mushroom Kingdom (First Visit) is Cleared
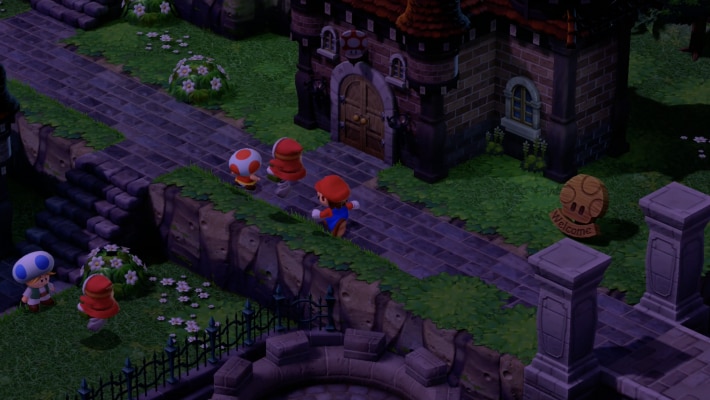
Enter Mushroom Kingdom
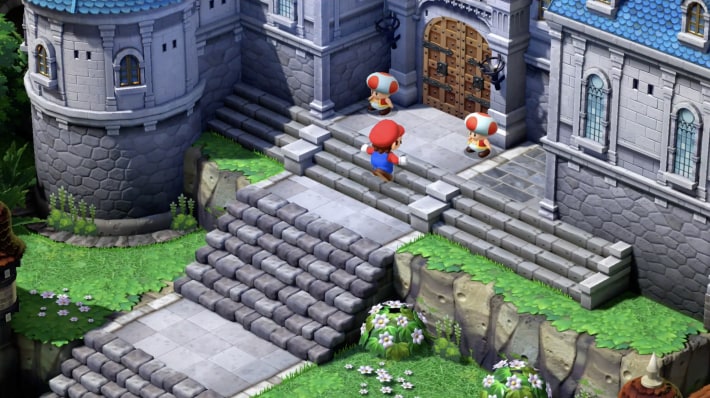
After entering the area, proceed straight to find Mushroom Kingdom. Follow the Toad inside.
Talk to the Chancellor
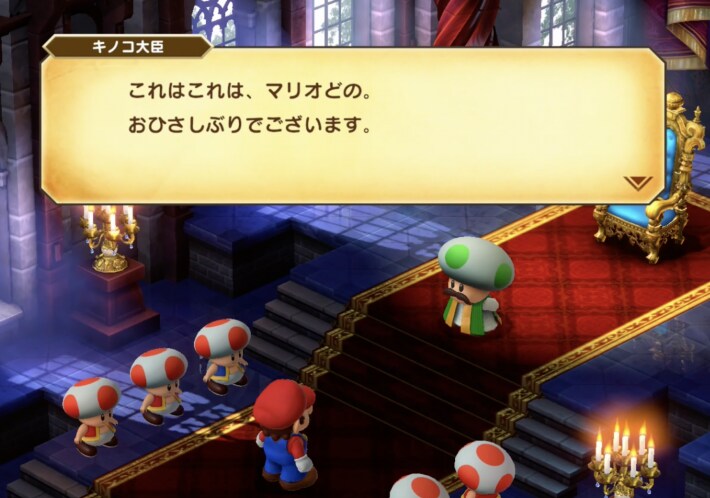
Proceed to the back of the castle to talk to the Chancellor. He will tell you to prepare for your journey in the vault.
Collect items in the vault
From the room where you talked to the Chancellor, exit, go straight, enter the right entrance, then the bottom entrance to reach the vault. Here you can get a Mushroom, Flower, and 10 coins, so be sure to visit.
Talk to Mallow
When you leave the castle, an event will start, and if you talk to the crying Mallow, he will join your party. Mallow is a character who can perform area-of-effect attacks and healing with special moves.
Get a Pick Me Up at the item shop
After Mallow joins, go to the item shop to get a Pick Me Up. While you're buying recovery items and armor to prepare for your journey, be sure to also collect the hidden treasure chest in the basement.
Get the Signal Ring
Talk to the old woman in the basement of the item shop, and she will tell you the location of a hidden treasure chest. Inside is the Signal Ring. Equipping it will make a sound and display text in the upper right corner of the screen when a hidden treasure chest is nearby.
Get on Toad's head to open the hidden treasure chest
After talking to the Chancellor, leave the castle once and re-enter, and Toad will be standing there. Get on top of him and jump to get the hidden treasure chest.
Talk to the guard near the exit
Talk to the guard Toad at the exit on the right side of the area to get a "Map". After that, you'll proceed to Bandit's Way, but there are sub-events that only occur at this stage, so it's recommended to explore the castle town before proceeding.
Until Bandit's Way is Cleared
Learn how Mallow fights
Mallow, your new party member, is a character who can perform area-of-effect attacks and healing with special moves. He's useful in mob battles, but his normal attacks are weak, and managing FP is important.
Save before proceeding
There are no items or treasure chests in the first area, but if you proceed downwards, you'll find a save point. From here, enemies will be slightly stronger and there will be a boss battle, so save before proceeding.
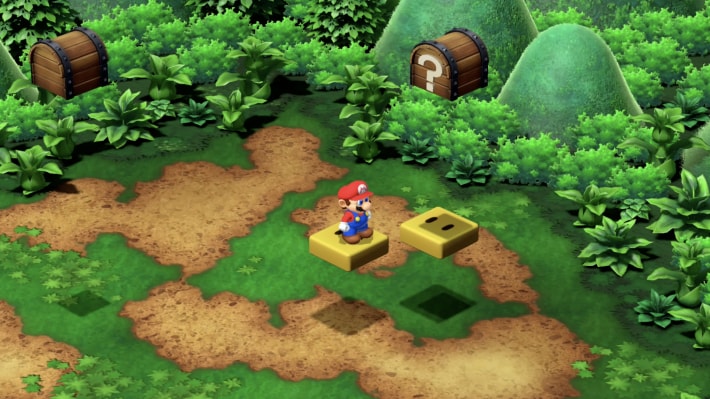
Move by riding on two platforms
In the second area, two platforms will appear. When you ride on one platform, the other platform will move, so jump between them alternately to proceed. If you fall, you can get directly onto the platforms.
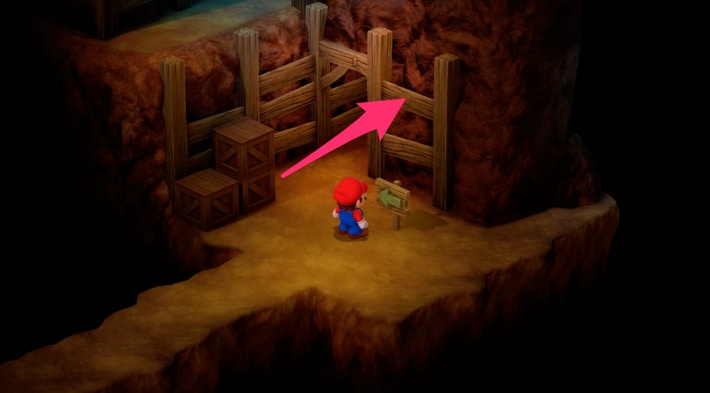
Hidden treasure chest at the end of the 2nd area
Ride the red flower at the end of the second area, and jump when it's facing right to open a hidden treasure chest. Inside is a KeroKeroCola.
Full recovery mushroom in the 3rd area
At the very top of the third area is a treasure chest containing a full recovery mushroom. It fully restores HP and FP, so open it if you've taken damage in battles so far.
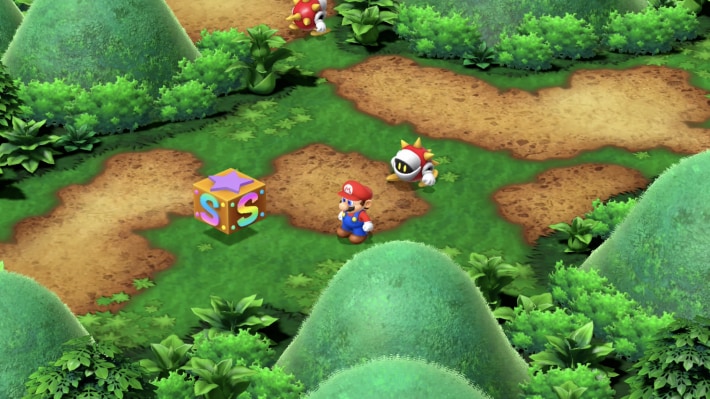
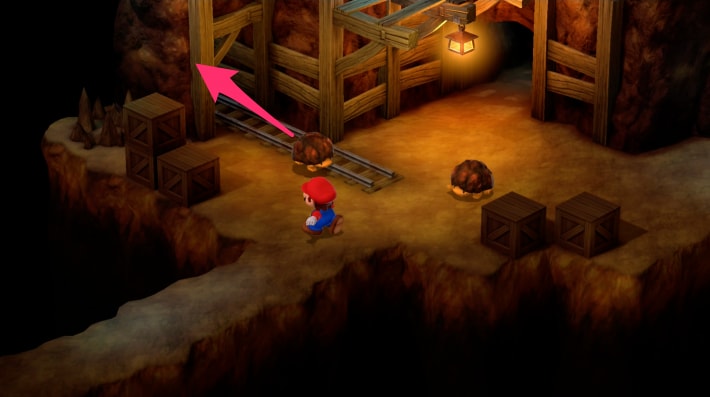
The first treasure chest in the 4th area is a Star
The first treasure chest after entering the fourth area contains a Star. You'll become invincible and defeat enemies just by touching them, and you'll also gain experience points. It's a chance to level up, so defeat lots of the surrounding K-9s.
The second treasure chest is a Flower
Proceed by riding the platform to find a second treasure chest. It contains a Flower, which increases your FP limit by 1, so be sure to open this one as well.
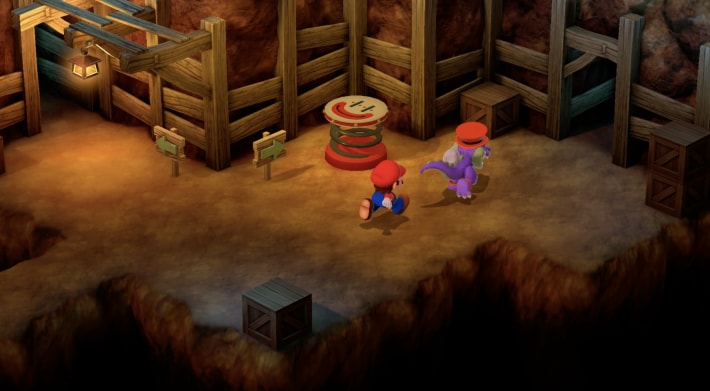
Catch Croco from behind 3 times
In the fifth area, you need to chase Croco and catch him 3 times. You can't catch him from the front or side, so catch him from directly behind. After catching him 3 times, a battle will start immediately, so heal up just before.
Open the treasure chest right after entering after catching him twice
Opening the treasure chest right after entering the fifth area will fully restore your HP and FP with a mushroom. You'll want to use this before the boss battle, so it's recommended to open it after catching Croco twice.
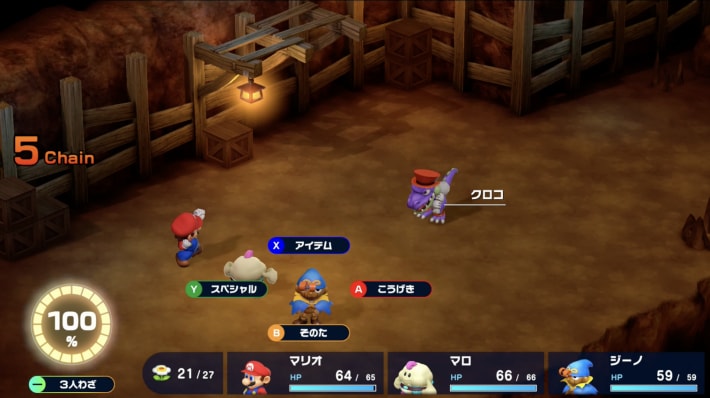
Battle with Croco
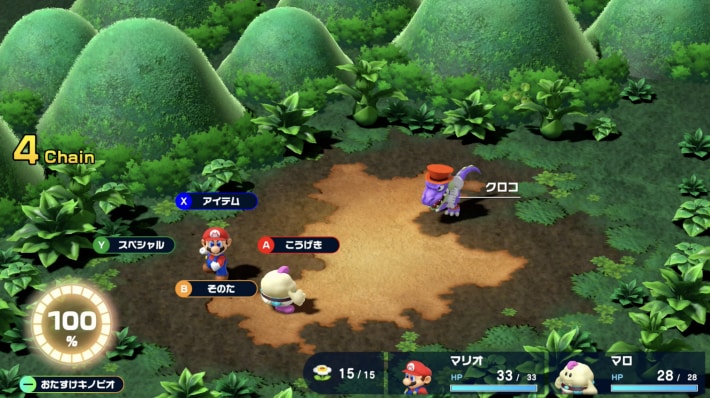
- Fireball is effective
- Have Mallow focus on healing
- Prepare Honey Syrups
Croco is weak to fire, making Mario's Fireball effective. You learn this skill at level 3, so if you're not level 3 yet, level up by fighting nearby enemies.
Return to Mushroom Kingdom
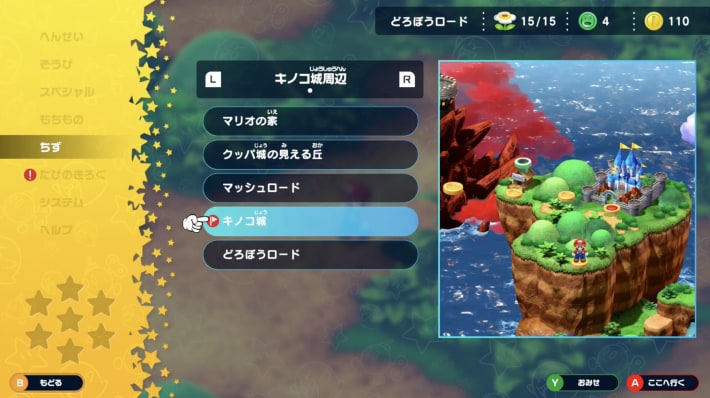
After defeating Croco, you need to return to Mushroom Kingdom. Press the + button and select Mushroom Kingdom from the map.
Until Mushroom Kingdom (After Croco Battle) is Cleared
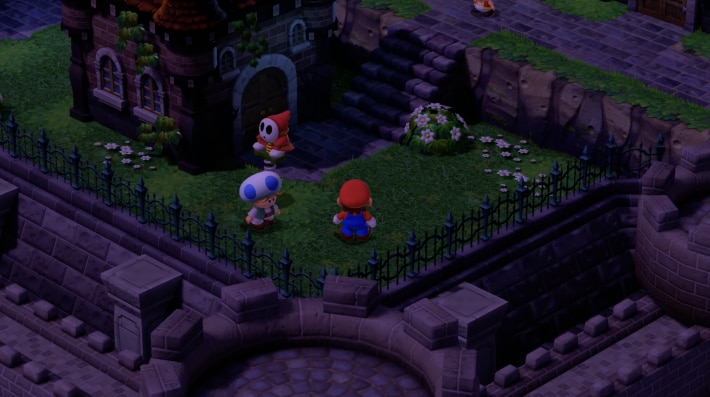
Rescue people being attacked
In Mushroom Kingdom, people are being attacked by Shymores everywhere. Rescuing them may reward you with items, especially don't miss the two places where you can get a Flower Tab.
Guard on the far right
| Reward | 10 Coins |
|---|
Blue person below the guard
| Reward | Flower Tab |
|---|
After defeating the Shymore, you'll be asked if you want to return the wallet. If you return it, you'll get a reward.
House immediately to the left of the area entrance
| Reward | Flower Tab |
|---|
There's a Shymore inside the house. There's one on the 1st floor and one on the 2nd floor, so defeat both to get a reward.
Rescue Toad in Mushroom Kingdom
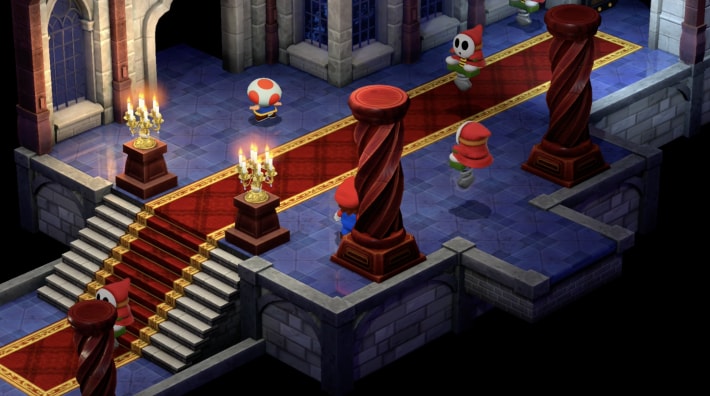
As soon as you enter, a Toad and a Shymore will cross your path, so rescue them. After that, defeat the Shymore in front of the stairs in the left room and the Shymore in front of the door after climbing the stairs, and you'll be able to heal and save in Peach's room.
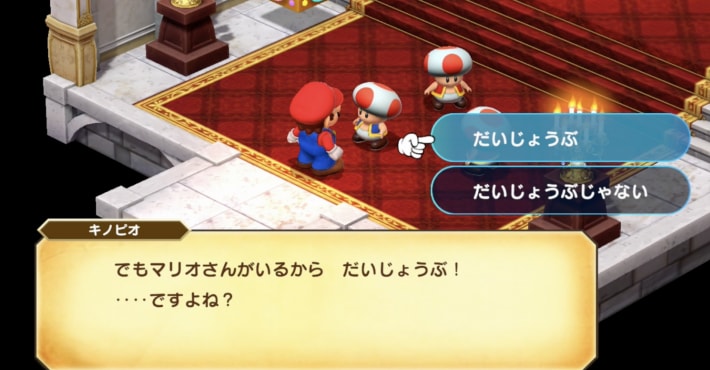
Choose "It's okay" for the choice with Toad
| Reward | Flower Tab |
|---|
When you enter Peach's room, Toad will talk to you and a choice will appear. If you choose "It's okay", you'll get a Flower Tab. If you choose "It's not okay", you won't get anything, so be careful.
Talk to the guard in the upper right room
In the room in the upper right, there's a Toad in the corner, so talk to him. You'll get an "Wake Up Pin" that prevents Mute and Sleep.
Collect items in the vault
In the vault in the lower right, the treasure chests you opened on your first visit have reappeared. You can get a Mushroom, Flower, and 10 coins, so open them.
Proceed further to fight Claymorton
- Thunderbolt is effective
- Have Mario focus on healing
Claymorton appears with four Shymores, and the Shymores will reappear periodically even if defeated. Mallow's Thunderbolt is effective, so have Mario focus on normal attacks + item healing.
Get the 1st Star Piece
Defeating Claymorton will reward you with the 1st Star Piece. After that, talk to the Chancellor cowering in the back of the room.
Stop by the item shop before heading to the next area
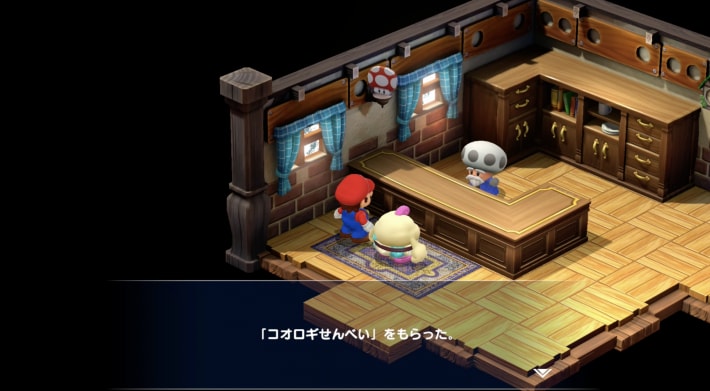
After defeating Claymorton, go to the item shop to get a "Cricket Pie". You can exchange it for Mallow's weapon in the next area, so be sure to stop by the item shop before proceeding to Kero Sewers.
Walkthrough Chart up to the 2nd Star Piece
Until Kero Sewers is Cleared
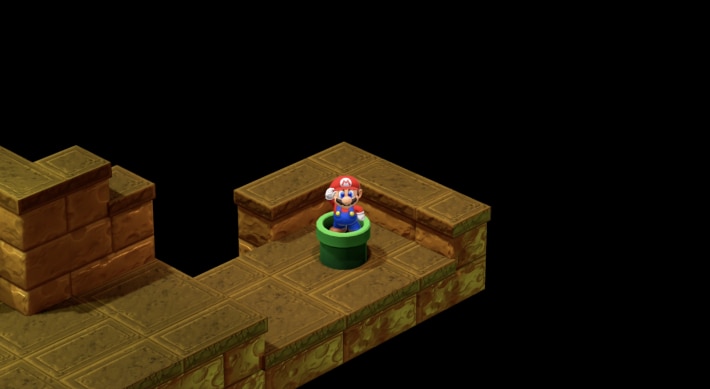
Enter the pipe
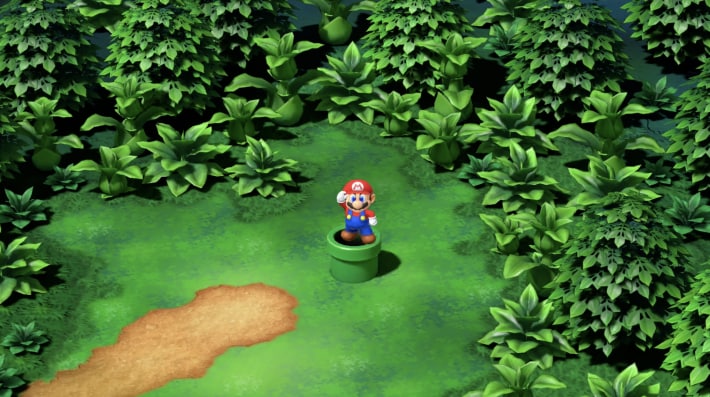
When you enter the area, there's a pipe, and Mallow will go in first. Get on top of the pipe and press the A button to enter the pipe.
Proceed to the right
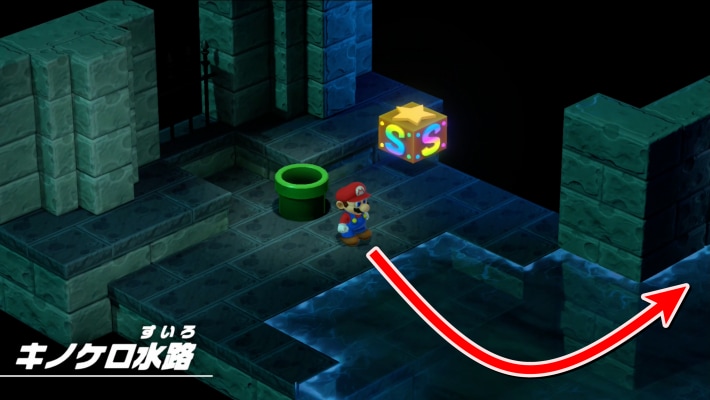
After entering the pipe, proceed through the waterway and enter the pipe on the right.
Enter the pipe immediately below

Enter the pipe immediately below to proceed to the next area.
Enter the pipe on the right
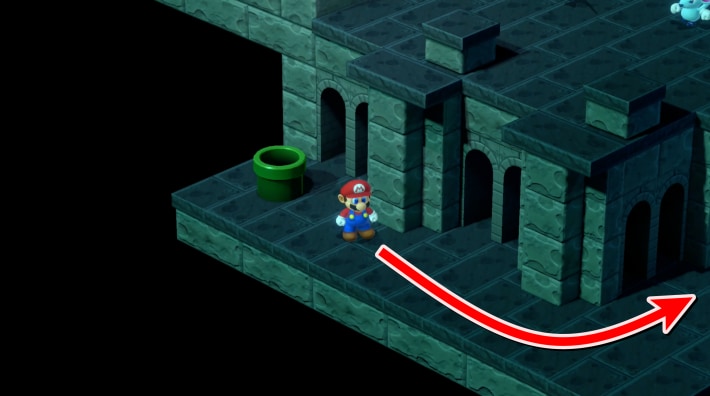
Proceed to the right and enter the pipe.
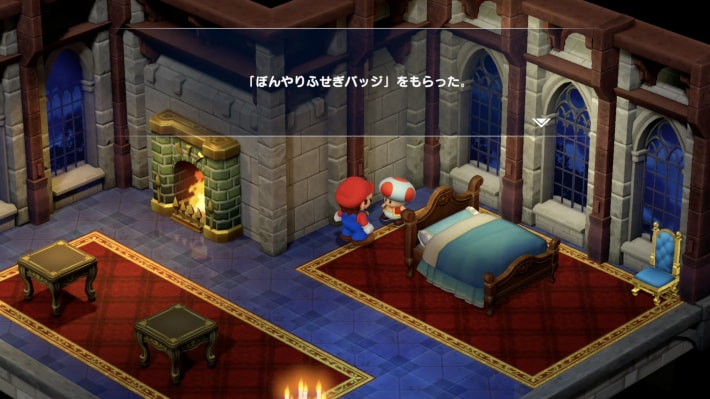
Get a badge effective against the boss
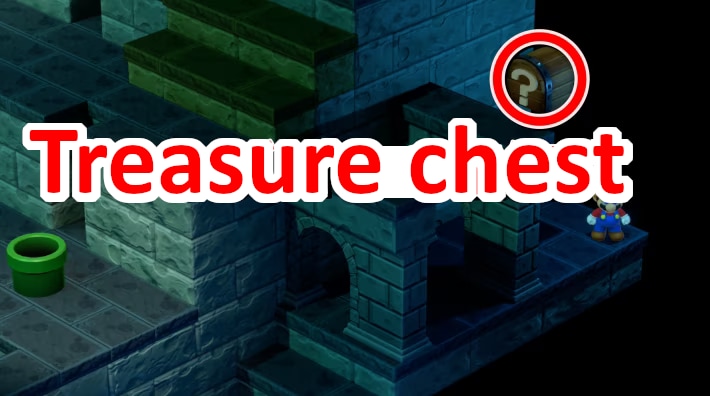
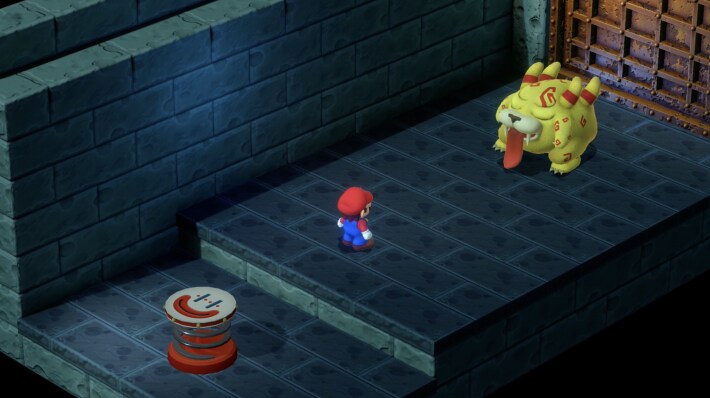
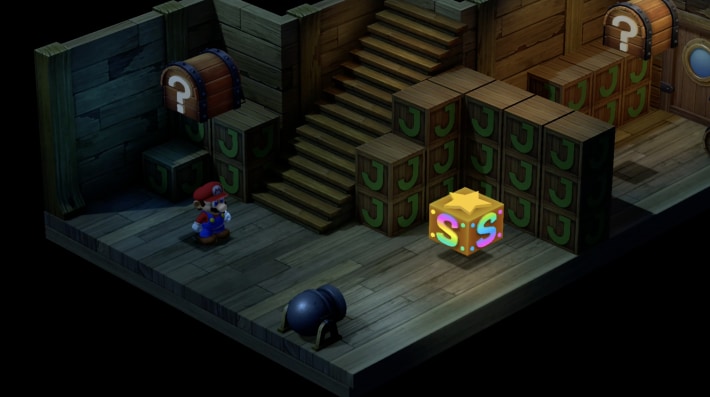
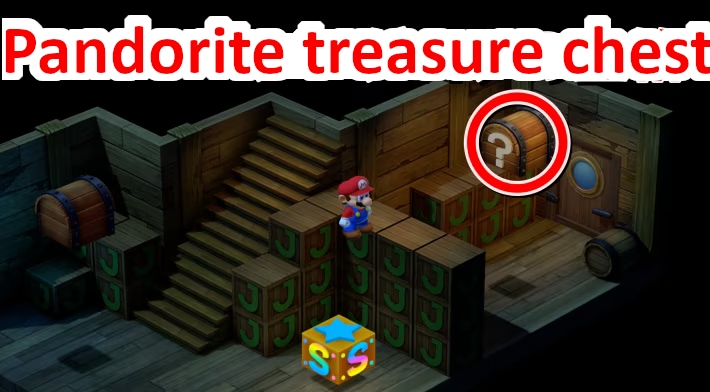
After exiting the pipe, head to the treasure chest in the back right. You'll fight a tough enemy here, so restore HP and FP before opening the treasure chest. Open the treasure chest and defeat Pandorite to get a Flower Set and a Trueform Pin, which is effective against Belome.
- PandoriteKero Sewers30020WeaknessEffectiveImmune
Pandorite is weak to Jump
Pandorite has very high HP and its attacks are powerful. It's weak to Jump, and immune to Thunder, so Mallow's Thunderbolt won't work. It's recommended to have Mario as the attacker and Mallow as the healer.
Postpone if HP is low
It's dangerous to fight with low HP and FP, so if you don't have a way to heal, proceed further, reach a save point, and then come back.
Go back up and enter the pipe on the top floor
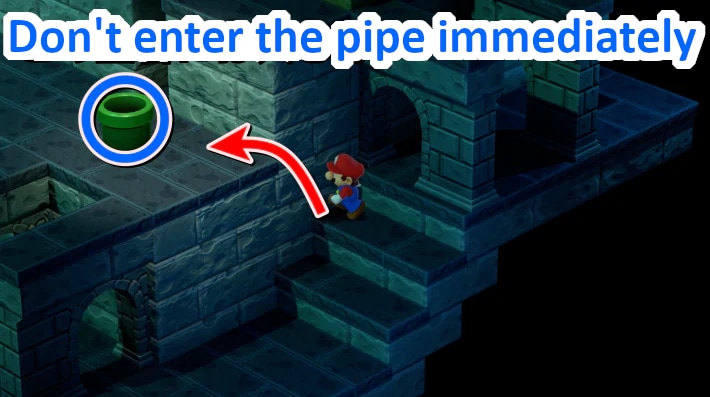
Jump from the stairs to go back up, get the Flower from the treasure chest in the back left, and enter the pipe on the top floor. Rat Funks will appear from the indentations along the way, so be careful. Don't enter the pipe immediately after returning to the top.
Use the Star to defeat enemies
The treasure chest immediately after exiting the pipe contains a Star. Defeat the surrounding enemies to level up. Boos are at the edge of the screen and hard to defeat, so it's recommended to lure them near the center before getting the Star.
Enter the pipe in the back left
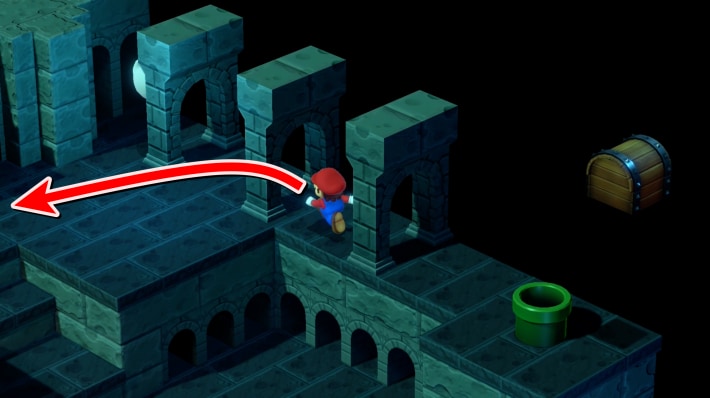
After using the Star, enter the pipe in the back left.
Proceed through the narrow passage
After proceeding to the next area, go through the narrow passage where Rat Funks are. Three Rat Funks will appear, and if you want to avoid battle, you can jump over them.
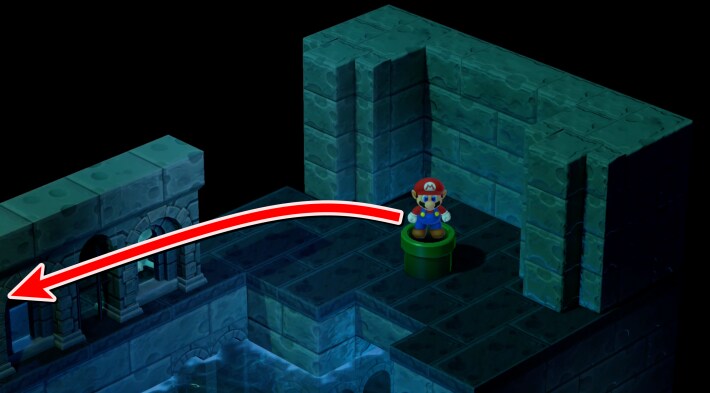
Enter the pipe below
In the next area, jump and enter the pipe below. If you're not good at jumping, climb the left wall to reach the pipe below.
Press the switch
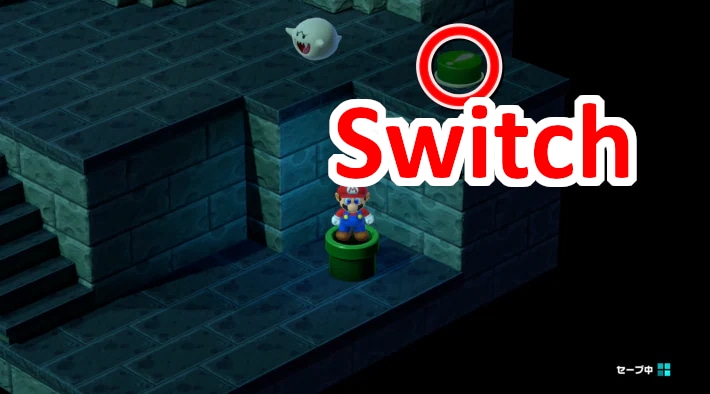
Press the switch on the stairs to drain the water. Then enter the pipe that appears and go back.
Go down the ledge and enter the pipe at the far end
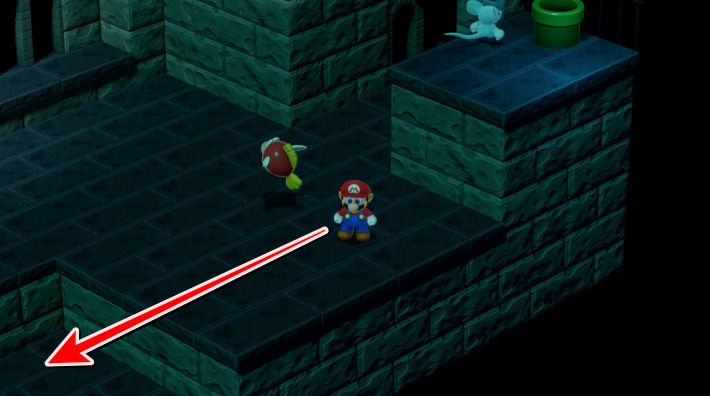
When you return to the previous area, the water will be drained, so go down the ledge and enter the pipe at the far end.
Heal and save
The treasure chest contains a mushroom that fully restores HP and FP, and there's a save point nearby. There's a boss battle immediately after this, so heal and save.
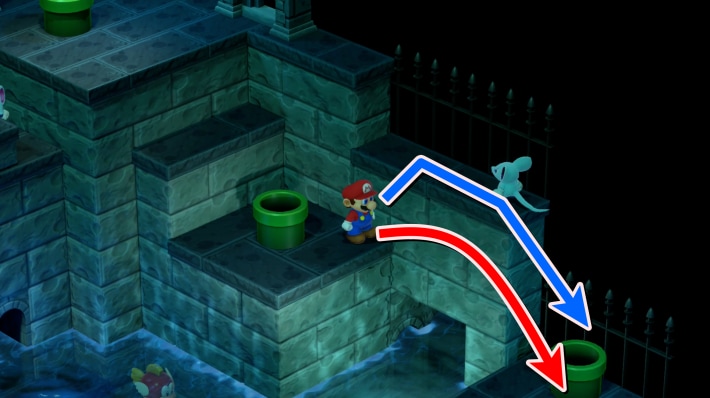
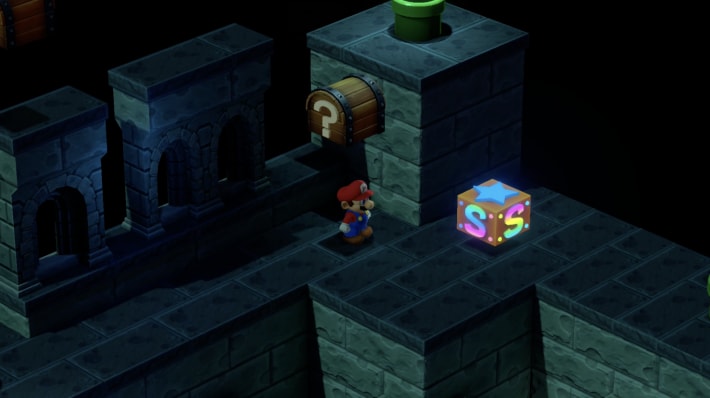
You can get on the upper ledge by riding a Boo
You can get on the upper ledge by bumping into a Boo, then fleeing from battle and riding the flashing Boo. The treasure chest on the left contains a Flower instead of the original "Cricket Jam", but the chest will reappear when you come from Land's End, so it's okay to open it here.
You don't need to enter the right pipe
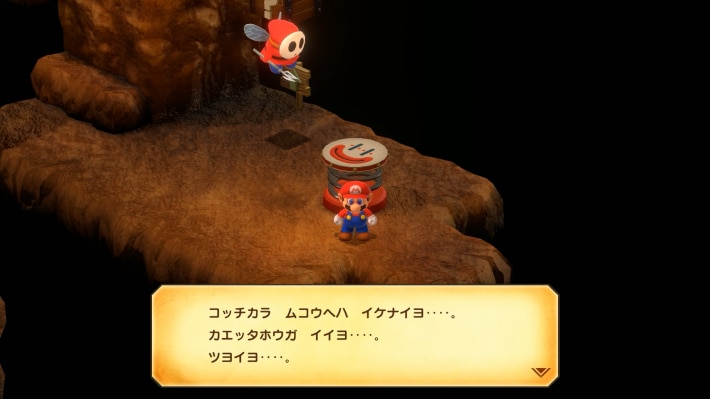
The right pipe leads to Land's End, but you can't proceed further from this side. The enemies are also very strong and it's almost impossible to win at this point, so don't enter and proceed.
Enter the right pipe and approach the enemy
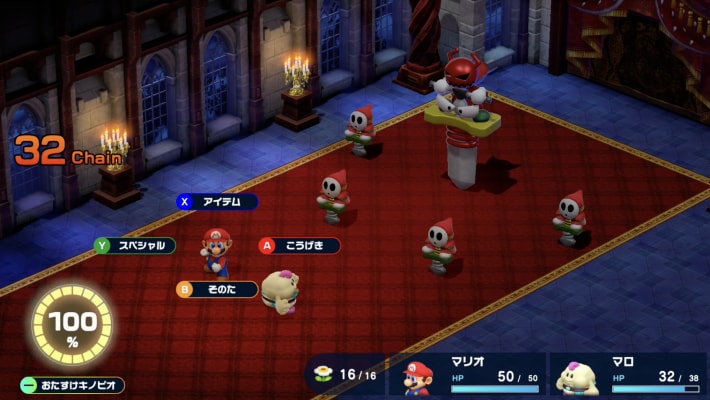
Enter the pipe and approach the enemy in front of you to trigger a boss battle. They use status ailments, so equip Mario with the "Trueform Pin" you got along the way, and Mallow with the "Wake Up Pin" you got in Mushroom Kingdom.
Belome Battle
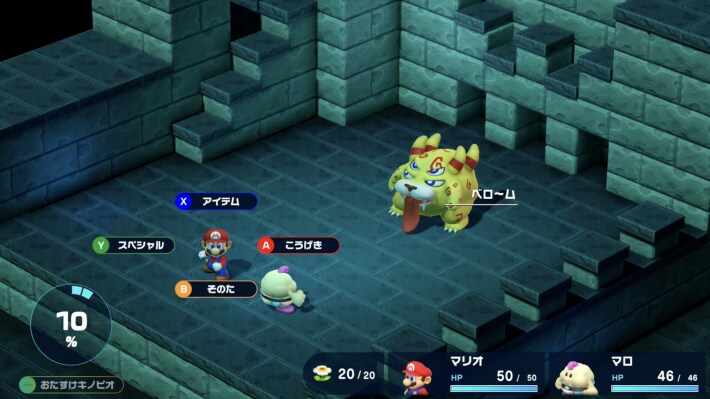
- Prepare for status ailments with badges
- Be careful about healing when Mallow is eaten
- Thunderbolt is effective
It's weak to Thunder, so Mallow's Thunderbolt is effective. After a certain number of turns, Mallow will be swallowed, and you'll have to fight with Mario alone for a while, so be careful.
Defeating the boss triggers a mini-game
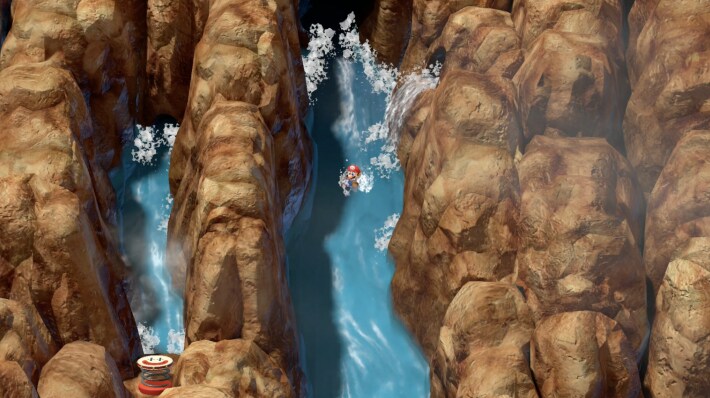
Defeating the boss will immediately trigger the "Midas River" mini-game, and you'll move to the next area, "Midas River".
Until Tadpole Pond is Cleared
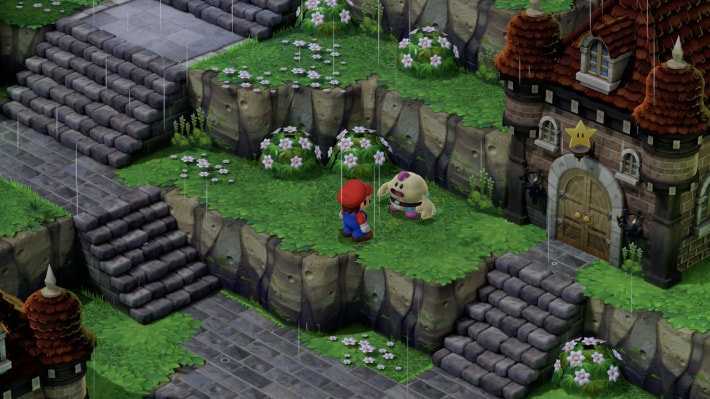
Step on the stone in front of the lake and talk to the tadpole
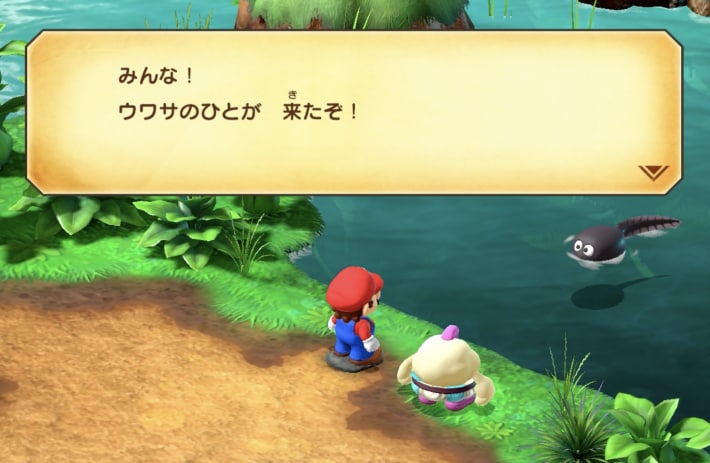
Enter the area and proceed straight, and you'll find a stone embedded in front of the lake. Stand on it to talk to a tadpole, and if you show them your jump, you'll talk to Frogfucius.
Cross over the tadpoles

Tadpoles will appear in the lake, so cross over them. After talking to Frogfucius at the far end, you'll be able to proceed to the next destination, Rose Town.
Get Mallow's weapon with Cricket Pie
If you got the "Cricket Pie" from the item shop in Mushroom Kingdom, talk to Frogfucius to get Mallow's weapon, the "Froggie Stick". Be sure to get it to strengthen Mallow.
You can play Melody Bay on the right side of the area

Proceed to the right side of the area to play the mini-game "Tadpole Compose (Melody Bay)". Clearing it will reward you with a card that increases the items you can buy at the drink shop.
You can ask the tadpole what kind of song to play
You can ask the tadpole on the way to Toadofsky's location what kind of song Toadofsky wants.
Exit the area and head to Rose Way

Return to the world map from the entrance of Tadpole Pond and head to the next area, "Rose Way".
Until Rose Way is Cleared
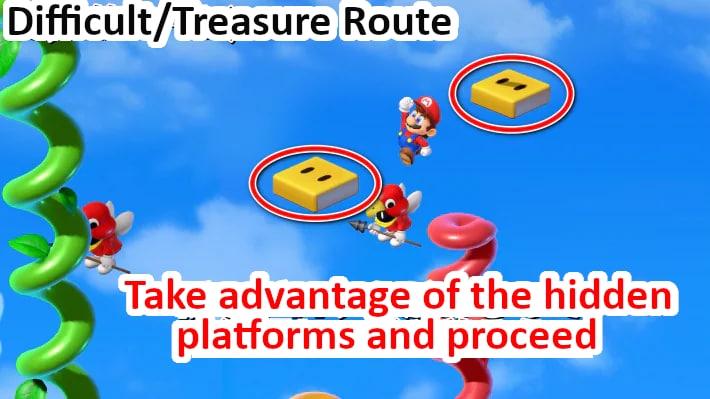
Area where you proceed by riding yellow platforms

Most of Rose Way is water, and you'll move by riding the yellow platforms flying in the sky. Also, since there's no boss in this area, you can fight without worrying about saving FP.
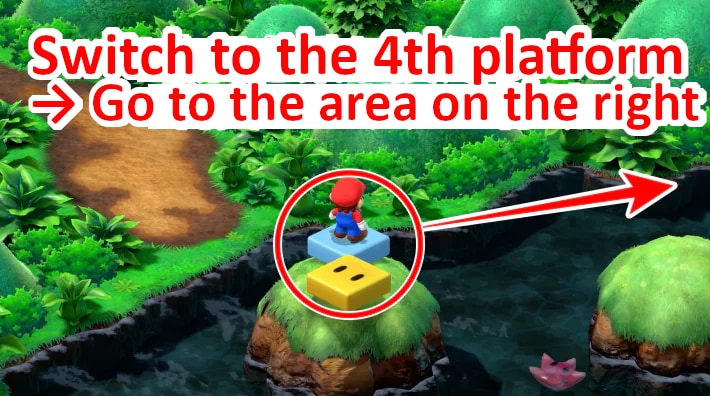
Proceed along the path until the 3rd platform
Proceed along the path until the 3rd platform. At the transfer point from the 3rd to the 4th platform, don't transfer yet, but proceed to the lower left to collect a Flower. After that, move to the 4th platform.
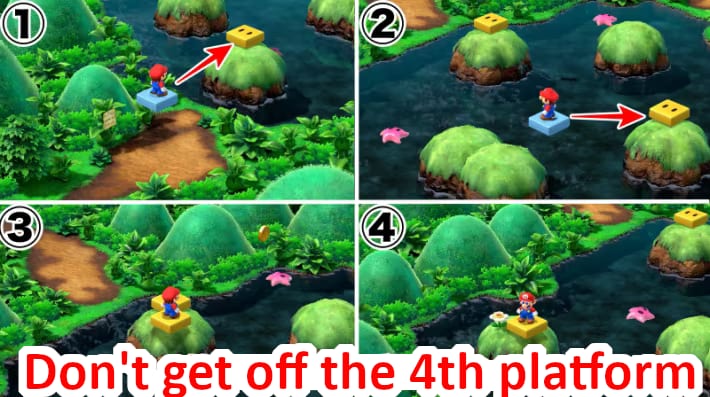
Get off immediately after riding the 4th platform
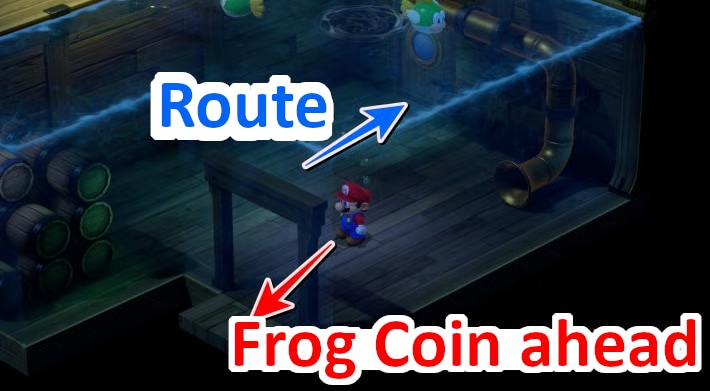
After riding the 4th platform, get off onto the ground immediately in front of you. If you proceed further, there's a platform that swings like a swing, so jump around the midpoint to get on top. The treasure chest at the end contains 1 Frog Coin.
Go back and ride the 4th platform again
After returning to the original area, ride the 4th platform to move. After moving twice, you'll reach the entrance to another area, so get off and proceed.
Proceed along the path
There are no particular points to watch out for in the next area. Several enemies will appear, so defeat them or avoid them while proceeding to the next area.
Move to the right platform
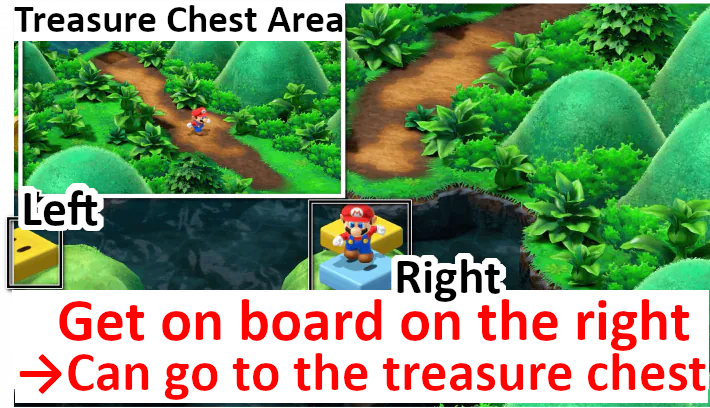
Ride the platform immediately after moving to the next area, and you can transfer to the left and right platforms. Riding the left one will take you back to the previous route, so ride the right one to proceed to the next area.
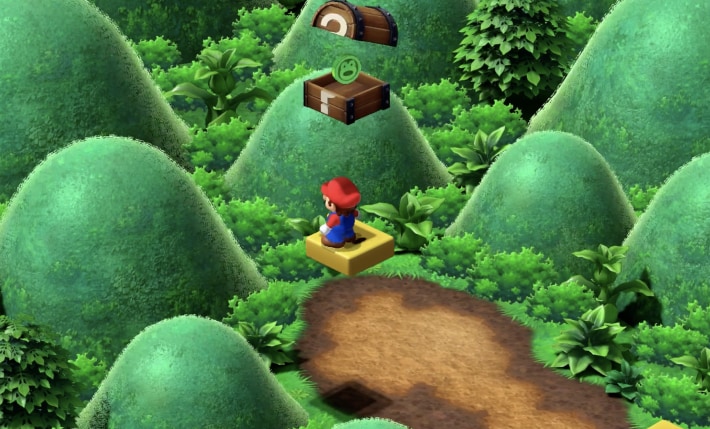
Get coins in the treasure chest area
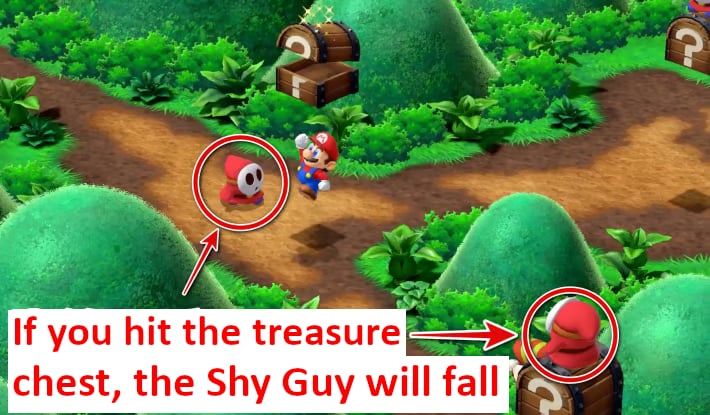
This is an area with 5 treasure chests with Shy Guys on top. The one in the middle of the top row contains an instant full recovery mushroom, and the others contain 5 coins each. You can buy new equipment in the next town, so collect all the coins.
Watch Bowser's event and head to Rose Town

Proceed a little further in the next area to trigger Bowser's event. Beyond that is the exit of the area, and you'll be able to proceed to Rose Town.
Until Rose Town is Cleared
Enter the inn and watch the event
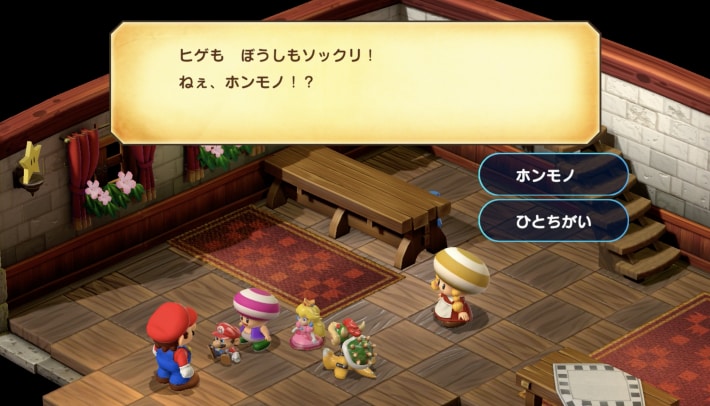
Enter the town and go to the "Inn" on the left. An event will occur when you enter, and if you play with Gaz's dolls, you'll stay overnight, and Geno will head to the Forest Maze.
Re-enter the inn and stay to get an item
Go outside once and re-enter to stay. This is an event that only occurs at this timing, and after staying, you can get a "Flower Tab" from Toad.
Buy equipment at the item shop
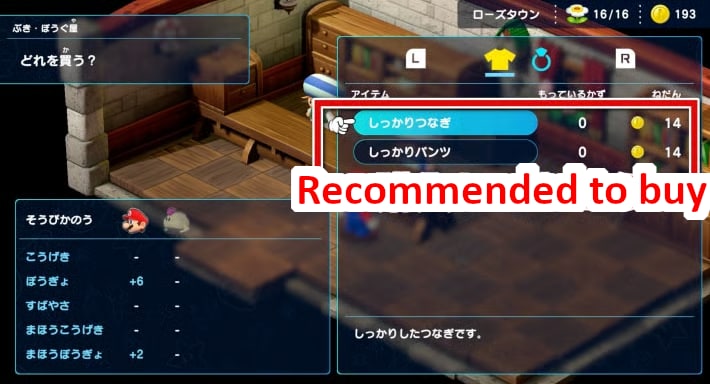
New equipment is sold at the item shop, so buy armor for Mario and Mallow.
Status ailment prevention accessories are also recommended
Enemies that use troublesome status ailments will gradually increase, so if you have enough coins, purchase accessories that protect against status ailments other than poison.
Hear a hint about a hidden room in the house on the cliff
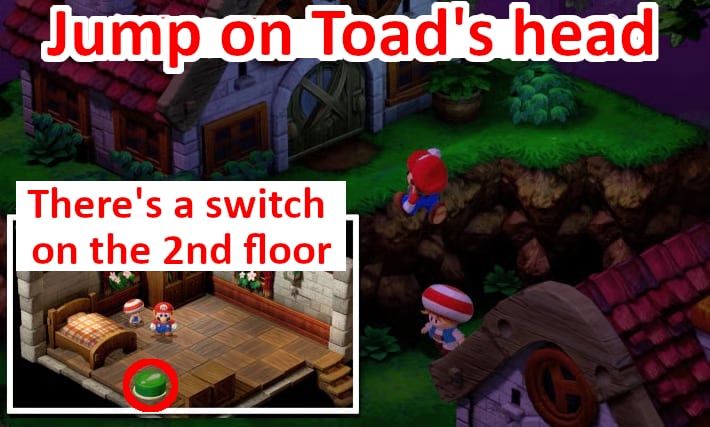
You can enter the house on the cliff by using the nearby Toad's head as a foothold. Press the switch on the 2nd floor to rescue the owner, and you'll get a hint about a hidden room in the Forest Maze.
- Where there are 4 exits
- Judge by the direction Mario is facing
- Proceed in the order of left → left → straight → right
The contents of the treasure chest change depending on when you take it
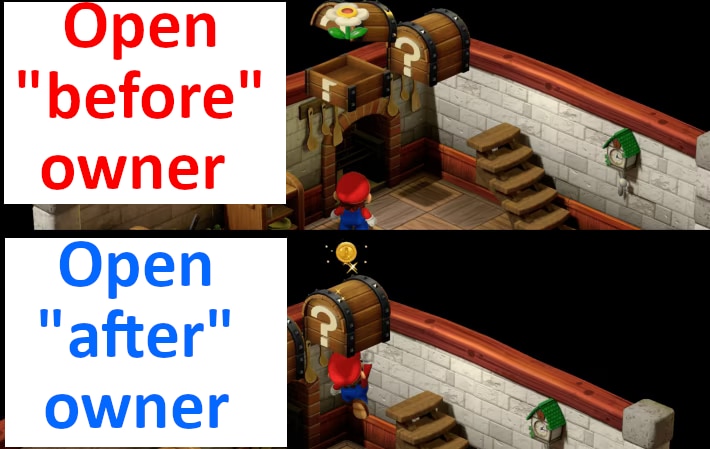
The contents of some treasure chests in the house and the Forest Maze change depending on whether you take them before or after the owner enters. You can pick up Mushrooms in the Forest Maze, so it's recommended to open it later.
| Before the owner enters... | House Treasure Chest | Forest Hidden Room |
|---|---|---|
| Open first | Flower x2 | Mushroom x3 Flower x1 Frog Coin x1 |
| Open later | Coins x13 | Mushroom x1 Flower x3 Frog Coin x1 |
Leave town and enter the Forest Maze
After the inn event, follow Geno into the "Forest Maze".
Until Forest Maze is Cleared
Proceed along the path
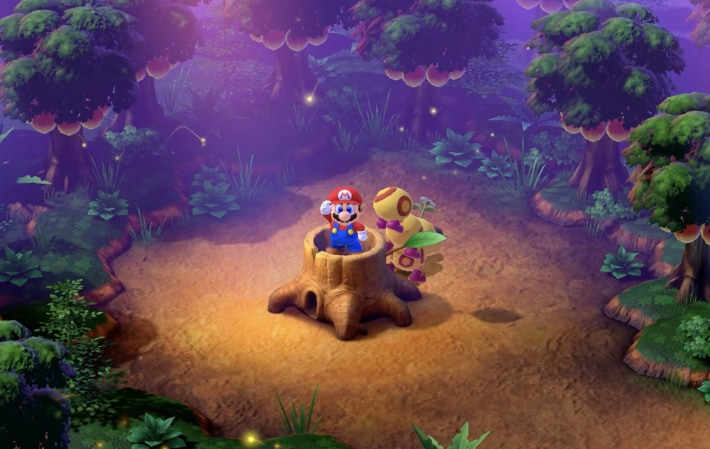
After entering the Forest Maze, proceed along the path and enter the stump at the very end of the map with multiple stumps.
You can enter stumps with the "A button"

Like pipes, you can enter stumps by pressing the A button.
Step on the sleeping Wiggler underground
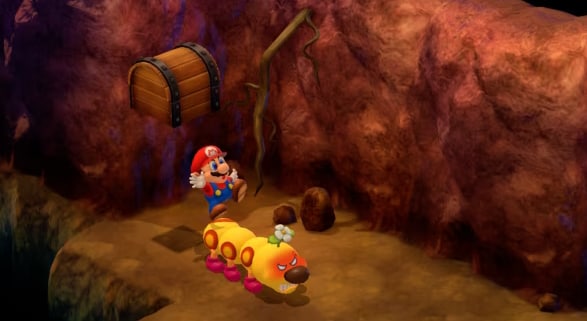
Step on the sleeping Wiggler in the underground of the stump, and a new path will appear on the surface. Go back up and proceed.
At the crossroads with 4 exits, follow Geno
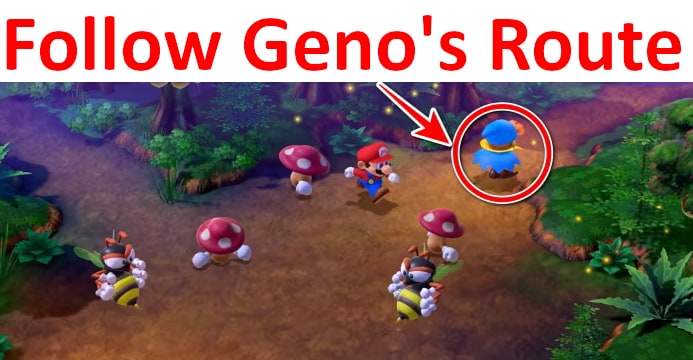
In the forest with 4 exits, if you go in the wrong direction, you'll be sent back to the original place. The path Geno took is the correct route, so follow Geno.
Crossroads path and map
- At the crossroads, go southeast
- Proceed northeast
- Proceed northeast
- Proceed southeast
- Proceed northeast
- In the last area, go northwest
Battle with Bowyer

- Be careful of command prohibition
- Take measures so Mallow doesn't fall asleep
- Keep HP high when A is prohibited
- Super Jump and Geno Beam are mainstays
- Be careful with Geno's HP management
- After reducing a certain amount of HP, finish with a "Triple Move"
When you reach the deepest part, a battle with the boss "Bowyer" will occur. Geno will join, and you'll fight with three people. Bowyer uses sleep attacks and powerful thunder magic, so prepare sleep countermeasures and healing methods before challenging him.
There's a tutorial for Triple Moves

After dealing a certain amount of damage to Bowyer, an event will occur. All commands will be sealed, but you'll get an explanation on how to use Triple Moves and be able to deliver the finishing blow.
After Geno joins, return to town and report
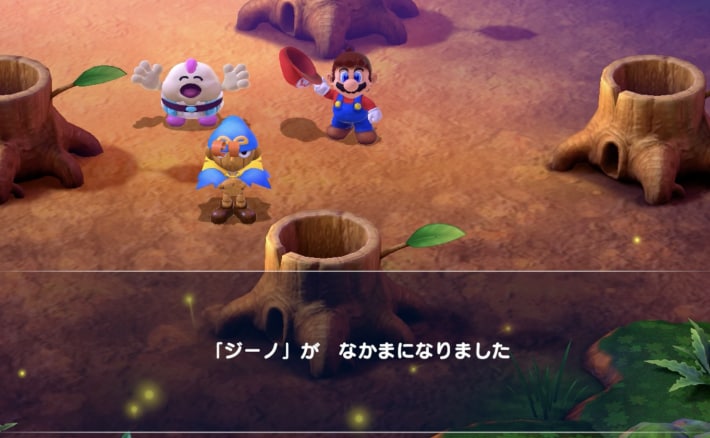
After the battle, "Geno" will officially join your party. Return to town and report to Gaz at the inn.
Head to the next area
The next area is Pipe Vault. It's not mandatory to go there, but it's necessary to clear it to go to Yo'ster Isle, so be sure to stop by.
Walkthrough Chart up to the 3rd Star Piece
Until Pipe Vault is Cleared
Detour Area
Pipe Vault is a detour area and not mandatory to clear for story progression. However, you can get Flowers and Frog Coins, and it's not that difficult, so it's recommended to clear it anyway.
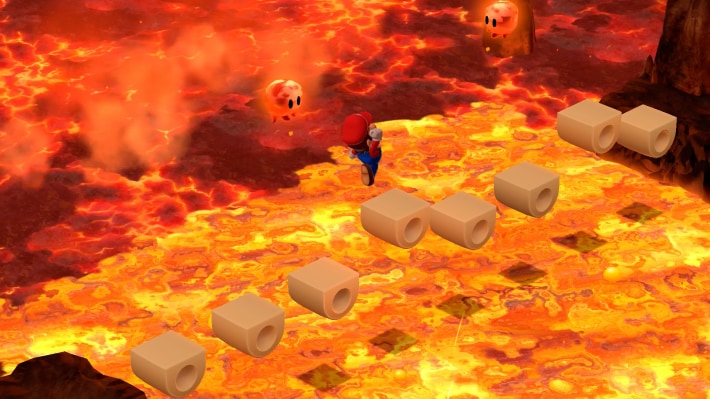
Clear the lava zone with dash jumps
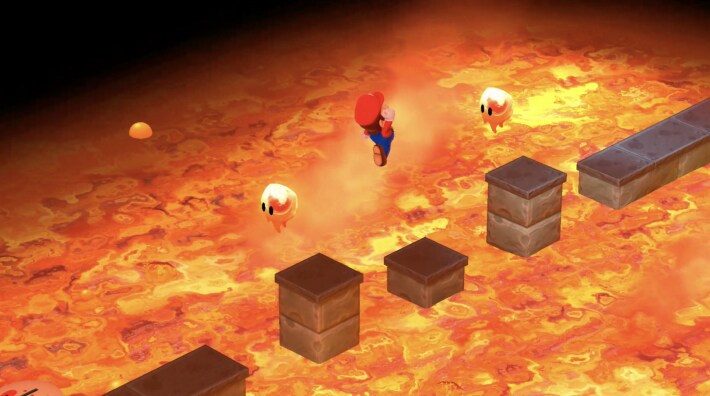
In the lava zone, if you fall, you'll be sent back to the starting point. Jump onto the platforms at the right time after the Podoboos fall.
Run past Thwomps after they land
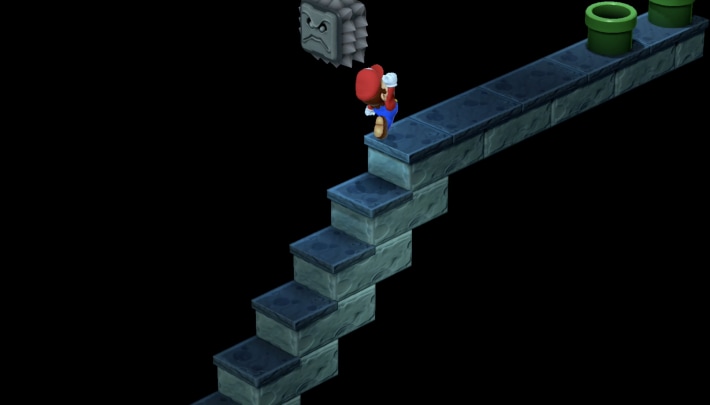
If you get crushed by the Thwomps on the stairs or touch the vibration when they land, you'll be sent back to the bottom. Run up immediately after it lands.
The furthest of the 6 pipes is the progression route

In the passage with 6 pipes, there are 3 pipes you can enter, but the progression route is only the furthest pipe.
Get items in the 2nd pipe
Enter the 2nd pipe to find a hidden platform in front of the entrance, and 2 hidden treasure chests and 1 normal treasure chest in the upper passage. The Frog Coin on the ground can be obtained by pressing the bottom-left key to crouch just before hitting the wall while dashing.
You can play a mini-game in the 5th pipe
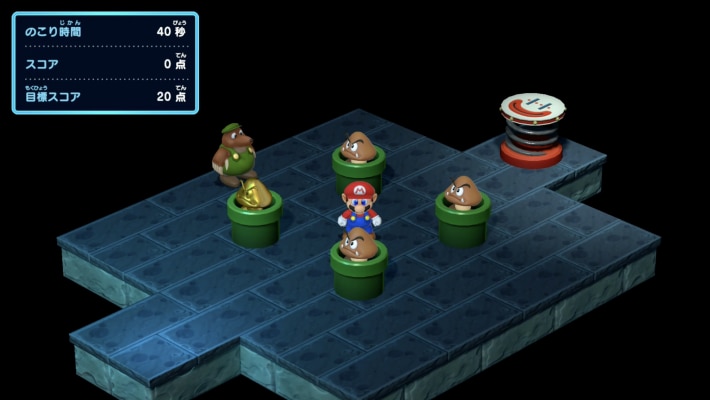
Enter the 5th pipe to play the Goomba Thump mini-game for 10 coins. Get 20 points on your first try to receive a Flower Tab, and thereafter, you'll get a reward for every 2 points you improve.
Proceed while avoiding Piranha Plants
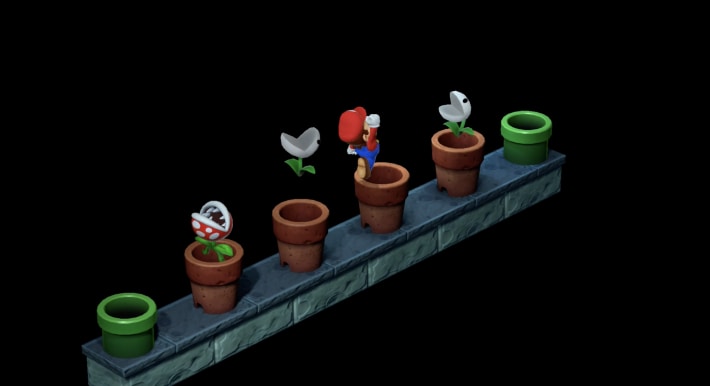
Touching Piranha Plants will steal 2 coins. Be careful not to touch them and jump over them.
Enter the pipe at the far end
Collect the treasure from the yellow block and enter the pipe at the far end. For the second treasure chest, you need to jump when the block stops, otherwise you'll hit the Piranha Plant below. Entering the pipe will allow you to proceed to Yo'ster Isle.
Until Yo'ster Isle is Cleared
First, ride Yoshi
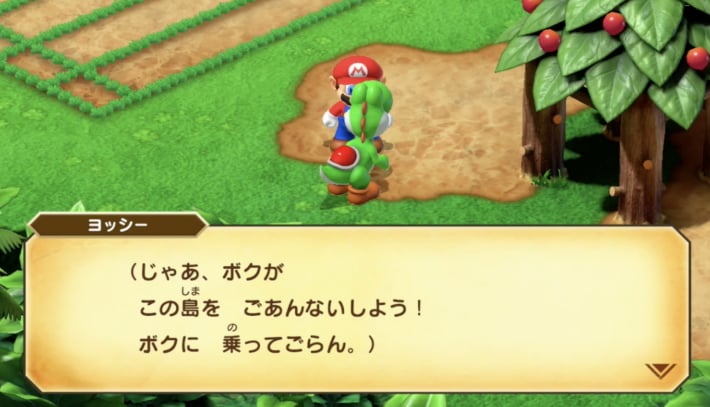
Mario can't talk to Yoshis as he is, but he can talk to the Yoshi at the starting line of the race track. First, talk to this Yoshi, choose "I want to ride", and then jump onto its back.
Get cookies from Red Yoshi
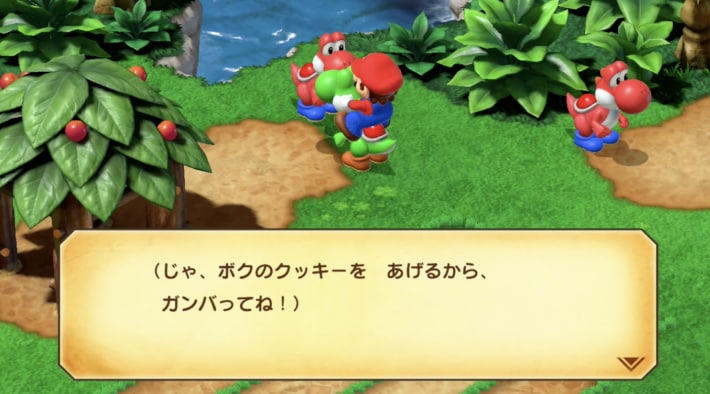
Once you're riding Yoshi, you can talk to other Yoshis. There's a Red Yoshi at the finish line of the race track, so talk to it to get cookies.
Win the race against the Blue Yoshi with sunglasses
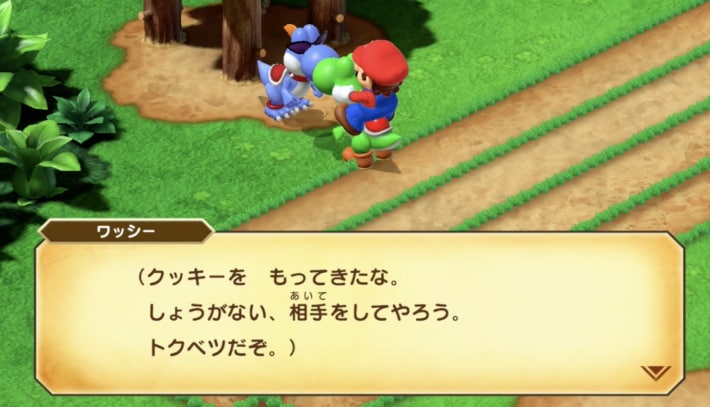
Talk to the Blue Yoshi wearing sunglasses to challenge it to a race. Winning will unlock the "Yoshi Race" mini-game.
If you lose, talk to Red Yoshi again
If you lose the race against Blue Yoshi, talk to Red Yoshi again. You can get more cookies, allowing you to race Blue Yoshi again.
Talk to Yoshi to get 3 cookies
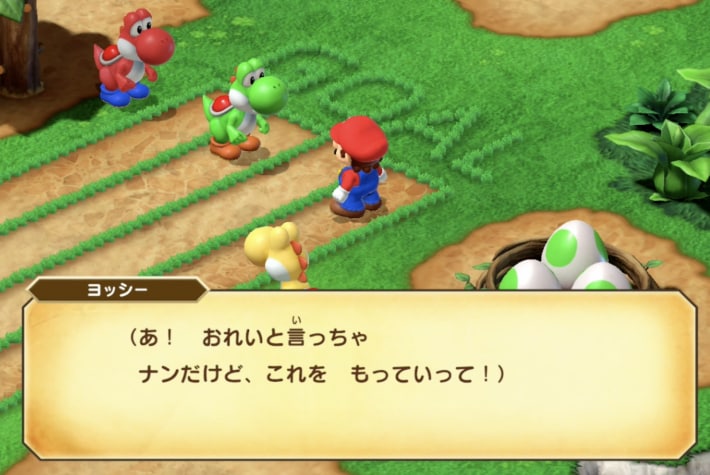
After winning the race against Blue Yoshi, talk to Yoshi to get 3 "Yoshi Cookies".
3 ways to use Yoshi Cookies
- Challenge Yoshi Race
- Give to Baby Yoshis
- Use as a battle item
The main way to increase Yoshi Cookies is to bet them and challenge the race. Increase your cookies and give them to Baby Yoshis to receive rewards. You can also use them as battle items, and if successful, you can turn enemies into items.
Baby Yoshis appear after Peach joins
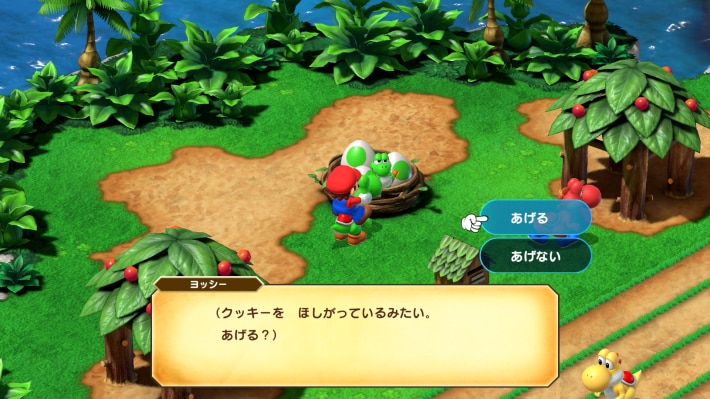
If you come to Yo'ster Isle at the earliest possible time, Baby Yoshis won't be there. They will appear after Princess Peach joins your party, so give them cookies later.
Until Moleville is Cleared
Gear up and save
When you enter Moleville, there's an item shop on the left and an inn on the right. Buy equipment and items at the item shop. You can stay at the inn for 10 coins, and there's also a save point, so save your game.
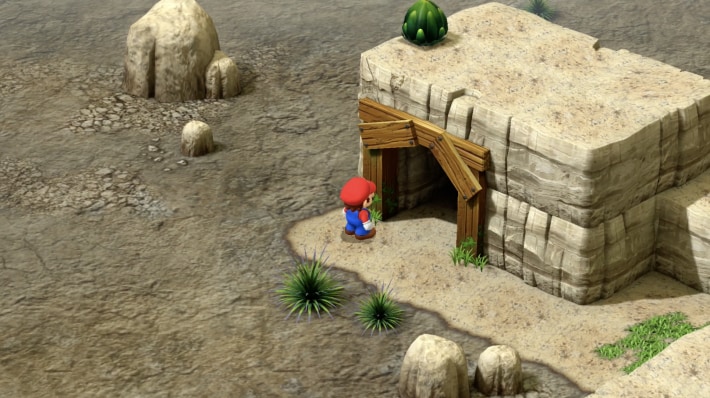
Watch the event and enter the mountain
Proceed to the upper part of Moleville to trigger Bowser's event. After that, a mole will be in front of the mountain entrance, so talk to it and enter the mountain.
Ride on the moles to proceed further
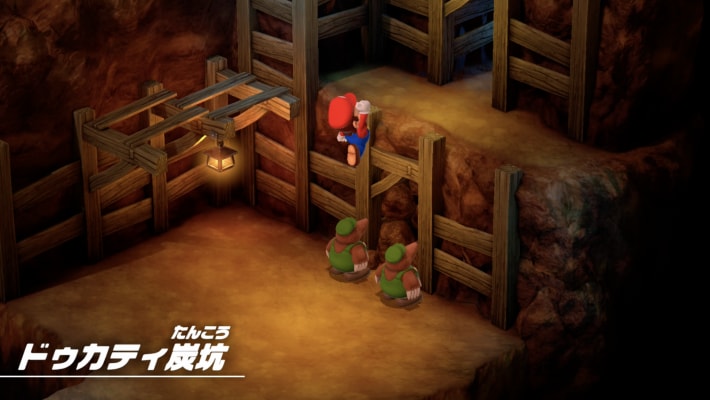
Enter the mountain and you'll talk to two moles. Answer "Yes" to their question for help. You'll then be able to climb on the moles, so proceed further. Continue along the path until you reach a room with a jump pad.
Event occurs when you get on the jump pad
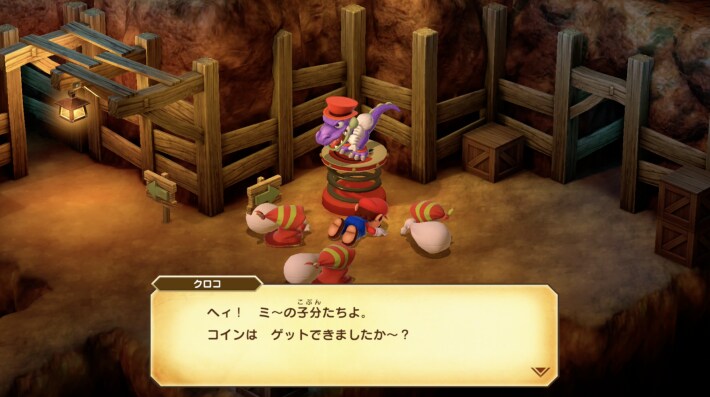
When you reach the room with a jump pad and a fork in the road, get on the jump pad. An event where Croco steals your coins will occur, so chase Croco and proceed through the right passage.
At the fork, go down
Proceed along the path, and an event where Croco breaks through a wall will occur twice. You'll then arrive at a room where you can go left or down, so take the bottom path.
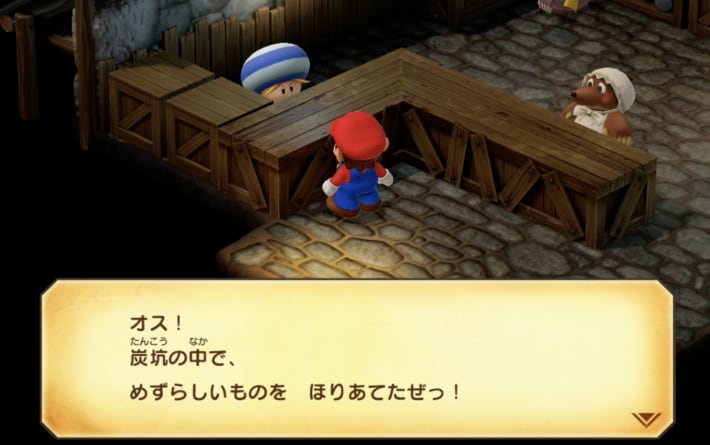
Defeat the 3 hidden Gassox
From here, 3 hidden Gassox will appear in the area. Find them and win the battle to get a Flower Tab. If you defeat Croco, the Gassox will also disappear, so be sure to find the Gassox first.
1st: Area to the left of the jump pad
2nd: Behind the jump pad
3rd: Area to the right of the jump pad
Catch Croco and fight
Croco will appear if you wait at the jump pad. Touching him will trigger a battle, so prepare before challenging him.
Croco Battle Strategy
- He will disable your items
- Fight while reserving FP for healing
- Focus on normal attacks
Shortly after the battle with Croco begins, he will disable your items. Mallow's special moves will be your means of healing, so fight while conserving FP from the beginning.
Take the left path at fork ⑤
Defeating Croco will reward you with a "Micro Bomb", so return to fork ⑤ in the chart and take the left path. Proceed further to find a mole, and talking to it will allow them to break the wall so you can proceed.
Take the bottom path to get a Frog Coin
In the next area, there are two paths, top and bottom, but first take the bottom path. Go to the end, and a minecart will crash into you, sending you back to the fork and rewarding you with a Frog Coin. After that, take the top path.
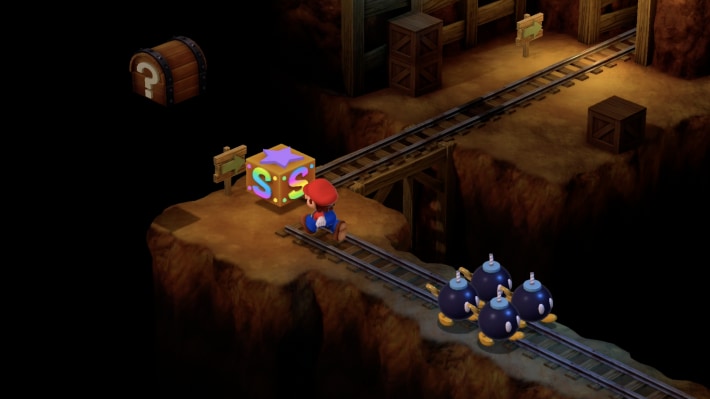
The treasure chest in the passage is a Star
The treasure chest in the middle of the passage contains a Star, so avoid the Bob-ombs along the way by jumping and open the treasure chest. From here, it's a straight path for a while, so proceed as far as you can while you have the Star and defeat enemies.
When you see a save point, a boss battle is near
Once you reach the save point, the next area is a boss battle. The treasure chest next to it is a full recovery mushroom, so heal up and then save. You can also avoid the 4 Bob-ombs in front by jumping.
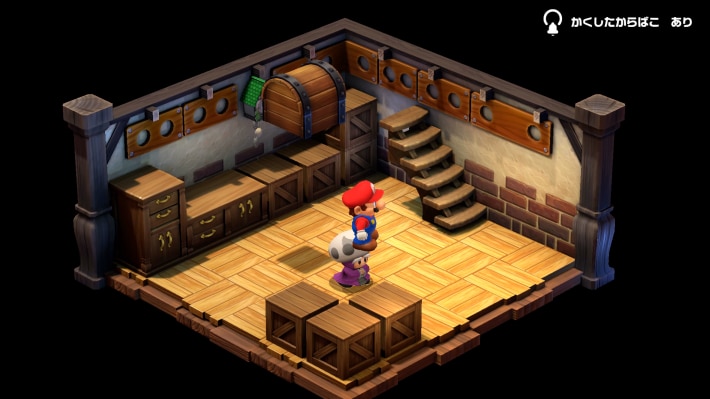
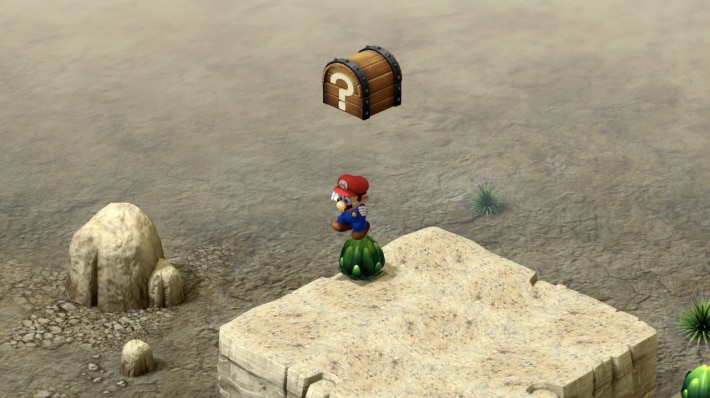
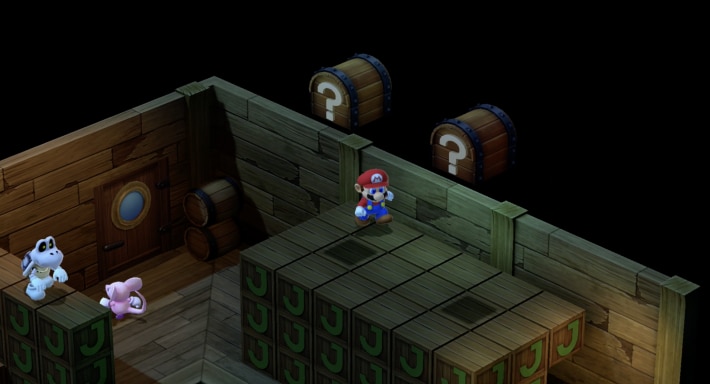
Jump from the wooden box for the high treasure chest
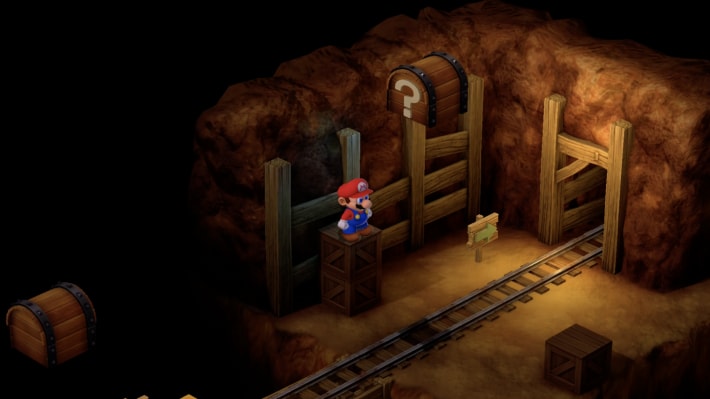
You can't reach the treasure chest floating high up by jumping from the ground. Get on the two-tiered wooden box and jump to reach it. Inside is a Flower that increases your FP limit by 1.
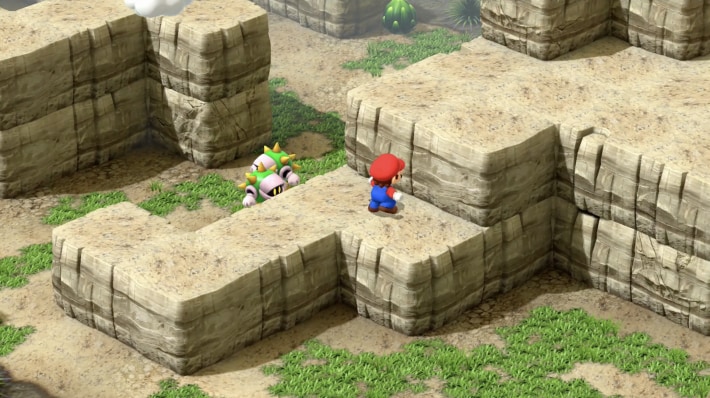
Approach Punchinello from the side and hit him from behind
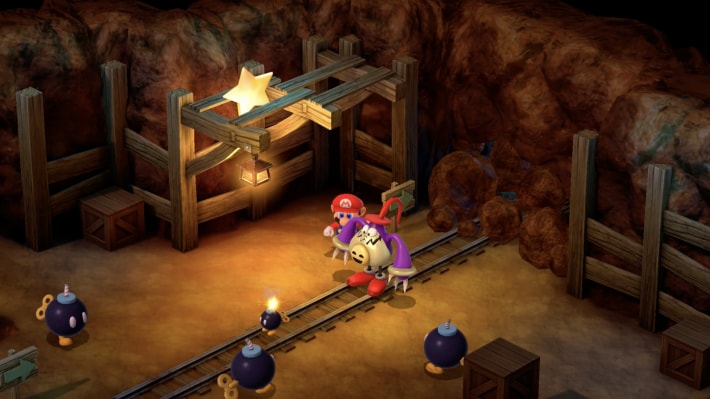
If you approach Punchinello from the front, you'll be blown away. Approach from the left side and hit him from behind to trigger the battle.
Punchinello Battle Strategy
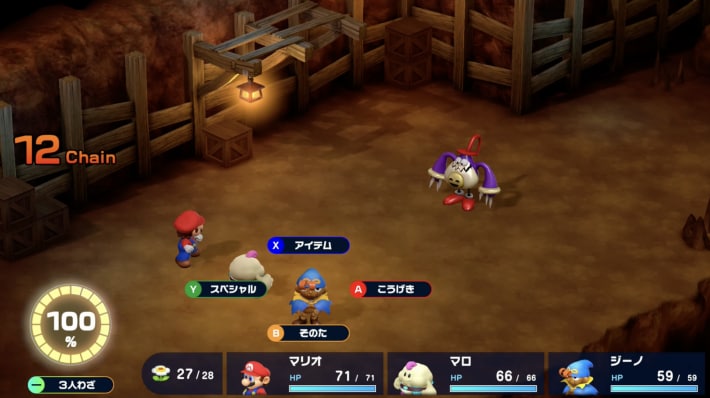
- Prepare for the Fear status
- Ignore the Bob-ombs and focus on Punchinello
- Guard the self-destruct right when it explodes
- Don't use Jump
Punchinello summons Bob-ombs, but if you keep defeating them, you won't be able to attack the boss much. Ignore the Bob-ombs and focus your attacks on the boss, and guard against the Bob-ombs' self-destruct. Defeating Punchinello will reward you with the 3rd Star Piece.
Mini-game "Mine Cart" in Moleville Mountain
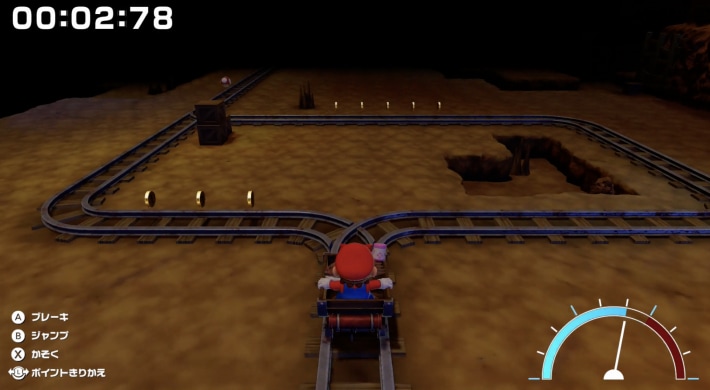
After defeating Punchinello and proceeding further, the mini-game "Mine Cart" will begin. When you finish running, you'll return to Moleville, and Moleville will be cleared.
Various shops open
After clearing the mountain event, various shops will open in Moleville. An item buyback shop, a bargain shop, and item trading events will become available, so explore before proceeding to Booster Pass.
Walkthrough Chart up to the 4th Star Piece
Until Booster Pass is Cleared
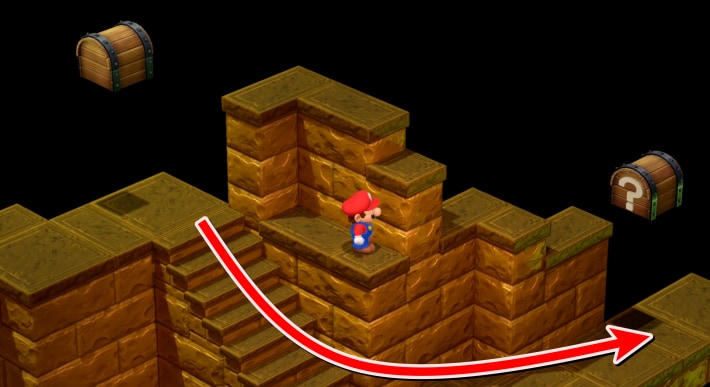
Climb the ledge immediately to the right after entering
Immediately after entering Booster Pass, climb the ledge on the right. There are enemies on the left side, so there's no particular need to go there.
Hidden Treasure Chest 1.
Enter Booster Pass and proceed to the left to find a hidden treasure chest.
Hidden Treasure Chest 2.
There's a hidden treasure chest just before proceeding to the next area, so open it while you're there.
There's a Frog Coin
Examine the bud near the entrance to get a Frog Coin.
Press the switch in the indentation
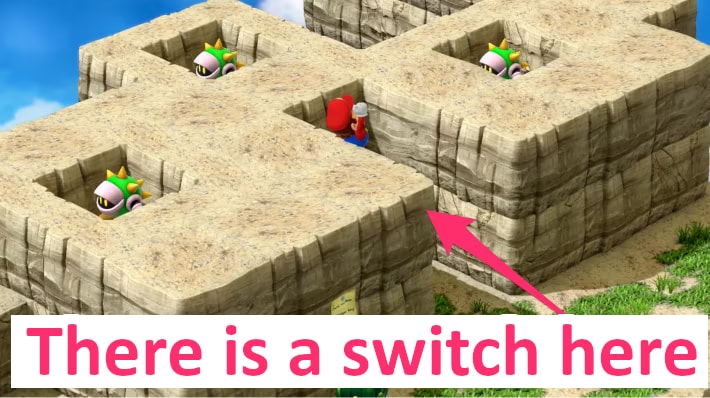
In the second area, don't climb the ledge, but proceed along the ground towards the back. You'll see an indentation, so go inside and jump to press the hidden switch. This will defeat all the Artilleries hidden in the rocks above.
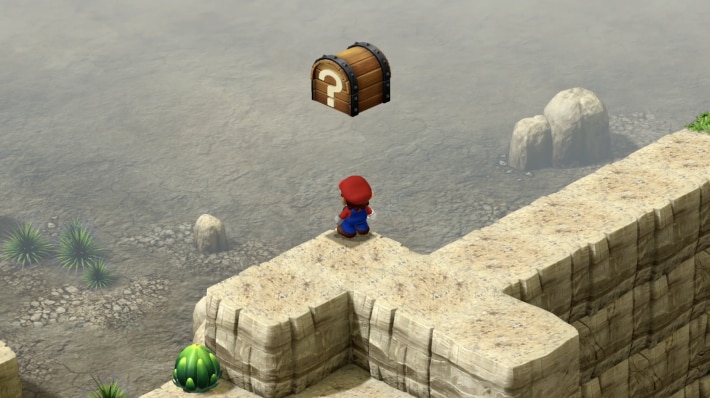
There's a Flower at the far end
Proceed along the ground to the far end to find a Flower. It increases your FP limit, so pick it up.
There's a Monster List entry service
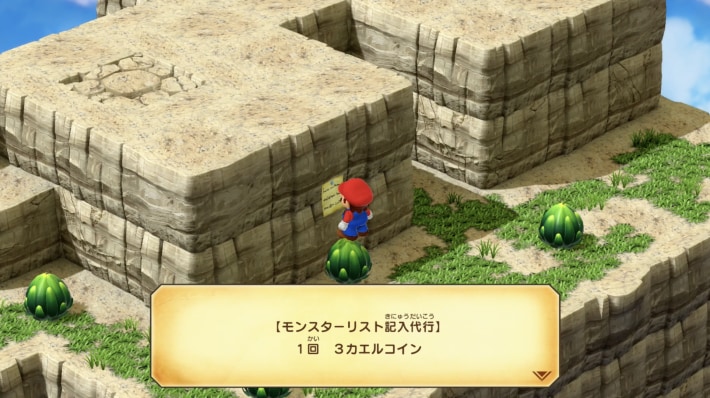
At the location where you pressed the switch, there's a person who will fill in your Monster List for 3 Frog Coins. However, the entry is random, so use it when you have a monster you just can't seem to register.
Climb the rocks to proceed
Climb the rocks to reach the exit of Booster Pass. After exiting, head to the next area, "Booster Tower".
After Clearing Booster Tower
Press the switch on the 4th floor of Booster Tower
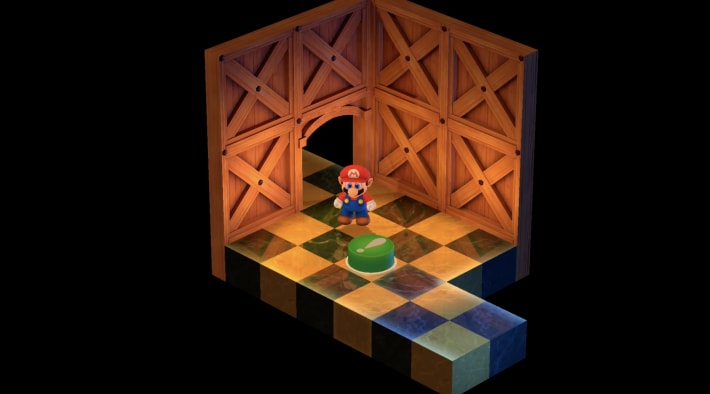
Pressing the green switch on the 4th floor of Booster Tower will change the terrain of Booster Pass, allowing you to proceed to a hidden area.
A hidden map appears immediately to the left after entering Booster Pass
Immediately after entering Booster Pass, proceed to the left to find the entrance to a hidden map, so go inside.
Proceed along the narrow footing to find treasure chests
Jump across the narrow footings to find 3 treasure chests at the far end. If you fall, you'll have to start over from the previous area, so proceed carefully.
Until Booster Tower is Cleared
Entrance: Bowser Joins

When you visit Booster Tower, Bowser is at the entrance. The entrance is locked, but if you head towards the exit, Bowser will open it for you. He will then join your party, so enter the tower.
1st Floor Hall: Take the stairs in the back left to the 2nd floor
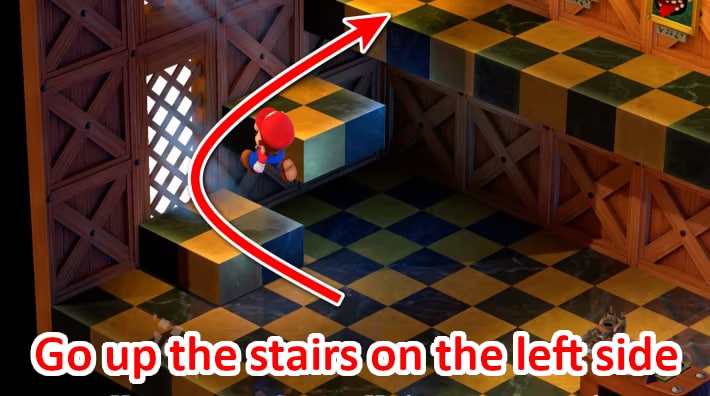
Enter the tower and you'll find a Snifit at the front reception. Talking to it will trigger a battle, so be careful. The room entered from the front passage only has a seesaw, so climb the ledge in the back left of the hall to go up to the 2nd floor.
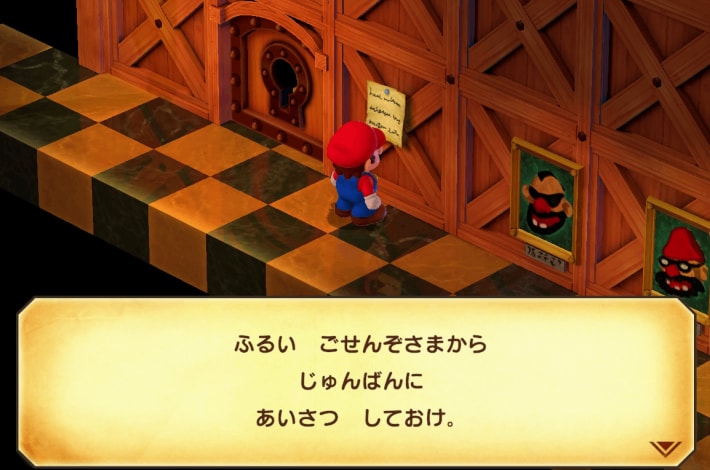
Memorize the portraits displayed in the hall
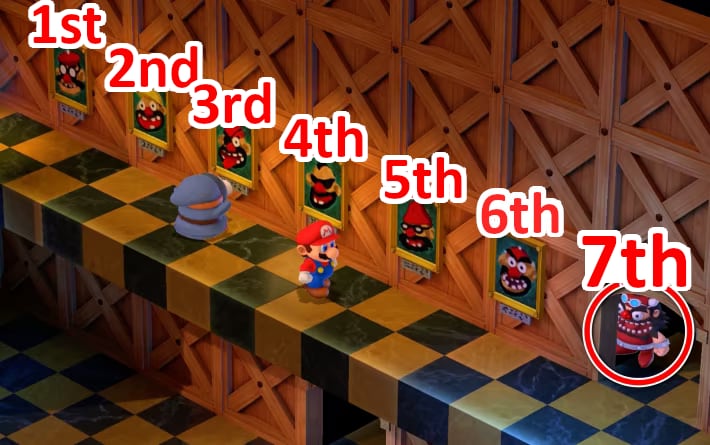
Portraits of past generations of Boosters are displayed. You'll need to remember their appearance and which generation they are to get the key to enter the "Ancestor Hall" later.
2nd Floor Stairs: Snifits descend in a line
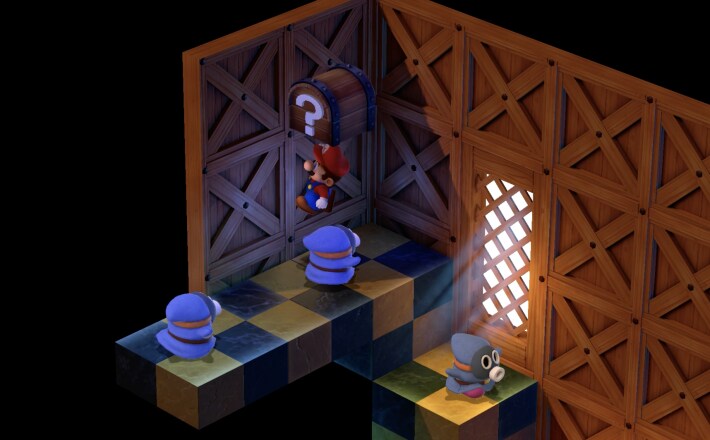
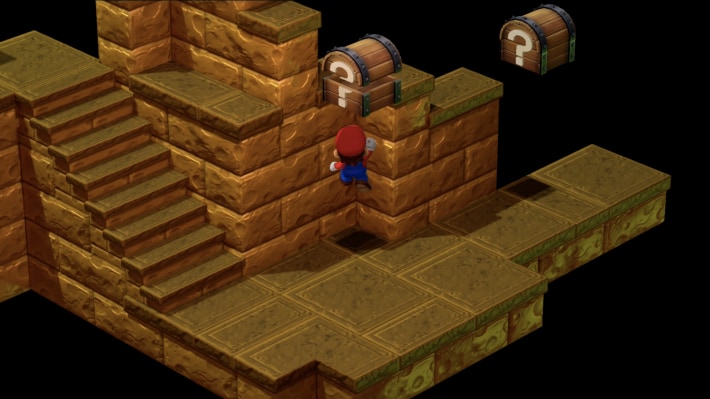
Snifits descend in a line on the stairs from the 2nd to the 3rd floor. You can avoid battle by walking along the wall. Also, there's a hidden treasure chest where you climb to the 3rd floor, so try jumping.
3rd Floor: Talk to Booster
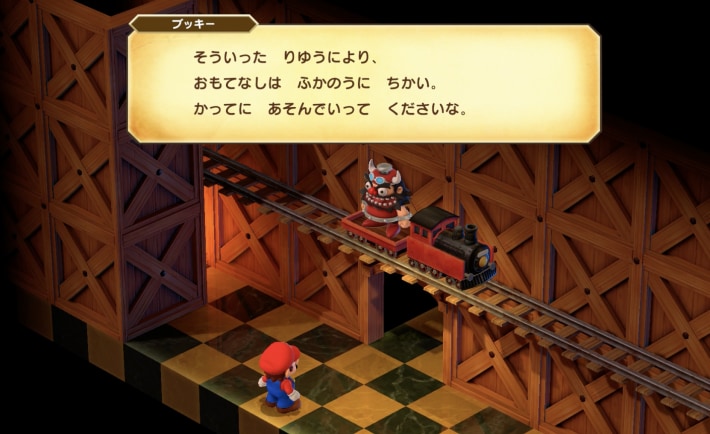
When you reach the 3rd-floor passage, Booster will appear riding a train. After a conversation, Booster will leave to the left of the passage.
Chasing him will lead to a battle with a Snifit
If you chase Booster, his subordinate will appear and a battle will begin. Following the opposite track will lead you to a "Flower Tab".
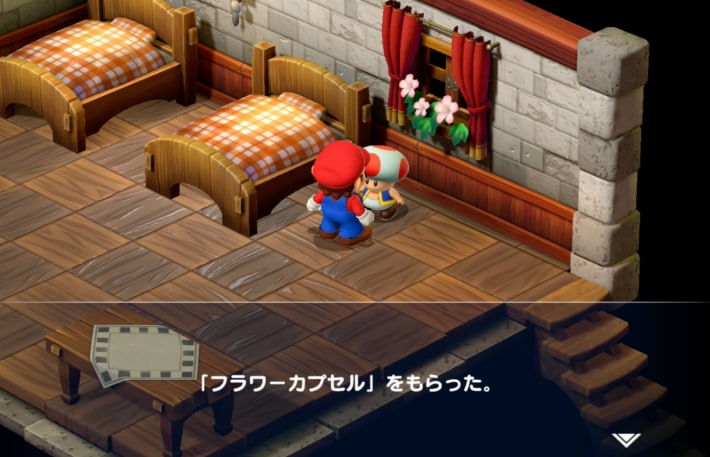
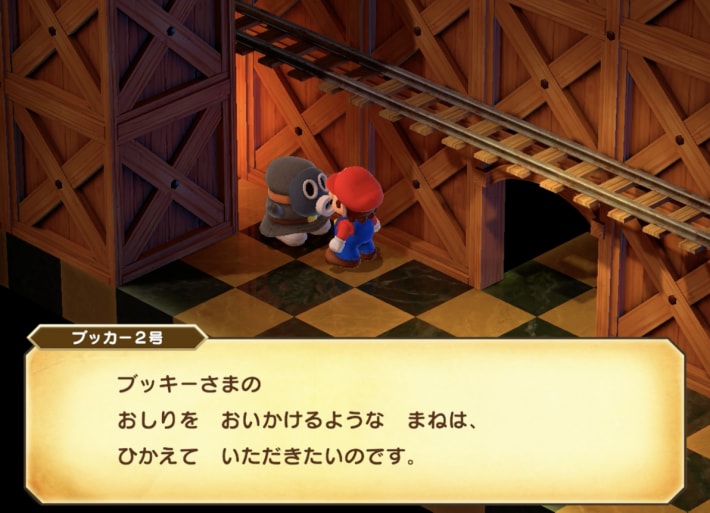
There's a "Flower Capsule" at the end of the right passage
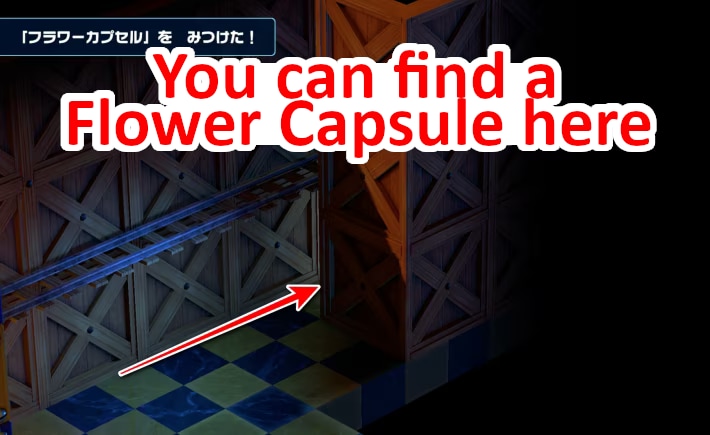
Meanwhile, there's a "Flower Tab" at the end of the right passage where the train departs, so don't forget to get it.
3rd Floor Stairs: Bob-ombs are walking around
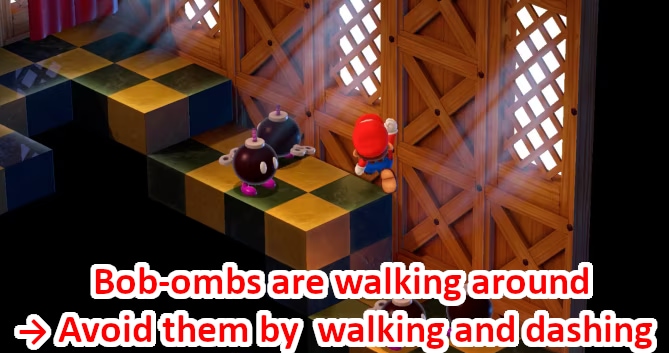
Bob-ombs are walking around on the stairs from the 3rd to the 4th floor. You can avoid battle by walking slowly instead of dashing.
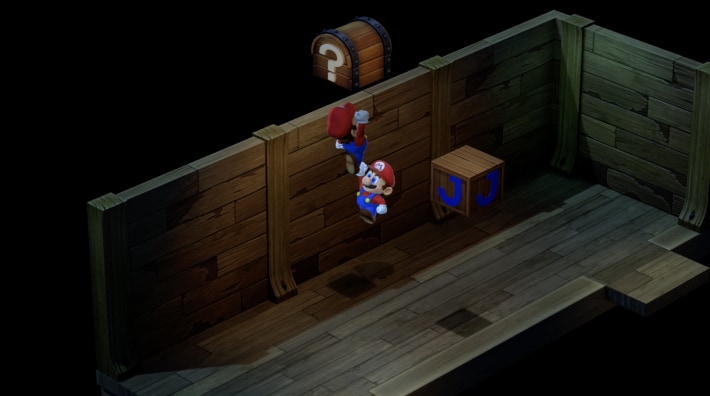
The room in front is the jumping spot for the seesaw
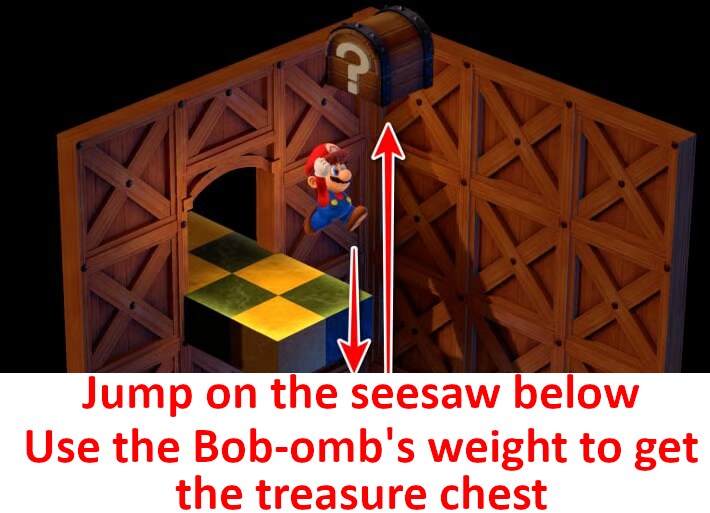
Enter the room and you'll find a treasure chest with a broken footing. Jumping will take you down to the room on the 1st floor where a Bob-omb is on a seesaw. You can use the seesaw to get the "Masher".
4th Floor: Press the switch
There's a "?" switch in the room. Pressing it will change the terrain of "Booster Pass", the area you came through to get to Booster Tower.
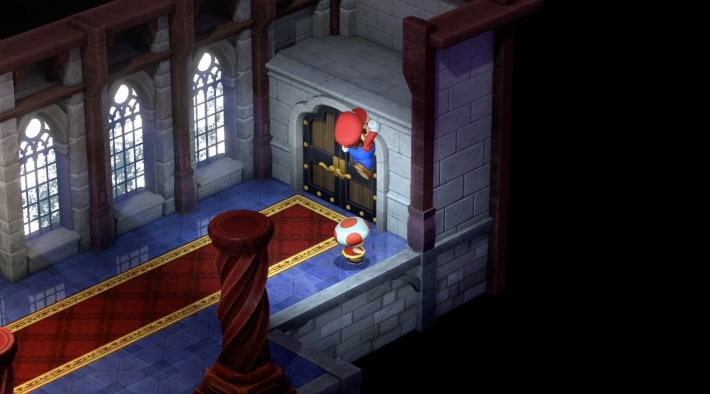
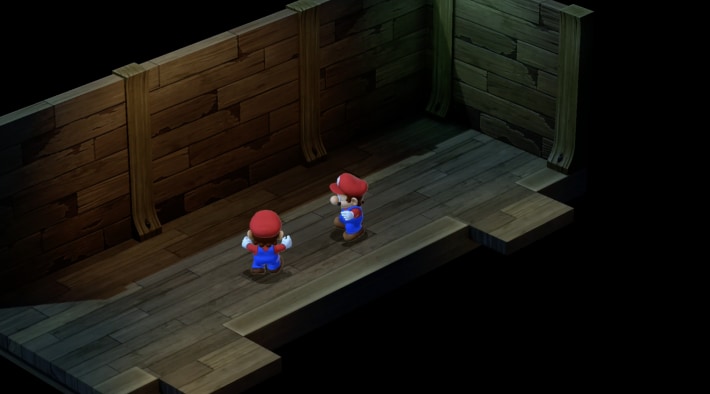
4th Floor Stairs: Enter the curtain to see a nostalgic form...
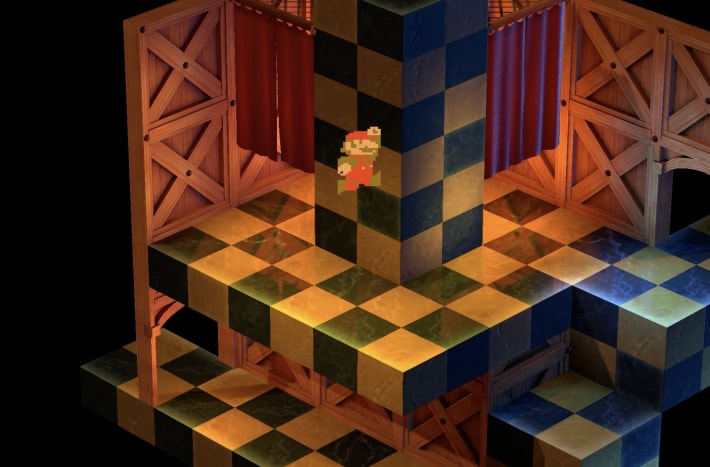
Climb the stairs to find a space hidden by a curtain. Enter it to transform into the Famicom version of Mario once. You'll change back when you leave the room, so have some fun.
5th Floor: Avoid the Bullet Bills and enter the room
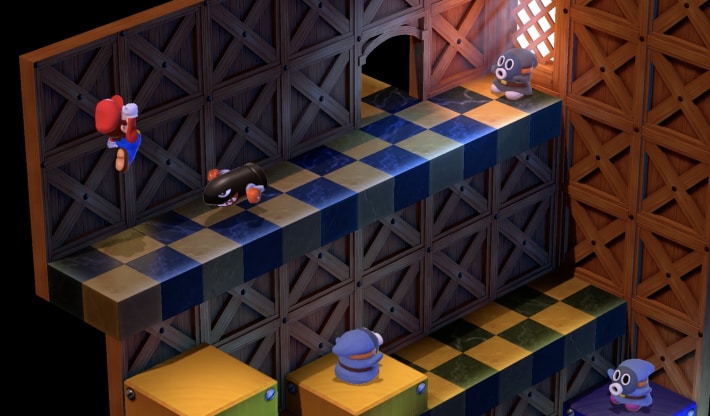
A Snifit is waiting on the ledge, and as you climb the stairs, Snifit #3 will be firing Bullet Bills from its mouth.
6th Floor: Bob-ombs are walking around
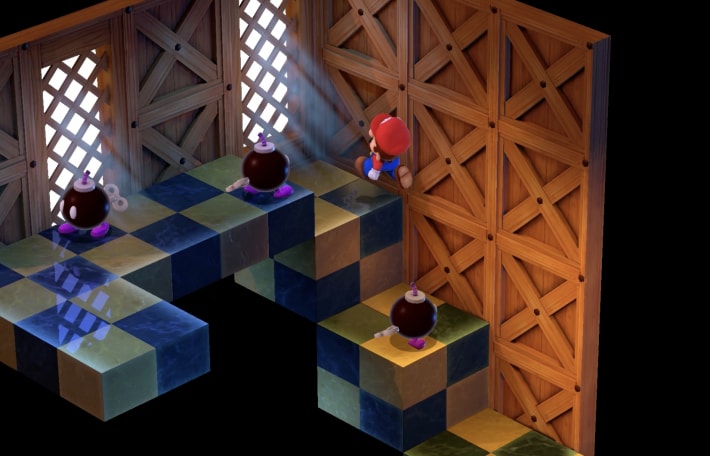
Bob-ombs are walking around on the ledge. You can avoid battle by climbing at the right time.
7th Floor: Save Point and "Ancestor Hall"
There's a save point on the 7th floor. Proceed further to find portraits of past generations of Boosters. Examine the portraits in order from the 1st to the 7th Booster, matching them with the ones displayed in the 1st floor hall.
There's a Chomp
There's a captured Chomp in the Ancestor Room. It's Bowser's weapon, so get it here and equip it.
7th Floor: Jump on the Thwomp's seesaw
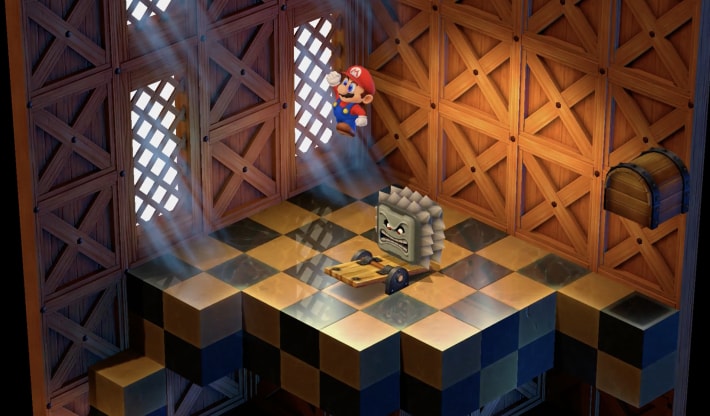
Climb the stairs to find a Thwomp on a seesaw. There's a treasure chest containing a mushroom at the far end, so don't forget to open it. Jumping onto the seesaw will launch you to the upper floor.
8th Floor: Jump across the platforms
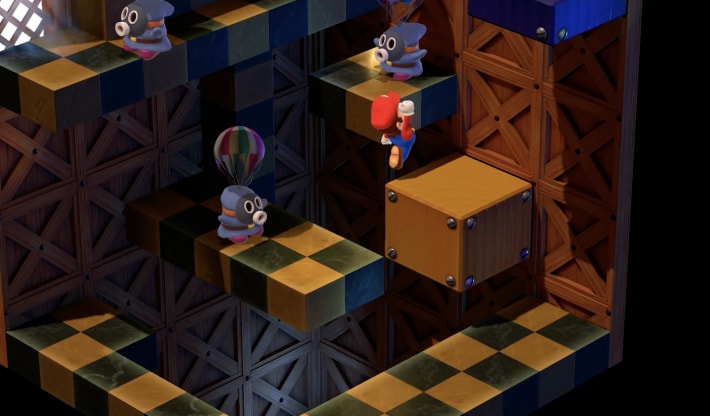
The platforms on the 8th floor are separated, and you need to jump across them. Also, Snifits will descend by parachute.
There's a Frog Coin in a hidden passage
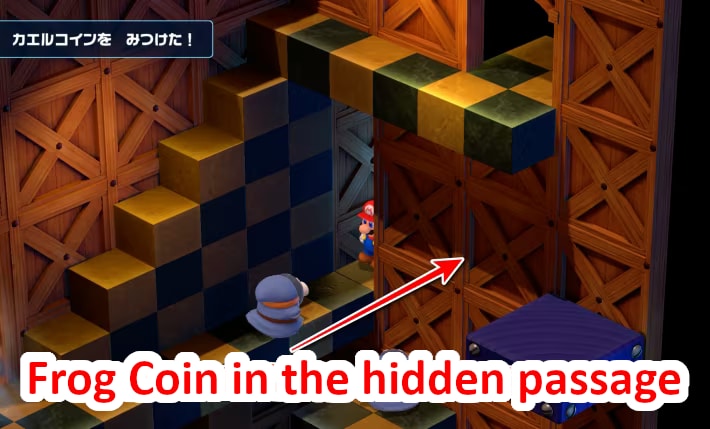
There's a Frog Coin at the end of the passage where the Snifit is walking, so get it.
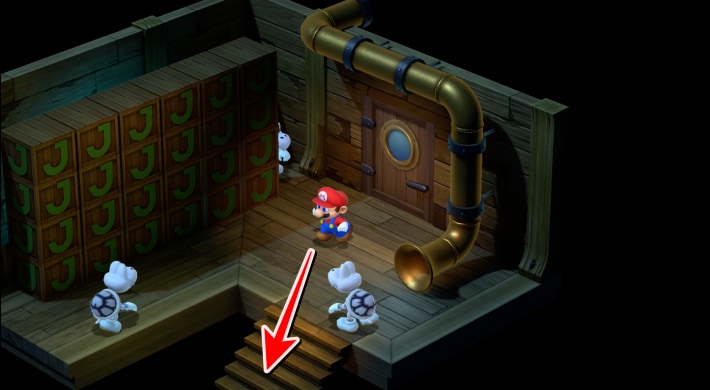
9th Floor: Proceed through the mine room

The 9th floor is a "mine room" where stepping on certain tiles will make Bob-ulks appear. There are no mines where there are coins, and you can proceed by exiting through the door in the upper left.
There's a treasure chest in the back right room
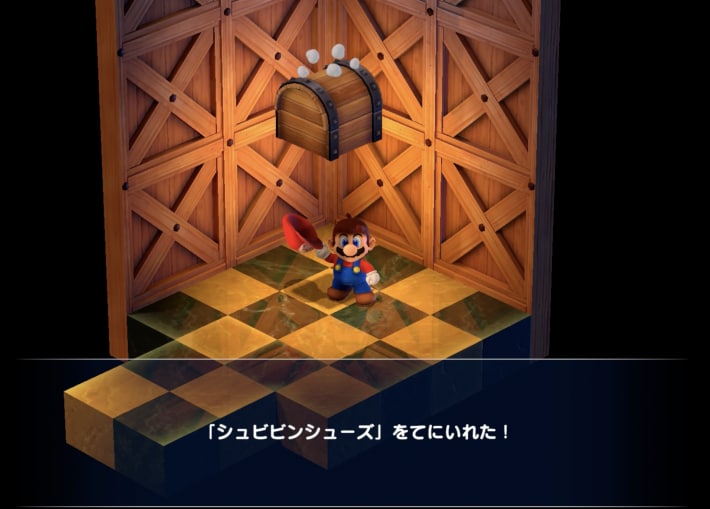
There's a key on the right side of the room, and entering the upper right room will reward you with "Zoom Shoes".
9th Floor Stairs: Avoid the Chomp and go up
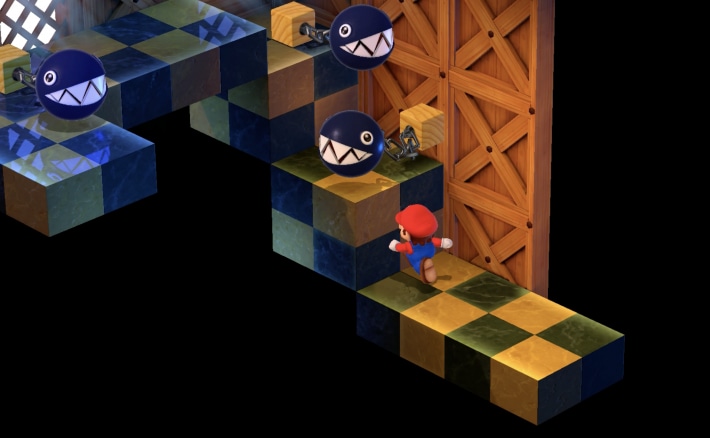
The exit in the back left of the mine room leads to stairs with a Chomp. You can avoid the Chomp by walking along the wall or jumping.
10th Floor: Booster drops Bob-ombs
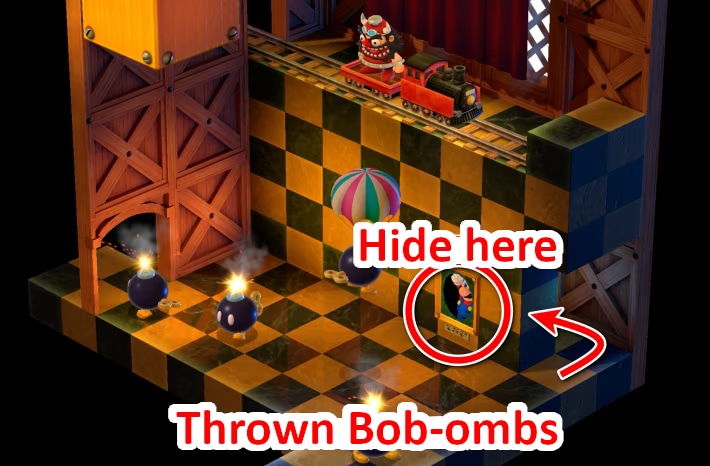
A conversation event with Booster will occur again. He'll drop Bob-ombs from above, but exiting the room will make the Bob-ombs explode and disappear.
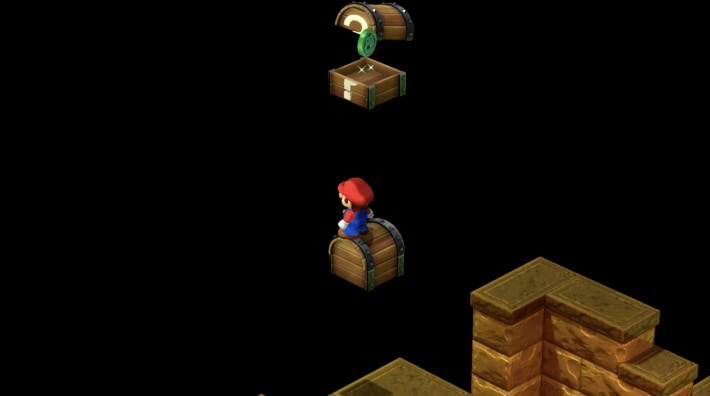
Open the treasure chest at the save point
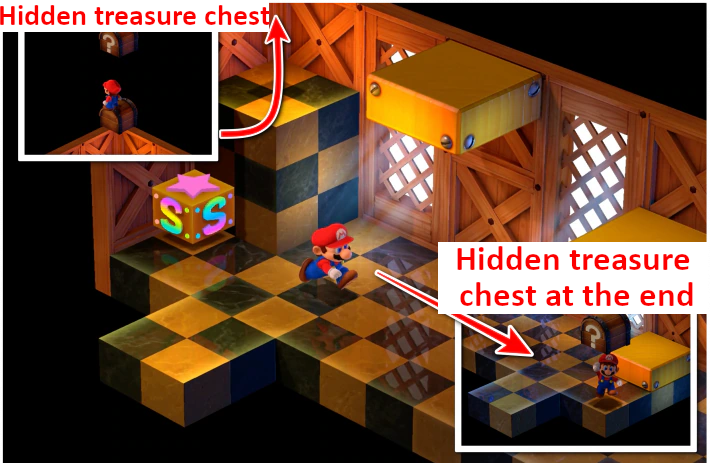
After talking to Booster, climb the stairs to the 11th floor, which is a save point. There's a treasure chest that can be opened by jumping straight up, and if you jump on this treasure chest, there's also a hidden treasure chest, so don't forget to open it.
Enter Booster's Room
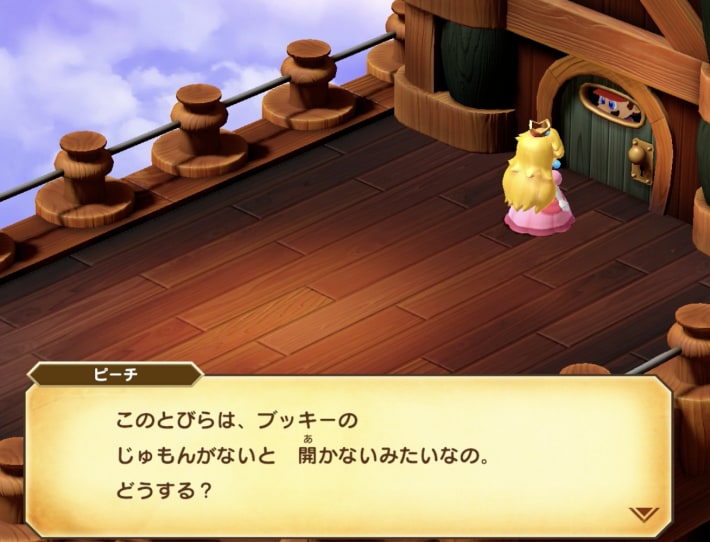
Enter Booster's room and you can peek at the balcony from the exit. After the conversation with Peach, Booster and his Snifits will enter the room, so hide behind the curtain.
Try the curtain game
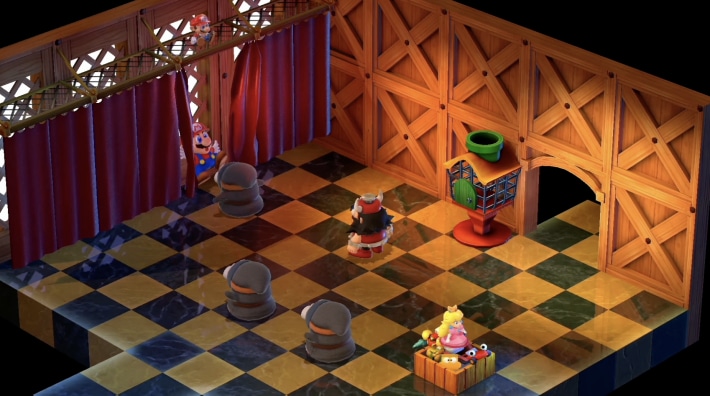
The Snifits will open the curtains in order, so hide well. Eventually, there will be 3 Snifits and only one hiding spot, and Booster will open the curtain. If you give him the Mario doll, you'll get the "Booster's Charm".
If you fail, you'll have to fight Booster
If the curtain is opened and Mario is found, you'll have to fight Booster. Avoid fighting as it's before a boss battle.
Boss Battle on the Balcony
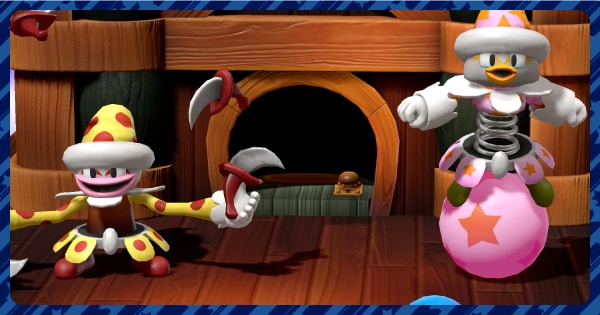
Exit Booster's room to the balcony, and a boss battle will begin immediately. You'll fight Booster and his Snifits.
- Equip the Wake Up Pin
- The brothers have different weaknesses
- Defeat the older brother first
- Use Bowser to inflict Fear on enemies
Descend from the balcony to Booster Hill

Chasing Booster, Mario and his friends go straight from the tower to Booster Hill.
Until Booster Hill is Cleared
Enter immediately after clearing Booster Tower
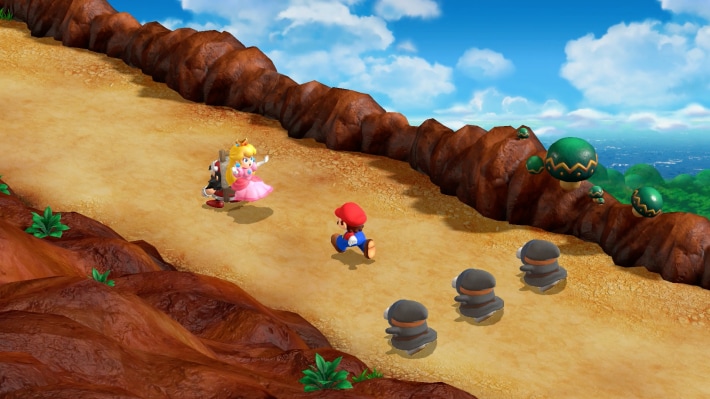
After defeating Booster and his Snifits in Booster Tower, you'll immediately move to Booster Hill and a mini-game will begin. You cannot return to the save point before entering Booster's room, so be careful.
Booster Hill Rules
- Mario can only move left/right and jump
- If you hit a chasing Snifit or a barrel in front, you'll fall
- You can advance significantly by successfully jumping on them
- Touching Peach will reward you with a "Flower"
Changes from the original game
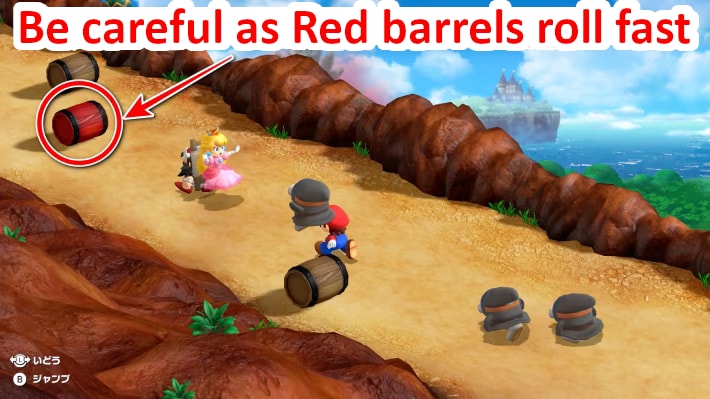
Red barrels, which didn't appear in the original game, will roll down. They are faster than normal barrels, so be careful not to fall.
Check the speed of the red barrels
You can only try once
In the Booster Hill race, you can get a "Flower" for each time you touch Peach. However, this event of chasing Booster is a one-time only event. Next time, it will just be a regular hill dash, and the specification is changed so that you can collect any missed Flowers.
When visiting for the second time or later
Mario climbs the hill alone
Snifits and Booster won't appear, and Mario will run up a hill with only barrels rolling down. However, any "Flowers" you missed on the first try will be on the path, so collect them.
Booster Hill Rules (2nd time onwards)
- Mario can only move left/right and jump
- If you hit a barrel rolling from the front, you'll fall
- You can advance by jumping on barrels
- You can get "Flowers" scattered on the path
You can collect Flowers missed on the first try
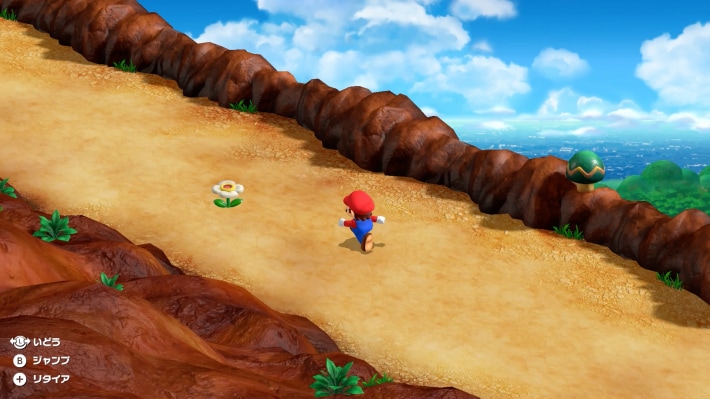
You can't race Booster, but from the second time onwards, Mario can climb the hill alone. Any Flowers you couldn't get on the first try will be on the path.
| Number of Flowers |
|---|
| Max 8 - Number obtained on first try = Number of Flowers on second try onwards |
Until Marrymore is Cleared
First, gear up at the item shop
Bowser, who joined in Booster Tower, has no equipment. First, get weapons and armor for each character at the item shop. If Mario has the Masher and Bowser has the Chomp from Booster Tower, you don't need to buy them.
You can't enter through the front entrance of the wedding
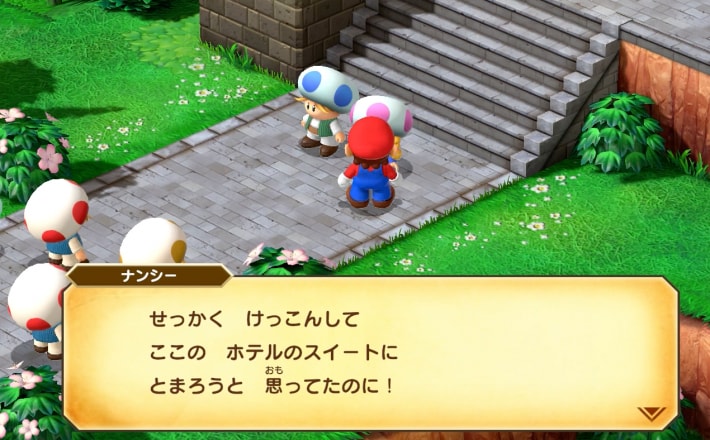
You've chased Booster, but the front entrance of the wedding chapel is occupied by Snifits and you can't enter. Raz and Raini from Mushroom Kingdom are in trouble because they can't have their wedding.
Enter through the back entrance of the chapel
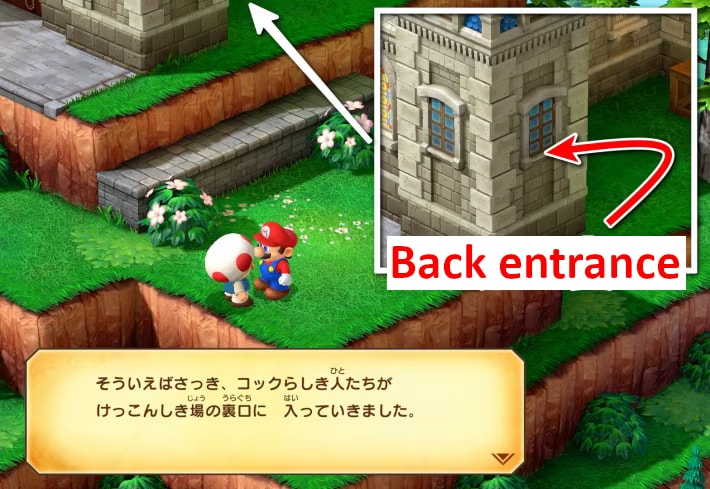
The photographer apparently saw someone who looked like a chef enter through the back entrance of the wedding chapel. As shown in the picture, enter through the entrance on the back side of the chapel.
Body slam the door with Snifit #1
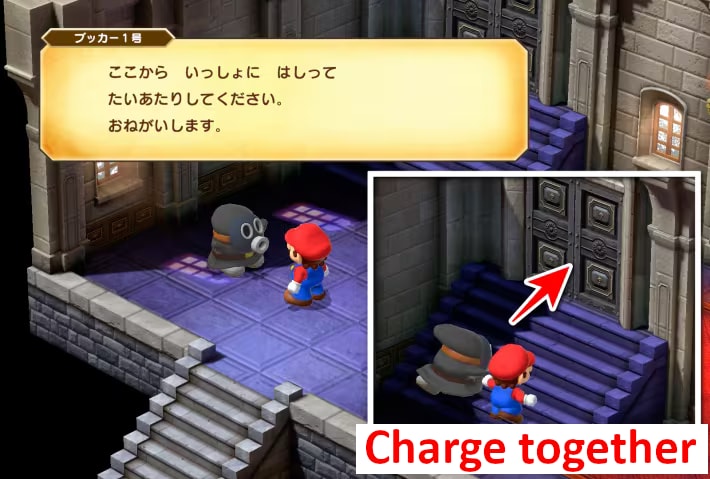
You'll be found by Snifit #1, who was blocking the front entrance. However, Snifit #1 also got locked out, so charge into the door at the same time to enter the chapel room.
Body slam the door with Bowser
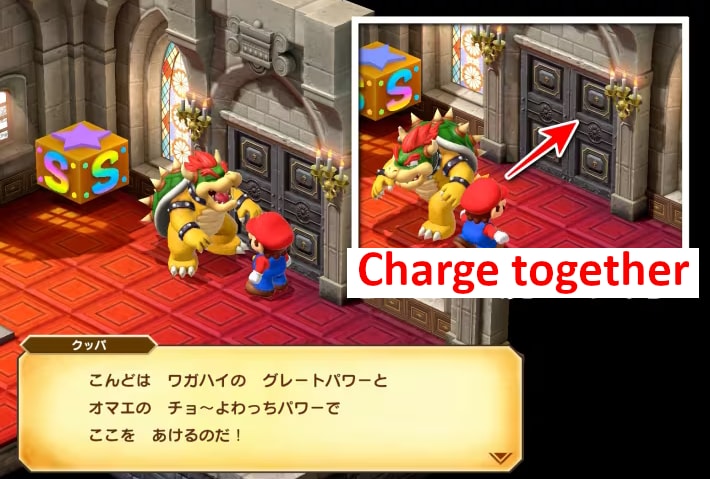
Snifit #1 flies straight into the chapel. The door is closed again, but Bowser suggests charging to open the door. Time it right and body slam the door. There's also a save point, so don't forget.
Collect Peach's accessories
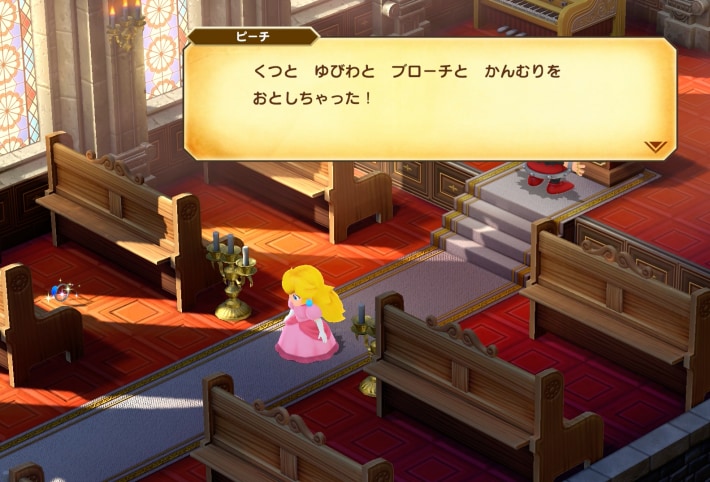
A mini-game begins where you find Peach's accessories that were scattered by the body slam.
- There are a total of 4 types of accessories
- Get from Snifits: Shoes, Brooch, Ring
- Examine above Booster's head: Crown
- Torches light up over time
- The reward changes depending on the number of lit torches
Talk to the running Snifits
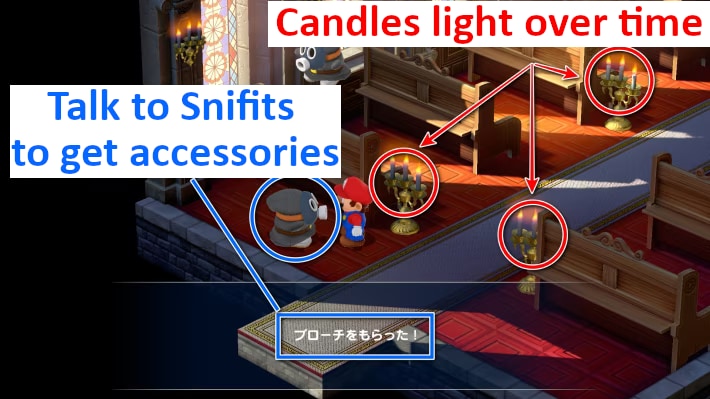
The Snifits holding the accessories are running around inside the church. Talk to them quickly to get the accessories.
Reward based on the number of lit torches

The fewer torches are lit, the better the kiss reward. One torch lights up about every 4 seconds, and if you can collect them within 2 lit torches, you'll get a kiss from Peach.
| Number of Torches | Content |
|---|---|
| 1-2 torches Within approx. 8 seconds |  Kissed by Peach Kissed by PeachBowser is kissed by Booster |
| 3-4 torches Within approx. 16 seconds |  Kissed by Bowser Kissed by Bowser |
| 5-6 torches Within approx. 24 seconds |  Kissed by Booster Kissed by Booster |
| 7-8 torches Approx. 32 seconds~ |  Kissed by Bowser and Booster Kissed by Bowser and Booster |
Boss battle when trying to leave the chapel
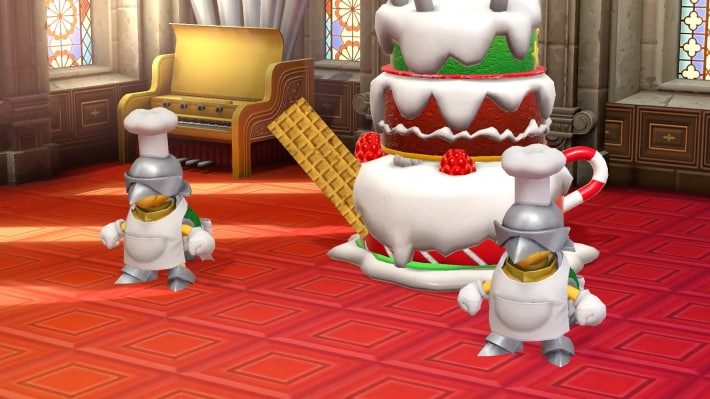
Mario successfully rescues Peach. When trying to leave the chapel, Chef Torte gets angry that they won't eat the cake he made, and a battle begins. You'll fight Chef Torte, his apprentice, and the cake.
- Prepare for status ailments beforehand
- First, reduce Bundt's HP
- Extinguish the candle flames with normal attacks
- Finally, defeat the remaining Raspberry
Leave Marrymore and return to Mushroom Kingdom
Leave the village from the entrance you came from Booster Hill, and you'll automatically return to Mushroom Kingdom. In Mushroom Kingdom, you'll report the rescue and introduce your companions to the Chancellor, and Peach will leave. When you leave the castle, Peach, who snuck out of the castle, will rejoin your party.
You can stay in the Suite Room
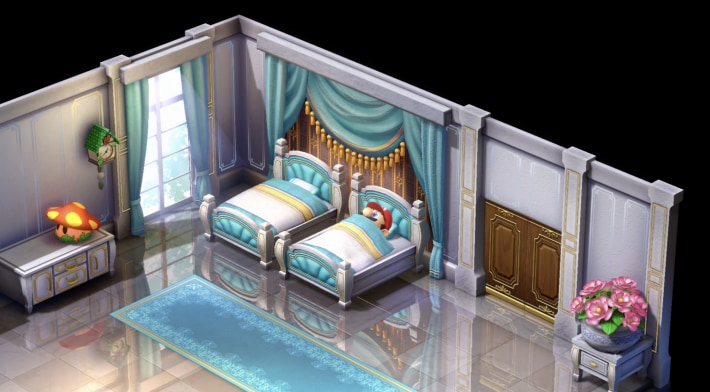
Visit the inn after clearing Marrymore, and you can stay in the Suite Room. It costs 200 coins, but you'll receive items depending on the number of times you stay.
Until Star Hill is Cleared
Hear about Star Hill from Frogfucius
You can hear about the location of the next Star Piece from Frogfucius at Tadpole Pond. After the conversation, the next map after Marrymore will be added.
If you can't proceed, go get the Cricket Pie
If you talk to Frogfucius and still can't proceed, you may not have completed the event of giving him the Cricket Pie. First, go to the item shop in Mushroom Kingdom, get the Cricket Pie, and then come back.
Star Hill has no treasure chests and no boss
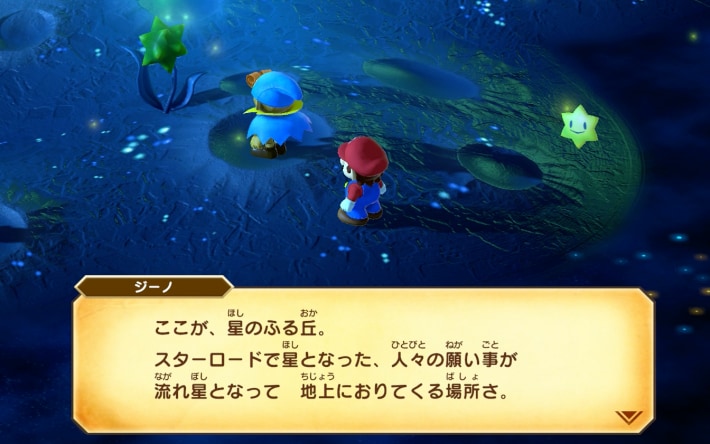
Geno gives an explanation at the entrance. Monsters appear in Star Hill, but there are no boss battles and no treasure chests, so you can explore at your leisure.
Light the Star Flowers to open the door
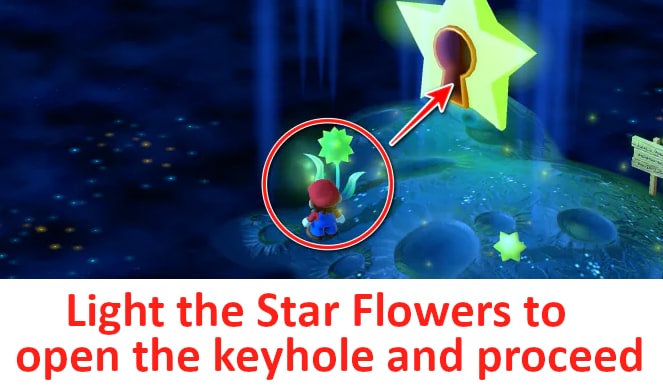
Examine the Star Flowers to light them. Light all the Star Flowers in the map, and a door will appear on the star with a keyhole. Once you enter the door, you can't return to the previous map.
Normal attacks are strictly prohibited against star-shaped Pulsars
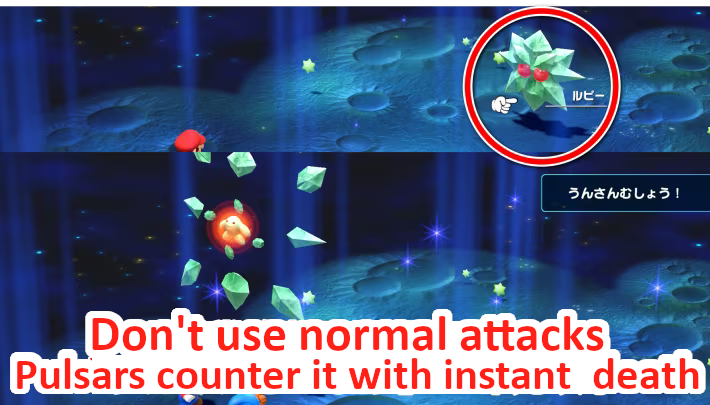
Be careful when fighting the Pulsars that appear. Star-shaped Pulsars counter normal attacks with an instant death attack. They are weak to fire, so defeat them with Mario's Fireball.
You can hear wishes from stars with faces
The stars with faces scattered throughout the map contain the wishes of characters appearing in Mario RPG. Try to guess whose wish it is.
Wishes of defeated bosses also appear

Wishes of bosses you've defeated so far will appear.
Find the Star Piece in Map 3
The Star Piece is in the northeast of the map you visit after opening the star door with the keyhole three times. After obtaining it, there are no particular events, so you can exit to the world map.
Walkthrough Chart up to the 5th Star Piece
Until Seaside Town is Cleared
Visit after getting the Star Piece at Star Hill
After obtaining the Star Piece at Star Hill, you can visit Seaside Town.
Buy limited-time items at the item shop

On your first visit, the villagers are acting strangely, and only the item shop is available. However, this item shop is for a limited time only, and you won't be able to use it after clearing the next area. You can also buy valuable items, so be sure to check it out.
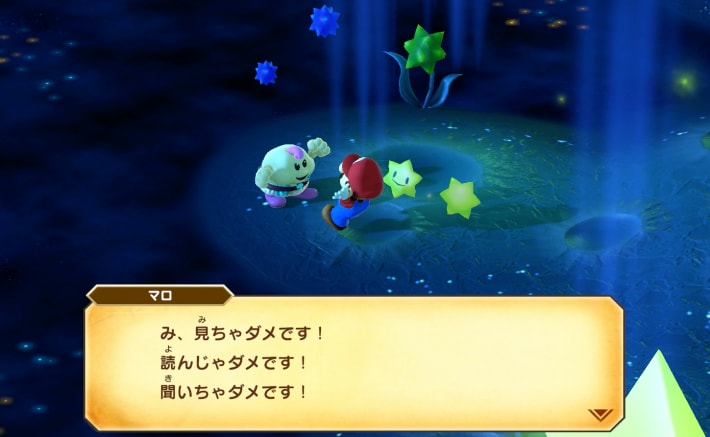
You can hear about the Star Piece at the Elder's house
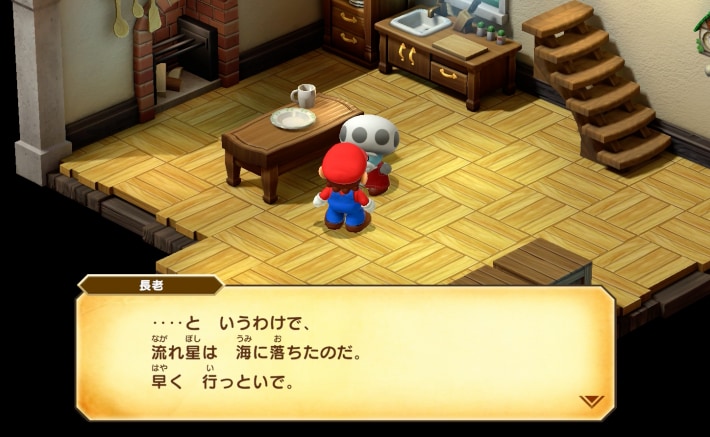
Go to the Elder's house to hear that the Star Piece fell into the sea. After that, you'll be able to go to the Sunken Ship.
Until Sea is Cleared
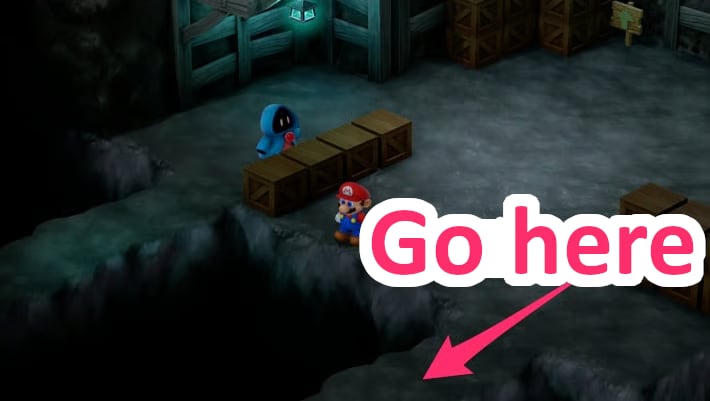
Proceed to the passage in front
Proceed from the front of the room with the shop.
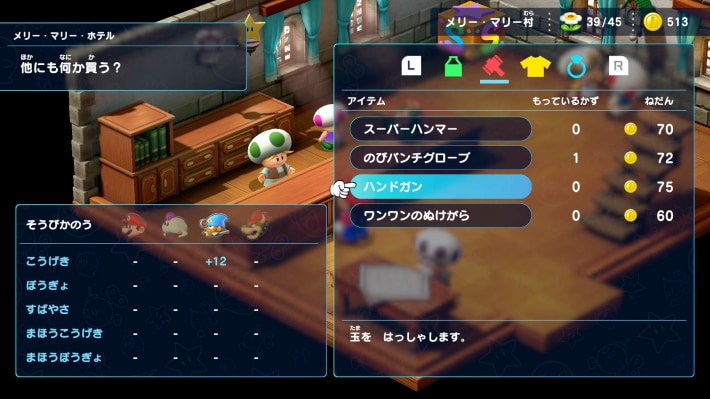
Get equipment at the shop
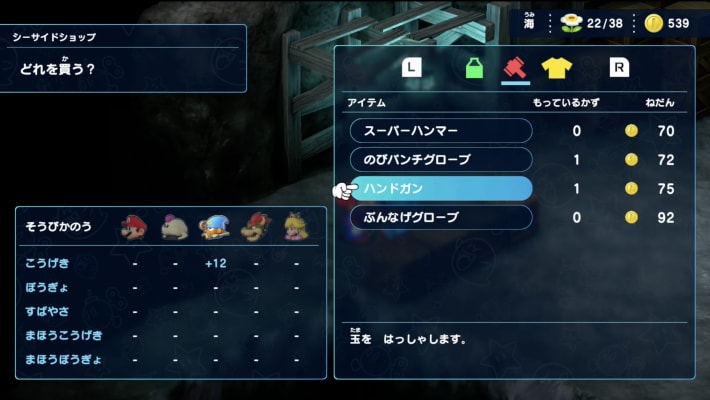
You can buy Geno's Hand Gun and Bowser's Hurly Gloves at the shop. They are strong weapons at this point, so buy them.
You can defeat enemies with the Star
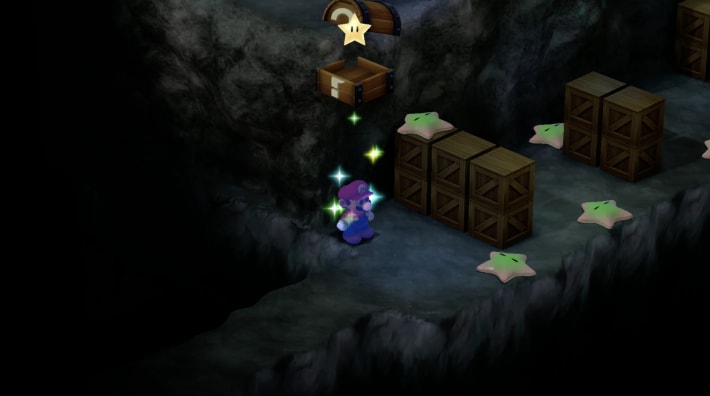
Proceed to the passage in front to get a Star from a treasure chest. Defeat the surrounding enemies while proceeding.
There's a treasure chest in the back room
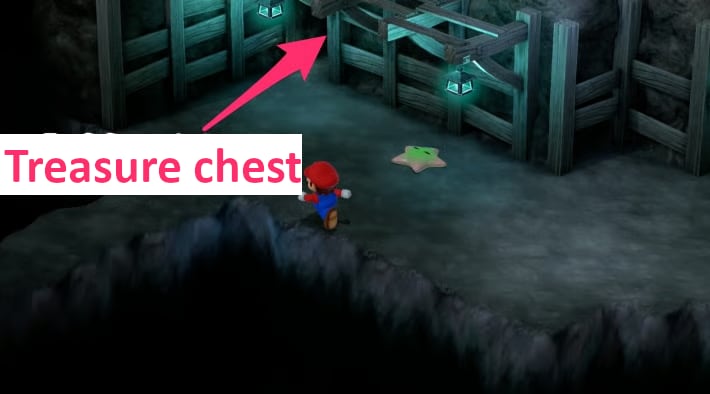
Before proceeding, go to the room in the back right to find a treasure chest. It contains a Mushroom, Flower, and Frog Coin, so get them.
Enter the whirlpool and go to the back room
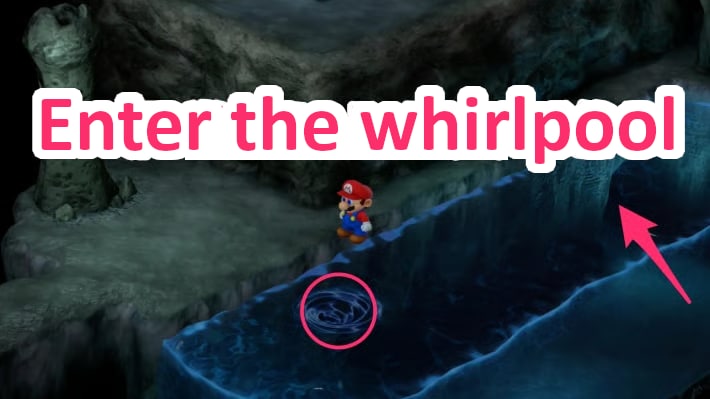
After proceeding, enter the whirlpool and go to the back room. Go up to get an Ultra Mushroom from a treasure chest.
Go outside and enter the whirlpool
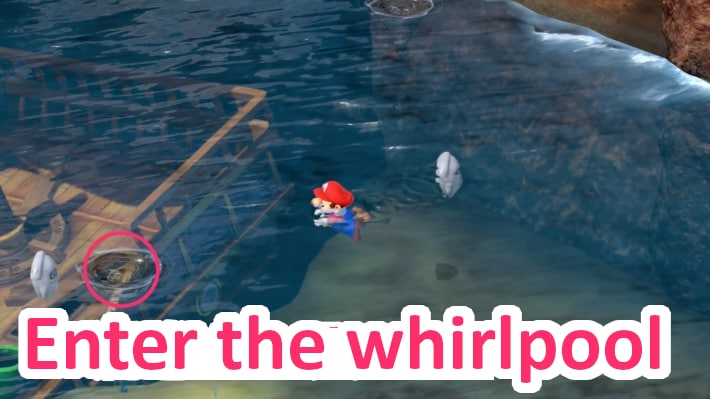
Go outside and enter the whirlpool to move underwater.
Go to the Sunken Ship from the pipe
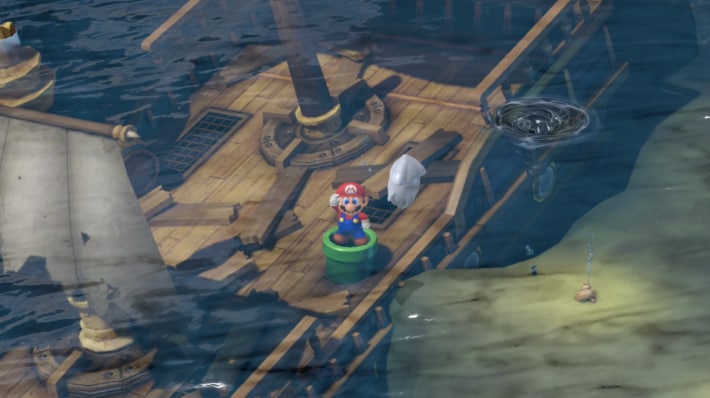
After going down the whirlpool, enter the pipe on the left to go to the Sunken Ship.
Until Sunken Ship is Cleared
Proceed to the door in the back left
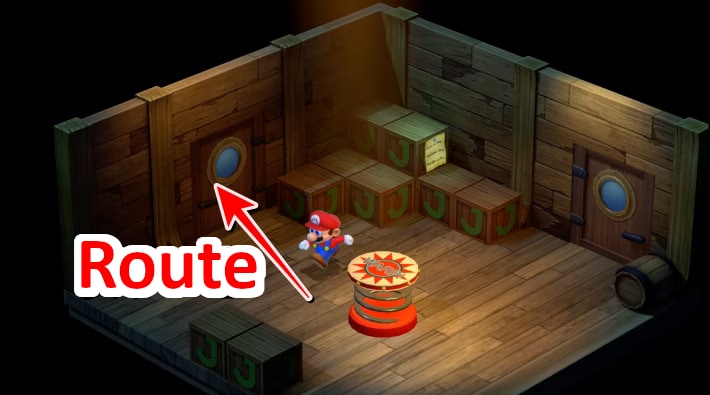
After entering the Sunken Ship, first proceed to the door in the back left. There's a save block in the back right room, so you can save there.
Proceed to the door at the far end
Proceed to the far end of the room with Greapers.
Proceed further
Proceed through the door at the far end of the room with Greapers and Dry Bones. Dry Bones can only be defeated with magic attacks, so if you want to conserve FP, don't fight them.
Go down the stairs
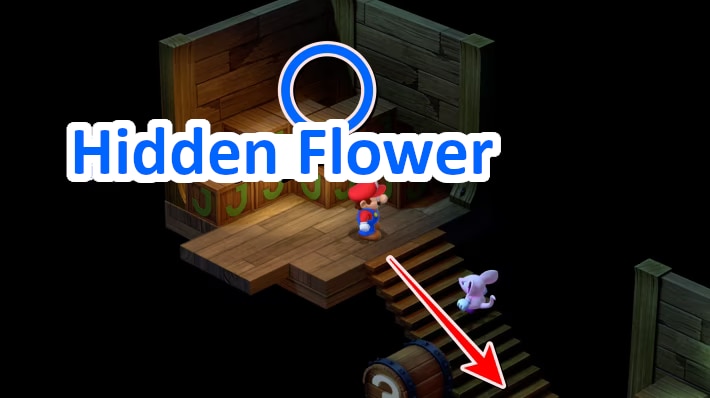
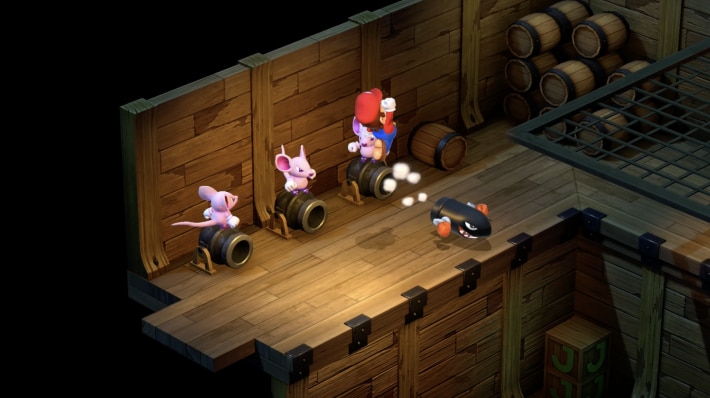
Go down the stairs where the Alley Rats are and proceed to get coins from the treasure chest. There's a Flower between the wooden boxes before the stairs, so get it.
1st Hint Room
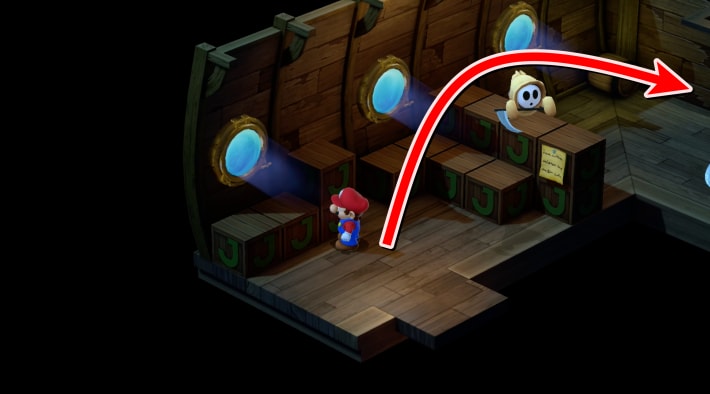
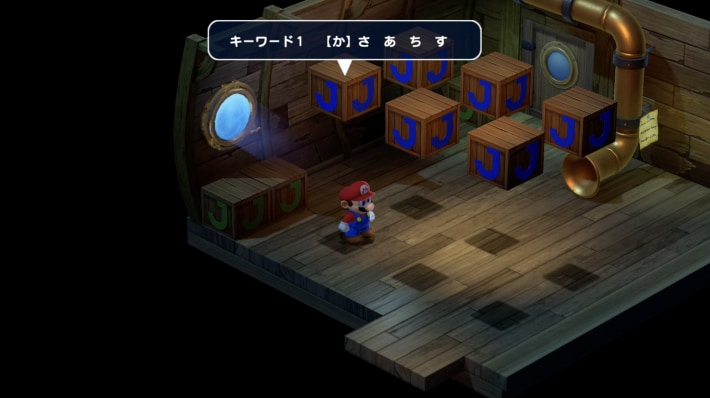
In the first hint room, you need to guide the Sky Troopa and drop the cannonball onto the switch. Go to the far end from the left side of the wooden box, then go around to the right side and come to the front to drop it successfully.
2nd Hint Room
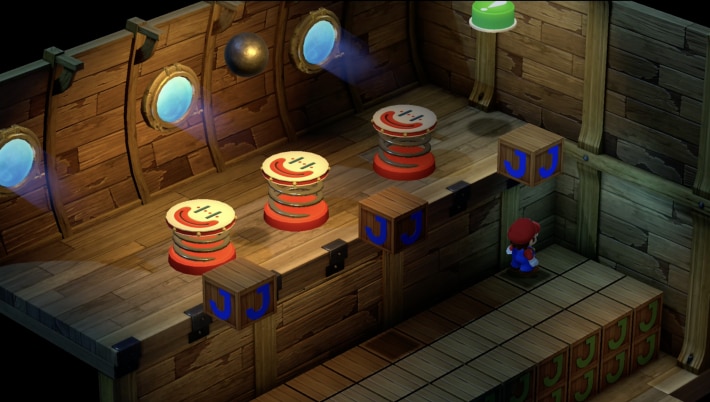
In the 2nd hint room, you need to press the switch on the wooden box, stop the jump pad, and place the cannonball on the switch. Refer to the image for the position to stop the jump pad.
3rd Hint Room
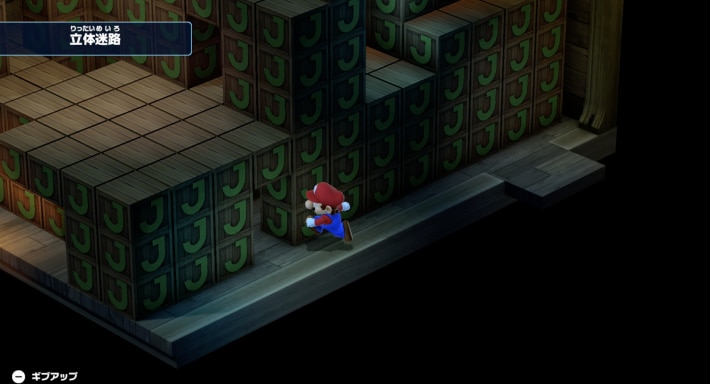
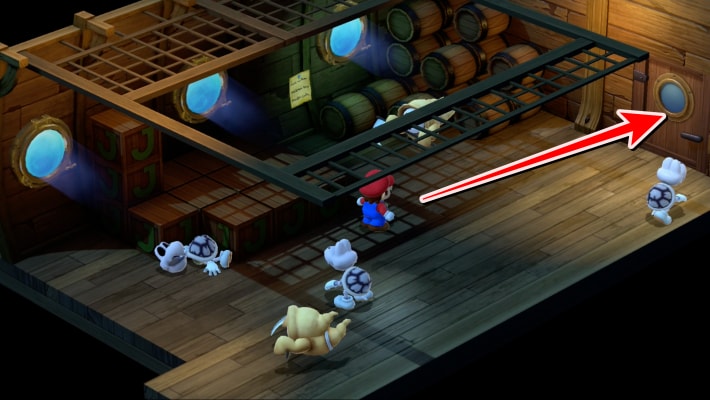
In the 3rd room, you need to proceed through a 3D maze and press a switch. This is the most difficult among the hint rooms and very hard. If you get stuck, you can give up by pressing the - button.
3D Maze Walkthrough Video
Defeat Dry Bones and get coins from the treasure chest
Proceed further to find a treasure chest. There's a Dry Bones nearby, so defeat it once and get coins from the treasure chest. If the Dry Bones revives, defeat it again and proceed.
There's a shop
Talk to the monster in the same room, and it will sell you equipment and items. If you're short on items, stock up.
4th Hint Room
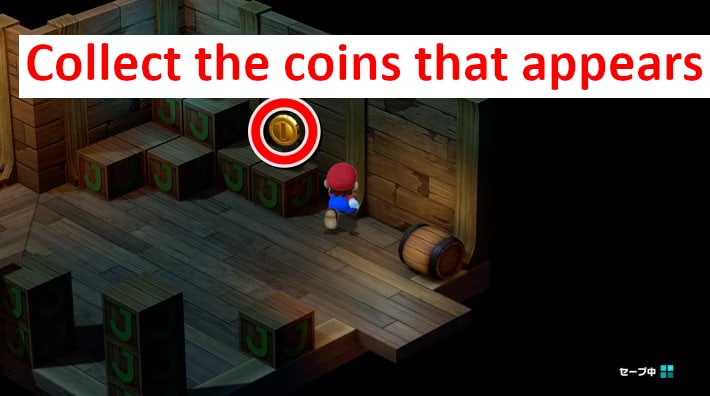
In the 4th hint room, you need to keep collecting moving coins. The coins disappear after a certain time, so collect them quickly. Also, be careful as taking the first coin will not give you a hint.
5th Hint Room
In the 5th hint room, you need to jump and hit the cannonball against the wooden box. Push the slightly lower wooden box on the left side of the room to fire the cannonball. You need to hit it consecutively, so move with good rhythm.
6th Hint Room
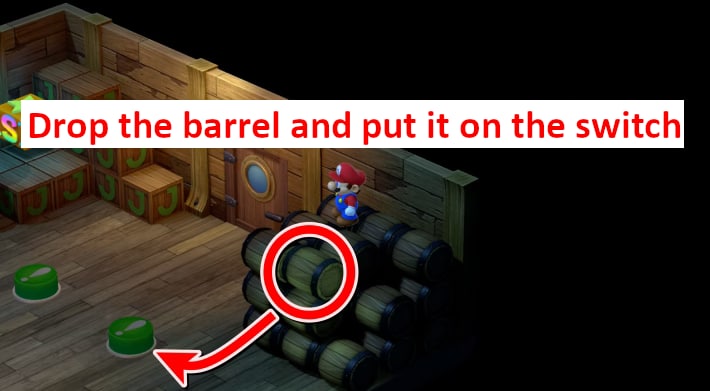
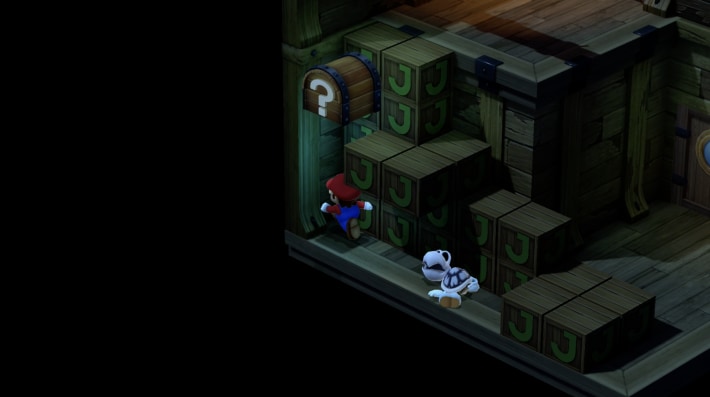
For the 6th hint, you need to press two switches. Jump on the differently colored barrel in the upper right to make it fall, then move it to the switch, and have Mario step on the remaining one.
Enter the password
Enter the 6-character password to open the door to proceed. Once you've set the password, examine the speaking tube (metal cylinder).
Answer here (Spoiler Alert)Answer
| Order | Keyword |
|---|---|
| 1. | P |
| 2. | E |
| 3. | A |
| 4. | R |
| 5. | L |
| 6. | S |
| Answer | Pearls |
Fight King Calamari and Blooper
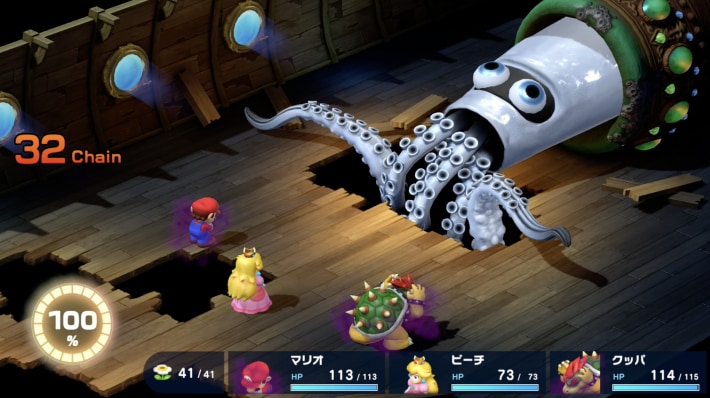
- Prepare for the Fear status
- In the early stages, defeat the King Calamari one by one
- The main body is also weak to fire attacks
Proceed through the door to fight King Calamari. After fighting King Calamari twice, Blooper will appear and the battle will begin.
Proceed from the 2nd floor
After defeating Blooper, proceed from the jump pad room and enter the door on the 2nd floor. There's nothing particular beyond the 1st-floor door, so you don't need to go there.
Proceed while avoiding Bullet Bills
After proceeding through the door, avoid the fired Bullet Bills and go to the far end. If you get hit by a Bullet Bill and fall, you'll need to go to the 2nd floor again.
Go down the stairs

Go down the stairs in the room with Alley Rats and proceed.
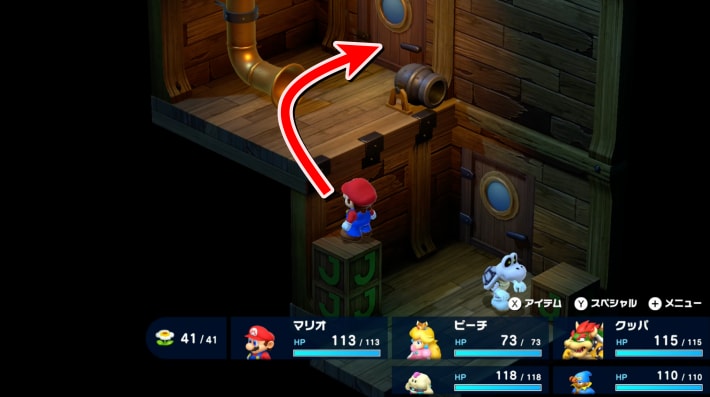
Get the treasure chest
Proceed further to find two treasure chests on top of wooden boxes. Ride the barrel at the far end and get on the wooden boxes to get the treasure chests.
Avoid the fake Marios and proceed
Proceed through the door to find fake Marios. If you talk to them, you'll enter a battle with enemy monsters and the fake Marios will disappear, so don't talk to them.
There's a hidden treasure chest
There's a wooden box near the center, and hitting it will make a treasure chest appear. Get on top of a fake Mario and hit the treasure chest. You can get on a fake Mario by dashing and jumping.
Go down the stairs
Go down the stairs beyond the door and proceed. There's nothing behind the wooden box on the left, just a Dry Bones, so you don't need to go there.
Get a Mushroom from the treasure chest
You can get a Mushroom from the treasure chest on the left side of the room. It restores health, so get it. There's also a save block, so save your game.
There's a Pandorite
A Pandorite will appear from the treasure chest at the far end. Defeating it will reward you with a Safety Badge, so you'll want to fight it. However, Pandorite is strong, so be sure to save.
- PandoriteSunken Ship60050WeaknessEffectiveImmune
Enter the whirlpool and go left
Proceed along the path, then enter the whirlpool and go left to get a Frog Coin. After that, return to the whirlpool room, proceed through the door, and go down the stairs.
Ride the barrel to proceed
Ride the barrel on the right side of the room with Bloopers to reach a door that allows you to proceed.
Get the Safety Ring
There's a hidden door on the left side of the room with Bloopers, and beyond it is the Safety Ring. It prevents instant death and status ailments, so equipping it on Peach will make healing easier and give you an advantage in battle.
Fight Bandana Red
Proceed further to fight Bandana Red twice. They're not strong, so defeat them with normal attacks.
Fight Jonathan "Johnny" Jones
- Fight while leaving one Bandana Blue alive
- Inflict Fear status
After defeating Bandana Red, proceed further to fight the boss, Jonathan "Johnny" Jones. He's a tough enemy, so prepare thoroughly.
Until Seaside Town (2nd Visit) is Cleared
Give the Star Piece to the fake Elder
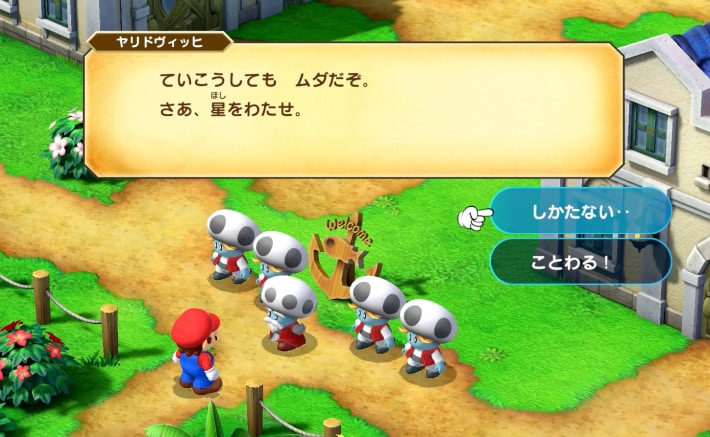
At the village entrance, you'll be threatened to hand over the collected Star Piece. The reward you get from the real Elder after defeating the boss changes depending on how many times you refuse.
Reward for each choice
| Times Refused | Reward |
|---|---|
| 0 times | Flower Box |
| 1 time | Flower Jar |
| 2 times | Flower Tab |
| 3 times~ | 1 Coin |
If you don't hand it over obediently, the Elder will be in trouble...
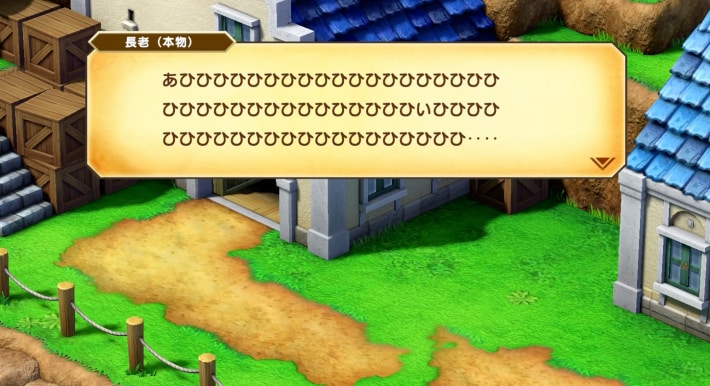
In terms of rewards, it's better to hand it over immediately. If you refuse 3 times, the Elder will be tickled by his four minions.
Head to the coast from the northwest of the village
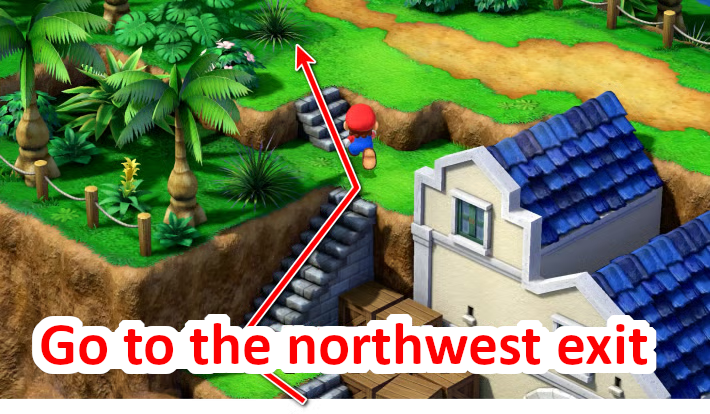
The fake Elder and his group seem to be fleeing from the coast northwest of the village. Chase them and corner them on the coast, and Jonathan "Johnny" Jones from the sea will block your way. After a conversation, you'll fight Speardovich.
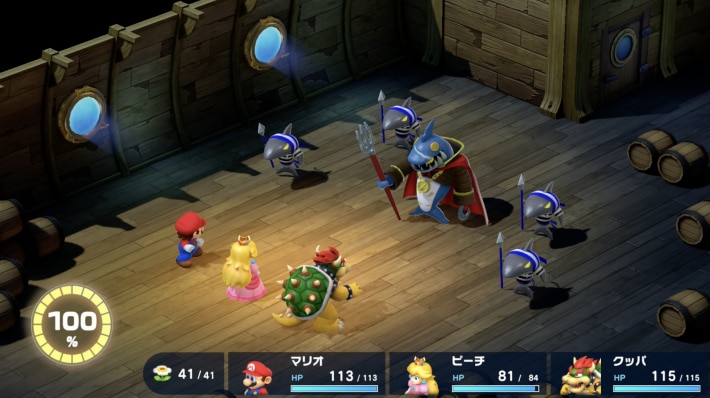
Fight Speardovich
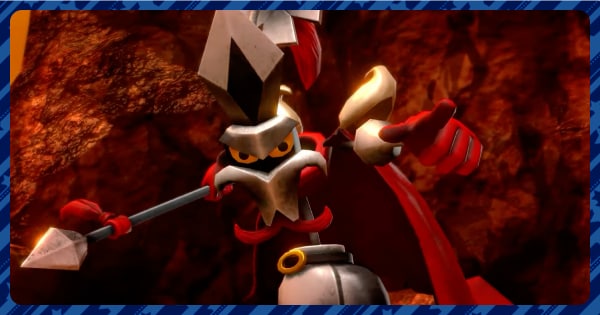
- Include Peach with area-of-effect healing
- Prepare revival items
- Weak to Thunder
- Learn how to distinguish the clones
Speardovich uses many area-of-effect attacks. Fight while healing with Peach. You can distinguish the clones with Mallow's "Psychopath", and "Shocker" is effective as it hits its weakness.
Walkthrough Chart up to the 6th Star Piece
Until Land's End is Cleared
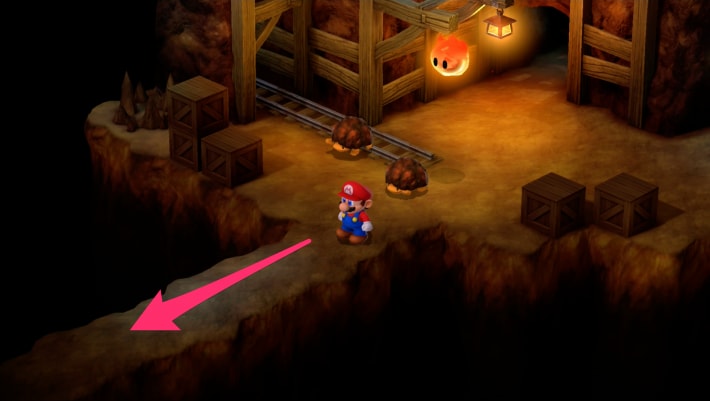
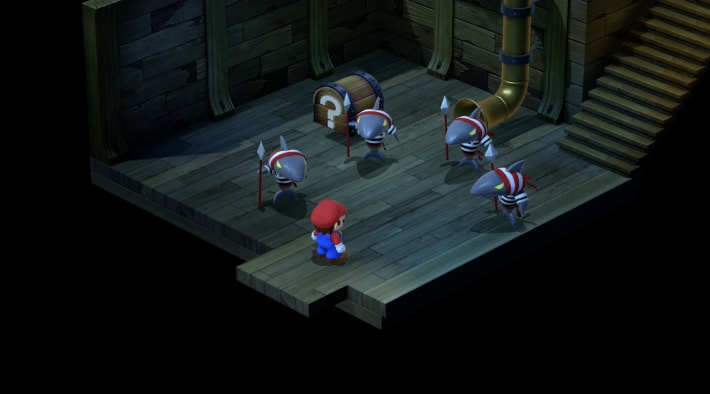
Enter the cannon and get on the upper rock platform
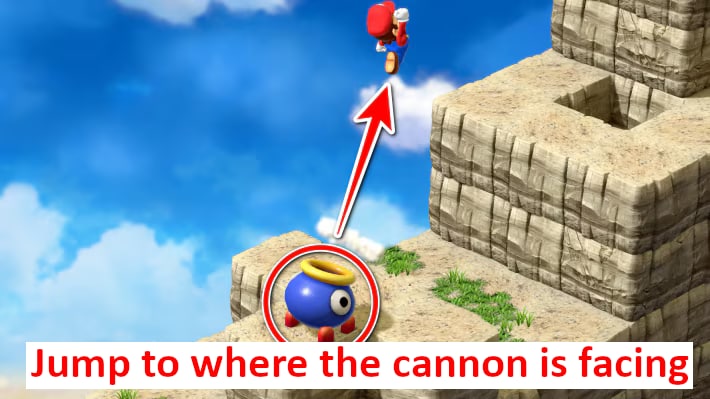
After entering Land's End, enter the cannon and get on the upper rock platform. Pay attention to the cannon's direction and press the button.
There's a hidden treasure chest in Area 1

Ride the yellow platform, and if the area exit is in front, jump towards the upper left to make a hidden treasure chest appear.
Area 2: Jump into the hole
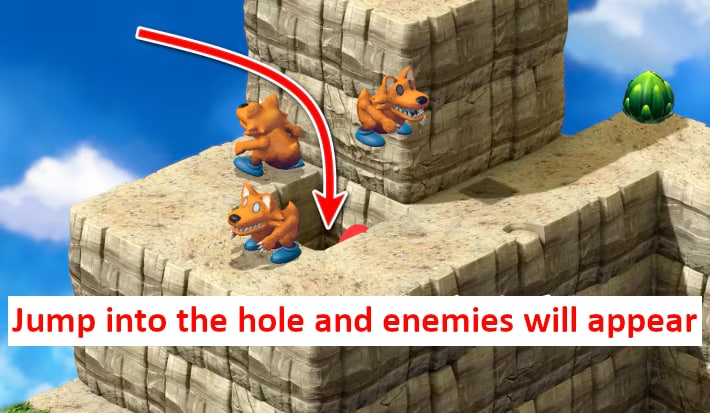
In Area 2, you'll also move by riding a cannon. Jump into the hole in the rock platform, and three Chows will jump out. You'll fight them when you exit, so defeat them while proceeding.
How to get the high treasure chest
| 1. | 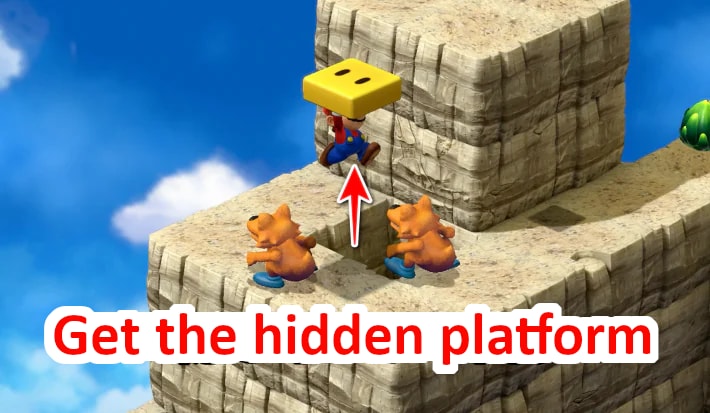 |
|---|---|
| 2. |  |
| 3. | 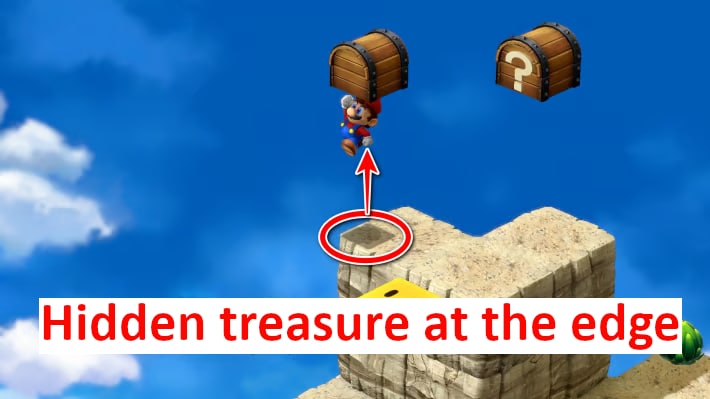 |
| 4. |  |
Cross the rock platforms to proceed
You can proceed to the next area by crossing the rock platforms. The platforms are narrow and enemy monsters are fired from cannons, so fight while crossing.
If you fall, use the cannon to go up
If you fall, you can get back on the rock platform by entering the cannon at the very front. There are also enemy monsters, so be careful not to touch them.
Ride the flower to aim for the top
Ride the rotating flower to aim for the top. If the rotating flower is facing a different direction, you'll go to a different place, so jump when it's facing the rock platform.
There's a hidden treasure chest
There's a hidden treasure chest where three blue flowers are lined up. Jump between the middle and right ones.
Cross the Donut Block Bridge
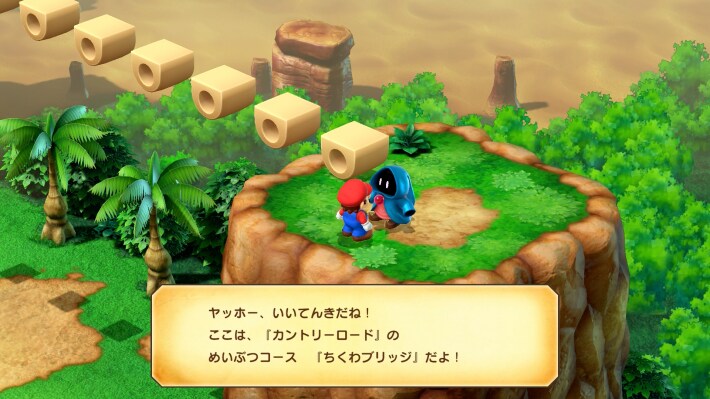
Cross the Donut Block Bridge to aim for the next area. You can try a mini-game, so give it a shot.
Go down and find a Flower Tab in the shadow of a tree
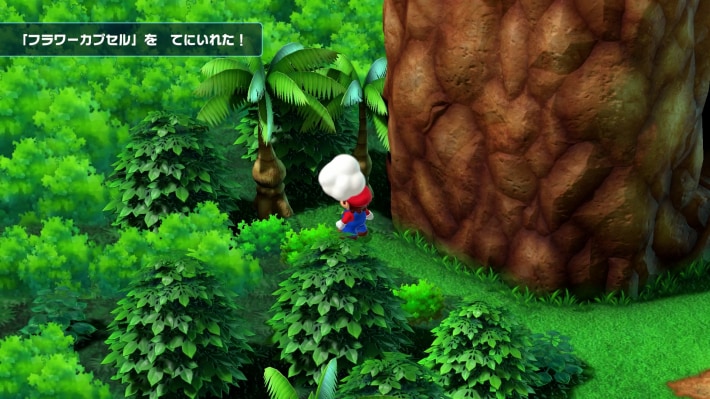
Go down from the Donut Blocks to find a passage in the shadow of a tree. A Flower Tab is there, so collect it.
Enter the whirlpool with ants
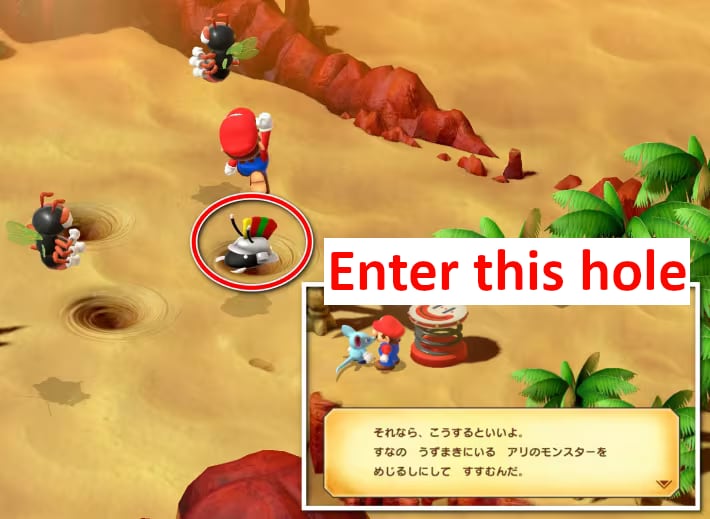
When you arrive at the desert area, enter the whirlpool with ants. You'll need to fight, so prepare thoroughly. Enter the whirlpool with ants 4 times to go to the next area.
- Armored AntLand's EndWeaknessEffectiveImmune
You can't enter the whirlpool even if you flee
You can't enter the whirlpool even if you flee from the battle with the ants. Defeat them properly while proceeding.
If you make a mistake, you'll return to the previous one
If you enter a whirlpool without ants, you'll return to the previous area. Enter the whirlpool with ants again.
Get the Star and defeat enemies while proceeding
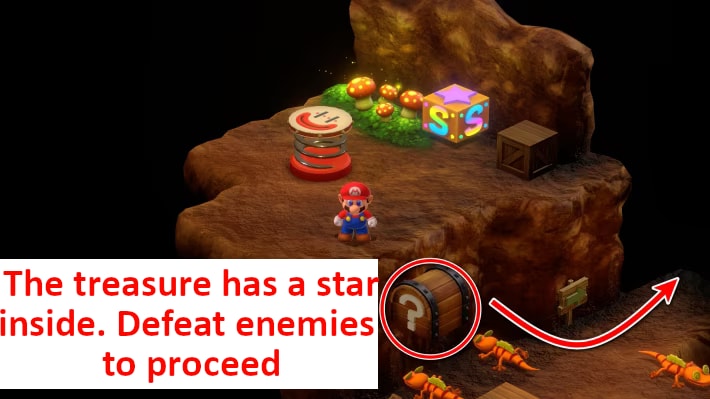
In the next area, you can get a Star from the treasure chest right after entering. There are many enemies around, so defeat them while proceeding.
You can buy a Star in the area below
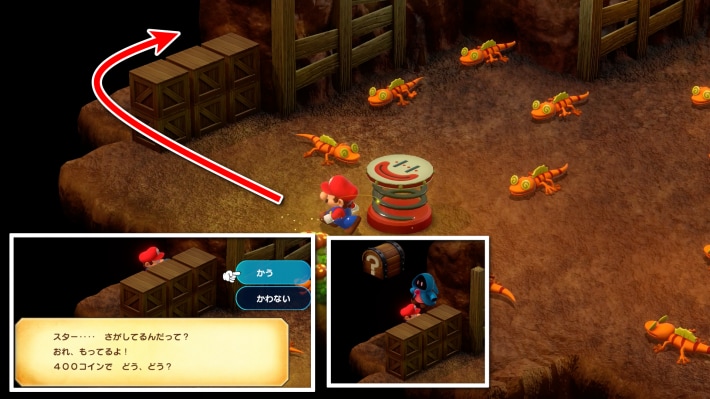
In the area below, a character who sells Stars for 400 coins is hidden in the shadow of a wooden box. There are many enemy monsters in this area as well, so if you have enough coins, buy one. Proceeding to the next area will take you to Belome Temple.
You can buy twice
If you talk to him again after buying a Star, he'll go look for another Star. When you visit again, he'll sell it to you for 800 coins, but it's expensive, so you don't have to buy it.
Until Belome Temple is Cleared
Go down the stairs and proceed
After entering Belome Temple, go down the stairs and proceed. You'll fight Belome again, so prepare your equipment and items.
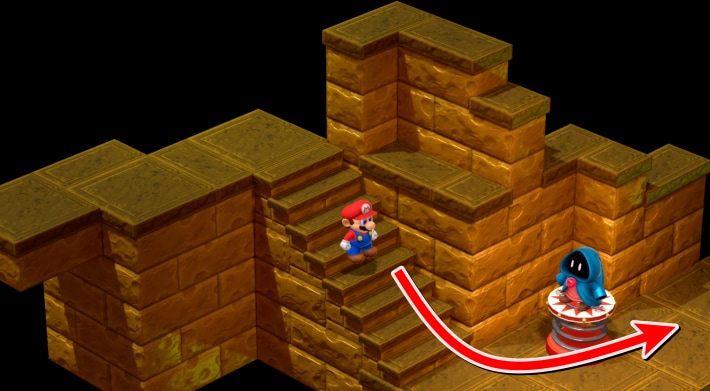
There's a jump pad to return to the surface
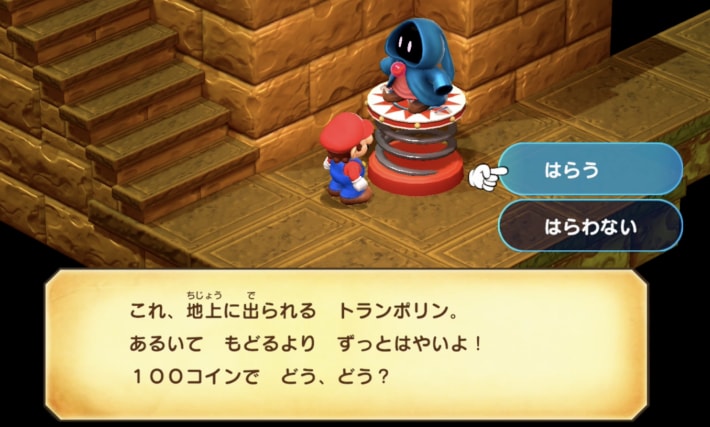
In the first area, there's a jump pad that returns you to the surface for 100 coins. After paying once, you can use it for free thereafter.
Draw a Belome fortune
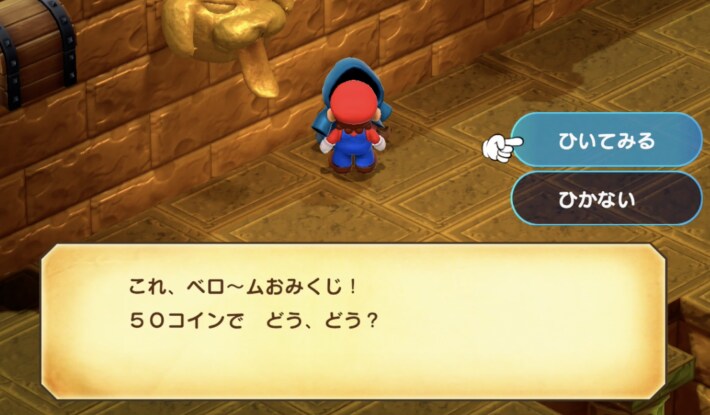
You can proceed by drawing a Belome fortune. It costs 50 coins each time, so make sure you have enough coins.
Belome Fortune Contents
| Press Order | Content |
|---|---|
| Right → Middle → Left | 100 Coins |
| Right → Left → Middle | 100 Coins |
| Left → Middle → Right | Mushroom |
| Left → Right → Middle | Yoshi Cookie |
| Middle → Right → Left | Enemy Monster |
| Middle → Left → Right | Enemy Monster |
You can try many times
After drawing a Belome fortune, you can go back and pay 50 coins to try again as many times as you want. You can collect coins and Yoshi Cookies.
Enter the pipe and proceed
After drawing a fortune, enter the pipe and proceed. If the fortune result is an enemy monster, defeat it to proceed.
Go down the stairs and proceed
Proceed past the closed shutter and go down the stairs. There are two hidden treasure chests in this area.
Hidden Treasure Chest 1
Get on top of the first treasure chest and jump to make a hidden treasure chest appear.
Hidden Treasure Chest 2
There's a hidden treasure chest immediately after going down the stairs.
Draw a Belome fortune for the second time
Proceed further to draw a Belome fortune for the second time. If you get "Mmm. I'm hungry", get on the yellow block and go down.
Enter the pipe to fight Belome again
- Prepare for sleep status beforehand
- Be careful of character copying
- Inflict Fear status with Bowser
- It's recommended to defeat Belome first
Enter the pipe to fight Belome again. Fear is effective, so you'll want to include Bowser in your party. After defeating him, proceed to Monstro Town.
From Monstro Town to Bean Valley
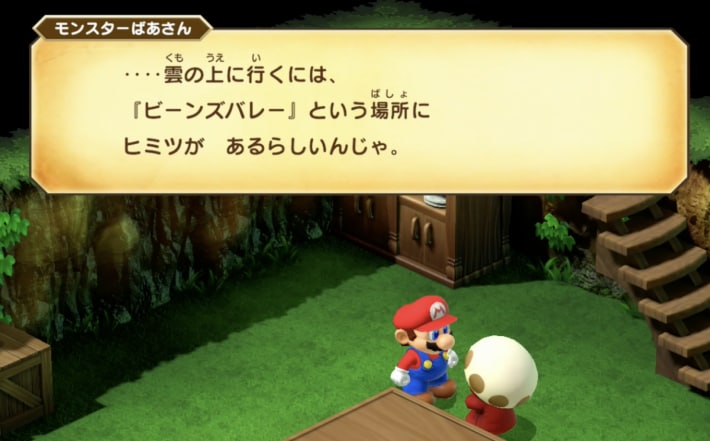
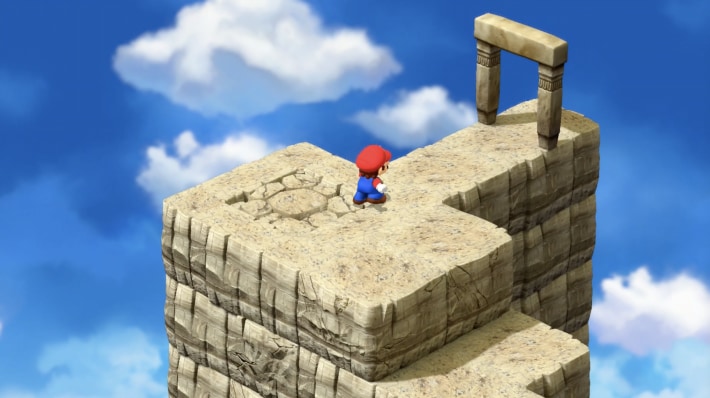
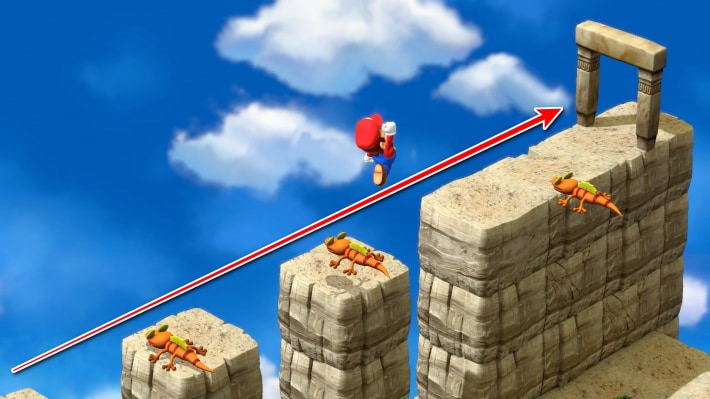
Talk to the monster grandma in the leftmost house in Monstro Town, and she'll tell you how to get to Bean Valley. Ride the Sky Troopas to aim for the top of the cliff.
How to get to the Sky Troopas' location
| Order | Image |
|---|---|
| 1. | 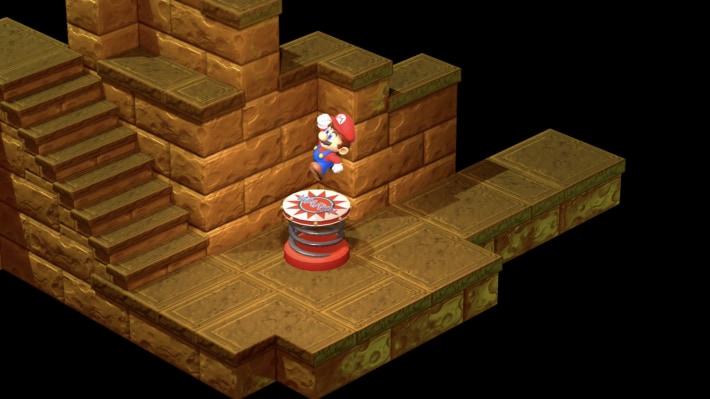 Return to Belome Temple and use the jump pad to return to the surface Return to Belome Temple and use the jump pad to return to the surface |
| 2. | 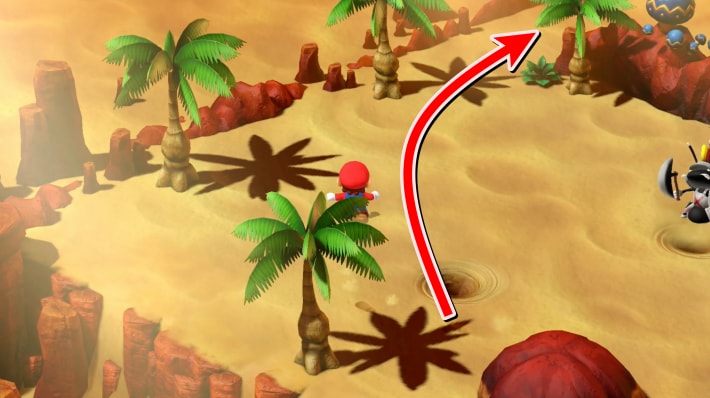 Don't enter the whirlpool, go upwards Don't enter the whirlpool, go upwards |
| 3. | 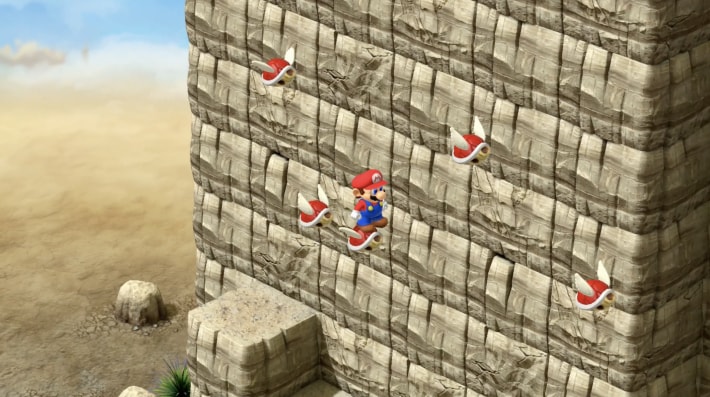 Ride the Sky Troopas to aim for the top Ride the Sky Troopas to aim for the top |
Monstro Town has many sub-events
For story progression, you just need to ask how to get to Bean Valley, but there are many other sub-events. Some reward you with powerful accessories, so it's recommended to take a little detour here.
Until Bean Valley is Cleared
Area 1: Enter the right pipe
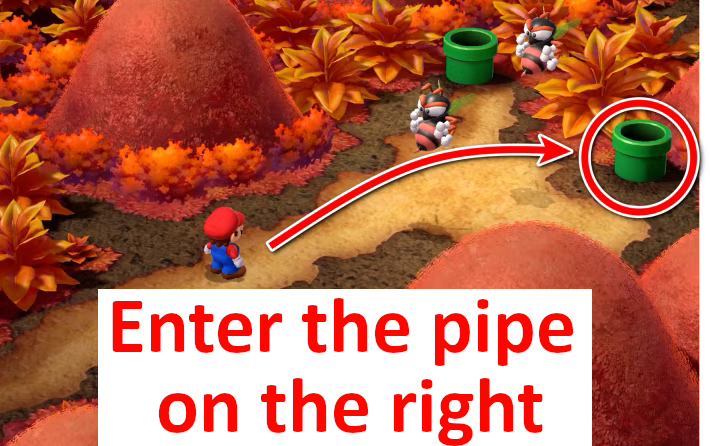
After entering Bean Valley, first enter the right pipe. There's nothing in the left pipe, so you don't need to enter it.
Area 2: Enter the pipe at the far end
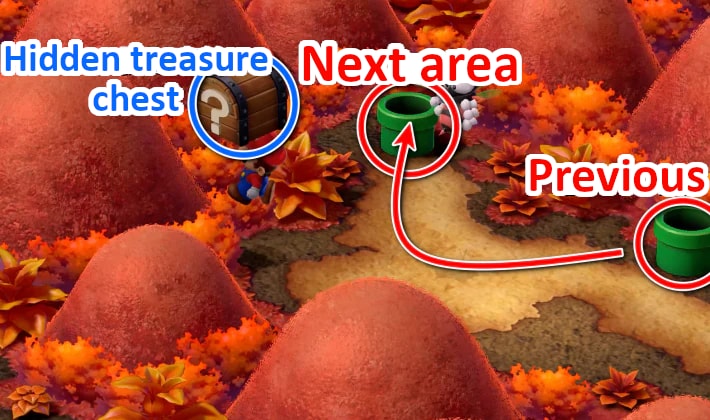
Go to the next area and enter the pipe at the far end.
Hidden Treasure Chest Location 1.
In the second area, there's a hidden treasure chest near the bottom of the pipe.
Area 3: Proceed to the path in the back left

Proceed to the left to go to the next area. Also, enter the pipe below to get a Flower.
Area 4: There are 5 pipes
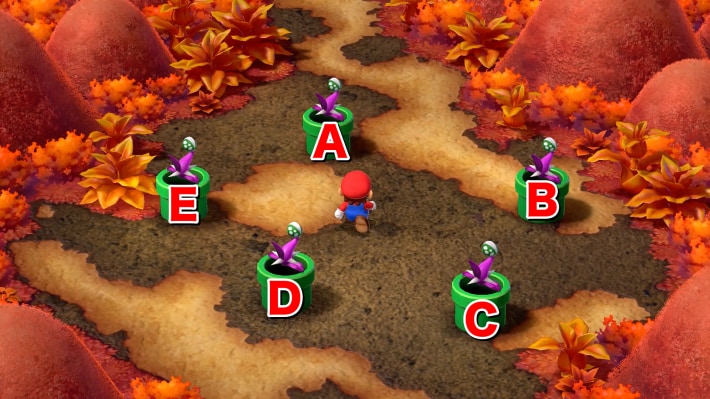
Piranha Plants appear in 5 pipes. Defeat them to enter the pipes and open treasure chests. However, there are also enemy monsters, so be careful.
Inside the pipes by position
| Pipe | Inside the Pipe |
|---|---|
| A | Treasure Chest Roulette (If you miss, you fight a Pandorite) You can go to Grate Guy's Casino |
| B | Frog Coin Pandorite (Enemy) |
| C | Treasure Chest Roulette (If you miss, you fight a Pandorite) |
| D | Treasure Chest Roulette (If you miss, you fight a Pandorite) |
| E | Enemy Monster |
Pipe A: To Grate Guy's Casino
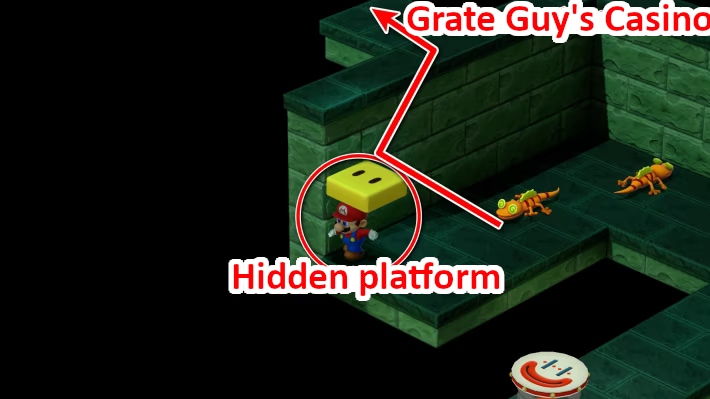
Enter Pipe A to reach a dead end. However, there's a hidden block, and you can jump to the exit on top of the wall. The exit leads to the world map, and a new path to Grate Guy's Casino is added. You need a Bright Card to use Grate Guy's Casino.
Pipe B: Frog Coin
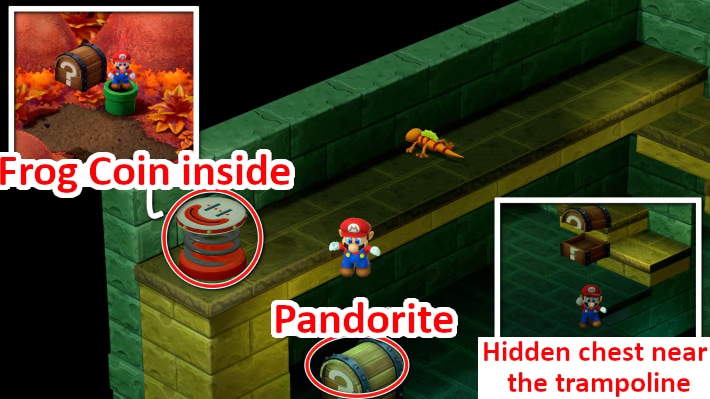
Enter Pipe B to find a treasure chest, stairs, and a trampoline. There's a hidden treasure chest near the trampoline to return, and the treasure chest in the room is a battle with "Pandorite". Go up the stairs and jump on the trampoline to open a treasure chest containing a Frog Coin.
Pipe C: Hidden Treasure Chest
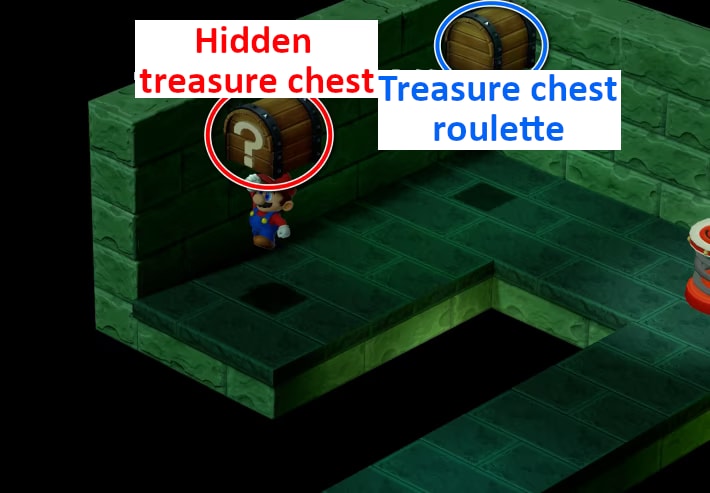
The treasure chest that appears when you enter Pipe C is a roulette. There's a hidden treasure chest near the dead end just ahead.
Pipes E/D: Treasure Chest Roulette
The rooms you reach by going down Pipes D and E only have treasure chest roulettes. If you miss, you'll fight a "Pandorite".
- PandoriteBean ValleyWeaknessEffectiveImmune
Fight Megasmilax
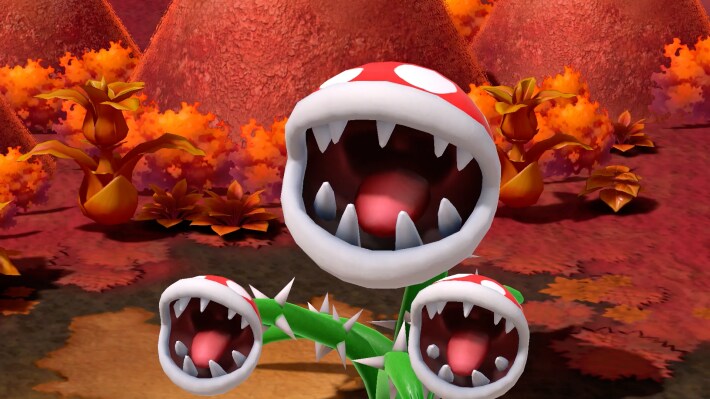
- Defeat the buds to make the main body appear
- Need to counter multiple status ailments
- Weak to Ice: "Snowy" is effective
Touch the Piranha Plant at the far end to trigger a battle. Defeat the buds to make Megasmilax appear. It's weak to Ice, so Mallow's Snowy is effective.
Get the Fertile Seed
Defeating Megasmilax will reward you with a Fertile Seed. It's necessary to obtain the Lazy Shell, so don't forget to get it.
Hit the rock block
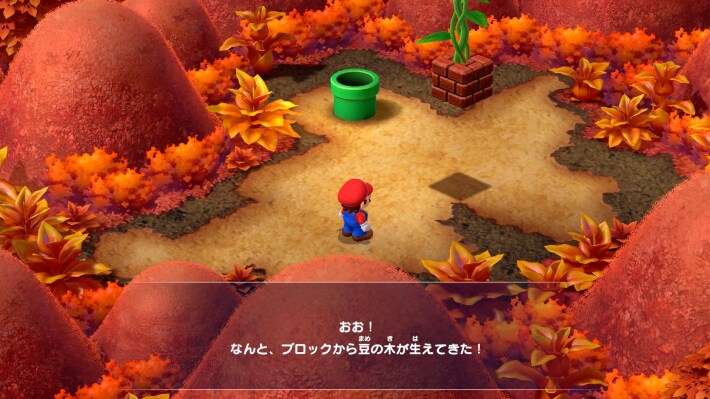
After entering the pipe, hit the rock block to make a beanstalk grow, allowing you to go to the clouds. Hit the block again to climb.
Cloud Area 1: Climb the green → yellow → blue vines

After climbing to the clouds, there are vines of different colors. You can move around the vines with the stick, and jump and transfer between them with the B button to climb.
Collect coins around the vines

There are coins around the vines, and you can collect them by moving around the vines with the stick while climbing.
Area 2: Fork in the road

Climb Area 2 to find a fork with yellow and green vines. The climbing difficulty is different for each, but the yellow vine also has a treasure chest, so try your hand at the jumping controls.
Yellow Route: Utilize hidden blocks
On the yellow vine route with the treasure chest, you can climb by jumping from vine to vine. However, there are also hidden blocks on top of the vines, and utilizing them makes jumping easier.
To Nimbus Land

Ride the trampoline to go to Nimbus Land in the clouds. There's an event in front of the palace, but after it ends, you can save at the inn.
Until Nimbus Land is Cleared
Fake Prince Mallow appears when you arrive in the kingdom

Climb the vine from Bean Valley to Nimbus Land, and an event will occur. Valentina and the fake Prince Mallow are giving a speech to the citizens.
Start by shopping first
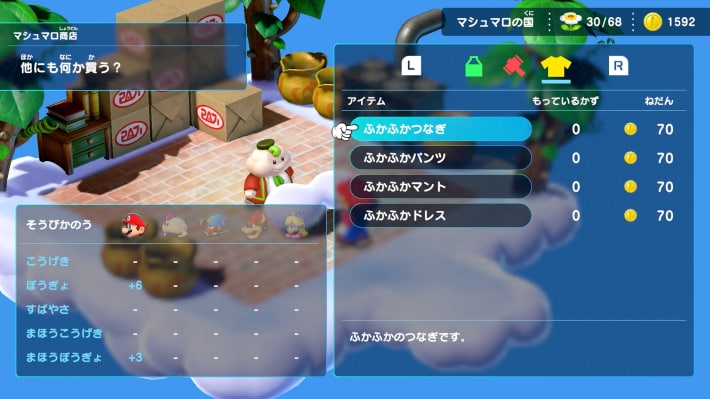
After the event, you can buy weapons and armor at the item shop at the kingdom entrance. If you proceed with the event at Garro the sculptor's house next, you won't be able to visit the shop for a while, so buy everything you need at this timing.
Open the hidden treasure chest
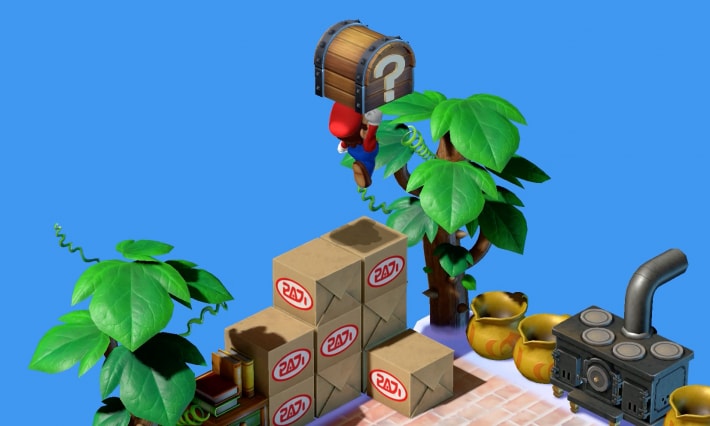
Boxes are stacked up in the back of the item shop. There's a hidden treasure chest on the very top, so open it.
Examine the statue in Garro the sculptor's house
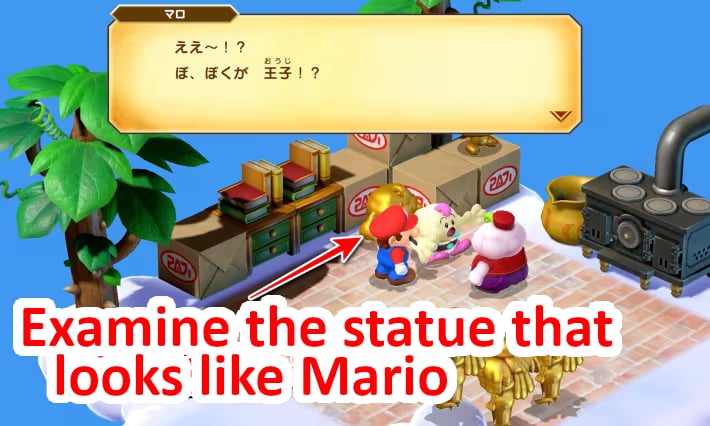
The building to the left of the palace is Garro the sculptor's house. Enter to find a statue of Mallow's father that looks just like him. Examine it to talk to Garro, and it will be revealed that Mallow is the prince. Choose "Yes" in the options to sneak into the palace disguised as a statue.
Save in the passage inside the palace
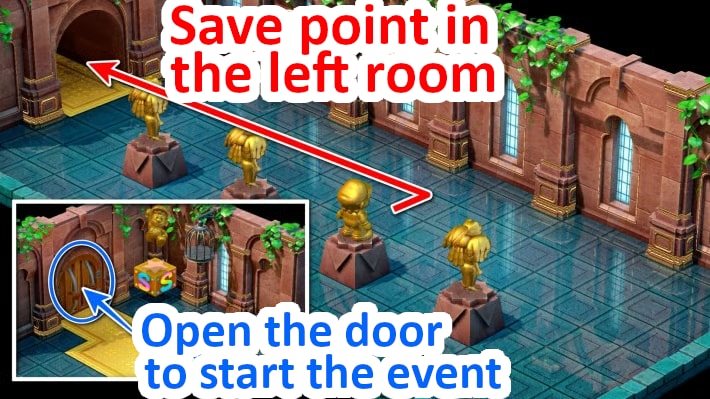
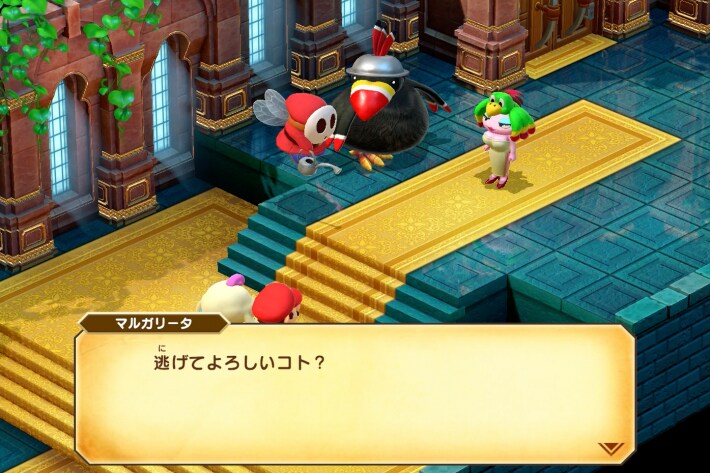
Go left from the room where the Mario statue was placed to save. If you try to proceed through the room, you'll hear Valentina and Dodo talking... Return to the original spot and pretend to be a statue so Dodo doesn't find out!
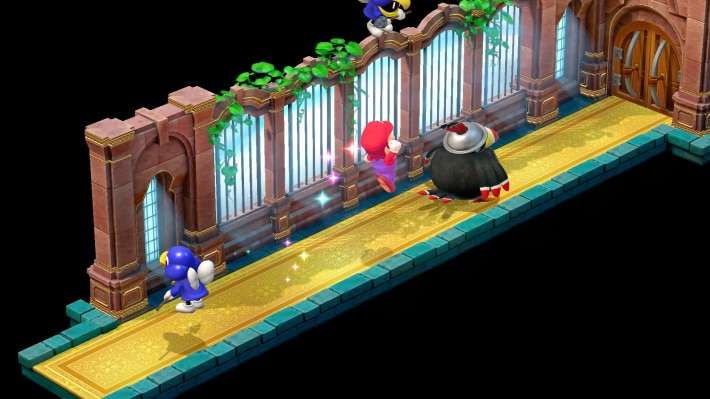
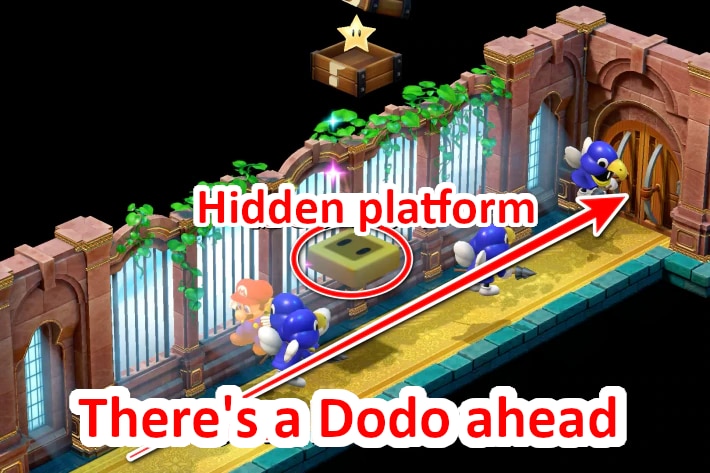
Avoid Dodo's pecks by jumping
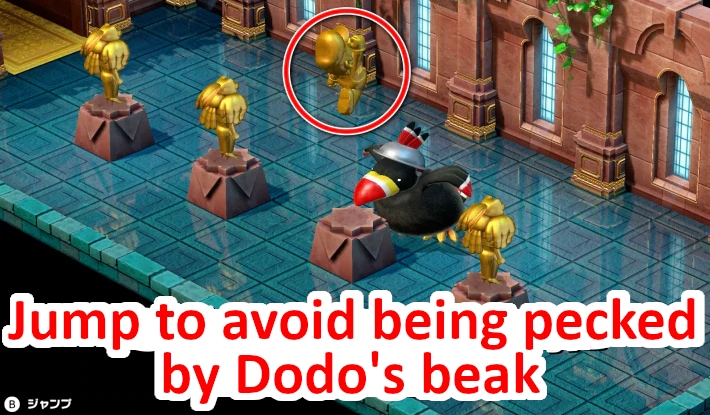
Dodo, ordered to polish the statue. He's in a bad mood, so a game begins where you avoid his beak pecks by jumping. Jump when he walks in front of Mario.
- He pecks a total of 4 times
- Finally, he circles the room and quickly comes in front
- If you fail, you start over
- If you fail twice, you'll battle
If successful, you get "Dodo's Feather"
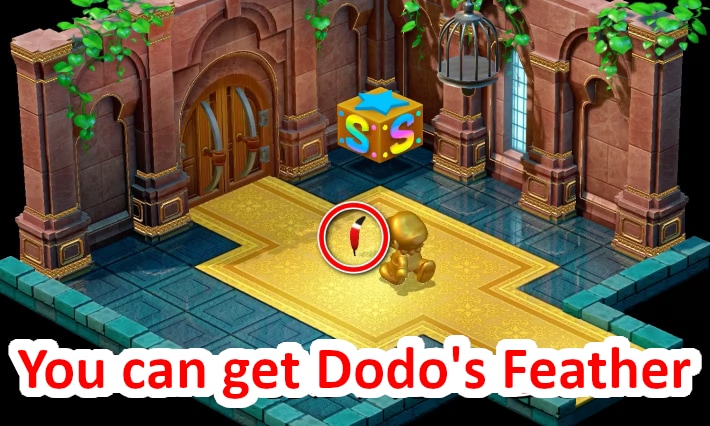
If you avoid all the pecks, "Dodo's Feather" will be in the next room. It's a valuable accessory that increases speed by +20.
If you fail the mini-game, you'll battle
If you fail twice, you'll battle Dodo. Dodo's normal attacks are powerful and inflict Silence, so prepare with accessories.
- Strategy for when mini-game fails or contact occurs is listed
- Prepare for Silence
- Fear status is effective
Get "Castle Key 1" from a resident
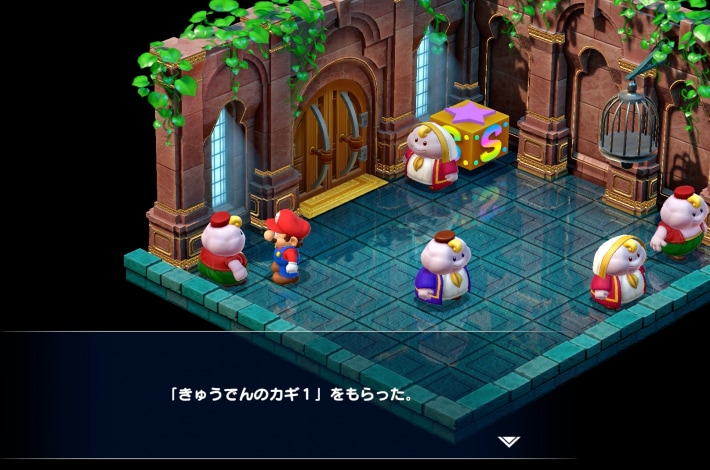
Aim for the save room where the people of Nimbus Land are. There are hidden treasure chests and other things along the way, so collect them while you go, and talk to the person in the room and select "Yes" to get "Castle Key 1".
| Order | Path Description |
|---|---|
| 1. | 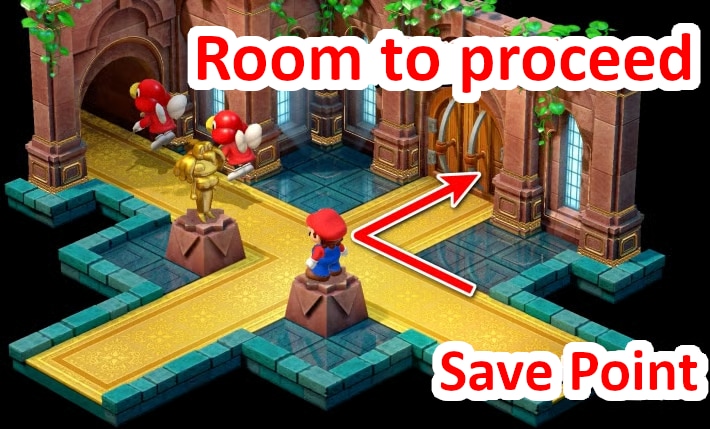 Proceed to the right room Proceed to the right room |
| 2. |  Proceed along the path Proceed along the path |
| 3. | 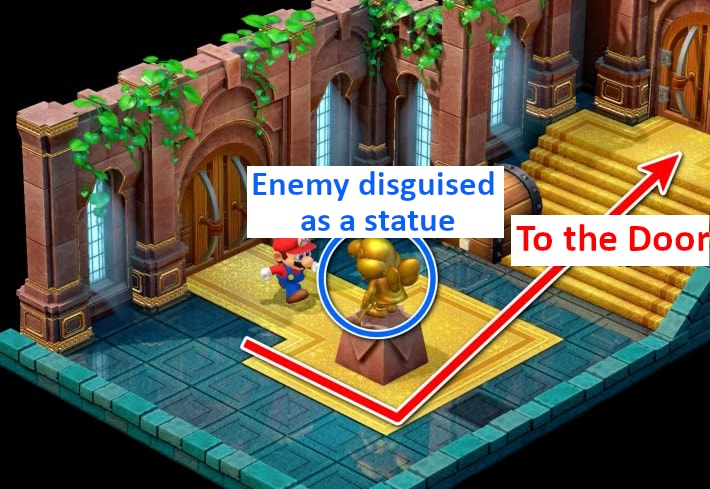 Be careful of enemies disguised as statues Be careful of enemies disguised as statues |
| 4. | 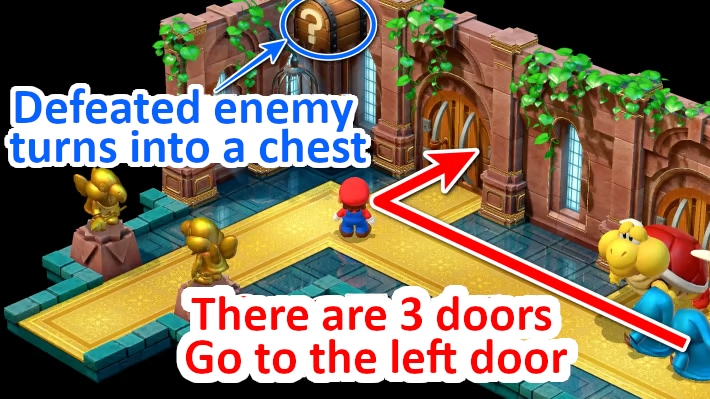 Enter the left door in the passage with the Heavy Troopa. Get the treasure chest near the door. Enter the left door in the passage with the Heavy Troopa. Get the treasure chest near the door. |
| 5. | 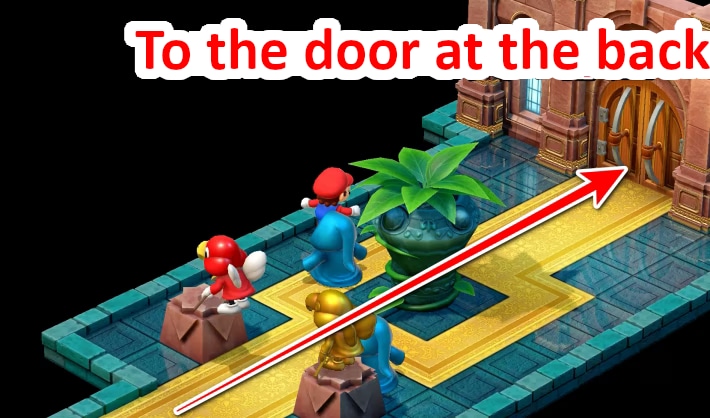 Enemies in the passage will approach, so be careful. Enemies in the passage will approach, so be careful. |
| 6. | 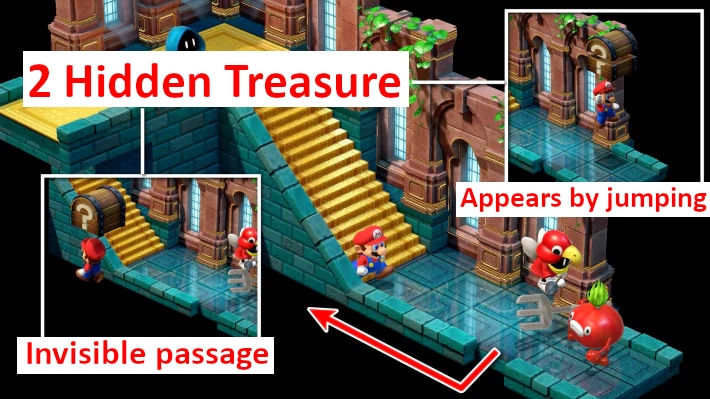 There are 2 hidden treasure chests. Proceed through the passage to There are 2 hidden treasure chests. Proceed through the passage to |
| 7. | 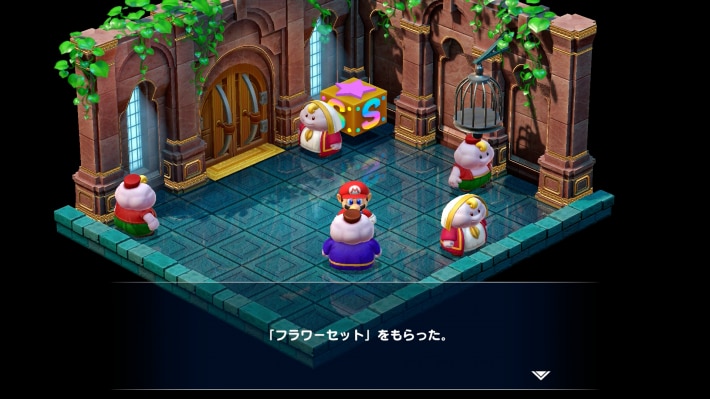 The save room with the palace servants. You can get a Flower Set and Castle Key 1. The save room with the palace servants. You can get a Flower Set and Castle Key 1. |
Defeat the Heavy Troopa guarding the door
Proceed through the palace to find a Heavy Troopa guarding a door, so defeat it. Jump attacks are effective. After defeating it, use the "Castle Key 1" you just got to open the door.
- Heavy TroopaNimbus LandWeaknessEffectiveImmune
Get "Castle Key 2" from Birdo
Talk to the egg in the room and select "Play with it" to trigger a battle. Normal attacks don't do much damage, but use the eggs Birdo spits out to deal damage. Winning will reward you with "Castle Key 2".
- Bounce back eggs with "Defend"
- Attack Birdo's eggs for explosion damage
- BirdoNimbus Land77760WeaknessEffectiveImmune
Get caught by Valentina in the back room
Open the door to get caught by Valentina, who flees to the back room, so chase her.
Chasing her leads to a battle with Dodo
You can catch up to the slow Dodo. Whether you defeat him in this room or not, you'll fight him along with Valentina after leaving the palace.
Become Star status with the floating treasure chest
There's no downside to earning experience, so aim to get the Star and then hit Dodo. Jump from directly below to make a hidden block appear. Open the treasure chest to become Star status and head to the next room.
Exit to the world map once to recover HP
You'll fall from the palace to the clouds below, and if you return to Nimbus Land again, an event will occur and you'll immediately be in a boss battle. Use the trampoline to exit to the world map, visit Seaside Town or Monstro Town to recover HP and save, then enter Nimbus Land again.
Change your party members
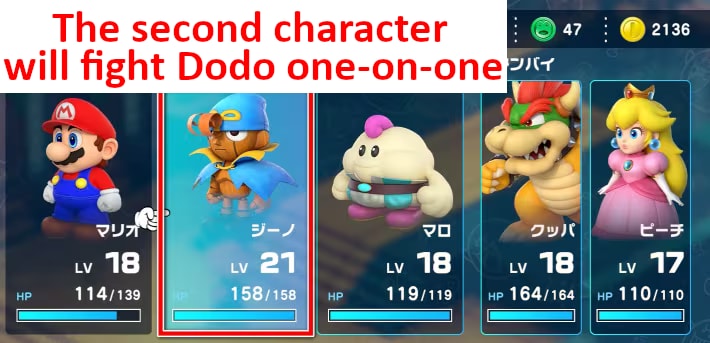
In the next battle with Valentina & Dodo, the character in the middle of your party will fight Dodo one-on-one in a different location. Dodo's normal attacks are powerful, so it's recommended to place fast Geno who can act first, or Bowser with high defense, in the middle.
Fight Valentina & Dodo in front of the palace
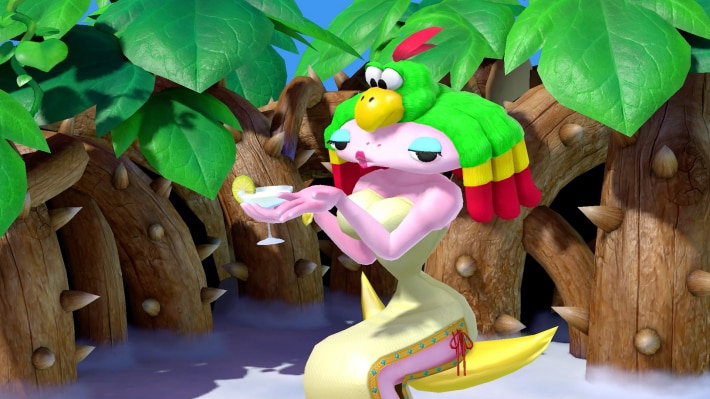
Initially, Dodo, called by Valentina, and the character in the middle of your party will fight in a different location. Then, it's Valentina vs. the remaining 2 characters, and then Dodo and his group will join, making it 3 vs. 2.
- Party member in the 2nd slot fights Dodo 1-on-1
- Prepare for status ailments
- Equip Peach with the Safety Ring
- DodoNimbus Land80070WeaknessEffectiveImmune
- ValentinaNimbus Land2000120WeaknessEffectiveImmune
Exit the palace and head to the hot spring
You can use the hot spring that only royalty can use. Talk to the hot spring guard to pass, then head to Barrel Volcano.
Until Barrel Volcano is Cleared
Descend from Nimbus Land
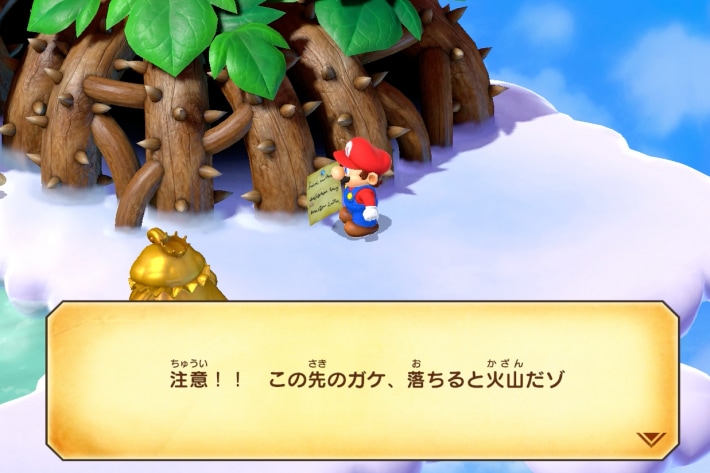
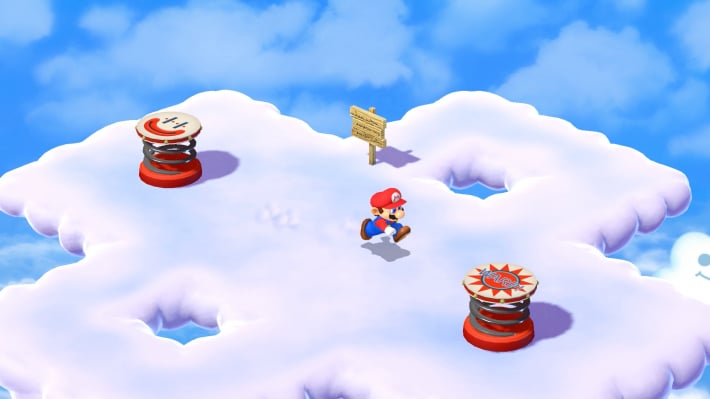
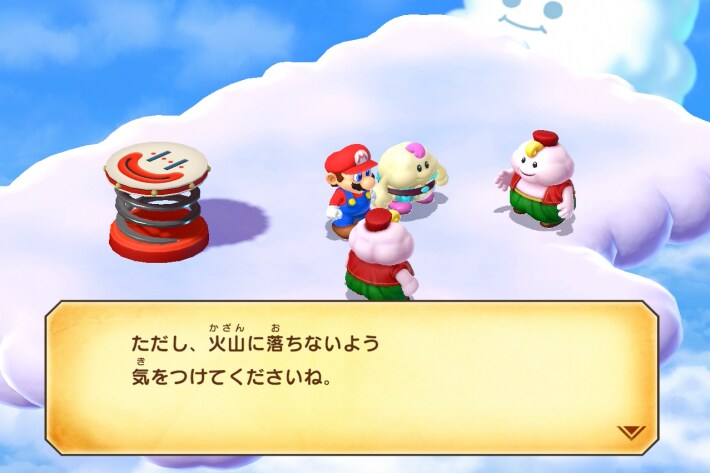
Head to the hot spring from the entrance of Nimbus Land. Talk to the guard, and Mallow will be proven to be royalty, allowing you to enter the hot spring. There's a sign, and falling through the gap in the clouds will take you into Barrel Volcano.
Features of Barrel Volcano Interior
Falling into lava makes you bounce
Inside Barrel Volcano, if you fall anywhere other than walkable areas, Mario will get burned and jump high. You'll return to a set position, so be careful when proceeding.
It's a straight path, no getting lost
Barrel Volcano has no forks and is a straight path. There are also two save points and an item/inn inside.
Many appearing enemies are weak to Ice
All enemies appearing in Barrel Volcano, except for the final bosses Axem Rangers and Zombone, are weak to Ice. Mallow's special move "Snowy" is very effective. There are many strong enemies, so don't hesitate to use it. Recover FP with Maple Syrups.
The 3rd treasure chest from the entrance is a Star
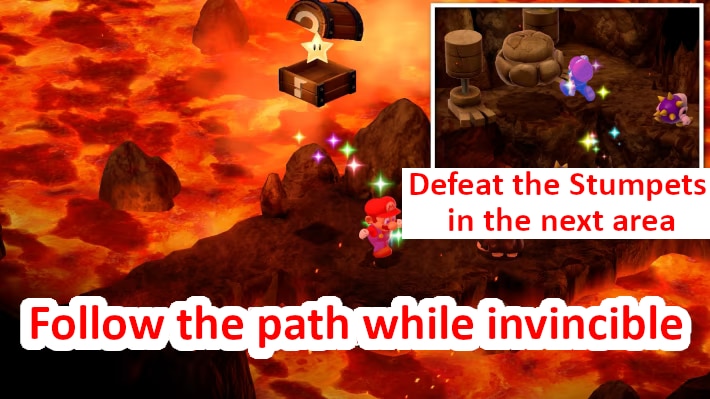
The 3rd treasure chest counting from the entrance contains a Star. Once you're invincible, quickly proceed to the next area where multiple "Stumpets" will appear. Hit them while invincible to level up quickly.
Defeat the Stumpet on the ledge with the Star
The "Stumpet" is troublesome in normal battles. Mallow's "Snowy" can defeat it easily, but if you want to conserve FP, defeat it while you have the Star.
How to get Frog Coins
There are several Frog Coins inside Barrel Volcano, but you need a little trick to get them.
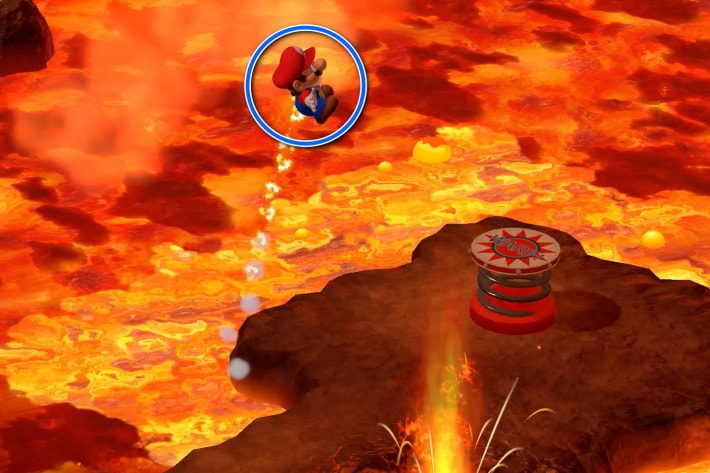
Frog Coin in the lava
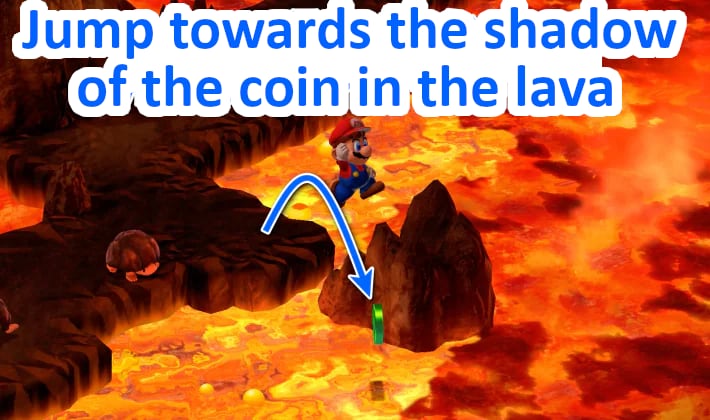
There's a Frog Coin in the lava where there's no footing. To get it, jump from the side to grab the coin. You won't take damage from stepping on the lava, so you can try as many times as you need.
Frog Coin above the exit
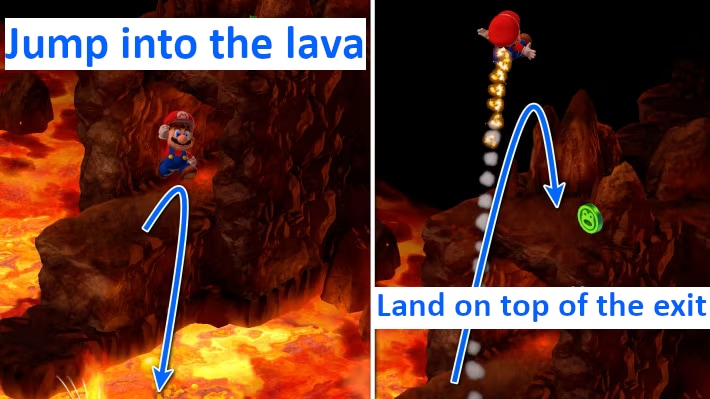
There's an area where Vomers jump out of the lava, and you cross by jumping on platforms. There's a Frog Coin above the exit, but no footing. To get it, fall into the lava near the exit, and you'll jump up onto the area above the exit.
Frog Coin where Dry Bones is
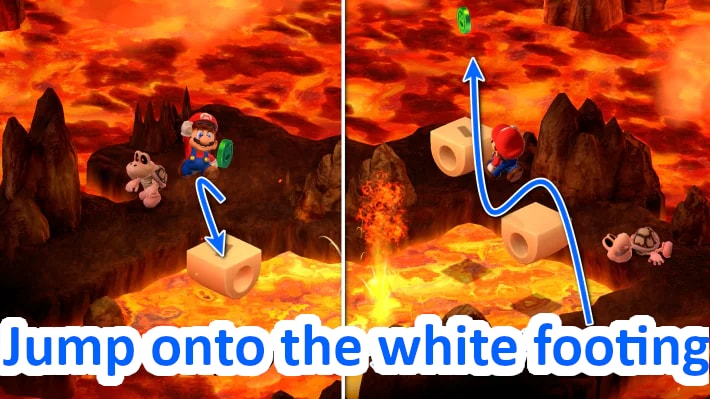
The Frog Coin in the area where Dry Bones roams can be obtained by jumping onto the white footing that collapses over time.
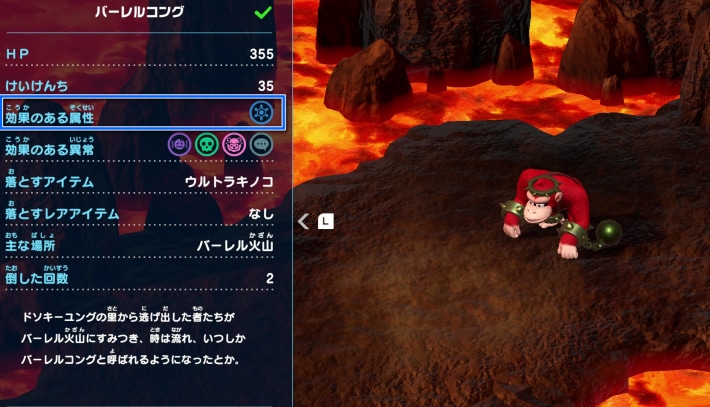
Mallow is effective against Magmus and Stumpet
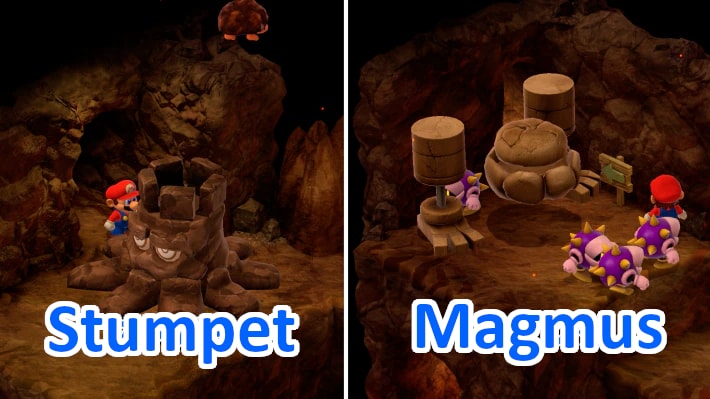
You must fight the "Magmus" and "Stumpet" blocking the passage. The special move "Snowy" which hits their weakness is effective, so include Mallow in your party.
- StumpetBarrel Volcano20050WeaknessEffectiveImmune
- MagmusBarrel Volcano50070WeaknessEffectiveImmune
Rest at Hinopio's Inn
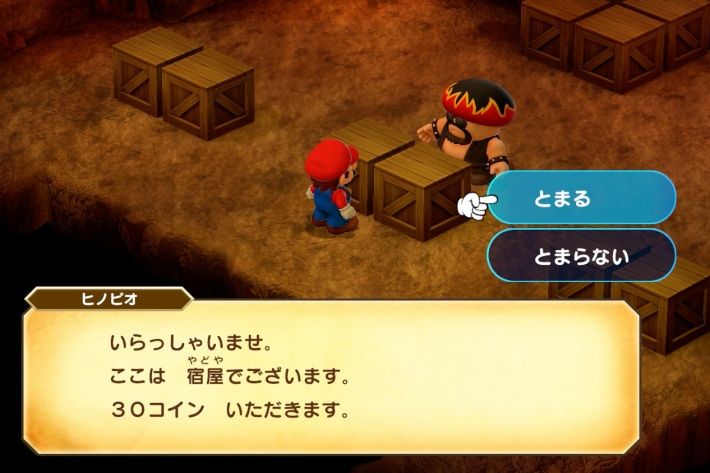
There's Hinopio who runs Hinopio Mart where you can shop. You can use items, equipment, and the inn, and there's also a save point in the next area, so strengthen your equipment with things like the Fire Shell.
Cross the lava by jumping on Donut Blocks
The floating Donut Blocks will fall after a certain time if you stand on them. If you fall once, return to the previous area and come back, and they will be restored.
Fight Czar Dragon
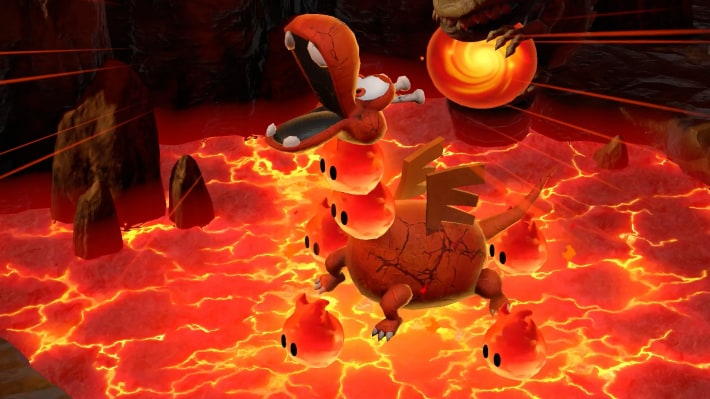
Enter the next area after crossing the Donut Blocks, and a boss battle will automatically begin. After defeating Czar Dragon, you'll fight Zombone in a consecutive battle. Their weaknesses are different, so be careful.
- Consecutive battle with Czar Dragon and Zombone
- Prepare for the Fear status
- Peach with area-of-effect healing is recommended
- Snowy is effective against Czar Dragon
- Chip away at Zombone with normal attacks
- Czar DragonBarrel Volcano1400100WeaknessEffectiveImmune
- ZomboneBarrel Volcano180050WeaknessEffectiveImmune
After defeating them, return to Hinopio's shop and save
After defeating Czar Dragon, you'll have a consecutive battle with the Axem Rangers in the next area. Before that, it's recommended to return to Hinopio's shop to save and buy any missing items.
Get the Star Piece... or so you thought
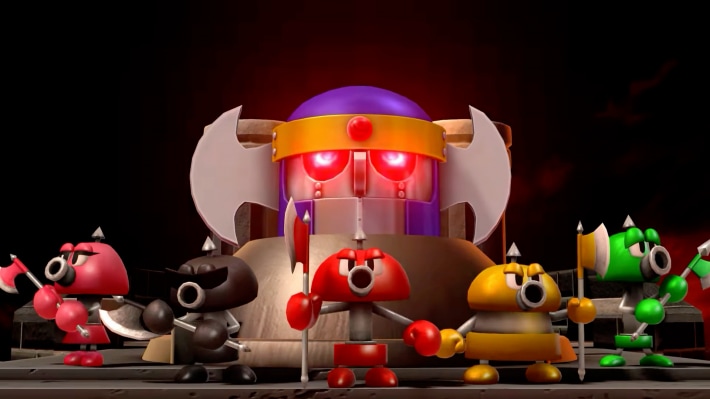
Finally, you get the 6th Star Piece... or so you thought, but it gets stolen by the "Axem Rangers". Chase them up the volcano, and you'll have consecutive battles with the Axem Rangers and the giant battleship, Blade, at the crater.
- Consecutive battle with Axem Rangers and Blade
- Prepare for status ailments beforehand
- Thoroughly use Peach's area-of-effect healing
- Prioritize defeating Green and Pink
- Be careful of Black's special move counter
- Heal everyone before defeating the 5th member
- Defeat Blade with Jump and normal attacks
- Axem RedBarrel Volcano8000WeaknessEffectiveImmune
- Axem BlackBarrel Volcano5500WeaknessEffectiveImmune
- Axem YellowBarrel Volcano6000WeaknessEffectiveImmune
- Axem PinkBarrel Volcano4000WeaknessEffectiveImmune
- Axem GreenBarrel Volcano4500WeaknessEffectiveImmune
- BladeBarrel Volcano99950WeaknessEffectiveImmune
Nimbus Land's Lakitu Bus is restored
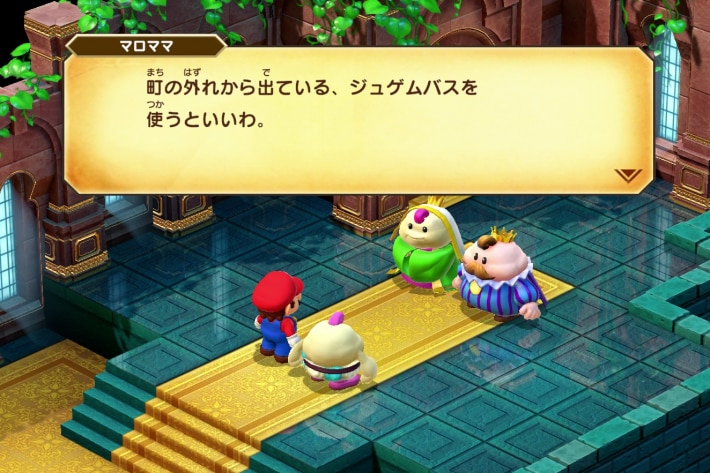
Report the battle in Barrel Volcano and the remaining Star Piece, and you'll be able to use the Lakitu Bus. Exit the palace, go left, and talk to the Lakitu Bus manager. Now you can go to Bowser's Keep anytime.
Walkthrough Chart up to the 7th Star Piece
Until Bowser's Keep is Cleared
You can go there via the Lakitu Bus in Nimbus Land
After reporting the battle in Barrel Volcano and the remaining Star Piece, you'll be able to use the Lakitu Bus. Exit the palace, go left, and talk to the Lakitu Bus manager. Now you can go to Bowser's Keep.
Proceed straight through the castle
After entering the castle, proceed straight along the path. There's a Donut Block bridge along the way, so be careful not to fall.
Enemies may flee if Bowser is present
If Bowser is in the battle, Koopa Troopas and Goombas may flee. This is effective if you want to minimize battles with enemies, but it also makes it harder to level up, so if you want to earn experience, remove Bowser from the party.
Proceed through the darkness
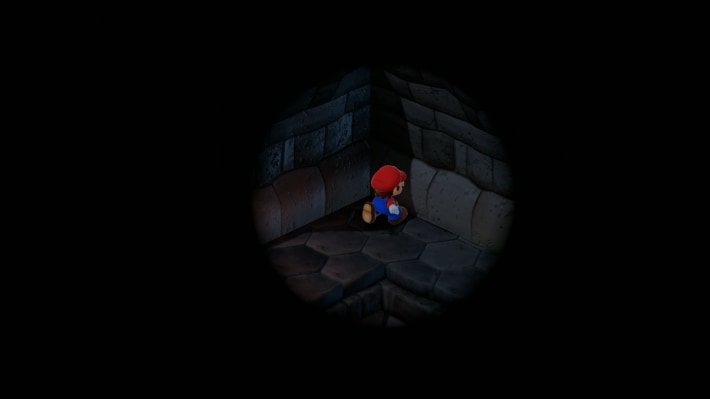
Proceed along the path to an area of darkness where only the area around Mario is visible. Enemies will appear suddenly, so if you want to avoid battle, proceed slowly.
There's a save point and Croco's shop
After passing through the dark area, there's a save block and Croco's shop. Be sure to save, as there will be 6 doors and consecutive boss battles after this.
There's a hidden room in the bottom left of the room
You can proceed to a hidden room from the bottom left corner of this room. Inside, there's an instant-use full recovery mushroom and 150 coins, so collect them.
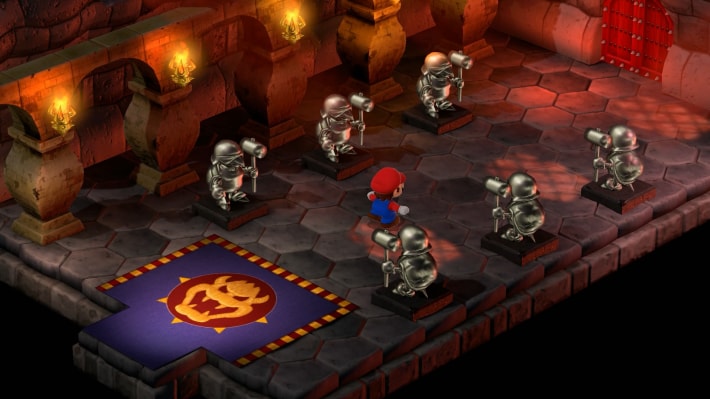
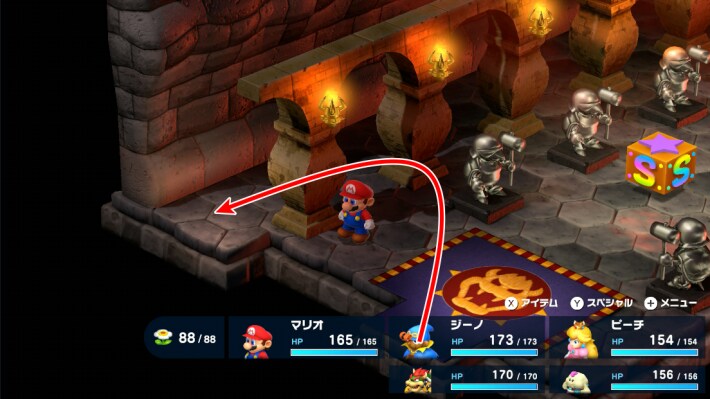
Clear the 6 doors
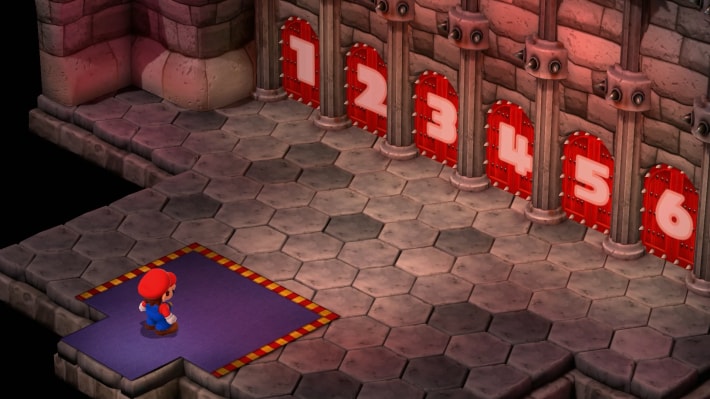
There are 6 doors, each leading to an action course, battle course, or puzzle course. Clear 4 doors to proceed to the next area. The course beyond the door is random, and you won't know what's inside until you enter.
Area Features
| Action Course | - Easy if you're confident in Mario's controls - Excellent weapon for crossing magma |
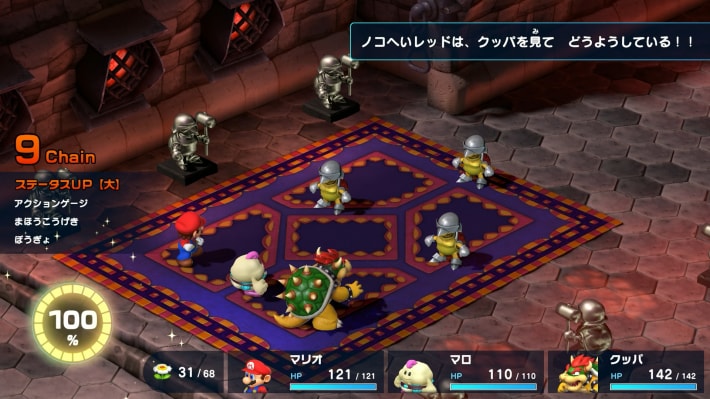
|---|---|
| Battle Course | - 12 consecutive battles with enemies - Easy if your combat power is sufficient - Excellent weapons in both rooms |
| Puzzle Course | - Easiest if you look at the answers - Rewards are mediocre |
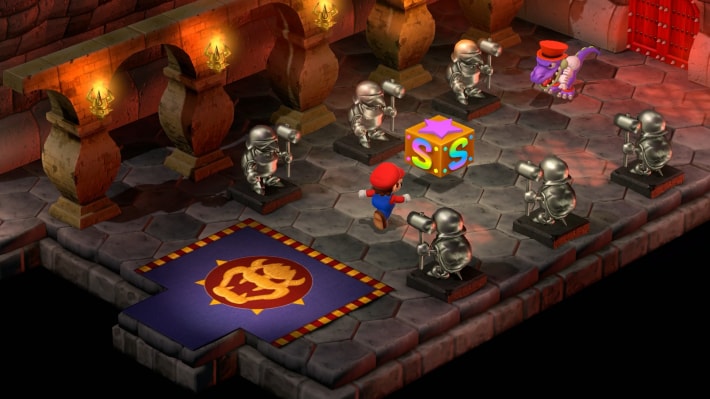
You can avoid difficult doors by giving up
Once you enter a door, you can't exit, but if it's a type of content you're not good at, you can give up by pressing the - button. Giving up will return you to the front of the door, so if you open a door you're not good at, give up.
The items you get are different
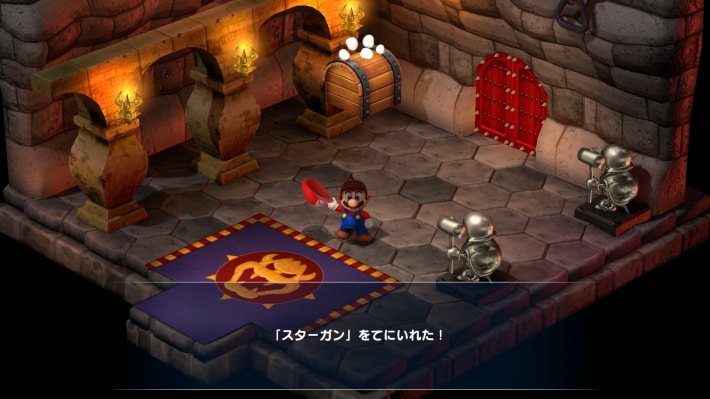
The items you get differ depending on the course. Be sure to obtain the strongest pre-clear weapons: Drill Claw, Sonic Cymbal, and Star Gun.
Rewards by Course
| Battle Course | |
|---|---|
| Starts with Terra Cotta | Star Gun (Geno's Weapon) |
| Starts with Sackit | Drill Claw (Bowser's Weapon) |
| Action Course | |
| Starts with platform crossing | Sonic Cymbal (Mallow's Weapon) |
| Starts with invisible floor | Super Slap (Peach's Weapon) |
| Puzzle Course | |
| Starts with coin collecting | Rock Candy |
| Starts with quiz | Rock Candy |
Fight Magikoopa
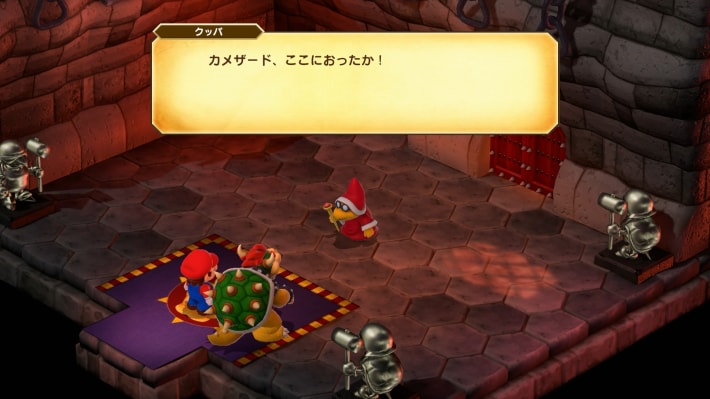
- Prepare for elemental attacks
- Defeat summons with normal attacks
- Be careful of area-of-effect attacks
Proceed further to fight Magikoopa. Magikoopa uses powerful elemental magic, so equip accessories that reduce elemental damage, like the "Safety Ring" or "Booster's Charm".
- MagikoopaBowser's Keep160030WeaknessEffectiveImmune
Free healing and infinite coins
After defeating Magikoopa, you can talk to it, and it will fully restore your HP and FP for free. It will also provide a treasure chest with infinite coins, so get coins if you need them.
Croco is in the left door
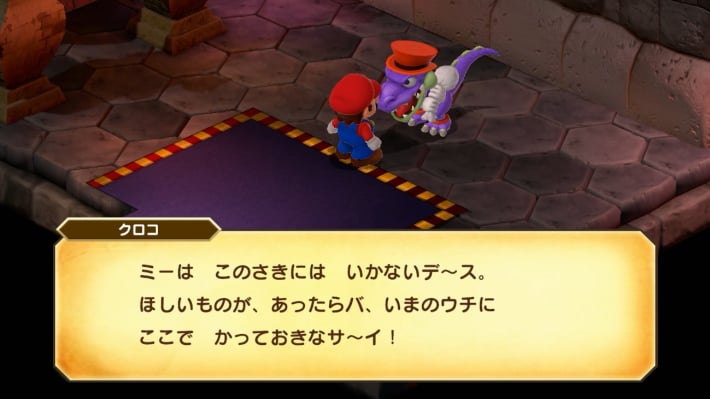
Croco is beyond the left door. You can buy the strongest exclusive armor for each character, so purchase and equip them.
Proceed along the Thwomp path.
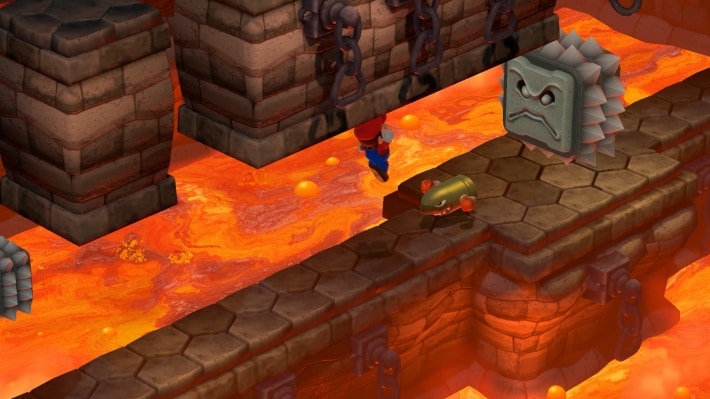
You cannot move the moment a Thwomp falls, and if crushed, you will be unable to move for a certain period. You can avoid the vibration by jumping, so jump frequently to proceed smoothly.
Fight Boomer
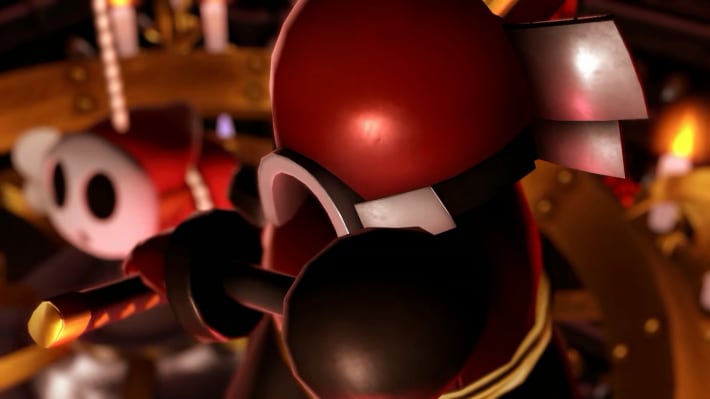
- Prepare for Shaker
- Stats change with color
Proceeding further leads to a battle with Boomer. Its attack and defense power differ depending on its body color, so fight while assessing it.
- BoomerBowser's Keep200057WeaknessEffectiveImmune
Fight Exor
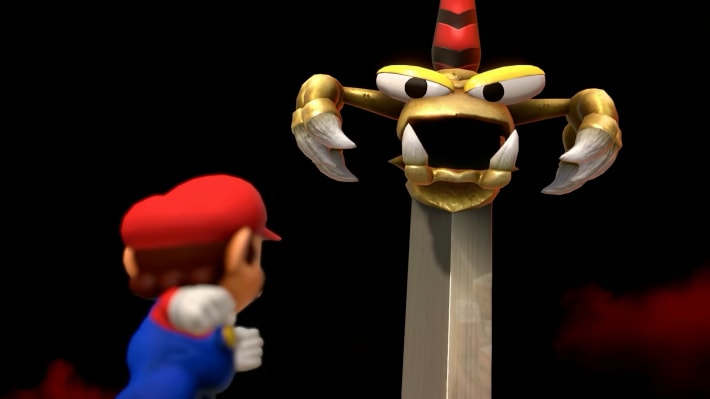
- Counter magic with Mute
- Defeat the Left Eye to remove the barrier
- Geno Beam is effective against the main body
After defeating Boomer, you will immediately fight Exor. After defeating it, you can go to the final area, Weapon World.
- ExorBowser's Keep1800100WeaknessEffectiveImmune
Until Weapon World is Cleared
You can return to the world map using the jump pad.
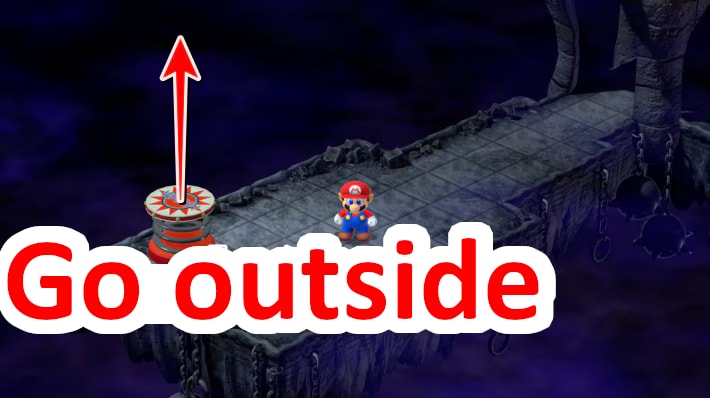
After defeating Exor, your HP and FP will be fully restored, and you will move directly to Weapon World. If you want to replenish items, either use the nearby jump pad or exit from the menu to prepare.
Proceed by jumping on the nuts.
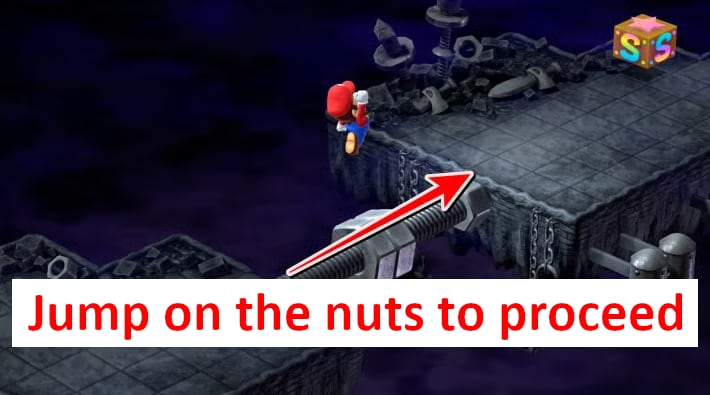
In Weapon World, there are narrow screw paths that you cannot cross directly. Jumping on the nuts will move them, so advance the nuts and cross over them.
Return to the top with jump pad
If you fall from a nut, you can automatically return to the top using a jump pad.
At the fork, go right.
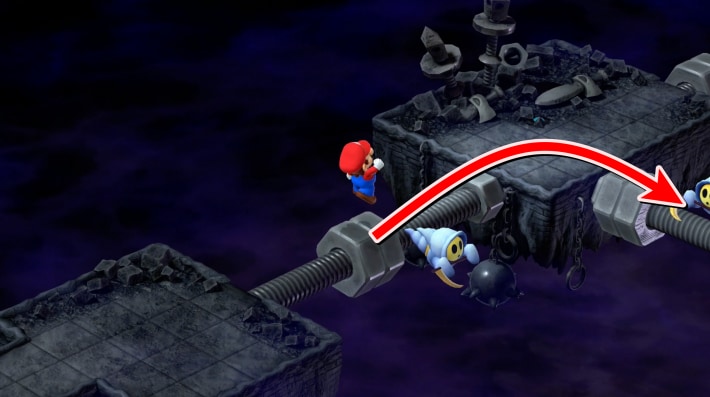
When you reach a fork in the nut path, proceed to the right.
Proceed straight along the nut.
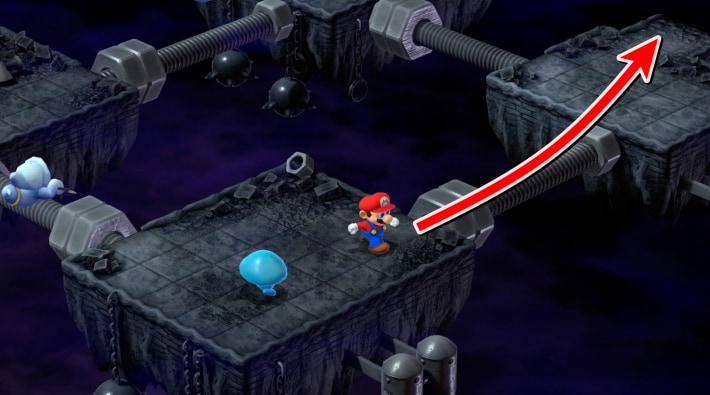
After going right, proceed straight along the next nut to the next area.
Press the green button to proceed.
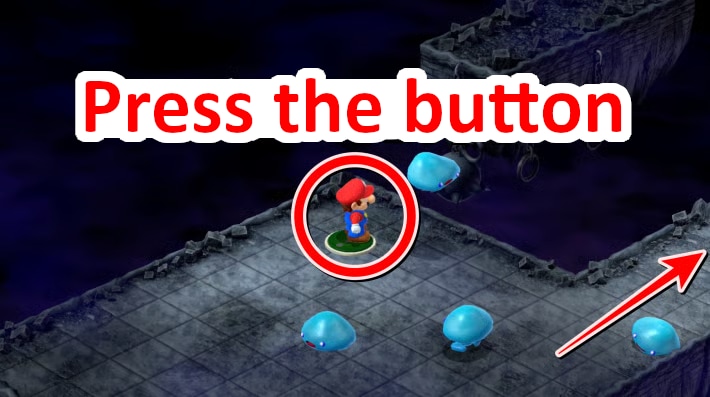
Pressing the green button will make a path appear, allowing you to proceed. Enemies will fall from the path above the button, so if you want to avoid battle, move away immediately after pressing the button.
Hidden treasure chest at the save point.
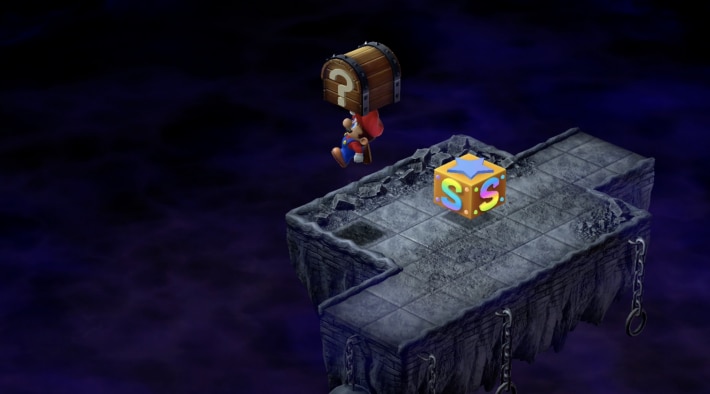
There is a hidden treasure chest to the bottom left of the save point, containing a full recovery mushroom. A boss battle awaits ahead, so recover and then save.
The 'Ultra Hammer' is in the next area
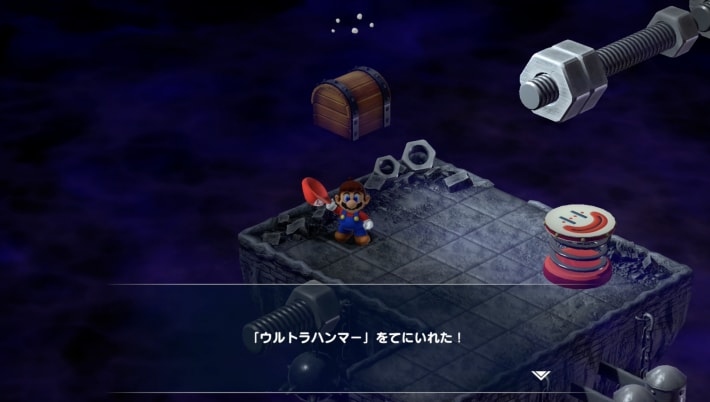
The treasure chest in the area one step ahead from here contains the 'Ultra Hammer'. If you have obtained the 'Lazy Shell' (weapon), you don't need to equip it, but if you haven't, it's a powerful weapon, so equip it.
Boss Battle: Count Down
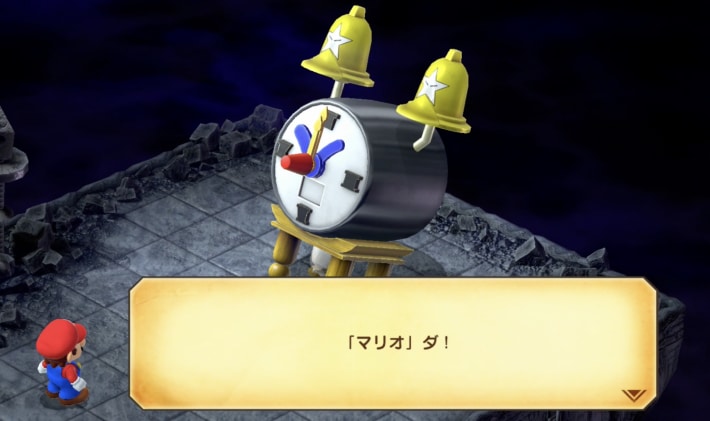
- Prepare for status ailments and instant death.
- Count Down has a fixed action order.
- Defeat Ding-A-Lings first.
- Fight while being aware of weaknesses.
Following the path will lead to a battle with the alarm clock-like boss, Count Down. If you defeat Count Down without defeating the Ding-A-Lings, you won't receive experience points and coins, so be sure to defeat the Ding-A-Lings first.
Save before proceeding
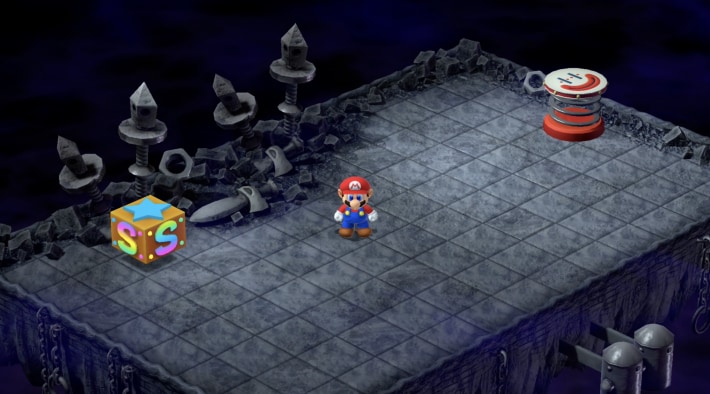
A save point will appear after defeating Count Down, so save before proceeding.
Go down in the conveyor belt area.
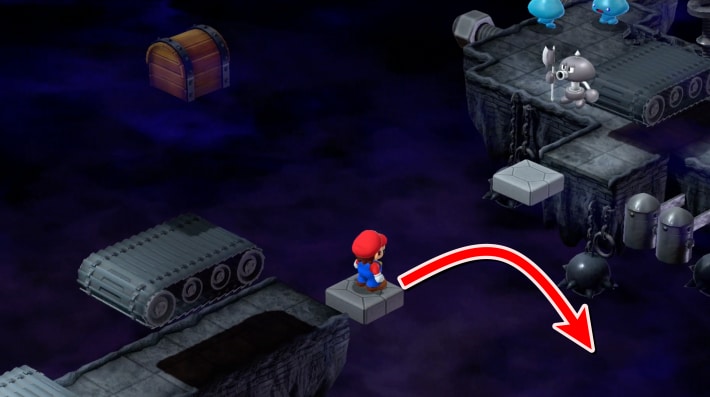
When the conveyor belt appears, you can go down from the location of the white plate. If you go down and proceed, there will be treasure chests with a Flower and a full recovery mushroom, so collect them and return using the jump pad.
Cross to the other side and proceed.
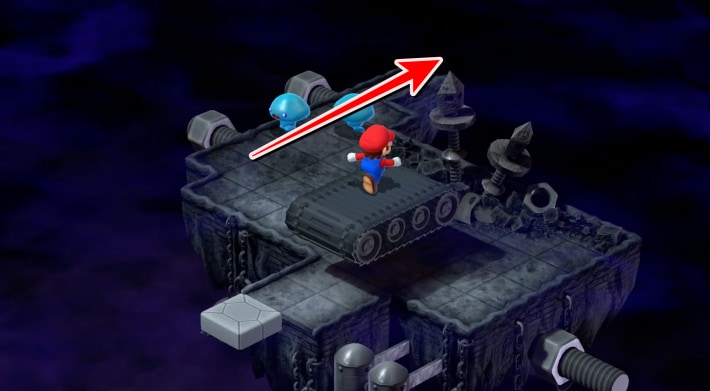
Once you cross to the other side, proceed from the far right.
Proceed while avoiding falling arrows.

In the area where many enemies flow from the conveyor belt, arrows will fall from the sky. If hit, you will be unable to move for a certain period, so proceed while avoiding arrows and enemies.
Proceed without falling from the conveyor belt.
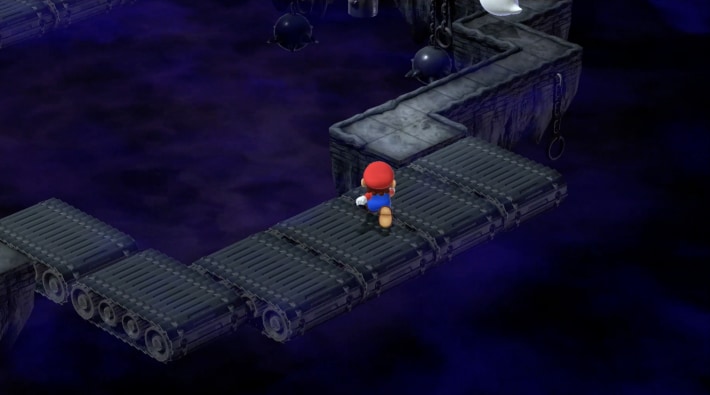
Running against the flow of the conveyor belt will only keep you in place, so basically, proceed by jumping. Narrow paths without conveyor belts do not have pitfalls, so you can run through them without worry.
Get on the white plate to go to the other side.
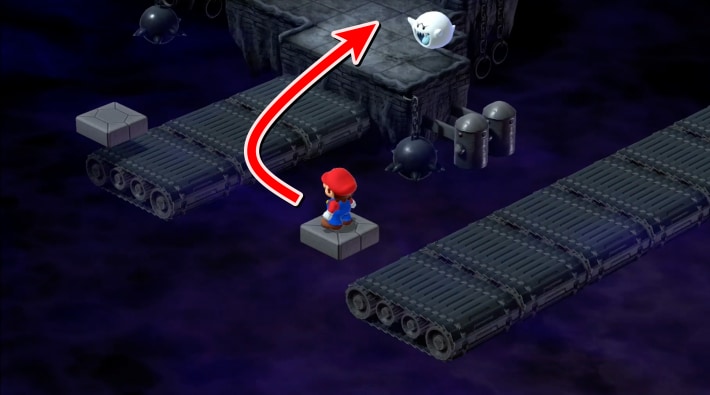
Where the conveyor belt ends, get on the white plate to move to the other side. Then proceed to the right.
Climb the conveyor belt stairs.
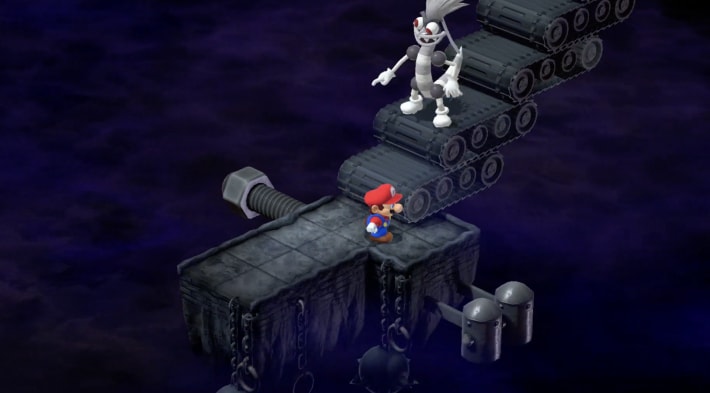
In the next area, the conveyor belt is shaped like stairs. Mass-produced Speardovich will fall from above, so climb while avoiding them.
Proceed while avoiding Axem Rangers.
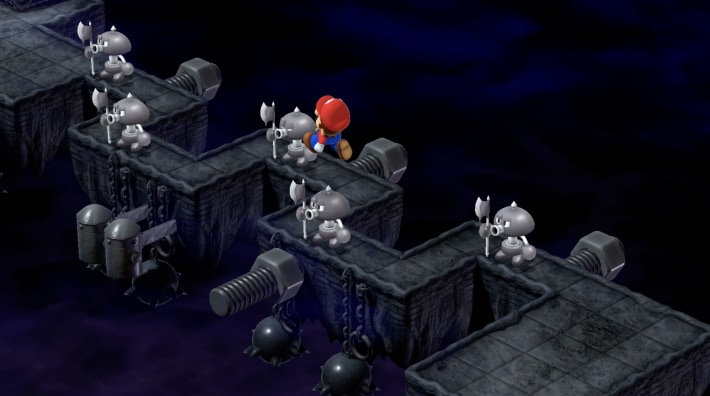
After climbing the conveyor belt stairs, Axem Rangers will appear on a narrow path. Proceed while avoiding them by jumping.
Defeat the falling Mass-produced Speardovich.

In the area where Mass-produced Speardovich fall onto blocks, defeating them will break the blocks, allowing you to fall down. A boss battle awaits below, so before that, proceed to the area in the far left.
There is a Flower and a full recovery mushroom
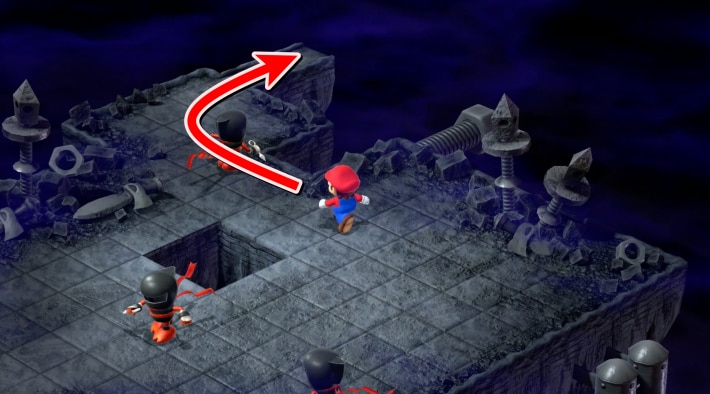
Proceeding to the area in the far left, there are two treasure chests containing a Flower and a full recovery mushroom. In preparation for the upcoming boss battle, recover and then return to the previous area to save.
Boss Battle: Cloaker & Domino
- Prepare for Fear.
- Defeat Domino first.
- Next, defeat Cloaker.
- Use physical and magical attacks appropriately.
Going down leads to the boss battle with Cloaker & Domino. Two enemies will appear, and defeating one will cause Earthlink to appear and merge with the remaining one. It is recommended to defeat them in the order of Domino -> Cloaker -> Earthlink.
After defeating the boss, return to save
From here on, it will be a boss rush, so after defeating Cloaker & Domino, enter the entrance of Weapon World once, go outside to save, and prepare items. You can return to the Weapon World entrance from the menu.
Boss Battle: Clerk
- Not a very strong enemy.
- Fear status is effective.
After an event, you will battle 3 'Mad Mallets', followed by consecutive battles with 'Clerk' + 2 'Mad Mallets'. However, they are not very strong enemies and can be easily defeated using Bowser's 'Terrorize' or Mallow/Geno's area-of-effect attacks.
Proceed a little further and Toad's shop will appear.
After defeating Clerk and proceeding a little, an event will occur, and Toad will appear to sell items. You can replenish recovery items here, and after finishing the shop conversation, you will receive 1 'Rock Candy'.
Boss Battle: Manager
- Fear status is effective.
- Pounders will revive if all are defeated.
Proceeding to the next area will lead to a battle with 'Manager' + 3 'Pounders'. Fear status is also effective here, but Pounders will reappear if all are defeated. If you want to reduce the damage taken, leave only one Pounder, defeat Manager first, and then defeat the remaining Pounder.
Boss Battle: Director
- Attack after inflicting Fear status.
- Poundettes will revive if all are defeated.
Proceeding to the next area will lead to a battle with 'Director' + 4 'Poundettes'. The basic strategy is the same as for 'Manager', but the number of enemies has increased, and their attack power is also higher. Defeat 2-3 Poundettes to reliably reduce the damage taken and fight.
Save before the tough enemy
After defeating Director and proceeding a little, a save point will appear. A tough boss awaits ahead, so save and, if necessary, go back to shop with Toad.
Boss Battle: Factory Chief & Gunyolk
- Prepare for status ailments.
- Fight while healing HP generously.
- Fear status is effective.
- Defeat Factory Chief first.
Proceeding further leads to the boss battle with Factory Chief & Gunyolk. Unlike the boss rush so far, this is a tough enemy, so prepare thoroughly with accessories and fight.
Save before pressing the switch.
After defeating Factory Chief & Gunyolk, a green switch will appear, but before pressing it, return to the previous area and save.
Boss Battle: Smithy

- Prepare for status ailments.
- Defeat Smelter first.
- Fight while using Peach's group heal.
- Focus attacks on the head.
- Use Yoshi-Ade during the magic form.
The battle with the final boss, Smithy. Defeating him will clear Weapon World and lead to the ending.