

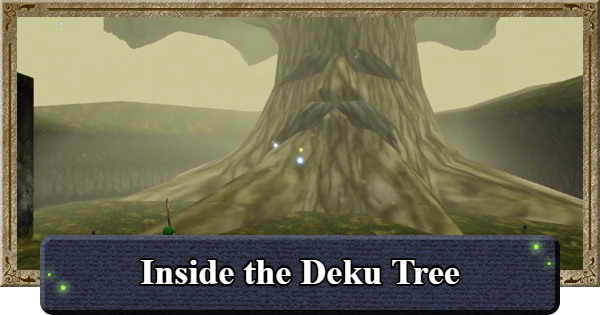
This is a full walkthrough of Inside the Deku Tree in Ocarina of Time, including the locations of the Gold Skulltulas in Inside the Deku Tree and Boss Gohma tips and strategy.
| ◀ Previous | Next ▶ |
|---|---|
| Intro | Hyrule Castle |
Table of Contents
Inside the Deku Tree Walkthrough
| Table of Contents (Tap to Jump) | |
|---|---|
| 1 | ▼How to Get the Fairy Slingshot |
| 2 | ▼Until Basement Floor 1 |
| 3 | ▼Until Gohma Boss Fight |
Until You Obtain the Fairy Slingshot


Obtain the Dungeon Map

Climb the vines growing on the wall of the 1st floor to proceed to the upper floor. After climbing, you'll immediately see a large chest containing the Dungeon Map
just a short distance away.
Follow the Path and Head Through the Door

Continue following the path and enter the door at the end.
You Can Jump Across Gaps

You can jump across short gaps by moving in the desired direction with the L Stick.
Defeat the Deku Scrub and Talk to It
Deflect the projectiles shot by the Deku Scrub and then chase after it to talk to it. You can reflect its projectile attacks with the Deku Shield by pressing the R Button
— note that sword attacks will not work.
Lock On Makes It Easier to Block
Press the ZL
button toward the enemy to enter lock-on mode, then press the "R" button to easily align your shield against the enemy's attack. Make good use of this technique.
Obtain the Fairy Slingshot
Proceed through the door ahead and open the chest to obtain the Fairy Slingshot.
Set the Fairy Slingshot from the Menu

| Steps | |
|---|---|
| 1. | Open the menu with the +button |
| 2. | Go to the C Menu screen with the ZLbutton |
| 3. | Highlight the Fairy Slingshot with the ZL Stickand set it with any direction of the R Stick |
Set the Fairy Slingshot to the C Menu from the equipment screen in the menu opened with the +
button.
Until Basement Floor 1

Drop the Ladder and Backtrack
Shoot the ladder with the Fairy Slingshot to lower it, then backtrack the way you came.
How to Shoot the Slingshot
| How to Shoot the Slingshot | |
|---|---|
| 1 | Select the Fairy Slingshot with the R Stick |
| 2 | Aim with the ZLbutton |
| 3 | Flick the R Stickto fire |
The Fairy Slingshot set in the C slot can be used by tilting the "R Stick" in the direction of its assigned icon.
Slingshot Ammo Can Be Obtained by Cutting Grass

If you run out of Slingshot ammo, cut the grass in the area with your sword to find more. The grass regrows over time, allowing you to collect ammo from the same spots repeatedly.
Shoot the Skulltula on the Vines
The spider enemies known as Skulltula block the vines on the wall. Use the Fairy Slingshot to defeat them and clear the path for climbing.
Climb the Vines and Enter the East Door
Climb the vines and drop into the east corridor. Follow the path to the door and proceed through it.
Press the Switch and Obtain the Compass
Press the switch on the east side upon entering to create a platform. Cross it and open the chest at the back of the room to obtain the Compass.
Gold Skulltula on the West Side of the Room

There is a Gold Skulltula on the west side of the room. It is recommended to defeat it while you're there and collect its token.
Gold Skulltula Locations and RewardsLight the Torches and Exit the Room
Assign the Deku Stick to the C Menu as you did with the Fairy Slingshot. Light it using the torch near the entrance, then use it to light the unlit torches.
Obtain Deku Sticks from Deku Baba
Deku Sticks can be obtained from Deku Baba. After it attacks, strike its fully extended stem to make it stand upright. Hit it again while upright to obtain a Deku Stick. If you run out, defeat the Deku Baba in the area to get more.
Defeat the Large Skulltula on the West Side
After exiting the room, head slightly west and defeat the large Skulltula. It can only be damaged when its belly is facing you, so wait until it turns around before attacking.
Drop Down onto the Webbed Floor
From where you defeated the large Skulltula, drop toward the cobweb-covered floor in the center of the 1st floor. You'll break through the cobweb and fall to Basement Floor 1.
Until Gohma Boss Fight

- Ignite the Webs with a Deku Stick
- Defeat and Speak to the Deku Scrub
- Shoot the Eye Above the Door
- Dive for the Switch to Cross to the Other Side
- Move the Block and Proceed
- Solve the Torch Puzzle and Proceed
- Burn the East Webs with Fire and Proceed
- Move the Block and Burn the Floor's Webs
- Defeat the Three Deku Scrubs
- Fight the
Gohma
Boss
Ignite the Webs with a Deku Stick
Press the switch near the torch stand on the east side of the room to light the torch, then carry the flame with a Deku Stick to burn the cobweb on the south side of the room.
Gold Skulltulas on the Iron Bars and Vines
| Iron Bars | Vines |
|---|---|
 |  |
Gold Skulltulas are on the iron bars along the north side and the vines on the west wall. Defeat them and collect their tokens while you're here.
Gold Skulltula Locations and RewardsDefeat and Speak to the Deku Scrub

Defeat the Deku Scrub beyond the door and speak to it. Reflect its projectile with your shield using the R Button to defeat it. Sword attacks will not work.
Shoot the Eye Above the Door and Proceed

Shoot the eye above the closed door in the room with the Fairy Slingshot to open the door and proceed.
Dive for the Switch to Cross to the Other Side
| How to Dive | Hold the A Button while on the water surface |
|---|
Press the switch in the water on the west side of the room to lower the water level, which will allow you to cross to the other side using the moving platform.
Move the Block and Proceed

After crossing to the other side, move the block and climb on top of it to proceed. A giant Skulltula is near the block, so defeat it before moving the block.
Solve the Torch Puzzle and Proceed
Use the Deku Stick to light both torches and proceed. Note that there is a Deku Baba in the center of the room, so be careful.
Burn the East Webs with Fire and Proceed
Carry fire from a torch with the Deku Stick to burn the cobweb and proceed. The cobweb on the east side leads deeper into the dungeon, while the northwest path only contains enemies and can be ignored.
Move the Block and Burn the Floor's Webs
Push the block into the water to create a foothold, then carry fire from a torch to the cobweb on the floor. While holding a lit Deku Stick,
Defeat the Three Deku Scrubs

After burning through the webs and proceeding, you will find three Deku Scrubs. You must defeat them in the order: center → right → left before you can proceed.
Fight the Gohma Boss
| Strategy Points |
|---|
| - Shoot Gohma in the eye to create openings - Destroy eggs before they hatch - Prioritize dodging when the eye turns red |
Shooting Gohma's eye with the Fairy Slingshot creates an opening to attack, so it we recommend making use of the ZL Button
lock-on while fighting.
Obtain the Kokiri's Emerald After Defeating the Boss

After defeating the boss, you are returned from the dungeon, and a cutscene with the Great Deku Tree occurs, after which you obtain the Kokiri's Emerald.
| ◀ Previous | Next ▶ |
|---|---|
| Intro | Hyrule Castle |
Gold Skulltula Locations
- Inside the Deku Tree Skulltula 1Wall in the room with the compass


- Inside the Deku Tree Skulltula 2On the vines after falling through the web

 *Use the Slingshot
 - Inside the Deku Tree Skulltula 3Behind the iron bars at the bottom of the cobweb


- Inside the Deku Tree Skulltula 4Past the wall in the room where three baby Gohmas appear

 *Use a Bomb to destroy the wall and retrieve with Boomerang
Gohma Boss Guide

Boss Movements
| Movement | Effect |
|---|---|
| Arms Slam | Frontal attack |
| Egg Drops | Drops eggs that can hatch into a Gohma Larva |
How to Defeat and Tips
The top tip to defeating Gohma is to be aware of its attack tells. When its eyes turn red, dodge its attack, then shot its eye with the Slingshot stun it to create an opening to attack.
Red Eyes Signal Incoming Attack
When the Gohma's eye turn red, it's a signal that an attack is coming. Prepare to back dodge when it slams its arms down for a frontal attack. Use the Z Targeting to make it easier to dodge and aim at Gohma while it's on the ceiling.
Counter with Slingshot After Dodging
After dodging an attack, aim to hit the Gohma's eye using your Slingshot. Successfully hitting the eye will stun the Gohma, allowing you to attack it with your sword for a time.
Use Deku Nut to Immobilize It
If you have Deku Nuts with you during the fight, you can stun Gohma with them as well. Once it gets hit with the Deku Nut, you can attack it with your sword before it gets back up again.
Destroy Eggs Before They Hatch
Gohma may move to the ceiling and drop 3 eggs. If left alone, these eggs can hatch into hostile Gohma Larva. Prioritize in destroying the eggs before they can hatch so you won't have to deal with additional enemies in this boss fight.
Ocarina of Time Related Articles
 Story Walkthrough - All Chapters
 1. Opening
 2. Great Deku Tree
 3. Hyrule Castle
 4. Dodongo's Cavern
 5. Lord Jabu-Jabu
 6. Forest Temple
 7. Fire Temple
 8. Ice Cavern
 9. Water Temple
 10. Bottom of the Well
 11. Shadow Temple
 12. Gerudo Fortress
 13. Spirit Temple
 14. Ganon's Castle











