

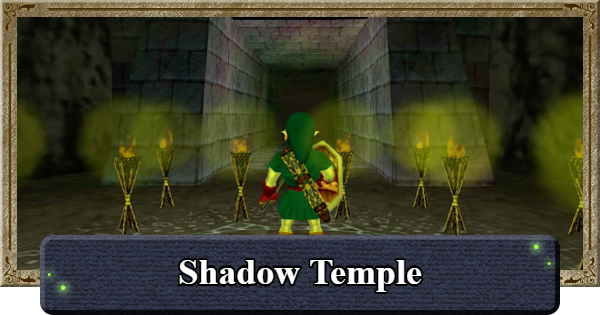
This is a full walkthrough of Shadow Temple in Ocarina of Time, including the locations of Gold Skulltulas in Shadow Temple, strategies, and tips for defeating Boss Bongo Bongo.
| ◀ Previous | Next ▶ |
|---|---|
| Bottom of the Well | Gerudo's Fortress |
Table of Contents
Shadow Temple Location
Use Din's Fire to Open Graveyard Door
The Shadow Temple is located underground in the Kakariko Village Graveyard. To enter, you'll first need to warp to the Graveyard by playing the Nocturne of Shadow, then light a set of torches to reveal the entrance.
Return to Adult then Head to Kakariko Village


Return to the Temple of Time and pull the Master Sword from its pedestal to become Adult Link again. Then, head to Kakariko Village, where a cutscene will trigger. After it ends, Sheik will teach you the Nocturne of Shadow.
Play Nocturne of Shadow to Enter Graveyard

| Nocturne of Shadow |
|---|
 |
Play the newly learned Nocturne of Shadow to warp to the Graveyard in Kakariko Village. Once you arrive at the Graveyard, go down the stairs located just behind the warp point.
Use Din's Fire in the Center of the Torches

At the bottom of the stairs, use Din's Fire in the center of the many torches. After all the torches are lit, the entrance to the Shadow Temple will appear. Enter the temple once you're ready.
Shadow Temple Walkthrough
| Table of Contents (Tap to Jump) | |
|---|---|
| 1 | ▼How to Get Map & Hover Boots |
| 2 | ▼How to Get Compass |
| 3 | ▼How to Get to the Moving Spike Room |
| 4 | ▼How to Get to the Fan Room |
| 5 | ▼How to Get Boss Key and Defeat Boss |
How to Get Map & Hover Boots

Use the Hookshot to Cross the Pit

Just past the Shadow Temple entrance, use the Hookshot on the target across the pit to reach the other side.
Pass Through Walls to Reach the North Room

After passing through the hidden walls, head to the north room. Use the Lens of Truth often, as the Shadow Temple contains many hidden paths and items.
Find hidden things with the Lens of Truth

Use the Lens of Truth to reveal hidden objects and paths. Since the Shadow Temple has many hidden elements, use it whenever something seems suspicious while exploring.
Defeat Redead and Keese in the North Room

Head to the north side room and defeat the ReDead and two Keese to make a chest appear.
Open the Chest to Get the Dungeon Map

Open the appeared chest to get the Dungeon Map. After obtaining it, head toward the room in the back-left of the map.
Head to the West Room for the Dead Hand Fight

When you enter the room, a Dead Hand will appear. Let the hands grab you to reveal its main body, then attack when it lowers its head. Repeat this until it is defeated.
Get Hover Boots from the Chest
Open the chest after defeating Dead Hand to obtain the Hover Boots. They let you walk on air briefly, making them essential for clearing the Shadow Temple.
▲ Back to topHow to Get Compass

Return and Find the Correct Pillar in Statue Room

After collecting the Hover Boots, return to the room with the bird statue and use the Lens of Truth to find the correct pillar. The correct pillar is the one that still has a skull on it even after you peer through the Lens of Truth.
Rotate Bird Statue to the Correct Pillar

Rotate the bird statue so it faces the correct pillar. You can rotate the bird statue by pushing the block beneath its base.
Use the Hover Boots to Reach the Opened Door

Facing the bird statue in the correct direction opens the door on the right side of the map. Equip the Hover Boots, cross the pit, and proceed through the door.
Go Down the Slope to the South Room

After descending the stairs, pass through the hidden wall south of the Beamos room. Use the Lens of Truth to reveal the correct wall if needed.
It's easier if you defeat the Beamos beforehand
The Beamos in the central room fires a tracking beam, so defeat it first with a Bomb or Bombchu to avoid taking damage while moving around.
Defeat 2 Gibdos in the South Room

Defeat the 2 Gibdos inside the room on the south side of the map. A chest will appear once they are defeated.
Open the Appeared Chest to Get the Compass
Open the chest to obtain the Compass. It reveals chest locations and the Boss Room, making dungeon exploration easier.
▲ Back to topHow to Get to the Moving Spike Room

- Head to the Room on the North Side
- Dodge the Blade While Getting 5 Silver Rupees
- Open the Appeared Chest to Get a Small Key
- Return to Beamos Room and Open East Door
- Carefully Pass Skulltulas and Guillotines
- Equip the Hover Boots and Cross the Platforms
- Use Moving Platforms to Reach Beamos
- Get 5 Silver Rupees While Avoiding Blade
- Find and Pull the Block Past the Door
- Move the Block to the Second Spike
- Climb From the Block and Press the Switch
- Get the Small Key From the Far Chest
Head to the Room on the North Side

Head toward the room on the north side of the map that has the spinning blade.
Dodge the Blade While Getting 5 Silver Rupees

In the north room, collect all 5 Silver Rupees while avoiding the spinning blade. Hide in wall alcoves or crouch at floor ledges to dodge it.
Use Hookshot to reach the floating Rupee

Use the Hookshot on the nearby target to reach the back-left platform and collect the hidden Silver Rupee. If you can't find the last one, look upward or check the room carefully.
Open the Appeared Chest to Get a Small Key

Open the appeared chest to get a Small Key. The chest is located where the iron gate on the east side of the room was.
Return to Beamos Room and Open East Door

Return to the room with Beamos, bomb the cracked east wall to reveal a passage, then use the Small Key to unlock the door ahead.
Carefully Pass Skulltulas and Guillotines

In the next corridor, Swatch for Skulltulas dropping from above and guillotines. Move carefully, as the Skulltulas fall in quick succession.
Equip the Hover Boots and Cross the Platforms

At the end of the corridor, equip the Hover Boots and carefully cross the narrow platforms, avoiding the guillotines.
You Can Ignore the Stalfos Here

Ignore the Stalfos beyond the guillotine platforms and continue. You won't need to return here to clear the Shadow Temple.
Use Moving Platforms to Reach Beamos

Cross the moving platforms on the west side of the map and advance to where the Beamos is. You need to equip the Hover Boots to cross the moving platforms.
Get 5 Silver Rupees While Avoiding Blade
Collect the 5 Silver Rupees around the Beamos while watching out for the 2 spinning blades. There is also a Silver Rupee beneath where you defeat the Beamos, and collecting all 5 opens a door.
Find and Pull the Block Past the Door

Once you enter the room with moving spikes, use the Lens of Truth to find the hidden block. Pull the block out and move it to help you avoid the spikes and proceed forward.
Move the Block to the Second Spike
Push the block through the first spike and then halfway toward the second spike to prevent both spikes from dropping, then go around the block to safely pass.
Climb From the Block and Press the Switch

Climb onto the moved block to reach the ledge and cross the spikes. Then press the yellow switch on the other side.
Get the Small Key From the Far Chest

Press the yellow switch to make a chest appear on the other side. Use the Hookshot to reach it and get the Small Key. Break the pot next to the chest to restore HP.
▲ Back to topHow to Get to the Fan Room

- Return to Beamos Room and Find Platform
- Cross Hidden Platform and Open Locked Door
- Get 5 Silver Rupees While Avoiding Spikes
- Enter Room and Throw Bomb Into Giant Pot
- Defeat the Keese in the Room to Open the Door
- Hookshot to Ceiling Target and Enter Door
- Time the Fans and Proceed Forward
- Find Hidden Passage Between Fans
- Blow Up the Mound on the Right
- Take the Small Key and Go Through Door
Return to Beamos Room and Find Platform

After getting the Small Key, return to the platform where Beamos was. Use the Lens of Truth to reveal a hidden platform to the north, then continue from there.
Cross Hidden Platform and Open Locked Door

Cross the hidden platform to enter the locked room on the north side of the map.
Get 5 Silver Rupees While Avoiding Spikes

Once inside, defeat the 2 ReDeads first to secure the area. Then collect all 5 Silver Rupees while avoiding the spikes hidden in the floor.
Hookshot to the wall targets for the floating Rupees

Use the Hookshot to collect the 2 floating Silver Rupees from the nearby targets. The far-left target is hidden, so use the Lens of Truth to reveal it first.
Enter Room and Throw Bomb Into Giant Pot

Collecting all 5 Silver Rupees opens the door on the left side of the room. Throw the Bomb on the ledge into the giant pot in the room to get a Small Key.
Defeat the Keese in the Room to Open the Door

After getting the Small Key, defeat all the Keese in the room and return to the previous room.
Hookshot to Ceiling Target and Enter Door

Use a Small Key to enter the room with rising spikes. Use the Hookshot on the target above the door to open it.
Time the Fans and Proceed Forward

Carefully avoid the fans and spinning blades in the corridor. Equip the Iron Boots to resist the wind and pass through easily.
Find Hidden Passage Between Fans
Take the hidden path on the left in the fan corridor. Wait for the fans to stop, then cross the gap with the Hover Boots.
Blow Up the Mound on the Right

Blow up the yellow-green mound on the right side of the room to reveal a hidden invisible chest.
Take the Small Key and Go Through Door

Use the Lens of Truth to see the hidden chest that appeared, open it, and proceed through the locked door.
▲ Back to topHow to Get Boss Key and Defeat Boss

- Move the Block to the Indentation
- Play Zelda’s Lullaby on the Crest
- Jump to the Left Platform When It Appears
- Head to the South Room Through the Door
- Defeat the Invisible Floor Master
- Get the Small Key From the Chest
- Head to the North Room on the Map
- Use Din’s Fire to Burn the Spikes
- Get the Boss Key From the Chest
- Return to Where You Left the Boat
- Shoot the Southeast Bomb Flower
- Cross the Fallen Statue to Reach the Door
- Use Hover Boots and Lens of Truth to Cross
- Open the Door to Fight Bongo Bongo
- Use the Warp to Get Shadow Medallion
Move the Block to the Indentation

Move the block beside the room entrance to the spot below the ladder.
Play Zelda’s Lullaby on the Crest

| Zelda's Lullaby |
|---|
 |
Climb the ladder from the repositioned block and play Zelda's Lullaby on the crest. Playing the song will set the boat in motion.
Jump to the Left Platform When It Appears

Wait for the boat to move, then jump to the left platform when it appears near the end. Ignore the 2 Stalfos that appear and simply block or dodge their attacks.
Head to the South Room Through the Door

Enter the door at the far end, then head south. Use the Lens of Truth to navigate through the invisible walls.
Defeat the Invisible Floor Master

Defeat the invisible Floor Master lurking in the room. Walk with the Lens of Truth active and Z-target the moment you spot it to make the fight easier.
Get the Small Key From the Chest

Open the appeared chest to get a Small Key.
Head to the North Room on the Map

After getting the Small Key, head toward the room on the north side of the map.
Use Din’s Fire to Burn the Spikes

When you enter the north room, spikes will close in from both sides. Before the spikes fully close, use Din's Fire to burn both sets.
Get the Boss Key From the Chest

Open the appeared chest to get the Boss Key.
Return to Where You Left the Boat

After getting the Boss Key, return to where you disembarked from the boat.
Shoot the Southeast Bomb Flower

Shoot the Bomb Flower to the south with an arrow. The explosion will hit the statue's base and knock it down.
Cross the Fallen Statue to Reach the Door

Cross the fallen statue, unlock the door on the right with a Small Key, and continue forward.
Use Hover Boots and Lens of Truth to Cross

Use the Lens of Truth to find the invisible platforms, then use the Hover Boots to reach the door and start the Bongo Bongo boss fight.
Open the Door to Fight Bongo Bongo
| Key Strategy | |
|---|---|
| 1 | Z-target one hand and shoot it with an arrow to stun it |
| 2 | Attack the other hand with arrows to expose the weak point |
| 3 | Use the Lens of Truth and attack when the body approaches |
| Tip | Equip the Hover Boots when the hands are pounding the floor |
Attack Bongo Bongo’s hands with arrows to stun them. Use the Lens of Truth to reveal its body and attack the exposed eye once both hands are stunned.
Use the Warp to Get Shadow Medallion

After defeating Bongo Bongo, collect the Heart and enter the warp point. After the event, get the Shadow Medallion and clear the dungeon.
▲ Back to top| ◀ Previous | Next ▶ |
|---|---|
| Bottom of the Well | Gerudo's Fortress |
Gold Skulltula Locations
- Shadow Temple Skulltula 1Inside the cell in the room with spikes moving up and down


- Shadow Temple Skulltula 2On the wall behind the large skull pot


- Shadow Temple Skulltula 3In the room beyond the room with invisible spinning blades

 *Defeat all enemies in the room and proceed
 - Shadow Temple Skulltula 4On the wall in the room where the boat is docked

 *Play Scarecrow's Song then move with Longshot to retrieve
 - Shadow Temple Skulltula 5On the wall in the room with three large spinning skull pots


Bongo Bongo Boss Guide

Boss Movements
| Movement | Effect |
|---|---|
| Swipe | Swipes forward with one hand |
| Grip | Grips and swings with one hand |
| Body Slam | Charges with its whole body |
| Push | Pushes forward with one open hand |
| Crush | Crushes down from above with a single hand |
| Punch | Punches with one clenched hand |
| Two-Handed Crush | Crushes from both sides with both hands open |
How to Defeat and Tips
In the Ocarina of Time Boss Guide for Bongo Bongo, attack each hand one at a time with the Bow. Stunning both hands will expose the weak point — his eye. Once the weak point is exposed, equip the Lens of Truth to make the main body visible, then attack.
Z-Target one hand and stun it with Bow shots
Start by Z-Targeting one of the hands and stunning it with the Bow. A stunned hand turns blue and will stop attacking for a short time.
While one hand is stunned, attack the other hand with the Bow
While one hand is stunned and glowing blue, hit the other hand with the Bow as well. Once both hands are stunned, the weak point — his eye — will appear.
Use the Lens of Truth and attack when the body charges at you
Equip the Lens of Truth to make the main body visible, then shoot the eye with the Bow the moment he charges at you. Stun him with the Bow, then follow up with sword attacks on the eye to deal maximum damage.
Equip the Hover Boots when the hands are slamming the floor

When the hands slam the floor, the bouncing makes it difficult to aim with the Bow, so equip the Hover Boots. Use the Bow to stop Bongo Bongo's charge, then it is recommended to remove the Hover Boots when moving in to attack, as they cause you to slide.
Ocarina of Time Related Articles
 Story Walkthrough - All Chapters
 1. Opening
 2. Great Deku Tree
 3. Hyrule Castle
 4. Dodongo's Cavern
 5. Lord Jabu-Jabu
 6. Forest Temple
 7. Fire Temple
 8. Ice Cavern
 9. Water Temple
 10. Bottom of the Well
 11. Shadow Temple
 12. Gerudo Fortress
 13. Spirit Temple
 14. Ganon's Castle











